
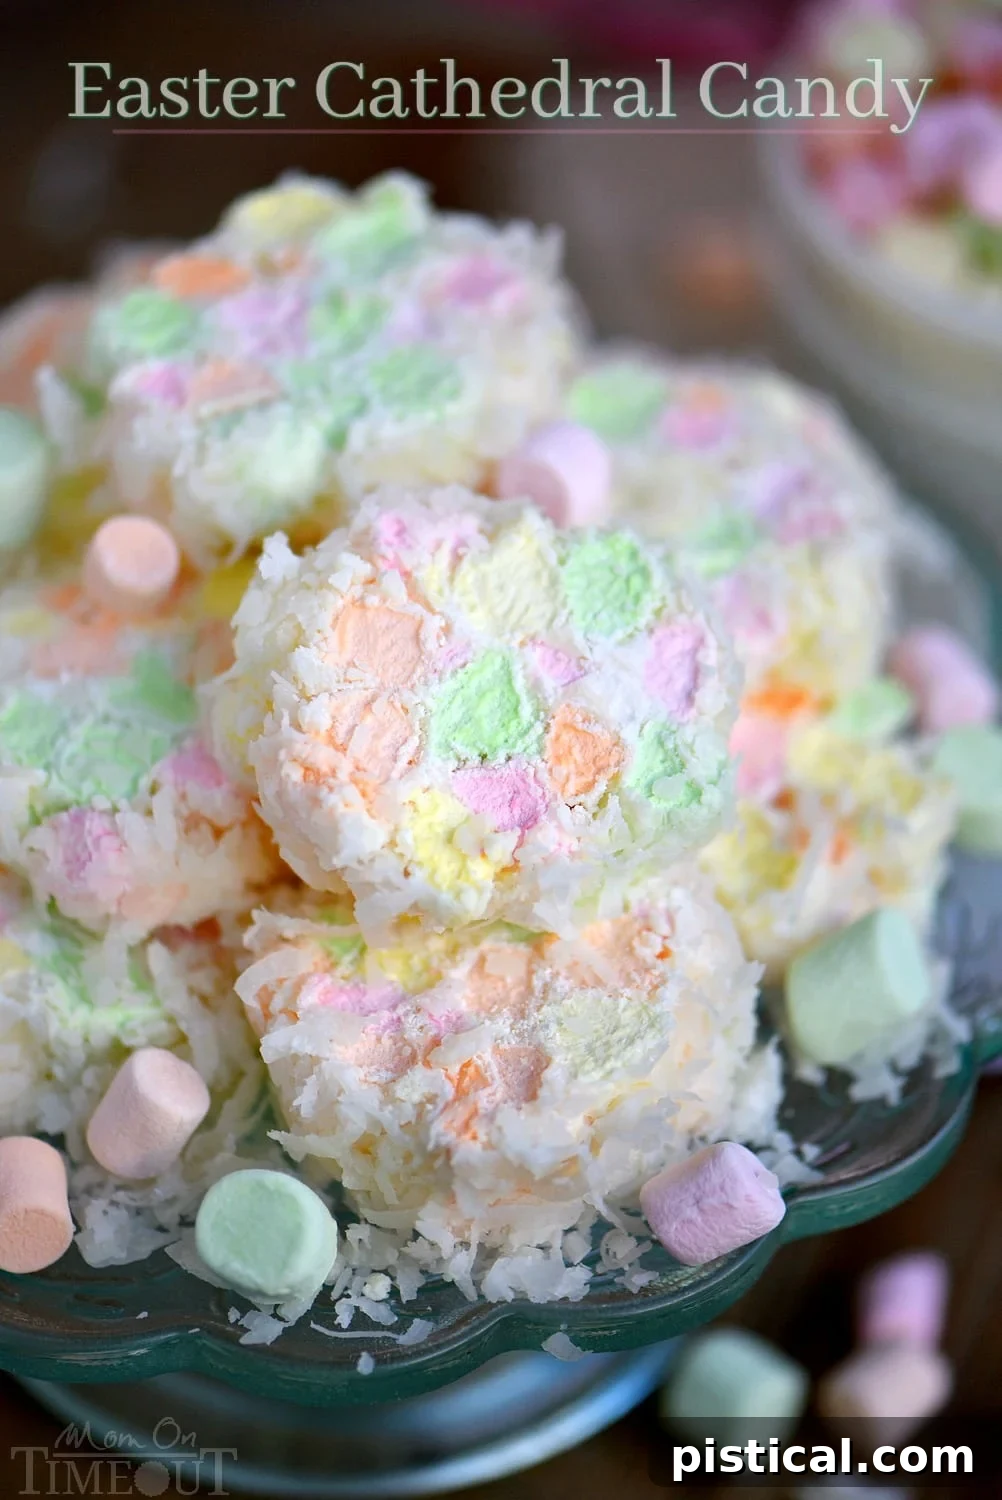
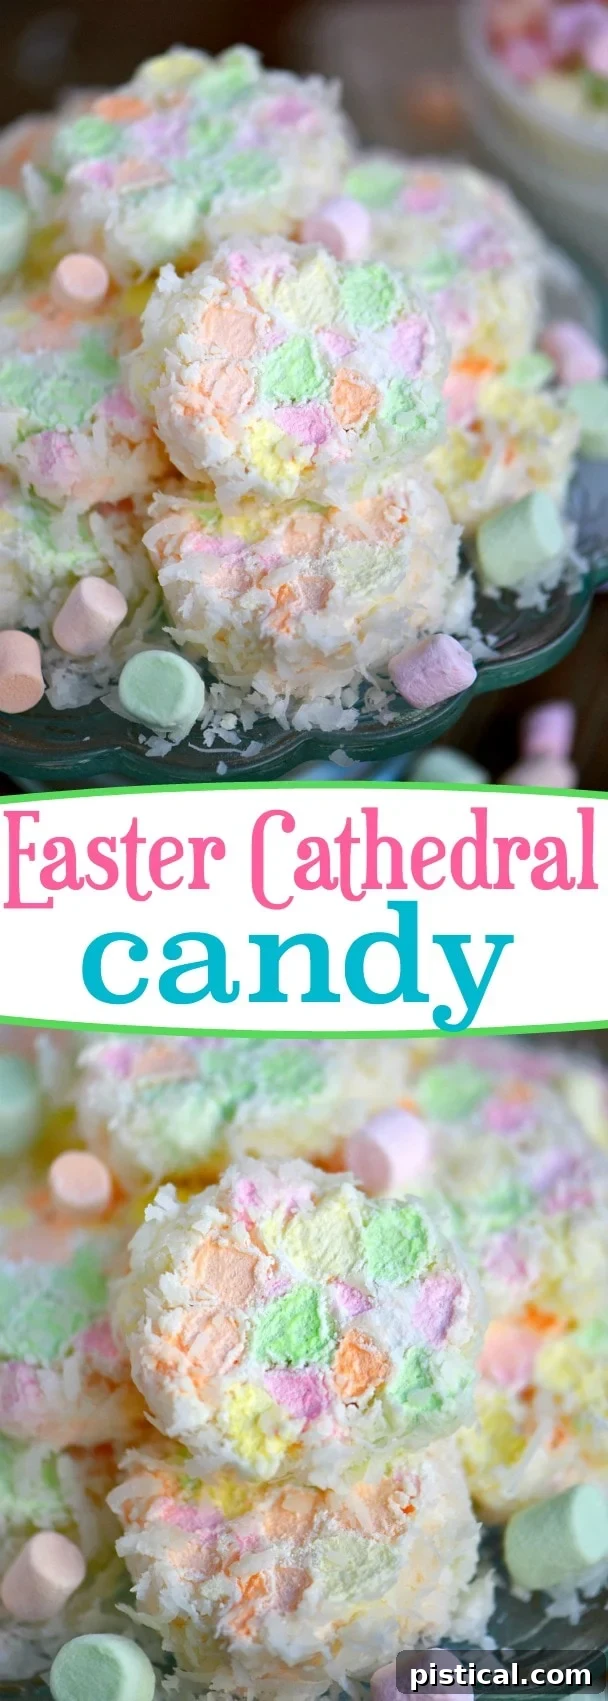
This Easter Cathedral Candy recipe is a vibrant, easy-to-make treat that requires just three simple ingredients. Its stunning, stained-glass appearance makes it perfect for Easter celebrations, baby showers, spring parties, or any occasion needing a touch of colorful sweetness. Even the youngest chefs will love lending a hand with this delightful no-bake dessert!
Stay connected for more delicious inspiration! Sign up to receive our newest recipes directly in your inbox. You can also follow us on Facebook and Instagram for daily updates and behind-the-scenes fun!
PIN THIS RECIPE FOR LATER!
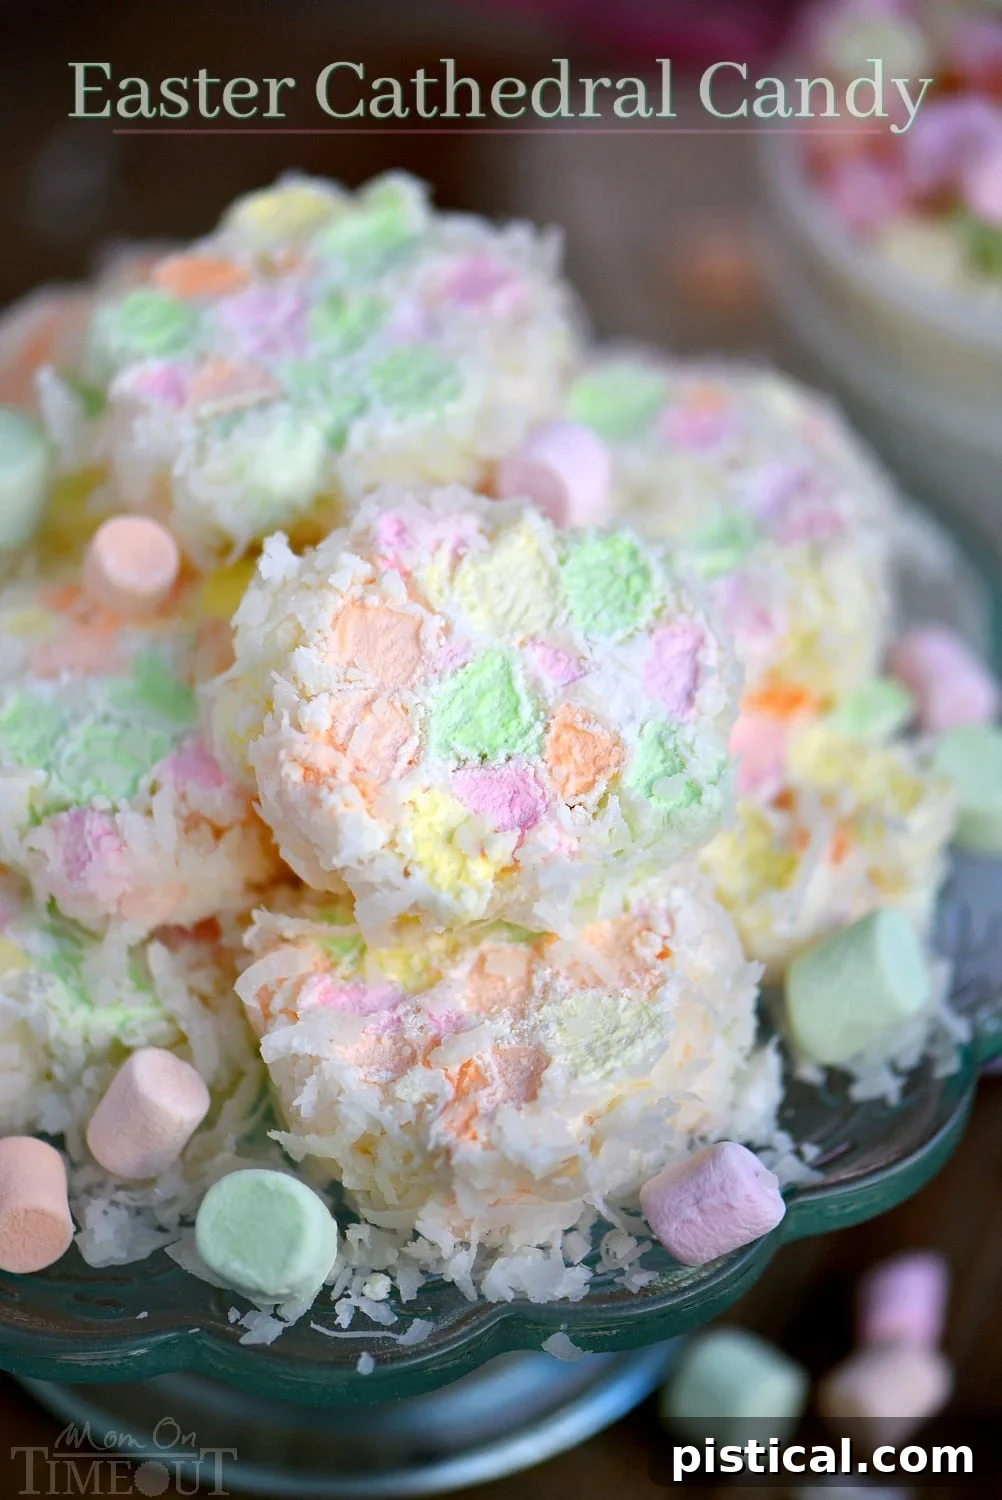
A Festive and Simple Easter Treat: Cathedral Candy
Easter always seems to arrive so quickly, doesn’t it? For many, the closeness of St. Patrick’s Day and Easter can throw off the holiday decorating and baking schedule. There’s often a need for a little more breathing room between major holidays to truly soak in the festive spirit and prepare the home for celebration. This year, as the beautiful spring weather began to emerge, my son Bryce and I decided to get a head start on our Easter decorations. While sprucing up the house, the natural inclination was to whip up a festive Easter treat, and what better way to pass the time than with something sweet?
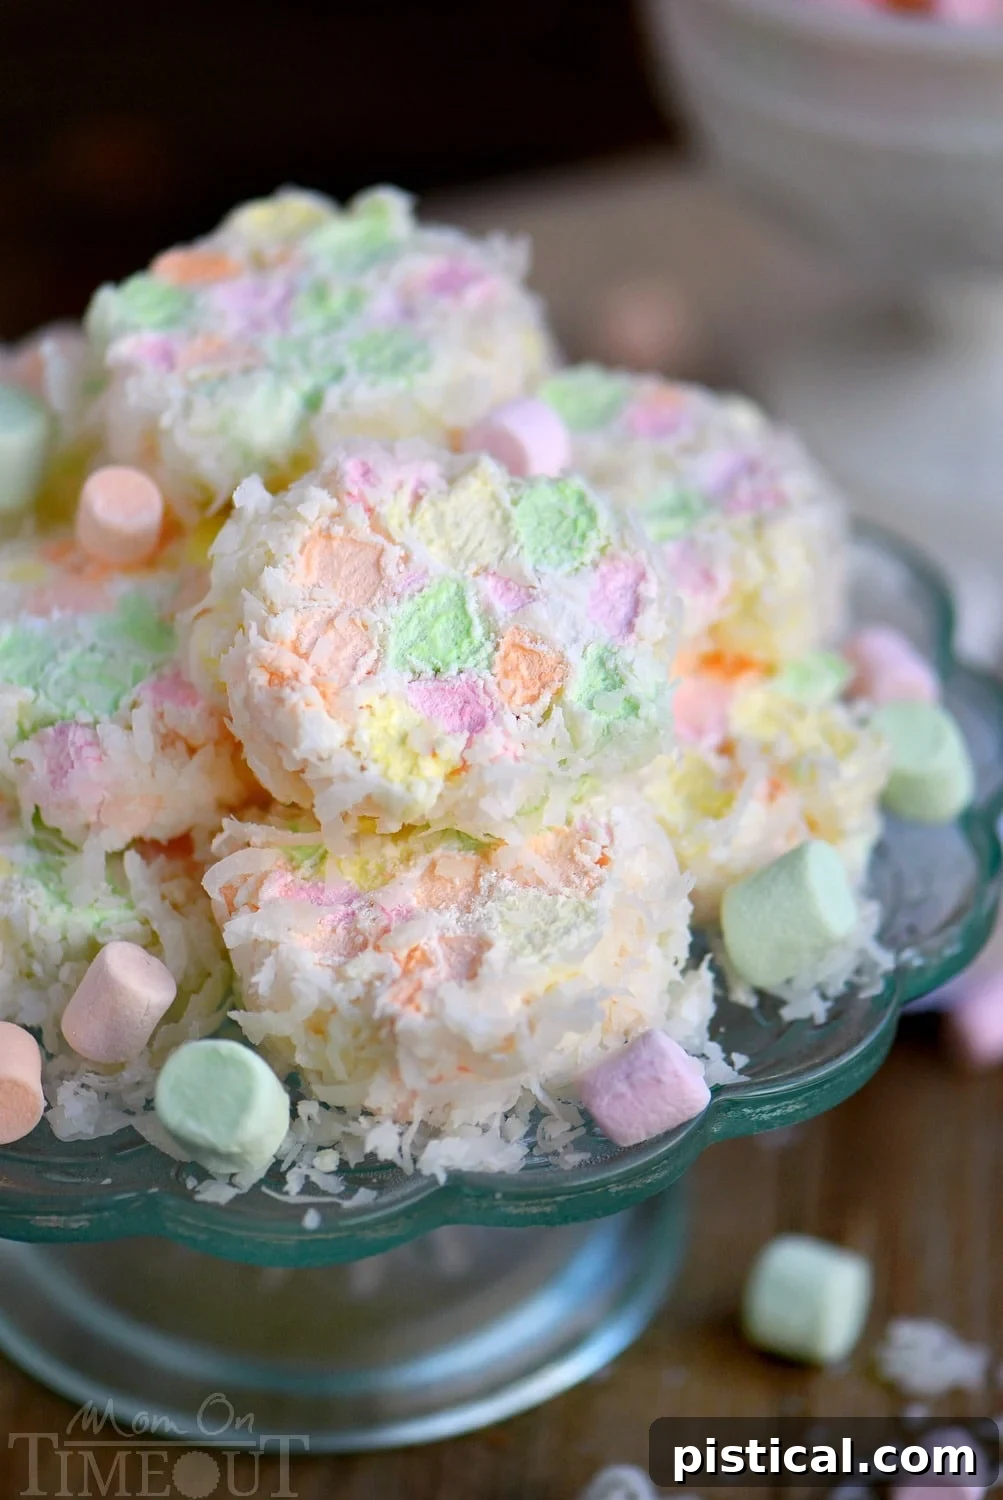
I was reminded of a delightful recipe my sister and I made for Christmas: Cathedral Cookies. Those festive “cookies” (they are more like candy, really!) featured semi-sweet chocolate and nuts, creating a beautiful mosaic effect. It struck me that this concept could be perfectly adapted for Easter, with a much more vibrant and spring-friendly color palette. A quick check of the pantry revealed the ideal trio of ingredients: shredded coconut, CandiQuik (or your preferred candy coating), and a bag of colorful marshmallows. It’s truly amazing how three simple components can transform into such an elegant and impressive confection.
The Magic of Three Ingredients
The beauty of this Easter Cathedral Candy lies in its incredible simplicity. You only need:
- **Candy Coating:** Vanilla flavored CandiQuik is our go-to for its ease of melting and consistent results. However, you can absolutely substitute it with almond bark, high-quality white chocolate melting wafers like Ghirardelli, or any other candy coating designed for easy melting. The key is to choose a product that melts smoothly and sets firmly.
- **Colorful Marshmallows:** These are the stars that create the “stained glass” effect. We used Bunny Mallows for an extra Easter touch, but any colored marshmallows will work wonderfully. The smaller the marshmallows, the more intricate and varied the color mosaic will appear in the final slices. If you only have larger marshmallows, simply cut them into smaller pieces before mixing.
- **Sweetened Coconut Flakes:** This provides the outer “snowy” coating and adds a fantastic textural contrast and tropical flavor. Sweetened flakes are recommended for a richer taste, but unsweetened can also be used if you prefer less sugar.
This minimalist ingredient list means less shopping, less fuss, and more time to enjoy the holiday festivities!
Quick and Easy Prep: A Kid-Friendly Activity
The preparation time for these Cathedral Candies is remarkably short. Bryce and I completed the hands-on portion in about 5 minutes, and then it was just a matter of waiting for them to chill. I sometimes struggle with what to call them – “cookies” feels a bit misleading given their candy-like nature, so “candy” it is! I’m also continually discovering new ways that coconut enhances any treat. From my Nana’s To-Die-For Carrot Cake to my Zucchini Carrot Coconut Craisin Oatmeal Cookies, that flaky goodness always adds an irresistible dimension. It seems we just can’t get enough of coconut around here!
Assembling Your Cathedral Candy Logs
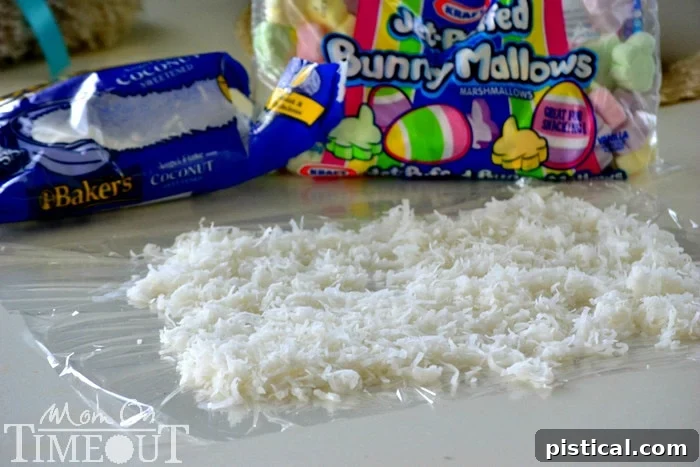
The assembly process is straightforward and fun. First, lay out a large piece of plastic wrap on your counter. This will be your workspace and also helps in shaping the candy. Generously cover the plastic wrap with sweetened coconut flakes. Approximately 2 cups should be more than enough to create a beautiful, even coating for your log. A spread of about 14 inches by 9 inches is a good target for the coconut base.
Next, place your colored marshmallows into a medium-sized, microwave-safe bowl. Melt half a package (around 8 oz) of your chosen candy coating (CandiQuik, almond bark, or melting wafers) according to package directions. Typically, this involves microwaving in short bursts and stirring until smooth and fluid. Once melted, pour the warm candy coating over the marshmallows. Stir gently but thoroughly to ensure all the marshmallows are evenly coated. The smaller the marshmallows, the better, as this allows for more vibrant colors to show through in the finished product, truly mimicking stained glass.
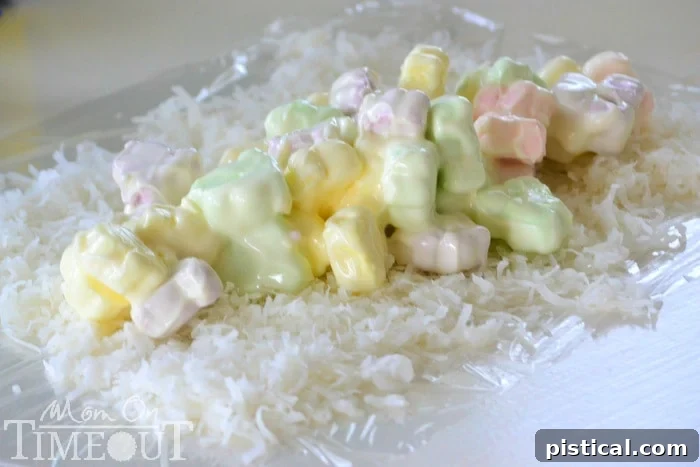
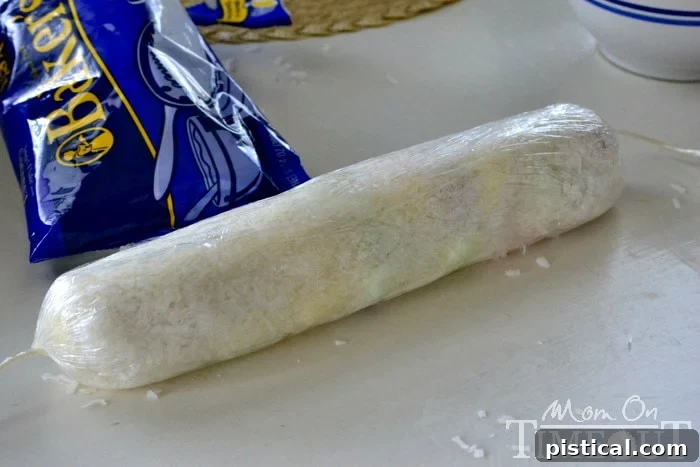
Now for the shaping! Carefully spread the warm, gooey marshmallow mixture down the center of your coconut-covered plastic wrap. Try to form it into a rough log shape. The crucial step is next: grab one of the long sides of the plastic wrap and carefully pull it up and over the marshmallow mixture towards the opposite side. The goal is to roll the marshmallow mixture into a tight log, ensuring the coconut flakes adhere completely to the outside, creating a beautiful, uniform coating. Roll it gently and then wrap the entire log tightly in the plastic wrap.
At this point, Bryce was practically beside himself with excitement! Marshmallows AND coconut? Yes, baby, Mommy loves you! I only recently discovered Bryce’s fervent passion for coconut when I made Raspberry Coconut Magic Bars last week. Now, every time that bag of coconut flakes makes an appearance, he gets incredibly excited. The small downside? I now frequently find coconut flakes scattered across my dark wood floors, but it’s a small price to pay for such enthusiastic help in the kitchen!
Chilling and Serving Your Delightful Creation
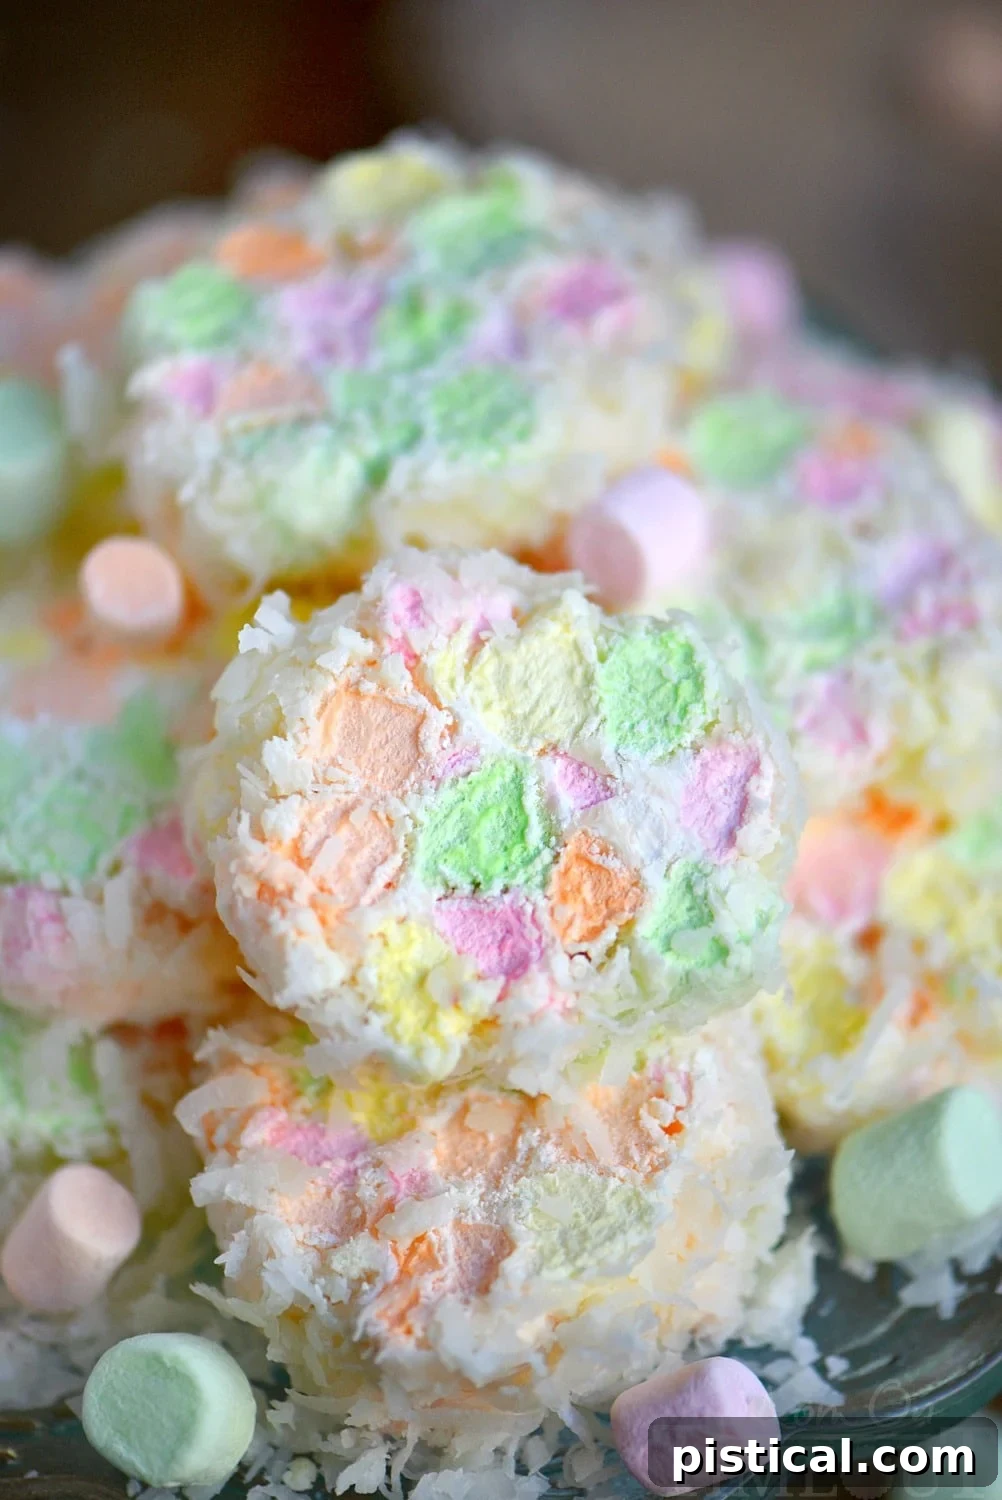
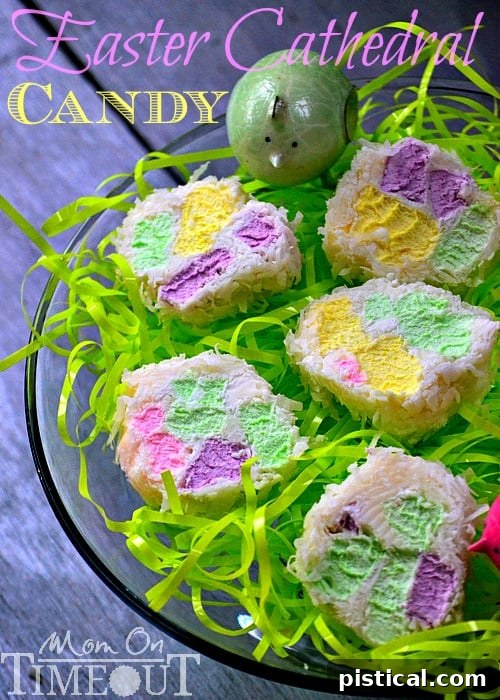
Waiting for treats to set is never the most thrilling part of baking, especially for eager little ones. However, the good news is that CandiQuik (or most candy coatings) sets up mercifully fast. While it will eventually firm up at room temperature, refrigerating the log for about 30 minutes significantly speeds up the process. Plus, chilling has the added benefit of reducing the frequency of the dreaded question, “Mommy, is it ready yet?” Once firm, retrieve your log from the refrigerator, unwrap it, and slice it into beautiful rounds. The cross-section will reveal the stunning “stained glass” pattern from the colored marshmallows, making each piece a miniature work of art.
These candies turned out absolutely beautiful and wonderfully delicate, making them utterly perfect for Easter celebrations and spring gatherings!
SAVE THIS RECIPE TO PINTEREST!

Print Recipe
Pin Recipe
Easter Cathedral Candy (3-Ingredient No-Bake Treat)
Ingredients
- 8 oz Vanilla flavored CandiQuik (or almond bark, or white chocolate melting wafers)
- 2 cups sweetened coconut flakes
- 6 oz colored marshmallows (miniature work best for more “stained glass” effect)
Instructions
-
Lay out a large piece of plastic wrap on a clean surface. Generously sprinkle 2 cups of sweetened coconut flakes over it, aiming for an even layer of approximately 14 inches by 9 inches. This will form the outer coating of your candy log.
-
Place the 6 ounces of colored marshmallows into a medium-sized, microwave-safe mixing bowl. If your marshmallows are large, consider cutting them into smaller pieces for a more intricate “stained glass” pattern.
-
Melt the 8 ounces of vanilla candy coating (CandiQuik, almond bark, or melting wafers) according to the package instructions. Be careful not to overheat it. Once fully melted and smooth, pour the warm candy coating over the marshmallows in the bowl. Stir gently with a spatula or spoon until all the marshmallows are thoroughly coated with the melted candy.
-
Carefully spoon the marshmallow and candy mixture down the center of the coconut-covered plastic wrap. Try to shape it into a loose log, leaving enough coconut on either side to fold over.
-
Taking one long side of the plastic wrap, gently lift and pull it up and over the marshmallow mixture to meet the opposite side. The idea is to form the mixture into a neat log shape, ensuring that the coconut flakes completely surround the candy interior.
-
Roll the log gently and evenly, then wrap it up tightly in the plastic wrap, twisting the ends to seal it. This helps to compact the candy and ensures the coconut sticks well.
-
Refrigerate the wrapped candy log for at least 30 minutes, or until completely firm. This quick chilling time allows the candy coating to set, making it easy to slice.
-
Once firm, unwrap the log and use a sharp knife to slice it into desired thickness (about 1/2 to 3/4 inch rounds are ideal). Arrange on a platter and serve immediately, or store for later.
-
Store any leftover Easter Cathedral Candy in an airtight container at room temperature for up to a week, or in the refrigerator for up to two weeks. Enjoy your beautiful and delicious homemade treat!
Nutrition
Tips for Perfect Cathedral Candy Every Time
- **Even Coconut Layer:** Ensure your coconut is spread evenly on the plastic wrap. This guarantees a consistent coating on your candy log.
- **Don’t Overheat Candy Coating:** Melt your CandiQuik or other candy coating slowly and in short intervals. Overheated coating can become thick and difficult to work with, and might burn the marshmallows.
- **Work Quickly:** Once the marshmallows are coated, work relatively fast to shape the log. The candy coating will start to set as it cools.
- **Firm Chill is Key:** Do not skimp on the chilling time. A firm log means clean, beautiful slices. If it’s too soft, your “stained glass” effect might smudge.
- **Sharp Knife for Slicing:** Use a sharp knife, and wipe it clean between slices if needed, to achieve crisp edges and showcase the vibrant colors.
- **Storage:** Keep these candies in an airtight container. While they are fine at room temperature for a day or two, refrigeration will extend their freshness and keep them firm, especially in warmer climates.
Variations to Explore
While the classic Easter colors are stunning, this recipe is highly adaptable. Consider these variations:
- **Seasonal Themes:** Use red and green marshmallows for Christmas, orange and black for Halloween, or colors matching a specific party theme.
- **Nutty Crunch:** For those who enjoy nuts, you can fold in a 1/2 cup of chopped pecans or walnuts into the marshmallow mixture before shaping. This would hearken back to the original “Cathedral Cookies.”
- **Flavor Boost:** A few drops of vanilla extract, almond extract, or even a hint of peppermint extract can be stirred into the melted candy coating for an added flavor dimension.
- **Different Coatings:** If coconut isn’t your favorite, try rolling the log in colorful sprinkles, finely crushed shortbread cookies, or even a mix of mini chocolate chips.
- **Chocolate Swap:** Use dark or milk chocolate melting wafers instead of vanilla for a richer flavor profile, though the “stained glass” effect might be less prominent.
Ready for Easter? What’s Your Favorite Holiday Treat?
With this incredibly simple yet stunning Easter Cathedral Candy, you’ll be well on your way to a delightful holiday season. This recipe offers a fantastic opportunity for family fun in the kitchen, creating beautiful memories alongside delicious treats. We’d love to hear from you – what’s your go-to Easter treat or tradition that brings joy to your family every year?
More Easter Fun from Our Kitchen:
Looking for more inspiration to make your Easter celebrations even sweeter and more creative? Explore these other popular Easter recipes and crafts:
Carrot Cake Bars with Cream Cheese Frosting – A Classic Holiday Dessert
Braided, Yarn-Wrapped Easter Eggs – A Fun and Colorful Craft
Peeps in a Basket – An Adorable and Easy Easter Dessert
No Fail Jell-O Divinity – A Sweet and Nostalgic Candy
20+ Non-Candy Easter Egg Stuffers – Creative Alternatives

For all our delectable bar recipes, explore HERE.
Dive into our full collection of dessert recipes HERE.
Don’t miss out on new culinary adventures! Sign up for email updates when new recipes are posted!
For even more fantastic ideas, follow us on social media: Facebook – Pinterest – Instagram – Twitter – Bloglovin’.