
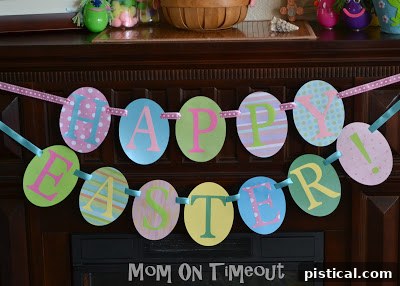
Craft Your Own Charming Two-Tier “Happy Easter” Banner: A Simple DIY Project
As the vibrant hues of spring emerge, bringing with them the promise of renewal and celebration, many of us turn our attention to sprucing up our homes for Easter. There’s an undeniable joy in transforming living spaces with festive, handcrafted decorations that truly reflect the spirit of the season. One such project that adds a personalized and heartwarming touch to any home is a DIY Easter banner. Imagine a beautiful, custom-made banner adorning your mantelpiece, welcoming guests and spreading cheer. This guide will walk you through creating an adorable two-tier “Happy Easter” banner, using readily available materials like scrapbook paper, ensuring your decor is both unique and budget-friendly. This project is not only satisfying to complete but also offers a wonderful opportunity to express your creativity and infuse your home with an extra dose of festive charm.
Why DIY Your Easter Decorations?
In a world brimming with mass-produced decor, creating your own Easter decorations offers numerous advantages. Firstly, it allows for unparalleled personalization. You get to choose the exact colors, patterns, and style that perfectly complement your existing home decor, making your banner a seamless addition rather than just another store-bought item. Secondly, DIY projects often prove to be more cost-effective. Utilizing materials you might already have on hand, like a stash of beautiful scrapbook paper, minimizes expenses. Lastly, there’s immense satisfaction in stepping back and admiring something you’ve crafted with your own hands. Each piece tells a story, imbued with your effort and creativity, making your holiday celebrations even more meaningful. This “Happy Easter” banner project is a prime example of how simple materials can be transformed into stunning, personalized decor that truly stands out.
Gather Your Materials: What You’ll Need
Before embarking on your crafting journey, it’s essential to have all your supplies organized. The beauty of this Easter banner lies in its simplicity and the fact that most items are likely already in your craft drawer. Here’s a comprehensive list of what you’ll need:
- Scrapbook Paper: This is the star of our project! Look for papers with Easter-themed patterns, spring colors, or designs that resemble speckled eggs. You’ll need enough variety for 12 ovals (for “Happy Easter!”) and coordinating paper for your letters.
- Scissors or Craft Knife: For cutting out your egg shapes and letters.
- Oval Template or Die-Cut Machine: To ensure consistent egg shapes. If you don’t have one, freehand drawing is perfectly fine!
- Mod Podge (Matte or Gloss): Our trusty adhesive for attaching letters and sealing the paper.
- Foam Brush or Paintbrush: For applying Mod Podge smoothly.
- Rectangle Punch or Hole Punch: To create slots for your ribbon. A standard hole punch can work, but a rectangle punch offers a more refined look.
- Ribbon: You’ll need two different ribbons, or simply enough of one kind, to create the two-tier effect. Choose colors that complement your scrapbook paper. Approximately 3-4 feet for each tier, depending on your desired spacing and length.
- Pencil and Eraser: For tracing and marking.
- Printer (Optional): If you choose to print your letters rather than cutting them from paper directly.
Having all these items ready will streamline your crafting process and help you focus on the creative aspects of bringing your Easter banner to life.
Step-by-Step Guide to Creating Your Easter Egg Banner
Step 1: Selecting and Cutting Your Easter Egg Ovals
The foundation of your “Happy Easter!” banner begins with selecting the perfect scrapbook paper for your egg shapes. Dive into your collection and choose prints that evoke the essence of Easter – think soft pastels, floral patterns, or even subtle polka dots. The key is to find patterns that resemble the beautiful designs often seen on painted Easter eggs. Once you’ve chosen your papers, you’ll need 12 ovals for the phrase “Happy Easter!” (six for “Happy” and six for “Easter!”).
To achieve consistent shapes, use an oval template or a die-cut machine if you have one. If you’re cutting freehand, draw an oval shape on the back of your chosen paper, then carefully cut it out. For a more authentic egg shape, gently trim one end of the oval, making it slightly narrower than the other. This small detail truly elevates the ‘egg’ aesthetic. Lay out your chosen eggs and arrange them until you are pleased with the mix of patterns and colors. This initial layout helps visualize the final banner and allows for adjustments before committing to gluing.
Step 2: Crafting and Attaching Your Letters
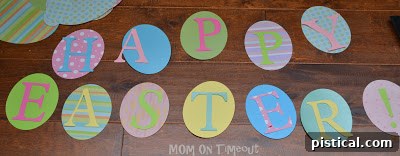
Now it’s time to add the message! For the letters of “Happy Easter!”, select coordinating scrapbook paper that contrasts nicely with your egg shapes, making the letters pop. You can either print out your letters in a desired font, trace them onto your paper, and then cut them out, or use letter dies with a die-cut machine for a precise finish. Ensure your letters are appropriately sized to fit neatly within your egg ovals.
Once your letters are ready, carefully position each one onto its corresponding egg. Take your time to arrange them evenly. Then, using Mod Podge and a foam brush, gently adhere each letter to the center of its egg. Apply a thin, even coat of Mod Podge to the back of the letter, press it firmly onto the egg, and then apply another thin coat over the top of the letter and the entire egg. This not only glues the letter securely but also gives the egg a smooth, protective finish. Allow ample drying time for each egg, typically 15-20 minutes, or longer if applying multiple coats, to prevent smudging or stickiness. This step is surprisingly quick and satisfying!
Step 3: Creating Ribbon Slots
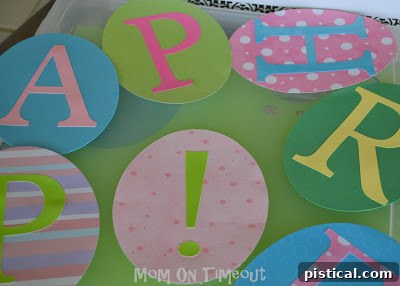
To thread your ribbon through, you’ll need to create slots in each egg. A rectangle punch is ideal for this, as it creates neat, even slots that the ribbon can easily weave through. If you don’t have a rectangle punch, a standard hole punch can also work, creating two holes side-by-side on each egg. Aim to punch two slots at the top of each egg, ensuring they are equidistant from the edges and from each other. Consistency in placement is key for a professional-looking banner. Make sure the slots are wide enough for your chosen ribbon to pass through without creasing or tearing the paper. Punching slots before threading the ribbon ensures a clean finish and prevents any damage to your beautifully crafted egg letters.
Step 4: Threading Your Ribbon for the First Tier (“Happy”)
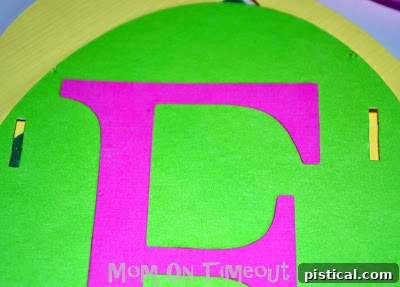
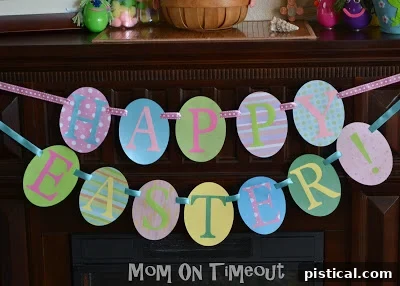
Once all your eggs have dry letters and punched slots, it’s time to assemble the banner. Start with the word “Happy.” Choose your first ribbon, perhaps a lovely pink polka dot as initially intended, or any ribbon that complements your design. Begin threading the ribbon through the slots of each egg, from the back to the front, and then back through the second slot. This weaving technique keeps the eggs securely in place and allows them to hang neatly. As you thread, ensure the letters are facing the correct way and are in the proper order. Once all the “Happy” eggs are threaded, space them out evenly along the ribbon. It’s a good idea to temporarily hang this first tier to see how it looks and make any adjustments to the spacing before moving on. This allows you to get a feel for the overall flow and balance of your banner.
Step 5: Completing the Second Tier (“Easter!”)
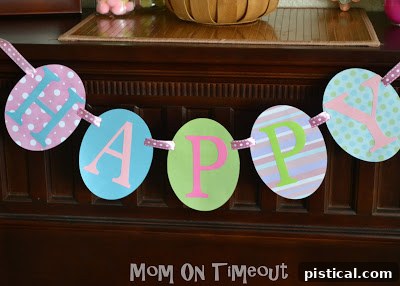
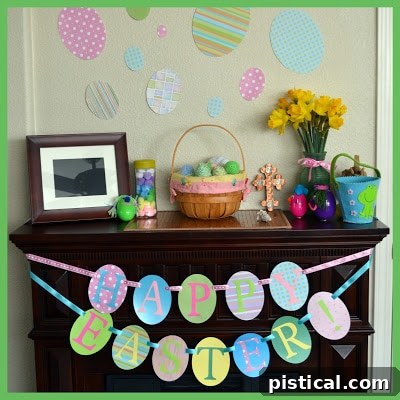
For the second tier, “Easter!”, you can either use the same ribbon as “Happy” or opt for a different one to create visual interest and emphasize the two-tier design. In our case, a different ribbon was chosen, perhaps due to running out of the pink polka dot, but this often leads to delightful and unexpected results! Select a ribbon that still harmonizes with your overall color scheme. Thread the “Easter!” eggs onto this second ribbon using the same back-to-front weaving method. Once all the letters are threaded, arrange them to form the word “Easter!” and ensure they are evenly spaced. The beauty of using two separate ribbons is the flexibility it offers in hanging; you can adjust the height of each tier independently, allowing for a perfectly staggered or aligned look, depending on your preference. Seeing both tiers come together is incredibly rewarding.
Step 6: Displaying Your Beautiful Easter Banner
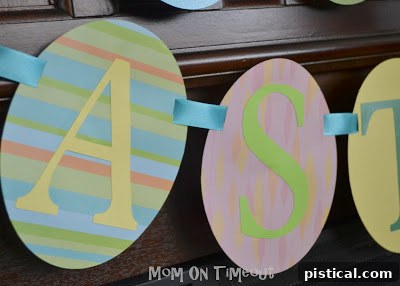
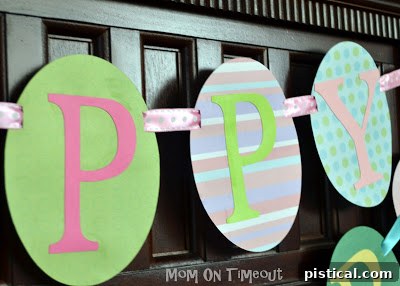
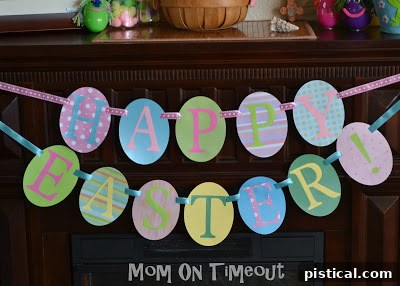
With both tiers complete, it’s time for the grand reveal! Choose your desired hanging spot – a mantelpiece, a wall, or even across a doorway are all excellent options. Carefully hang the “Happy” tier first, ensuring it is level. Then, position the “Easter!” tier below it, adjusting its height and center point to create a balanced and aesthetically pleasing two-tier effect. Step back and admire your handiwork! You’ll likely be delighted with how charming and festive your homemade banner looks. The combination of carefully chosen scrapbook papers, personalized letters, and the gentle sway of the ribbon creates a dynamic and inviting piece of holiday decor that truly expresses the warmth of the season.
Your DIY “Happy Easter!” banner is now complete, ready to bring cheer and a touch of handmade elegance to your home. This project is a testament to how simple materials and a bit of creativity can transform your holiday decor. It’s a wonderful reminder that the most cherished decorations are often those made with love.
Tips for a Flawless Banner
- Paper Weight Matters: Opt for thicker scrapbook paper (cardstock weight) for your eggs to ensure durability and a professional finish. Thinner paper might warp with Mod Podge or tear when punched.
- Mod Podge Application: Always apply Mod Podge in thin, even coats. Too much can cause wrinkling or buckling of the paper. Allow each coat to dry completely before applying another or handling.
- Letter Alignment: Before gluing, lay out all your letters on their respective eggs and adjust until you’re satisfied with the alignment and spacing. A ruler can help ensure consistency.
- Ribbon Choice: Consider the width of your ribbon. If it’s too wide, it might be difficult to thread through the punched slots. If it’s too narrow, the eggs might twist easily. A medium-width ribbon (around 1/2 to 1 inch) usually works best.
- Two-Tier Spacing: When hanging, ensure there’s enough vertical space between “Happy” and “Easter!” so the words are clearly legible and the banner doesn’t look cramped.
Variations and Personalization Ideas
This “Happy Easter!” banner is just the starting point. Feel free to unleash your creativity with these ideas:
- Different Messages: Instead of “Happy Easter!”, consider “He Is Risen,” “Easter Blessings,” or even personalize it with a family name.
- Alternative Shapes: While eggs are iconic, you could cut out bunny shapes, carrots, chicks, or even flowers from your scrapbook paper for a different look.
- Embellishments: Add glitter, small buttons, rhinestones, or tiny silk flowers to your eggs for extra sparkle and dimension.
- Material Swap: Experiment with other materials like felt for a softer, more textural banner, or even thin wood slices if you’re feeling adventurous.
- Photo Banner: Instead of letters, attach small photos of family members or past Easters to each egg for a nostalgic touch.
- Single Tier: If you prefer a simpler look or have less space, create a single-tier banner that spells out “Easter” or “Happy.”
- Battery-Operated Lights: Weave a strand of tiny battery-operated fairy lights along the ribbon for a magical glow, especially enchanting in the evening.
Caring for Your Handmade Banner
To ensure your beautiful “Happy Easter!” banner lasts for many seasons to come, a little care goes a long way. After the Easter celebrations are over, carefully remove the banner from its display spot. Gently unthread the ribbon if you wish to store the eggs flat, or simply fold the banner neatly. Store it in a dry, cool place, preferably in a protective container or a large Ziploc bag, to prevent dust accumulation, creasing, or damage. Avoid exposing it to direct sunlight for prolonged periods, as this can fade the vibrant colors of your scrapbook paper. With proper storage, your personalized Easter banner will be ready to adorn your home year after year, bringing a smile to your face each spring.
Creating your own “Happy Easter!” banner is a delightful project that offers a perfect blend of creativity and festive spirit. It’s an opportunity to transform simple materials into a cherished piece of holiday decor that speaks volumes about your personal style. Whether you’re a seasoned crafter or just starting, this easy-to-follow tutorial will guide you through each step, resulting in a beautiful, personalized banner that will surely be a focal point of your Easter celebrations. So gather your supplies, put on some cheerful music, and get ready to craft a “Happy Easter!” banner that will bring joy to your home for years to come. Happy crafting and Happy Easter!