
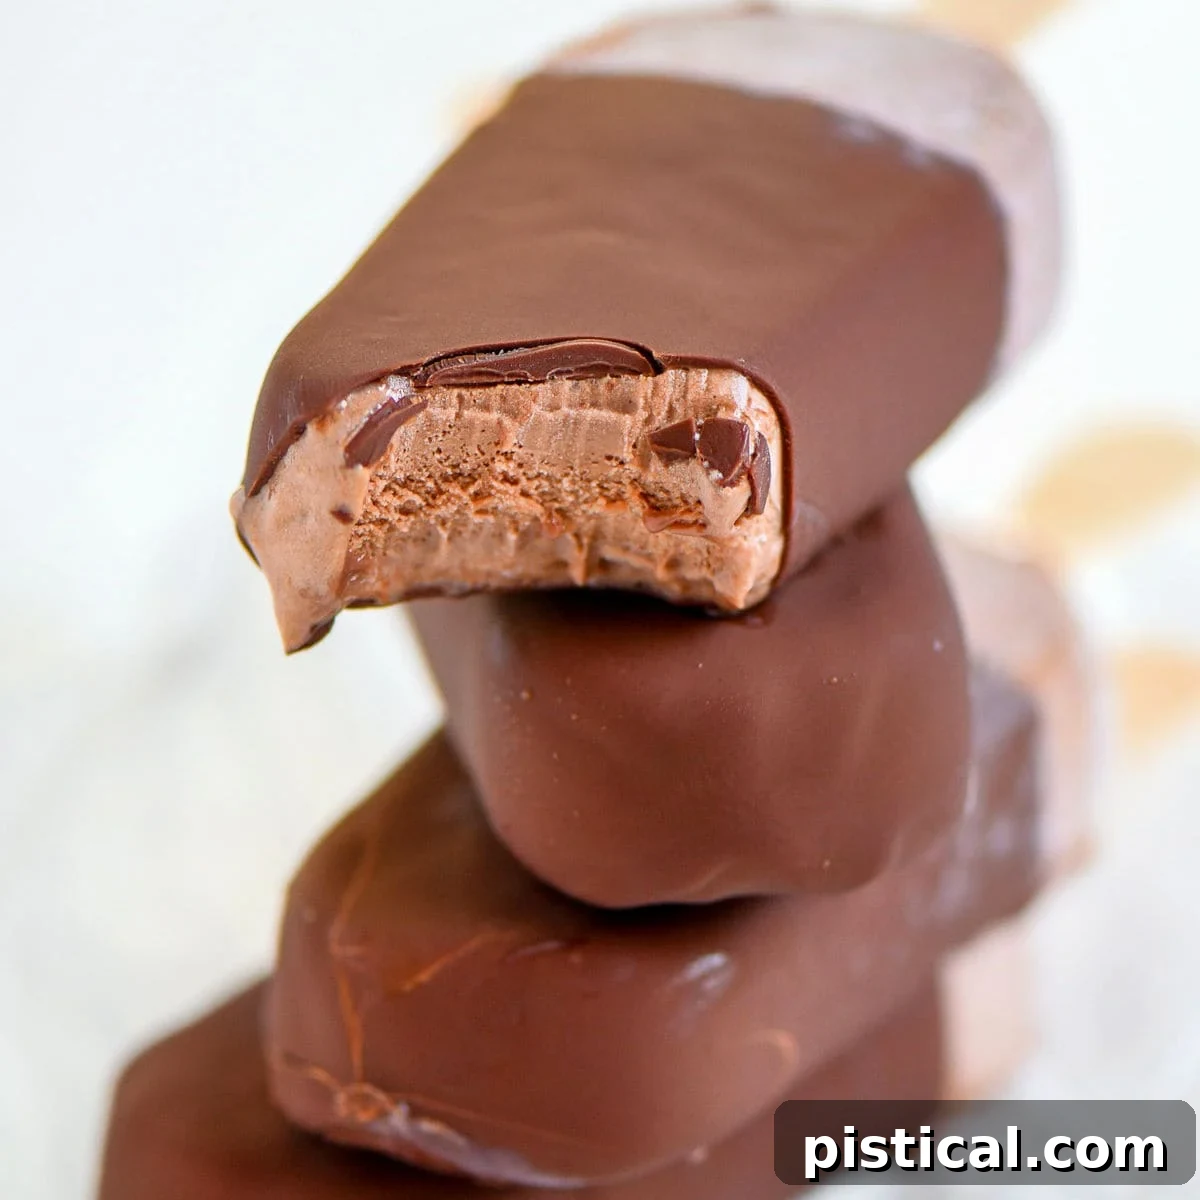
Unleash pure dessert magic with this incredibly easy homemade Chocolate Magic Shell recipe! Requiring only two simple ingredients and mere minutes of your time, you can create a rich, glossy, and satisfyingly crackly chocolate shell that instantly hardens over your favorite frozen treats. It’s the ultimate upgrade for sundaes, ice cream cones, popsicles, and those special dessert evenings when you crave something truly extraordinary without the fuss.
Craving more irresistible chocolate creations? Be sure to explore these other decadent recipes: my rich Chocolate Cheesecake, fluffy Chocolate Cupcakes, and this divine Chocolate Mousse!
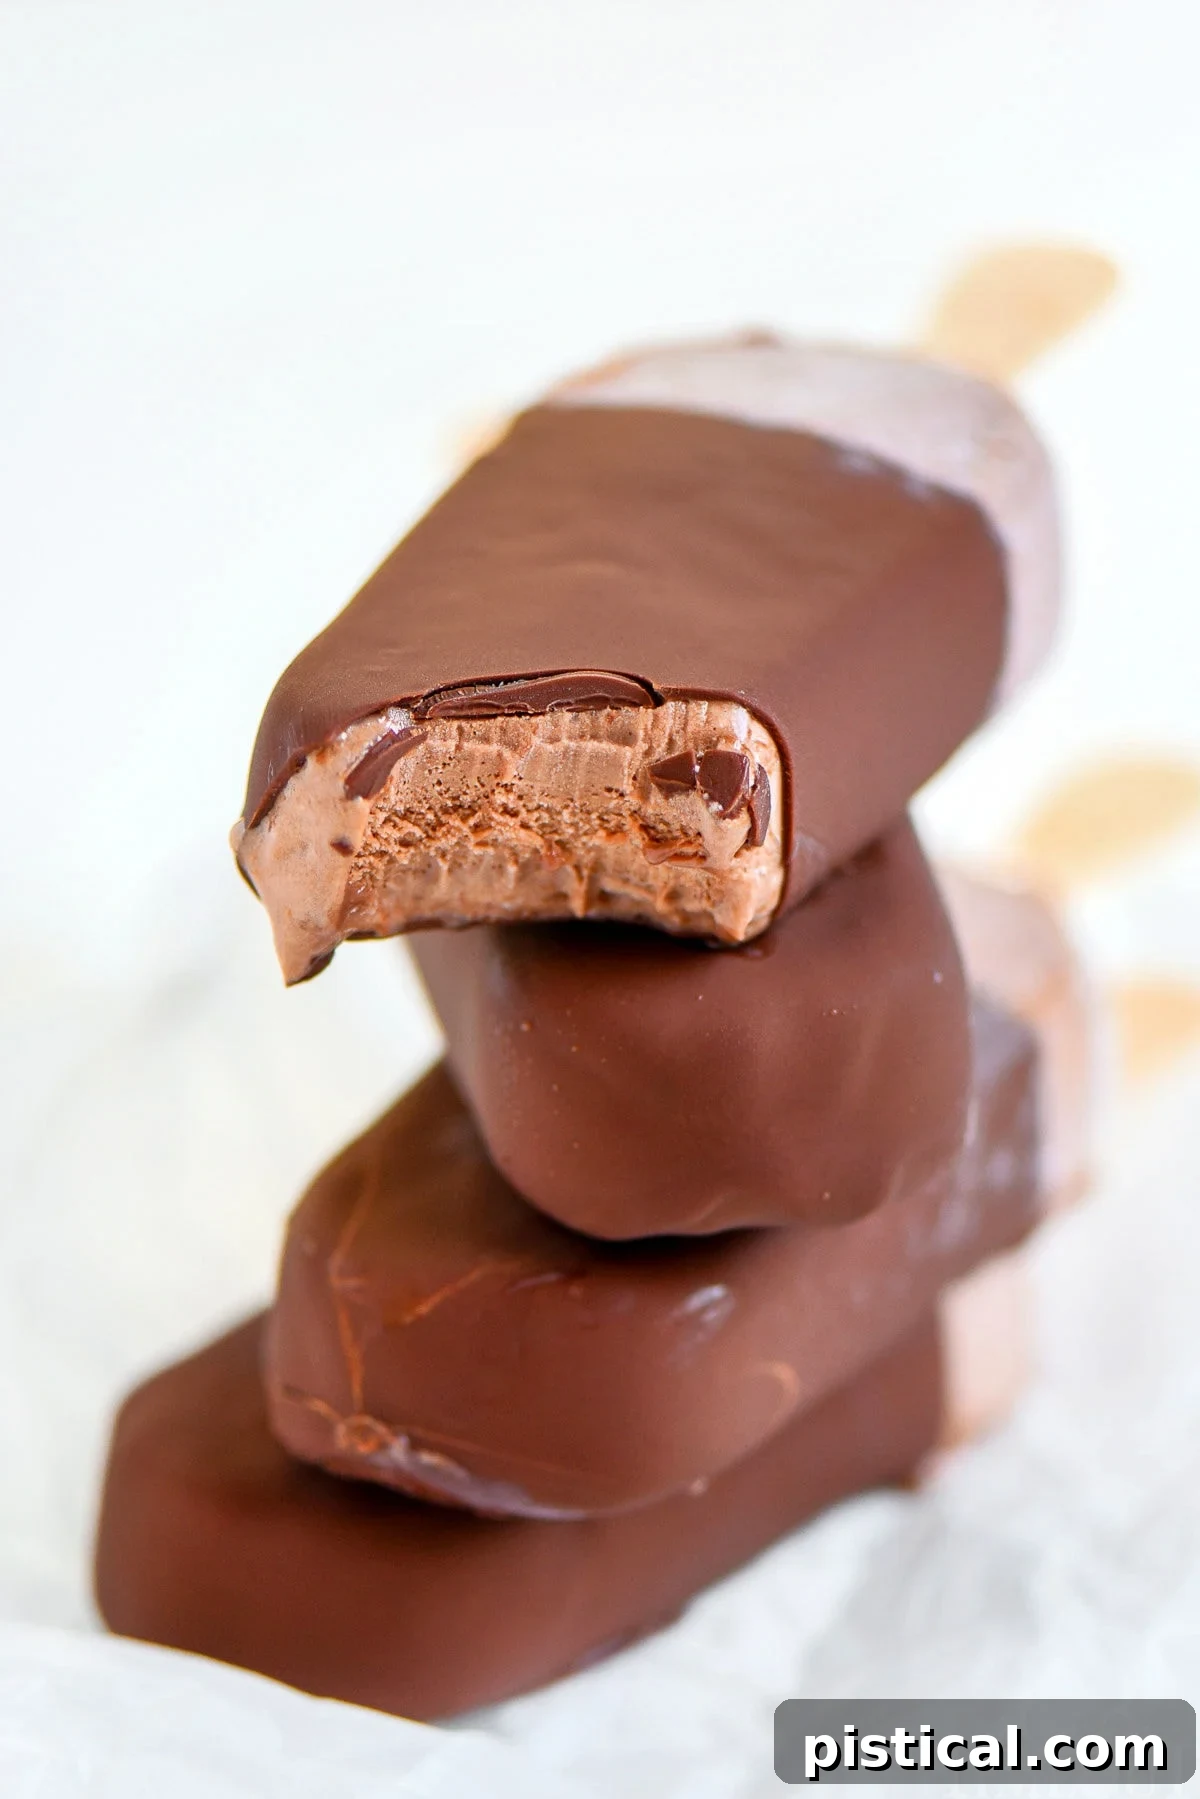
Unlocking the Magic: Your Guide to Homemade Chocolate Magic Shell
If you’ve never experienced the joy of making your own chocolate magic shell, prepare for an absolute revelation! This foolproof, two-ingredient recipe transforms ordinary chocolate chips and coconut oil into a luxurious, glossy chocolate coating that sets in mere seconds when it touches anything cold. Imagine turning a simple scoop of vanilla ice cream or a basic popsicle into a gourmet dessert with an exciting, satisfying crunch. It’s not just a topping; it’s an interactive dessert experience that brings out the inner child in everyone.
Crafting this homemade magic shell is incredibly quick and wonderfully rewarding. Beyond its instant gratification, it boasts impressive longevity, storing beautifully for months in your pantry. This means you can have a gourmet topping ready at a moment’s notice for any impromptu ice cream craving, family dessert night, or backyard barbecue. Whether you’re generously drizzling it over sundaes, expertly dipping ice cream cones, or swirling it into frozen yogurt, this easy chocolate shell recipe is an essential staple you’ll want to keep on hand throughout the year, not just summer!
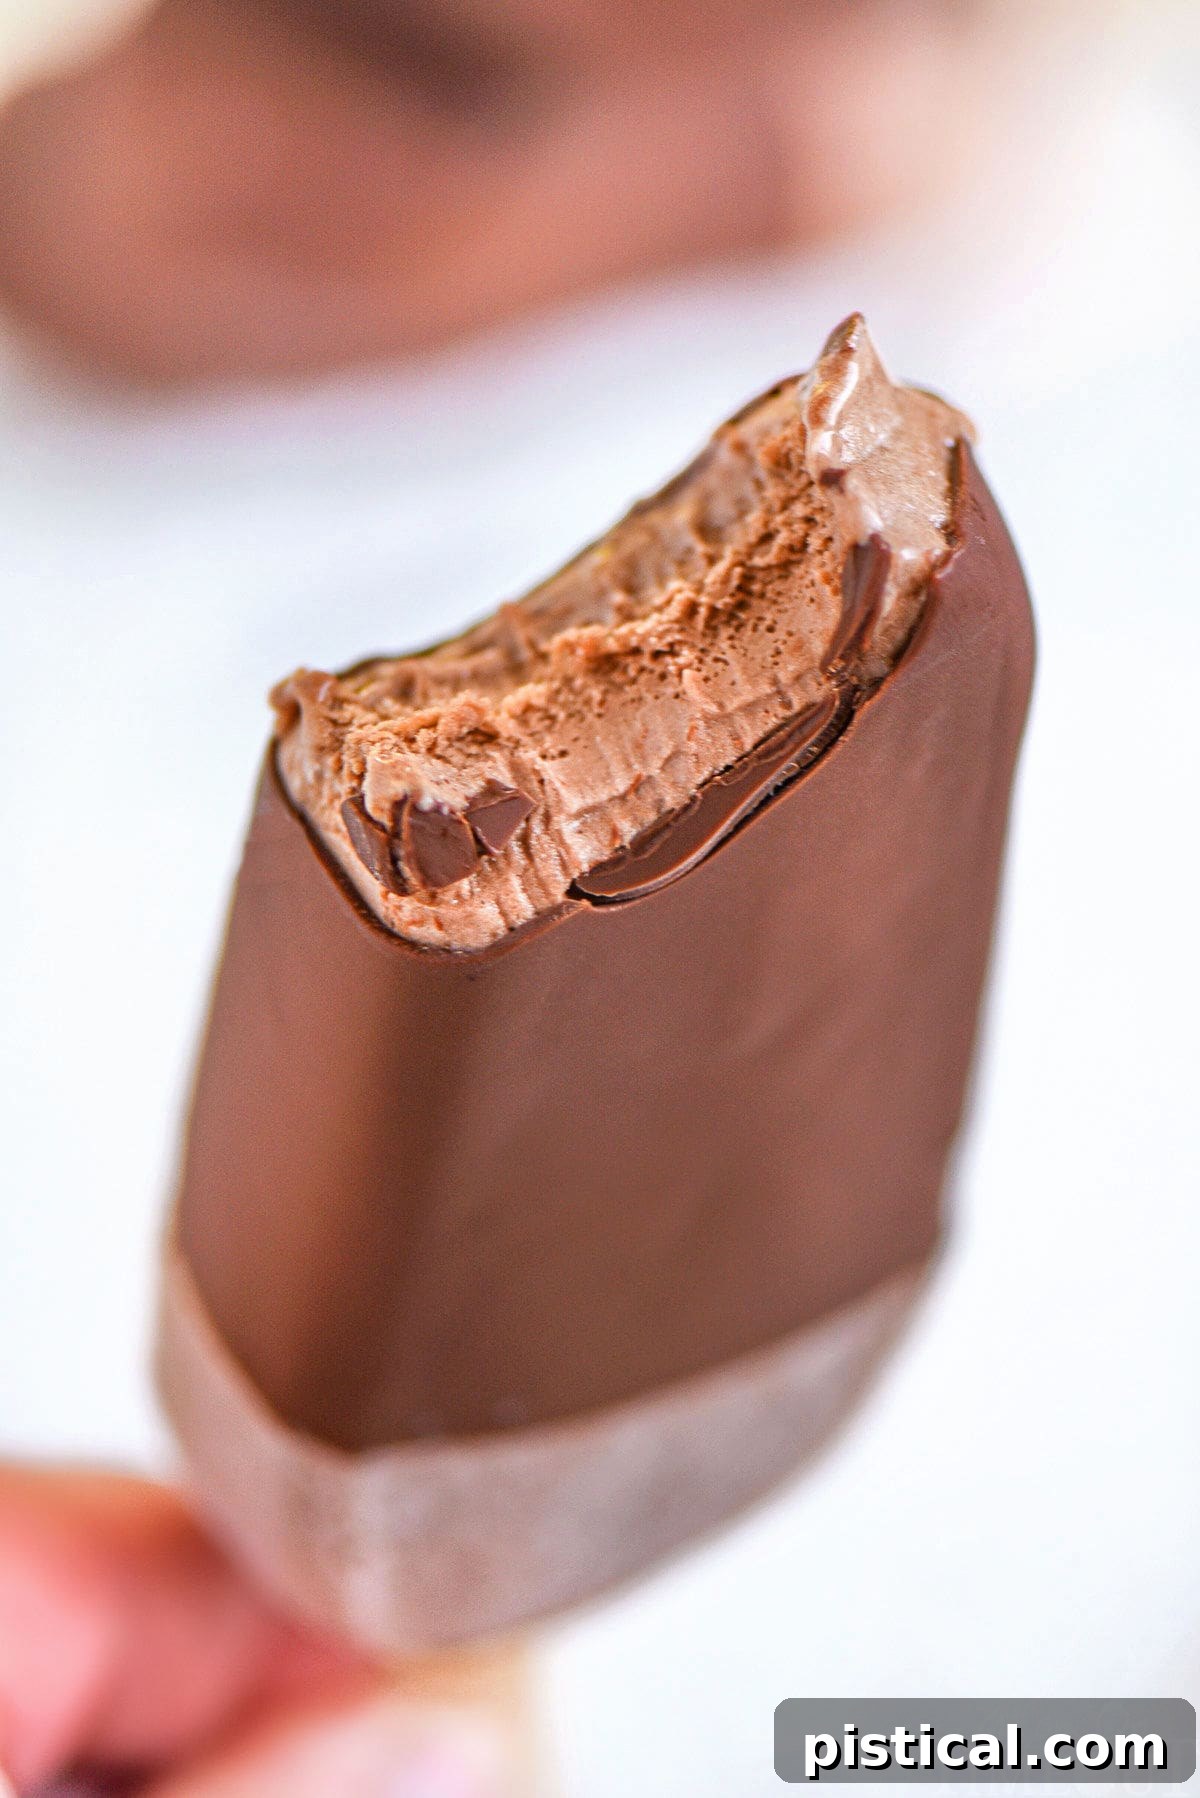
Why This Homemade Chocolate Magic Shell Will Become Your Favorite
Let’s dive into what makes this Dark Chocolate Magic Shell recipe an absolute game-changer for your dessert routine:
- Effortless 2-Ingredient Recipe: Forget complicated ingredient lists or specialty items. All you need are readily available pantry staples: your favorite chocolate chips and a bit of coconut oil. For the best flavor, always opt for the highest quality chocolate chips you can find, as they form the foundation of this delicious topping. It’s simplicity at its finest!
- Lightning-Fast Preparation: From start to finish, this chocolate magic shell is ready in mere minutes. A quick melt and a simple stir, and you’re done. You’ll likely have this rich, pourable topping ready before your ice cream is even scooped. This makes it ideal for spontaneous dessert cravings and busy weeknights.
- Incredible Shelf Life for Months: Unlike many homemade toppings that require refrigeration and spoil quickly, this magic shell is shelf-stable. Store it in an airtight container at room temperature, and it will remain perfect for up to six months. This means you can always have a batch ready to go, making it a fantastic addition to your dessert arsenal.
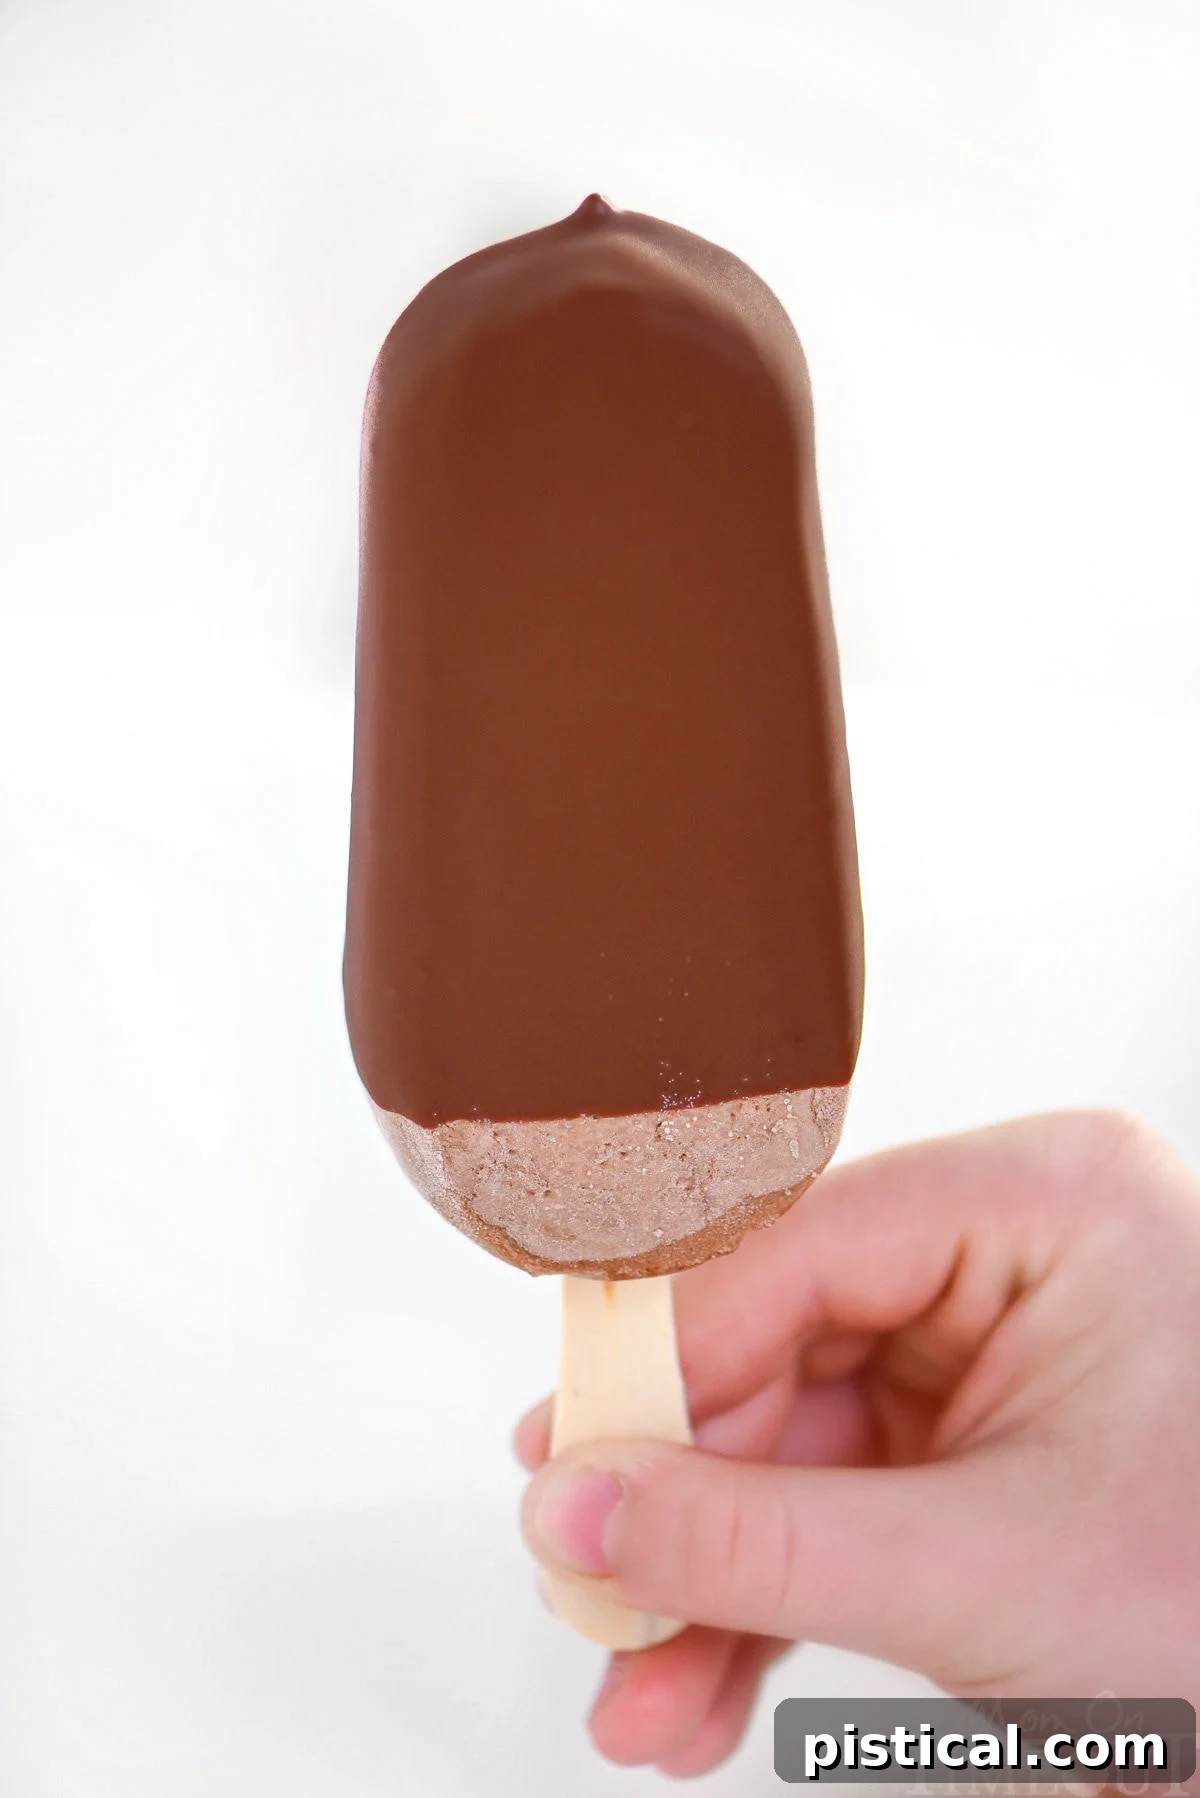
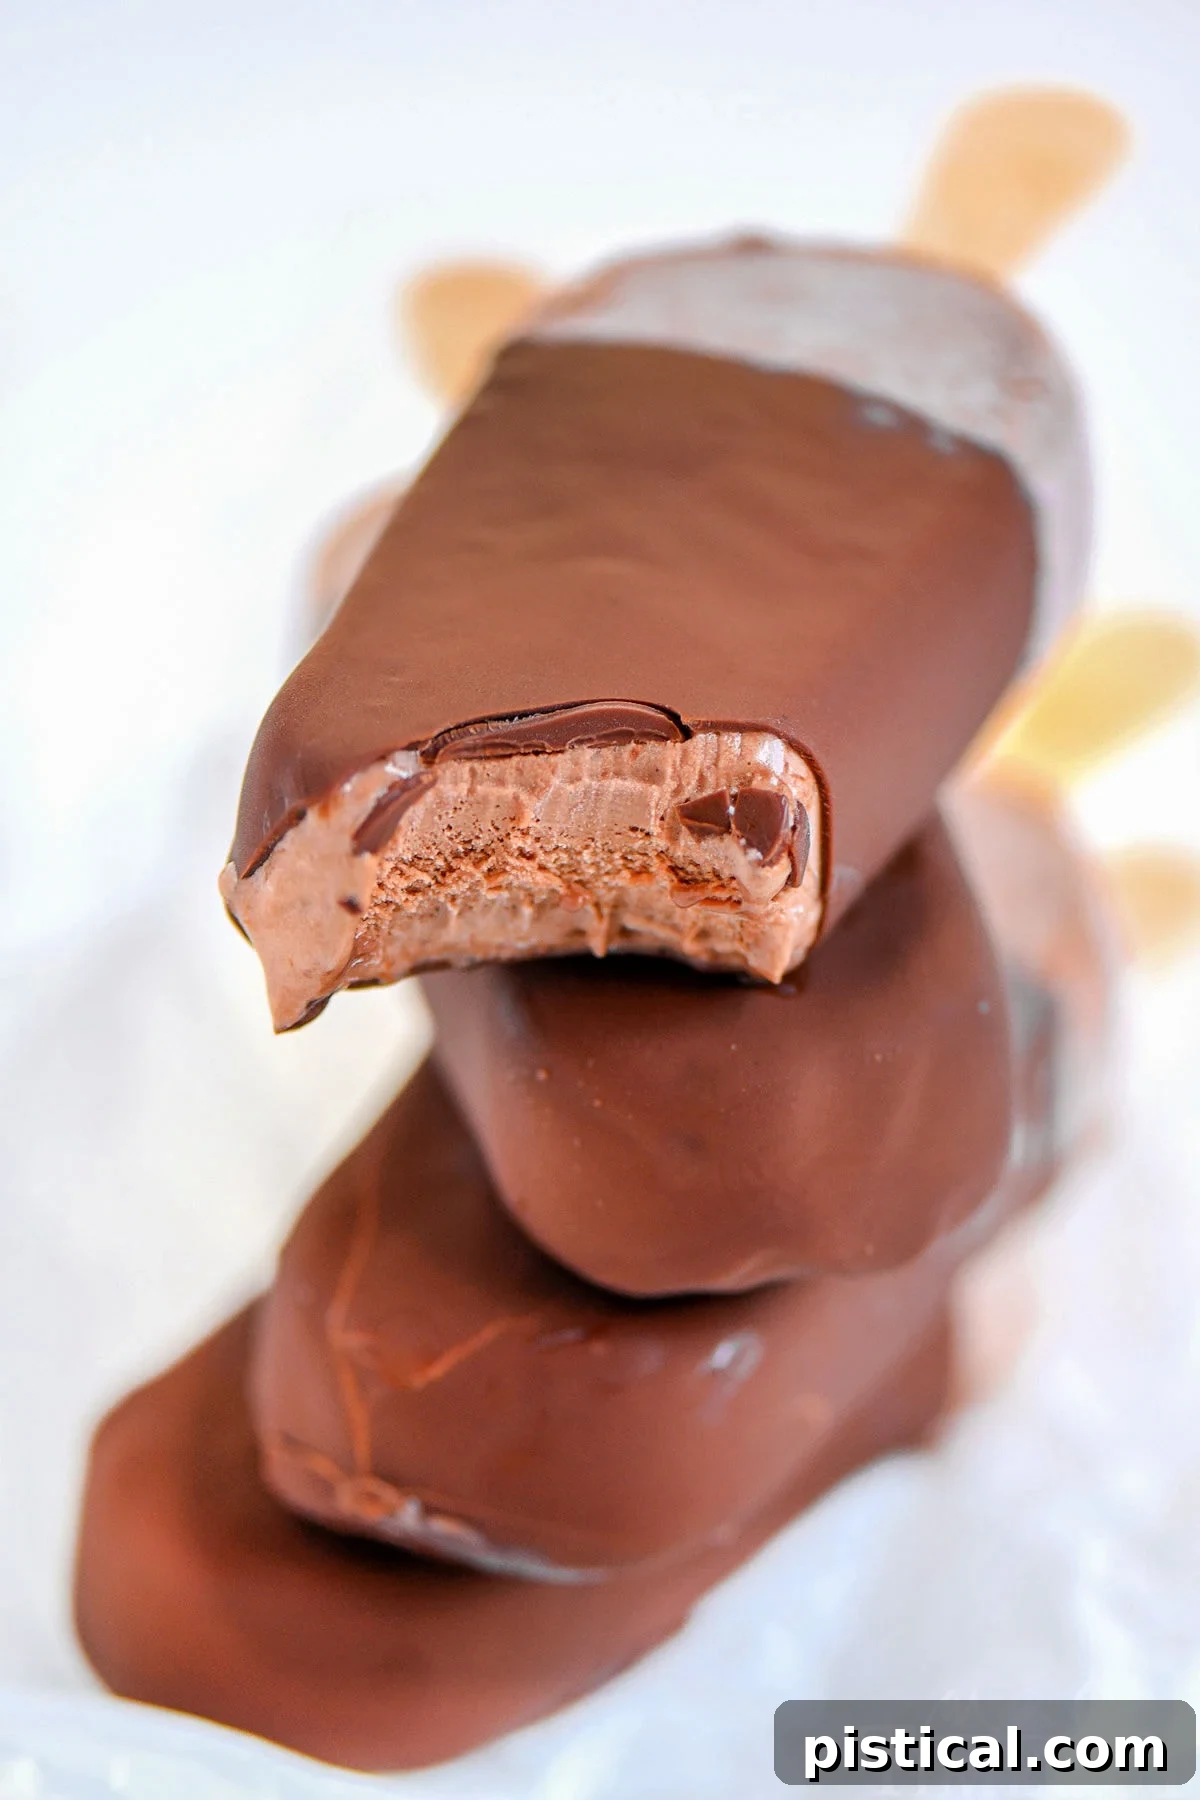
- Transforms Any Frozen Treat: This isn’t just for ice cream! Drizzle it over popsicles, fruit, frozen yogurt, or even use it to coat homemade ice cream bars. The instant hardening creates a delightful, satisfying crunch that elevates any simple frozen treat into a special indulgence.
- Customizable Flavor Profile: While delicious on its own, this base recipe is incredibly versatile. Easily adapt it to create white chocolate, peanut butter, or even mint chocolate variations (more on that below!).
Essential Ingredients for Your Magical Creation
The beauty of this recipe lies in its minimalist approach. You only need two key ingredients, each playing a crucial role in achieving that signature crackly shell:
Chocolate Chips: This is where your magic shell gets its deep, rich flavor and its structural integrity. You have a spectrum of choices here:
- Bittersweet Chocolate (Recommended): Offers an indulgent, intensely chocolatey flavor without being overly sweet, providing a wonderful contrast to sweet ice cream.
- Semisweet Chocolate: A classic choice that offers a balanced sweetness and rich chocolate taste. It’s a crowd-pleaser and works beautifully.
- Milk Chocolate: For those who prefer a sweeter, creamier chocolate flavor. Be aware it might be a bit softer in texture once set compared to darker chocolates, but still delicious.
- Dark Chocolate: For a more sophisticated and less sweet profile, dark chocolate (70% cocoa or higher) will yield a very intense and elegant shell.
No matter your preference, using a high-quality chocolate chip brand will significantly impact the final taste and texture of your magic shell. Opt for baking chocolate chips over candy melts for the best results.
Coconut Oil: This is truly the “secret ingredient” responsible for the enchanting transformation! Coconut oil is unique because its high saturated fat content means it melts at a relatively low temperature but solidifies very quickly when exposed to cold. This property is precisely what creates that instant, firm, and audibly crackly shell over your frozen desserts.
- Refined Coconut Oil: If you prefer your magic shell to have no discernible coconut flavor, refined coconut oil is your best bet. It undergoes a process that removes most of its natural coconut aroma and taste, making it virtually neutral.
- Unrefined (Virgin) Coconut Oil: For a subtle, tropical hint of coconut flavor that beautifully complements the chocolate, opt for unrefined coconut oil. Both options yield the same magical texture, so choose based on your flavor preference.
It’s important to use pure coconut oil, not a blend or a different type of oil, as its specific chemical properties are what make the “magic” happen.
Step-by-Step Guide: Crafting Your Own Chocolate Magic Shell
Bring the delightful ice cream shop experience right into your kitchen with this incredibly simple Chocolate Magic Shell recipe! With just chocolate chips and coconut oil, you’ll effortlessly create a smooth, pourable topping that instantly hardens into a delectable, crunchy shell.
For a convenient, printable version of this recipe with precise measurements and full instructions, please refer to the dedicated recipe card located at the end of this post.
- Combine Ingredients: In a microwave-safe container (a glass measuring cup with a spout works perfectly for easy pouring later), add your chosen chocolate chips and coconut oil. Ensure your container is clean and dry.
- Microwave and Stir: Heat the mixture on high power for 30 seconds. Remove from the microwave and stir thoroughly with a spoon or whisk. The chocolate won’t be fully melted yet, but stirring helps distribute the heat. Return to the microwave for another 30 seconds, then stir again. Continue heating in shorter 15-second intervals, stirring well after each, until the mixture is completely smooth and free of any lumps. Be careful not to overheat the chocolate, as this can cause it to seize.
- Cool to Room Temperature: This step is crucial for success! Allow the melted chocolate mixture to cool down to room temperature before using it. If the magic shell is too warm, it will melt your delicious ice cream instead of hardening over it. This usually takes about 10-15 minutes. Stir it occasionally as it cools to ensure an even consistency.
- Dip, Spoon, or Pour: Once cooled, your magic shell is ready! Dip your frozen treats directly into the chocolate, spoon it generously over scoops of ice cream, or pour it artfully over sundaes. Watch in amazement as the magic happens right before your eyes!
The transformation is almost instantaneous. As soon as the warm chocolate mixture meets the cold surface of your dessert, it will begin to set. You’ll notice the chocolate transitioning from a super shiny, liquid state to a matte finish within seconds. That matte appearance is your signal that the shell has perfectly hardened and is ready to be enjoyed with a satisfying bite!
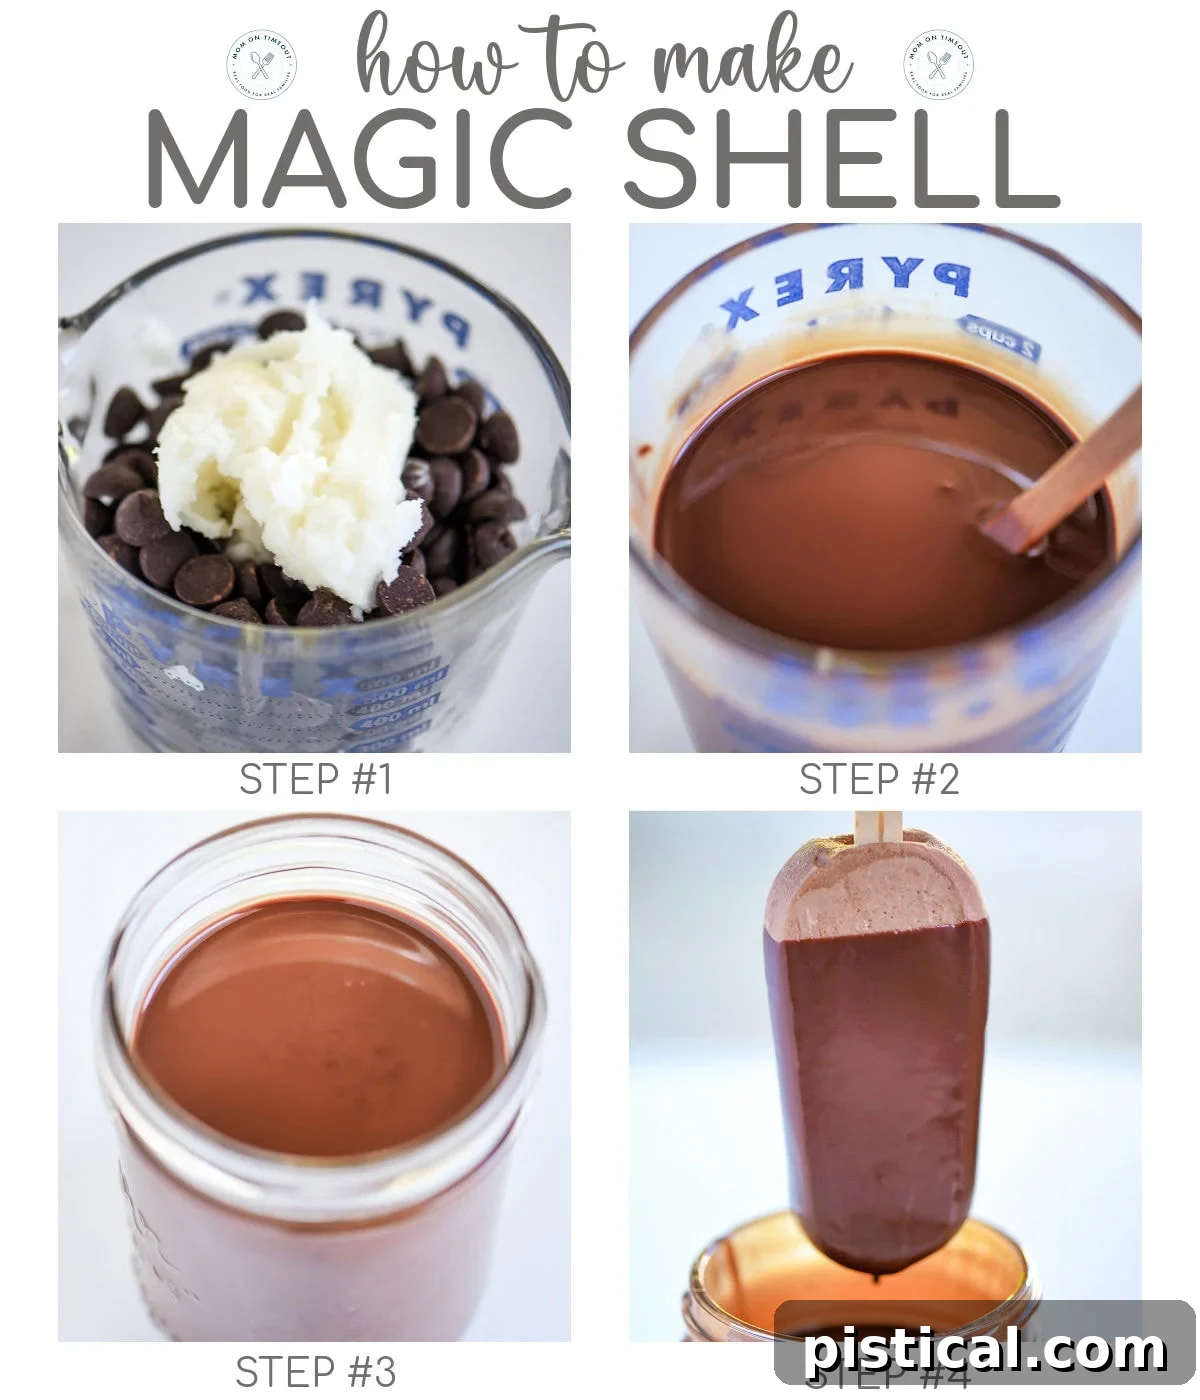
Crucial Storage Tip: After microwaving and cooling, please do NOT refrigerate this magic shell concoction. This recipe is designed to be shelf-stable. For optimal storage, simply pour any leftover magic shell into a clean glass canning jar, seal it tightly with a lid, and store it in your pantry at room temperature.
Storage and Reheating Tips for Longevity
One of the fantastic advantages of this homemade chocolate magic shell is its excellent storage capabilities. It’s designed to remain pourable and ready for action at room temperature, making it a super convenient staple to have on hand.
- Room Temperature Storage: For best results and maximum shelf life, store your magic shell in an airtight container, such as a glass canning jar, in a cool, dark pantry. Properly stored, it will maintain its quality for up to 6 months. The tight seal of a canning jar is ideal for preventing air exposure and maintaining freshness.
- Reheating Instructions: If, over time, your magic shell thickens or solidifies (especially in cooler room temperatures), there’s no need to worry! Simply remove the lid and gently warm it in the microwave. Use short bursts of 10 to 15 seconds, stirring well after each interval, until it returns to a smooth, pourable consistency. Avoid overheating.
- DO NOT Refrigerate or Freeze: This is a critical point for success! Placing your magic shell in the refrigerator or freezer will cause the chocolate to harden prematurely and become difficult to use or pour. It can also lead to an undesirable texture when reheated. Always keep it at room temperature.
Exciting Variations to Experiment With
While the classic chocolate magic shell is undeniably delicious, this versatile recipe serves as a fantastic base for various flavor explorations. Get creative and customize your dessert experience with these delightful variations:
- White Chocolate Magic Shell: For a lighter, sweeter, and creamy shell, simply swap out the bittersweet chocolate chips for an equal amount of high-quality white chocolate chips. This is perfect for pairing with berry-flavored ice creams or for a visually striking contrast.
- Peanut Butter Magic Shell: Elevate your chocolate shell with a nutty twist! After melting the chocolate and coconut oil, stir in 2 tablespoons of smooth peanut butter until fully incorporated. This creates a rich, peanut buttery chocolate shell that’s a dream come true for peanut butter lovers.
- Mint Chocolate Magic Shell: Add a refreshing kick to your chocolate shell by stirring in about ¼ teaspoon of pure peppermint extract after the mixture has fully melted and is smooth. Adjust the amount to your taste preference. This is perfect for holiday treats or a cool, invigorating summer dessert.
- Coffee-Infused Magic Shell: For a sophisticated flavor, add ½ teaspoon of instant espresso powder or coffee extract to the melted chocolate mixture. It deepens the chocolate flavor and adds a delightful coffee note.
- Spicy Chocolate Magic Shell: Feeling adventurous? Stir in a tiny pinch (⅛ teaspoon) of cayenne pepper for a subtle, warming heat that beautifully complements the rich chocolate.
Frequently Asked Questions About Magic Shell
Here are some common questions and helpful answers to ensure your homemade magic shell turns out perfectly every time:
Can I use another type of oil besides coconut oil?
While it might be tempting to substitute, coconut oil is truly the star ingredient for a reason. Its unique composition, particularly its high saturated fat content, allows it to solidify rapidly when chilled, creating that distinct crackly texture and satisfying “bite” that magic shell is known for. Other oils, such as vegetable oil, canola oil, or olive oil, will not perform the same way. They remain liquid at colder temperatures and will not produce the characteristic hard shell. For authentic magic shell results, stick with coconut oil.
Does the magic shell taste like coconut?
The taste of coconut in your magic shell depends entirely on the type of coconut oil you choose:
- Refined Coconut Oil: If you use refined coconut oil, you will find it has a very neutral flavor, almost undetectable, and will not impart any coconut taste to your chocolate shell. This is the best choice if you want the pure chocolate flavor to shine through.
- Unrefined (Virgin) Coconut Oil: If you opt for unrefined or virgin coconut oil, you may notice a mild, pleasant coconut flavor in the finished product. Many people enjoy this subtle tropical note, especially with chocolate. Choose based on your preference!
Can I use a double boiler instead of a microwave?
Absolutely! If you prefer not to use a microwave or simply don’t have one, a double boiler is an excellent alternative. Simply combine the chocolate chips and coconut oil in the top bowl of a double boiler set over simmering water (ensure the bowl doesn’t touch the water). Stir continuously over low heat until the mixture is completely smooth and melted. This method provides gentle, even heating, reducing the risk of burning the chocolate. Just remember to let it cool to room temperature before using!
Can I use chocolate bars instead of chocolate chips?
Yes, you can! If using chocolate bars, chop them into small, uniform pieces before melting. This helps them melt more evenly and prevents scorching. High-quality chocolate bars, especially baking chocolate, can yield an even smoother, richer magic shell. Just ensure the total weight or volume matches the amount of chocolate chips specified in the recipe.
Is this recipe dairy-free and vegan?
Yes, this recipe is naturally dairy-free and vegan, provided you use dairy-free chocolate chips! Many brands of dark and bittersweet chocolate chips are naturally dairy-free. Always check the ingredient label to ensure they contain no milk products. With dairy-free chocolate chips and coconut oil, this magic shell is a wonderful option for those with dietary restrictions.
Trish’s Expert Tips for a Perfect Chocolate Magic Shell
Achieve flawless results every time with these helpful hints and best practices:
- Choose the Right Container for Pouring: For effortless drizzling and pouring over ice cream or other treats, melt your magic shell in a container that has a convenient spout, such as a glass measuring cup. This gives you greater control and minimizes mess.
- Opt for a Tall Container for Dipping: If you plan to dip ice cream cones, popsicles, or frozen banana slices, use a tall, narrow, cylindrical container. This allows you to submerge the treat fully with less magic shell, ensuring a complete and even coating.
- Always Cool to Room Temperature: This tip cannot be stressed enough! Allowing the magic shell to cool to room temperature before applying it to frozen treats is absolutely essential. If the chocolate is too warm, it will instantly melt your ice cream, creating a soggy mess instead of a firm shell. Patience here pays off!
- Enhance Texture and Flavor with Add-Ins: For an extra layer of crunch and flavor, immediately after pouring or dipping, sprinkle your magic shell-coated treat with a handful of finely chopped nuts (like peanuts, almonds, or pecans), crushed cookies (like Oreos or Graham crackers), or colorful sprinkles. These adhere beautifully as the shell sets.
- Avoid Water Contact: When melting chocolate, even a tiny drop of water can cause it to seize and become thick and grainy. Ensure all your equipment is completely dry before you start.
- Use Quality Ingredients: As with any simple recipe, the quality of your ingredients truly shines through. Invest in good quality chocolate chips for the best flavor experience.
More Irresistible Ice Cream & Dessert Toppings You’ll Adore
Pair your perfect homemade magic shell with these other fantastic ice cream and dessert toppings, or enjoy them on their own for a complete sweet treat experience:
- Rich Homemade Hot Fudge: A classic, warm, and gooey chocolate sauce that’s pure indulgence.
- Velvety Caramel Sauce: Smooth, buttery, and utterly divine, perfect for a salty-sweet combination.
- Fluffy Homemade Whipped Cream: Light, airy, and much more delicious than store-bought.
- Fresh Strawberry Sauce: A vibrant, fruity topping bursting with natural sweetness.
- Easy No-Churn Vanilla Ice Cream: The perfect creamy canvas for all your favorite toppings, no ice cream maker needed!
Pin
Chocolate Magic Shell
This easy homemade Chocolate Magic Shell recipe is pure dessert magic! Just two ingredients and a few minutes is all it takes to create a rich, crackly shell that hardens instantly over your favorite frozen treats. Perfect for sundaes, cones and those extra-special dessert nights!
- Course
- Dessert
- Cuisine
- American
- Keyword
- chocolate magic shell, magic shell, magic shell recipe
- Prep Time
- 1 minute
- Cook Time
- 2 minutes
- Total Time
- 3 minutes
- Servings
- 24
- Calories
- 119 kcal
Author: Trish – Mom On Timeout
Ingredients
- 1 ½ cups bittersweet chocolate chips (9 oz)
- ¾ cup coconut oil (unrefined or refined)
Instructions
- Combine chocolate chips and coconut oil in a microwave-safe container.
- Heat on high heat for 30 seconds, then stir thoroughly.
- Heat again for an additional 30 seconds on high, then stir.
- Continue heating on high in 15-second intervals, stirring after each, until the mixture is completely smooth and free of lumps.
- Let cool to room temperature before using.
- Store in an airtight container at room temperature until ready to use. Spoon or dip magic shell over any frozen treat. Allow 10 to 15 seconds for the shell to harden completely.
- Properly stored, this magic shell will last for up to 6 months.
Notes
Storage Information
This recipe stores beautifully and stays pourable at room temperature.
- Room Temperature: Store in an airtight container (a canning jar works perfectly for a tight seal) for up to 6 months.
- Reheating: If the shell thickens or solidifies during storage, gently warm it in the microwave using 10 to 15-second bursts, stirring between each until smooth.
- Do Not Refrigerate or Freeze: This will cause it to harden excessively and make it difficult to use.
Tools and Equipment: Glass Mixing Bowls | Whisk
Please refer to the detailed post above for more information, step-by-step process photos, additional recipe tips, and frequently asked questions.
Nutrition
- Calories
- 119 kcal
- Carbohydrates
- 6g
- Protein
- 1g
- Fat
- 10g
- Saturated Fat
- 9g
- Cholesterol
- 1mg
- Sodium
- 12mg
- Potassium
- 71mg
- Fiber
- 1g
- Sugar
- 4g
- Vitamin C
- 0.1mg
- Calcium
- 34mg
- Iron
- 0.1mg
Originally published May 31, 2016.