
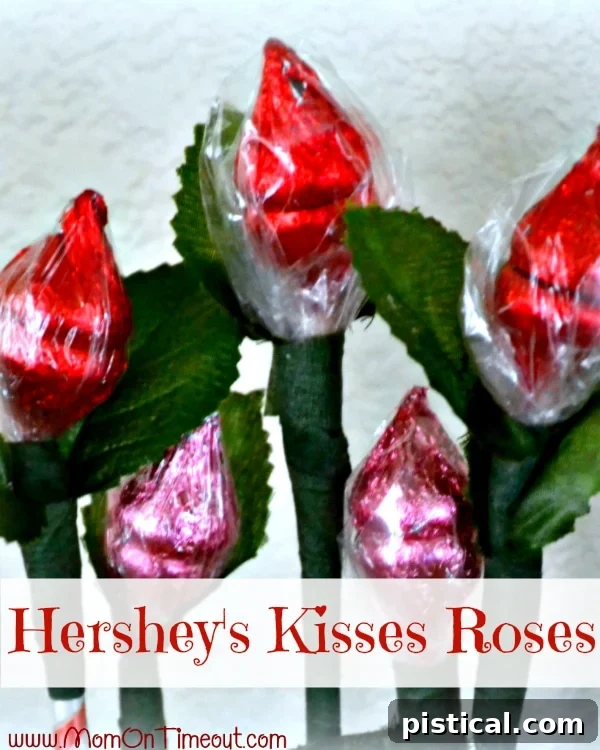
Crafting Sweet Memories: The Enduring Charm of Hershey’s Kiss Roses
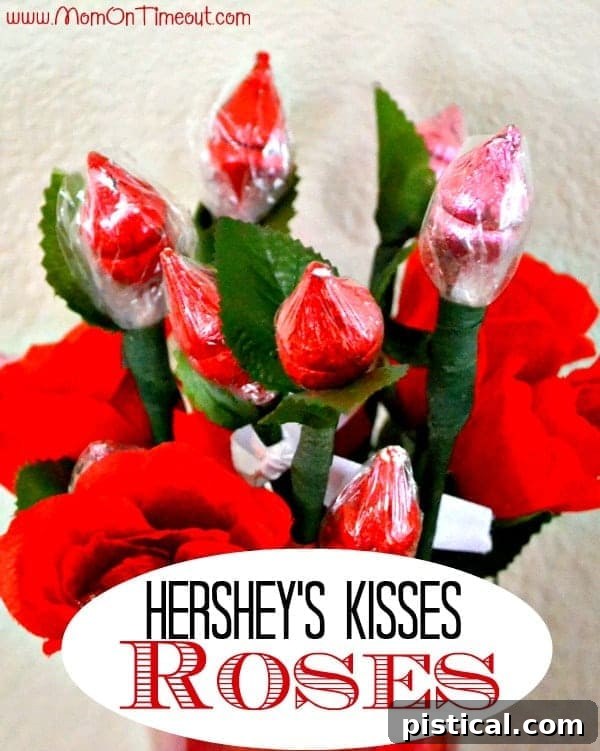
In a world bustling with fleeting trends, there’s a timeless appeal to handmade gifts. They carry a unique warmth, a personal touch that mass-produced items simply cannot replicate. Among these thoughtful gestures, Hershey’s Kiss Roses stand out as a wonderfully simple, yet incredibly sweet craft, perfect for expressing affection on any special occasion. Whether you’re looking for a charming DIY Valentine’s Day gift, unique wedding favors, or a heartfelt anniversary surprise, these delightful chocolate blooms offer an elegant and edible solution. Their understated beauty and inherent sweetness make them an unforgettable token of love and appreciation, easily crafted and deeply cherished.
A Personal Touch: Cherished Memories with Sweet Blooms
The magic of these Hershey’s Kiss Roses isn’t just in their appearance; it’s often in the memories they evoke. For me, these delightful creations hold an incredibly special place in my heart, thanks to my wonderful Mom. Many years ago, she first introduced me to the charm of crafting these candy roses. Her creativity shone as she helped me assemble them as thoughtful favors for my wedding, adding an extra layer of sweetness and personal meaning to our big day.
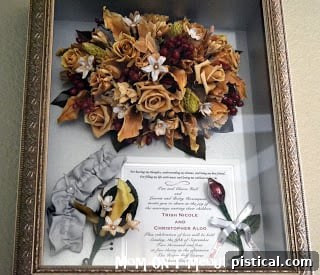
But the story doesn’t end there. While I was enjoying my honeymoon, my Mom, with her characteristic thoughtfulness, created a truly unforgettable gift. She captured a moment from our wedding, incorporating one of these very Hershey’s Kiss Roses into a beautiful framed piece of art.
Why Choose Hershey’s Kiss Roses for Your Next Special Occasion?
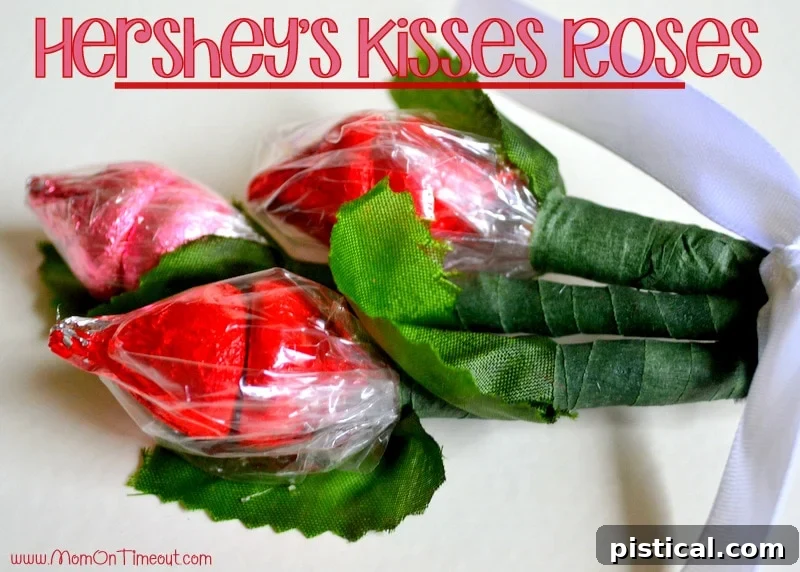
Creating Hershey’s Kiss Roses is not just a craft; it’s an act of love, offering numerous benefits that make them an ideal choice for a variety of occasions:
Effortless Elegance: A Breeze to Make
One of the most appealing aspects of these candy roses is their simplicity. Despite their elegant appearance, they are truly a breeze to make. You don’t need extensive crafting experience or specialized tools to create a stunning bouquet. This makes them accessible to everyone, from seasoned crafters to enthusiastic beginners looking for a quick yet impactful DIY project.
Affordable and Impactful
Compared to purchasing expensive floral arrangements or generic gifts, Hershey’s Kiss Roses offer an incredibly budget-friendly alternative. The main components are readily available and inexpensive, allowing you to create a grand gesture without breaking the bank. This affordability doesn’t compromise on impact; the thoughtfulness behind a handmade gift often outweighs its monetary value.
Personalized Perfection
The beauty of DIY projects lies in the ability to personalize every detail. You can choose different flavors or colors of Hershey’s Kisses, coordinating cellophane, and ribbons to match a specific theme or recipient’s preferences. This level of customization ensures that each rose, and indeed the entire bouquet, is a unique reflection of your affection and creativity.
The Sweetest Surprise: Edible Art
Who wouldn’t love a beautiful bouquet that doubles as a delicious treat? Hershey’s Kiss Roses combine visual appeal with gustatory delight, making them a dual-purpose gift that is sure to bring a smile. They offer a delightful surprise – a beautiful rose that can be unwrapped and enjoyed, adding an extra layer of sweetness to the gesture.
Versatility for Every Celebration
While often associated with Valentine’s Day, these sweet roses are incredibly versatile. They can serve as charming wedding favors, thoughtful anniversary gifts, delightful birthday surprises, or even a simple “just because” gesture to brighten someone’s day. Their adaptable nature makes them a go-to craft for any occasion where you want to express love, gratitude, or friendship. You can literally have a “sweet” bouquet for the love of your life in no time!
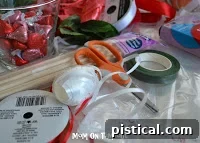
Gathering Your Sweet Garden: Materials for Hershey’s Kiss Roses
Before you begin crafting your enchanting chocolate blooms, gather your materials. The beauty of this project lies in its simplicity and the accessibility of its components. You won’t need a trip to a specialized craft store; most items can be found at your local supermarket, dollar store, or general craft supply retailer.
Essential Materials:
- Hershey’s Kisses: You’ll need two kisses for each rose. Consider using different flavors or colors (e.g., milk chocolate, special dark, cherry cordial, hugs) to add variety to your bouquet. The classic silver foil is always elegant, but seasonal foils can add a festive touch.
- Floral Tape: This self-adhesive, stretchy tape is crucial for securing your rose and creating a realistic stem. Green is the most common color, mimicking natural stems, but you can find it in other colors if you want to experiment.
- Wood Dowels or Floral Sticks: These form the sturdy stems of your roses. Floral wire can also be used, but wooden dowels or pre-cut floral sticks provide more stability and a natural look.
- Glue Dots or Double-Sided Tape: Essential for securely joining the bases of the two Hershey’s Kisses together. Glue dots are particularly easy to use and create a strong, clean bond.
- Clear or Tinted Cellophane: A square piece of cellophane will wrap around your Kisses, giving them that classic rose bud appearance. Clear cellophane allows the chocolate foil to shine, while tinted options (like red, pink, or gold) can enhance the rose aesthetic or match your theme.
- Ribbon (optional): For those finishing touches! Ribbons can be tied around the stems of individual roses or used to create a beautiful bow for an entire bouquet. Choose satin, organza, or grosgrain ribbons in complementary colors.
- Small Artificial Rose Leaves (optional): These can be taped along the stem to give your chocolate roses an even more realistic floral appearance. They are often available in bundles at craft stores.
Having all your supplies ready before you start will ensure a smooth and enjoyable crafting process. Let’s transform these simple ingredients into something truly special!
Crafting Your Chocolate Blooms: Step-by-Step Instructions
Now that you have all your materials, let’s dive into the fun part: assembling your beautiful Hershey’s Kiss Roses. Follow these clear and simple steps to create a stunning bouquet that will impress anyone.
Step 1: Preparing Your Hershey’s Kisses
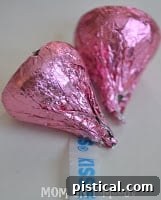
Begin by gently pulling out the small white paper plume that extends from the top of each Hershey’s Kiss. This piece of paper, often called a “plume” or “flag,” needs to be removed to ensure a smooth, rose-like finish. It might come out easily with a gentle tug, or it might tear. Don’t worry if it tears, just ensure no visible paper is left poking out from the top of the candy. If, in the process of removing the paper, the foil wrapper around the top of the Kiss becomes a little loose or ruffled, simply use your fingers to gently push it back into place, securing it snugly around the chocolate. The goal is to have a clean, smooth surface at the top of each Kiss.
Step 2: Joining the Kisses

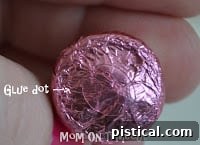
To form the “bud” of your rose, you’ll need two Hershey’s Kisses for each flower. Take one Kiss and place a glue dot or a small piece of double-sided tape onto its flat bottom. Then, carefully align the flat bottom of a second Hershey’s Kiss and firmly press the two candies together, base-to-base. This creates a slightly elongated, symmetrical shape that forms the core of your rose. Ensure they are securely attached so they don’t separate during the subsequent steps.
Step 3: Wrapping with Cellophane
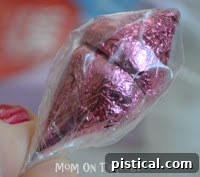
Next, prepare a square piece of cellophane, approximately 3 inches by 3 inches (7.5 cm x 7.5 cm). The exact size might vary slightly depending on the size of your Kisses and how much “petal” effect you desire. Place your joined Hershey’s Kisses in the center of the cellophane square. Gather the edges of the cellophane upwards and around the Kisses, drawing them together tightly at the bottom, just where the two Kiss bases meet. This wrapping forms the delicate “petals” and outer layer of your chocolate rose, adding structure and protection.
Step 4: Inserting the Stem

With the cellophane gathered tightly at the base, take one of your wood dowels or floral sticks. Carefully insert the stick into the gathered cellophane at the very base of your wrapped chocolate rose. The key here is to insert the stick into the gathered cellophane and *not* directly into the Hershey’s Kisses themselves, which could damage the candy or cause it to wobble. Once the stick is in place, firmly wrap the cellophane even tighter around the top portion of the stick, ensuring a snug fit. This will help secure the rose head to its stem.
Step 5: Taping the Stem with Floral Tape
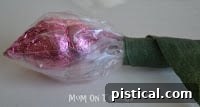
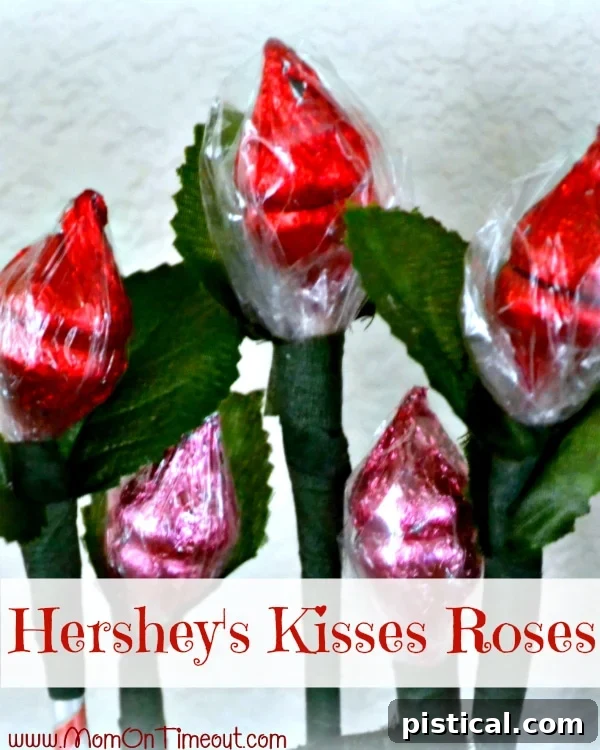
Now comes the floral tape. This specialized tape is slightly sticky and adheres to itself when stretched, making it perfect for floral arrangements. Start by wrapping the floral tape tightly around the base of the rose, where the cellophane meets the stick, to secure everything firmly. As you wrap, gently stretch the tape a little to activate its adhesive properties. Continue winding the tape diagonally down the length of the stick, covering it completely to create a uniform, green stem. Overlap the tape slightly with each turn for full coverage and a smooth finish.
Step 6: Adding Rose Leaves (Optional but Recommended)
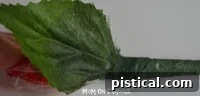
For an even more realistic touch, incorporate small artificial rose leaves as you tape. While wrapping the floral tape down the stem, strategically place one or two leaves around the stick. I typically use 1-2 leaves per stem and prefer to place them closer to the base of the chocolate rose to mimic natural growth. However, you can place them anywhere along the stem where you feel they look best. Simply lay the leaf stem against the dowel and continue wrapping the floral tape over it, securing it firmly in place.
Step 7: Finishing the Stem

Continue wrapping the floral tape all the way down to the very end of the stick. Once you reach the bottom, cut the floral tape and press the end tightly against the stick to ensure it adheres well and doesn’t unravel. Give the entire stem a gentle squeeze to ensure all parts of the tape are securely fastened. You now have a beautifully crafted Hershey’s Kiss Rose, complete with its own stem and leaves!
Presenting Your Sweet Bouquet: Finishing Touches and Creative Ideas
Once you’ve crafted a collection of these charming Hershey’s Kiss Roses, the next step is to present them in a way that truly highlights their beauty and your thoughtfulness. There are countless ways to arrange and embellish your sweet bouquet, making it even more special.
Mixing with Real Blooms for an Enchanting Display
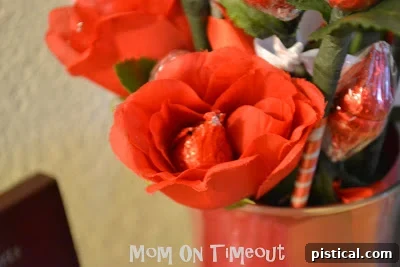
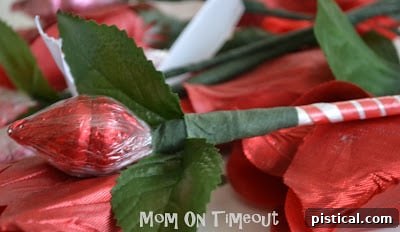
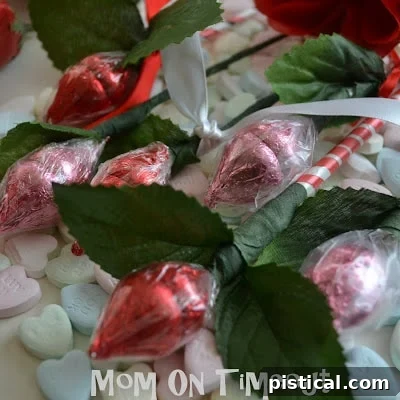
Embellishing with Ribbons and Bows
A beautiful ribbon can elevate the presentation of your Hershey’s Kiss Roses, whether individually or as a bouquet.
Add a coordinating bow around the gathered stems of your bouquet…
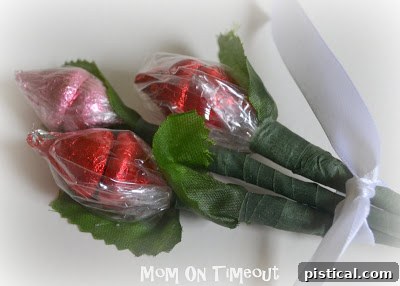
…or tie a delicate ribbon gracefully along the length of each stem for an added touch of elegance.
Creative Display Ideas
Consider arranging your bouquet in a charming vase, a decorative pot, or even a personalized mug. For wedding favors or party decorations, place individual roses at each place setting. You can also create a stunning centerpiece by arranging a larger collection in a beautiful basket or a rustic wooden box. Don’t be afraid to experiment with different arrangements and containers to find what best suits your aesthetic and the occasion.
Beyond the Bouquet: More Ways to Use Your Sweet Creations
The versatility of Hershey’s Kiss Roses extends far beyond just bouquets. These charming creations can be incorporated into various aspects of gift-giving and decoration:
- Gift Toppers: Instead of a traditional bow, tie a single Hershey’s Kiss Rose onto a wrapped present for an unexpected and delightful embellishment.
- Party Favors: Offer them as sweet takeaways at birthdays, bridal showers, or engagement parties. You can personalize them with small tags.
- Centerpiece Enhancements: Use them to accent larger floral arrangements or as standalone centerpieces in smaller vases.
- Edible Decorations: Arrange them on a dessert table as a unique, edible decoration that guests can enjoy.
- Gift Basket Fillers: Add a few chocolate roses to a themed gift basket (e.g., a “romantic night in” basket or a “sweet treats” collection).
- Table Place Cards: Attach a small name tag to the stem of each rose and place one at each guest’s seat for an elegant and edible place card.
Conclusion: Crafting Joy, One Sweet Rose at a Time
The art of gifting is truly elevated when it comes from the heart, and handmade items like Hershey’s Kiss Roses are the perfect embodiment of this sentiment. They are more than just candy and craft supplies; they are small tokens of affection, carefully assembled with love, carrying personal stories and creating lasting memories. From the simplicity of their creation to the joy they bring, these sweet blooms offer an unparalleled way to express warmth, appreciation, and love.
Whether you’re celebrating Valentine’s Day, a wedding anniversary, a birthday, or simply want to brighten someone’s day, take a moment to craft these enchanting Hershey’s Kiss Roses. The process is relaxing, the materials are affordable, and the impact is profound. Share a sweet moment, create a cherished keepsake, and remind someone how special they are with a bouquet that’s both beautiful to behold and delicious to devour. Get creative, have fun, and spread a little chocolate-covered happiness!
Connect with me for more sweet ideas and crafty inspiration!
Facebook |
Twitter |
Pinterest |
Google+ |
RSS
Find more delightful projects and join the community by linking up with MomOnTimeout, Home Stories A2Z, and My Repurposed Life.