Build Your Own Dream Garden: An Easy DIY Raised Planter Box Tutorial!

I am absolutely thrilled to share this fantastic new addition to my garden – our magnificent DIY raised planter box! This project was incredibly simple to tackle, and I’m confident that anyone can build this beautiful and functional planter, even if you’re a beginner DIYer. The best part? You can complete it in just a couple of hours! Perhaps even quicker if you don’t have enthusiastic (but sometimes distracting) 5 and 3-year-old helpers eager to join the fun! 😉
Last year, we made the decision to invest in a new, deeper raised garden bed. Our previous planter boxes simply weren’t cutting it; they weren’t deep enough to support the robust root systems of our beloved vegetables, especially given our challenging clay soil. As many gardeners know, once roots hit dense clay, growth can really suffer, leading to stunted plants and disappointing harvests. After tossing around a few ideas and considering various designs for maximizing yield and minimizing effort, we finally settled on this robust and elegant solution. This DIY planter box isn’t just a container; it’s a foundation for a flourishing vegetable garden, meticulously designed to overcome common gardening hurdles and bring abundant, healthy harvests right to your backyard.
Why Choose a DIY Raised Garden Bed? Unlocking Gardening Success
If you’re contemplating whether a raised garden bed is right for your gardening aspirations, let me assure you, the benefits are incredibly numerous! Building your own DIY planter box offers substantial advantages over traditional in-ground gardening, particularly if you’re dealing with less-than-ideal soil conditions, such as our heavy, compacted clay.
Firstly, **improved soil control** is paramount. With a raised bed, you have complete command over the soil composition, allowing you to create the ideal nutrient-rich, well-draining environment your plants desperately need to thrive. No more battling impenetrable compacted clay or nutrient-depleted native dirt! Secondly, **superior drainage** means roots won’t sit in soggy soil, which is a common cause of rot and disease, thereby promoting healthier, more vigorous growth. Thirdly, **extended growing seasons** are a real bonus; the soil in raised beds warms up faster in the spring sunshine, allowing you to plant earlier and potentially harvest later into the fall. Fourthly, they offer **easier access and significantly reduced back strain**, as you won’t have to bend as much to tend to your plants. Lastly, strategically designed raised beds can act as a natural **barrier against many common garden pests** like slugs and snails, and they simply look fantastic, adding structured beauty and aesthetic appeal to your outdoor living space. This 8ft x 4ft design, meticulously built with durable redwood, is generously deep enough to accommodate even demanding root vegetables, promising a thriving, productive harvest year after year.
Gathering Your Materials: What You’ll Need for Your DIY Planter Box
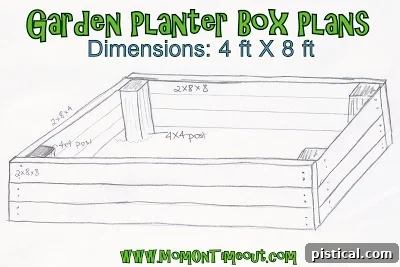
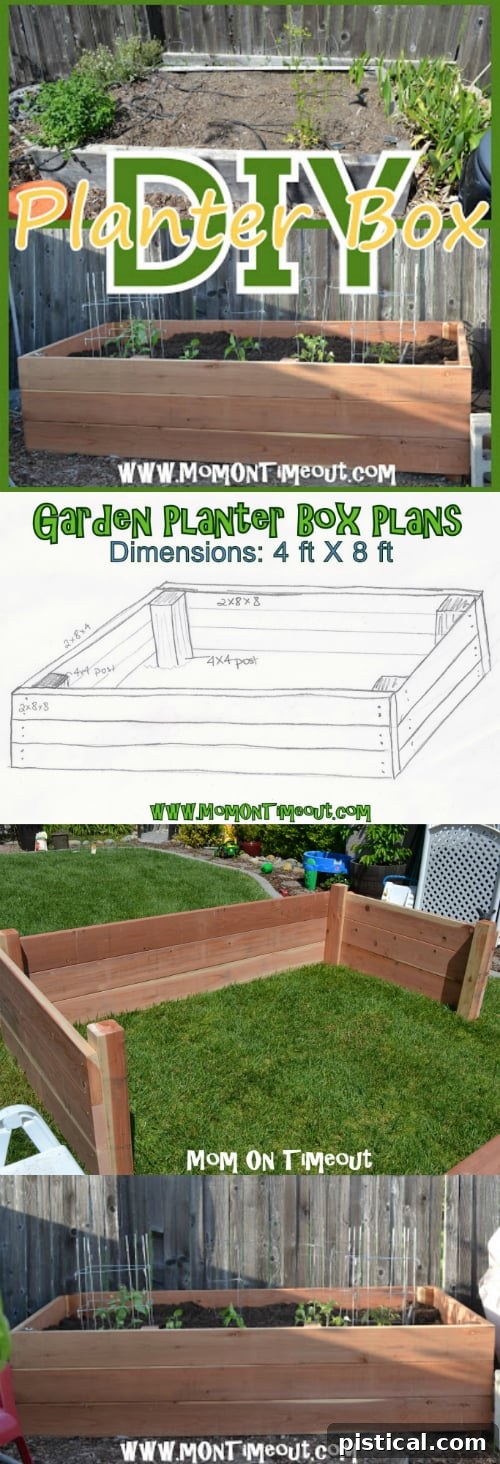
While I may not be an artist by any stretch, I sincerely hope this simple illustration provides you with a clear visual representation of the robust planter box we’re about to build. Our chosen design calls for an impressive 8 feet by 4 feet footprint, constructed primarily from redwood. Redwood stands out as an exceptional choice for raised garden beds due to its inherent, natural resistance to rot, decay, and insect infestation, making it incredibly durable and long-lasting for outdoor use without the need for harsh chemical treatments. However, don’t feel constrained by redwood; other excellent lumber types like cedar (which also boasts natural resistance), treated pine (if you opt for this, ensure it’s rated for ground contact and safe for edibles, though many prefer to avoid it for organic vegetable gardening), or even alternative materials such as composite lumber or corrugated metal can be used, depending on your budget, aesthetic preference, and local availability.
Here’s the comprehensive list of materials and essential tools required for constructing our spacious 8’x4′ three-level redwood planter box:
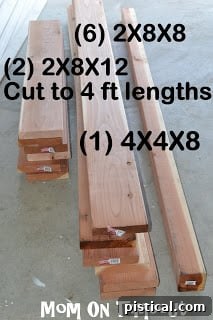
(6) 2″x8″x8′ Redwood Boards: These will form the three levels of the long sides (8 ft) of your planter. Using 2x8s provides a generous depth for robust root growth, crucial for heavy feeders and root vegetables.
(2) 2″x8″x12′ Redwood Boards: You’ll efficiently cut these into three equal 4 ft lengths each, yielding a total of (6) 2″x8″x4′ boards. These will constitute the three levels of the short ends (4 ft) of your planter.
(1) 4″x4″x8′ Redwood Post: This vital component will be precisely cut into four equal 2 ft sections, which will serve as the strong vertical corner supports, anchoring your entire planter structure securely into the ground.
Screws: Acquire approximately 3-4 pounds of 3 1/2″ exterior-grade, self-drilling, galvanized or stainless steel screws. These specialized screws are absolutely crucial for longevity as they resist rust and corrosion in outdoor conditions, providing strong, secure, and lasting connections.
You’ll also need a few basic yet essential tools: a circular saw (or a miter saw for more precise cuts), a power drill with appropriate bits (including a driver bit for your screws), a reliable measuring tape, a sturdy spirit level, and most importantly, safety glasses and work gloves for protection.
Budget-Friendly Alternatives and Size Adjustments for Your Planter
We purchased all our premium redwood materials from Lowe’s, and the total cost, including tax, came in just under $170. For a substantial and durable planter box of this impressive size and quality, we found that to be a very fair and reasonable price. However, if this particular 8×4 ft size is too grand for your available garden space, or if the cost of redwood stretches your current budget, rest assured that this flexible design is incredibly adaptable! You can effortlessly modify the dimensions to perfectly fit any area and choose alternative lumber types that better suit your financial plan without compromising on functionality.
Here are a couple of practical examples for calculating lumber needs for different common planter sizes, based on our three-level height design (three 2x8s stacked):
**For a 4 ft x 4 ft Planter:** You would require a total of 48 linear feet of wood (16 ft for each level: 4ft + 4ft + 4ft + 4ft = 16ft per level x 3 levels = 48ft).
**For a 3 ft x 6 ft Planter:** You would require a total of 54 linear feet of wood (18 ft for each level: 3ft + 6ft + 3ft + 6ft = 18ft per level x 3 levels = 54ft).
Before making your final purchase, I highly recommend a quick trip to your local home improvement store. Take the time to compare prices for different lengths and various types of lumber (e.g., untreated fir, affordable cedar, treated pine, or even durable composite options). Carefully do the math to minimize material waste and ensure you’re truly getting the absolute best value for your hard-earned money. Remember, meticulous planning and smart material selection are key ingredients for a successful and cost-effective DIY garden project!
Lumber Preparation: Getting Your Boards Ready for Assembly
To significantly streamline the building process and make assembly quicker, we wisely utilized the cutting service available at Lowe’s. A helpful associate expertly cut our two 12 ft boards into three perfectly equal 4 ft lengths each, which saved us considerable time and effort. However, it’s a common practice that home improvement stores typically don’t cut the larger, thicker 4×4 posts due to safety regulations. For that essential task, we relied on our trusty circular saw at home. We carefully measured and cut the single 8 ft 4×4 post into four precisely equal 2 ft lengths. These robust 2 ft sections will serve as our essential corner posts, providing unparalleled stability and foundational strength to the entire three-tiered planter structure. Always, without exception, remember to wear appropriate personal protective equipment, including sturdy eye protection and work gloves, when operating any power tools to ensure your safety.
Step-by-Step Assembly: Building Your Robust Raised Planter Box
With all your lumber precisely cut and readily available, it’s now time for the most exciting part – the hands-on assembly of your brand-new raised garden bed! We quickly discovered that working on a completely flat, level, and spacious surface is absolutely paramount for achieving precision and stability throughout the entire building process.
Step 1: Constructing the Short Sides with Corner Posts
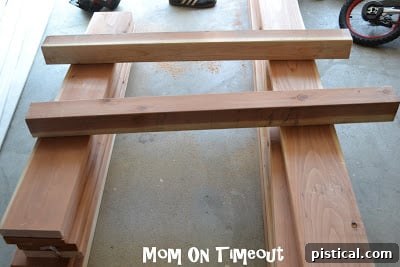
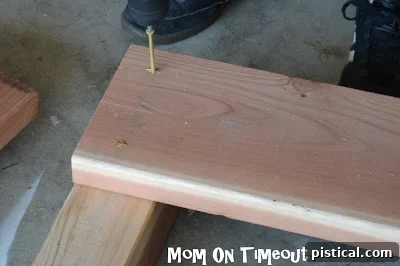
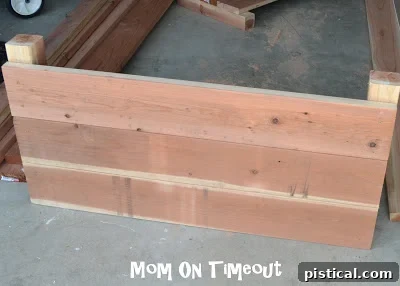
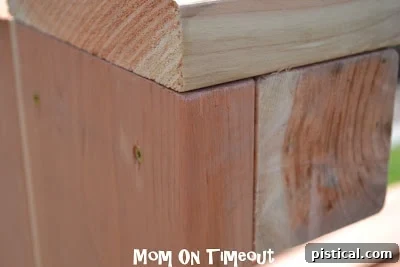
We initiated the assembly process by meticulously constructing one of the short ends of the planter. Take three of your 4 ft 2×8 boards and one of your 2 ft 4×4 posts. Stand the 4×4 post upright on your working surface and carefully align the ends of the three 4 ft boards flush with two adjacent edges of the post, ensuring they are perfectly squared using a speed square or a large framing square. We used two 3 1/2″ exterior-grade screws per board, per side, driving them securely into the 4×4 post. This precise method means a total of four screws for each of the three boards where they meet the post, creating an incredibly sturdy and resilient corner connection. To prevent the wood from splitting, especially with the dense grain of redwood, it’s highly recommended to pre-drill pilot holes before driving in your screws. This step forms a strong and stable “L” shaped corner.
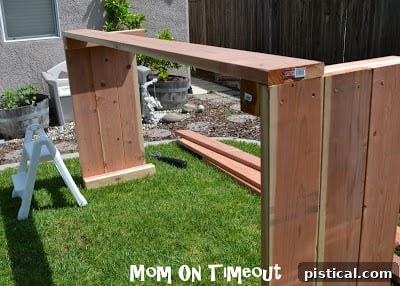
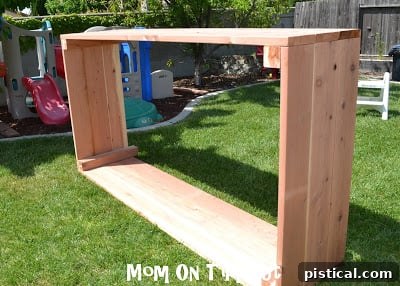
Here’s a clear visual representation of one completed “short” side of the planter, with all three 2×8 boards securely attached to the 4×4 post, forming a solid and reliable corner.
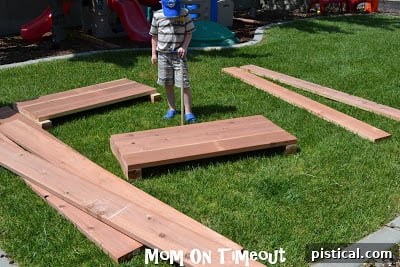
Repeat this precise process to construct the second short side of your planter, ensuring identical measurements and squareness. Once both short ends are fully built, you’ll need to carefully move them to their final, desired location in your backyard or garden area. We quickly learned from experience that attempting to move the entire 8×4 ft planter once it’s completely assembled would be an extremely monumental and potentially damaging task due to its size and weight. Therefore, we strategically moved the two short ends separately. My incredibly helpful partner, Reece, bravely took on the majority of the heavy lifting – a huge thank you, Reece, for your muscle and assistance! 😉
Step 2: Connecting the Long Sides – Precision and Teamwork are Key
This next crucial step definitely requires the assistance of at least two people, and ideally more, to ensure that everything remains perfectly aligned, stable, and square. It’s absolutely paramount that each corner is squared up precisely at this point of assembly to prevent a wobbly, uneven, or structurally weak planter box. Take your time and double-check all measurements.
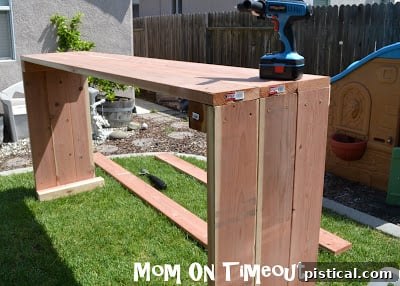
With one person securely holding up each of the short sides (which now have their 4×4 posts ready), carefully position one of the 8 ft 2×8 boards across to create the first long side of your planter. Align it precisely with the exposed faces of the 4×4 posts and ensure it’s perfectly level and square using your spirit level and speed square before you begin driving in your screws. Getting this initial long board perfectly in place and perfectly square will significantly simplify the installation of the remaining five 8 ft boards, making the rest of the process flow smoothly. Continue attaching the two other 8 ft boards directly above the first, ensuring they are flush, level, and securely fastened to the 4×4 posts with your exterior-grade screws.
Here’s a detailed view of the planter with three sides now securely completed. It’s truly starting to take its impressive final shape, promising a vast and productive gardening space!
Step 3: Post Stabilization and Appreciating the Scale
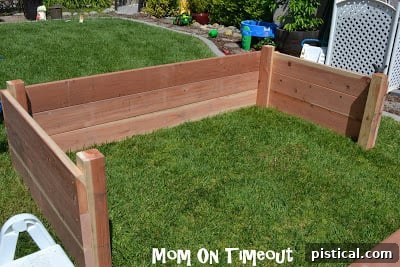
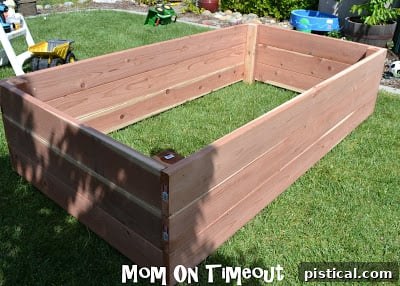
Flipping the partially assembled planter over and setting it onto the ground offered a truly breathtaking perspective on its impressive size – it’s genuinely enormous and incredibly exciting to envision this space bursting with thriving plants! This particular view also offers a clear and unobstructed look at the 4×4 corner posts. You’ll notice that they purposefully extend a couple of inches below the base of the planter box. These critical extensions are absolutely crucial; they will be firmly dug and buried into the ground, providing robust stabilization and securely anchoring the entire planter. Considering that this 8ft x 4ft x 2ft (three 2×8 boards high) planter will eventually hold approximately 64 cubic feet of heavy material (a combination of soil, compost, and organic matter), this anchoring method is not just a good idea, it’s absolutely essential for preventing any shifting or movement. While a planter of this immense size is inherently stable, this added ground stabilization is a fantastic and highly recommended practice for any raised garden bed, especially smaller ones that might be more prone to movement from frost heave or external forces.
Next up – attaching the final side! We are almost at the finish line for the construction phase!
Installation and Cultivation: Preparing for Your Bountiful Harvest
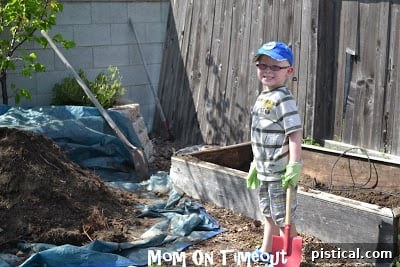
Now that the magnificent raised planter box is fully constructed and standing proudly, the crucial next step is to meticulously prepare its new and permanent home! This immediately meant it was time to move our old, much smaller planter out of the way. But first, we had the substantial task of emptying it completely – another big thank you to Reece for tackling that hefty and dirty job!
Site Preparation and Meticulous Leveling
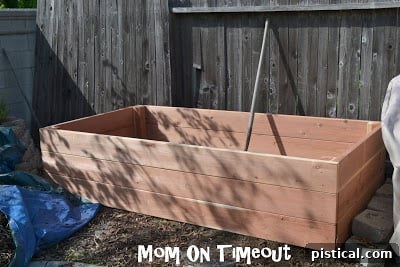
With the old planter finally removed and the area cleared, we carefully maneuvered our impressive new 8ft x 4ft raised bed into its perfectly designated spot. To give you some perspective, our previous planter was a modest 3ft x 6ft, so this new one is indeed a significant and exciting upgrade in terms of gardening potential and available growing space! Before we even contemplated the enormous task of filling it with soil, we made absolutely certain that the planter was perfectly level. Using a reliable spirit level, we meticulously checked all four sides and corners, carefully shimming with small pieces of wood or compacted soil where necessary to ensure an impeccably even and stable surface. A precisely level planter is incredibly crucial for several reasons: it ensures proper and uniform drainage, prevents water from pooling unevenly (which can lead to root rot or inconsistent moisture distribution for your precious plants), and it also looks far more aesthetically pleasing in your garden landscape.
Filling Your Raised Bed: Smart Soil Strategies for Optimal Growth
Filling a generously sized raised bed like this one (which holds approximately 64 cubic feet of material!) can be a substantial undertaking and certainly requires a good amount of material. To fill it most efficiently and cost-effectively, while also promoting long-term soil health, consider employing a layering technique often referred to as “Hugelkultur” or a similar progressive filling method. This involves strategically placing larger organic materials at the very bottom, such as decaying logs, sturdy branches, wood chips, and autumn leaves, which will slowly decompose over time. This decomposition process releases valuable nutrients into the soil and creates natural air pockets, significantly improving drainage and water retention. On top of this base layer, you can then add a thick layer of high-quality compost, followed by a premium raised bed potting mix for the top 12-18 inches where your plants’ roots will primarily reside. This intelligent layering not only drastically reduces the amount of expensive topsoil or potting mix you need to purchase but also establishes a dynamic, living, and incredibly nutrient-rich ecosystem for your plants, ensuring optimal growth and vitality year after year.
It took us approximately a week to diligently source and fill the planter with our carefully chosen layered soil mixture, allowing it a bit of time to settle naturally. Then, the most rewarding and anticipated part of the entire journey began: the joyous process of planting!
The Finished Product: Natural Beauty and Sustainable Gardening
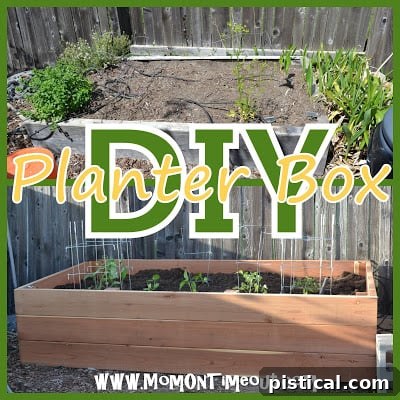
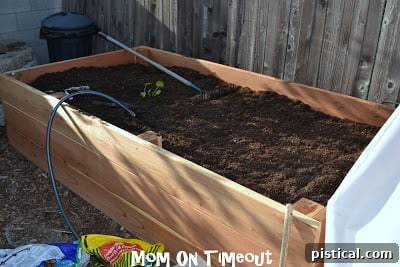
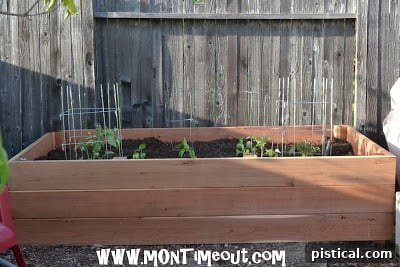
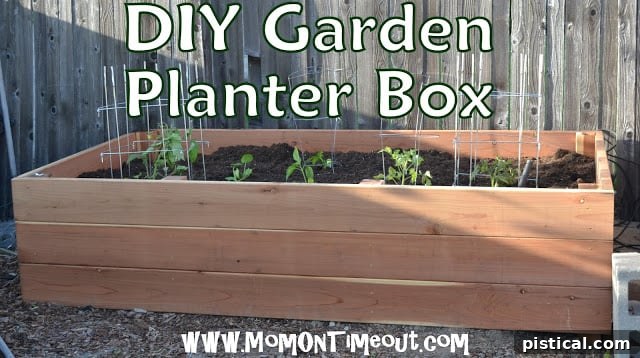
Building this magnificent DIY redwood planter box only took a dedicated couple of hours of our time, and I truly believe the final result is just GORGEOUS! We consciously made the decision not to stain, paint, or line the planter with plastic or fabric. Our primary goal was to meticulously eliminate any potential for chemicals or synthetic materials from leaching into our precious, organically grown soil. We are wholeheartedly embracing the “au natural” look, allowing the beautiful redwood to gracefully weather and develop its unique patina over time. I fully intend to savor its rich, initial color while it lasts, knowing unequivocally that it will age into an even more distinguished and characterful shade of grey. We’ve been incredibly busy planting a vibrant variety of seeds and robust young plants, and every single day I step outside, I’m greeted by the inspiring sight of my beautiful, thriving garden bed. It’s a constant source of immense joy, delicious fresh produce, and a profound connection to nature!
What are your thoughts on embarking on your own DIY raised garden bed project? Do you currently utilize planter boxes in your garden, or do you prefer the traditional method of gardening directly in the ground? We’d absolutely love for you to share your valuable gardening experiences, insights, and tips with us in the comments below!
Connect with me!
Linking up here, Home Stories A2Z, Savvy Southern Style, and My Repurposed Life.