
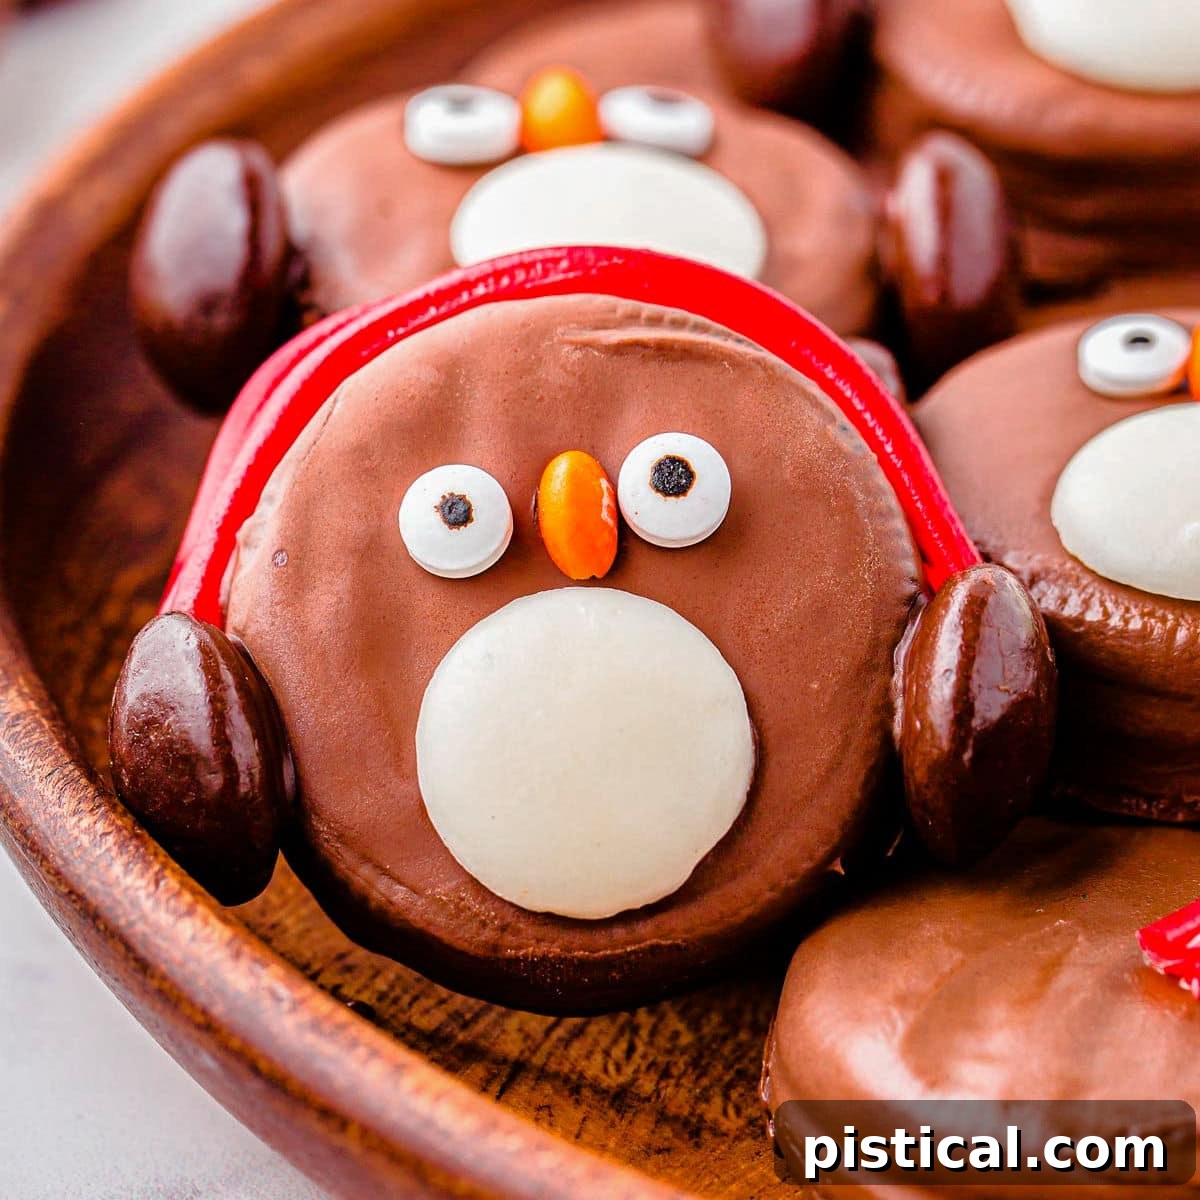
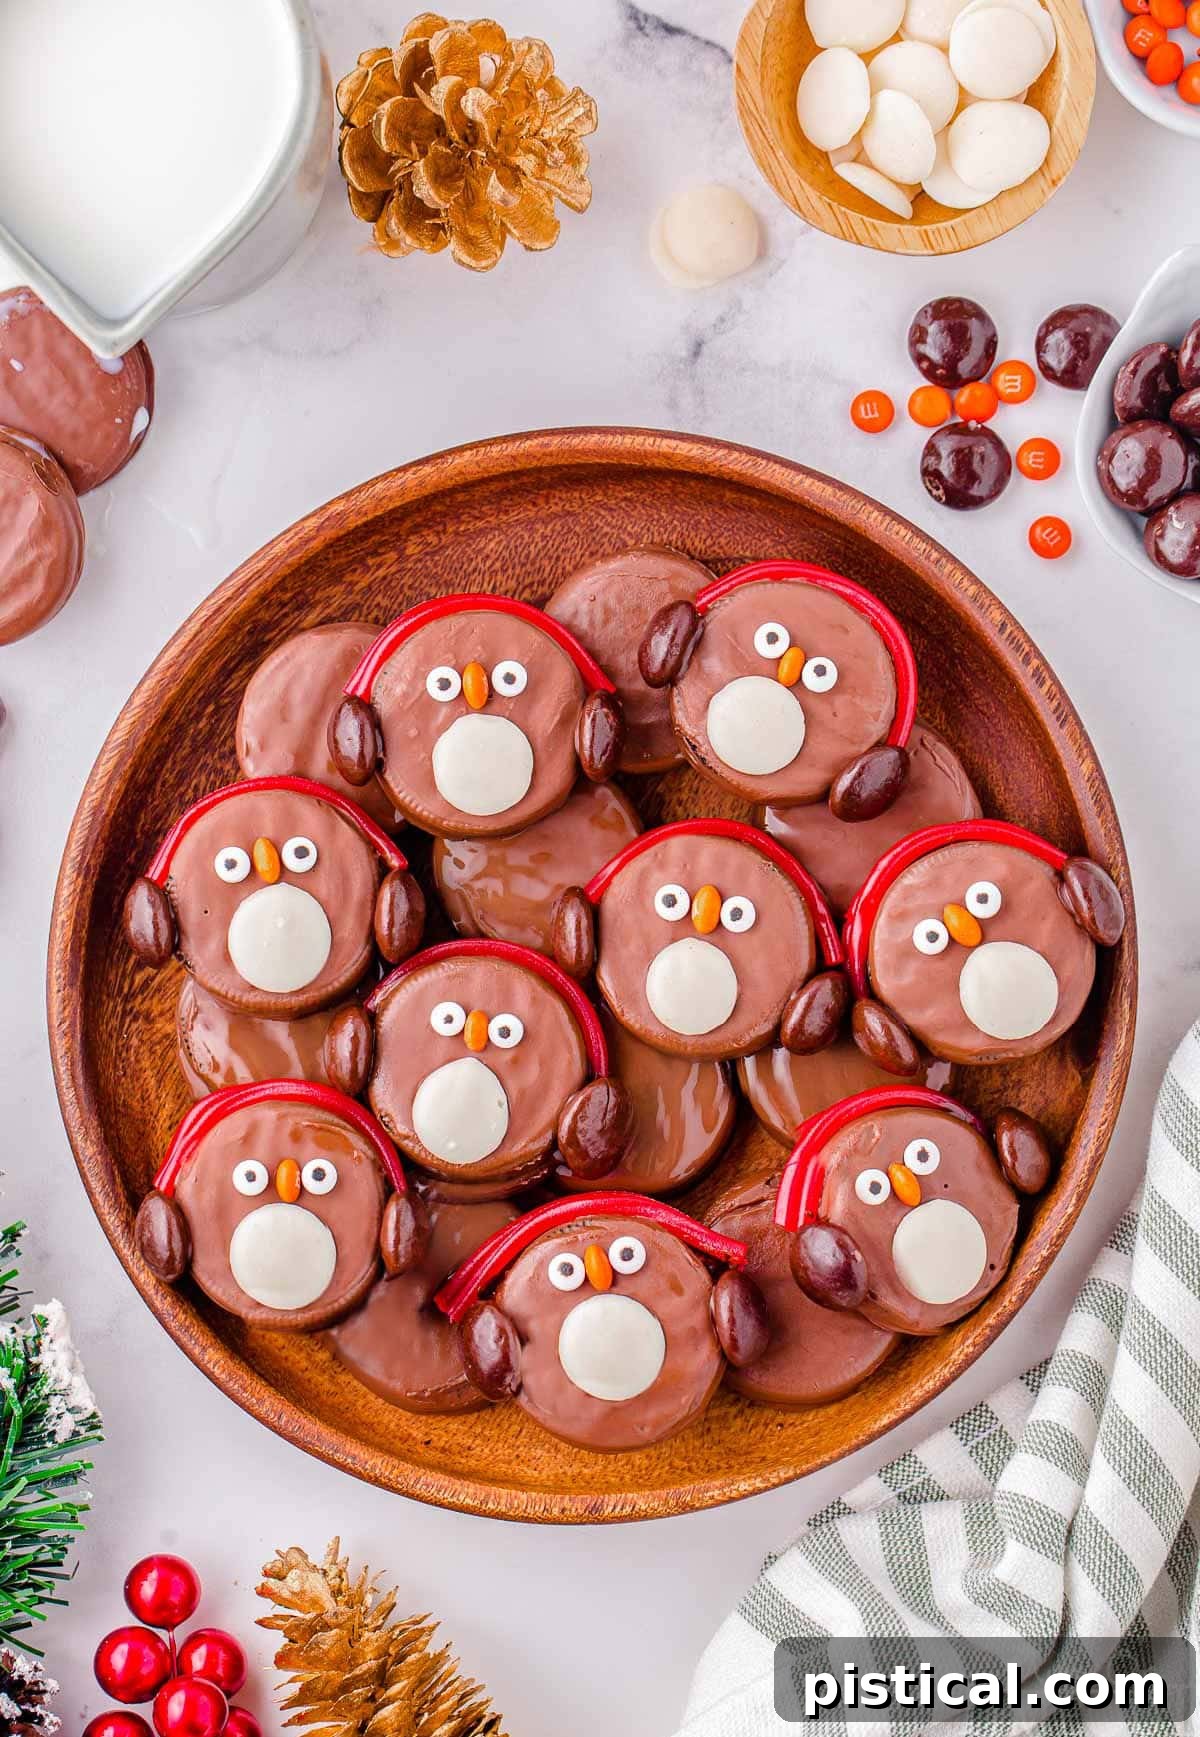
The holiday season calls for treats that are not just delicious but also enchanting and easy to create. Enter the beloved OREO Penguins – a no-bake wonder that promises to bring smiles and festive cheer to any gathering. These charming little creatures, crafted from humble OREOs and an assortment of candies, are the epitome of holiday cuteness and simplicity. Imagine the delight on faces young and old when they encounter these whimsical penguins with their signature earmuffs!
Whether you’re looking to adorn your dessert table, assemble heartfelt edible gifts, or simply enjoy a fun, interactive activity with the family, these OREO Penguins fit the bill perfectly. Their irresistible charm and straightforward preparation make them a standout addition to any cookie tray or holiday feast. Prepare to be amazed at how quickly these delightful treats disappear!
For those eager to expand their repertoire of stress-free holiday delights, explore some other no-bake favorites like Chocolate Peanut Butter Balls with Rice Krispies, the classic Divinity, and the ever-popular Snow Day Snack Mix. Each offers a unique flavor and easy preparation, perfect for busy holiday schedules.
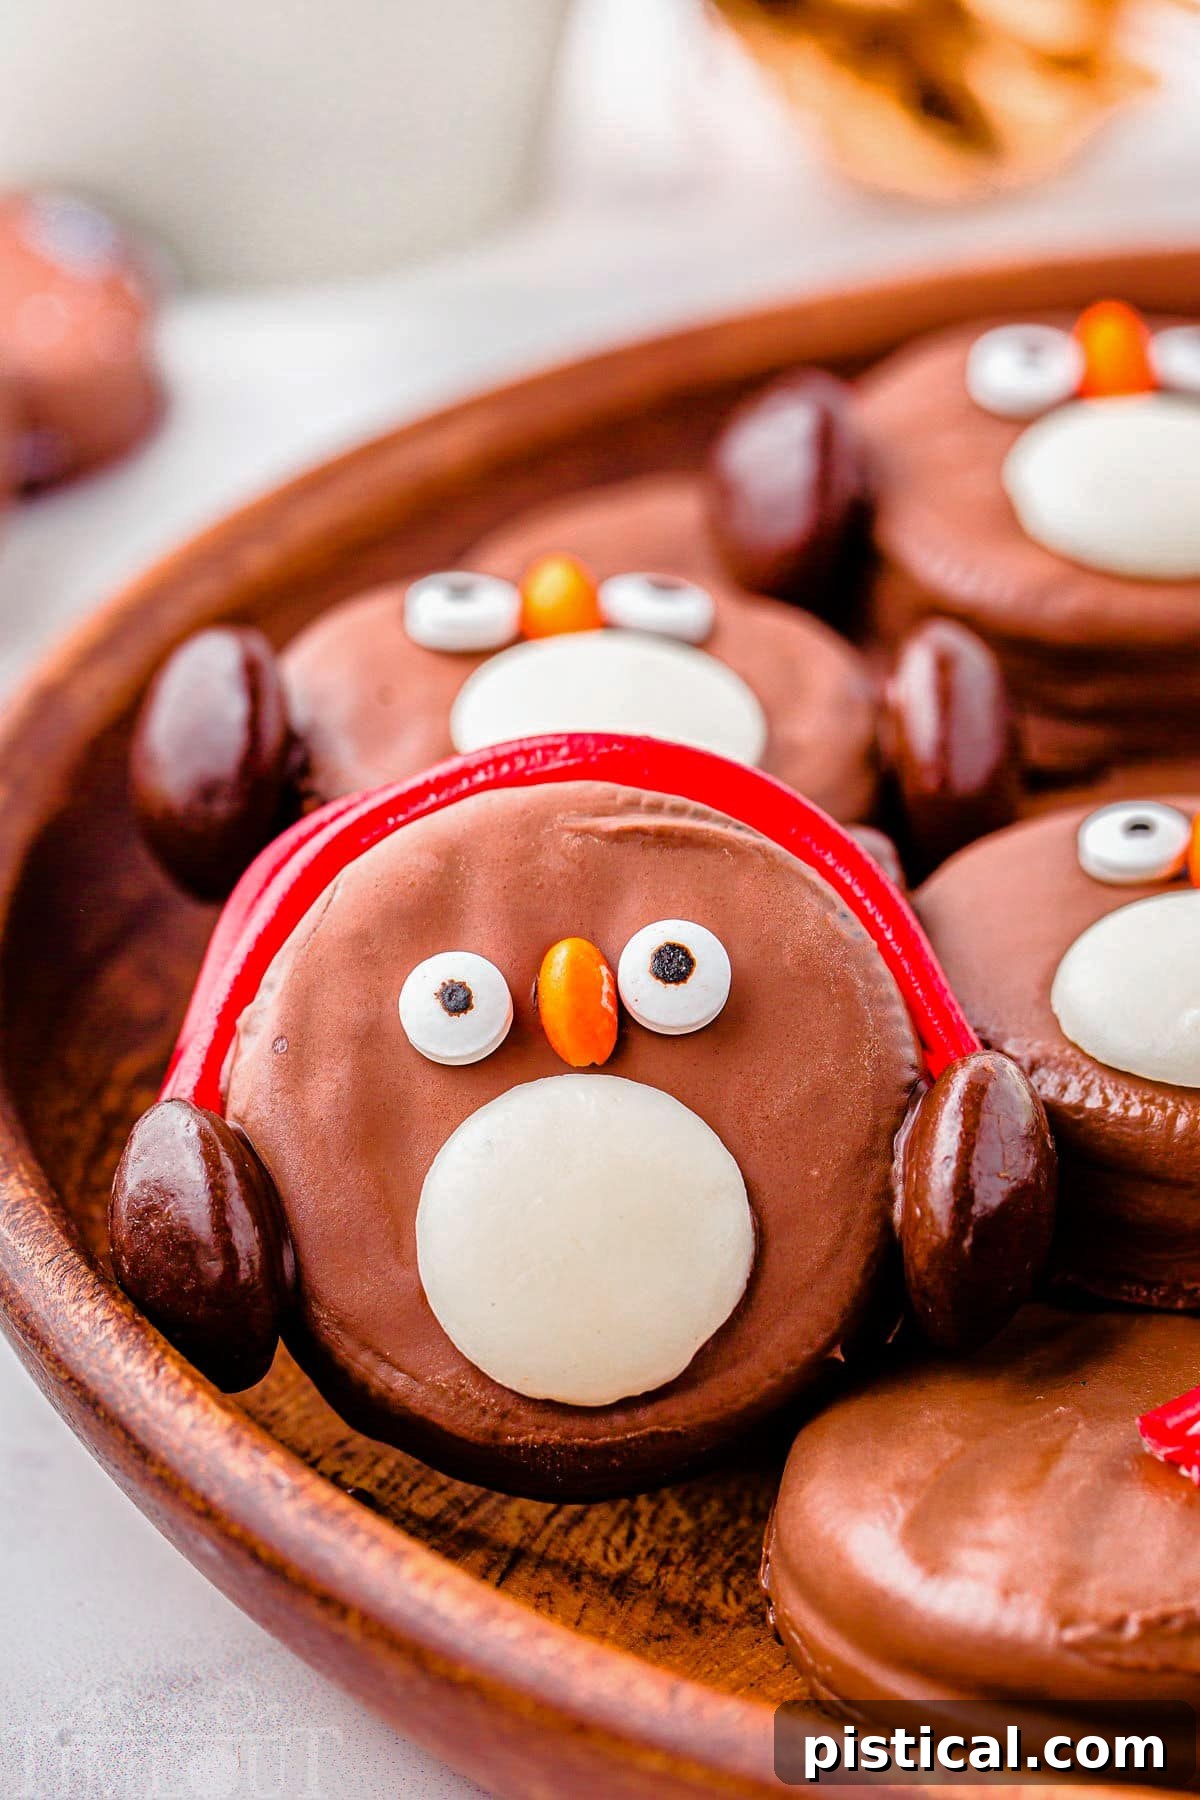
Irresistibly Cute OREO Penguins: Your Ultimate No-Bake Holiday Treat
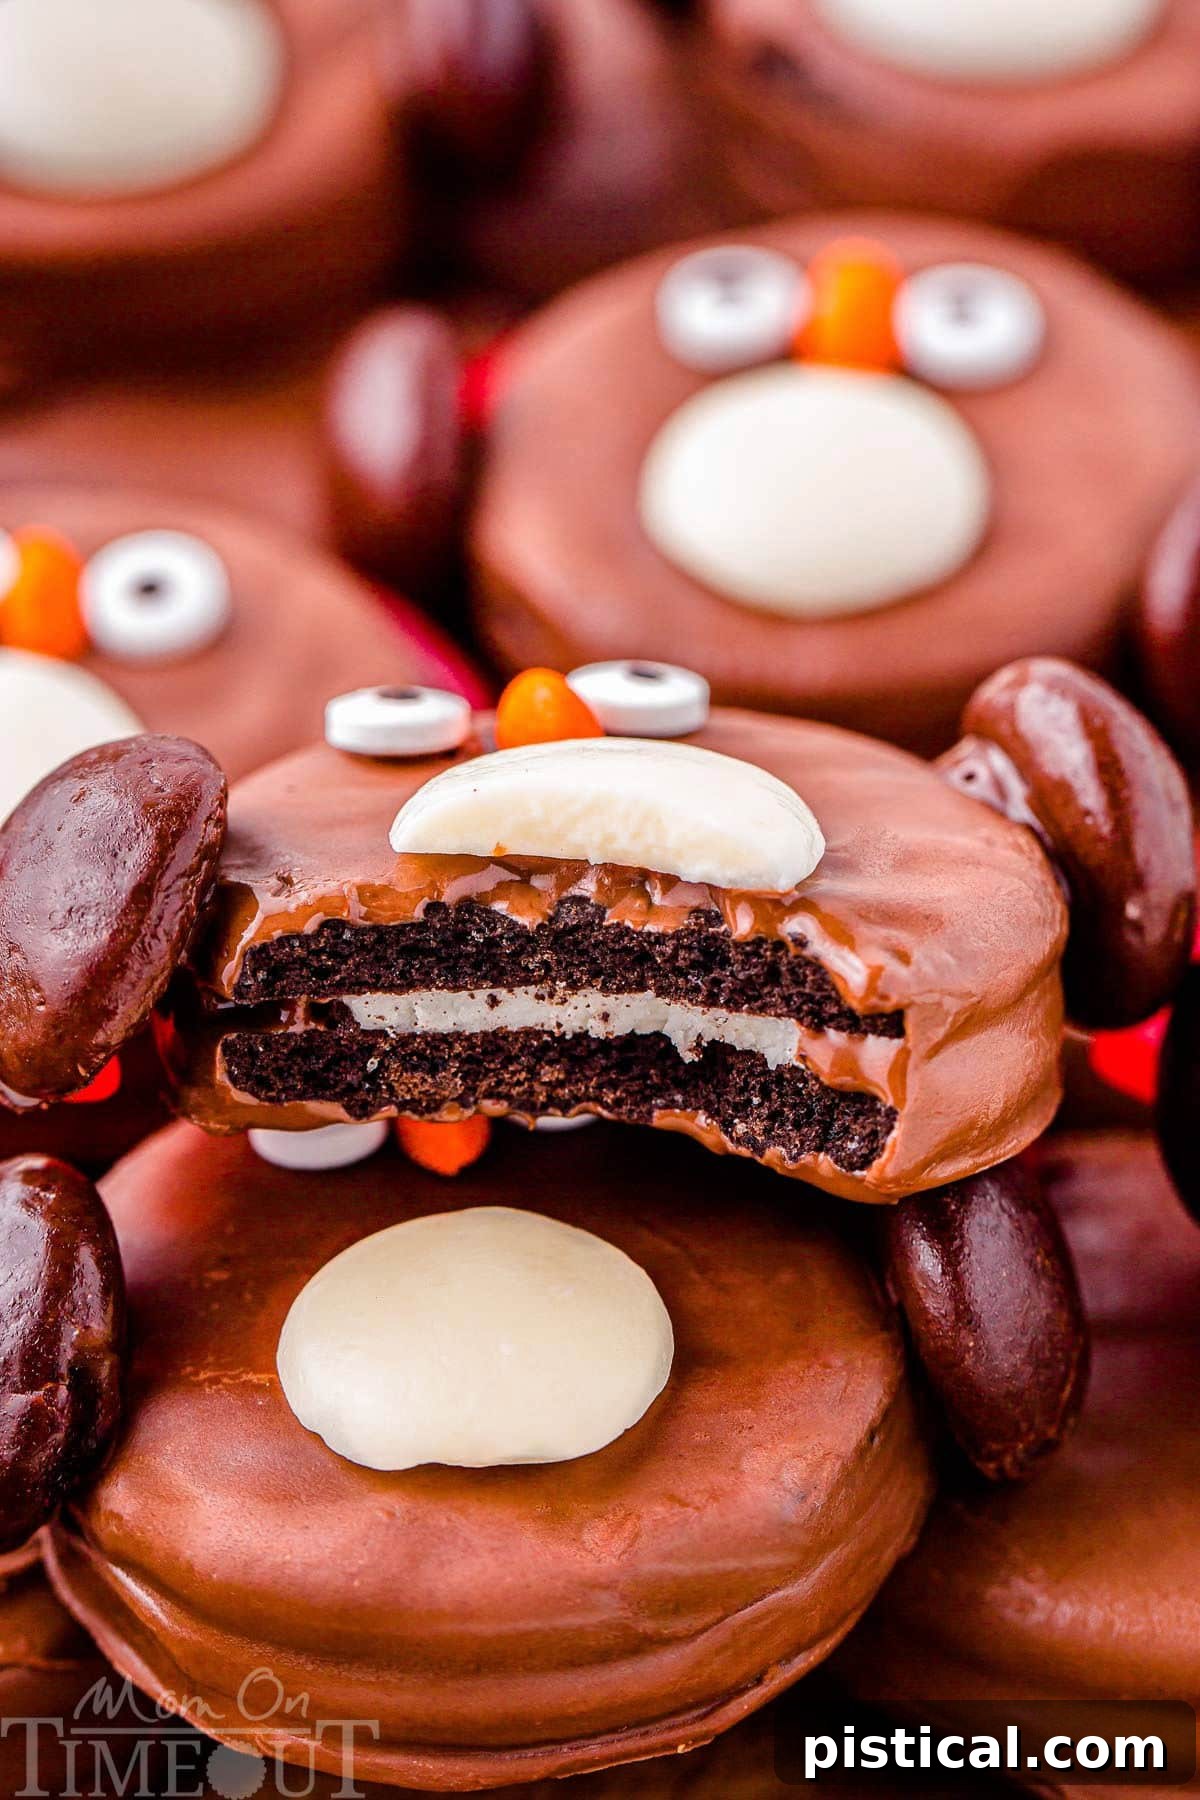
Embrace the magic of the holidays with these adorable OREO Penguins! More than just a dessert, they are a statement of festive joy and creative spirit, all wrapped up in a delightful, bite-sized package. Starting with readily available fudge-covered OREOs, the transformation into these sweet, tuxedo-clad characters is an enjoyable process, made even more charming with candy embellishments like vibrant Twizzler and Junior Mint earmuffs.
These whimsical OREO penguins are destined to become a staple of your holiday celebrations. Their no-bake nature means less time in the kitchen and more time enjoying the festivities. Perfect for bustling parties, serene family afternoons, or simply to elevate a traditional Christmas cookie platter, these treats are surprisingly simple to assemble. With just a handful of basic ingredients and a few easy-to-follow steps, even the youngest helpers can get involved, fostering a wonderful sense of creativity and togetherness.
Whether you’re a seasoned host preparing for a grand holiday gathering or a parent seeking a fun, engaging project to share with your children, these cute little penguins are guaranteed to spread smiles and earn rave reviews. They’re not just cookies; they’re tiny bundles of holiday happiness, ready to make your season brighter and sweeter.
Pro Tip: If fudge-covered OREOs are hard to find, don’t despair! You can easily create your own by dipping regular OREOs. My comprehensive guide on Dipped Oreos offers all the tips and tricks you’ll need to prepare your cookie base perfectly.
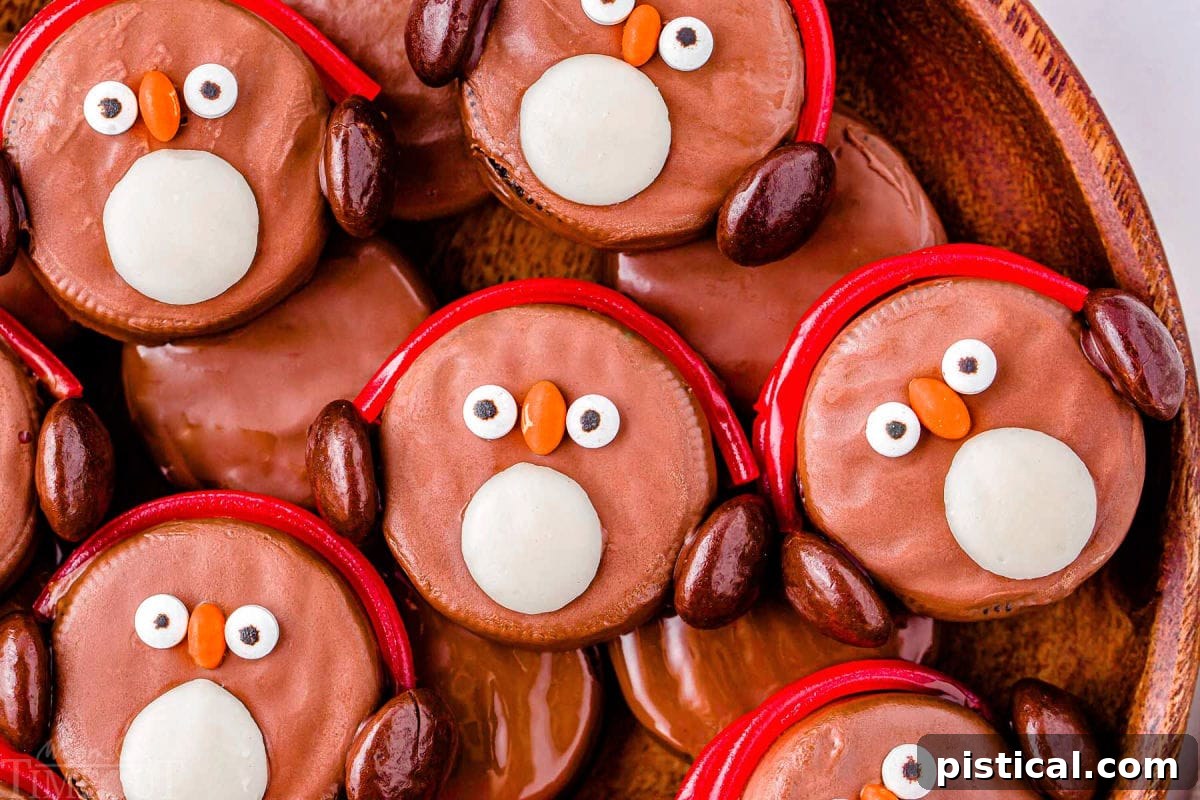
Why OREO Penguins Are a Must-Make Holiday Treat
Searching for a holiday dessert that ticks all the boxes – adorable, delicious, and easy? These OREO Penguins are your perfect solution! They are a delightful confectionery project that requires minimal effort yet delivers maximum impact, captivating both children and adults alike. Prepare to make them the star of your dessert table or package them as charming edible gifts to spread holiday cheer.
- No-Bake Bliss: The greatest advantage of this recipe is that it requires absolutely no baking. This means you can whip up a batch quickly and without stress, freeing up your oven for other holiday dishes. The straightforward assembly steps ensure that anyone, from a complete beginner to a seasoned baker, can create these charming treats effortlessly. It’s the ideal project for those who want impressive results without the hassle.
- Kid-Friendly Fun: Crafting OREO Penguins is an engaging and exciting activity for children of all ages. They will relish the opportunity to get creative, transforming simple cookies into their own unique penguin characters. This hands-on project is not only fun but also a wonderful way to foster imagination and create lasting family memories during the festive season. It’s a sweet bonding experience that results in an even sweeter reward.
- Endless Customization: Let your imagination soar with these versatile penguins! You can easily change up the colors of the earmuffs, add different decorative elements, or even give them tiny candy scarves and hats to perfectly match your celebration’s theme or personal style. Whether you opt for classic red earmuffs or experiment with blues, greens, or even glitter, these penguins are a canvas for your creativity, making each one truly unique.
- Simple Ingredients, Big Impact: Despite their impressive appearance, these OREO Penguins are made with just a handful of affordable and easy-to-find ingredients. This means you can create a show-stopping dessert that’s both budget-friendly and incredibly impressive. The simple ingredient list makes shopping a breeze, ensuring you can gather everything you need without a frantic search.
- Perfect for Gifting: Handmade edible gifts are always cherished, and these OREO Penguins are no exception. Packaged in clear bags with festive ribbons, they make delightful presents for teachers, neighbors, friends, and family. Their charming appearance makes them a thoughtful and personal gift that shows you care, without hours of kitchen labor.
- Festive & Whimsical: There’s something inherently joyful about a penguin, especially during the colder months. These OREO penguins capture that whimsical spirit, instantly adding a festive touch to any holiday spread. They evoke a sense of childlike wonder and fun, making them a conversation starter and a memorable part of your holiday food traditions.
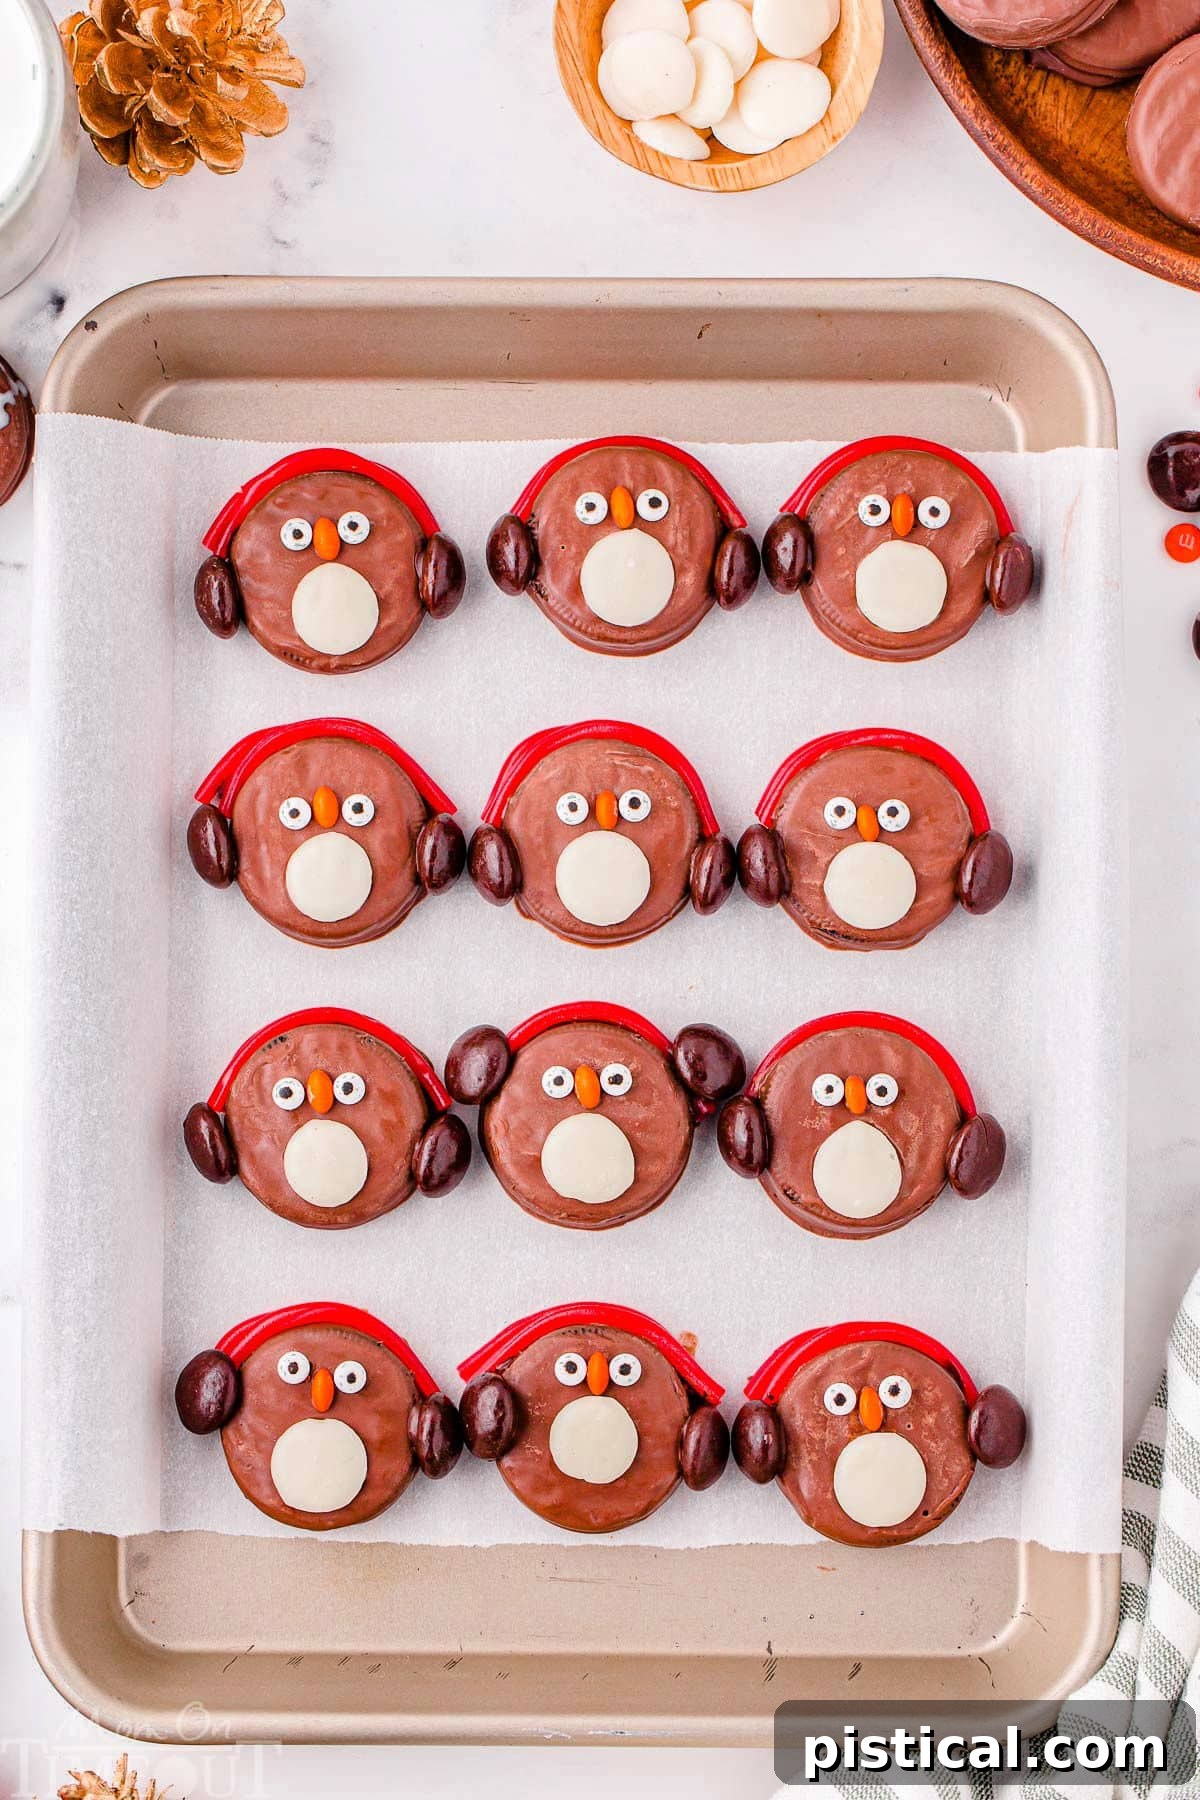
Gather Your Ingredients for Penguin Perfection
Creating these adorable OREO Penguins is a joy, and it all starts with gathering the right ingredients. The beauty of this recipe lies in its simplicity and the accessibility of its components. Here’s what you’ll need to bring your sweet, little waddlers to life:
- Fudge-Covered OREOs (7.9 ounces, 1 package): These are the heroes of our recipe, providing the perfect dark base for our penguins. The fudge coating not only adds an extra layer of chocolatey goodness but also makes them easier to handle without the cream filling separating. If you can’t find them, regular OREOs dipped in melted chocolate (as linked above) work just as well!
- Dark Chocolate Chips (¼ cup, or semi-sweet chocolate chips): Melted chocolate acts as the “glue” for all your decorations. Dark chocolate provides a lovely contrast and richness, but semi-sweet works perfectly if that’s what you have on hand. Ensure your chocolate is of good quality for smooth melting and a beautiful finish.
- White Candy Melt Wafers (12 count): These will form the penguins’ characteristic white bellies. Opt for round candy melts if possible, as they provide the most natural shape for the penguin’s front. These melt smoothly and set quickly, making assembly efficient.
- Small Candy Eyes (24 count): These are essential for giving your penguins their expressive, lifelike gaze. They are widely available in baking aisles or online. If you’re struggling to find them, don’t worry, there are great alternatives!
- Mini M&Ms (12 count, orange): The bright orange color of these mini M&Ms is perfect for crafting tiny, adorable beaks. You’ll cut them in half, so having a sharp knife ready is key.
- Pull ‘n Peel Twizzler (1 count, red or any preferred color): This candy is ingeniously used to create the band for the earmuffs. The “Pull ‘n Peel” variety is ideal as it can be separated into thin strands, making it easy to form neat bands. Red offers a classic festive look, but feel free to choose any color that sparks your creativity.
- Junior Mints (24 count): These delightful chocolate-mint candies are the perfect size and shape to form the soft, puffy earmuffs for your penguins. Their flat base makes them easy to attach securely.
Step-by-Step Guide: How to Craft Your Adorable OREO Penguins
Transforming ordinary OREOs into extraordinary OREO Penguins is a truly rewarding and simple process. These no-bake treats are bursting with personality and are sure to be a beloved addition to any holiday celebration. Whether you’re making them with enthusiastic little helpers or preparing a surprise for your guests, this straightforward guide will ensure your delightful penguins come to life!
As always, you can find the full printable recipe card with exact measurements and detailed instructions at the end of this post.
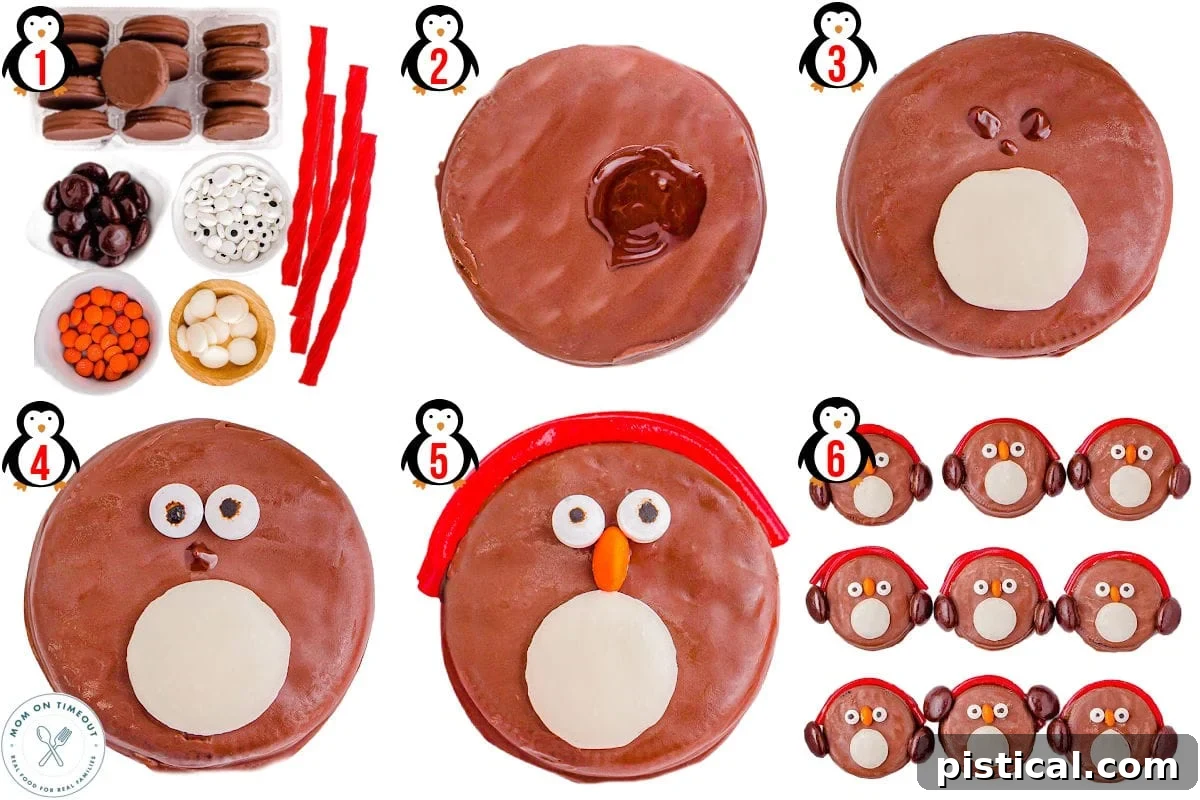
- Prepare Your Workspace: Begin by lining a large baking sheet with parchment paper. This provides a non-stick surface for your decorated OREOs to set without sticking. Arrange your 12 fudge-covered OREOs evenly spaced on the parchment paper, giving yourself plenty of room to work.
- Melt the Chocolate: Place your dark chocolate chips in a small, microwave-safe bowl. Heat the chocolate in the microwave for 30 seconds at 50% power, then remove and stir thoroughly. Continue microwaving in short 10-15 second intervals, stirring well after each, until the chocolate is completely melted and beautifully smooth. Be careful not to overheat it, as this can cause it to seize.
Creating the Penguin’s Belly
- Attach the White Belly: Using a small knife or a toothpick, spread a tiny amount of the melted chocolate onto the flat back of a white candy melt wafer. Carefully press this candy melt onto the bottom half of a fudge-covered OREO, positioning it to resemble the penguin’s distinctive white stomach. Repeat this process for all of your OREO cookies.
Adding the Eyes
- Place the Candy Eyes: Dip the tip of a toothpick into the melted chocolate and dab two small dots where you want the penguin’s eyes to be, just above the white belly. Gently press two small candy eyes onto these chocolate dots. The chocolate will act as an adhesive, securing the eyes in place. Repeat for all OREOs, giving each penguin its unique expression.
Fashioning the Beak
- Craft and Attach the Beaks: Carefully cut each orange mini M&M in half using a sharp knife. This will create a flat edge for attachment. Take a toothpick, dab a tiny bit of melted chocolate onto the cut side of an M&M half, and gently press it between the candy eyes to form the penguin’s beak. Continue this step for all your penguins, adding a pop of cheerful orange.
Designing the Earmuffs
- Prepare and Attach the Earmuff Bands: Gently peel a Pull ‘n Peel Twizzler apart so you have a section that is two strands thick. Cut these two-strand sections into approximately 2-inch pieces. Spread a thin layer of melted chocolate along one side of each Twizzler piece and press it onto the top of the OREO, arching over where the penguin’s head would be. This forms the colorful earmuff band. Repeat for all penguins.
- Attach the Earmuff Ear Pieces: For each penguin, spread a small amount of melted chocolate onto the flat side of two Junior Mints. Carefully attach one Junior Mint to each side of the penguin’s head, ensuring they connect to the ends of the Twizzler strand. This completes the adorable earmuffs. Repeat for all remaining penguins.
Setting and Serving Your OREO Penguins
Once all your OREO Penguins are fully decorated, allow them to set. You can leave them at room temperature for about 30 minutes, or for a quicker set, place them in the refrigerator for 10-15 minutes. Once the chocolate has hardened and all the decorations are secure, your delightful OREO Penguins are ready to be served and enjoyed!
Smart Storage for Lasting Freshness
To ensure your charming OREO Penguins remain delicious and presentable for as long as possible, proper storage is key. Here’s a guide to help you keep them fresh:
- Room Temperature: For optimal freshness and to avoid any changes in candy texture, store your OREO Penguins in an airtight container at room temperature. Placed in a cool, dry place away from direct sunlight, they will stay delightful for up to 2 weeks. This method is generally recommended to preserve the integrity of the various candy decorations.
- Refrigerator: While the refrigerator can extend the shelf life of the OREO cookies themselves, storing the decorated penguins in the fridge is generally not recommended for extended periods. The humidity and cold can cause some candies, especially the M&Ms, to “bleed” their colors or lose their vibrant appeal. If you must refrigerate for a short period (e.g., to quickly set the chocolate), ensure they are in a completely airtight container to minimize moisture exposure.
- Make in Advance: These penguins are an excellent make-ahead treat! You can prepare them up to 2 weeks before your event. Just follow the room temperature storage guidelines: keep them in an airtight container in a cool, dry place. This allows you to tackle your holiday baking list in stages and reduces stress closer to the big day.
- Freezing: Freezing is generally not recommended for OREO Penguins. The delicate decorations, especially the various candies and the melted chocolate, may suffer. Upon thawing, they can lose their original texture, become sticky, or experience significant color bleeding, detracting from their adorable appearance. It’s best to enjoy these within their recommended shelf life at room temperature.
Frequently Asked Questions About OREO Penguins
Here are some common questions about making these delightful OREO Penguins, along with helpful answers to ensure your success:
- Can I use regular OREOs instead of fudge-covered ones?
Absolutely, yes! If you can’t find fudge-covered OREOs, simply use regular OREO cookies. You’ll need to dip them in melted chocolate first to create the dark base for your penguins. My detailed instructions for dipping OREOs here will guide you through the process. For best results, I highly recommend using high-quality melting chocolate like Ghirardelli dark chocolate melting wafers, which melt smoothly and provide a beautiful, even coating.
- I can’t find the candy eyes, what can I use instead?
No candy eyes? No problem! You have several creative alternatives. Mini chocolate chips can be used as eyes – simply press them into a dot of melted chocolate. Alternatively, you can use a fine-tipped icing pen or a toothpick dipped in black gel icing to draw on little eyes. Candy eyes are often found in the baking aisle of major grocery stores like Target, but you can also find a wide variety of candy eyes online, particularly on Amazon, ensuring you’re stocked for future projects.
- Can I use other types of chocolate for melting?
Yes, while dark chocolate chips are recommended for a rich contrast, you can certainly use semi-sweet chocolate chips or even milk chocolate chips if you prefer a sweeter profile. White chocolate can also be used, but ensure it’s a good quality melting chocolate to avoid seizing. Always melt your chocolate slowly and stir frequently for the smoothest consistency.
- How many penguins does this recipe make?
This recipe is designed to make 12 adorable OREO Penguins, which is typically one standard package of fudge-covered OREOs. This amount is perfect for a small gathering, a few gifts, or a fun afternoon project. If you’re hosting a larger party or wish to give more gifts, you can easily double or triple the recipe to create a whole colony of penguins!
Creative Variations to Personalize Your Penguins
While the classic OREO Penguin is undeniably charming, there’s ample room for creativity and personalization! Here are some fun variations to make your penguins truly unique and suited to any occasion:
- Add a Matching Scarf: Give your penguins a cozy touch by adding a tiny scarf! You can use thin strips of candy straw, airheads extremes, fruit leather, or even pipe a scarf design with icing. Choose colors that complement their earmuffs or match your holiday decor.
- Earmuff Alternatives: If Junior Mints aren’t your preferred candy or you’re looking for a different texture, try using small marshmallows (white or pink would be wonderfully soft!) or other round candies like mini chocolate-covered pretzels for the earmuff ear pieces.
- Switch Up the Color Themes: Don’t limit yourself to red earmuffs! Experiment with different colored Twizzlers and candy melts to match specific party themes, school colors, or favorite hues. Blue and white for a frosty look, or green and red for a classic Christmas feel.
- Sparkle & Shine: For an extra touch of holiday glamour, add sprinkles or a dusting of edible glitter to your penguins! Apply them to the wet chocolate or directly onto the earmuffs before they set for a magical, shimmering effect.
- Different OREO Flavors: While fudge-covered OREOs provide a fantastic base, consider experimenting with other OREO flavors. Peppermint OREOs could add a cool, festive kick, or gingerbread OREOs could bring a warm, spicy twist to your penguin creations.
- Miniature Penguins: For smaller bites or delicate decorations, consider using OREO minis! The decorating process will be similar, but you’ll need smaller candies for the features.
Expert Tips for Perfect OREO Penguins
To ensure your OREO Penguin crafting experience is as smooth and enjoyable as possible, here are some invaluable tips from Trish, designed to help you create perfectly adorable treats every time:
- Prep for Speed and Efficiency: Before you even think about melting the chocolate, take the time to prepare all your other ingredients. Cut the M&Ms in half, unpeel and cut the Twizzlers, and lay out all the candy eyes and Junior Mints. Having everything prepped and within arm’s reach will allow you to work quickly and efficiently once the chocolate is melted, preventing it from hardening mid-decoration.
- Master Chocolate Management: When melting your chocolate, always work in small batches, especially if you’re making a large number of penguins. This strategy helps prevent the chocolate from cooling and hardening prematurely, giving you ample time to attach all your decorative elements without rushing or needing to constantly reheat.
- Precise Cutting for Beaks: Use a very sharp knife to cut the mini M&Ms in half. A clean, precise cut ensures neat, even halves that will form perfectly shaped penguin beaks, contributing to a more polished look for your finished treats.
- Maintain Optimal Chocolate Temperature: If your melted chocolate starts to cool and thicken while you’re decorating, simply reheat it in the microwave for a few seconds (5-10 seconds at 50% power) and stir it well. This will restore its smooth, workable consistency, allowing for easy application of candies.
- Handle Twizzlers with Care: Pull ‘n Peel Twizzlers are typically sold in bunches of 9 strands. For this recipe, you’ll only need one full bunch, which you’ll split into four pieces, each two strands thick. This will provide more than enough material to create the 2-inch long earmuff bands for all 12 penguins. Carefully peeling them ensures clean, even strips.
- Gloves for Neatness and Heat Control: Wearing food-grade gloves during the decorating process is a clever trick. It not only keeps your hands clean but also prevents the heat from your hands from inadvertently melting the chocolate coating on the OREOs as you handle them, ensuring a pristine finish.
- Embrace Imperfection and Have Fun: Remember that these are homemade treats, and part of their charm is their unique, handcrafted look. Don’t stress about making every single penguin look absolutely identical. Embrace the slight variations; they add character and prove they were made with love! Enjoy the process and the creative expression.
- Making a Large Batch? Plan Ahead: If you’re planning to make a large quantity of OREO Penguins, consider setting up an assembly line. Assign different tasks to different people if you have helpers (e.g., one person for stomachs, one for eyes, etc.), or break the process down into stages for yourself. This makes large-batch production much more manageable and efficient.
More Festive No-Bake Christmas Treats to Explore
If you’ve fallen in love with the ease and charm of these OREO Penguins, you’re in luck! The world of no-bake Christmas treats is vast and delightful. Here are more fantastic ideas to sweeten your holiday season without ever turning on the oven:
- Christmas Puppy Chow: A festive twist on a classic snack mix, perfect for sharing.
- Pretzel Reindeer: Salty and sweet, these adorable reindeer are another kid-friendly craft.
- Melting Snowman Oreo Balls: Whimsical and delicious, these snowman treats are almost too cute to eat.
- Buckeyes: A rich peanut butter fudge dipped in chocolate, a timeless holiday favorite.
- Penuche: A delightful brown sugar fudge that melts in your mouth.
- Hot Cocoa Fudge: Capture the cozy flavors of hot cocoa in a decadent fudge form.
OREO Penguins Recipe Card
These OREO Penguins are the ultimate no-bake holiday treat – easy to make, irresistibly cute, and oh-so-delicious! These charming penguins are perfect for parties, gift-giving, or a fun family activity. A delightful addition to dessert tables and cookie trays!
Course: Dessert
Cuisine: American
Keyword: oreo penguins, penguin cookies, no-bake dessert, holiday treats
Prep Time: 30 minutes
Cook Time: 15 minutes (assembly)
Servings: 12 penguins
Author: Trish – Mom On Timeout
Ingredients
- 7.9 ounces fudge covered OREOs (1 package)
- ¼ cup dark chocolate chips (or semi-sweet chocolate chips)
- 12 white candy melt wafers (get the ones that are circles if you can)
- 24 small candy eyes
- 12 mini M&Ms (orange)
- 1 Pull ‘n Peel Twizzler (red or any color your prefer)
- 24 Junior Mints
Instructions
- Line a large baking sheet with parchment paper. Place 12 fudge-covered OREOs evenly spaced on the baking sheet.
- Place chocolate chips in a small, microwave-safe bowl. Heat for 30 seconds at 50% power, then stir well. Continue microwaving in 10-15 second intervals, stirring after each, until the chocolate is fully melted and smooth.
- For the Stomachs: Use a small knife or spoon to spread a small amount of the melted chocolate on the back of a white candy melt. Attach the candy melt to the bottom half of an OREO to create the penguin’s “stomach.” Repeat for all OREOs.
- For the Eyes: Using a toothpick, place a small dot of melted chocolate where the eyes will go on each OREO. Press candy eyes onto the chocolate dots. Repeat for all OREOs.
- For the Beaks: Cut mini orange M&Ms in half with a sharp knife. Use a toothpick to dab melted chocolate on the cut side of an M&M half, then place it between the eyes to form the beak. Repeat for all penguins.
- For the Earmuff Bands: Peel the Twizzler so it is 2-strands thick. Cut each strand into 2-inch pieces. Spread melted chocolate on one side of each strand and press it onto the top of the OREO to form the earmuff band. Repeat for all penguins.
- For the Earmuff Ear Pieces: Spread a small amount of melted chocolate on the flat side of two Junior Mints for each penguin. Attach one Junior Mint to each side of the penguin’s head, at the ends of the Twizzler strand. Repeat for all penguins.
- To Set: Allow the OREO Penguins to set at room temperature for 30 minutes or in the refrigerator for 10-15 minutes before serving. Enjoy!
Notes
For detailed storage information, frequently asked questions, and extra tips, please refer to the sections above in this post.
- Room Temperature: Store penguins in an airtight container at room temperature for up to 2 weeks.
- Refrigerator: The Oreo penguins can be stored in the refrigerator for longer storage but some candies will likely bleed and/or lose color.
- Make in Advance: These penguins can be made ahead of time (up to 2 weeks) and stored in an airtight container at room temperature.
- Freezing: Not recommended, as the decorations may lose their texture and color after thawing.