Delicious Cookie Sliders: The Ultimate Mini Dessert Burgers for Any Occasion!
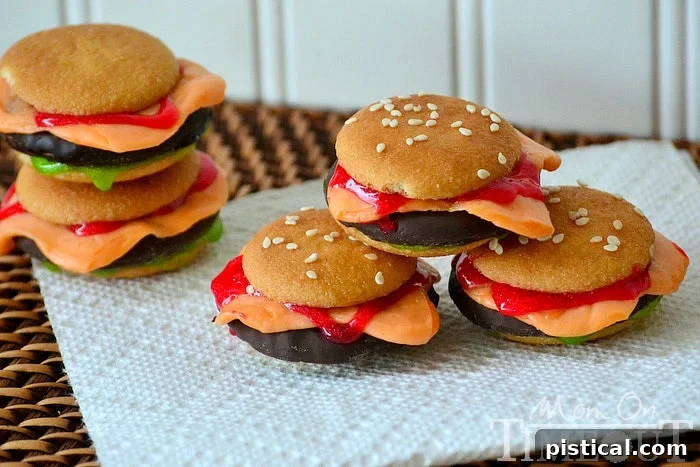
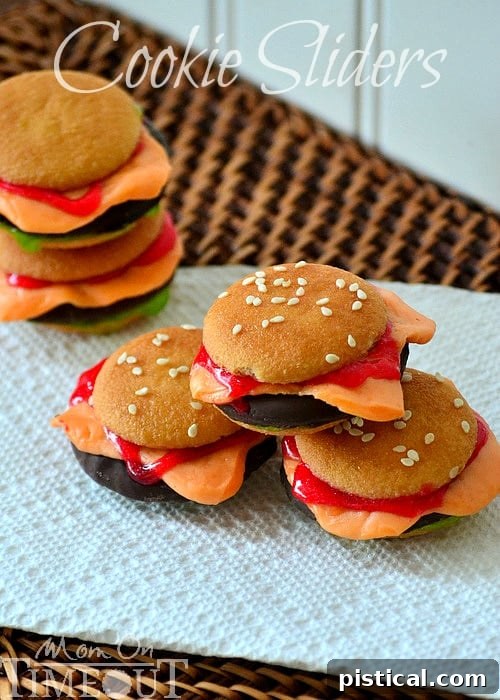
Prepare to delight and surprise your guests with these incredibly charming and delicious Cookie Sliders! These ingenious dessert sandwiches are expertly crafted to resemble adorable mini cheeseburgers, making them the perfect playful treat for April Fool’s Day, a fun addition to your next backyard BBQ, or any festive get-together. Beyond their undeniable visual appeal, these sweet sliders offer a delightful taste that will leave everyone craving more.
Get ready to create a dessert that’s not just a treat, but an experience! I am absolutely thrilled to share the recipe for these Cookie Sliders today. They are not only incredibly fun to assemble but even more exciting to serve. Whether you’re planning a “sweet” April Fool’s prank that will surely elicit smiles rather than groans, or you’re looking for a standout dessert for a casual barbecue, these mini cheeseburger cookies are guaranteed to generate “ooohs” and “aaahhs” from everyone who sees and tastes them. What’s even better? They come together in mere minutes, and you have endless possibilities to customize them with your favorite cookies and candies, making each batch uniquely special for your friends and family. They truly look like miniature savory cheeseburgers, but their sweet, delightful flavor is even better than you can imagine!
Why These Cookie Sliders Are a Must-Make
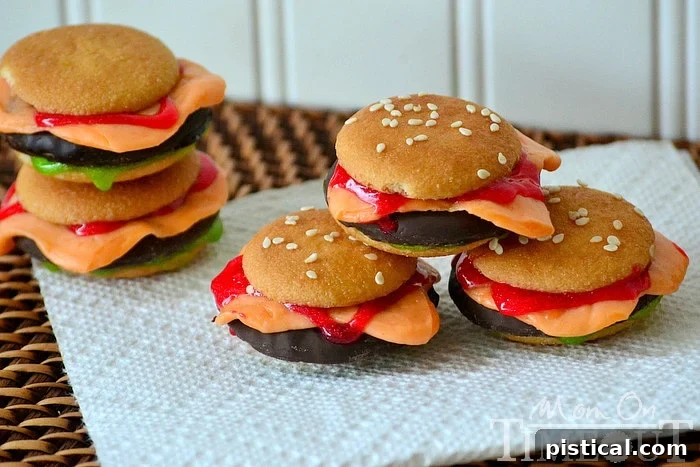
These Cookie Sliders aren’t just another dessert; they’re a conversation starter, a giggle-inducer, and a genuinely delicious treat all rolled into one. Here’s why they’ll become your new favorite recipe:
- Deceptively Fun: Their uncanny resemblance to real cheeseburgers is what makes them truly special. Imagine the surprise on your guests’ faces when they discover these aren’t savory but delightfully sweet! This element of surprise is perfect for April Fool’s Day or any event where you want to add a playful touch.
- Effortlessly Easy: Forget complicated baking or extensive prep work. These no-bake cookie sliders require minimal effort and can be assembled in a flash, making them ideal for last-minute party preparations or when you need a quick, impressive dessert.
- Completely Customizable: The beauty of this recipe lies in its flexibility. You can easily swap out ingredients to match dietary preferences, flavor cravings, or simply what you have on hand. Explore different cookies for the “buns” and “patties,” experiment with various candy for the “cheese,” and get creative with your “condiments.”
- Crowd-Pleasing Perfection: From toddlers to grandparents, everyone adores these mini dessert burgers. Their whimsical appearance and sweet flavors appeal to all ages, guaranteeing they’ll be a hit at any gathering, from casual barbecues to sophisticated celebrations.
- Visual Masterpiece: They photograph beautifully! If you love sharing your culinary creations, these cookie sliders are incredibly Instagram-worthy, ensuring your dessert table looks as good as the treats taste.
Crafting Your Cookie Sliders: Essential Ingredients and Substitutions
The magic of these cookie sliders comes from simple ingredients cleverly disguised. Here’s a breakdown of what you’ll need and how to choose the best components for your delightful dessert burgers.
1. The Buns: Nilla Wafers
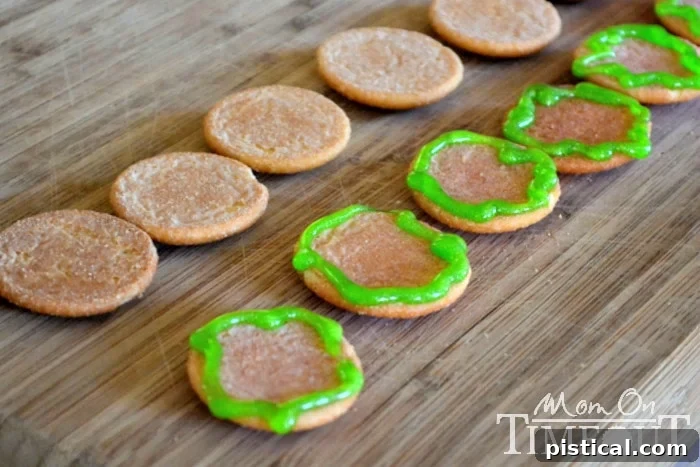
Nilla Wafers are the perfect choice for the “buns” of your cookie sliders due to their classic vanilla flavor and ideal size. Their light color perfectly mimics a lightly toasted burger bun. You’ll need two Nilla Wafers for each slider you plan to make.
- Substitution Tip: If Nilla Wafers aren’t available, other vanilla-flavored wafer cookies or even plain shortbread cookies of a similar size would work wonderfully. You could also try larger round butter cookies for a slightly bigger slider.
2. The Lettuce: Green Frosting or Gel
To create the illusion of crisp lettuce peeking out from your burger, green frosting or gel is your go-to ingredient. The beauty of using gel is its slightly translucent quality, which can make it look even more realistic.
- How to Apply: You don’t need to cover the entire wafer. A small dollop or a thin line of green gel/frosting squeezed onto the bottom wafer, just enough to extend slightly beyond the “burger” patty, will achieve the desired effect.
- Substitution Tip: For an even more authentic “leafy” texture, you can use green Starbursts (or even green fruit leather) and follow the same shaping steps described below for the cheese. If using Starburst, crimp the edges gently after shaping to mimic lettuce frills.
3. The Burger Patty: Chocolate Covered Cookies
This is where the rich, decadent flavor of your cookie slider truly comes through. Any chocolate-covered cookie will work perfectly, adding a dark, inviting contrast to your “buns” and “cheese.”
- My Favorite Choice: For this particular batch, I opted for Oreo Fudge Creme cookies, specifically the peanut butter creme flavor. They are incredibly delicious and add a fantastic depth of flavor!
- Versatile Options: Don’t limit yourself to just Oreos. Chocolate-covered digestive biscuits, Thin Mints, Fudge Rounds, or even individual peppermint patties make excellent “burger” patties. Choose what you love most to give your sliders a personal touch.
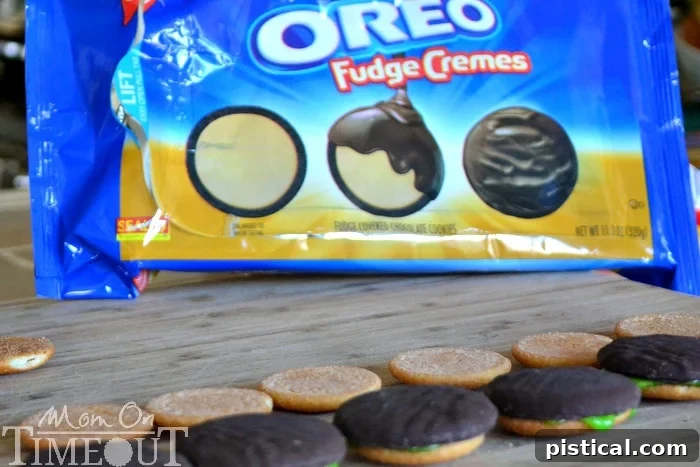
4. The Cheese: Melted Starburst Candy
This is arguably the most brilliant and fun part of assembling these cookie sliders! Orange icing just doesn’t quite capture the look of melted cheese. A slightly melted and stretched Starburst, however, is an absolute game-changer. It looks incredibly realistic and tastes wonderfully fruity.
- The Magic Trick: Unwrap orange (or yellow) Starburst candies. Place 3-4 candies in the microwave at a time and heat on high for just 5 seconds. They will become wonderfully soft and pliable.
- Shaping Perfection: Once soft, quickly stretch each Starburst until it’s just slightly larger than your chosen cookie “patty,” allowing it to gracefully drape over the edges, mimicking perfectly melted cheese. The visual effect is remarkably convincing!
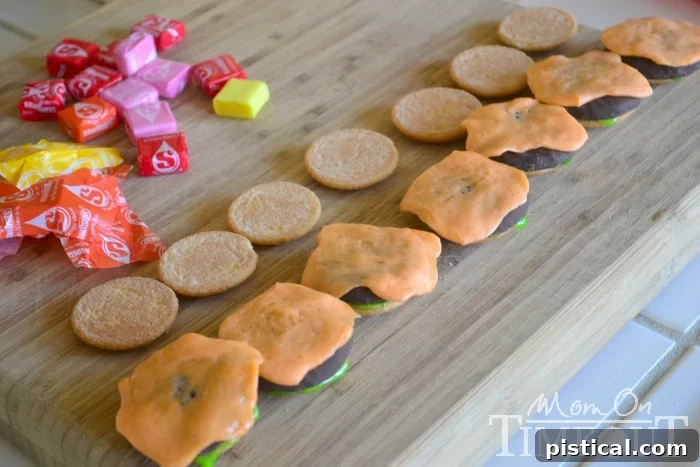
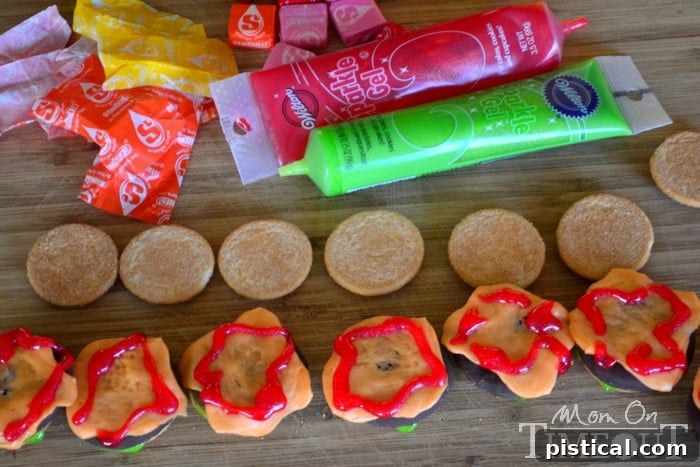
5. The Ketchup: Red Frosting or Gel
No burger is complete without a squirt of ketchup! Red frosting or gel provides that iconic touch of color. While I used sparkle gel once because it was all I had on hand, rest assured, the sparkle is barely visible, so any red gel or frosting will do the trick.
- Creative Freedom: You can absolutely add yellow gel for “mustard” or even tiny dabs of white frosting for “mayo” to spark even more creativity!
- Application Tip: Similar to the “lettuce,” you don’t need a lot of “ketchup.” A small dot or a quick squiggle on top of the “cheese” layer is all it takes to complete the illusion. Just a little goes a long way!
6. The Finishing Touch: Sesame Seeds
This is the pièce de résistance – the detail that truly sells the mini cheeseburger illusion. Sesame seeds sprinkled on top of the “bun” are absolutely genius!
- How to Apply: To get those tiny seeds to stick perfectly, warm a small amount of honey (about a teaspoon) in the microwave for 10 seconds. Then, gently brush a thin layer of the warm honey onto the tops of your Nilla Wafer “buns.” Immediately sprinkle the sesame seeds over the honey, and voila – instant burger buns!
- No Sesame Seeds? No Problem: If you don’t have sesame seeds or prefer to omit them, your cookie sliders will still be charming and delicious!
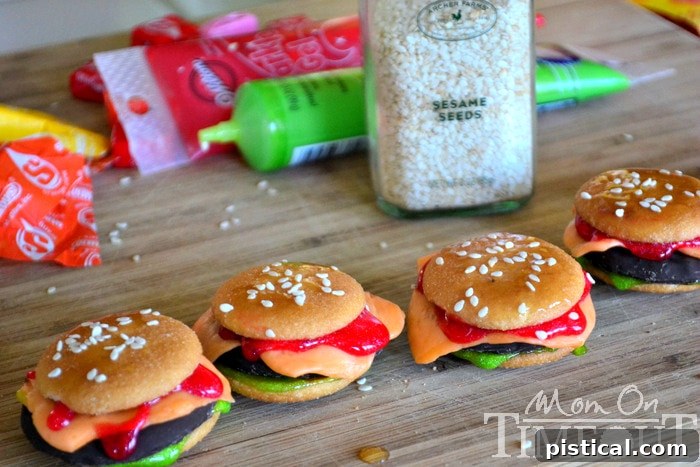
Step-by-Step Guide to Assembling Your Fun Cookie Sliders
Assembling these cookie sliders is a breeze and incredibly satisfying. Follow these simple steps for perfect results every time!
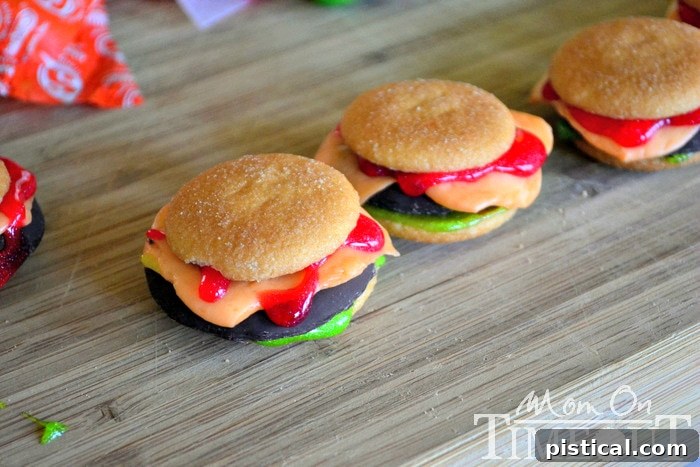
- Prepare Your Buns: Begin by laying out two Nilla Wafers for each cookie slider you intend to create. These will form the top and bottom of your mini burger bun.
- Add the “Lettuce”: Take one Nilla Wafer (this will be your bottom bun) and squeeze a small amount of green frosting or gel onto its center. You only need a thin ring or dab, just enough so that it peeks out from under the “burger” once assembled. This creates the illusion of lettuce.
- Place the “Patty”: Carefully place one chocolate-covered cookie (your chosen “burger” patty) directly on top of the green frosting layer. Press gently to ensure it adheres.
- Melt and Shape the “Cheese”: Unwrap 3-4 orange (or yellow) Starburst candies. Place them in the microwave and heat on high for precisely 5 seconds. They will soften quickly. Immediately remove them and, working one at a time, quickly stretch and flatten each Starburst until it’s slightly larger than your cookie patty. This will give it that classic melted cheese look, hanging just over the edges of the “burger.” Place one shaped Starburst on top of each chocolate cookie patty.
- Drizzle the “Ketchup”: Using red frosting or gel, add a small dot or a thin line onto the Starburst “cheese” layer to mimic ketchup. If you’re feeling extra creative, a tiny dash of yellow frosting could represent “mustard.”
- Add the Top “Bun”: Carefully place the second Nilla Wafer on top of the assembled layers. Press down gently to secure all the components.
- Attach Sesame Seeds (Optional but Highly Recommended): For that truly authentic burger bun look, warm about one teaspoon of honey in the microwave for 10 seconds. Dip a clean brush or your finger into the warm honey and lightly brush it onto the tops of the Nilla Wafer “buns.” Immediately sprinkle sesame seeds over the honeyed surface. The honey acts as a perfect edible adhesive, making the seeds stick beautifully.
Pro Tips for Perfect Cookie Sliders Every Time
Achieving cookie slider perfection is easy with these insider tips:
- Microwave Timing is Key for Starburst: Five seconds in the microwave is typically ideal for softening Starbursts. Any longer, and they can become too sticky or start to harden quickly. Work quickly once they are out of the microwave to shape them while they are pliable.
- Experiment with “Lettuce” & “Condiments”: Don’t be afraid to try different green candies for the “lettuce” or add other colored gels for “mustard” or even tiny white sprinkles for “onions.”
- Less is More with Frosting: For both the green “lettuce” and red “ketchup,” a small amount is all you need. Too much can overpower the delicate cookies and make the sliders messy.
- Honey for Sesame Seeds: The warm honey trick is foolproof for getting sesame seeds to adhere. If you don’t have honey, a tiny dab of light corn syrup can also work in a pinch.
- Chill for Stability: If you’re making these in advance, a brief chill in the refrigerator can help all the layers set firmly, especially if your frosting or gel is soft.
Unleash Your Creativity: Customization Ideas for Your Cookie Sliders
The beauty of Cookie Sliders lies in their adaptability. Don’t stop at the basic recipe; use it as a springboard for your own creative culinary adventures!
- Bun Variations: While Nilla Wafers are classic, consider ginger snaps for a spiced “bun,” chocolate wafers for a darker look, or even mini shortbread cookies. For a slightly different texture, try coating your Nilla Wafers in a thin layer of melted white chocolate and letting it set before assembling.
- Patty Power: Beyond chocolate-covered Oreos, explore other round chocolate cookies. Chocolate-covered graham crackers (cut into circles), mini fudge stripes, or even homemade chocolate ganache patties could elevate the flavor profile. For a fun twist, use peanut butter patties for a “peanut butter burger” look!
- Cheese Please: Starburst candies come in various colors. Yellow Starbursts can make for a lighter “cheddar,” while red could even resemble “pepper jack.” Experiment with other fruit chew candies that melt similarly.
- Beyond Ketchup: Add a dollop of yellow frosting for “mustard.” Tiny white sprinkles can act as “onions,” and a small piece of green fruit leather, cut into a zig-zag, could be a “pickle slice.”
- Fries & Shakes: Serve your cookie sliders alongside “cookie fries” (e.g., thinly cut sugar cookies or wafer sticks) and small cups of “milkshake” (e.g., mini pudding cups or small glasses of flavored milk) for a complete dessert diner experience.
- Holiday Themes: Use red and green frosting for Christmas, orange and black for Halloween, or pastel colors for Easter. The possibilities are truly endless!
The Perfect Treat for Any Occasion
These Cookie Sliders aren’t just a novelty; they’re a versatile dessert suitable for a wide array of events.
April Fool’s Day Delight
There’s no better way to celebrate April Fool’s Day than with a treat that plays a delicious trick! Imagine the look of surprise when your unsuspecting guests bite into what they think is a savory slider, only to discover a burst of sweet, delightful flavors. It’s a harmless, fun, and memorable prank that everyone will adore.
BBQ and Party Favorite
When you’re grilling up burgers at your next barbecue, why not serve a sweet version alongside them? These mini dessert burgers are a fantastic complement to any outdoor feast. They’re easy to eat, don’t require utensils, and add a whimsical touch to your dessert spread. They’re also perfect for potlucks, birthday parties, game nights, or any gathering where you want a treat that stands out.
Kid-Friendly Fun
If you’re searching for a kid-pleasing treat that’s both engaging to make and exciting to eat, look no further! Kids absolutely love the playful appearance of these cookie sliders. They can even help with the assembly process, making it a wonderful activity for a rainy afternoon or a themed birthday party. Their small size is perfect for little hands.
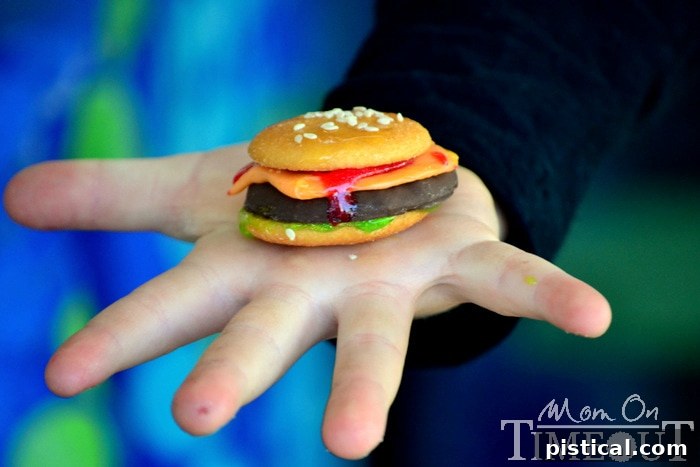
Seriously, does it get any cuter or more fun than this? These Cookie Sliders are a guaranteed hit that will bring smiles and sweet memories to any event!

Recipe Summary: Cookie Sliders That Look Just Like Mini Cheeseburgers!
Cookie Sliders That Look Just Like Mini Cheeseburgers!
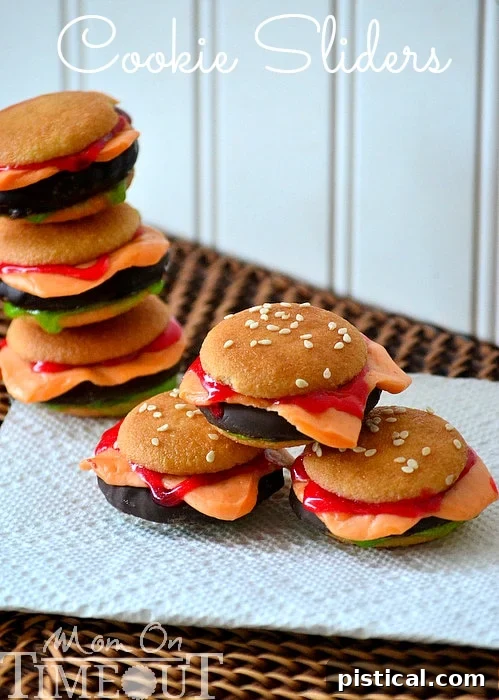
Cookie Sliders are the perfect treat to serve up for April Fool’s Day or for your next BBQ or get-together! These cookie sandwiches look like real mini cheeseburgers and taste delightful!
Recipe Details
- Course: Appetizer, Dessert
- Cuisine: American
- Keyword: cookie sliders, mini cheeseburger cookies, dessert burgers, April Fool’s dessert, easy party treats
- Prep Time: 10 minutes
- Cook Time: 1 minute
- Total Time: 11 minutes
- Servings: 12 sliders
- Author: Trish – Mom On Timeout
Ingredients (for 12 Cookie Sliders)
- 24 Nilla Wafers
- 12 chocolate-covered cookies (such as Oreo Fudge Creme, Thin Mints, or Fudge Rounds), or peppermint patties
- Green frosting or gel (for “lettuce”)
- Red frosting or gel (for “ketchup”)
- 12 orange (or yellow) Starburst candies (for “cheese”)
- Sesame seeds
- 1 teaspoon honey
Instructions
- Prepare Your Buns: For each cookie slider you wish to make, set aside two Nilla Wafers. These will form the top and bottom “buns” of your mini burger.
- Add the “Lettuce”: Take one Nilla Wafer (this will be the bottom bun) and apply a small amount of green frosting or gel onto its surface. You want just enough so that it peeks out slightly from under the “burger” when assembled, mimicking a crisp piece of lettuce.
- Place the “Patty”: Gently place one chocolate-covered cookie or peppermint patty on top of the green frosting layer. This forms the “burger” patty.
- Melt and Shape the “Cheese”: Unwrap 3-4 orange (or yellow) Starburst candies. Place them in the microwave and heat on high for approximately 5 seconds. The candies will become soft and pliable. Working quickly, stretch each softened Starburst until it is slightly larger than your cookie patty, creating the look of melted cheese. Place one shaped Starburst on top of each chocolate cookie patty.
- Drizzle the “Ketchup”: Use red frosting or gel to add a small dot or a light drizzle on top of the Starburst “cheese” layer. This will represent the “ketchup.” Feel free to add yellow frosting for “mustard” if you desire more condiments!
- Add the Top “Bun”: Carefully place the second Nilla Wafer on top of your assembled layers to complete your mini cookie slider.
- Attach Sesame Seeds (Optional but Recommended): For an authentic touch, warm about one teaspoon of honey in the microwave for 10 seconds. Gently brush this warm honey onto the tops of the Nilla Wafer “buns.” Immediately sprinkle sesame seeds over the honeyed surface to make them stick.
Nutrition Information (per slider, approximate values)
- Calories: 241kcal
- Carbohydrates: 48g
- Protein: 1g
- Fat: 6g
- Saturated Fat: 3g
- Cholesterol: 1mg
- Sodium: 60mg
- Potassium: 58mg
- Fiber: 1g
- Sugar: 34g
- Vitamin C: 3mg
- Calcium: 5mg
- Iron: 1mg
Explore More Delicious Treats
If you enjoyed crafting these fun and delicious Cookie Sliders, you’ll love these other sweet recipes that are perfect for sharing!
Raspberry Coconut Magic Bars
Rainbow Sugar Cookie Bark
Turtle Thumbprint Cookies