
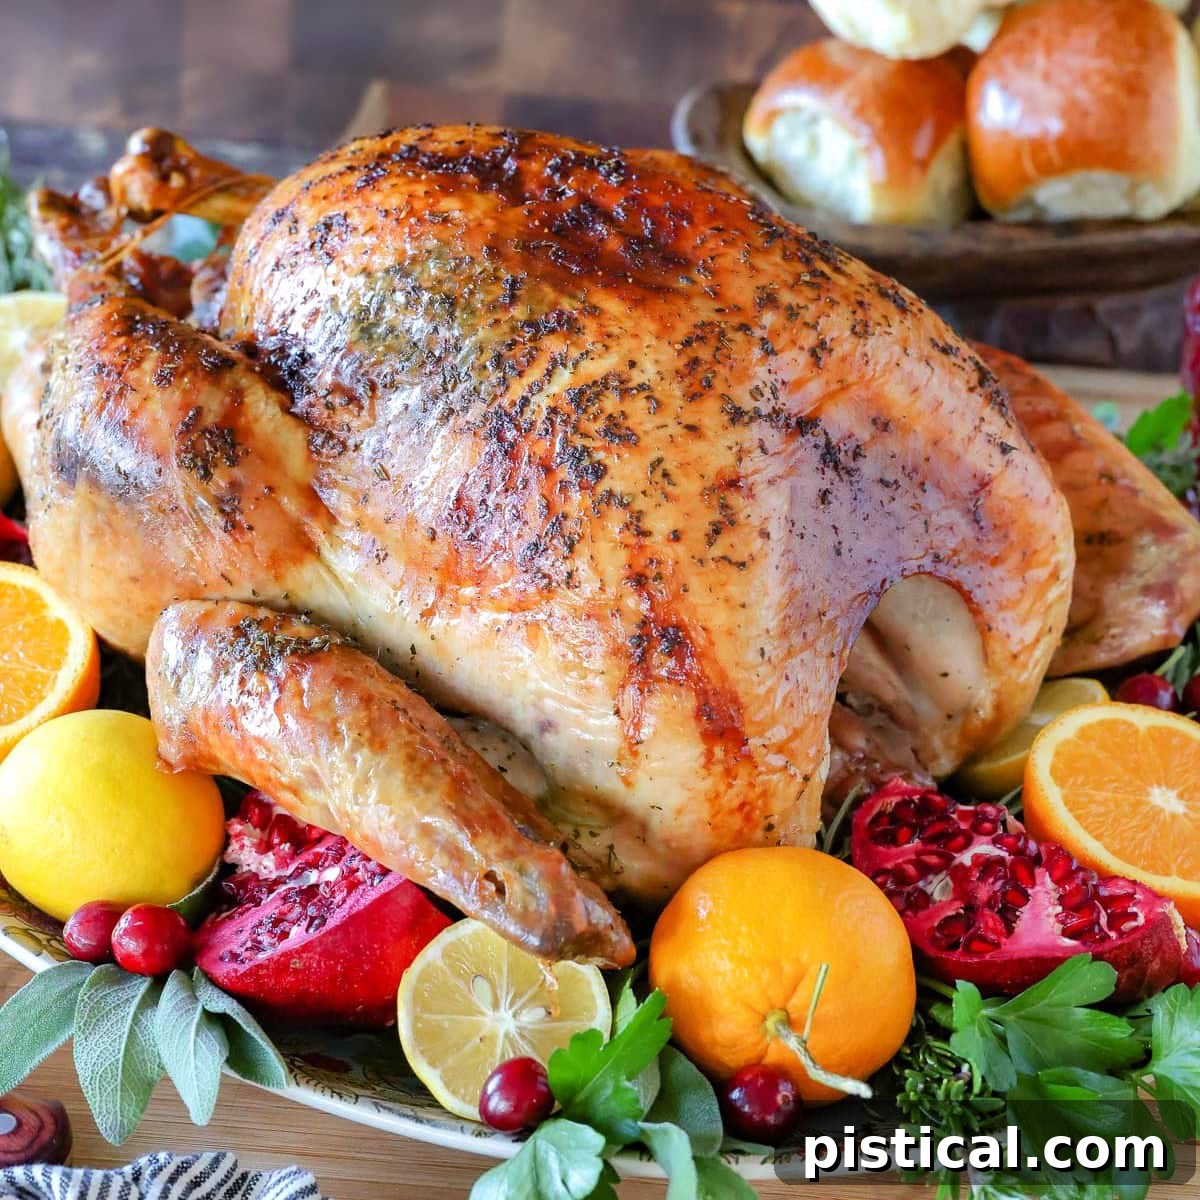
Prepare for the ultimate holiday centerpiece with this truly exceptional Thanksgiving Turkey recipe. Renowned for its incredibly juicy, tender meat and irresistibly crispy, golden-brown skin, this foolproof method promises to make your festive meal unforgettable. Forget dry, bland turkey; our comprehensive guide, complete with step-by-step instructions, will ensure your guests are clamoring for seconds!
While this recipe is guaranteed to become a new family favorite, you might also be interested in exploring other delicious turkey options. Discover our popular recipes for Roast Turkey Breast, the convenient Air Fryer Turkey Breast, and the effortlessly succulent Crockpot Turkey Breast for smaller gatherings or everyday meals.
Crafting the Perfect Thanksgiving Turkey
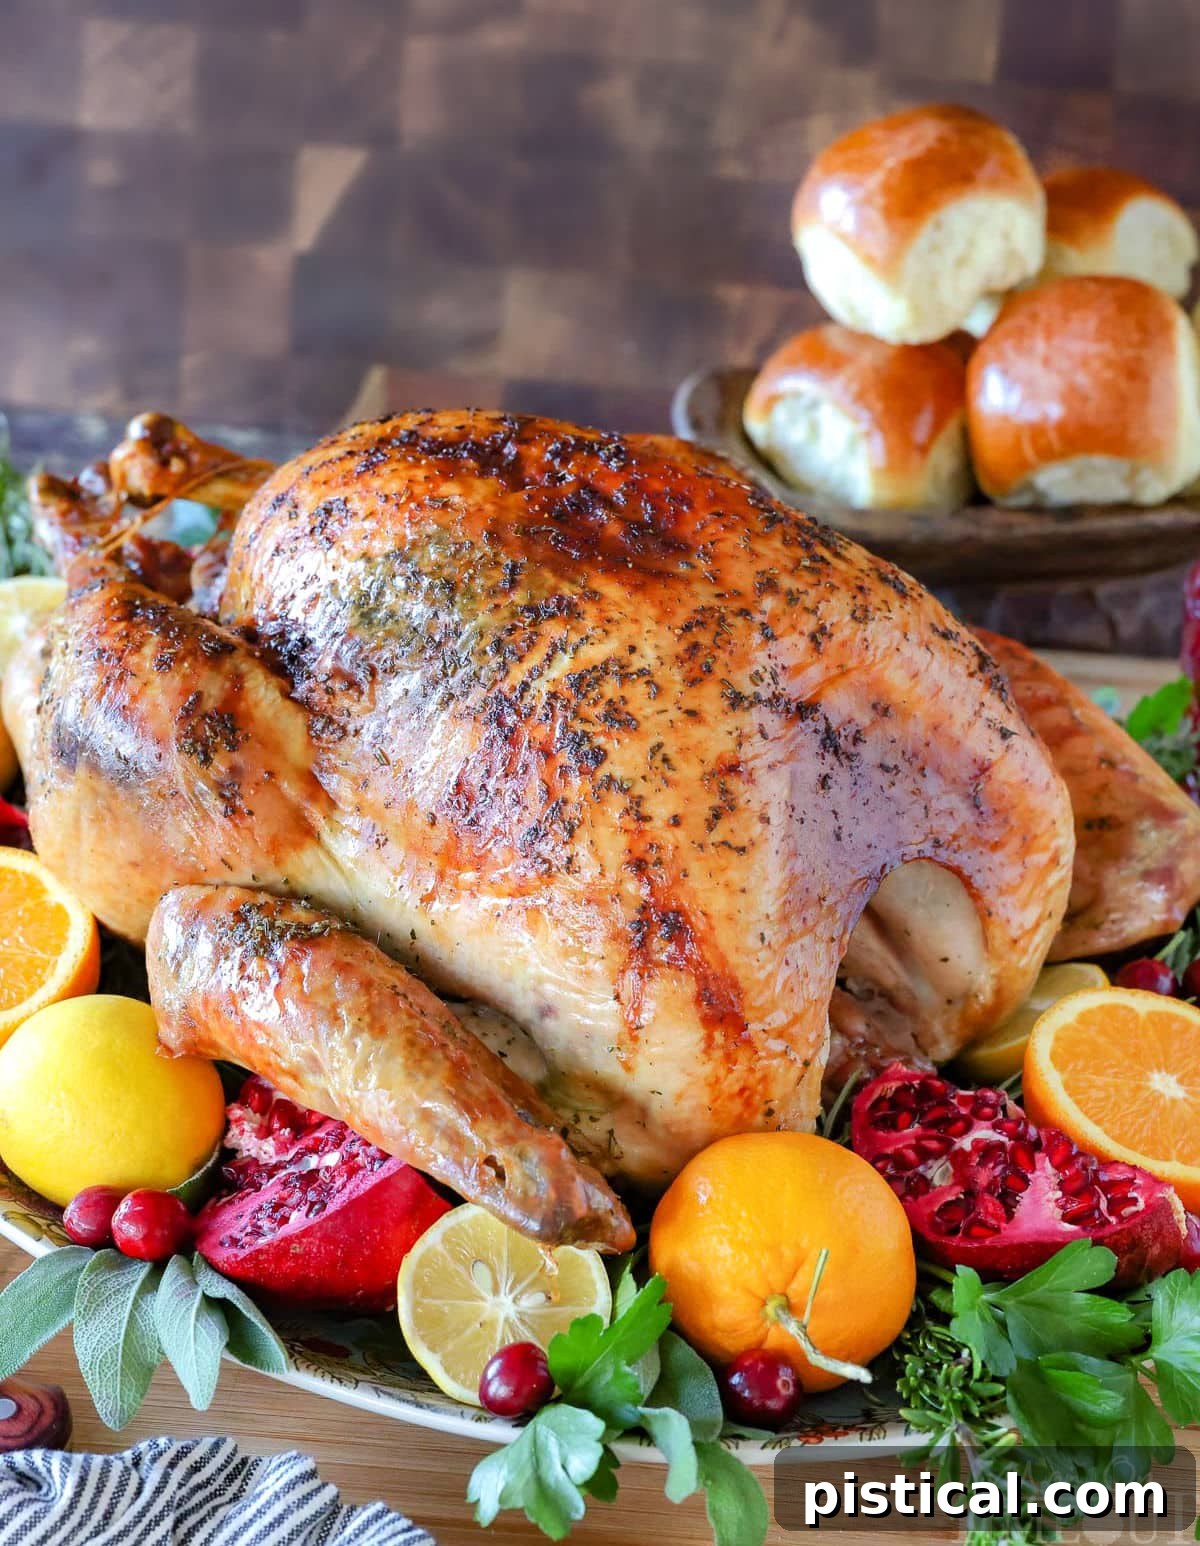
No Thanksgiving or Christmas celebration feels complete without the glorious presence of a perfectly roasted turkey. For decades, this very recipe has graced my holiday table, earning rave reviews and converting even the most skeptical turkey-eaters into avid fans. As someone who once meticulously brined turkeys, my standards for a truly outstanding turkey recipe are exceptionally high. This method delivers all the incredible flavor and succulence of a brined bird, but without the extensive prep work.
By distilling my favorite flavors and essential ingredients from tried-and-true brining techniques, I’ve created an easy roast turkey recipe that consistently produces tender, flavorful meat encased in beautifully crispy, golden-brown skin. It’s the kind of dish that transforms a simple meal into a festive feast, making it an ideal centerpiece for your holiday celebrations. The secret lies in a harmonious blend of fresh herbs, rich butter, and a hint of bright citrus that infuses every bite with unforgettable taste. This turkey isn’t just a meal; it’s an experience, designed to turn out perfectly moist and delicious every single time.
The magic begins with a savory herb-infused compound butter, generously slathered both over and delicately under the turkey’s skin. This strategic application locks in moisture and imbues the meat with profound flavor as it roasts. Accompanied by fresh aromatic vegetables, vibrant citrus, and fragrant herbs tucked within its cavity, the turkey slow-roasts to a stunning golden perfection. Your home will fill with an irresistible aroma that signals the start of a truly special occasion. Each slice reveals incredibly juicy, tender meat, bursting with a symphony of flavors, making this the ultimate show-stopping centerpiece for any holiday gathering.
Why This Roast Turkey Will Be Your New Go-To Recipe
This roast turkey isn’t just a dish; it’s a testament to simple elegance and incredible flavor. Infused with a fragrant herb compound butter and roasted alongside a medley of vibrant vegetables, zesty citrus, and aromatic herbs, this turkey is as stunning to behold as it is delightful to eat. There are countless reasons to adore this amazing recipe, but here are some of our absolute favorites:
- Effortlessly Flavorful: Despite its impressive outcome, this roasted turkey recipe is remarkably straightforward, requiring only a few key ingredients. The brilliant combination of fresh herbs, rich butter, and bright citrus delivers an explosion of flavor that will captivate everyone at your table, making it taste like you spent hours longer than you did.
- Unbelievably Moist and Tender: The secret to its succulent texture lies in the ingenious use of compound butter. Applied directly under the skin, this butter bastes the meat from within, ensuring every fiber remains incredibly moist and tender. Paired with the flavorful herbs and veggies nestled in the cavity, this method guarantees a juicy, melt-in-your-mouth experience with every bite.
- Perfect for Any Gathering: This recipe is a genuine crowd-pleaser, designed to shine at large family holiday gatherings or any special occasion. It consistently produces a turkey that’s both visually impressive and deliciously satisfying. And should you be fortunate enough to have any leftovers, they are just as delicious—or perhaps even more so—the next day, ready to be transformed into exciting post-holiday meals!
Step-by-Step Guide: How to Make the Best Thanksgiving Turkey
Making a show-stopping roast turkey might seem daunting, but it’s much simpler than you imagine! With a few fresh herbs, a wonderfully flavorful compound butter, and a little preparatory effort, you can create a tender, juicy turkey with irresistibly golden, crispy skin. Follow these detailed steps to craft a profoundly flavorful turkey that will undoubtedly be the star of your holiday spread! Remember, a complete list of ingredients and precise instructions are provided in the recipe card at the end of this post.
Phase 1: Turkey Preparation
- Bring to Room Temperature: Remove your thawed turkey from the refrigerator approximately one hour before you plan to begin roasting. This allows the turkey to come closer to room temperature, promoting more even cooking. While the turkey rests, prepare your aromatic herb butter.
- Unpack and Inspect: Carefully remove the turkey from all its packaging. Reach into the main cavity and the neck cavity to remove any giblets, neck, or other contents—often found in a small bag. Also, remove any plastic pieces or pop-up thermometers that may be embedded. You can save the giblets and neck for making rich stock or gravy, or discard them as you prefer.
Phase 2: Crafting the Herb Butter
- Soften the Butter: Place the softened, cubed unsalted butter into a medium-sized bowl. It’s crucial that the butter is at room temperature for easy mixing and spreading.
- Infuse with Herbs: Add your finely chopped fresh herbs—parsley, rosemary, thyme, and sage—along with sea salt and freshly ground black pepper to the softened butter.
- Combine Thoroughly: Use a fork or a rubber spatula to thoroughly combine all the ingredients until you have a cohesive, fragrant herb compound butter. Ensure the herbs and seasonings are evenly distributed throughout the butter.
- Prepare Cavity Aromatics: Gather all the ingredients destined for the turkey’s cavity and the roasting pan.
- Chop and Quarter: Roughly chop the carrots and celery into 1 to 2-inch pieces. Quarter the large onion, orange, and lemon. These will infuse the turkey with incredible aromatics and flavor from the inside out.
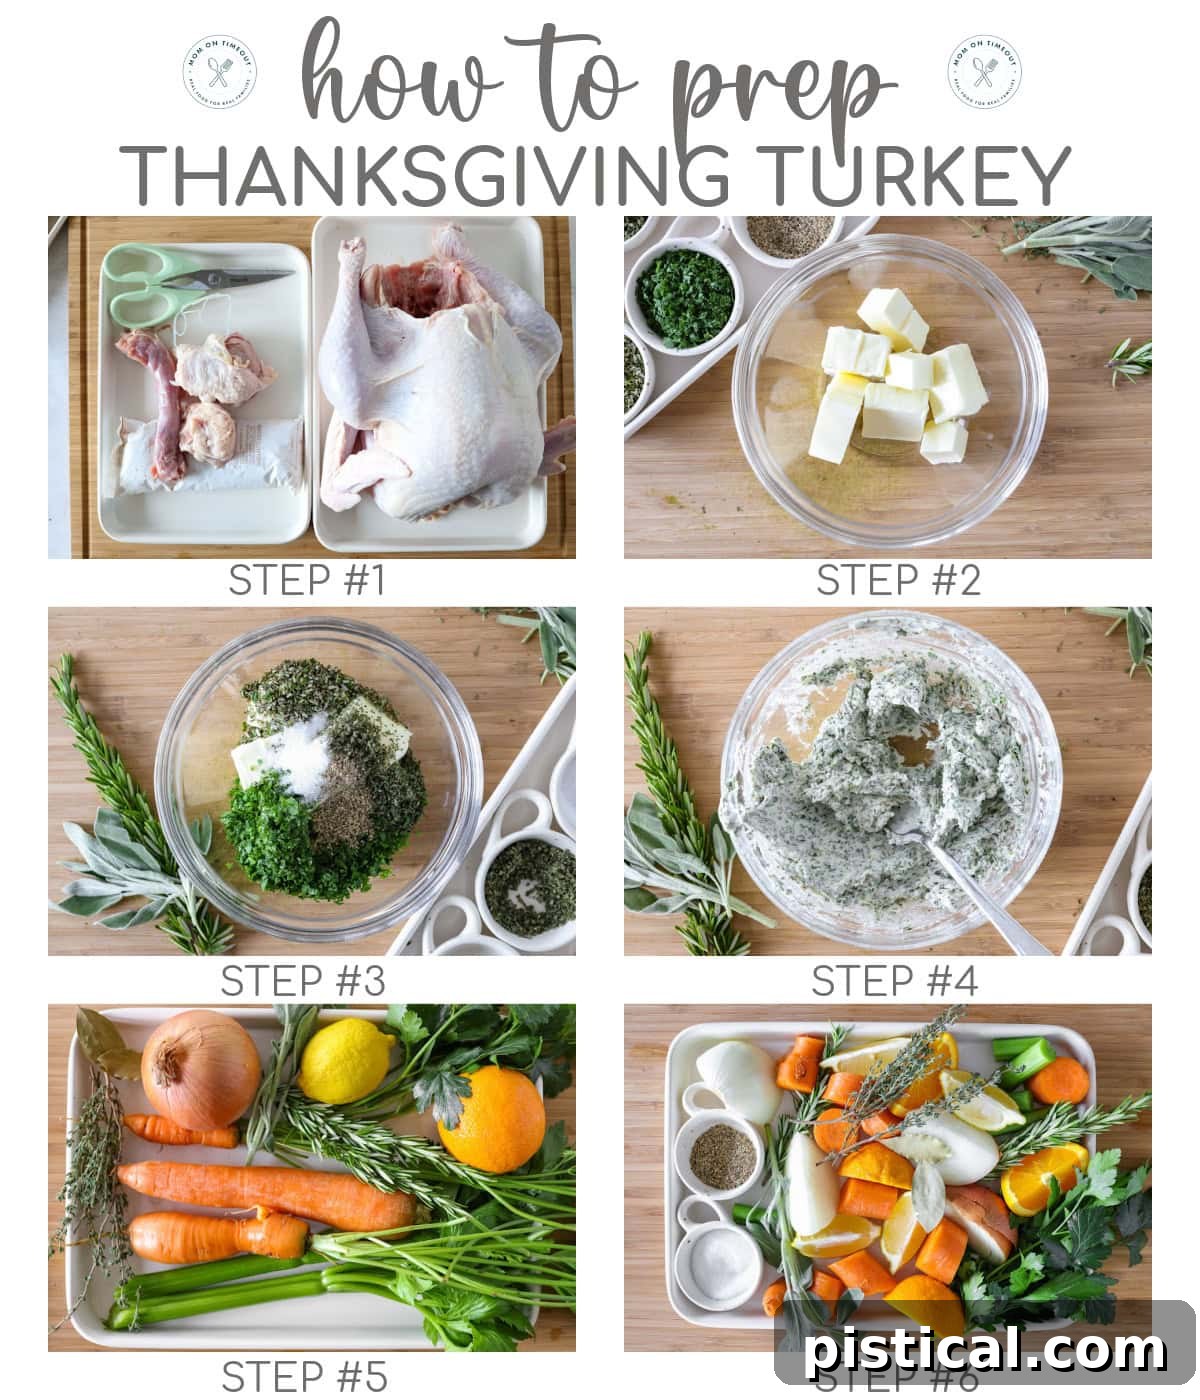
Phase 3: Stuffing the Cavity and Seasoning
- Pat Dry: Using paper towels, thoroughly pat the entire turkey dry, paying special attention to areas around the wings and legs. A dry surface is essential for the skin to crisp up beautifully and for the herb butter to adhere properly.
- Season the Interior: Lightly season the inside of the turkey’s cavity with salt and pepper to enhance the internal flavor.
- Loosely Stuff: Gently and loosely stuff the cavity with your prepared carrots, celery, onion quarters, fresh herb sprigs (thyme, rosemary, sage, parsley), bay leaves, and the orange and lemon quarters. Avoid overstuffing, as this can hinder even cooking. Use only as much as will comfortably fit. You may have some leftover aromatics, which can be added directly to the roasting pan.
Phase 4: Applying Herb Butter and Trussing
- Lift the Skin: Working from the neck opening, carefully slide your fingers between the skin and the breast meat, gently separating the membrane. Do the same for the thigh areas. This creates pockets for the compound butter.
- Apply Butter Under Skin: Take a few tablespoons of the herb butter and place it under the skin over each breast. Use your fingers to gently spread the butter evenly across the breast meat. Repeat this process for the thighs and any other areas you can comfortably reach under the skin.
- Slather Exterior: Generously slather the remaining herb butter mixture all over the exterior of the turkey, ensuring an even coating for maximum flavor and golden browning.
- Truss the Turkey: Loosely tie the turkey’s legs together with butcher’s twine. This helps the turkey cook more evenly and maintain a compact shape. Tuck the wing tips underneath the body to prevent them from burning during roasting.
- Prepare Roasting Pan: If using a roasting rack, place the trussed turkey on it. Pour the chicken stock (or water) and apple cider into the bottom of the roasting pan. This liquid serves multiple crucial purposes: it prevents the drippings and cavity vegetables from burning, adds moisture to the oven environment for a juicier bird, and contributes wonderful aromatics and flavor to the pan juices, which are essential for making a superb gravy. If you don’t have apple cider, simply use additional chicken or turkey stock.
Phase 5: Roasting Your Masterpiece
- Preheat Oven & Position: Adjust your oven rack to the lower third or half of the oven, depending on your turkey’s size, to ensure adequate space. Preheat your oven to 325°F (160°C).
- Roast to Perfection: Place the turkey in the preheated oven. Roast until a reliable meat thermometer, inserted at least two inches deep into the thickest part of the thigh (without touching the bone) and also in the thickest part of the breast, reads 160°F (71°C). This typically takes approximately 12 to 15 minutes per pound, though actual cooking times can vary based on oven calibration and turkey size.
- Optional Basting: While basting is optional, it can help promote even browning and add a little extra moisture. If basting, do so once an hour with the pan juices or extra chicken/turkey stock. Be quick to avoid excessive heat loss from the oven.
- Monitor Browning: Keep an eye on the turkey’s skin. If it begins to brown too quickly before the internal temperature is reached, lightly tent the turkey with aluminum foil to prevent further browning and allow the internal meat to finish cooking without burning the skin. I usually tent it after about 90 minutes.
- Rest for Juiciness: Once the thermometer reads 160°F, remove the turkey from the oven and carefully transfer it to a clean cutting board or baking sheet. Loosely tent it with foil. Allow the turkey to rest for a minimum of 20 to 30 minutes (the exact time depends on the turkey’s size, with larger birds needing closer to 30 minutes). This crucial resting period allows the juices to redistribute throughout the meat, ensuring every slice is incredibly moist and tender. The internal temperature will also continue to rise during this time, reaching the safe temperature of 165°F (74°C) through carryover cooking.
- Gather Drippings: Be sure to reserve all the flavorful drippings and pan juices from the roasting pan. These are the foundation for the most delicious homemade turkey gravy!
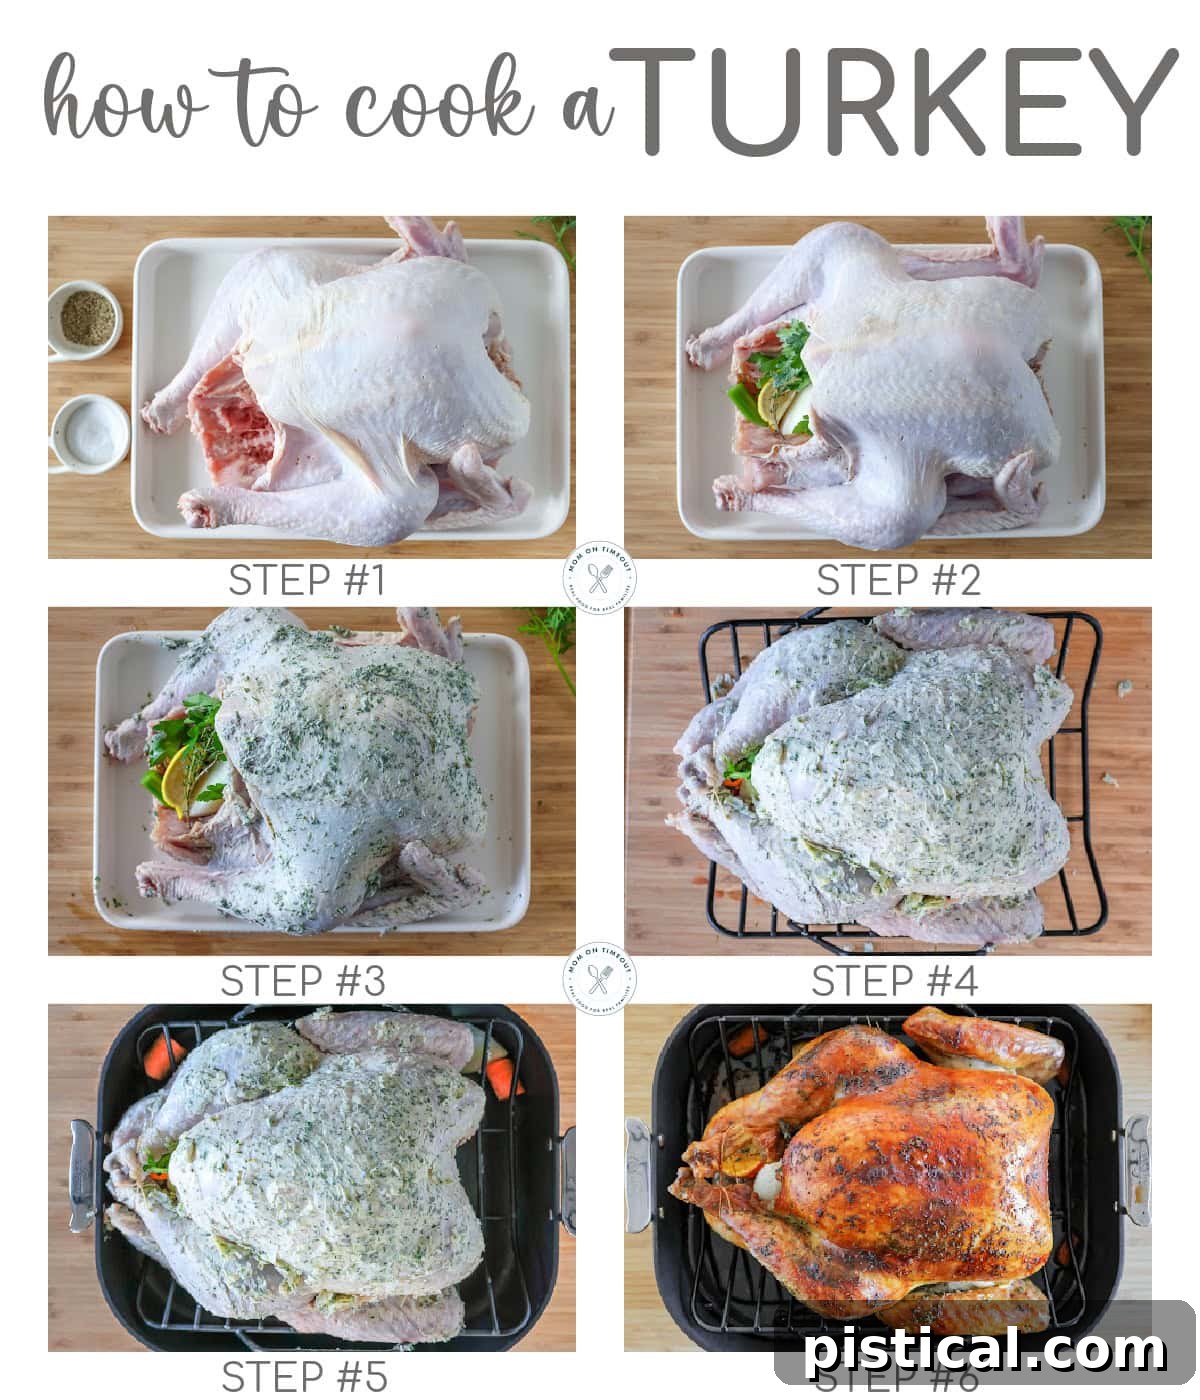
Pro Tip: Prepare the herb compound butter in advance! This time-saving trick allows you to get a head start on your holiday prep. The butter can be made up to one week ahead and stored in the refrigerator, or frozen for up to three months. Simply shape it into a log, wrap it tightly in plastic wrap, and store. Just remember to let it come to room temperature before you plan to use it on your turkey for easy spreading.
Mastering the Art of Turkey Carving
Carving a whole turkey can feel a bit intimidating, especially if it’s your first time or if you only do it once a year. But don’t worry, I’m here to guide you through it! Remember, the goal with this turkey is incredible flavor and juiciness. Even if your cuts aren’t absolutely perfect, the taste will still be amazing. Let’s tackle this together!
- Maintain Warmth: Keep the turkey loosely tented with foil after resting until you are ready to begin carving. This helps retain heat and moisture.
- Crucial Resting Time: As mentioned, resting is vital. A turkey needs about 25 to 30 minutes to rest, depending on its size. For turkeys under 15 pounds, aim closer to 25 minutes; for those around 20 pounds, allow the full 30 minutes. This critical period allows the internal juices to redistribute throughout the meat, resulting in a much juicier and more moist turkey when carved. Skipping this step often leads to dry meat.
- Essential Carving Tools: The right tools make all the difference. You’ll need a very sharp knife—I mean, *really* sharp—to cleanly carve the turkey. Grab your sharpest chef’s knife or consider a dedicated carving knife like this one for optimal precision.
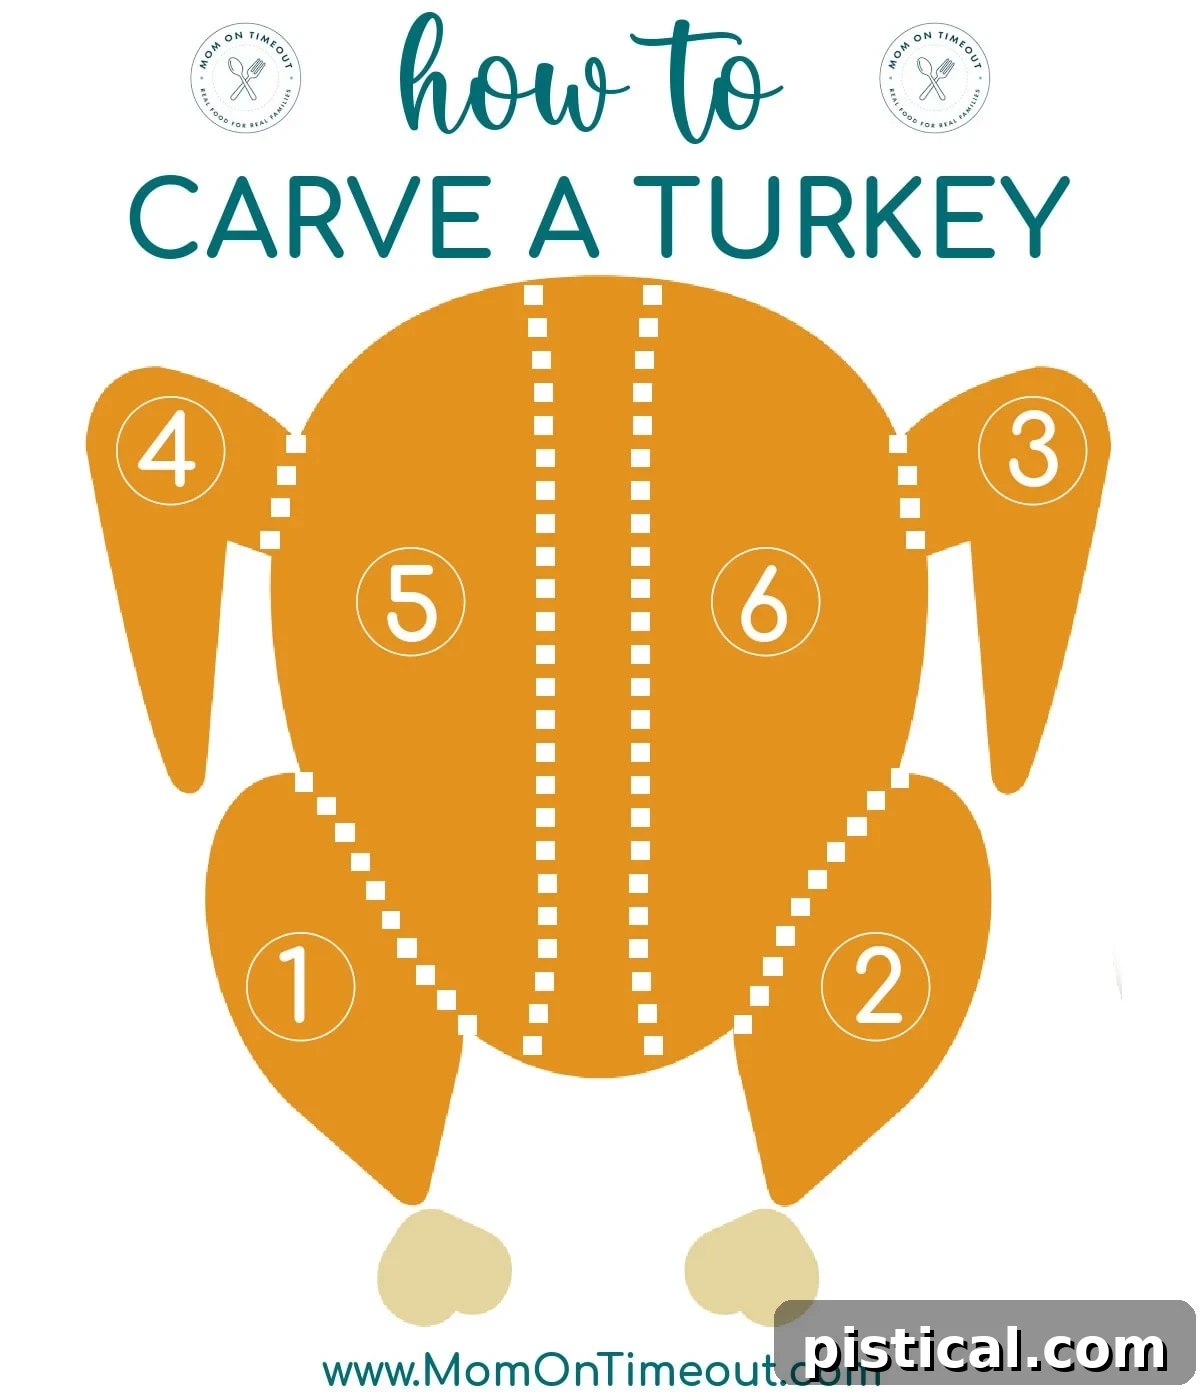
- Begin with the Drumsticks: Surprisingly, the legs can be the trickiest part to remove cleanly. I find it easiest to tackle them first while the bird is still whole and stable on the cutting board. Locate where the leg joins the body, cut through the skin, and then firmly press the leg down towards the cutting board until you feel and hear the joint pop. Once the joint is exposed, cut *through* the joint (not the bone) to separate the leg from the body. You can then separate the drumstick from the thigh, if desired, by locating that joint.
- Remove the Wings: The wings detach in a similar fashion to the legs. Gently pull or press the wing away from the turkey’s body until you can clearly see the joint. Carefully cut through the joint to remove the entire wing.
- Carve the Breast Last: Now for the prized breast meat. Locate the breastbone (keel bone) in the center of the turkey. Using a long, sharp knife, make a cut parallel to the breastbone, running the knife along the rib cage to remove each breast half from the turkey. Once removed, I prefer to slice each breast into smaller, even pieces for easier serving. For maximum juiciness and optimal texture, always remember to slice the breast meat against the grain.
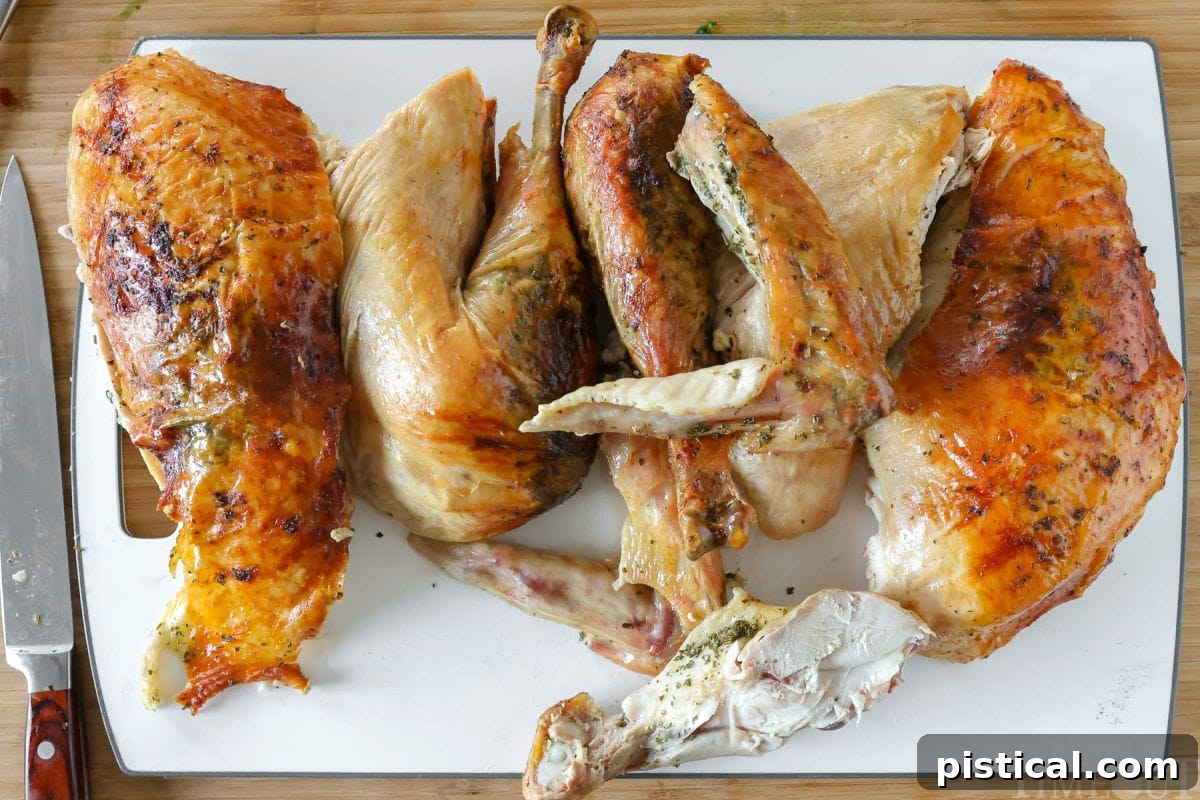
Presenting Your Thanksgiving Turkey
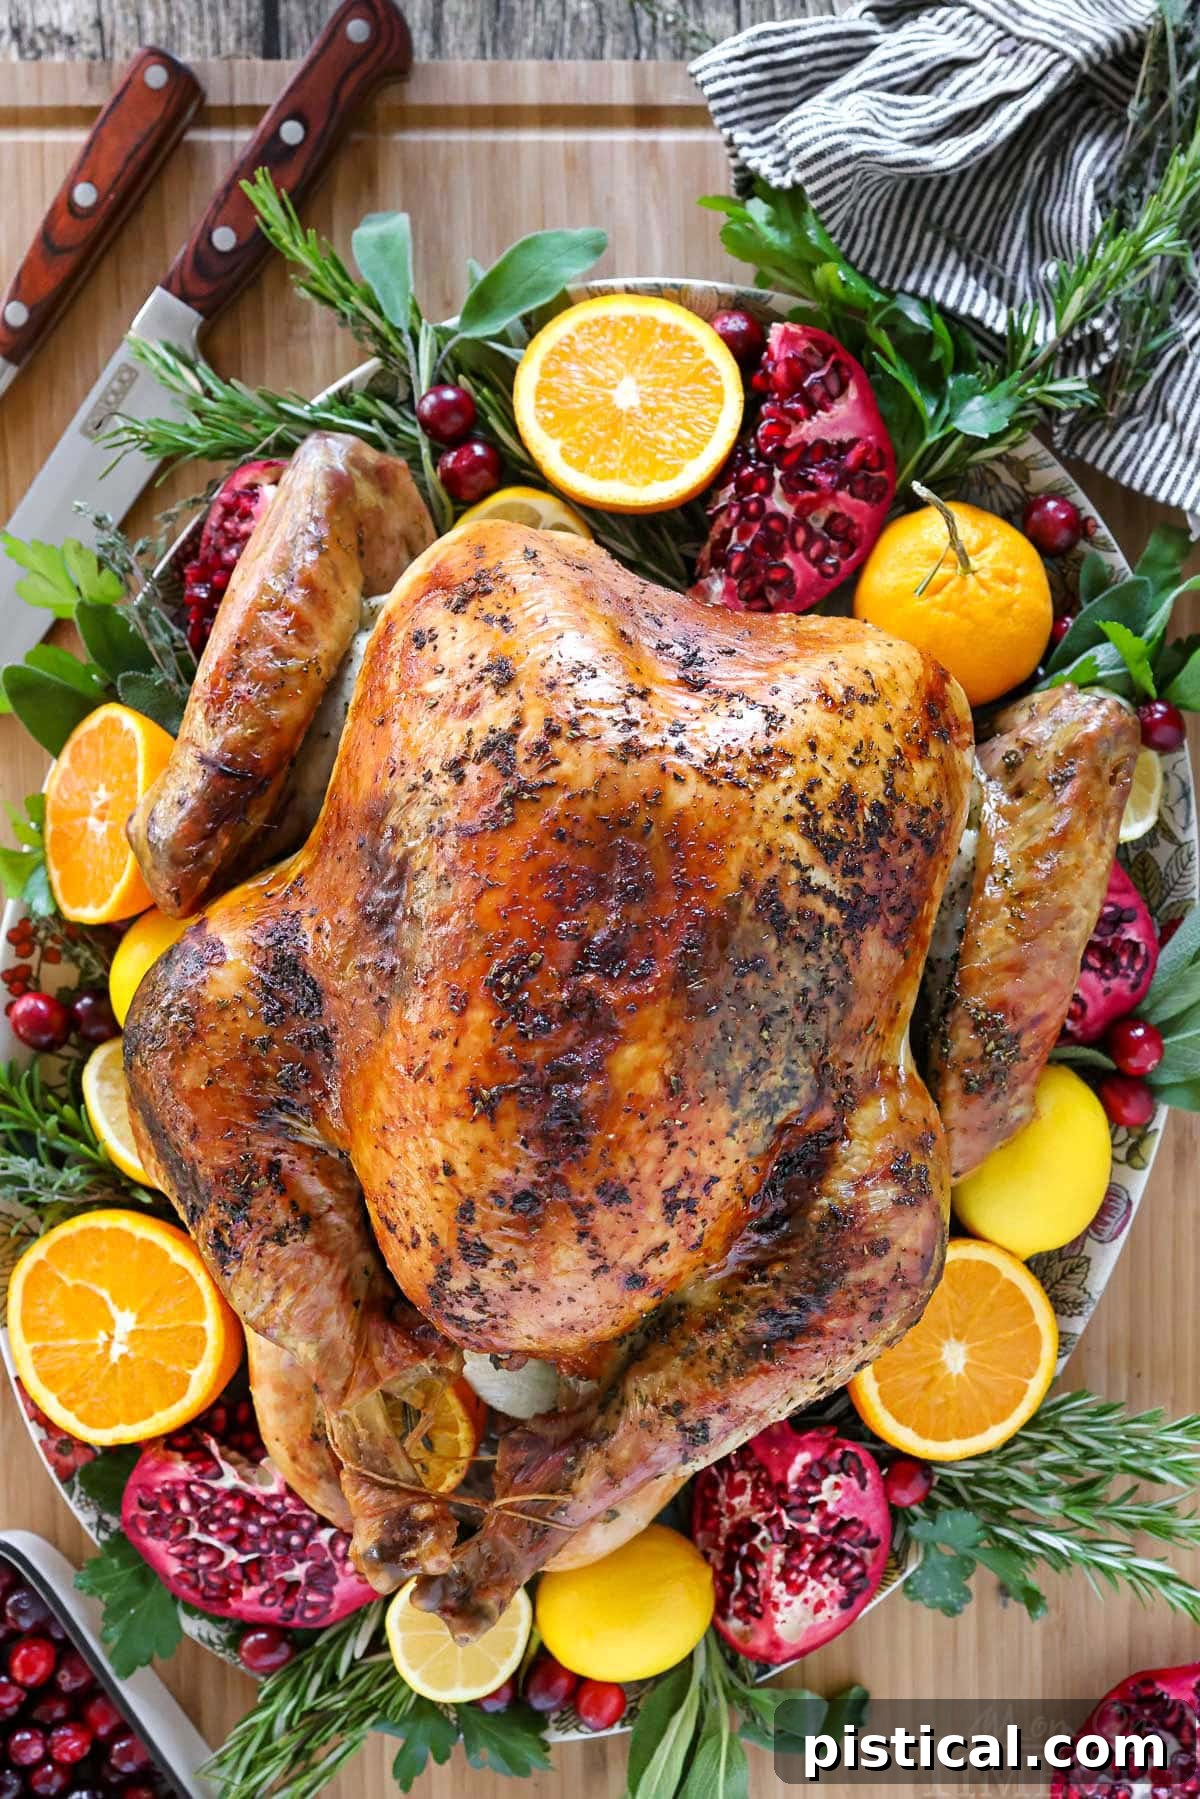
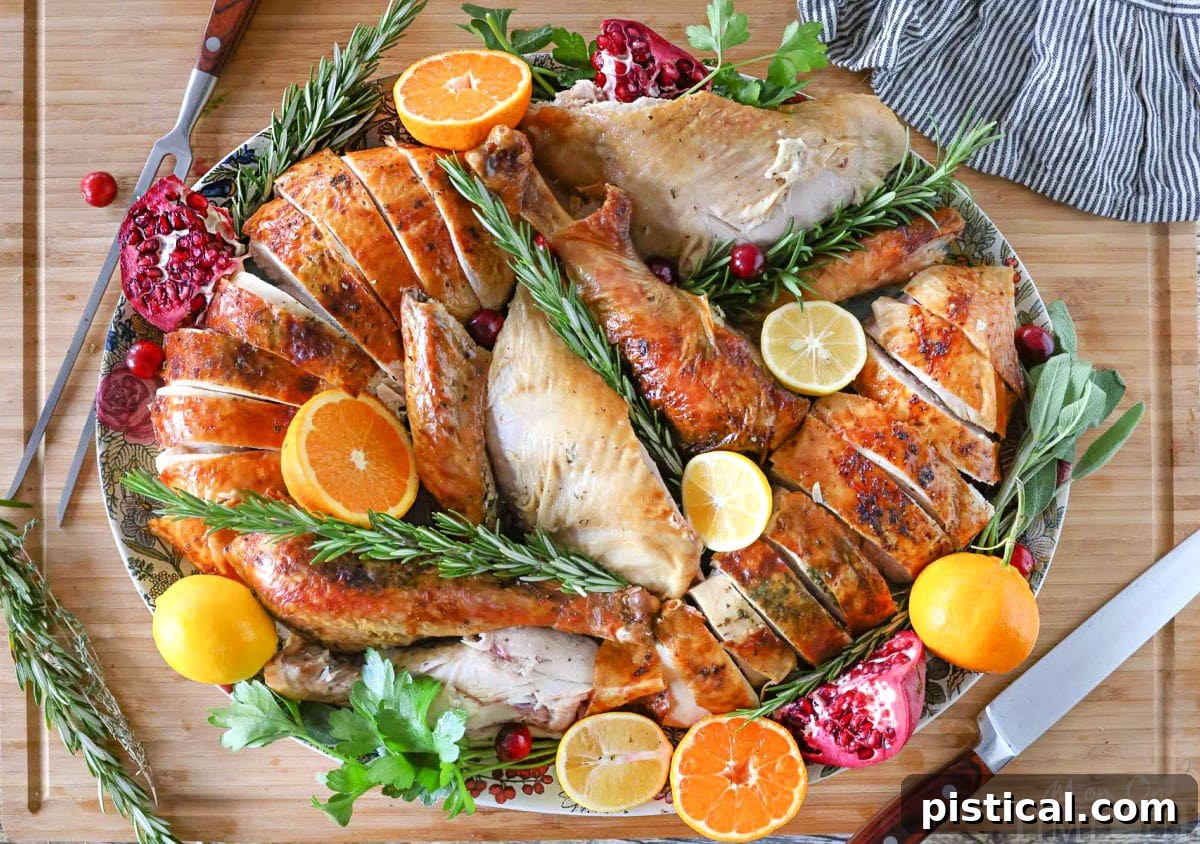
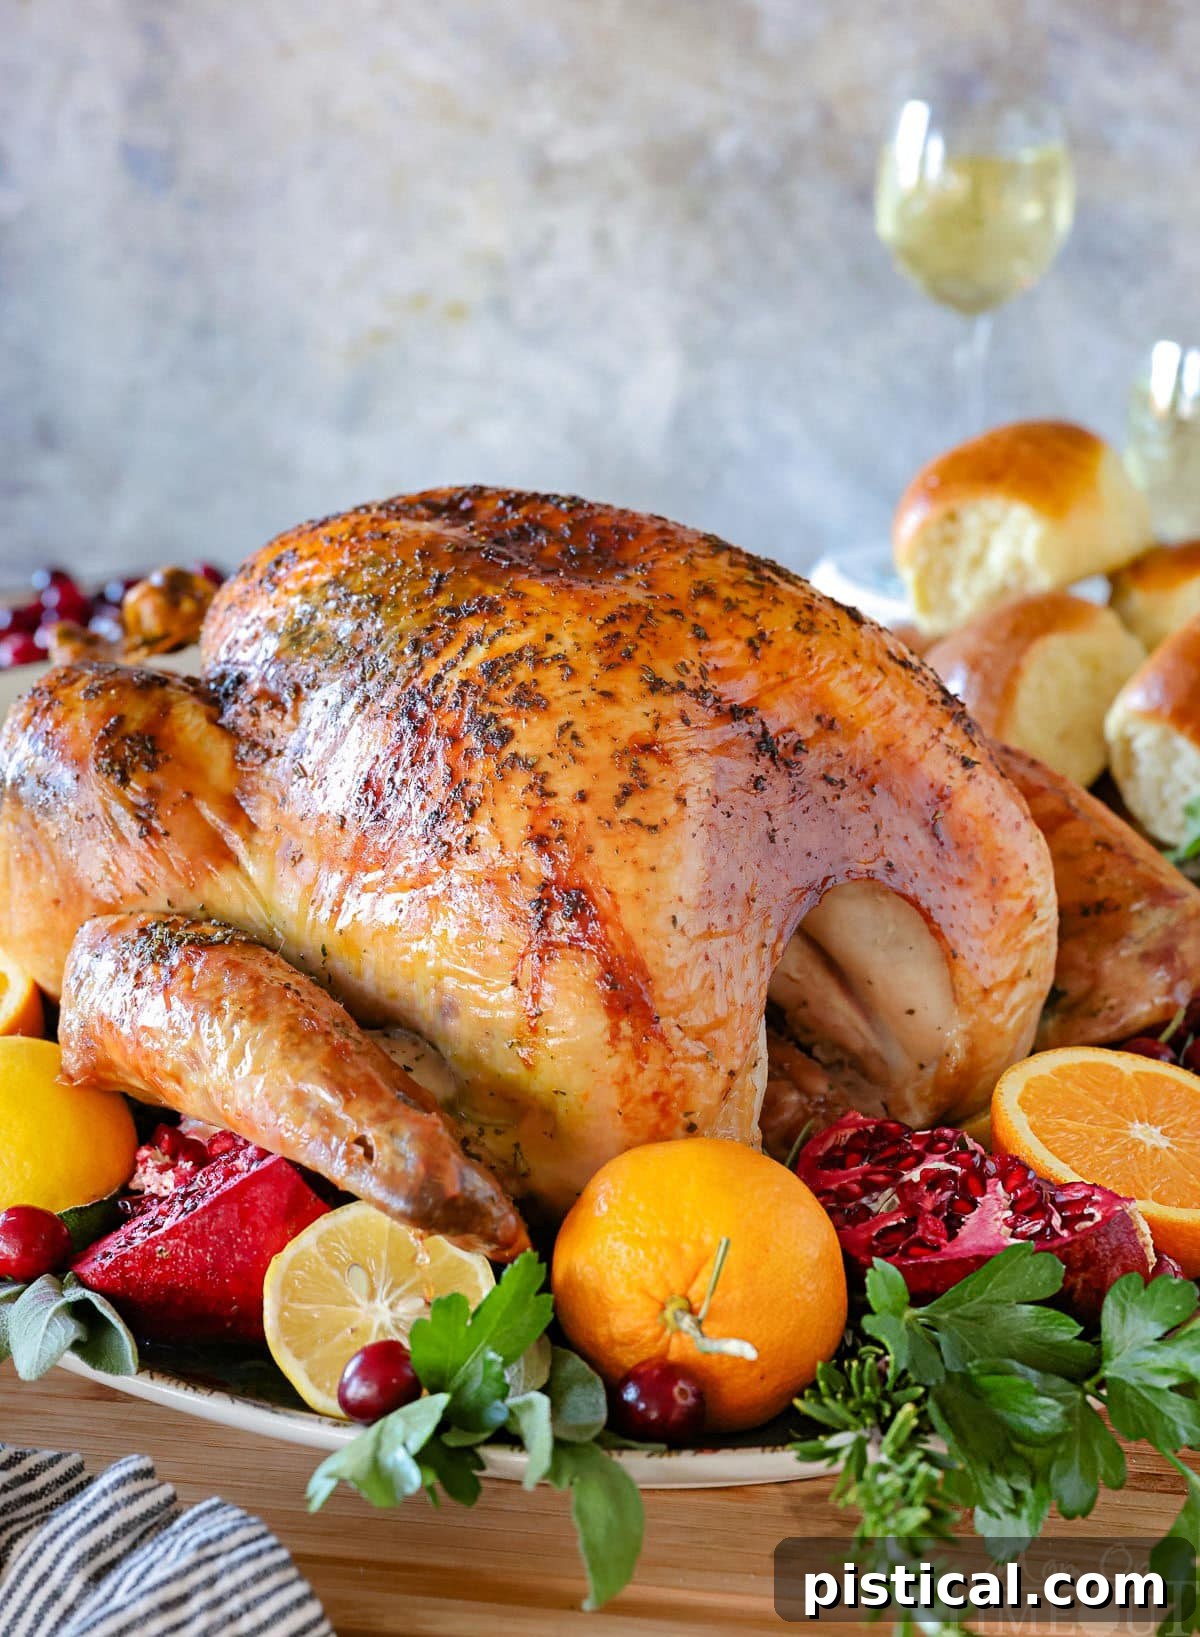
Once your turkey is expertly carved, artfully arrange all the pieces on a large, impressive serving platter. Elevate its presentation by garnishing with fresh herbs like rosemary and thyme, vibrant citrus slices (oranges, lemons), glistening pomegranates, or bright cranberries. This adds a beautiful festive touch that enhances the visual appeal of your magnificent feast. Now, it’s time to enjoy the fruits of your labor!
Storage and Leftover Brilliance
Turkey leftovers are truly a gift that keeps on giving, offering endless possibilities for delicious repurposed meals! Knowing how to properly store your turkey ensures you can enjoy its deliciousness later in recipes like my comforting Turkey Pot Pie.
- Refrigerator Storage: After your turkey has fully cooled to room temperature, carve the meat off the bone and store it in an airtight container. Alternatively, wrap individual portions tightly in plastic wrap or aluminum foil. Properly stored, leftover cooked turkey will remain fresh and safe to eat in the refrigerator for 3 to 4 days.
- Freezer Storage: For extended preservation, freeze your cooked turkey meat in freezer-safe bags or rigid containers. To prevent freezer burn, ensure you remove as much air as possible from bags before sealing. Leftover turkey can be safely frozen for up to 4 months. For convenience, it’s a good idea to portion the turkey into smaller, meal-sized servings before freezing. When ready to use, simply thaw the frozen turkey overnight in the refrigerator.
Understanding Turkey Thawing Times
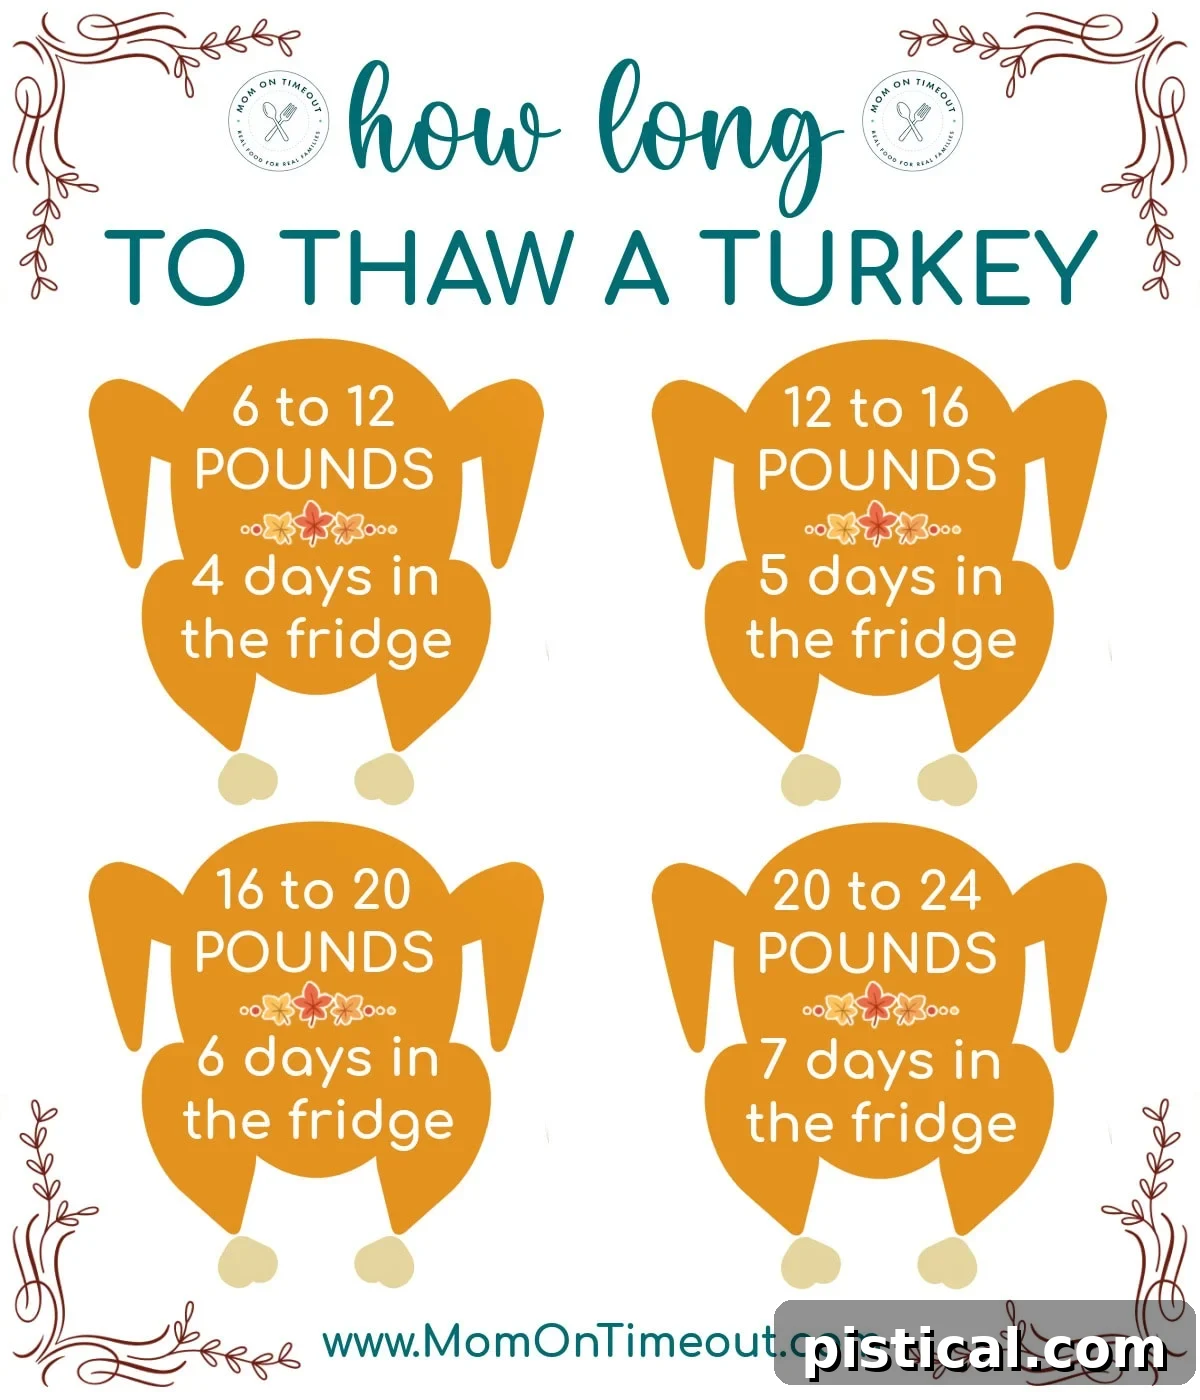
While finding a fresh turkey at your local store is ideal, most turkeys are sold frozen due to ease of shipping and storage. It is absolutely critical to allocate ample time for your frozen turkey to thaw safely in the refrigerator. Rushing this process can compromise both safety and quality.
The generally accepted rule of thumb is to allow 1 day of thawing time for every 5 pounds of turkey. However, from experience, I’ve found this isn’t quite enough to guarantee a fully thawed bird. I recommend a slightly more generous approach: allow 1 full day for every 4 pounds of turkey, plus an additional buffer day. Factors such as varying refrigerator temperatures, or turkeys stored in external fridges (which often run colder), can influence thawing speed. Refer to the chart below to accurately plan your thawing schedule and avoid any last-minute stress!
Exciting Variations to Elevate Your Turkey
While our classic herb butter recipe is sensational on its own, don’t hesitate to experiment with these creative variations to tailor your turkey to your unique taste preferences:
- Citrus Boost: For an even brighter, more zesty flavor, add extra lemon and orange zest directly into the herb compound butter mixture. Further enhance this by stuffing the turkey cavity with additional citrus halves or quarters and extra sprigs of fresh herbs like thyme and rosemary.
- Garlic Lover’s Dream: Incorporate roasted garlic into your compound butter for a deep, rich, and intensely savory twist. Spread this garlicky butter generously under the turkey skin to infuse the meat with a profound, aromatic flavor that beautifully complements the herbs. Alternatively, simply add a half or whole head of garlic, cut in half horizontally, to the turkey’s cavity for a subtle garlic aroma and taste.
- Sweet & Savory Glaze: During the final hour of roasting, brush the turkey with a delightful maple syrup glaze. This creates a beautiful, caramelized crust and adds a hint of sweetness that perfectly balances the savory notes of the meat.
- Spiced Delight: Swap the traditional herbs for a warming blend of paprika, cumin, coriander, and a touch of chili powder. This variation introduces a wonderful warmth and a slight smokiness to the turkey, perfect for those who enjoy a little extra kick.
- Bacon-Wrapped Bliss: For an extra layer of flavor and moisture, drape strips of high-quality bacon over the turkey breast before roasting. As the bacon cooks, its fat renders, basting the meat and keeping it incredibly moist, while also adding a wonderfully crispy, savory finish.
- Apple Cider Brine (Advanced): For those willing to put in a little extra effort, consider brining the turkey overnight in a solution of apple cider infused with warming spices like cinnamon sticks and whole cloves. This brine deeply moisturizes the meat and adds a subtle, fragrant sweetness, ensuring an exceptionally juicy and flavorful turkey.
Frequently Asked Questions About Roasting Turkey
Do I need to baste the turkey?
Basting is entirely optional, but it can contribute to a more moist turkey and help achieve that desirable golden-brown skin. If you choose to baste, do so once every hour using the flavorful pan juices or extra chicken/turkey stock. Be efficient when opening the oven door to minimize heat loss and maintain a consistent cooking temperature.
What if my turkey skin is browning too fast?
If you notice the turkey skin is reaching your desired golden-brown color before the internal temperature indicates it’s fully cooked, simply tent the turkey loosely with aluminum foil. This will shield the skin from direct heat, preventing it from burning while allowing the turkey to continue cooking through to the correct internal temperature.
Can I prep the turkey the night before?
Absolutely, and it’s a fantastic time-saver! You can season the turkey and apply the compound herb butter under and over the skin the night before your big cooking day. After preparing, cover the turkey tightly and refrigerate. On Thanksgiving morning, remove the turkey from the fridge about an hour before roasting to allow it to come closer to room temperature, ensuring more even cooking.
Do I have to add chicken stock and apple cider to the roasting pan?
While you don’t *have* to, I highly recommend it, and here’s why: The stock and apple cider serve several crucial purposes. Firstly, they prevent any aromatics or drippings in the roasting pan from burning, creating a much better foundation for gravy. Secondly, the liquid contributes to a more moist cooking environment, subtly aiding in the turkey’s juiciness. Lastly, they release wonderful aromatics and infuse the pan drippings with additional flavor. It’s truly a win-win. If apple cider isn’t available, simply use extra chicken stock, turkey stock, or even plain broth.
How much turkey should I plan per person?
A good rule of thumb is to plan for 1.5 pounds of uncooked turkey per person. This allows for generous servings and typically leaves enough for delicious leftovers. You can scale this amount up or down based on your guest list, considering the proportion of adults to children, and whether you specifically desire plenty of leftovers for post-holiday meals.
Can I use dried herbs instead of fresh herbs in this recipe?
While fresh herbs undeniably provide the most vibrant and aromatic flavor, you can certainly use dried herbs if fresh ones are unavailable. As a general conversion rule, use 1 teaspoon of dried herbs for every tablespoon of fresh herbs specified in the recipe. Remember that dried herbs are more concentrated in flavor.
I don’t have a roasting pan, what else can I use?
No roasting pan? No problem! You can use a large, deep oven-safe dish that is spacious enough to comfortably accommodate your turkey. Alternatively, many stores offer inexpensive disposable aluminum roasting pans, which are a convenient option for holiday cooking and easy cleanup. To ensure air circulation and prevent the turkey from sitting directly on the bottom, you can create a makeshift rack by layering thick slices of carrots, celery, and onions on the bottom of your pan.
Why do my turkeys always turn out dry?
The most common culprit for dry turkey is overcooking. The absolute best way to ensure a perfectly juicy turkey every time is to use a reliable meat thermometer. It is critical to cook the turkey precisely to the correct internal temperature, and a good meat thermometer will be your most valuable tool. I highly recommend a thermometer with a probe that can remain inserted in the turkey while it roasts. This allows you to monitor the temperature without repeatedly opening the oven, ensuring you pull the turkey out at the exact moment it’s ready, guaranteeing a moist and tender result.
Trish’s Essential Turkey Tips for Success
Beyond the recipe, these tried-and-true tips from my kitchen will help you achieve turkey perfection:
- Achieve Crispy Skin: It is paramount to pat the turkey very, very dry with paper towels before you apply any butter or seasonings. Removing all excess moisture from the skin is the secret to achieving that beautifully golden and irresistibly crispy texture in the oven. It also helps the compound butter spread more easily and adhere better.
- The Power of Resting: After roasting, resist the urge to carve immediately. Allow the turkey to rest undisturbed for 20–30 minutes (covered loosely with foil). This crucial step permits the meat fibers to relax and reabsorb all the flavorful juices, resulting in a significantly more tender and juicy turkey when sliced.
- Don’t Waste the Drippings: The flavorful juices collected in the roasting pan are liquid gold! Be sure to save these precious drippings to make the most incredibly rich and delicious turkey gravy. You can also freeze them for later use to add incredible depth of flavor to soups, stews, or casseroles throughout the year.
- Even Cooking for All Ovens: If you know your oven tends to have hot spots or cooks unevenly, make it a point to rotate the turkey once or twice during the roasting process. This simple action helps ensure consistent browning and even cooking across the entire bird.
Perfect Pairing: Our Favorite Serving Suggestions
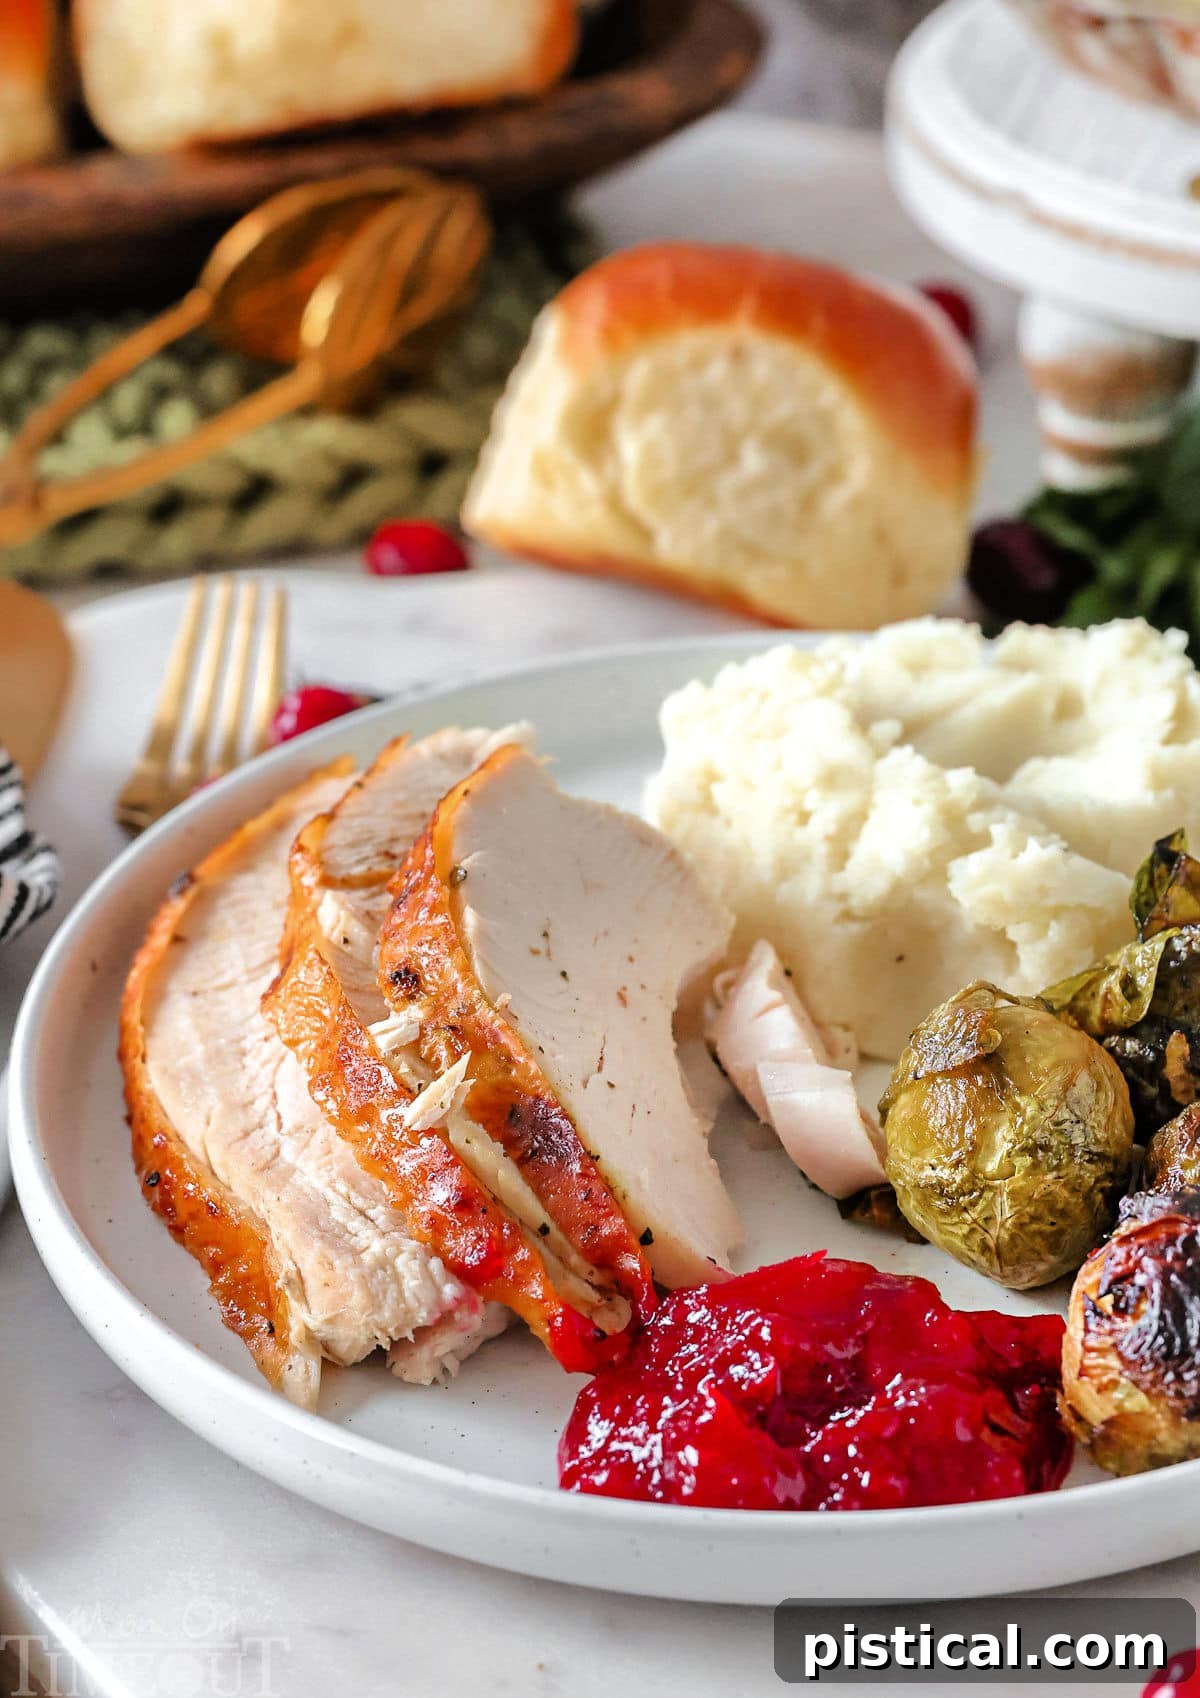
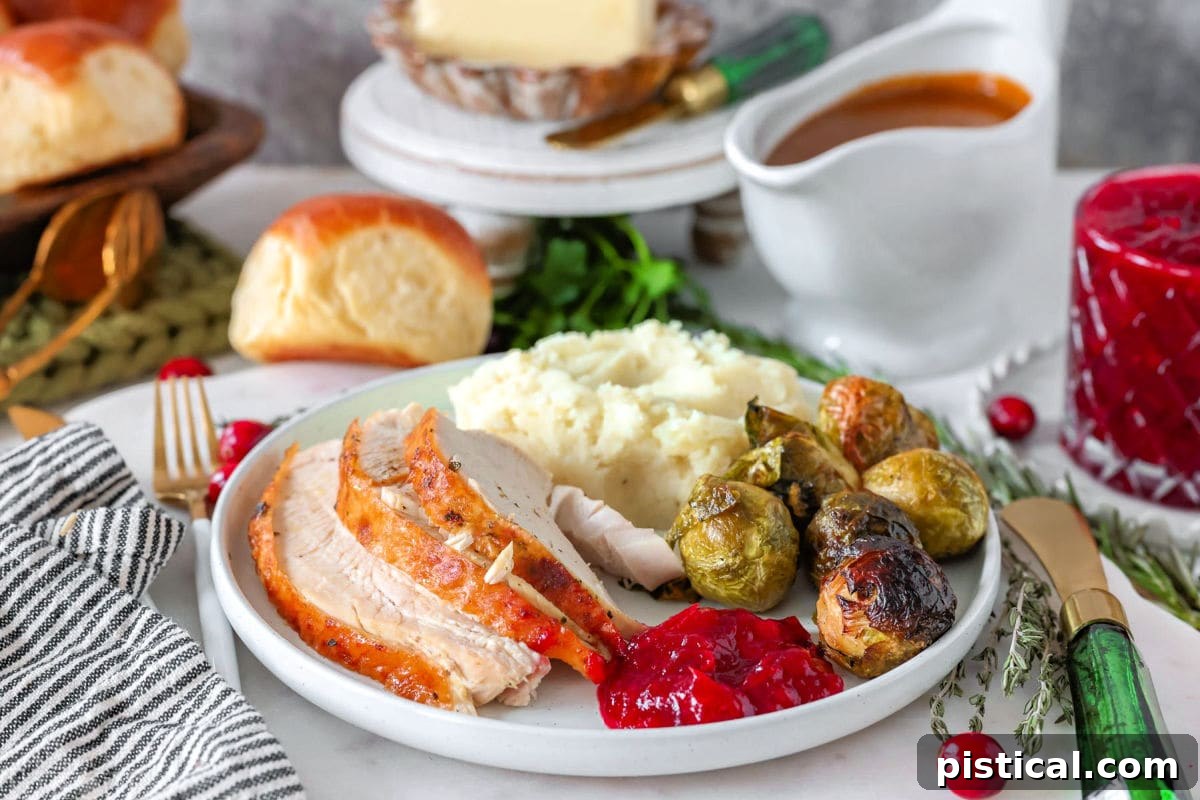
Now that your magnificent turkey is roasting to perfection, it’s time to finalize the rest of your holiday spread. A truly spectacular holiday feast wouldn’t be complete without these essential and beloved side dishes:
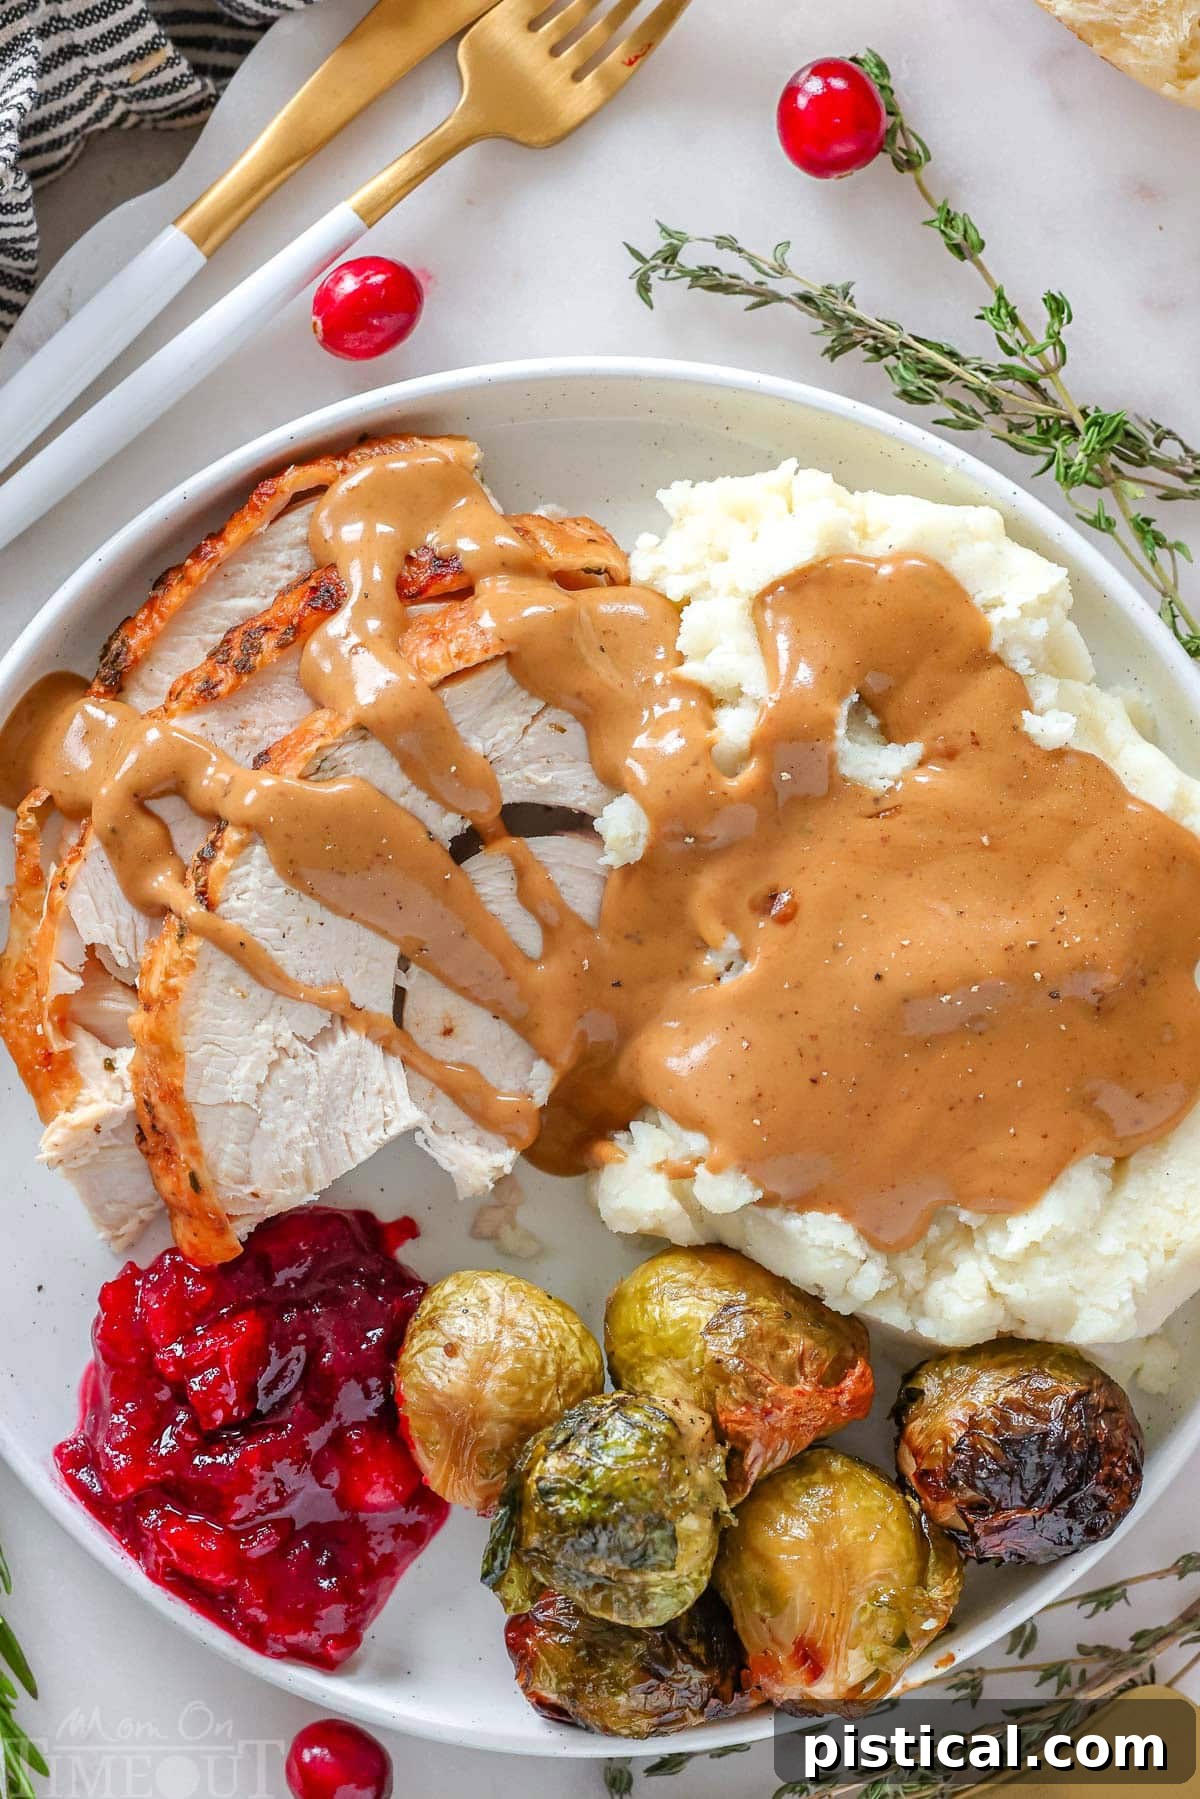
- Creamy Mashed Potatoes: Fluffy, buttery, and utterly irresistible—the perfect canvas for gravy.
- Sweet Candied Yams: Tender sweet potatoes glazed to perfection, a classic holiday staple.
- Homemade Baked Mac and Cheese: Rich, gooey, and comforting—a guaranteed crowd-pleaser for all ages.
- Decadent Sweet Potato Casserole: Often topped with a crunchy pecan or marshmallow crust, it’s a sweet indulgence.
- Fluffy Dinner Rolls: Essential for soaking up gravy and savoring every bite of your meal.
- Rich Turkey Gravy: Made from the pan drippings, it’s the savory elixir that ties the entire meal together.
- Classic Green Bean Casserole: Creamy green beans topped with crispy fried onions, a traditional favorite.
- Homemade Cranberry Sauce: Tart and sweet, offering a bright contrast to the rich holiday flavors.
Best Thanksgiving Turkey Recipe
Truly the best Thanksgiving Turkey Recipe with juicy, flavorful, tender meat and crispy golden skin – this fool-proof turkey recipe will have your guests coming back for seconds! A complete step-by-step guide on how to cook a turkey so it’s the centerpiece your holiday table deserves!
Equipment
- Thermometer with Probe
- Butchers Twine
- Carving Knife
- Turkey Platter
Ingredients
- 1 (14 to 20 pound) turkey (thawed)
Herb Butter
- 10 tablespoons unsalted butter (softened)
- 1½ tablespoons fresh parsley (finely chopped)
- 1 tablespoon fresh rosemary (finely chopped)
- 1 tablespoon fresh thyme (finely chopped)
- ½ tablespoon fresh sage (finely chopped)
- 1 teaspoon fine sea salt
- ¾ teaspoon freshly ground black pepper
Cavity and Roasting Pan
- 1 teaspoon fine sea salt
- ½ teaspoon freshly ground black pepper
- 2 large carrots (cut into 1 to 2 inch pieces)
- 1 stalks celery (cut into 1 to 2 inch pieces)
- 1 large onions (quartered)
- 2 bay leaves
- 2 sprigs fresh thyme
- 2 sprigs fresh rosemary
- 2 sprigs fresh sage
- 4 sprigs fresh parsley
- 1 orange (quartered)
- 1 lemon (halved or quartered)
- 1 cup low sodium chicken stock (or broth)
- ½ cup apple cider
Instructions
Prep Turkey
- Remove the thawed turkey from the refrigerator one hour before roasting. (If you bought a frozen turkey, thaw in the refrigerator, allowing 24 hours for every 4 to 5 pounds of turkey.)
- Remove the turkey from its packaging. Check the cavity of the turkey and remove the giblets, neck – really anything that is in there. Also remove any thermometers, plastic pieces, etc. Feel free to save the neck and/or giblets for stock and gravy or go ahead and discard if you want. Let the turkey come to room temperature while you prepare the herb butter.
Preheat Oven
- Adjust the rack in your oven so the turkey sits in the lower third to half of the oven, depending on the size. Preheat the oven to 325°F.
Prepare Herb Butter
- Combine the butter, parsley, rosemary, thyme, sage, salt and pepper in a small bowl or food processor and stir or process until combined. Set aside.
Stuff Cavity
- Using paper towels, pat the turkey very dry, making sure to get around the wings and legs. The turkey needs to be dry so the butter can spread easily on the skin. Season the cavity with salt and pepper.
- Loosely stuff the cavity with carrots, celery, onion quarters, fresh herbs, bay leaves orange and lemon quarters adding just as much as will comfortably fit. You will have leftovers.
Apply Herb Butter
- Working from the neck, lift the skin from the breasts and thighs, releasing the membrane that connects the skin. Stuff a few tablespoons of the compound butter under the skin on top of each breast. Use your fingers to smooth it out from the the top. Now add some of the butter mixture under the thigh and leg skin and anywhere else you can reach.
- Slather the remaining butter mixture all over the turkey.
- Loosely tie the legs together with butchers twine and tuck the wing tips under the body of the turkey and transfer to the rack of your roasting pan (if using).
- Add chicken stock (or water) and apple cider to the roasting pan (this will keep anything from burning as well as aid in keeping the turkey moist and flavorful).
- Place the turkey in the preheated oven and roast the turkey until a thermometer inserted at least two inches in between the thigh and the breast reads 160°F (this takes approximately 12 to 15 minutes per pound). If you want to baste the turkey, you can baste once an hour with turkey stock, chicken stock or with the pan juices. (Be quick about it, as we don’t want the oven temperature to reduce unnecessarily.)
- Check on the turkey occasionally to ensure the skin isn’t getting too dark. If it is, simply tent with foil to stop the browning. I usually tent with foil about 90 minutes in.
- Remove the turkey from the oven, transfer to a baking sheet and tent with foil (carry over cooking with cause the internal temperature to reach 165°F.) Let rest for 20 to 30 minutes (at least!) before carving. Serve immediately.
- Make sure to reserve any drippings and pan juices to make turkey gravy.
Notes
Storage Information
- Refrigerator: Once the turkey has cooled to room temperature, store it in an airtight container or tightly wrap it in plastic wrap or foil. Leftover turkey will stay fresh in the refrigerator for 3-4 days.
- Freezer: For longer storage, freeze turkey in freezer-safe bags or containers. Be sure to remove as much air as possible to prevent freezer burn. Leftover turkey can be frozen for up to 4 months. It’s a good idea to portion it out into smaller servings for easier use later. Thaw overnight in the refrigerator before using.
For additional helpful graphics, information about thawing, carving, and more, please refer to the comprehensive guide above.
Nutrition
Carbohydrates: 5g |
Protein: 88g |
Fat: 32g |
Saturated Fat: 12g |
Polyunsaturated Fat: 6g |
Monounsaturated Fat: 10g |
Trans Fat: 1g |
Cholesterol: 315mg |
Sodium: 858mg |
Potassium: 1014mg |
Fiber: 1g |
Sugar: 2g |
Vitamin A: 2655IU |
Vitamin C: 6mg |
Calcium: 67mg |
Iron: 4mg