
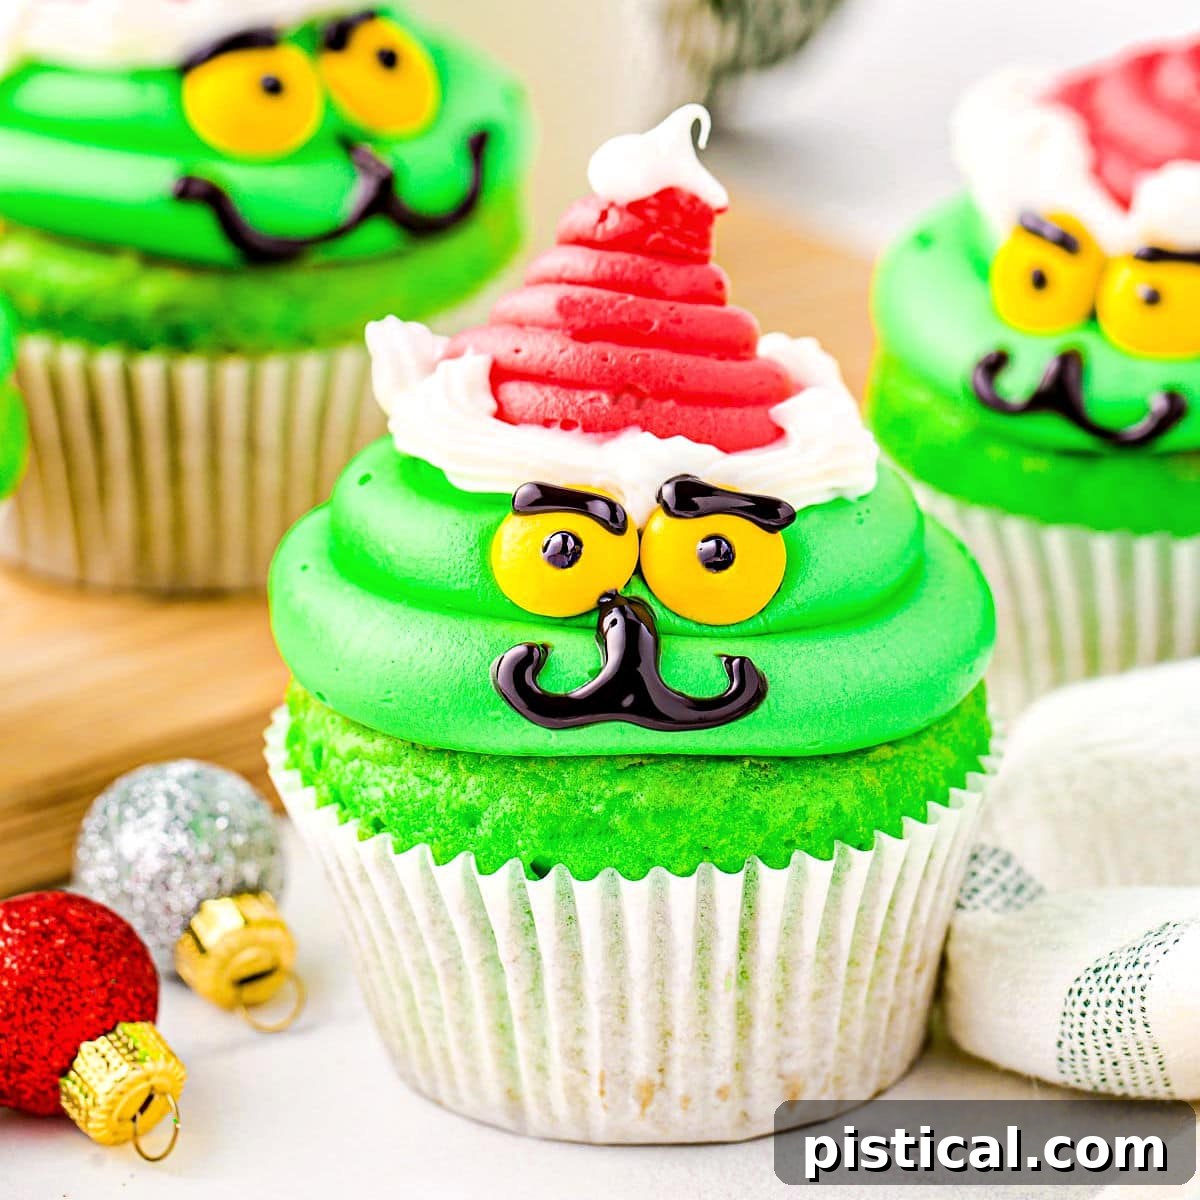
Unleash the festive spirit this holiday season with these utterly charming Grinch Cupcakes! Designed to delight both young and old, these Christmas cupcakes are more than just a treat – they’re a celebration of Whoville’s most beloved (and once grumpiest) resident. Imagine the smiles when your guests encounter these vibrant green creations, each adorned with a classic Santa hat and a mischievous Grinchy expression. This simple yet spectacularly decorated dessert is guaranteed to make hearts (and stomachs!) grow three sizes, transforming any gathering into a joyous Whobilation.
Feeling a touch of Grinchiness yourself this holiday hustle and bustle? Let these delightful cupcakes ease your mind and add a dash of cheer. Pair them with our refreshing Christmas Punch, bake a batch of adorable Grinch Cookies, or scoop up some creamy Peppermint Ice Cream for a truly magical festive spread. These easy-to-make Grinch-themed treats are your secret weapon for a stress-free and deliciously merry Christmas!
Crafting the Perfect Christmas Cupcakes
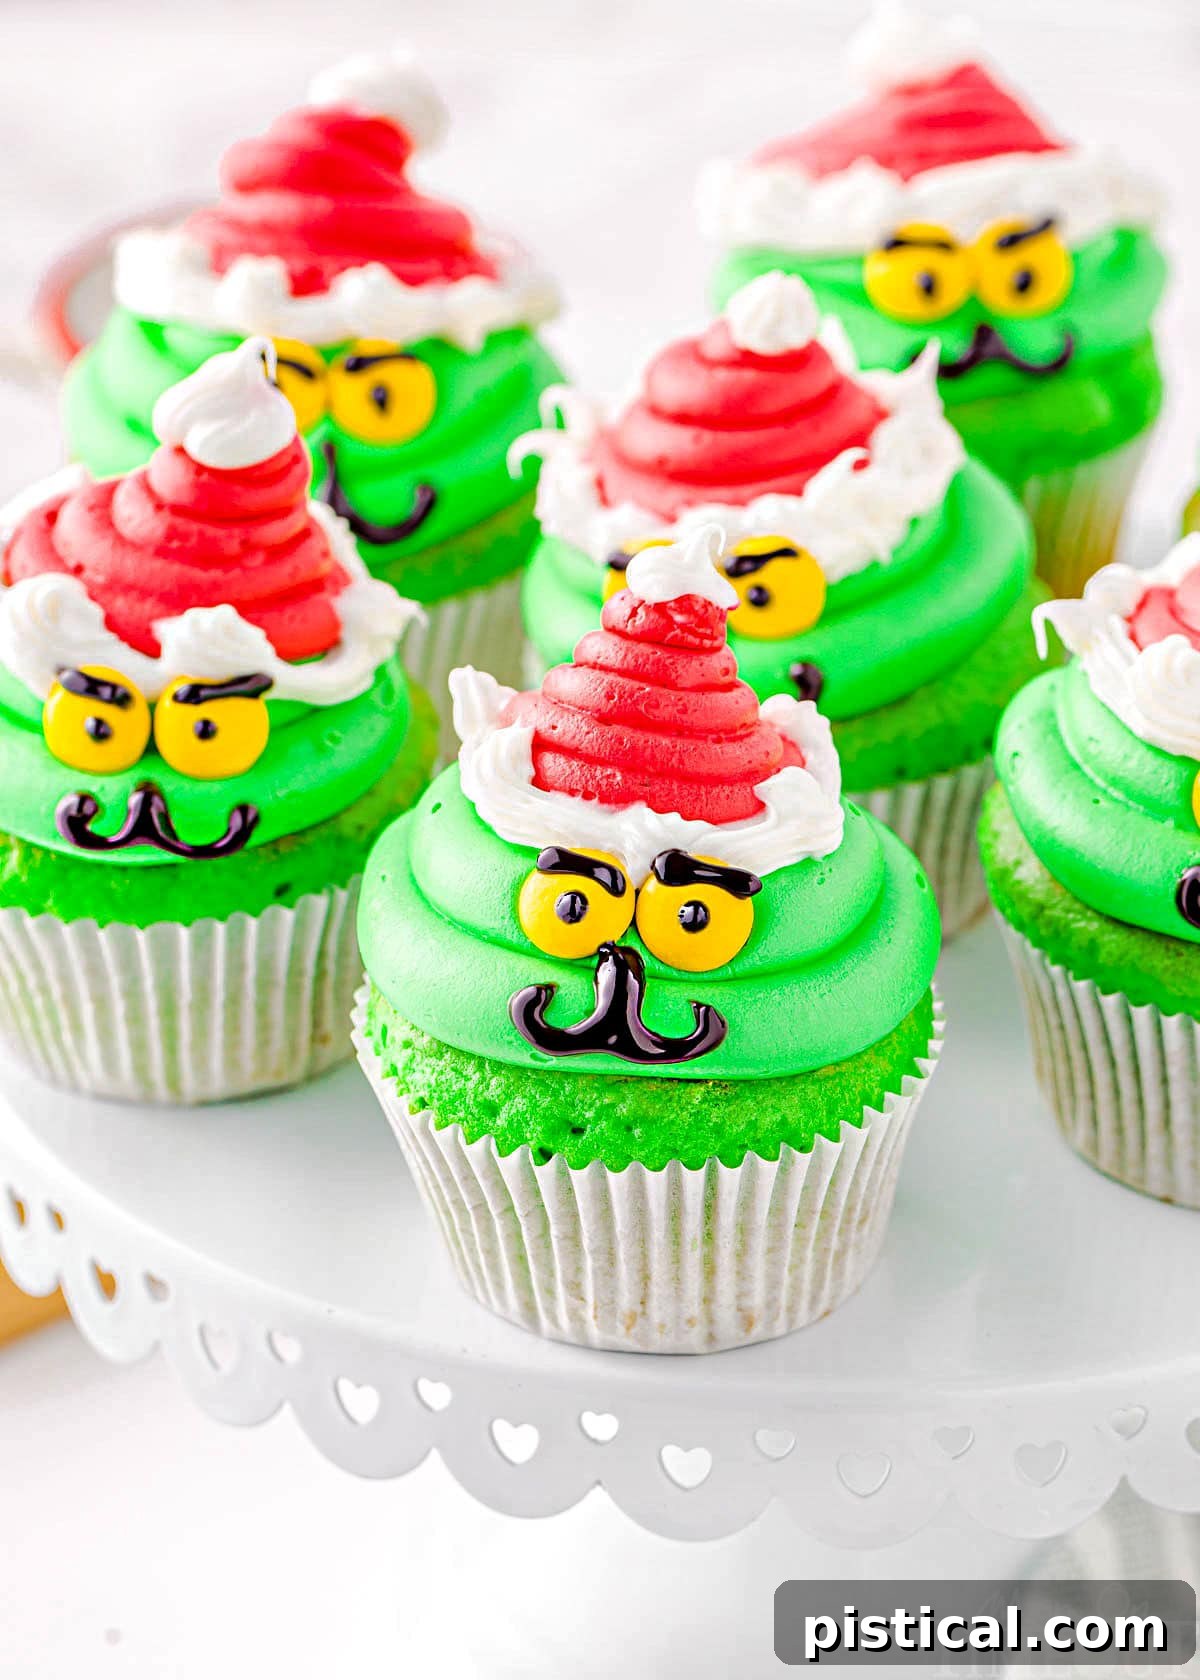
Yes, he’s a mean one, Mr. Grinch, but he certainly inspires an incredibly tasty cupcake! These Grinch Cupcakes are the epitome of festive cheer, combining delightful flavors with an eye-catching design that brings everyone’s favorite Christmas curmudgeon to life. Each vibrant green cupcake, topped with a jaunty red Santa hat, is a little edible masterpiece. They’re not just desserts; they’re conversation starters, sure to be the star of your holiday dessert table and inspire hearts to grow three sizes larger, just like the Grinch himself!
What makes these cupcakes truly special is their deceptive simplicity. You can start with your favorite boxed cake mix – no need for complicated recipes here – add a simple dash of neon green food coloring, and with some surprisingly straightforward decorating techniques, you’ll create a batch of Grinch masterpieces. Forget complex baking endeavors; these charming treats are designed to make your holiday baking fun and effortless. Whether you’re aiming to find the true meaning of Christmas or simply satisfy a collective sweet tooth, these cute cupcakes will transform any party into a truly spectacular Holiday Whobilation!
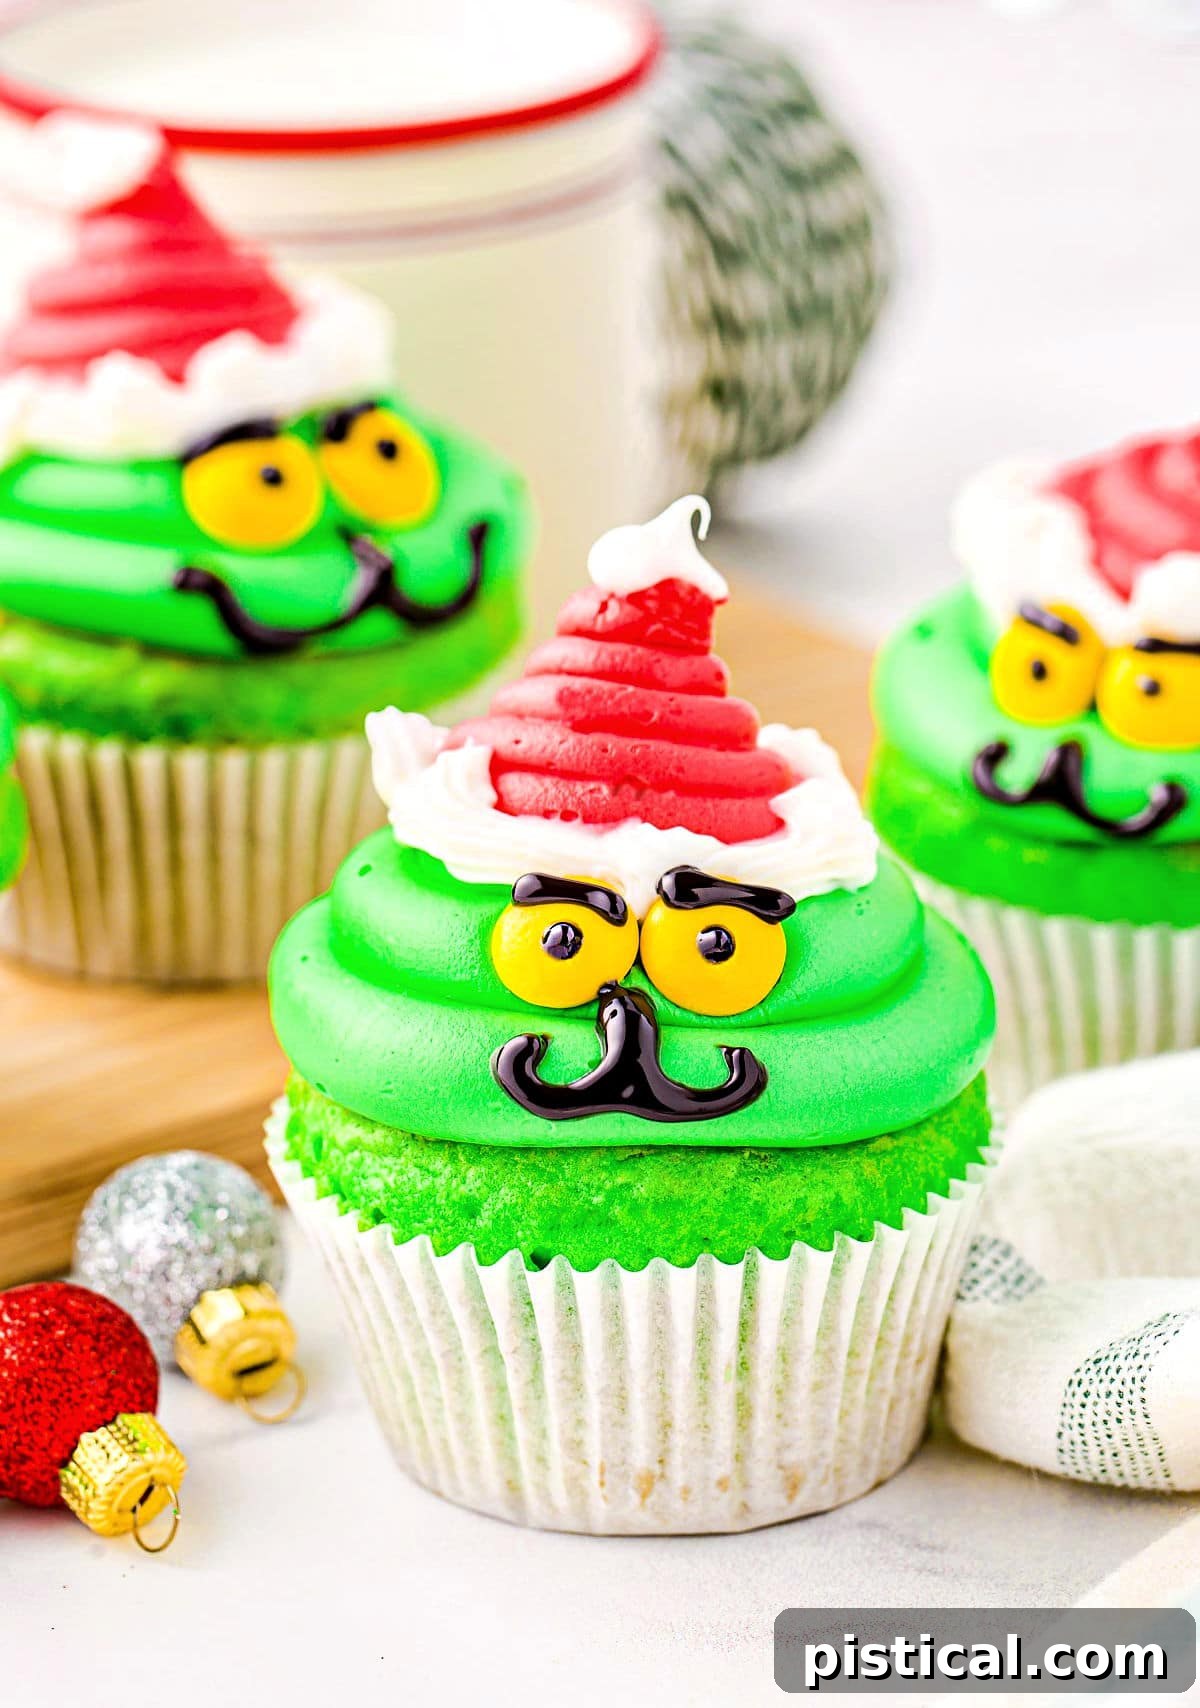
Give your Grinch Cupcakes a unique personality with a playful smirk, a joyful smile, or even a classic Grinchy frown!
Why You’ll Adore These Grinch Cupcakes
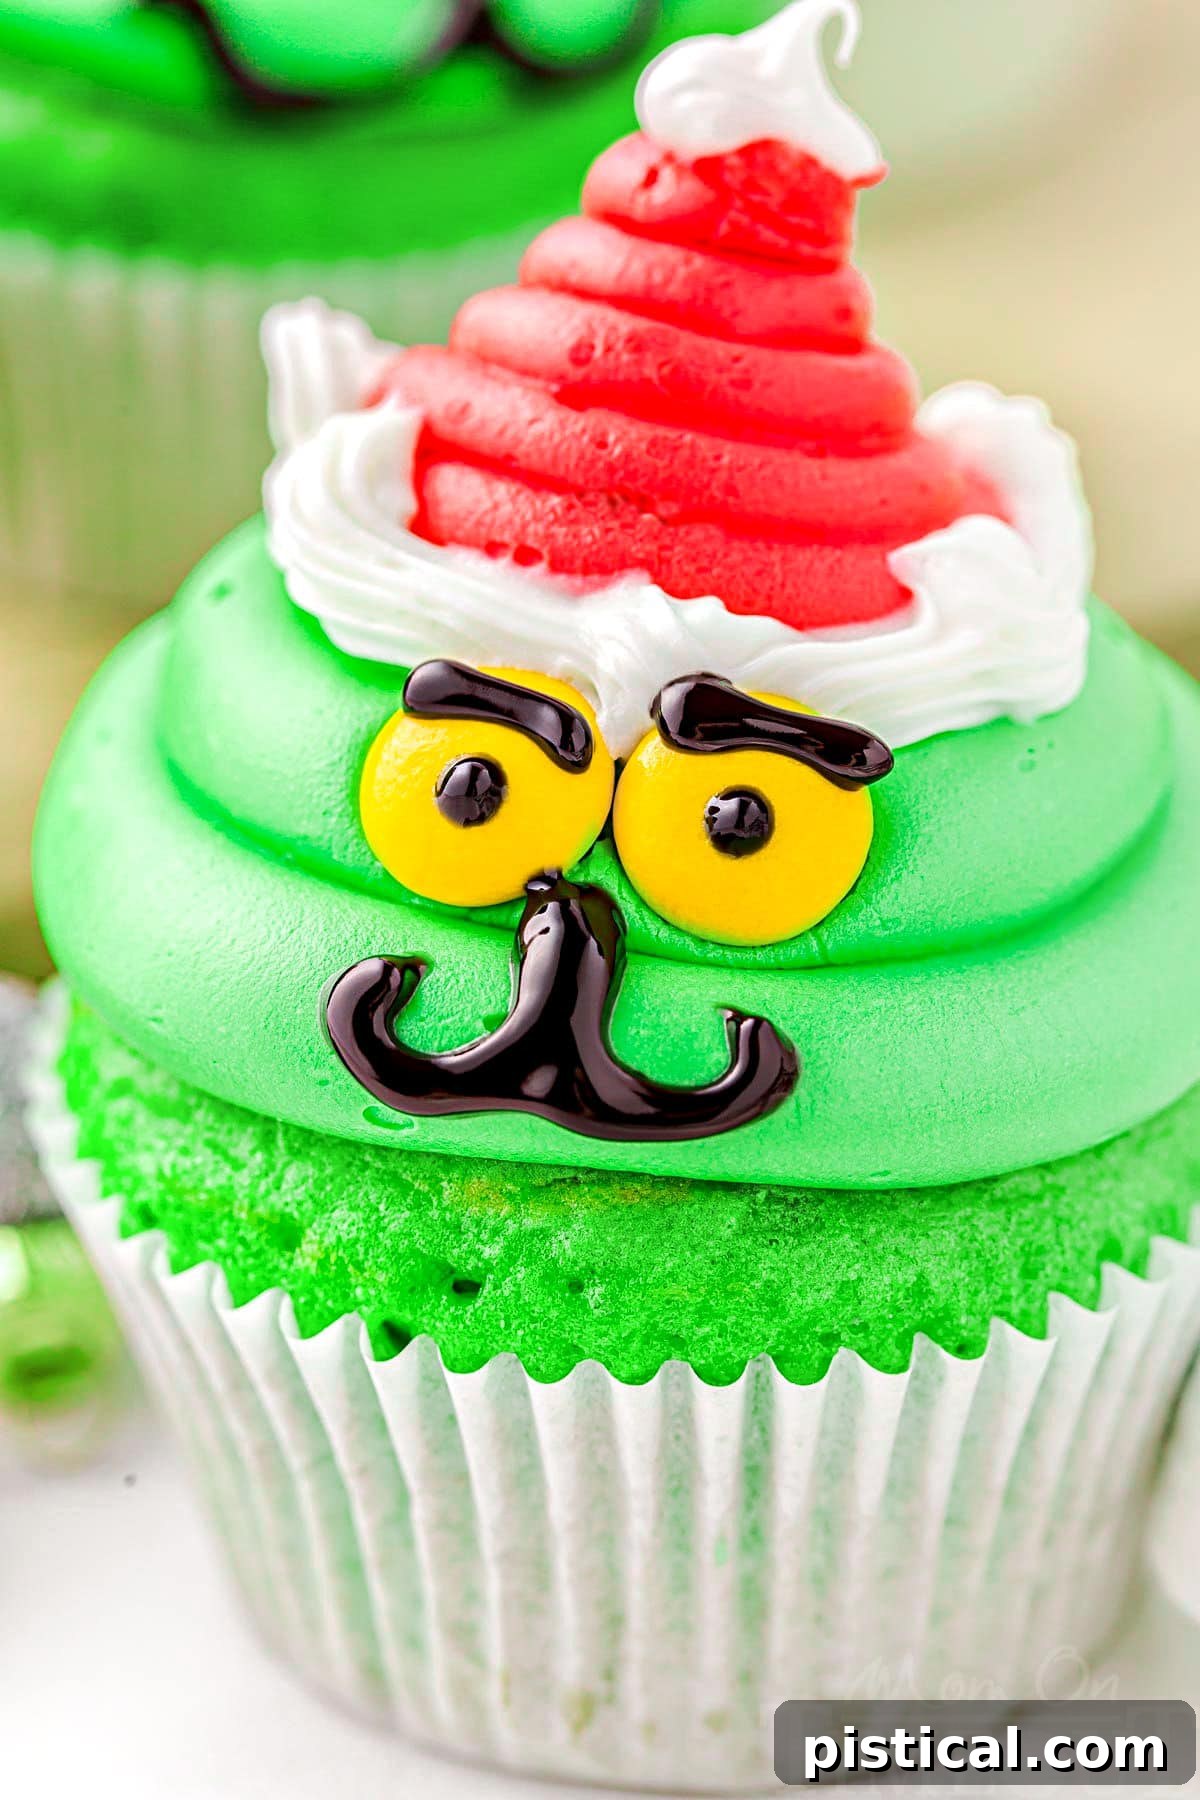
- Unforgettable Festive Appeal: These delightful cupcakes are true showstoppers among all your holiday treats. Their vibrant green hue, coupled with the iconic Grinch face and Santa hat, immediately captures attention and excites everyone, making them irresistible. They are perfect for holiday parties, school events, or simply a fun family baking project.
- Simplicity in Disguise: While they boast an intricate and impressive appearance, these Grinch cupcakes are surprisingly easy to make. The cupcake base itself is straightforward, whether you choose a convenient boxed mix or a simple homemade recipe. The decorating steps, though detailed, are designed for ease, allowing even novice bakers to create these adorable treats without feeling overwhelmed.
- Kid-Friendly Fun: Involving children in the decorating process is a joy! From adding the candy eyes to drawing the Grinch’s various expressions, kids will love bringing these characters to life. It’s a wonderful activity that creates lasting holiday memories and sparks creativity in the kitchen.
- Perfect Party Treat: Serving individual cupcakes is incredibly convenient for any gathering. They are easy to distribute, require no cutting, and offer a perfectly portioned dessert that everyone can enjoy without fuss. Their festive look also enhances any holiday spread.
More Christmas Recipes Even The Grinch Can’t Resist
Looking for more holiday delights? These recipes are so good, they might just convince the Grinch to join in the feasting!
- Christmas Bark: A delightful no-bake treat featuring layers of chocolate, peppermint, and festive sprinkles – quick, easy, and utterly addictive.
- Peanut Butter Fudge with M&Ms: Rich, creamy peanut butter fudge studded with colorful M&Ms, offering a perfect blend of sweet and nutty flavors.
- Homemade Gumdrops: Soft, chewy, and bursting with fruity flavor, these homemade gumdrops are a nostalgic holiday candy that’s surprisingly simple to make.
- Christmas Crack: A ridiculously easy and unbelievably delicious toffee treat made with saltine crackers, butter, brown sugar, and chocolate – a true crowd-pleaser.
- Reindeer Cookie Bars: Chewy cookie bars decorated with adorable reindeer faces, perfect for a festive and fun holiday dessert.
Gather Your Grinch Cupcake Essentials
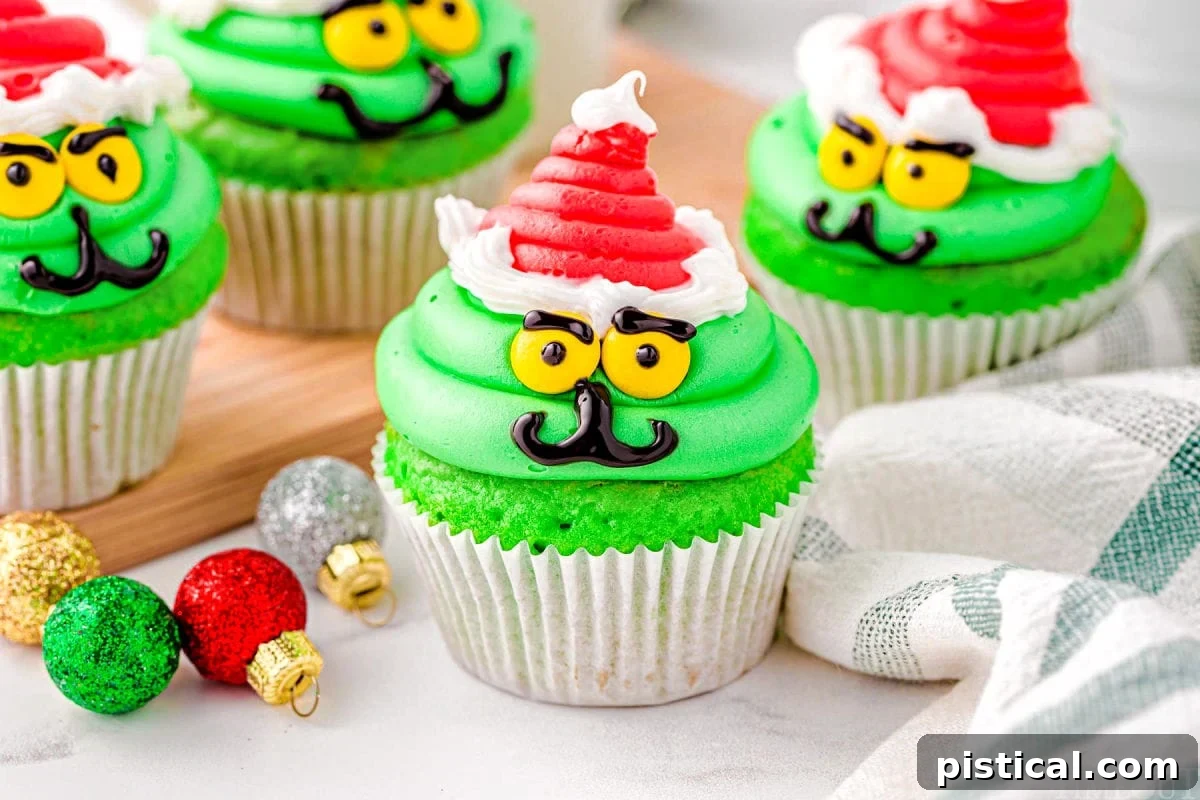
Don’t be a mean one this Christmas! Elevate your Who-liday Cheer with a vibrant tray of festive Grinch Cupcakes. As always, you’ll find the full printable recipe with comprehensive instructions in the recipe card at the end of this post. But first, let’s take a closer look at the key ingredients you’ll need to bring these delightful characters to life:
- White Cake Mix: This serves as the perfect neutral base to achieve that iconic Grinch green. While a high-quality boxed mix offers convenience and consistent results, you are certainly welcome to use your favorite homemade white cupcake recipe if you prefer a from-scratch approach. If going homemade, remember you’ll adjust for the eggs, milk, and butter specified for the boxed mix. For an extra touch, I adore using my almond cupcake recipe for its subtle nutty flavor!
- Large Eggs: You’ll need three large eggs, ideally at room temperature. Room temperature eggs emulsify better with other ingredients, resulting in a smoother batter and a more tender, even-textured cupcake.
- Whole Milk: While you can substitute with lower-fat milk or a non-dairy option, whole milk is highly recommended for its richness. It contributes to a moist, flavorful crumb and a more luxurious texture in your finished cupcakes.
- Salted Butter: Ensure your butter is completely melted before incorporating it into the batter. Salted butter adds a depth of flavor that vegetable or canola oil simply can’t match. If you must use oil, note that your cupcakes may not be quite as rich or flavorful.
- Food Coloring: Essential for that signature Grinch look! You’ll need neon green food coloring for the cupcakes and the main frosting, plus red food coloring for the Santa hats. Gel food colorings are often preferred as they provide more vibrant colors without thinning the batter or frosting significantly.
- White Frosting: Plan for at least two 16-ounce tubs of good quality white frosting. It’s always a good idea to have a little extra on hand in case you need to adjust consistency or make more. If you prefer to make your own, a classic buttercream or even a cream cheese frosting (like the one from my beloved carrot cake recipe) works beautifully. Homemade frosting offers superior flavor and can be easier to tint.
- Powdered Sugar: This is your secret weapon for achieving the perfect frosting consistency. Adding powdered sugar helps to stiffen the frosting, making it much easier to pipe intricate decorations and ensure they hold their shape without melting or drooping.
- Yellow Reese’s Pieces or M&Ms: You’ll need approximately 48 candies in total to create the Grinch’s iconic yellow eyes. Remember to place them printed side down for a smooth, consistent look. These candies add a fun pop of color and edible detail.
- Black Cookie Icing: This is crucial for adding all those expressive facial details – the eyebrows, irises, nose, and mouth. Look for it in the baking aisle of your local grocery store or easily find it online. The fine tip on these tubes allows for precise detailing.
Crafting Your Grinch Cupcakes: A Step-by-Step Guide
Baking the Grinch-Green Cupcakes
- Prepare Your Oven and Muffin Tins: Begin by preheating your oven to 350°F (175°C). This ensures your oven is at the correct temperature for even baking. Line two standard muffin tins with paper cupcake liners, ideally in green, red, or white to complement the Grinch theme. Set them aside.
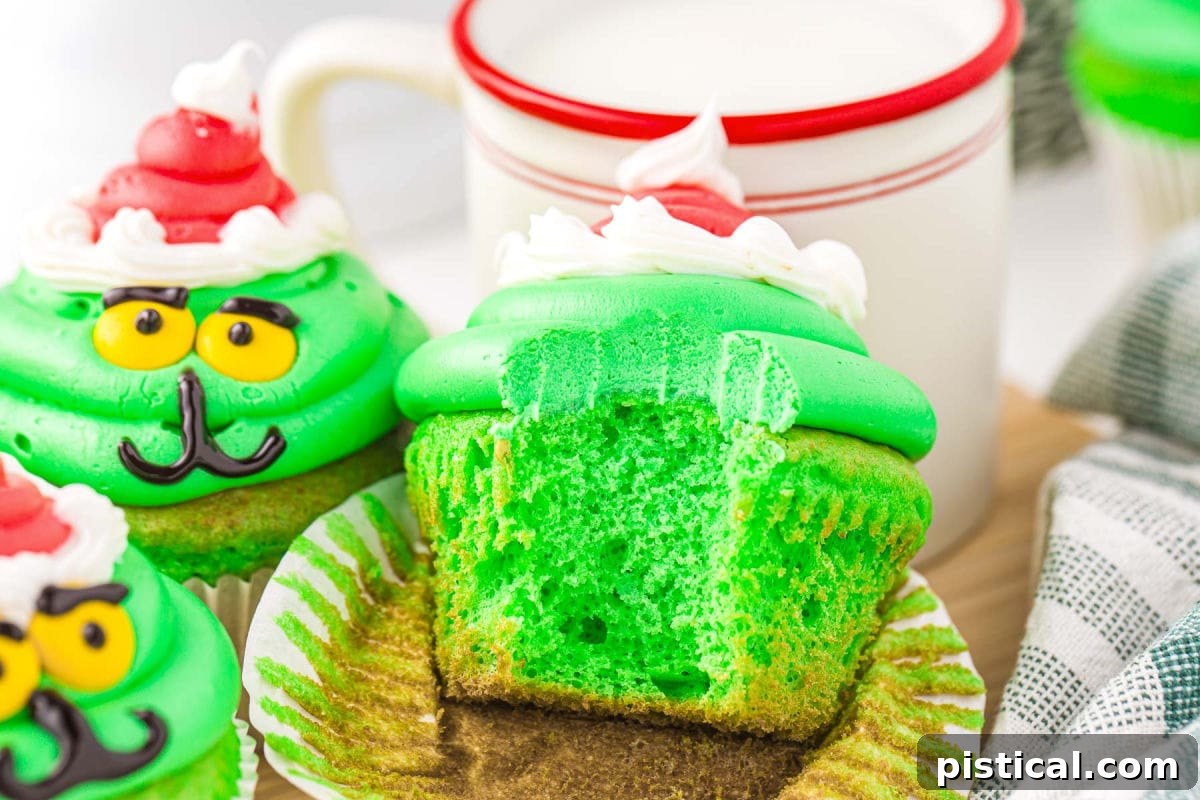
- Combine Wet and Dry Ingredients: In a large mixing bowl, combine the white cake mix, the three large room-temperature eggs, one cup of whole milk, and the eight tablespoons of completely melted salted butter. Using a hand mixer, beat these ingredients together on medium speed until they are just fully combined. Be careful not to overmix, as this can lead to tough cupcakes. About 2 to 3 minutes should suffice.
- Achieve the Perfect Grinchy Hue: Gradually add neon green food coloring, a few drops at a time, to the cupcake batter. Mix thoroughly after each addition until you reach that unmistakable, vibrant Grinch green color. Gel food coloring often provides the best results for intense color without altering batter consistency.
- Fill the Liners: Carefully pour the green batter into your prepared muffin tins, filling each liner approximately two-thirds full. This allows enough room for the cupcakes to rise without spilling over the edges, ensuring beautifully domed tops.
- Bake to Perfection: Place the muffin tins in the preheated oven and bake for 18 to 23 minutes. Baking times can vary slightly depending on your oven, so check for doneness by inserting a toothpick into the center of a cupcake; if it comes out clean, they are ready.
- Cool Completely: Once baked, remove the cupcakes from the oven and transfer them to a wire rack. It is absolutely crucial that the cupcakes cool completely before you begin frosting. Attempting to frost warm cupcakes will cause the frosting to melt and slide off, ruining your decorations.
Preparing the Festive Frosting
- Color the Grinch’s Head Frosting: In a medium bowl, combine one 16-ounce tub of white frosting with ¼ cup of powdered sugar. Add neon green food coloring, a few drops at a time, and use a hand mixer to beat the frosting until it’s thick, smooth, and perfectly matches the vibrant green of your baked cupcakes. Ensure there are no streaks of color. This powdered sugar addition is key to making the frosting stiff enough to hold its shape for piping. If the frosting feels too soft, add another tablespoon or two of powdered sugar and beat again until desired consistency is achieved.
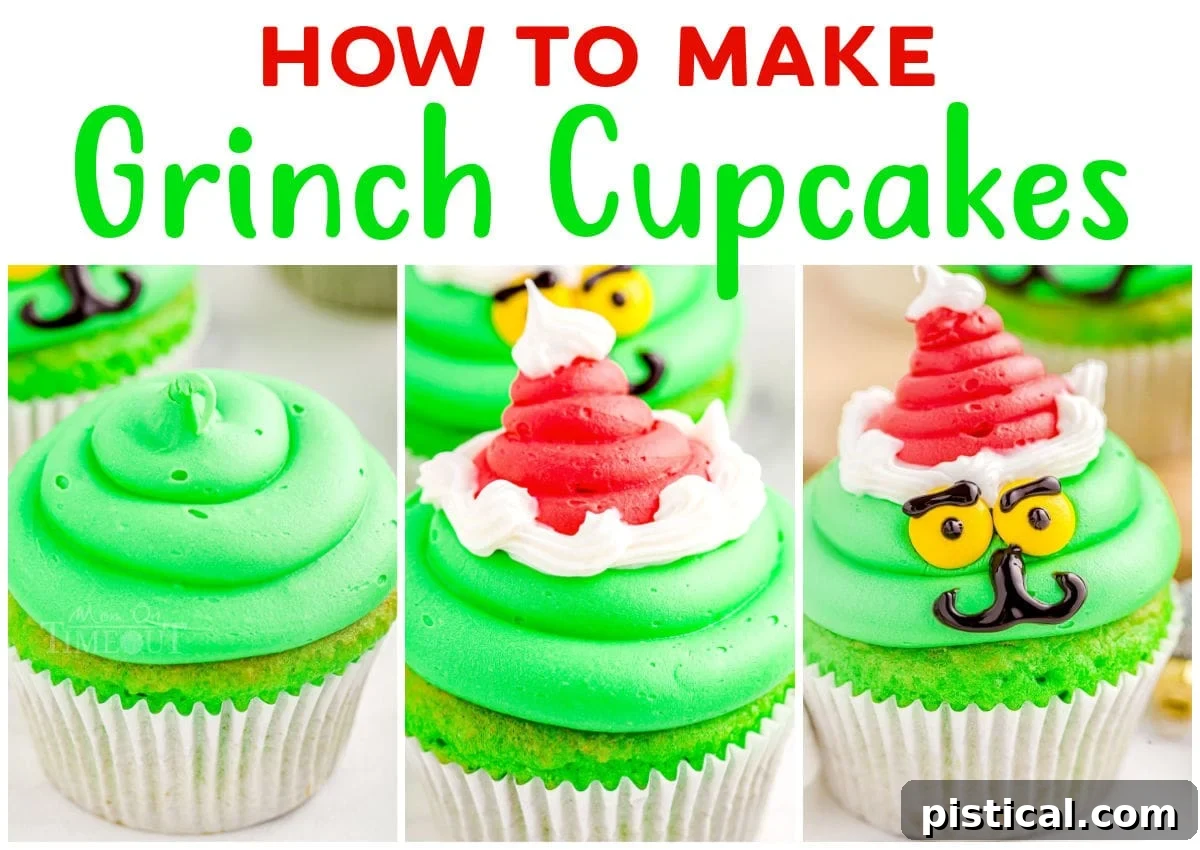
- Pipe the Grinch Heads: Transfer the green frosting into a piping bag fitted with a large, circular piping tip (such as a Wilton 2A open round tip). Pipe a generous, tall swirl of green frosting onto the center of each completely cooled cupcake. This will form the Grinch’s head, so make it substantial enough to accommodate the eyes and Santa hat later.
- Prepare White Frosting for Detail: Set aside about ¾ cup of white frosting from your remaining tub. Scoop this into a separate piping bag fitted with a smaller star tip (like a Wilton 22 star tip) for the fur trim on the Santa hats.
- Color the Santa Hat Frosting: Take the rest of the white frosting from the second tub and add several drops of red food coloring. Mix with your hand mixer until you achieve a bright, cheerful Santa red color, ensuring no white streaks remain. You can add a bit of powdered sugar here too if the red frosting seems too soft.
- Pipe the Santa Hats: Transfer the red frosting into a piping bag fitted with another small circular tip (such as a Wilton 12 open round tip). Carefully pipe a swirling or conical shape on top of each green Grinch head to create the Santa hats. Remember to leave a small space at the base of the red hat for the white fur trim.
- Add the Fur Trim and Pom-Pom: Using the piping bag with the white frosting and star tip, pipe a fluffy trim around the base of each red Santa hat. Then, pipe a dollop or small star on the very top of each hat to mimic the classic Santa hat pom-pom.
- Place the Grinch’s Eyes: Carefully place two yellow Reese’s Pieces or M&Ms on each Grinch head, just below the white fur trim of his hat. For a more mischievous look, you can place them slightly higher so they appear to peer out from under the brim. Ensure the printed side of the candies faces down for a clean appearance.
- Detail the Grinch’s Expressions: Finally, use the tube of black cookie icing to add the crucial facial details. Pipe on eyebrows, irises (small dots within the yellow candies), a nose, and the Grinch’s signature mouth. You have the creative freedom to make your Grinches smile, frown, or even sport a mischievous smirk, giving each cupcake a unique personality!
- Serve and Enjoy: Your Grinch Cupcakes are now ready! Serve them immediately to eager guests, or refrigerate them until you’re ready to present them. Happy Who-Lidays!
Storage and Freezing Tips for Your Grinch Cupcakes
To keep your festive Grinch cupcakes fresh and delicious, proper storage is key. You can store these decorated cupcakes in an airtight container in the refrigerator for up to 5 days. When choosing a container, ensure it’s deep enough so the frosting decorations don’t get squished or damaged. Alternatively, if your kitchen is cool, they can remain at room temperature for up to 2 days, though refrigeration is recommended for longer freshness, especially with dairy-based frostings.
To freeze unfrosted cupcakes: If you’re looking to get a head start on your holiday baking, you can freeze the unfrosted cupcakes after they’ve cooled completely. Once cooled, place them in a freezer-safe airtight container, or wrap each cupcake individually in plastic wrap before placing them in the container. This method helps prevent freezer burn. They will stay fresh in the freezer for up to 3 months. When you’re ready to decorate, simply defrost the cupcakes at room temperature until they are fully thawed, then proceed with the frosting and decorating steps as directed. Keep in mind that while the cupcake base freezes beautifully, frosted cupcakes can sometimes experience a slight change in the texture and consistency of the frosting after freezing and thawing, which is why freezing them unfrosted is often preferred.
Frequently Asked Questions About Grinch Cupcakes
Piping bags and frosting tips are widely available and easy to find, especially during the holiday season. You can typically find a good selection at any major supermarket in the baking or party supplies aisle. For a wider variety and specialty items, your local craft and hobby supply store will have dedicated sections for cake decorating. If you prefer online shopping, you can easily order sets and individual tips online.
Don’t let the lack of piping tips deter you from making these adorable cupcakes! While piping bags and tips certainly make the decorating process easier and more precise, you can absolutely create beautiful Grinch cupcakes without them. Simply use sturdy resealable plastic bags (freezer bags are ideal as they are thicker and hold up better to squeezing) as makeshift piping bags. For the Grinch’s head, snip a larger hole in one corner of the bag to create wide swirls. For the Santa hat, snip a slightly smaller hole. For the white fur trim and pom-pom, cut an even smaller hole and apply the frosting in lots of small dots or short lines to create a fluffy texture.
Absolutely! While a white cake mix works best for achieving that truly vibrant and bright Grinch green color, feel free to experiment with other flavors. Yellow or vanilla cake mixes are excellent alternatives that will still allow the green to show through beautifully. You could even try a funfetti mix for an extra festive surprise inside!
Yes, you can! The unfrosted cupcakes can be baked 1-2 days in advance and stored in an airtight container at room temperature, or frozen for up to 3 months (as detailed in the Storage section). The frosting can also be prepared a day or two in advance and stored in the refrigerator in an airtight container. Allow it to come to room temperature and re-whip it for a minute or two before piping. Assemble and decorate the cupcakes on the day you plan to serve them for the freshest look.
For the most vibrant and true-to-character colors, we highly recommend using gel food coloring. Gel colors are more concentrated than liquid food colorings, meaning you’ll need less to achieve intense hues, and they won’t thin out your batter or frosting. Brands like Wilton or Americolor are excellent choices for bright, consistent results.
Special Tools and Ingredients for Grinch Cupcakes
To make the decorating process smooth and your Grinch Cupcakes picture-perfect, consider these helpful tools and specific ingredients:
- Wilton 22 Star Tip: Ideal for piping the fluffy white fur trim on the Santa hats, giving it that classic, delicate texture.
- Green Food Coloring or Neon Green Food Coloring: Crucial for achieving the iconic Grinch shade. Gel food coloring provides the most intense and vibrant results.
- Red Food Coloring: For coloring the frosting for the Grinch’s Santa hat. Again, gel coloring is recommended for a rich, deep red.
- Green Cupcake Liners: While not strictly necessary, using green, red, or white liners adds an extra touch of festive charm and ties into the Grinch theme beautifully.
- Wilton 2A Open Round Tip: Perfect for piping the tall, smooth swirls that form the Grinch’s head. Its large, circular opening creates a bold and even frosting layer.
- Wilton 12 Open Round Tip: A slightly smaller round tip, excellent for piping the Santa hats on top of the Grinch’s head, allowing for precision in shape.
- Piping Bags: Essential for controlled and clean frosting application. Look for disposable piping bags for easy cleanup, or a reusable set that often comes with a variety of tips.
Trish’s Expert Tips and Tricks for Grinch Cupcakes
Ensure your Grinch Cupcakes are a resounding success with these tried-and-true tips from Trish:
- Cupcake Liner Color Matters: When selecting paper cupcake liners, I find that green, red, or classic white work best. These colors beautifully complement the Grinch’s festive Santa suit and enhance the overall visual appeal of your holiday treats.
- Patience with Cooling: This tip is paramount! Always let your cupcakes cool completely on a wire rack before you even think about frosting them. If the cupcakes are even slightly warm, the frosting will begin to melt and slide off, ruining your meticulously crafted Grinch faces.
- Frosting Consistency Control: If you notice your frosting isn’t holding its shape well while piping, don’t panic! Simply place the piping bag (or bowl of frosting) in the refrigerator for about 15 minutes to allow it to firm up. Alternatively, you can beat in a bit more powdered sugar, one tablespoon at a time, to stiffen it further, then chill. Remember, the warmth from your hands can soften the frosting in the piping bag, so a quick chill halfway through decorating can save your Grinches from slouching!
- Double Your Joy: This recipe makes a convenient 24 cupcakes, but it’s incredibly easy to double the batch! Making a whole “Whoville” worth of Grinches ensures there’s enough festive cheer for a larger party or for sharing with all your loved ones.
- Avoid Overfilling Liners: To ensure all your cupcakes bake evenly and rise beautifully without creating messy overflow, only fill each liner about two-thirds full with batter. This helps maintain a consistent size and shape across your batch.
- Creative Grinch Expressions: Don’t limit yourself to just one expression! Play around with the black cookie icing to give each Grinch cupcake a unique personality. Some can be smiling, others frowning, a few with a mischievous smirk, and even some with questioning raised eyebrows. This adds character and fun to your display!
- Consider Homemade Buttercream: While store-bought frosting is convenient, making your own buttercream offers superior flavor and a generally more stable consistency for piping. See the detailed homemade frosting recipe in the notes section of the recipe card below.
- Transporting Cupcakes Safely: If you plan to take your Grinch Cupcakes to a party, invest in a cupcake carrier. This will protect your beautifully decorated treats from getting smushed or damaged during transit, ensuring they arrive looking just as perfect as when they left your kitchen.
More Magical Christmas Treats to Explore
If you loved making these Grinch Cupcakes, you’ll certainly want to explore these other fantastic Christmas dessert ideas. Expand your holiday baking repertoire and impress your guests with these festive favorites!
- Grinch Cookies: Another fantastic Grinch-themed treat, these soft, chewy green cookies with a bright red heart are just as charming and delicious as the cupcakes.
- Stained Glass Cookies: Beautiful, jewel-toned cookies that are as much a decoration as they are a treat, perfect for hanging on the tree or gifting.
- Whipped Shortbread Cookies: Light as air and melt-in-your-mouth tender, these classic shortbread cookies are simple, elegant, and always a holiday favorite.
- Buddy The Elf Cookies (Haystacks): Inspired by the movie “Elf,” these no-bake haystacks are a fun, sweet, and easy treat that kids will especially adore making and eating.
- Polar Bear Paw Cupcakes: Adorably decorated cupcakes resembling polar bear paws, offering a cute and cozy addition to your winter dessert table.
Grinch Cupcakes Recipe Card

Grinch Cupcakes
Ingredients
- 15.25 ounces white cake mix (1 box)
- 3 large eggs (room temperature)
- 1 cup whole milk
- 8 tablespoons salted butter (melted)
- Neon green food coloring (divided)
- 32 ounces white frosting (2 x 16-ounce tubs)
- ¼-½ cup powdered sugar
- 48 yellow Reese’s Pieces or M&Ms
- 1 tube black decorating icing
- Red food coloring
Instructions
Make the Cupcakes
- Preheat the oven to 350°F (175°C). Line two muffin tins with paper cupcake liners.
- In a large mixing bowl, beat together the cake mix, eggs, milk, and melted butter until well combined, about 2 to 3 minutes.
- Mix in the neon green food coloring, adding a few drops at a time, until you achieve a lovely Grinchy green color.
- Scoop the batter into the prepared muffin tins, filling each liner about ⅔ of the way full.
- Bake for 18 to 23 minutes, or until an inserted toothpick comes out clean.
- Remove cupcakes from tins and transfer to a wire rack to cool completely.
Prepare the Frosting
- Combine one tub of white frosting with ¼ cup of powdered sugar and enough green food coloring to match the cupcakes. Use a hand mixer to beat until thick, smooth, and streak-free. If needed, add more powdered sugar, a tablespoon at a time, until the frosting holds its shape when piped.
Decorate
- Transfer the green frosting into a piping bag fitted with a Wilton 2A tip. Pipe a tall, thick swirl of green frosting onto each completely cooled cupcake to form the Grinch’s head.
- Remove about ¾ cup of white frosting from the remaining tub and transfer it to a piping bag with a Wilton #22 star tip. Set aside.
- Add several drops of red food coloring to the rest of the white icing in the tub. Mix until combined and you achieve a bright, Santa-red color.
- Transfer the red frosting into a piping bag fitted with a Wilton #12 tip. Pipe Santa hats onto the top of each Grinch head, leaving space below for the white fur trim.
- Using the white frosting and star tip, pipe a trim around the base of each red hat and a dollop on the very top for the pom-pom.
- Place two yellow Reese’s Pieces or M&Ms (for the Grinch’s eyes) just below the white fur trim of the Santa hat. You can adjust their position for different expressions.
- Finally, use the black decorating icing to pipe on the Grinch’s eyebrows, irises (small dots in the yellow candies), nose, and mouth (choose a smile, frown, or smirk!). You can even place the eyebrows on the white fur trim for a more exaggerated look.
Notes
- Wilton 22 Star Tip
- Green Food Coloring or Neon Green Food Coloring
- Red Food Coloring
- Green Cupcake Liners
- Wilton 2A Open Round Tip
- Wilton 12 Open Round Tip
- Piping Bags (this set also comes with some piping tips)
- 1 cup unsalted butter, softened
- 1/4 teaspoon fine sea salt
- 1 teaspoon vanilla extract
- 4 cups powdered sugar, sifted
- 2 to 3 tablespoons heavy cream
- In a large mixing bowl, beat the softened butter on medium speed until it is completely smooth and light in color, about 1 minute.
- Add the fine sea salt, vanilla extract, and one cup of the sifted powdered sugar. Beat until completely combined and smooth.
- Gradually beat in 2 more cups of powdered sugar, adding one cup at a time. Beat thoroughly after each addition until the frosting is smooth and creamy, which should take about 3 to 4 minutes in total.
- Add 1 tablespoon of heavy cream to the mixture and continue beating until incorporated.
- Mix in the remaining cup of powdered sugar, adding it half a cup at a time, ensuring each addition is fully combined before adding the next.
- Add additional heavy cream, one teaspoon at a time, until your desired frosting consistency is reached. The frosting should be firm enough to hold its shape for piping, but still smooth and spreadable.
- Finally, turn the mixer to medium-high speed and continue beating for an additional minute. This step incorporates air, making the frosting wonderfully fluffy and smooth, perfect for your Grinch Cupcakes!