
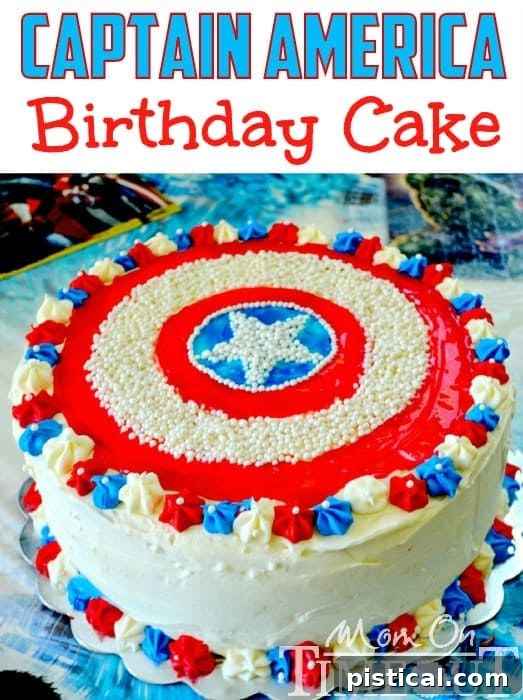
Crafting an Epic Captain America Birthday Cake: A Step-by-Step Guide
Unleash your inner superhero baker! This comprehensive tutorial will guide you through creating an unforgettable Captain America Birthday Cake that will be the star of any Avengers birthday party. Perfect for superhero enthusiasts and a fantastic option for 4th of July celebrations too, this cake promises to impress with its iconic shield design.
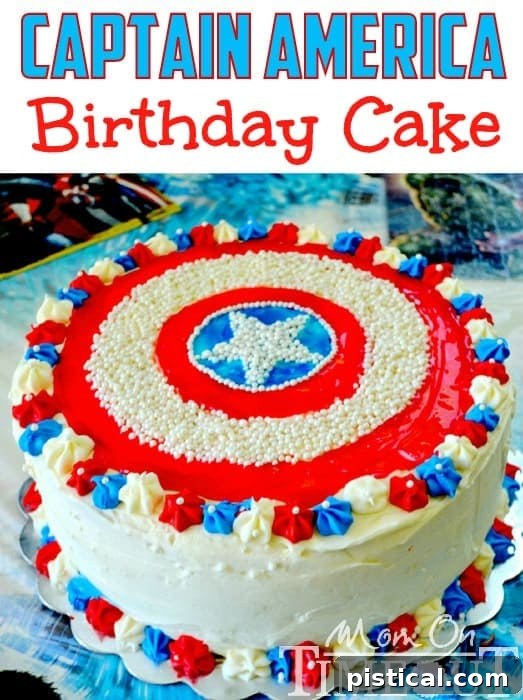
There’s nothing quite like the joy of seeing your child’s face light up at their birthday party, especially when it involves their favorite superheroes. Recently, we celebrated my son Reece’s 6th birthday, and it’s truly incredible how quickly these little ones grow! Reece, a huge fan of the Marvel universe, specifically requested an Avengers themed birthday party. Naturally, as any parent would, I aimed to make his dream a reality, especially when it came to the centerpiece of the celebration: the cake.
Reece played a hands-on role in selecting many aspects of his party, and the cake was no exception. His enthusiasm for all things Avengers guided our creative process, leading us to one of the most recognizable symbols of heroism: Captain America’s vibranium shield. This cake isn’t just a dessert; it’s a statement, a tribute to courage and justice, and a truly impressive visual treat.
Why a Captain America Shield Cake? The Perfect Heroic Centerpiece
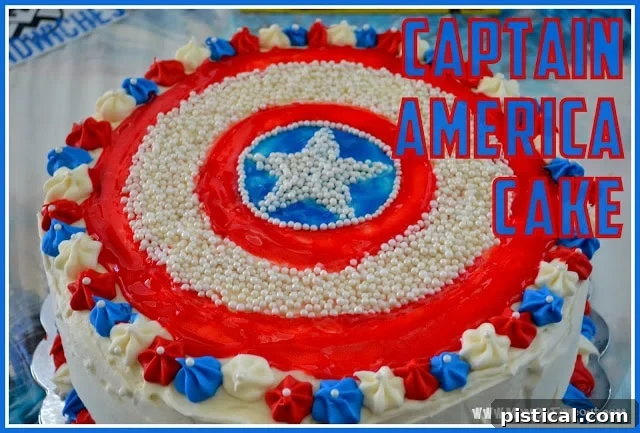
The iconic design of Captain America’s shield makes for an instantly recognizable and incredibly striking cake. Its vibrant red, white, and blue colors, combined with the prominent star, are not only aesthetically pleasing but also relatively straightforward to replicate with the right tools and techniques. While many bakers might instinctively turn to fondant for such intricate designs, I wanted to explore a more accessible and equally stunning approach using sparkle gels and sprinkles, proving that a show-stopping cake doesn’t always require professional confectionery skills.
This particular design is fantastic because it’s easily customizable. You can adjust the size, flavor, and even the type of decorations to suit your preferences and skill level. For Reece’s cake, the goal was maximum visual impact and a taste that would be remembered. The shield’s circular shape lends itself perfectly to standard round cake pans, making the foundational baking process simple for home bakers.
Gathering Your Supplies: Ingredients and Decoration Essentials
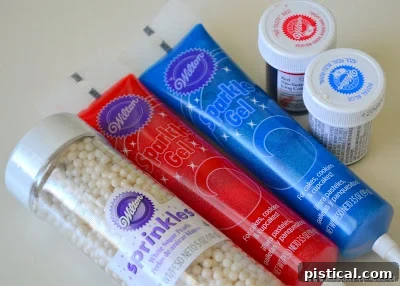
Before diving into the baking and decorating process, it’s crucial to have all your ingredients and tools ready. Reece and I embarked on a fun shopping trip to gather everything we needed. He personally selected the Wilton Sparkle Gels and white Wilton Sprinkles (small white beads), setting the stage for a truly personalized cake.
For the Cake Base:
- Cake Flavor: Lemon Cake (3 layers, 12-inch round). You can use your favorite lemon cake recipe from scratch or a high-quality box mix for convenience. Ensure you have enough batter for three substantial layers.
- Ingredients for Lemon Cake: (If baking from scratch) Flour, sugar, eggs, butter, buttermilk, lemon zest, lemon juice, baking powder, baking soda, salt.
For the Lemon Cream Cheese Frosting:
- Ingredients: Cream cheese, unsalted butter, powdered sugar (confectioners’ sugar), fresh lemon juice, lemon zest, vanilla extract. This frosting offers a delightful tangy counterpoint to the sweet cake.
For the Captain America Shield Decoration:
- Wilton Sparkle Gels: Red and Blue. These gels provide a vibrant color and a beautiful shimmer that truly stands out.
- Wilton Sprinkles: Small white beads (for the star and the outermost ring).
- Star Cookie Cutter: A medium-sized star cutter that fits well in the center of your 12-inch cake.
- Circular Objects: Various sizes of household items like plates, bowls, or even paper cutouts to help create concentric circles for the shield design.
- Offset Spatula or Butter Knife: For spreading frosting smoothly.
- Small Spoon or Back of a Spoon: For carefully spreading the sparkle gels.
- Clean Tweezers: Essential for precise placement of individual sprinkle beads.
- Measuring Cups and Spoons: For accurate ingredient measurements.
- Mixing Bowls and Mixer: Stand mixer or hand mixer for cake batter and frosting.
- 12-inch Round Cake Pans: Three pans are ideal for baking multiple layers simultaneously.
- Parchment Paper: To line cake pans for easy release.
- Cake Leveler or Serrated Knife: To ensure flat cake layers.
- Cake Board or Platter: A sturdy base for your finished cake.
Step-by-Step Tutorial: Assembling the Captain America Shield Cake
This tutorial breaks down the process into manageable steps, making it achievable for even intermediate bakers. The key is patience, especially during the intricate decorating phase!
1. Bake the Lemon Cake Layers
- Prepare your three 12-inch round cake pans by greasing and flouring them, or lining them with parchment paper.
- Follow your chosen lemon cake recipe to prepare the batter.
- Divide the batter evenly among the three pans and bake according to recipe instructions, or until a wooden skewer inserted into the center comes out clean.
- Once baked, let the cakes cool in the pans for about 10-15 minutes before inverting them onto wire racks to cool completely. Level the tops of the cakes with a cake leveler or a serrated knife if needed, ensuring flat layers for stacking.
2. Prepare the Lemon Cream Cheese Frosting
- In a large mixing bowl, beat softened cream cheese and unsalted butter together until smooth and creamy.
- Gradually add powdered sugar, mixing until fully incorporated and lump-free.
- Stir in fresh lemon juice, lemon zest, and vanilla extract. Beat on medium-high speed until the frosting is light, fluffy, and spreadable. Adjust consistency with more powdered sugar (for thicker) or a splash of milk/cream (for thinner) if necessary.
3. Assemble and Base Coat the Cake
- Place your first cooled cake layer on your chosen cake board or serving platter.
- Spread an even layer of lemon cream cheese frosting over the top.
- Carefully place the second cake layer on top, aligning it perfectly. Repeat with another layer of frosting.
- Add the third cake layer.
- Apply a thin crumb coat of frosting over the entire cake – top and sides. This traps any loose crumbs. Chill the cake in the refrigerator for about 15-20 minutes to set the crumb coat.
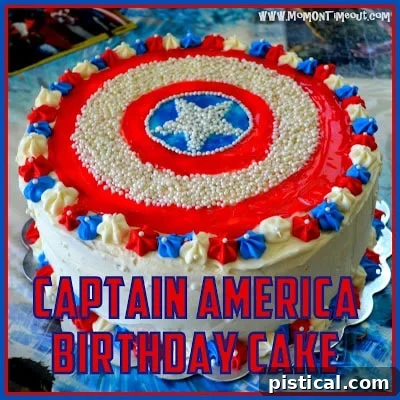
- Once chilled, apply a final, thicker, and smooth layer of white lemon cream cheese frosting over the entire cake. This will be the base for your shield design. Ensure it’s as smooth as possible for the best decorative results.
4. Create the Central Star
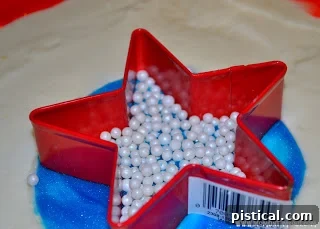
- Take your star cookie cutter and center it perfectly on top of the frosted cake. Gently press it down just enough to leave a clear outline in the frosting, but not so deep that it cuts the cake.
- Carefully pour the white sprinkle beads into the outlined star shape. Use your finger or the back of a spoon to gently pat them down, ensuring they adhere well to the frosting and fill the star completely. This creates a brilliant, textured white star.
5. Form the Concentric Circles and Apply Gels
This step requires a steady hand and a little creativity to get those perfect circles.
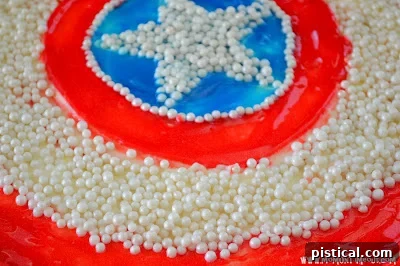
- First Blue Ring: Using a slightly larger circular object (e.g., a small plate or a paper template), lightly indent a circle around the white star. This will be your first color ring. Carefully drizzle the blue Wilton Sparkle Gel within this outlined ring.
- Using the back of a small spoon, very gently and slowly spread the blue gel evenly within its designated circle. The sparkle gel offers a vibrant, shimmery finish that truly brings the shield to life. Don’t press too hard, as you want to avoid disturbing the frosting underneath or the star sprinkles.
- Red Ring: Repeat the process with an even larger circular object to create the next ring, just outside the blue one. Fill this ring with red Wilton Sparkle Gel, spreading it smoothly with the back of a spoon.
- Outer White Ring with Beads: For the outermost ring, use the largest circular template. This ring will be filled with the individual white sprinkle beads, mimicking the detailed edge of Captain America’s shield.
- This is the most time-consuming but rewarding part! Using a pair of clean tweezers, meticulously pick up each white sprinkle bead and place it one by one along the outline of this outer ring. You can create a dense border or space them out slightly for a different effect. The precision of this step really elevates the cake’s appearance.
The Grand Reveal: A Moment of Pure Joy
After all the careful planning and meticulous decorating, the moment of presentation is truly the most rewarding. I completed Reece’s Captain America shield cake late the night before his party, around 11 p.m. Shortly after, he woke up, needing to be tucked back in. It was the perfect, spontaneous opportunity for a sneak peek.
I led him into the kitchen, his eyes still squinting in the dim refrigerator light, but they instantly lit up as he caught sight of his magnificent cake. The sheer excitement and happiness radiating from him made every single bead placed and every gel smoothed entirely worth the effort. That moment, witnessing his unadulterated joy, is why we pour so much love into these homemade celebrations.
Celebrating with the Hero: Blowing Out the Candles
The party itself was a whirlwind of Avengers-themed fun, and the cake stood proudly as its centerpiece. Watching Reece blow out his birthday candles, surrounded by friends and family, was a heartwarming sight. The cake wasn’t just a dessert; it was a tangible representation of his favorite hero and a symbol of a truly special birthday.
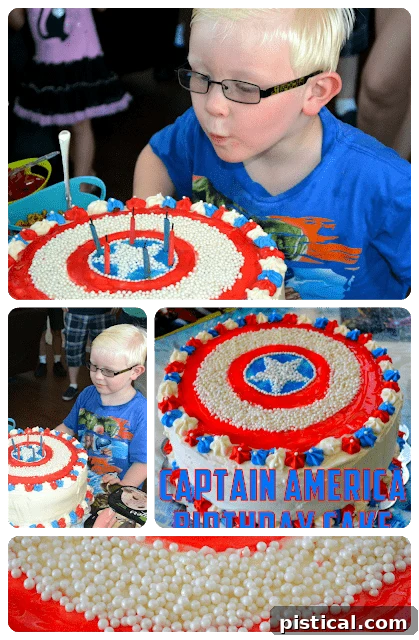
This Captain America Birthday Cake was a huge success, and I’m thrilled to share this tutorial with you. There are many more fun ideas and details from Reece’s Avengers party that I’m excited to share in upcoming posts, so stay tuned for more superhero-inspired celebration tips!

Connect with Us!
Loved this tutorial? Want to share your own superhero cake creations or get more party ideas? Connect with us on social media!
Linking up for more inspiration:
Mom On Timeout,
Home Stories A2Z,
Savvy Southern Style, and
My Repurposed Life.