
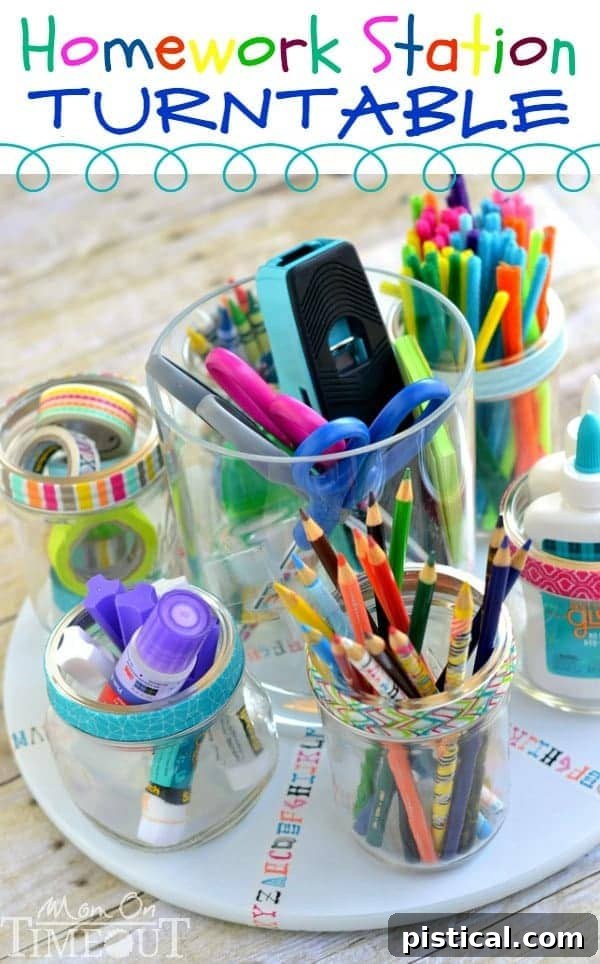
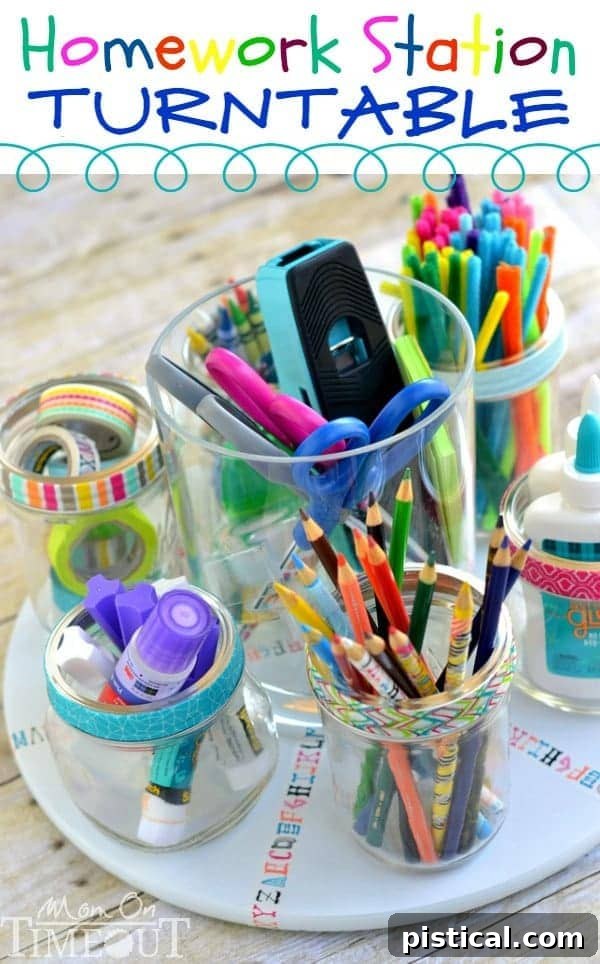
Transform homework time from a dreaded chore into a smooth, organized experience! This DIY Homework Station Turntable is the ultimate solution to keep all essential school and craft supplies neatly organized and always at your fingertips.
Conquering Homework Clutter: A Parent’s Guide to Organization
As parents, we often find ourselves navigating the ebb and flow of school routines. The initial excitement of a new academic year eventually settles into a rhythm, revealing areas where a little extra organization can make a big difference. For many families, one such area is undoubtedly the management of homework supplies. After my boys, Bryce and Reece, had settled into their school year, I quickly noticed that our haphazard approach to storing their school essentials was creating more frustration than focus.
Children, especially as they grow, move beyond needing just a simple pencil and a calculator for their assignments. Suddenly, their projects demand a broader array of tools: crayons for vibrant drawings, colored pencils for detailed work, scissors for precise cuts, glue for assembling masterpieces, and tape for countless creative endeavors. The constant interruptions, the calls for “Mom, where’s the…?” every few minutes, and the endless rummaging through drawers became a tiresome cycle for everyone involved. While I genuinely cherish helping my children, the repetitive task of retrieving and then putting away a seemingly endless parade of supplies was not only consuming my time but also hindering their independence.
Introducing Your Game-Changing Solution: The Homework Station Turntable
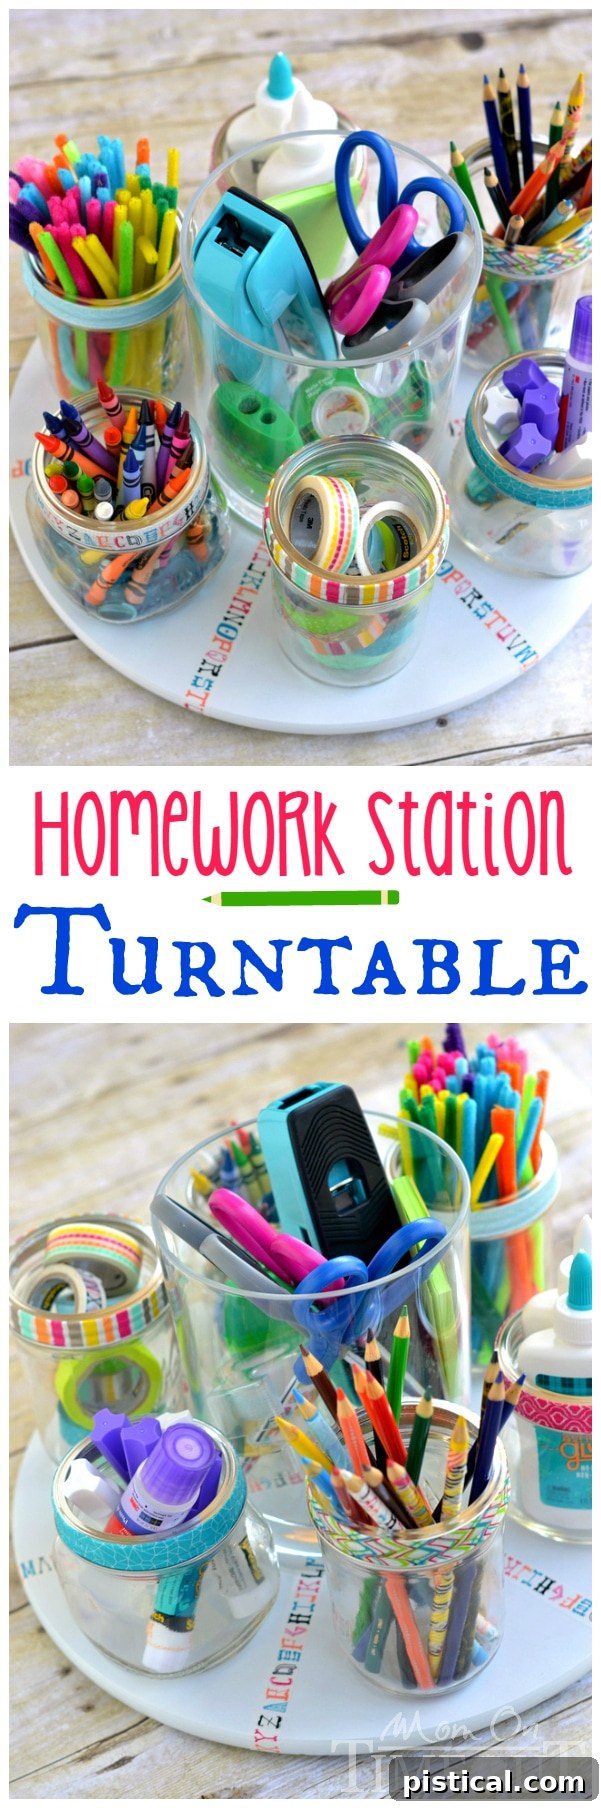
Driven by the desire for a more efficient and less stressful homework experience, I conceived a solution that has proven invaluable for our family: a fantastic DIY homework station turntable. This isn’t just another organizational tool; it’s a dynamic hub designed to centralize and categorize all their creative and academic essentials. The beauty of this turntable lies in its accessibility and versatility. My boys aren’t just using it during designated homework time; it’s become their go-to resource for art projects, crafting handmade books, and even simple tasks like grabbing a pair of scissors or a piece of tape for everyday needs. Having a single, dedicated spot for all their supplies has been a game-changer, fostering independence and significantly reducing clutter. And, I must admit, they absolutely adore how it spins!
Why a DIY Homework Station is a Must-Have for Every Family
Investing a little time in creating this DIY homework station turntable offers numerous benefits that extend far beyond simply tidying up. It’s an investment in your child’s learning environment and your family’s peace of mind:
- Boosts Independence: When all supplies are visible and within easy reach, children can take ownership of their tasks. They learn to find what they need and, importantly, put it back, fostering essential life skills and reducing reliance on parental assistance.
- Reduces Interruptions: The constant stream of “Where’s the glue?” or “Can you find my colored pencils?” can disrupt not only your child’s focus but also your own tasks. A well-organized station minimizes these calls, leading to more concentrated and productive study periods.
- Minimizes Clutter: Desks and tables can quickly become swamped with scattered pencils, papers, and craft items. This turntable acts as a central containment unit, keeping the workspace tidy and visually appealing.
- Enhances Creativity: Easy access to a variety of materials encourages spontaneous art, craft projects, and imaginative play. When supplies are readily available, children are more likely to explore their creative potential without barriers.
- Customizable and Personal: Unlike generic store-bought organizers, a DIY station can be tailored to your child’s specific needs, favorite colors, and even their unique personality through decorative elements like washi tape. This personal touch can make them more invested in using and maintaining it.
- Cost-Effective: Utilizing common household items like mason jars and a lazy susan, along with a few craft supplies, often proves to be more budget-friendly than purchasing specialized organizers from a store.
Ready to reclaim your evenings and empower your children with an organized study space? Let’s get started on building this incredibly useful and fun homework station!
Gathering Your Materials: Essentials for Your DIY Homework Hub
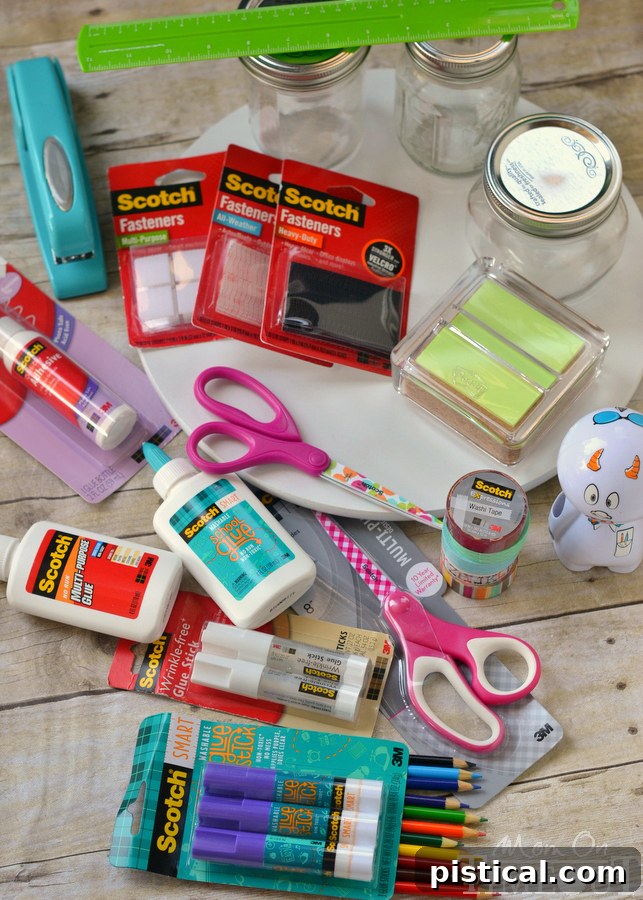
Creating this functional and stylish organization station requires just a few readily available items. The beauty of this project lies in its simplicity and the ability to customize with decorative elements like washi tape, allowing you to match any room’s decor or your child’s personality. Most of these items can be found at your local craft store, home goods store, or even around your house!
Materials Needed:
- Rotating Turntable (Lazy Susan): This is the crucial foundation of our spinning organizer. Choose one that is sturdy, provides a smooth rotation, and is appropriately sized for your intended space. A wooden or plastic model works equally well.
- Six Glass Mason Jars in Varying Sizes: Mason jars are perfect for this project due to their transparency (making contents easily visible), durability, and classic aesthetic. Having a mix of sizes allows you to accommodate different types and quantities of supplies effectively.
- One Cylindrical Plastic Container, or Larger Jar: This larger central container is ideal for holding bulkier items like pipe cleaners, rulers, or a stapler, or for serving as a collection point for miscellaneous items.
- Scissors: A good pair of sharp scissors will be essential for clean cuts when working with washi tape.
- Ruler: An indispensable tool for ensuring precise measurements and creating evenly spaced sections on your turntable.
- Pencil: Used for marking guidelines on the turntable before applying tape, ensuring accuracy.
- Washi Tape in a Variety of Patterns: This is where you infuse personality and charm into your project! Washi tape is easy to work with, comes in an endless array of designs, and adds a delightful decorative touch. The original project used blurred lines, cracked, pink quatrefoil, big zig, alphabet, and feather patterns, but feel free to choose designs that inspire you or your child.
- Scotch® All-Weather Fasteners: These powerful fasteners are the secret to securely attaching the jars to the turntable, preventing them from sliding or tipping even with enthusiastic spinning. This project used eight fasteners, ensuring robust stability for all containers. (NOTE: Each inch of this impressive product holds up to two pounds, providing a reliable and durable hold for your organized supplies.)
- Variety of Homework Supplies: Have your typical school and craft supplies ready to fill your new station. Think beyond just pencils! The original project showcased a comprehensive selection including glue sticks, pencils, pens, sticky notes, a stapler, pipe cleaners, rolls of tape, a ruler, crayons, and scissors.
Step-by-Step Instructions: Crafting Your Personalized Homework Station
Follow these simple steps to construct your durable and delightful homework station turntable. Careful attention to each stage will ensure a professional finish and a long-lasting organizational tool that your children will love to use.
Phase 1: Preparing Your Turntable and Jars
- Prepare Your Workspace and Materials: Begin by gathering all the necessary materials on a clean, flat, and well-lit surface. Before assembly, it’s absolutely crucial to thoroughly clean the surface of your rotating turntable and the bottoms of each mason jar. Dust, dirt, or any residual grease can significantly interfere with the adhesive properties of the Scotch® All-Weather Fasteners, compromising the stability of your station. Use a damp cloth followed by a dry one, or a mild cleaner if necessary. Ensure everything is completely dry before proceeding to the next step, as moisture can also prevent proper adhesion.
Phase 2: Designing Your Sections
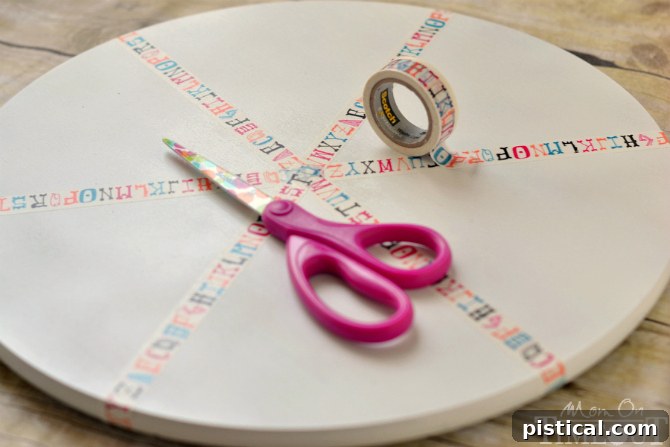
- Mark Your Sections: Using a ruler, carefully measure and mark six triangular sections on the surface of your turntable with a pencil. The goal is to make them as equal in size as possible to ensure a balanced and aesthetically pleasing layout. If you’re hesitant about drawing directly on the turntable, you can temporarily use painter’s tape to define your sections before committing with washi tape. These divisions will serve as visual guides for placing your jars and categorizing supplies.
- Decorate and Define Sections with Washi Tape: Following the pencil lines (or temporary tape) as your guide, apply your chosen washi tape patterns or colors to clearly divide the sections. Washi tape is wonderfully forgiving, allowing for repositioning if needed. For a clean, professional appearance, cut the end of the tape precisely to meet its starting point instead of overlapping. While you can certainly use different washi tapes for each section to add a vibrant, eclectic variety, using the same pattern or a coordinated set of patterns can create a more cohesive and polished look, as preferred in this project. This step not only adds visual appeal but also creates clear boundaries for different categories of supplies.
Phase 3: Arranging and Decorating Your Jars
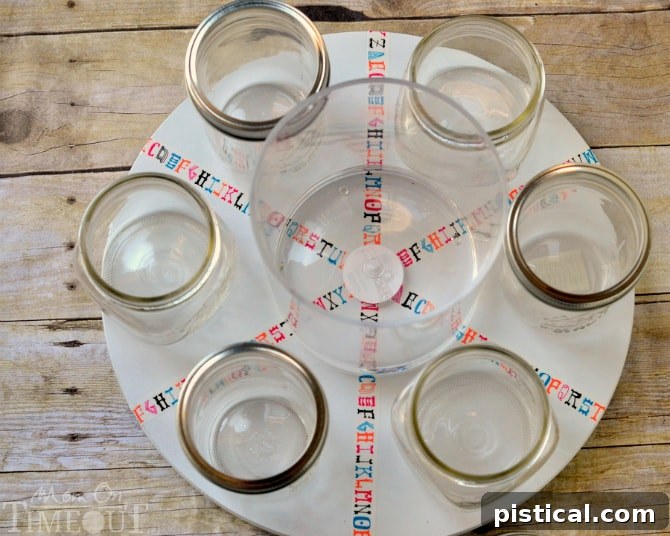
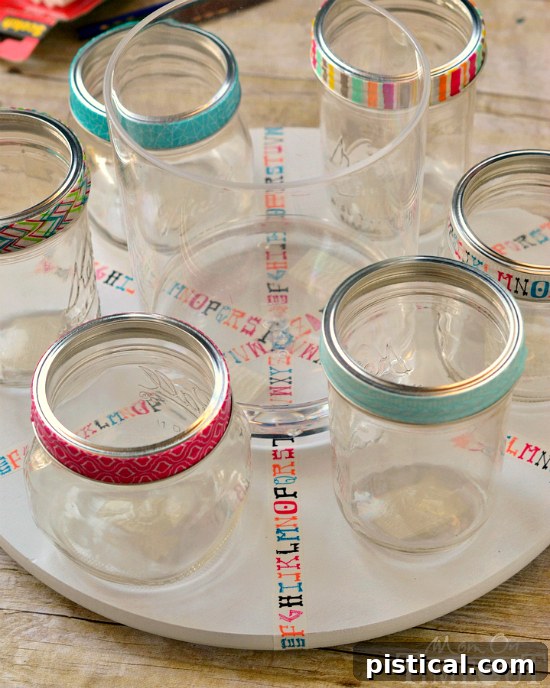
- Plan Your Jar Layout: Before securing anything permanently, arrange your empty jars on the turntable. Place one jar towards the outer edge of each triangular section you’ve defined. Experiment with different placements, rotating and repositioning until you achieve a layout that feels balanced, functional, and maximizes the use of space. For instance, this project strategically utilized three larger jars, three smaller jars, and one large plastic container positioned centrally to accommodate various sizes of supplies. This planning stage is crucial for optimizing space and ensuring easy accessibility to all items.
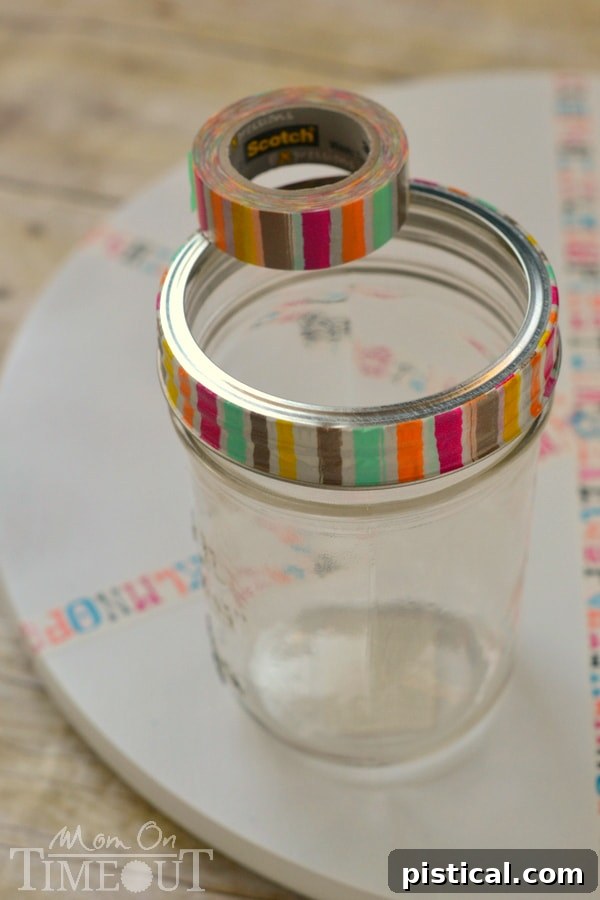
- Prepare Mason Jar Bands for Decoration: To decorate your first mason jar, begin by twisting off the metal band on the jar until it’s loose enough to slide off. Carefully remove both the metal band and the flat lid from the jar. The flat lid can be discarded as it won’t be needed for this project; we’re only interested in the metal band for decorative purposes.
- Decorate Jar Bands with Washi Tape: Now, get creative! Apply your chosen washi tape pattern or color all the way around the exterior of the metal band. Smooth the tape with your finger as you go to prevent air bubbles and ensure firm adhesion. For a very neat and professional finish, cut the tape precisely to meet the starting point rather than overlapping it. This project featured a delightful mix of blurred lines, cracked, pink quatrefoil, big zig, alphabet, and feather patterns on the bands, adding a vibrant and personalized touch to each jar. Embrace the opportunity to mix and match for a truly unique and eye-catching look!
- Repeat for All Jars: Continue steps 5 and 6 to decorate the metal bands for all your remaining mason jars. This consistent decorative element will tie the entire station together beautifully.
Phase 4: Securing Your Jars to the Turntable
- Prepare Scotch® All-Weather Fasteners: To ensure your jars remain securely in place and don’t budge even with frequent spinning, cut the Scotch® All-Weather Fasteners in half. This adjustment will make them fit perfectly onto the bottom of the mason jars, providing optimal contact without excess material and ensuring maximum adhesion strength.
- Apply Fasteners to Jar Bottoms: Peel the protective liner from one side of a fastener strip. Carefully apply this sticky side to the center of the bottom of a mason jar and press firmly for several seconds to ensure a strong, reliable bond. The robust adhesive of these fasteners is key to the overall stability and longevity of your organized station.
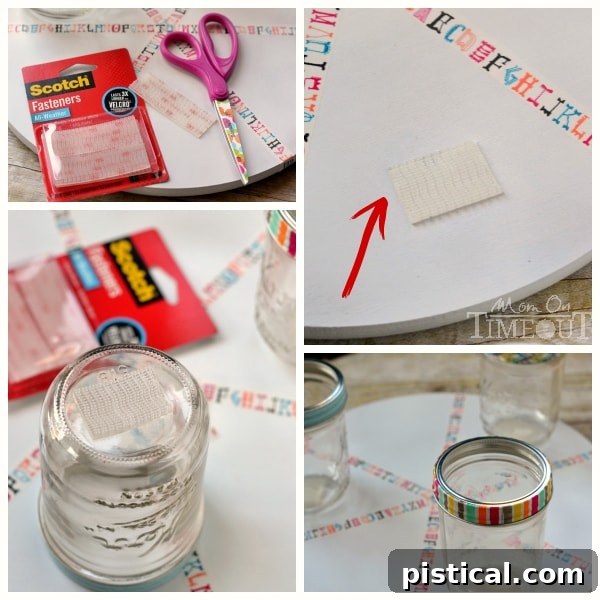
- Position Fasteners on Turntable: Now, peel the liner from the second side of the fastener that’s already attached to the jar. This exposes the other adhesive surface, ready to bond with the turntable. Carefully align the jar with its previously planned placement on the turntable surface, making sure the fastener on the jar aligns precisely with where you want it on the turntable.
- Attach Jars to Turntable: Press the jar down firmly onto the turntable where you’ve aligned the fasteners. Apply sustained, strong pressure. You’ll hear a distinct “snap” sound, indicating that the fasteners have securely engaged and locked into place. This audible click confirms that your jar is now securely attached to the turntable and ready for robust use. Remember, each inch of this product impressively holds up to two pounds, so your jars will be incredibly stable and resistant to movement.
- Secure All Containers: Repeat steps 8 through 11 for all remaining mason jars, attaching one to each marked section. For the central cylindrical plastic container (or larger jar), it’s highly recommended to use two sets of fasteners (cut in half as before) to provide extra stability. This is particularly important for a central container which might hold more items or be subject to more frequent use. Ensure all containers are firmly secured before proceeding to the final step.
Phase 5: Filling Your Homework Station
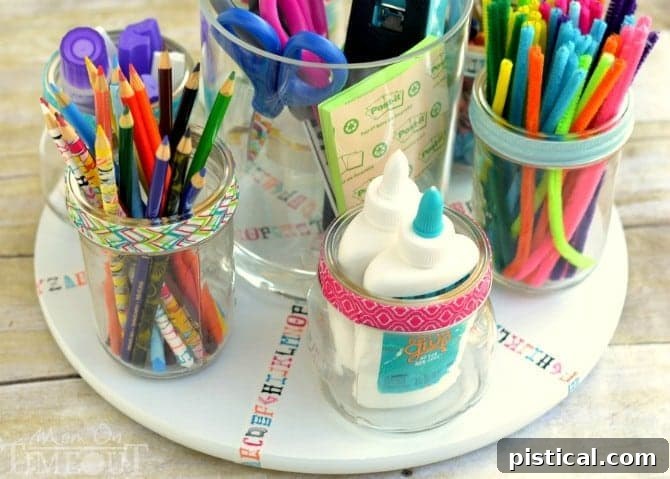
- Fill and Organize: This is arguably the most satisfying part of the entire project! Carefully fill the cylindrical container and each mason jar with your chosen homework and craft supplies. Consider categorizing items logically: for example, pencils, pens, and markers in one jar; crayons and colored pencils in another; scissors and glue sticks in a third; and smaller items like erasers, paper clips, and sticky notes in the smaller jars. Once filled, proudly place your brand-new homework station turntable in your designated homework or study area. Enjoy the immediate benefits of having all supplies perfectly organized, easily accessible, and ready for action, making homework time a breeze!
Beyond Homework: Maximizing Your Turntable’s Potential
While designed with homework in mind, the versatility of this spinning organizer extends far beyond academic tasks. Its 360-degree accessibility and clear compartments make it perfect for a myriad of other uses throughout your home:
- Art & Craft Supplies: Easily sort and access paintbrushes, glitter, beads, pipe cleaners, googly eyes, and other small craft essentials. It transforms a cluttered craft corner into an inspiring creative zone.
- Office Desk Organizer: Tidy up your home office or workspace with a dedicated, spinning spot for pens, highlighters, paper clips, rubber bands, sticky notes, small staplers, and other desk necessities.
- Makeup & Beauty Tools: Keep your vanity neat and organized. Store makeup brushes, lip glosses, eyeliners, small palettes, cotton swabs, and other beauty essentials in a compact, accessible way.
- Kitchen Countertop Caddy: Organize cooking utensils, frequently used spices, tea bags, coffee pods, or even small snack items. Its easy-spin feature is great for busy mornings.
- Hair Accessories: A perfect solution for hair ties, clips, headbands, and combs, especially for those with multiple children or a large collection of accessories.
- Small Toy Organization: Great for keeping LEGOs, small action figures, doll accessories, or other miniature toys sorted and easily findable.
The possibilities are endless, making this DIY project not just a homework solution, but a general organizational powerhouse that can adapt to the needs of any room in your home, bringing order and efficiency wherever it goes.
Get Organized for School and Life!
Creating this DIY Homework Station Turntable is a simple yet incredibly impactful way to bring order, efficiency, and a touch of personal flair to your children’s study and creative spaces. Say goodbye to the frustrations of lost supplies, constant interruptions, and cluttered desks. Instead, say hello to more focused, independent, and enjoyable homework sessions. Empower your kids with the tools they need, perfectly within reach, and watch their productivity and creativity soar! This project offers a practical and stylish solution to an age-old parenting challenge, proving that with a little creativity, homework time doesn’t have to be a pain at all.
Explore More: DIY Organization Station
Discover: DIY Art Display Station
Learn How: DIY Custom Drawer Organizer

Connect with me and get more amazing DIY and family tips!
Linking up at some of these parties.
Disclosure: I have been selected to be a brand ambassador for Scotch Brands. I have been compensated for my time. All opinions expressed are 100% my own!