

Welcome to the delightful world of Thumbprint Cookies – those charming, buttery shortbread delights that are as pretty to look at as they are delicious to eat! These iconic cookies, often called jam drops or hallongrotta (Swedish for “raspberry cave”), feature a tender, melt-in-your-mouth base with a sweet, vibrant jam center. Perfect for any occasion, from festive holiday gatherings and bustling cookie exchanges to a simple, comforting treat with your afternoon tea, these bite-sized wonders are universally loved.
What makes homemade Thumbprint Cookies truly special is their perfect balance of rich, buttery flavor and the bright, fruity burst from the jam. They are incredibly versatile, allowing you to customize the filling to suit any taste or theme. Imagine a tray of these jewel-toned beauties, each with its own unique personality, gracing your dessert table. They are sure to impress guests and become a staple in your baking repertoire.
Whether you’re an experienced baker or just starting your culinary journey, this easy Thumbprint Cookie recipe is designed for success. With straightforward steps and readily available ingredients, you’ll be baking batches of these irresistible treats in no time. Get ready to create some delicious memories with these classic, comforting cookies!

Understanding the Classic Thumbprint Cookie Recipe
At its heart, a Thumbprint Cookie is a celebration of simplicity and flavor. The cookie itself is a shortbread-style base, characterized by its tender, crumbly texture and rich buttery taste. Unlike many cookie recipes, this one typically contains no leavening agents like baking soda or baking powder, nor does it use eggs. This absence is key to its unique texture and ensures the cookies hold their shape beautifully in the oven, emerging exactly as you pressed them.
The magic truly happens with the filling. While tradition often dictates a vibrant fruit jam, the possibilities are endless. From tangy apricot and sweet raspberry to rich chocolate ganache or creamy caramel, each variation offers a delightful twist on the classic. The dough requires a brief chilling period, which is crucial for intensifying the flavors and making it easier to handle. This step helps prevent spreading during baking, resulting in perfectly formed cookies every time.
These stunning jam-filled cookies are not only a feast for the eyes but also incredibly satisfying to make. Their elegant appearance makes them a standout on any dessert table or cookie tray, yet the process is surprisingly simple. Once baked, they can be filled immediately or stored and filled as needed, offering excellent flexibility for advance preparation. Dive into this timeless recipe and discover the joy of baking these charming treats.
Why You’ll Adore This Thumbprint Cookie Recipe
There are countless reasons why this particular Thumbprint Cookie recipe will quickly become a cherished favorite in your kitchen. Beyond their charming appearance and delightful taste, these cookies offer unmatched versatility and ease, making them a joy for any baker.
- Unleash Your Inner Flavor Artist: One of the most exciting aspects of these cookies is the complete freedom to choose your fillings. Why settle for just one flavor when you can mix and match to create a dazzling assortment? We love the combination of sweet raspberry jam for its classic appeal and tangy apricot jam for a delightful contrast. But don’t stop there! Explore luscious strawberry, tart cherry, rich blackberry, or even exotic passion fruit jams. Beyond fruit spreads, consider creamy lemon curd, decadent caramel, or rich chocolate ganache for fun, elevated twists. Each bite becomes a new discovery!
- A Truly Versatile Foundation: The cookie base itself is a simple, sweet, and wonderfully buttery shortbread. This robust yet delicate foundation acts as the perfect canvas for an endless array of variations. It’s forgiving enough for beginners and adaptable enough for seasoned bakers looking to experiment. Whether you stick to classic jams or venture into more adventurous fillings, the integrity of the cookie ensures a delicious result every time.
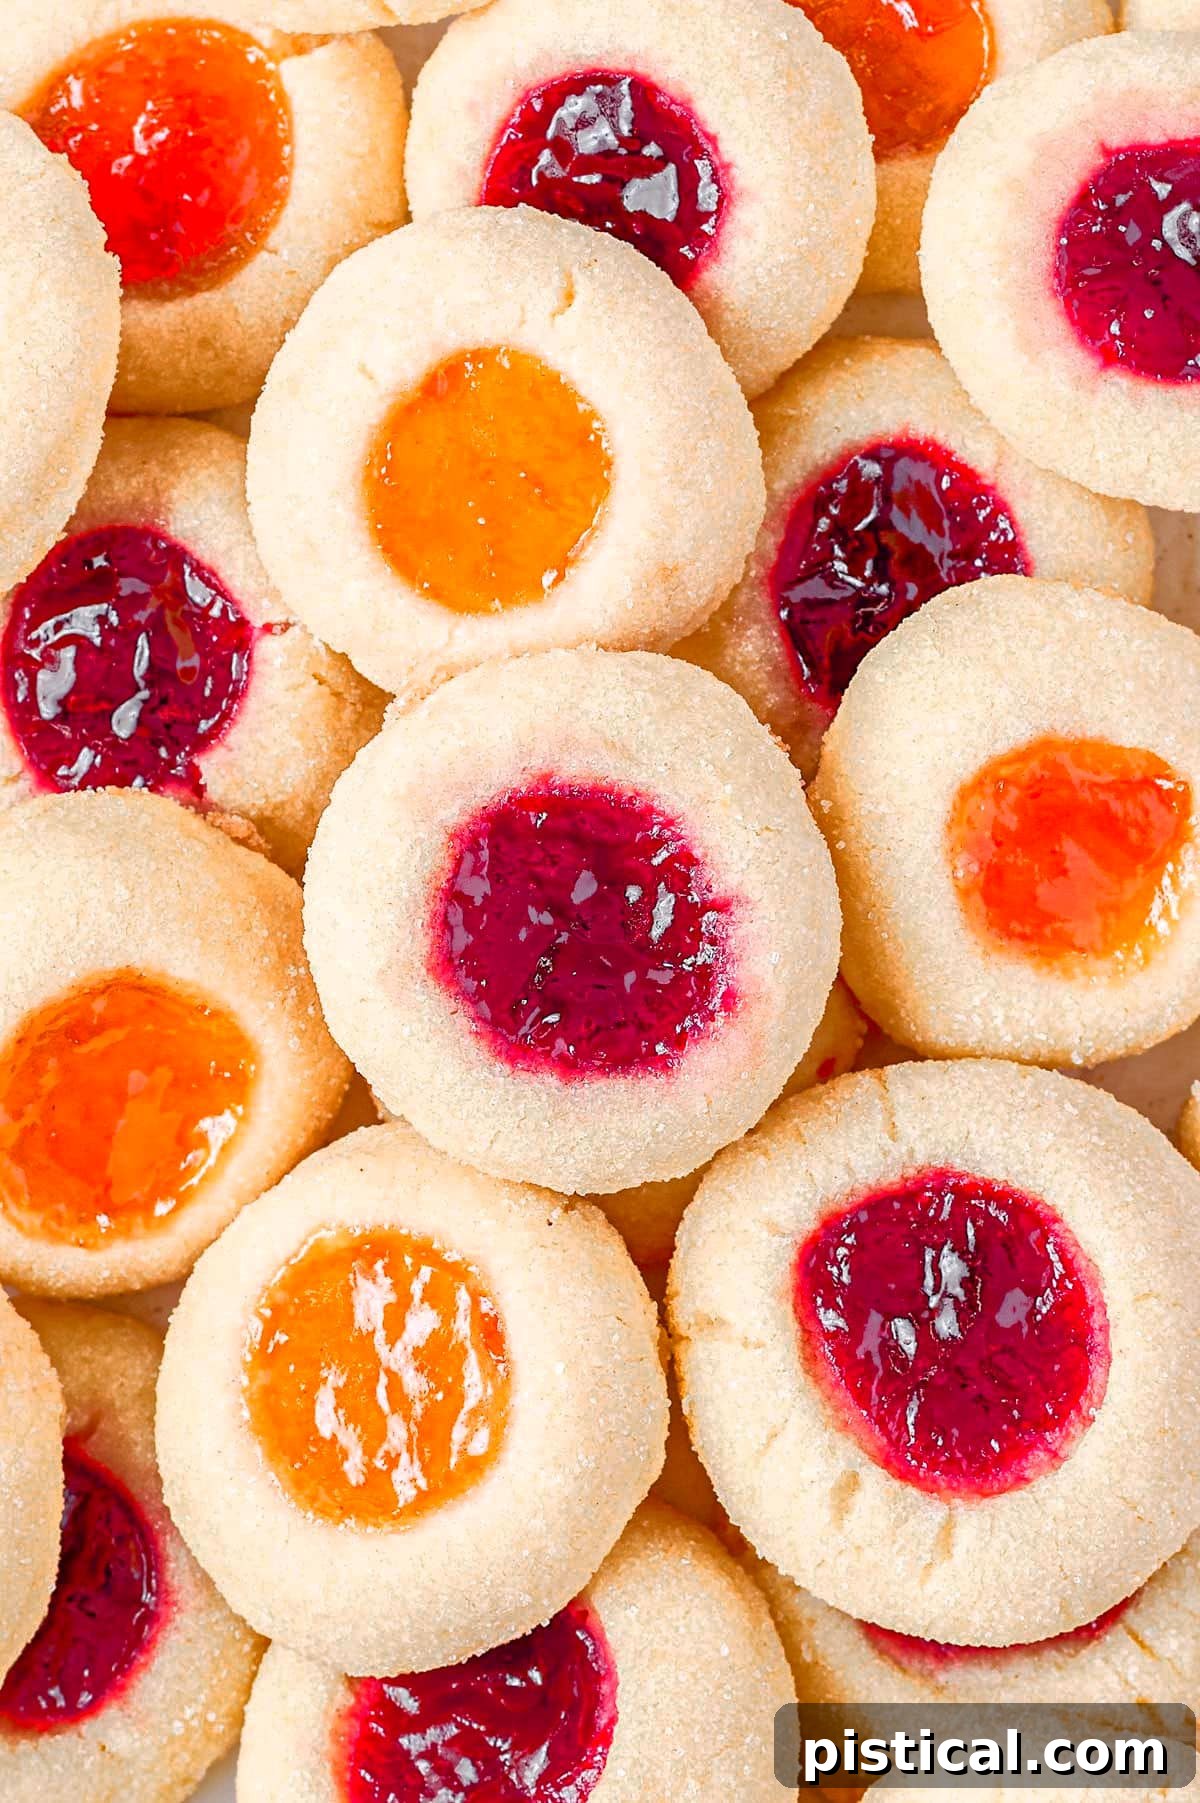
- Visually Stunning & Impressive Presentation: Few cookies offer the visual appeal of Thumbprint Cookies. The vibrant, jewel-toned jams nestled in their golden shortbread cups create a stunning display that will instantly elevate any cookie plate or dessert table. For maximum visual impact, we recommend using at least two different flavors or colors of jam. The contrasting hues make the cookies pop and invite everyone to sample the array of tempting options. They’re guaranteed to elicit “oohs” and “aahs” from your guests!
- Simple Ingredients, Incredible Results: Despite their elegant appearance, these cookies require only a handful of common pantry ingredients. This means less shopping, less fuss, and more time enjoying the baking process. The simplicity of the ingredients allows the quality of each component, especially the butter and chosen jam, to shine through, creating a truly memorable flavor experience.
- Perfect for Any Occasion: While often associated with the holidays, Thumbprint Cookies are truly a year-round treat. Their bite-sized nature makes them ideal for parties, potlucks, bridal showers, or simply as an everyday indulgence with coffee or tea. They travel well, making them fantastic gifts or contributions to bake sales.
Essential Ingredients for Perfect Thumbprint Cookies
Crafting these gorgeous jam-filled cookies is a rewarding experience, and it all starts with selecting the right ingredients. This recipe prides itself on its simplicity, relying on fundamental baking staples to create a cookie that is both tender and flavorful. Here’s a closer look at what you’ll need and why each component is vital:
- Unsalted Butter: The cornerstone of any great shortbread, unsalted butter is crucial for achieving that rich, creamy flavor and tender texture. It’s imperative that your butter is at room temperature. This allows it to cream easily with the sugar, creating a light and airy base for the dough. Cold butter won’t incorporate properly, leading to a dense cookie, while melted butter can make the dough greasy. Remember to take your butter out of the refrigerator at least an hour before you plan to start baking.
- Granulated Sugar: You’ll need granulated sugar for two key purposes in this recipe. Firstly, it sweetens the cookie dough, contributing to its classic flavor and helping to create a tender crumb. Secondly, extra granulated sugar is used to coat the cookie dough balls before baking. This sugar coating adds a delightful sparkle and a pleasant textural contrast to the soft cookie.
- Vanilla Extract: A staple in almost all cookie recipes, vanilla extract provides a warm, aromatic depth of flavor that beautifully complements the buttery shortbread and fruity jam. For a delightful twist, consider using almond extract instead. Almond extract pairs exceptionally well with a variety of jams, especially raspberry, enhancing the overall flavor profile.
- Salt: Often underestimated, salt plays a critical role in baking. In these Thumbprint Cookies, a touch of kosher salt intensifies all the other flavors, making the butter taste richer and the jam brighter. It also balances the sweetness, preventing the cookies from being overly sugary and ensuring a well-rounded taste.
- All-Purpose Flour: This is the structural backbone of your cookies. All-purpose flour provides the necessary framework for the dough, ensuring the cookies hold their shape without becoming tough. Because there are no leavening agents, the flour-to-fat ratio is particularly important for achieving the desired shortbread texture.
- Your Favorite Jam: This is where the “thumbprint” truly comes to life! We highly recommend using a good quality, thicker jam to prevent it from spreading too much during baking. Seedless raspberry jam, such as Smucker’s, offers a classic, sweet-tart taste and vibrant color. Apricot jam, like Bonne Maman’s, provides a beautiful tangy counterpoint. However, the beauty of this recipe lies in its flexibility – feel free to use any flavor and brand of jam you adore. Strawberry, cherry, blackberry, or even a citrus marmalade would be fantastic choices.
One crucial detail about this recipe is the deliberate absence of leavening ingredients – no eggs, no baking soda, and no baking powder. This characteristic is what gives Thumbprint Cookies their signature shortbread consistency and ensures they maintain their shape perfectly. What you place into the oven is precisely what you’ll get out, without any unexpected puffing or spreading, resulting in perfectly sculpted, jam-filled delights every time.

Step-by-Step Guide: How To Make Thumbprint Cookies
Creating these beautiful jam-filled cookies is a simple and enjoyable process. Follow these detailed steps to achieve perfect, tender, and delicious Thumbprint Cookies every time. Remember to gather all your ingredients and have them ready before you begin.
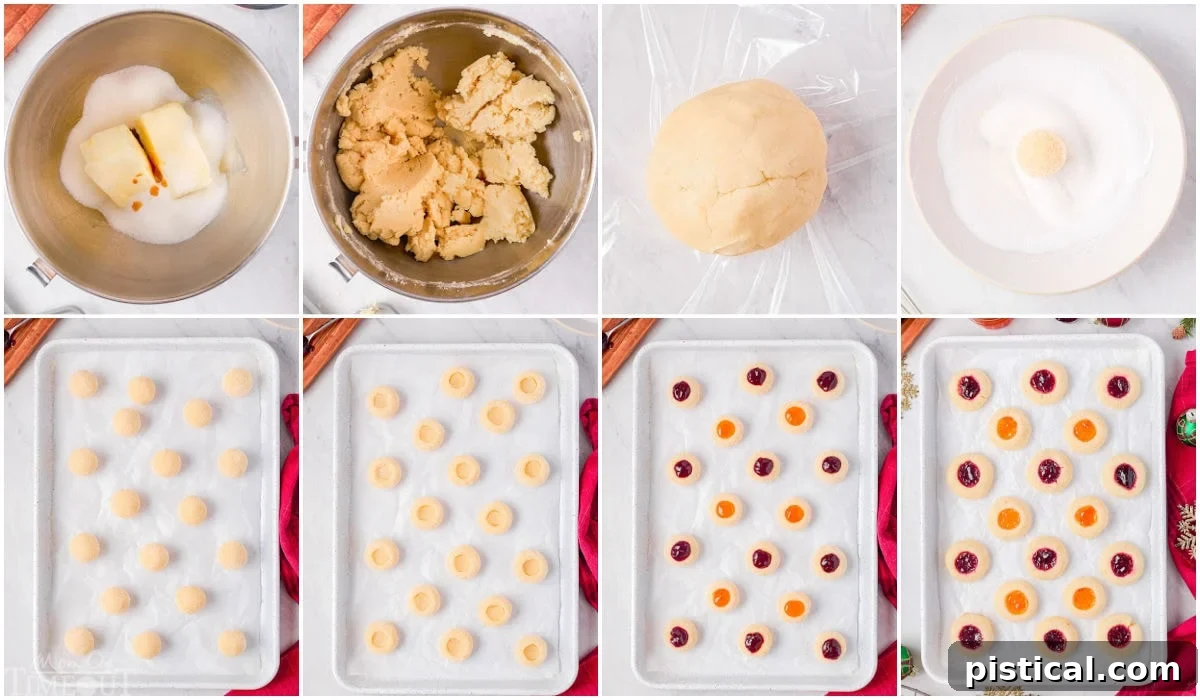
- Cream Butter and Sugar: In the mixing bowl of a stand mixer, fitted with the paddle attachment, add your room temperature unsalted butter and granulated sugar. Beat these two ingredients together on medium speed for about two to three minutes. Continue mixing until the mixture becomes noticeably light in color and has a creamy, fluffy texture. This step incorporates air, which contributes to the cookies’ tender crumb.
- Add Flavorings: Next, add the vanilla extract (or almond extract for an enhanced flavor) and the kosher salt to the creamed butter and sugar mixture. Beat again on medium speed until all ingredients are thoroughly combined and evenly distributed.
- Incorporate Flour: Scrape down the sides and bottom of your mixing bowl with a rubber spatula to ensure everything is well-mixed. Reduce the mixer speed to low. Gradually add in the all-purpose flour, a little at a time, mixing until just combined. The dough might appear crumbly or dry at first, but don’t worry! Continue mixing for another minute or two. If it still seems too dry, you can gently work the dough with your hands for a short period to help it come together more quickly. Avoid overmixing once the flour is added, as this can develop the gluten and result in tough cookies.
- Chill the Dough: Once your dough has formed a cohesive ball, wrap it tightly in plastic wrap. Transfer the wrapped dough to the refrigerator and chill for a minimum of one hour. This chilling period is crucial; it allows the butter to firm up, prevents the cookies from spreading too much during baking, and deepens the flavors.
- Prepare for Baking: After the dough has chilled sufficiently, preheat your oven to 350°F (175°C). Line two large baking sheets with parchment paper. Parchment paper prevents sticking and makes for easy cleanup. Place about ⅓ cup of granulated sugar into a shallow bowl for coating.
- Form and Coat the Cookies: Scoop out approximately one tablespoon of dough for each cookie. Gently roll each portion of dough between your palms to form a smooth ball. Next, roll each dough ball in the shallow bowl of granulated sugar, ensuring it’s evenly coated. Place the coated dough balls onto your prepared baking sheets, leaving a couple of inches between each cookie to allow for slight expansion.
- Create the Indentation and Fill: Using your thumb or the back of a small measuring spoon (like a half-teaspoon or quarter-teaspoon), gently press an indentation into the center of each cookie dough ball. Be careful not to press all the way through the dough. Then, spoon about half a teaspoon of your chosen jam into each indentation. Repeat this process until all cookies are formed and filled. For a more uniform hole, you can press your thumb a second time into the indentation to level out any slopes and create an even cavity for the jam.
- Bake to Perfection: Transfer the baking sheets to your preheated oven. Bake for 14 to 15 minutes, or until the edges of the cookies just begin to turn a light golden brown. The cookies should still be pale in the center. Avoid overbaking, as this can make them dry and hard.
- Cool and Enjoy: Once baked, remove the cookies from the oven. Let them rest on the baking sheets for one additional minute. This allows them to set slightly before you attempt to move them. Then, carefully transfer the cookies to a wire rack to cool completely. Allowing them to cool fully prevents them from becoming soggy and helps the jam set.
- Store Properly: Once the cookies are completely cool, store them in an airtight container at room temperature. This will help maintain their freshness and tender texture.
Storage and Freezing Instructions
Proper storage is key to enjoying your delicious Thumbprint Cookies for as long as possible. Whether you’re making them in advance for a holiday gathering or simply have leftovers (if that ever happens!), here’s how to keep them fresh:
- Room Temperature Storage (Baked Cookies): Store any leftover baked and completely cooled jam-filled cookies in an airtight container at room temperature. They will remain fresh and delicious for 3 to 5 days. For best results, place parchment paper between layers of cookies to prevent them from sticking together.
- Refrigerator Storage (Baked Cookies): To extend their longevity even further, you can store the baked cookies in an airtight container in the refrigerator for up to a week. The colder temperature helps maintain freshness, especially if your kitchen is warm or humid. Bring them back to room temperature before serving for the best texture and flavor.
- Freezing Baked Thumbprint Cookies: Yes, you can absolutely freeze these delightful treats! Once the cookies have cooled completely, arrange them in a single layer on a baking sheet and freeze until solid (this prevents them from sticking together). Then, transfer the frozen cookies to a freezer-safe container or a heavy-duty freezer bag, layering them with parchment paper if needed. They can be stored in the freezer for up to one month. To enjoy, simply thaw them to room temperature on a wire rack.
- Freezing Unbaked Cookie Dough: This is a fantastic option for making these cookies ahead of time! Prepare the cookie dough as directed through step 3 (before chilling). Then, you have two options:
- As a Whole Dough Ball: Form the dough into a ball, wrap it tightly in several layers of plastic wrap, and then place it in an airtight, freezer-safe Ziploc bag. Freeze for up to 3 months. When ready to bake, thaw the dough overnight in the refrigerator, then proceed with the recipe from step 4 (chilling, rolling, indenting, and filling).
- Portioned Dough Balls: For even quicker baking later, portion the dough into individual balls (step 6, before coating in sugar or indenting). Place these dough balls on a parchment-lined baking sheet and freeze until solid. Once frozen, transfer them to a freezer-safe container or bag. Freeze for up to 3 months. When you’re ready to bake, simply arrange the frozen dough balls on a prepared baking sheet, allow them to thaw at room temperature for about 15-20 minutes (or slightly longer for easier indenting), then roll in sugar, make the indentations, fill with jam, and bake as directed.
Remember, for both freezing methods of unbaked dough, wait to fill the dough with jam until it has thawed and you are just about to bake. This prevents the jam from becoming watery or affecting the dough’s texture during freezing.
Frequently Asked Questions About Thumbprint Cookies
Here are some common questions and helpful answers to ensure your Thumbprint Cookies turn out perfectly every time:
What kind of jam should I use to fill thumbprint jam cookies?
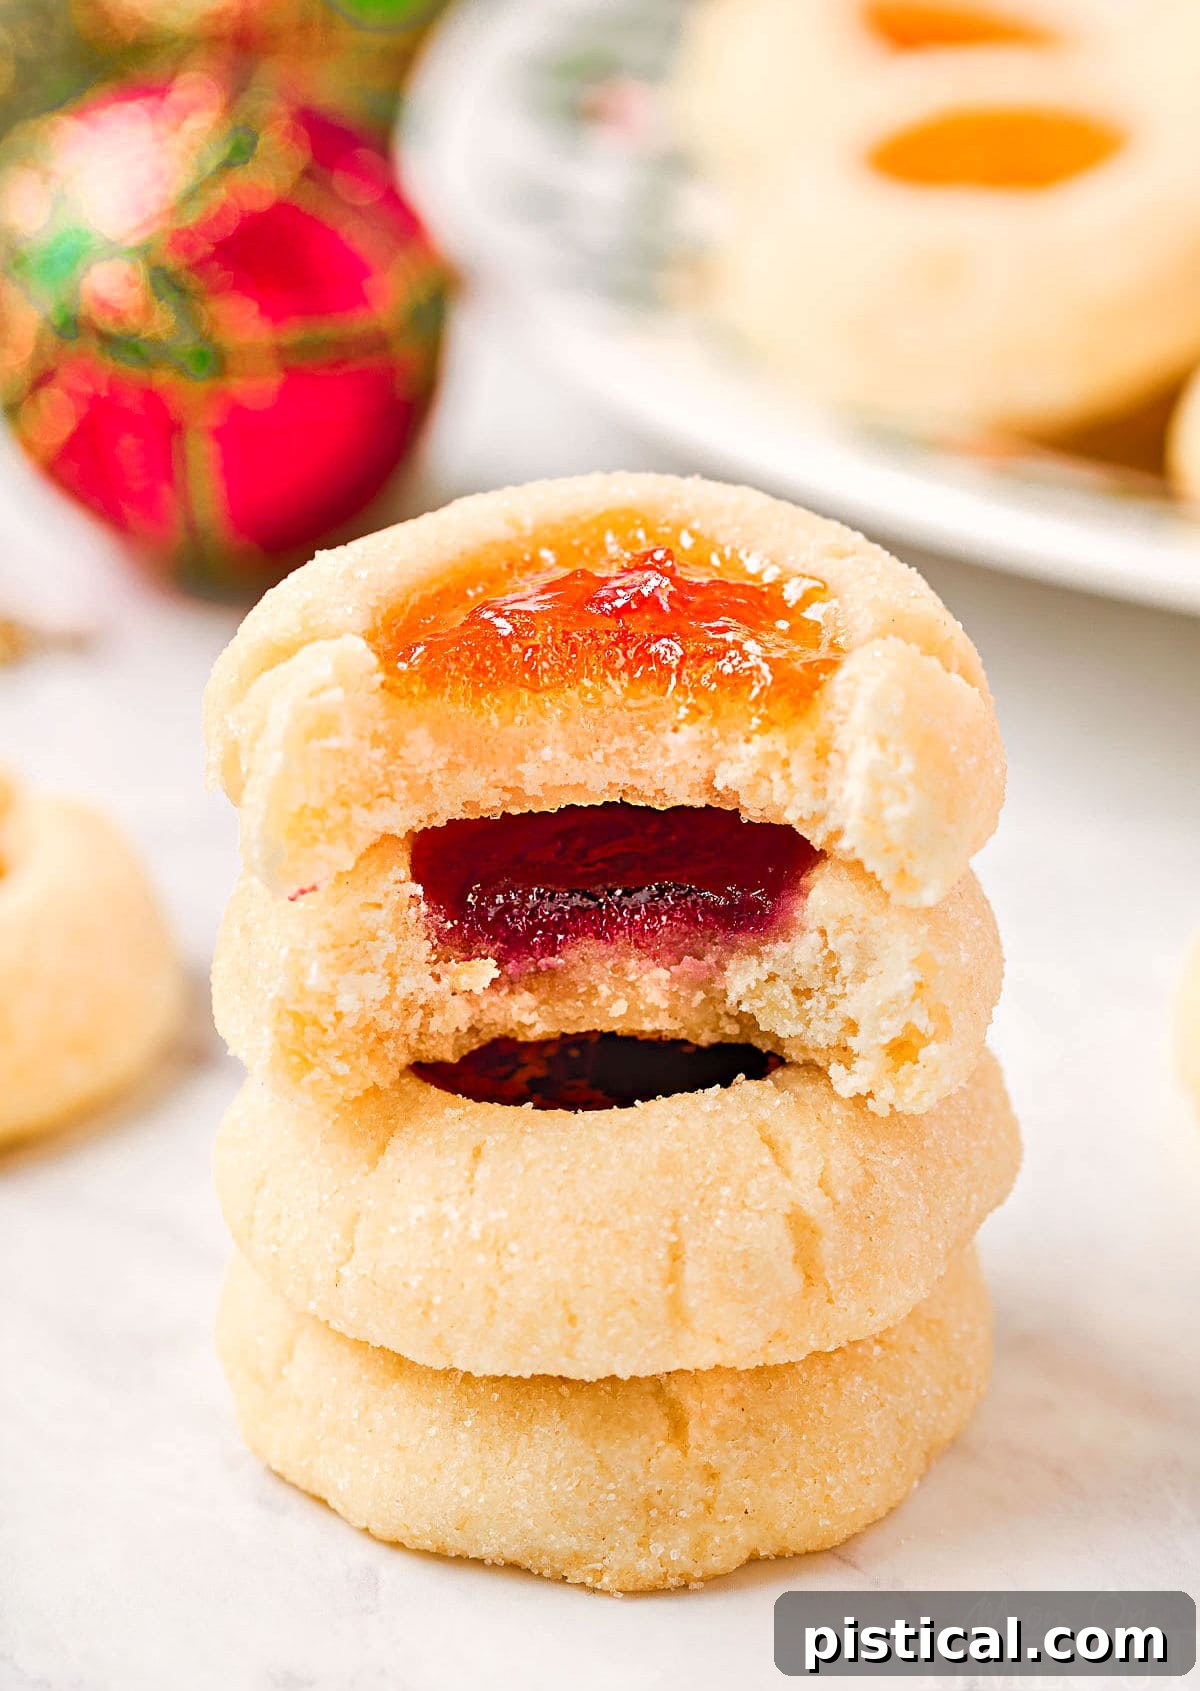
One of the most enjoyable aspects of baking Thumbprint Cookies is the freedom to customize the filling! While raspberry is traditionally the most popular choice for its classic flavor and vibrant color, and apricot is another timeless favorite, you can truly use any flavor you love. Consider strawberry, cherry, blackberry, orange marmalade, or even a spiced apple butter for a seasonal touch. The key is to use a thicker jam or preserve. Thicker jams are less likely to spread out over the cookie during baking, ensuring your beautiful “thumbprint” stays intact and the jam remains nestled perfectly in the center.
How long do these cookies last?
Baked Thumbprint Cookies, when stored in an airtight container at room temperature, will stay fresh and delicious for approximately 3 to 5 days. If you wish to extend their freshness, you can store them in the refrigerator for up to a week. Just make sure they are in a well-sealed container to prevent them from absorbing any odors from the fridge.
Can you freeze thumbprint cookies?
Yes, you can freeze Thumbprint Cookies! For the best results and texture, we typically recommend freezing the unbaked cookie dough rather than the baked cookies with jam. To do this, make the dough, roll it into a ball, and wrap it tightly in a few layers of plastic wrap. You can also portion the dough into individual balls and store them in a sealed freezer-safe container. Freeze the unbaked dough for up to three months. When you’re ready to bake, allow the dough to thaw overnight in the refrigerator (for a large ball) or at room temperature for about 15-20 minutes (for individual balls), then proceed with forming the indentations, filling with jam, and baking as directed in the recipe. If you prefer to freeze baked cookies, cool them completely, then store them in a freezer-safe container for up to one month. Thaw at room temperature before serving.
What other variations can I make with these cookies?
The versatility of Thumbprint Cookies is fantastic! Here are a few popular variations to try:
- Almond Infusion: Add a teaspoon of almond extract to the cookie dough. This pairs wonderfully with raspberry jam, creating a classic flavor combination.
- Chocolate Drizzle: Once the cookies are cooled, drizzle melted dark or white chocolate across their tops for an extra touch of elegance and flavor.
- Citrus Zest: Incorporate a teaspoon of lemon or orange zest into the cookie dough for a bright, fresh flavor that complements many fruit jams.
- Nutty Coating: Instead of rolling the cookies in granulated sugar, try finely chopped nuts (like pecans, walnuts, or almonds) for a different texture and nutty flavor.
- Icing Finish: For a less sweet cookie base, skip rolling the cookies in granulated sugar before baking. After baking and cooling, you can dust them with powdered sugar or drizzle a simple glaze (made from powdered sugar and milk/water/lemon juice) over them.
- Curd Fillings: Experiment with lemon curd, lime curd, or passion fruit curd instead of jam for a tangy and creamy center.

Expert Tips for Baking Perfect Thumbprint Cookies
Achieving the perfect Thumbprint Cookie is all about paying attention to a few key details. These tips and tricks will help you avoid common pitfalls and ensure your cookies are consistently beautiful and delicious:
- Preventing Cookie Spreading: If you notice your Thumbprint Cookies are spreading out too much in the oven, it’s a clear sign that your dough has become too warm. Warm dough causes the butter to melt too quickly, leading to flat cookies. The fix is simple: pop your shaped and filled cookie dough back into the refrigerator for an additional 10 to 15 minutes before baking. A colder dough holds its shape better.
- Avoid Overfilling the Centers: While it might be tempting to generously load up the jam, resist the urge to overfill the indentations. If you add too much jam, it will bubble up and spill over the top of the cookies during baking, ruining their neat appearance. Aim for about half a teaspoon of jam per cookie, ensuring it sits nicely within the well.
- The Power of Chilled Dough: Remember, chilled dough is your best friend when making shortbread-style cookies like these. Cold dough is significantly easier to work with; it’s less sticky and holds its shape better during rolling and indenting. If at any point you find your dough becoming too sticky or difficult to handle while working with it, simply place it back into the refrigerator for 5 to 10 minutes, or until it becomes more manageable again.
- A Magical Finishing Touch: For an elegant and subtly sweet finish, a quick dusting of powdered sugar transforms these cookies. It adds a delicate veil that makes them look even more festive and professionally baked. A dusting wand or a fine mesh sieve works wonders for an even coating.
- Jam Quantity and Consistency: For this recipe, we specify a total of ¼ cup of jam. This quantity is generally sufficient for filling all the cookies without overdoing it. While we used ⅛ cup each of apricot and seedless raspberry jam, feel free to use any combination or a single flavor that totals ¼ cup. It’s also worth reiterating: opt for a jam that is slightly thicker in consistency. This helps it stay put in the indentation during baking.
- Dough Texture Warning: When you’re first mixing the flour into the butter and sugar mixture, the dough will often look quite crumbly and appear as if it won’t come together. Don’t panic! Continue mixing for another 1-2 minutes, scraping down the bowl as needed, and it should gradually coalesce into a cohesive dough. If truly stubborn, a brief moment of kneading by hand can help.
- Achieving Even Indentations: Using your thumb is traditional, but it can sometimes create uneven wells. A neat trick is to press a second time into the indentation after the initial press. This helps to level out any sloped sides and creates a perfectly even hole, providing a stable and attractive bed for your jam. The back of a rounded measuring spoon (like a 1/2 teaspoon or 1/4 teaspoon) can also create a perfectly uniform well.
- Understanding the No-Leavening Factor: As mentioned before, a unique characteristic of this recipe is the complete absence of leavening ingredients (no eggs, no baking soda, no baking powder). This is intentional! It means that the cookies will maintain their exact shape and size from the moment they enter the oven until they emerge beautifully baked. This characteristic is what gives them their classic shortbread-like crispness and ensures your thumbprints remain defined.
More Festive Christmas Cookies to Explore
If you’re already planning your holiday baking or simply love to indulge in festive treats, these additional cookie recipes are sure to bring joy to your kitchen and your taste buds:
- Grinch Cookies: Fun, vibrant, and perfect for a themed holiday party.
- Chocolate Crinkle Cookies: Rich, fudgy, and beautiful with their powdered sugar coating.
- Kolaczki (Polish Cookies): Delicate cream cheese pastries with sweet fruit fillings, a true classic.
- Peppermint Snowball Cookies: Meltingly tender, minty, and rolled in powdered sugar for a snowy look.
- Coconut Macaroons: Chewy, sweet, and naturally gluten-free for a tropical escape.
- Almond Joy Cookies: A simple 4-ingredient recipe that tastes just like the candy bar.
- Coconut Macaroon Blossoms: A delightful combination of chewy macaroon and chocolate kiss.
Thumbprint Cookies Recipe Card

Print Recipe
Pin Recipe
5 from 21 votes
Thumbprint Cookies
These Thumbprint Cookies are pretty as a picture and the perfect bite-sized cookie for your next holiday gathering! Buttery, shortbread style cookies are coated in sugar and filled with your choice of jam. Perfect for holiday parties, cookie exchanges or a late night treat for Santa!
Course: Cookies, Dessert
Cuisine: American
Keyword: jam thumbprint cookies, thumbprint cookie recipe, thumbprint cookies, thumbprint cookies recipe
Prep Time: 20 minutes
Cook Time: 15 minutes
Chill Time: 1 hour
Servings: 36 cookies
Calories: 99 kcal
Author: Trish – Mom On Timeout
Ingredients
- 1 cup unsalted butter, room temperature
- ⅔ cup granulated sugar
- 1 teaspoon vanilla extract (or almond extract)
- ½ teaspoon kosher salt
- 2 cups all-purpose flour
- ¼ cup jam (I used apricot and seedless raspberry jam)
Cookie Coating
- ⅓ cup granulated sugar
Instructions
- In the mixing bowl of a stand mixer fitted with the paddle attachment, add the butter and granulated sugar. Beat on a medium speed for two to three minutes or until the mixture is light and creamy. (Ingredients: 1 cup unsalted butter, ⅔ cup granulated sugar)
- Add the vanilla extract and salt and beat until thoroughly combined. (Ingredients: 1 teaspoon vanilla extract, ½ teaspoon kosher salt)
- Scrape down the sides of the mixing bowl and reduce to a low speed. Gradually add in the flour, scraping down the sides and bottom of the bowl as needed. The dough may not appear like it’s coming together but give it a minute or two. You can also work the dough with your hands to make it come together quicker. (Ingredients: 2 cups all-purpose flour)
- Roll the dough into a ball and wrap it in plastic wrap. Refrigerate for one hour.
- Once the dough has chilled for an hour, preheat the oven to 350°F and line two baking sheets with parchment paper.
- Place 1/3 cup of granulated sugar in a shallow bowl. (Ingredients: ⅓ cup granulated sugar)
- Scoop one tablespoon of dough and roll into a ball. Coat each ball of dough by rolling in the bowl of sugar. Place the balls on the prepared baking sheets.
- Make an indentation in the center of each cookie using your thumb. Fill with half a teaspoon of jam. Repeat until all cookies are filled. (Ingredients: ¼ cup jam)
- Bake for 14 to 15 minutes or until the bottom edges just begin to brown. Let the cookies sit on the baking sheet for one additional minute before moving to a wire rack to cool.
- Let cookies cool completely before storing in an airtight container.
Notes
Storage Information
Store any leftover stained glass cookies in an airtight container at room temperature for 3 to 5 days. To increase longevity you can store them in your refrigerator for up to a week!
To Freeze: You can freeze these jam-filled cookies as well. Store cooled cookies in a freezer-safe container for up to a month. Thaw to room temperature and enjoy! If you want to make the cookie dough in advance, make the dough, transfer to an airtight, freezer-safe ziploc bag and freeze for up to 3 months. Thaw overnight in the refrigerator. Proceed with recipe as directed.
Nutrition
Calories: 99 kcal | Carbohydrates: 12g | Protein: 1g | Fat: 5g | Saturated Fat: 3g | Polyunsaturated Fat: 0.2g | Monounsaturated Fat: 1g | Trans Fat: 0.2g | Cholesterol: 14mg | Sodium: 34mg | Potassium: 11mg | Fiber: 0.2g | Sugar: 7g | Vitamin A: 158IU | Vitamin C: 0.2mg | Calcium: 3mg | Iron: 0.3mg