
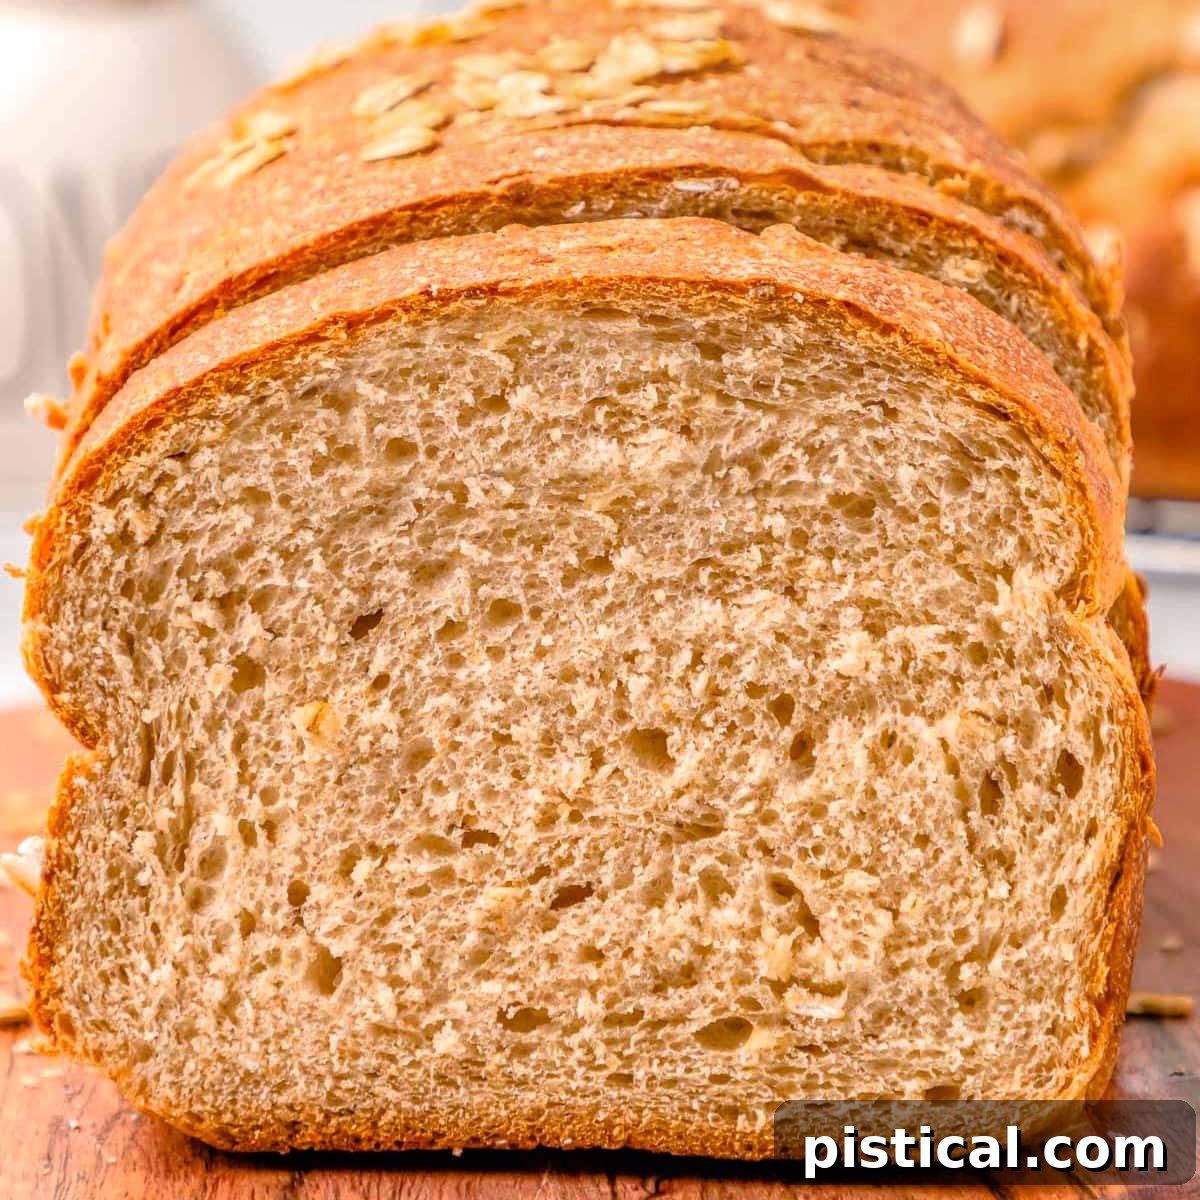
There’s an undeniable magic to baking bread at home, and this **Homemade Whole Wheat Bread** recipe perfectly captures that charm. Far superior to anything you can find on store shelves, this loaf is crafted with wholesome oats, rich brown sugar, and sweet honey, resulting in a robust texture and a subtly sweet flavor profile. It’s the ideal foundation for hearty sandwiches, a comforting companion to a bowl of soup, or simply toasted and spread with your favorite topping. Once you experience the warmth and flavor of freshly baked whole wheat bread, you’ll never look back.
If the delightful prospect of homemade bread truly excites you, be sure to explore more of our cherished recipes, including our beloved Banana Bread, the effortlessly delicious Molasses No Knead Bread, and our family-favorite Cinnamon Swirl Bread.
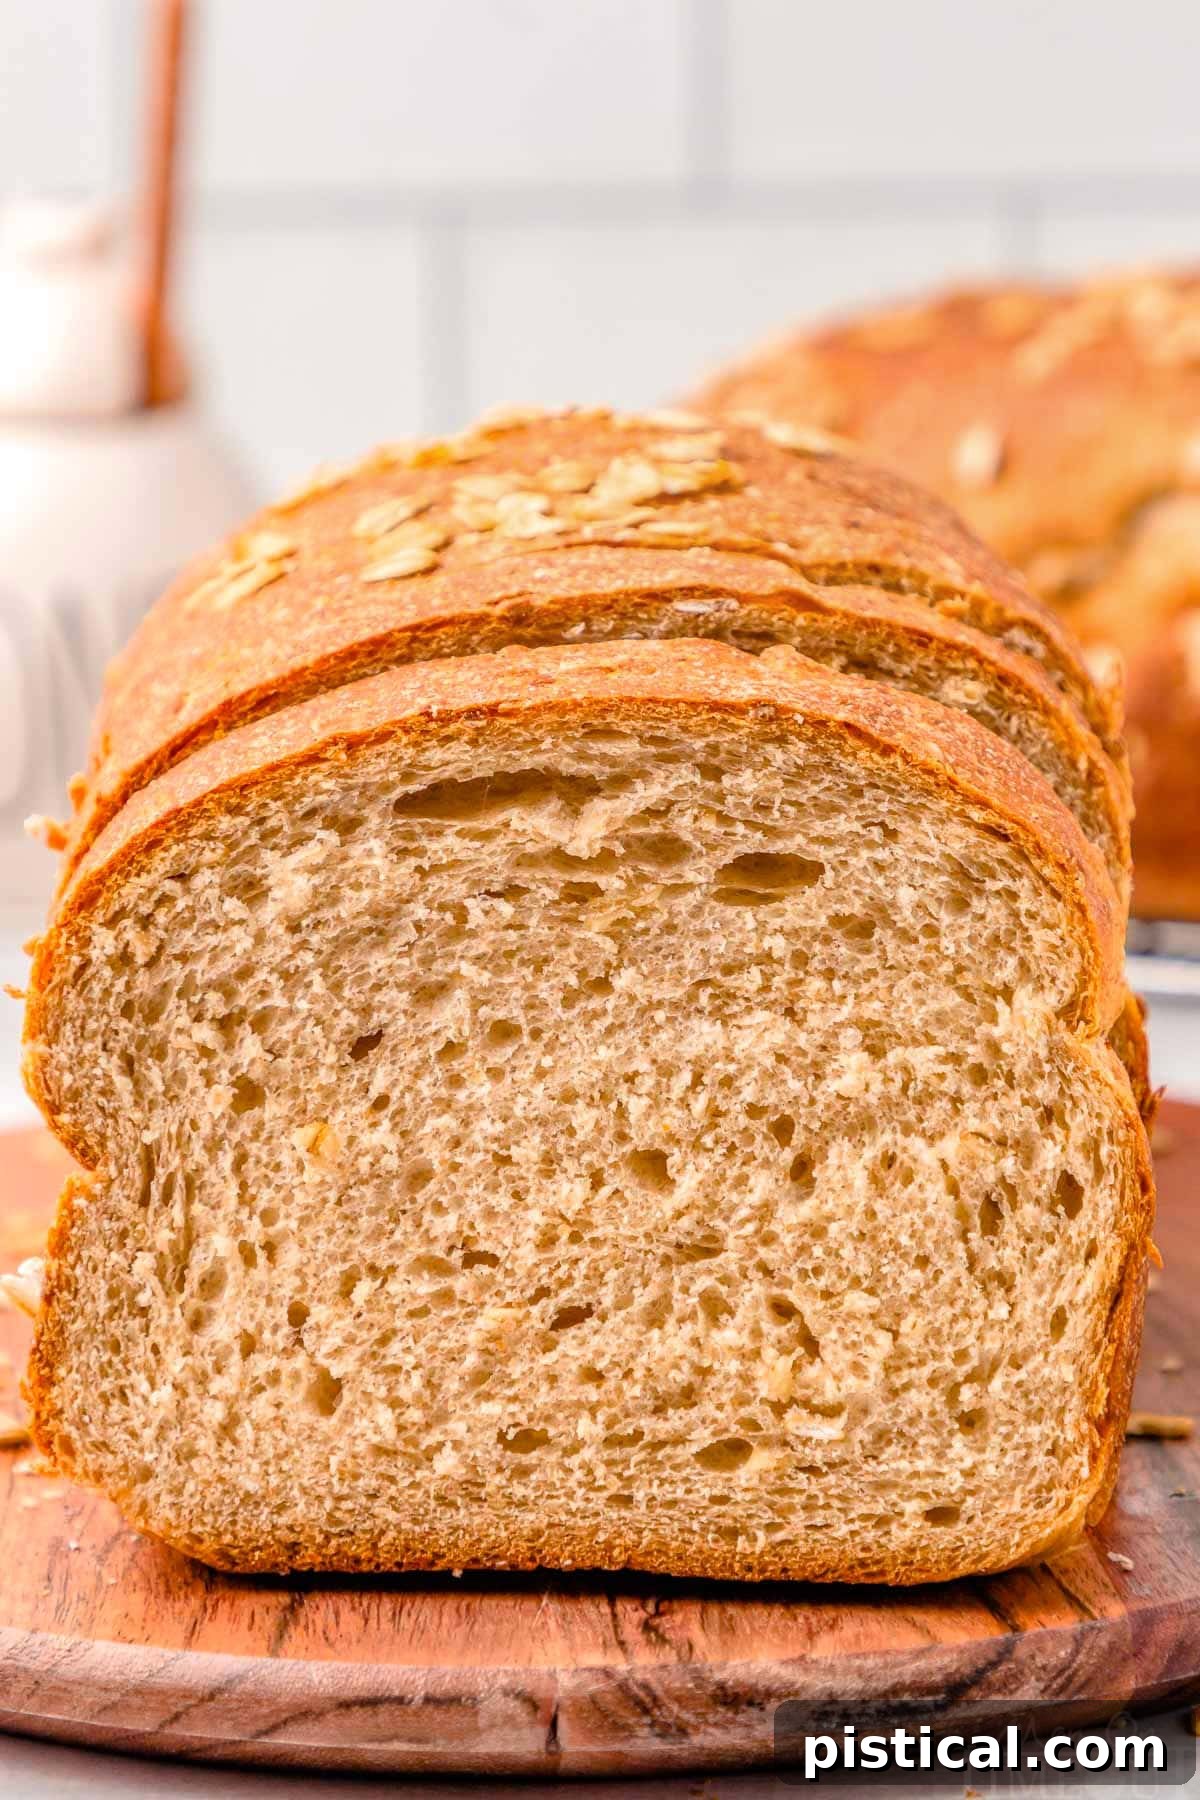
Unveiling Our Signature Homemade Honey Wheat Bread Recipe
Few things rival the simple pleasure of homemade bread. The aroma alone fills your kitchen with an inviting warmth, and the taste of a slice, still warm from the oven, is truly incomparable. Among our collection of cherished recipes, this **Honey Wheat Bread recipe** stands out as a true gem. We often bake bread in our home, and there’s something uniquely special about this **Whole Wheat Bread**, characterized by delightful hints of honey and brown sugar, the comforting heartiness of oats, and the wholesome, nutty depth of wheat flour. It’s a culinary experience that truly feeds the soul.
This easy **wheat bread recipe** yields two exquisite loaves, each boasting a rustic charm and an abundance of flavor, coupled with an incredibly satisfying texture. Wholesome and heartwarming, this versatile bread serves as the perfect canvas for your favorite jams, rich butters, or a wide array of sandwich fillings. Whether it’s a casual breakfast or a special meal, this bread elevates every occasion, making it a staple in any kitchen.
Why This Homemade Whole Wheat Bread Will Become Your Go-To
The enchanting aroma of freshly baked bread is just the beginning! There are countless reasons why this **Whole Wheat Oatmeal Bread** recipe is destined to become a beloved staple in your kitchen:
Versatility Beyond Compare
This exceptional bread offers incredible versatility. Enjoy it straight from the oven, still warm and slathered with a pat of butter, for an instant comfort meal. It transforms beautifully into perfectly golden toast, forming the ideal base for sweet or savory toppings. Its robust structure makes it perfect for substantial sandwiches, holding up well to a variety of fillings. And, of course, it’s an indispensable companion to a steaming bowl of your favorite soup or stew, soaking up all the delicious flavors.
Simple, Wholesome Pantry Staples
Crafting this delicious bread is surprisingly straightforward, relying mostly on ingredients you likely already have in your pantry. While the recipe calls for bread flour, which contributes to its superior texture and is readily available at most grocery stores, you can easily substitute all-purpose flour in a pinch, though the final texture may be slightly different. Other core ingredients like yeast, sugar, milk, butter, and oats are everyday items, making this recipe accessible and convenient for bakers of all experience levels.
A Symphony of Sweet and Savory Flavors
The careful combination of golden honey and rich brown sugar imparts a perfect, balanced sweetness to this hearty **honey wheat bread**, without ever being overpowering. These natural sweeteners complement the nutty notes of the whole wheat and the earthiness of the oats, creating a complex and utterly delicious flavor profile. If you prefer a less sweet loaf, both the brown sugar and honey quantities can be easily halved, or one of them can even be omitted entirely, allowing you to customize the bread to your precise preference.
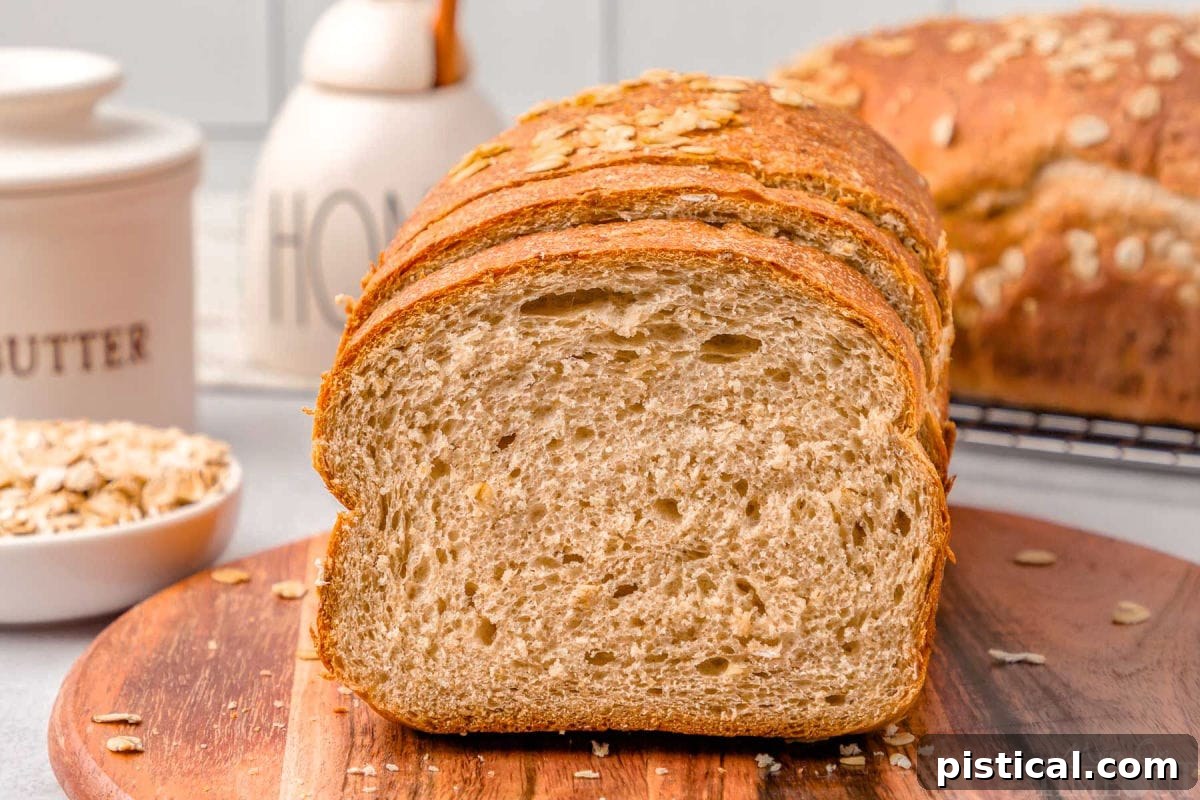
Endless Ways to Savor Your Whole Wheat Loaf
While my absolute favorite way to enjoy this homemade **wheat bread recipe** is fresh from the oven with a generous spread of Honey Butter, its versatility means there are countless other delicious avenues to explore:
The Quintessential Breakfast Treat
Start your day on a heartwarming note by slathering a warm slice of this bread with butter, your favorite fruit jam, or a drizzle of extra honey. Its wholesome flavor and satisfying texture make it a perfect accompaniment to your morning coffee or tea, providing a comforting and nourishing beginning to any day.
Elevate Your Everyday Sandwiches
Transform an ordinary peanut butter and jelly sandwich into something truly extraordinary with this **whole wheat sandwich bread**. Its hearty texture and mild sweetness provide an excellent base for a wide range of fillings, from classic cold cuts and cheeses to a gourmet grilled cheese. The bread’s structure ensures your sandwich holds together beautifully, delivering a delightful bite every time.
Perfectly Toasted Delights
This bread toasts magnificently, developing a crisp exterior and a tender interior. For a modern and nutritious twist, pair a slice of golden toast with mashed avocado, a sprinkle of flaky sea salt, and a generous drizzle of high-quality olive oil. It also works wonderfully with cream cheese, savory spreads, or simply as a side to eggs.
Decadent French Toast Experience
A true weekend indulgence in our home! Use thick slices of this **oatmeal bread** to create the most incredible French toast. The inherent heartiness of the oats and whole wheat flour adds an extra dimension of flavor and texture that pairs exquisitely with maple syrup, fresh berries, and a cloud of homemade whipped cream. It’s a breakfast that feels truly special.
The Ultimate Soup Companion
A thick slice of this wholesome bread is the quintessential accompaniment to your favorite homemade soups or robust stews. In fact, we often strategically plan to make a big batch of soup on the very day we bake this bread, ensuring we can enjoy their perfect pairing together. Its sturdy crumb is excellent for dipping and soaking up every last drop of flavorful broth.
Essential Ingredients for Your Whole Wheat Masterpiece
We absolutely adore this **whole wheat bread recipe**! The old-fashioned oats lend a wonderfully hearty texture, the honey provides a delicate hint of sweetness, and the brown sugar harmoniously ties all the flavors together. Baking two freshly baked loaves means there’s always enough to share with family and friends, or to freeze one for later enjoyment. As always, you’ll find the complete printable recipe with detailed instructions in the dedicated recipe card at the end of this article. But first, let’s explore the key ingredients you’ll need to create this magnificent loaf:
- Yeast: The Leavening Agent: We primarily use active dry yeast for this recipe, which acts as the crucial leavening agent, allowing the bread to rise beautifully and achieve its airy, tender crumb. Instant yeast can also be used as a substitute; with instant yeast, there’s no need for an initial proofing step as it can be added directly with the dry ingredients.
- Granulated Sugar: Activating and Nourishing: A small amount of granulated sugar is added to the warm water with the yeast. This sugar not only helps to activate and proof the yeast, ensuring it’s alive and active, but it also provides an initial food source for the yeast, kickstarting the fermentation process.
- Warm Water: The Catalyst: Warm water, ideally around 110°F (43°C), is essential for dissolving the sugar and activating the yeast. Water that is too cold will inhibit yeast activity, while water that is too hot can kill the yeast, preventing the dough from rising.
- Whole Milk: Richness and Tenderness: Whole milk is incorporated into the dough to contribute to a richer flavor profile and a more tender, softer crumb. Like the water, the milk should be warmed to approximately 110°F (43°C) to maintain the optimal temperature for yeast activity and ensure a smooth, well-integrated dough.
- Unsalted Butter: Enhancing Flavor and Texture: Melted unsalted butter adds luxurious richness and depth of flavor to the **homemade wheat bread**. It also contributes to the bread’s tender interior and helps to create a slightly crisp, golden crust. Using unsalted butter allows you to control the overall salt content in the recipe.
- Brown Sugar and Honey: Natural Sweeteners: The combination of light brown sugar and honey is what gives this bread its signature subtle sweetness and beautiful golden hue. Brown sugar offers a molasses-rich depth, while honey provides a floral sweetness and helps keep the bread moist. For those who prefer a less sweet loaf, both ingredients can be reduced by half, or one can be omitted entirely, without significantly compromising the bread’s structure.
- Old Fashioned Oats: Hearty Texture: Old-fashioned rolled oats are integral to creating a heartier bread with a delightful, chewy texture. They also add a wholesome, rustic appeal. We also love to sprinkle a few oats on top of the loaves before baking for an appealing visual finish.
- Whole Wheat Flour: Nutty Goodness: We recommend using approximately half whole wheat flour and half bread flour in this recipe, as this balance yields a perfect compromise between the wholesome, nutty flavor of whole wheat and the superior structure of bread flour. If you wish to increase the whole wheat content, you can do so by reducing the bread flour by an equivalent amount, keeping in mind it may result in a denser loaf.
- Salt: Flavor Enhancer: Fine sea salt is a crucial ingredient, as it enhances the flavors of all the other components and balances the sweetness from the honey and brown sugar. It also plays a role in controlling yeast activity and strengthening the dough’s gluten structure.
- Bread Flour: Superior Structure: Bread flour, with its higher protein content, is key to achieving the characteristic chewiness and elasticity of a truly great homemade bread. The added protein forms stronger gluten strands, which in turn trap more gas, resulting in a lighter, airier loaf. While all-purpose flour can be substituted, anticipate a slightly different texture. If using all-purpose flour, consider adding 2 tablespoons of vital wheat gluten to help replicate the structure.
Baking Your Perfect Loaves: A Step-by-Step Guide to Homemade Wheat Bread
If you’re new to the wonderful world of baking homemade bread, prepare for an absolute treat! This **Whole Wheat Bread recipe** is significantly more satisfying than any store-bought alternative and requires surprisingly minimal hands-on effort. While you’ll need to allocate a couple of hours for the dough to rise, the actual active preparation time is less than 15 minutes. For your convenience, the full printable recipe with comprehensive instructions is available in the recipe card at the conclusion of this post.
Activating the Yeast: The Foundation of Your Dough
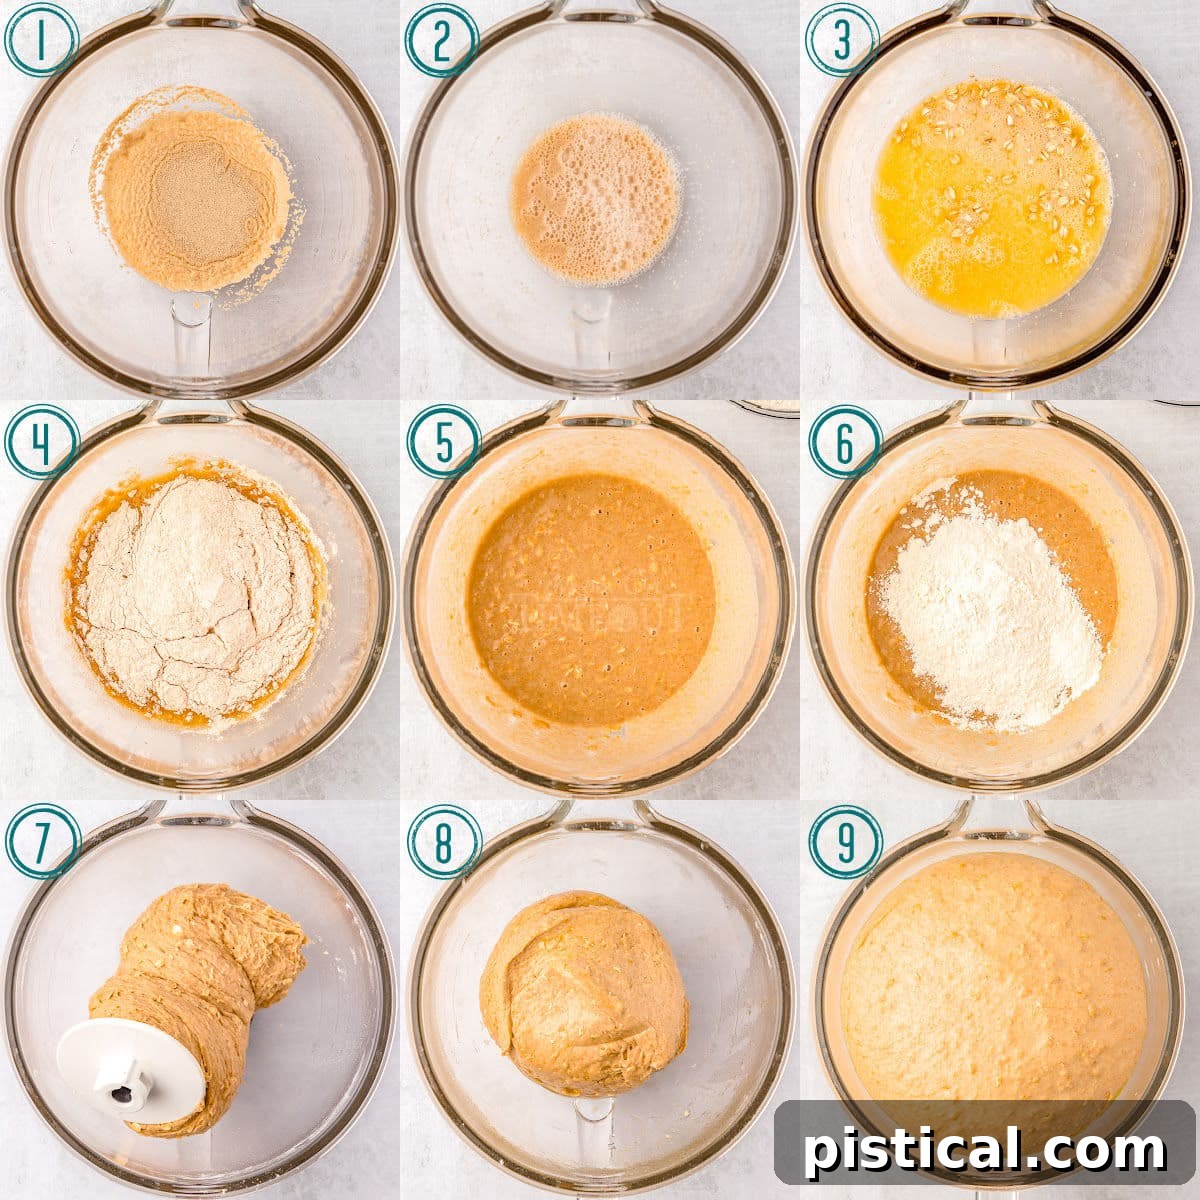
- Begin by combining the yeast, a tablespoon of granulated sugar, and the warm water in a large mixing bowl. If you’re using a stand mixer, use its bowl for this step. Gently stir these ingredients together until well combined.
- Allow the mixture to sit undisturbed for precisely 5 minutes. During this time, you should observe bubbles or a foamy layer forming on the surface. This is a crucial step for two reasons: it softens the yeast, making it active, and it serves as a reliable test to confirm your yeast is alive and potent. If, after 5 minutes, you don’t see any bubbling or foam, it’s highly likely your yeast is inactive or expired, and it’s best to discard the mixture and start again with fresh yeast.
Crafting the Dough: Mixing and Kneading
- Once your yeast is activated, stir in the warm milk, melted unsalted butter, light brown sugar, honey, and old-fashioned oats into the yeast mixture. Mix thoroughly until all these wet ingredients are well combined and evenly distributed.
- Next, add the whole wheat flour and salt to the wet mixture. Stir these ingredients until they are just combined, forming a shaggy dough. Use a spatula to scrape down the sides and bottom of the bowl as needed, ensuring all ingredients are incorporated.
- Gradually incorporate the bread flour (or all-purpose flour if substituting), adding it about ⅓ cup at a time. Mix on medium-low speed, using a dough hook if using a stand mixer, until all of the flour is fully integrated into the dough. Continue scraping down the bowl frequently to ensure even mixing. The dough will be somewhat sticky, which is normal for this recipe due to the honey content.
- Increase the mixer speed to medium-high and continue kneading the dough for a full 8 minutes. During this time, you’ll notice the dough transforming, becoming smoother and more elastic, and it should begin to pull away from the sides of the bowl. This vigorous kneading develops the gluten, which is essential for the bread’s structure and texture.
The First Rise: Patience is Key
- Lightly spray a clean, large bowl with nonstick cooking spray. Carefully transfer the kneaded dough into this prepared bowl.
- Cover the bowl securely with plastic wrap or a clean tea towel. This helps to create a warm, moist environment for the yeast.
- Place the covered bowl in a warm, draft-free place in your kitchen. Allow the dough to rise for approximately 2 hours, or until it has visibly doubled in size. This slow fermentation process is critical for developing the bread’s flavor and texture.
Shaping and the Second Rise
- While the dough is undergoing its first rise, prepare two loaf pans. Spray each pan thoroughly with nonstick cooking spray, then line them with a piece of parchment paper, allowing the paper to overhang on the sides for easy removal later. We prefer 8.5 x 4.5 inch loaf pans, but 9 x 5 inch loaf pans also work perfectly. Set these aside.
- Once the first rise is complete, gently remove the dough from the bowl and divide it into two equal portions.
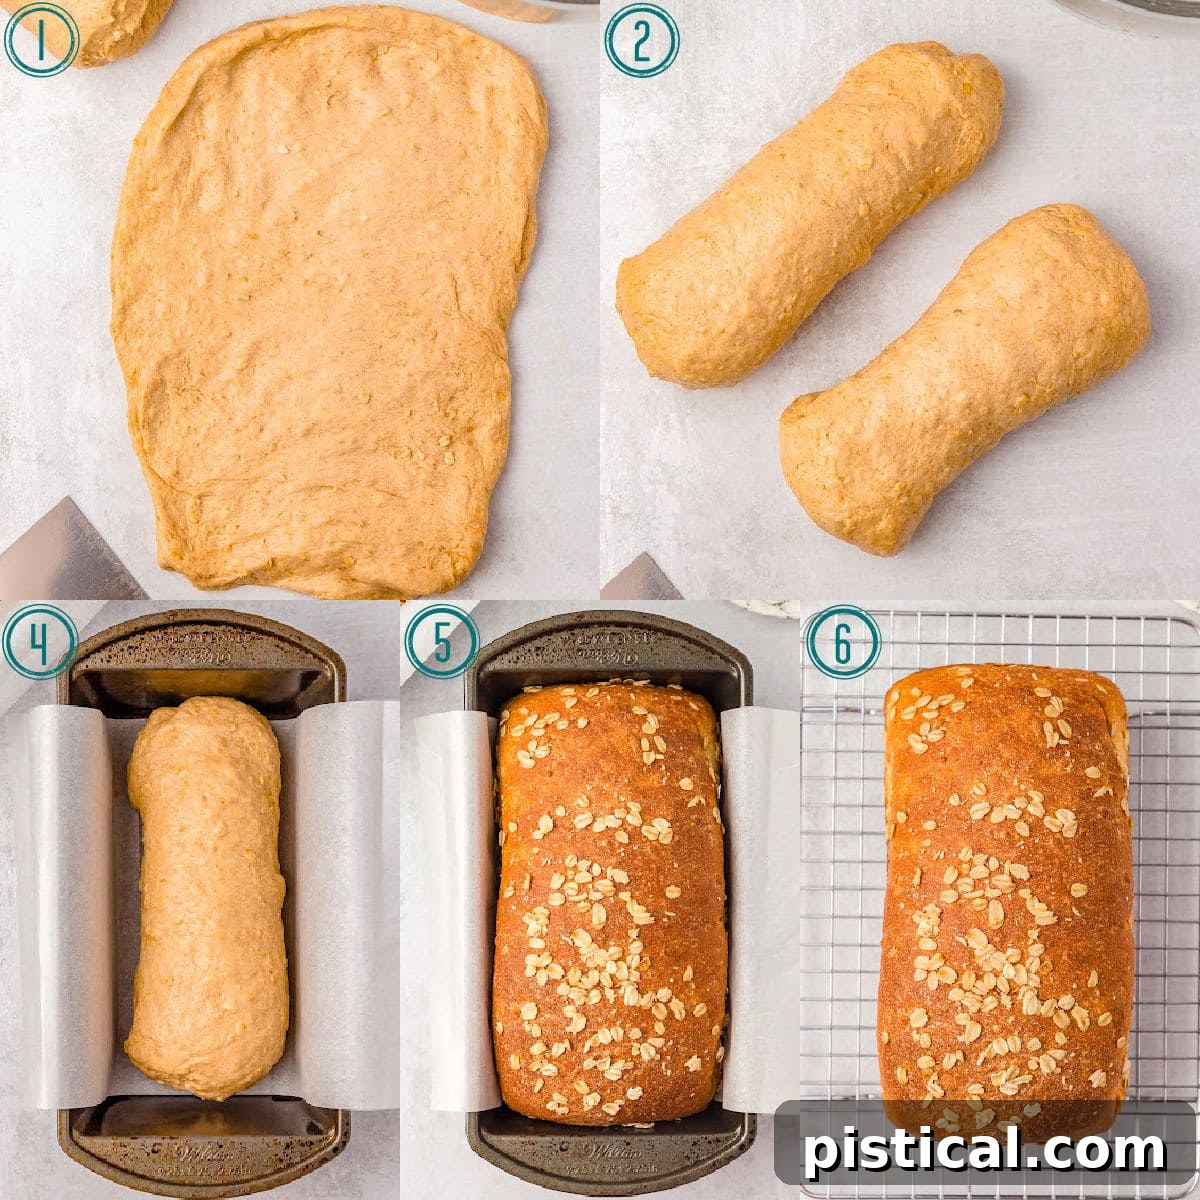
- Working with one portion at a time on a lightly floured surface, roll or pat the dough out into a rectangle, roughly 8 by 12 inches. As you do this, make sure to press out any visible air pockets. Air pockets can lead to undesirable hollow spaces within the final baked bread, unlike sourdough where they are desired.
- Starting from a short end of the rectangle, carefully roll the dough up tightly into a log. Pinch the seam firmly together along the entire length to seal the loaf. Place each shaped loaf, seam-side down, into its prepared loaf pan. If desired, sprinkle the top of each loaf with about a tablespoon of additional old-fashioned oats for a decorative and textured crust.
- Cover the loaves again with plastic wrap or a tea towel and let them rise for a second time in a warm, draft-free spot. This second rise should take about 45 minutes to 1 hour, or until the loaves have doubled in size within their pans.
Baking to Golden Perfection
- Approximately 10 minutes before your dough is expected to finish its second rise, preheat your oven to 375°F (190°C). This ensures the oven is at the correct temperature for immediate baking.
- Bake the loaves in the preheated oven for 25 to 30 minutes, or until the tops are beautifully golden brown. To confirm doneness, an internal thermometer inserted into the center of the loaf should register around 210°F (99°C). If you notice the tops browning too quickly, loosely tent a piece of aluminum foil over the loaves to prevent over-browning.
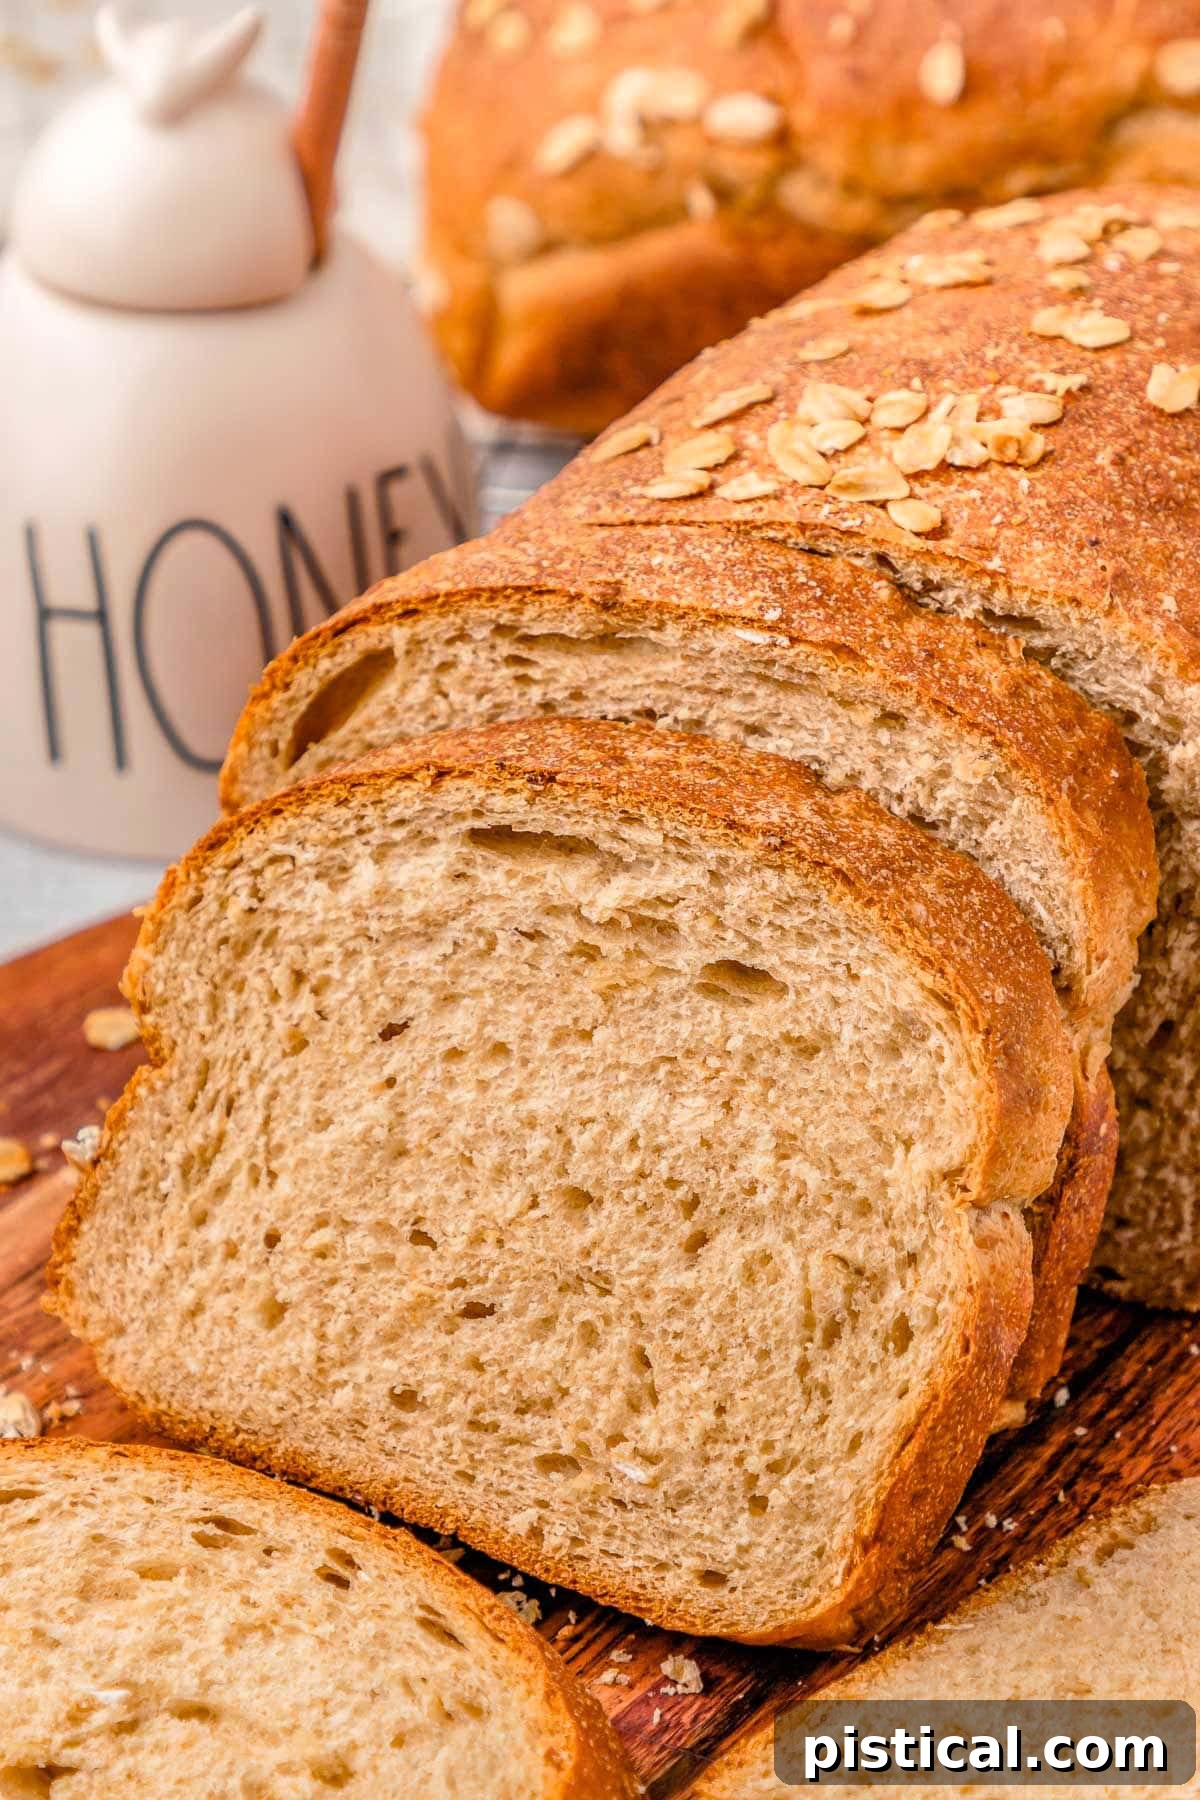
- Once baked, carefully remove the bread from the oven. Allow the loaves to cool in their pans for a few minutes before transferring them to a wire rack to cool completely. It’s crucial to let the bread cool for at least 20 minutes before attempting to slice it. This resting period allows the internal structure of the bread to set, ensuring cleaner slices and preventing a gummy texture. Serve your delicious homemade **Honey Wheat Bread** with honey, jam, butter, or as the base for a delightful sandwich!
Storage Information for Your Freshly Baked Loaves
To maintain its optimal freshness and flavor, this **Whole Wheat Oatmeal Bread** should be stored in an airtight container or a large resealable plastic bag at room temperature, where it will remain delicious for up to 3 days. For extended storage, you can refrigerate the bread for up to 1 week.
To freeze your homemade bread for even longer enjoyment, first ensure the loaves are completely cooled. Then, wrap each loaf tightly in plastic wrap, followed by a layer of aluminum foil, or place them in a freezer-safe resealable bag. Stored this way, the bread will keep well in the freezer for up to 3 months. To thaw, simply remove the bread from the freezer and let it come to room temperature on your countertop. For added convenience, consider slicing the bread before freezing; this allows you to thaw only the number of slices you need at a time, minimizing waste and maximizing freshness.
Frequently Asked Questions About Our Whole Wheat Bread Recipe
Yes, you can substitute quick oats for old-fashioned oats in this **homemade bread recipe**. However, be aware that quick oats are cut smaller and absorb liquid more quickly, which will result in a slightly different texture in your final bread, likely a bit softer and less chewy than if using old-fashioned oats.
Several factors can prevent your dough from rising. First, always check the expiration date of your yeast; old yeast is often inactive. Ensure your dough is rising in a warm, draft-free environment, as cold temperatures can significantly slow down or halt fermentation. Crucially, verify that your warm water and milk are not above 110°F (43°C), as excessively hot liquids will kill the yeast, rendering it ineffective.
Absolutely, you can use all-purpose flour instead of bread flour for your **whole wheat bread**. The resulting bread will still be delicious, but you might notice a slight difference in texture; it may be less chewy or have a slightly softer crumb due to all-purpose flour’s lower protein content. To compensate, you can add 2 tablespoons of vital wheat gluten to the recipe when using all-purpose flour to help strengthen the dough’s structure.
This particular **Honey Wheat Bread** dough is naturally stickier than many other bread doughs, primarily due to the inclusion of honey. Honey is a hygroscopic ingredient, meaning it attracts and holds onto moisture, which contributes to the dough’s stickiness. If your dough is excessively sticky, sticking persistently to the bowl and not forming any discernible ball, you can gradually add a tablespoon of flour at a time until it begins to pull away from the sides of the bowl. Remember, a slight stickiness is normal for this recipe.
Yes, you certainly can adjust the sweetness level of your **homemade wheat bread**. You can reduce both the honey and brown sugar by half, or even choose to omit one of them entirely. We recommend trying the recipe as written first to experience its intended balanced flavor, and then adjusting the amounts in subsequent batches based on your personal preference for sweetness.
Yes, you can use a non-dairy milk alternative, such as almond milk or soy milk, in this recipe. While the flavor and texture of the resulting bread might change slightly compared to using whole milk (which contributes richness and fat), the bread will still be wonderfully delicious and will rise successfully.
Absolutely! This **whole wheat bread recipe** is incredibly adaptable and can be easily halved. Simply divide all the ingredient quantities by two to make a single, perfectly sized loaf, which is great if you have a smaller household or less time.
There are a few reliable indicators to determine if your **homemade bread** is done. The crust should have achieved a beautiful, golden-brown color. When you gently tap the bottom of a baked loaf, it should sound hollow. For the most accurate assessment, an instant-read thermometer inserted into the center of the loaf should register an internal temperature of approximately 210°F (99°C).
Of course! While a stand mixer can make the kneading process easier and quicker, hand kneading the dough works just as effectively and yields equally fantastic results. The process of hand kneading can be quite therapeutic and allows you to truly connect with your dough. Just be prepared for a good arm workout!
Expert Tips for Baking Success with Your Whole Wheat Oatmeal Bread
This **whole wheat bread recipe** is incredibly straightforward, but here are some invaluable tips and tricks from Trish to help you achieve the very best results every single time:
- Enhance with Nuts or Seeds: For an added layer of crunch, flavor, and nutritional boost, consider incorporating nuts or seeds into your dough. Sunflower seeds, chopped pecans, walnuts, flax seeds, or even a mix of your favorites would work beautifully. Start with about half a cup of chopped nuts or seeds and adjust the quantity to your preference.
- Sweet Surprises with Dried Fruits: Introduce a delightful burst of sweetness and chewiness by adding dried fruits to the dough. Raisins, dried cranberries, or chopped apricots are excellent choices that complement the **honey wheat bread** flavors beautifully. Add about half a cup during the mixing stage.
- Easily Halved for Single Loaves: This recipe is designed to yield two loaves, perfect for sharing or freezing. However, if you only need one loaf, simply halve all the ingredients. The baking times and instructions remain largely the same, making it incredibly flexible.
- Choose the Right Loaf Pan: The recipe works wonderfully in standard 8.5 x 4.5 inch loaf pans, which tend to produce a slightly taller, more substantial loaf. However, it is equally successful when baked in 9 x 5 inch loaf pans, which may result in a slightly wider loaf. Both sizes will yield delicious bread.
- Don’t Skip the Yeast Proofing: The initial step of combining yeast, sugar, and warm water and letting it sit for 5 minutes is critical. This “proofing” step not only activates the yeast but also serves as a crucial test of its viability. If you don’t observe clear bubbling or foaming after 5 minutes, your yeast is likely inactive, and it’s best to discard the mixture and start fresh with new yeast to ensure a successful rise.
- Adjust Flour for Dough Consistency: While kneading, remember that this dough, especially with the honey, is designed to be somewhat sticky. It will stick to the bowl to some extent. However, if the dough appears overly wet or liquidy and isn’t forming any cohesive mass, gradually add flour, one tablespoon at a time, until it starts to pull away from the sides of the bowl and reaches a manageable, elastic consistency.
- Prevent Over-Browning: If you notice the tops of your loaves are browning too quickly during baking, but the internal temperature hasn’t reached 210°F yet, simply tent a piece of aluminum foil loosely over the tops. This will shield the crust from excessive heat, allowing the interior to finish baking without burning the exterior.
- Allow for Sufficient Cooling Time: Patience is a virtue, especially when it comes to cooling bread. It’s imperative to let your **homemade bread** rest for at least 20 minutes before attempting to slice it. This is similar to letting meat rest after cooking; it allows the internal starches to set, redistributes moisture, and ensures that your slices are clean and the crumb isn’t gummy. Slicing too early can result in a sticky, dense texture.
- Brush with Butter for a Glossy Crust: For an extra touch of perfection, lightly brush the tops of your freshly baked loaves with a pat of unsalted butter immediately after they come out of the oven. The residual heat will melt the butter, creating a beautiful, soft, and glossy crust that is as appealing to the eye as it is to the palate.
Discover More Irresistible Bread Recipes
If you’ve fallen in love with the art of baking after making this **Whole Wheat Bread**, you’ll be thrilled to explore these other fantastic bread recipes:
- Molasses No Knead Bread
- Irish Soda Bread
- Pumpkin Bread
- Banana Bread
- Beer Bread

Print Recipe
Whole Wheat Oatmeal Bread
This homemade Whole Wheat Bread recipe is so much better than anything you can buy at the store! Made with oats, brown sugar and honey for a hearty texture and subtly sweet flavor that’s perfect for sandwiches, soups and toast!
Course: Bread
Cuisine: American
Keyword: honey wheat bread, wheat bread, whole wheat bread, whole wheat bread recipe
Prep Time: 25 minutes
Cook Time: 25 minutes
Rise Time: 2 hours 30 minutes
Servings: 32 slices
Calories: 90 kcal
Author: Trish – Mom On Timeout
Ingredients
- 2 ¼ teaspoons dry active yeast (or instant yeast)
- 1 tablespoon granulated sugar
- ½ cup warm water (110°F)
- 1 cup whole milk (110°F)
- 4 tablespoons unsalted butter (melted)
- ¼ cup light brown sugar
- ¼ cup honey
- 1 cup old fashioned oats
- 1¾ cup whole wheat flour
- 1 teaspoon fine sea salt
- 1¾ to 2¼ cups bread flour (all purpose flour can be substituted)
Instructions
- In a large mixing bowl, or the bowl of a stand mixer, add the yeast, sugar, and warm water. Stir to combine and allow to sit for 5 minutes or until you see bubbles form on the top. This softens the yeast and will also test to see if your yeast is active. If the mixture does not bubble or foam, your yeast may be bad.
- Add the warm milk, melted butter, brown sugar, honey and oats. Stir until well combined.
- Add the whole wheat flour and salt to the mixture and stir to combine. Scrape down the sides and bottom of the bowl as needed.
- Slowly add in the bread flour, adding in about ⅓ cup at a time, mixing on medium-low speed until all of the flour is well incorporated, scraping down the sides and bottom of the bowl frequently.
- Increase the speed to medium high and continue kneading the dough for 8 minutes. You will notice that the dough is pulling from the edge of the bowl.
- Lightly spray a large bowl with nonstick cooking spray. Transfer the dough to the bowl and cover with plastic wrap or a tea towel. Place in a warm place and allow to rise for 2 hours or until the dough has doubled in size.
- Prepare 2 loaf pans by spraying with nonstick cooking spray and then line with a piece of parchment paper, set aside. We recommend 8.5 x 4.5 inch loaf pans, but 9 x 5 inch loaf pans also work well.
- Remove the dough from the bowl and divide into 2 equal portions.
- Roll or pat out the dough into a rectangle roughly 8 by 12 inches, making sure to press out any air pockets you see. Air pockets will create actual pockets in the bread which we don’t want – this isn’t sourdough!
- Roll the dough up, starting at the short end, and pinch the seam together to seal. Place each loaf in a prepared loaf pan. Sprinkle each loaf with a tablespoon of oats, optional.
- Cover the loaves and let rise again until doubled in size, about 45 minutes to 1 hour.
- About 10 minutes before the dough is finished rising a second time, preheat the oven to 375°F.
- Bake for 25 to 30 minutes or until golden brown on top (the interior temperature should be around 210°F). If the loaves are starting to get too brown, tent a piece of foil over the top of the loaves.
- Remove the bread from the oven and allow to cool for at least 20 minutes before cutting into them. Serve with honey, jam, butter, or in a sandwich!
Notes
Storage Information
This bread stays fresh for 3 days when stored in an airtight container at room temperature. We like to store it in a large ziploc bag. Refrigerate bread for up to 1 week.
To freeze, wrap the bread in plastic wrap and then place in a freezer safe ziploc bag for up to 3 months. Thaw at room temperature. Consider slicing before freezing as it allows you to thaw however many slices you need at a time.
Tools and Equipment: Glass Mixing Bowls | Whisk | Silicone Spatula | 8.5 x 4.5 inch Loaf Pan or 9 x 5 inch Loaf Pan
Please see post above for more information, step-by-step process photos, recipe tips and frequently asked questions.
Nutrition
Calories: 90kcal | Carbohydrates: 16g | Protein: 2g | Fat: 2g | Saturated Fat: 1g | Polyunsaturated Fat: 0.2g | Monounsaturated Fat: 1g | Trans Fat: 0.1g | Cholesterol: 5mg | Sodium: 77mg | Potassium: 57mg | Fiber: 1g | Sugar: 5g | Vitamin A: 57IU | Vitamin C: 0.01mg | Calcium: 16mg | Iron: 0.4mg