
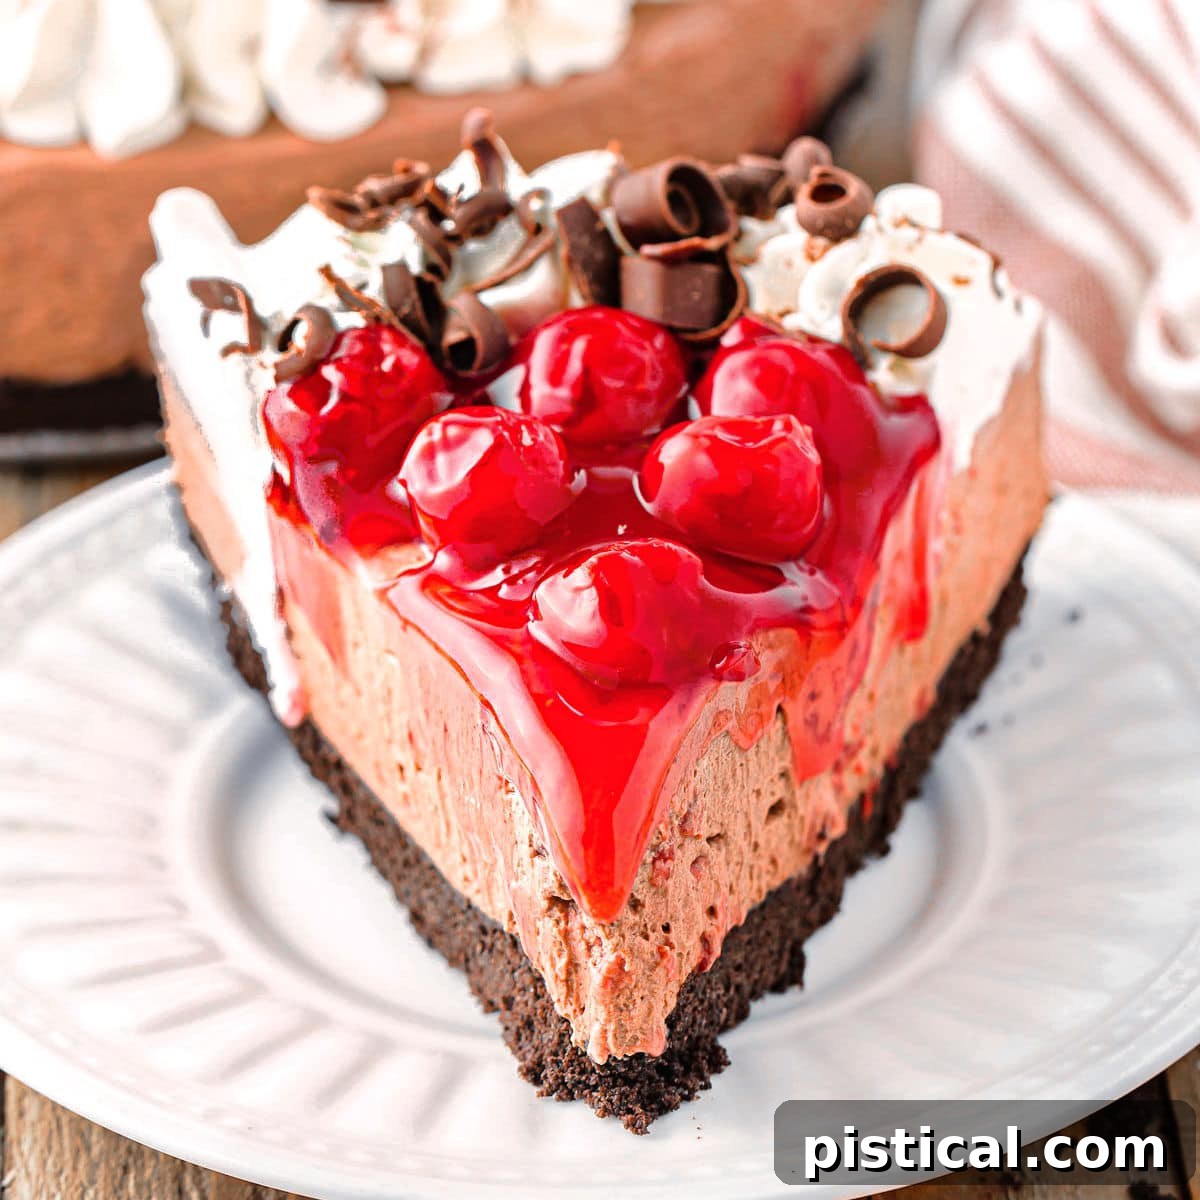
Welcome to the ultimate guide for creating a show-stopping dessert that requires absolutely no baking! If you’re searching for a dessert that combines the rich, decadent flavors of chocolate with the sweet-tart burst of cherries, look no further. This No-Bake Black Forest Cheesecake recipe is not just a treat for the palate, but also a simple yet elegant creation that will impress everyone at your table. Forget turning on the oven, because this creamy, dreamy chocolate cheesecake sets beautifully in the fridge, making it the perfect stress-free dessert for any occasion, from casual family dinners to festive holiday gatherings.
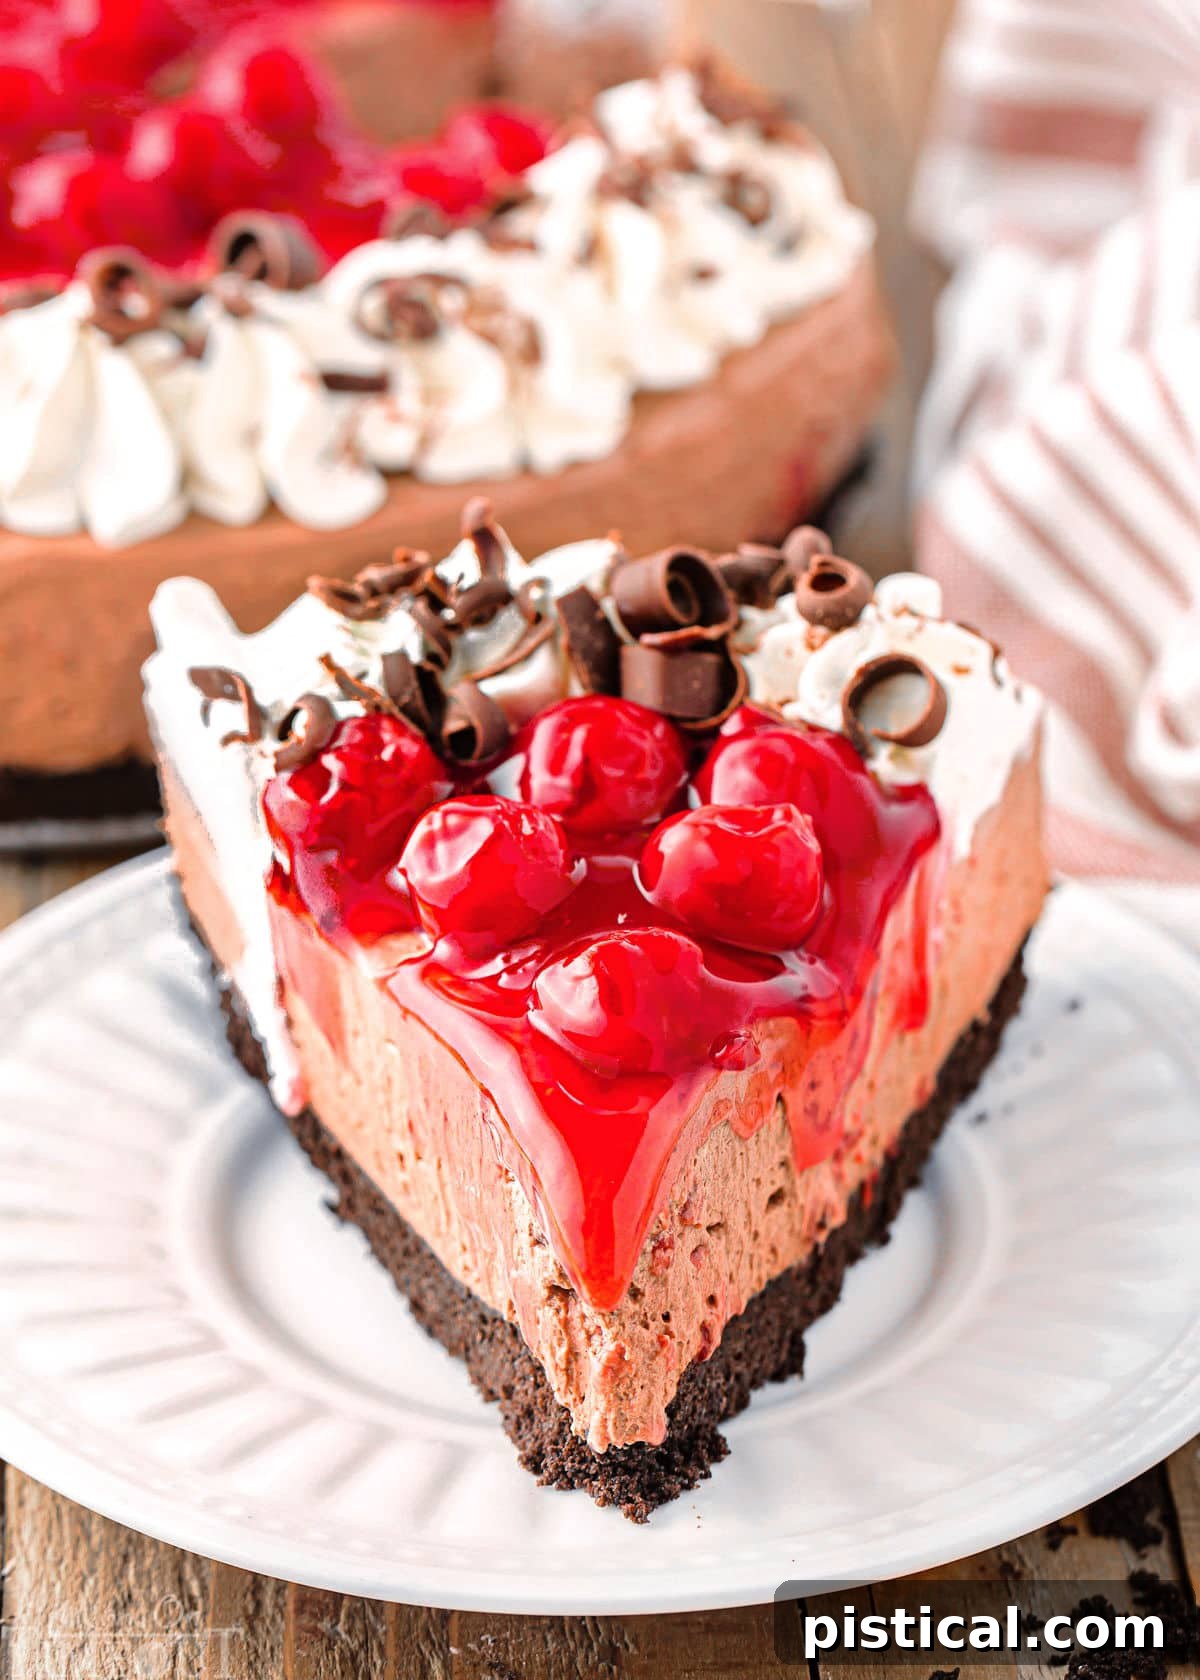
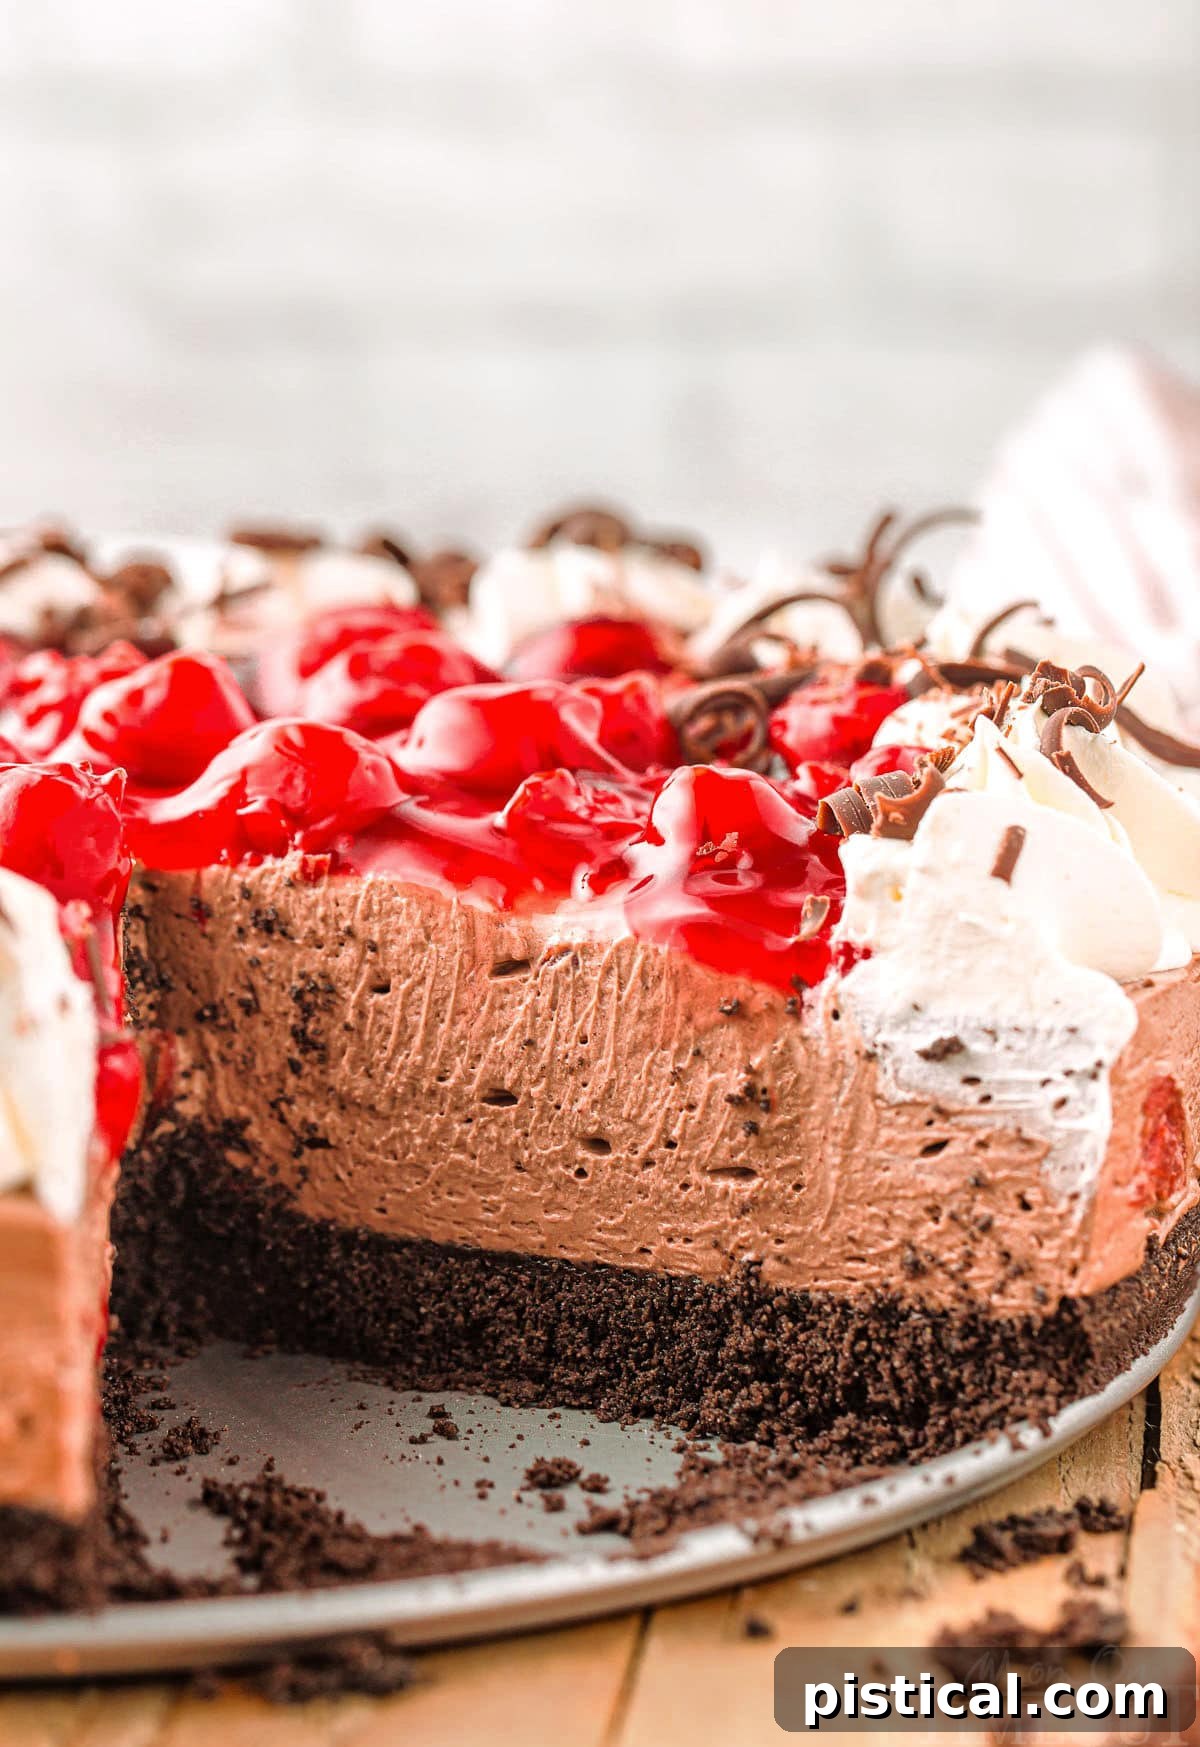
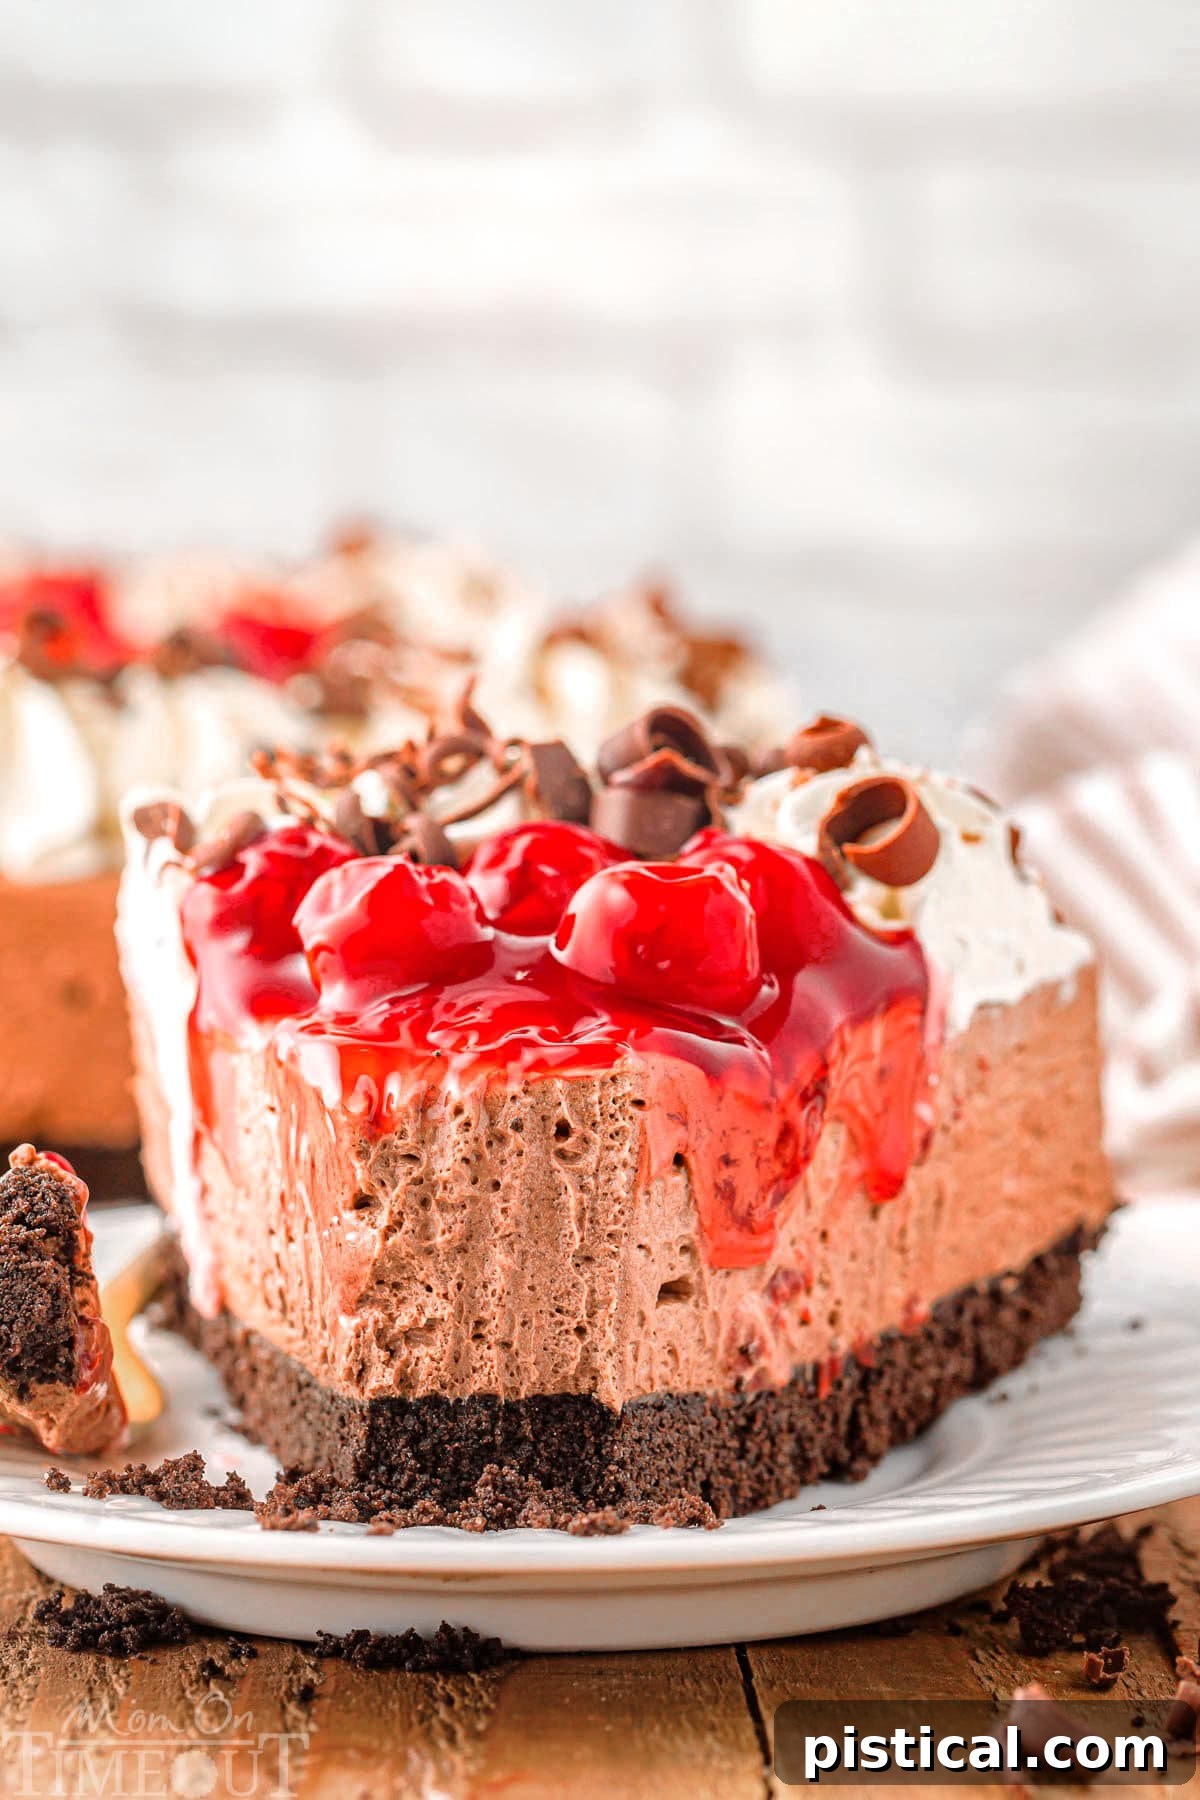
The classic Black Forest Cake, with its layers of chocolate sponge, whipped cream, and cherries, has long been a beloved dessert originating from Germany. Our no-bake cheesecake version pays a delicious homage to this timeless favorite, reimagining its iconic flavors in an accessible and utterly irresistible form. Picture this: a sturdy, crunchy OREO cookie crust forms the base, providing a delightful textural contrast. Above it, a cloud-like chocolate cheesecake filling, so rich and smooth it melts in your mouth, infused with just the right amount of cocoa. To crown this masterpiece, a vibrant layer of cherry pie filling adds a tangy sweetness, all finished with a generous swirl of homemade whipped cream and delicate chocolate shavings. Each bite is a symphony of flavors and textures, promising a truly memorable dessert experience.
Why This No-Bake Black Forest Cheesecake is a Must-Try
This recipe isn’t just another dessert; it’s an experience waiting to happen. Whether you’re a seasoned baker or a kitchen novice, you’ll find joy in preparing this delightful cheesecake. Here’s why this No-Bake Black Forest Cheesecake is destined to become a staple in your recipe collection:
- Effortless Elegance with No Baking Required: The biggest draw of this recipe is undoubtedly the “no-bake” aspect. Say goodbye to preheating ovens, monitoring baking times, and worrying about cracks in your cheesecake. This dessert comes together beautifully with just a mixer and a refrigerator, making it perfect for hot summer days or when your oven is already occupied with other dishes. It’s a simple process that yields surprisingly elegant results, perfect for impressing guests without the stress.
- A Symphony of Layers and Textures: Every component of this cheesecake is carefully crafted to deliver a harmonious blend of flavors and textures. The base offers a satisfying crunch from the OREO crust, contrasting wonderfully with the incredibly smooth and creamy chocolate cheesecake filling. The sweet-tart cherry topping cuts through the richness, providing a refreshing counterpoint, while the light and airy whipped cream adds a final touch of indulgence. It’s a truly multi-sensory dessert that keeps you coming back for more.
- A Guaranteed Crowd-Pleaser for Any Occasion: Chocolate and cherries are a classic pairing that rarely disappoints, and this cheesecake elevates that combination to new heights. Its impressive presentation, complete with piped whipped cream and chocolate shavings, makes it ideal for holidays, birthdays, potlucks, or any special celebration. You can be confident that friends and family will rave about this decadent dessert, making you the star of any gathering. It’s rich enough for a special treat, yet light enough not to feel overly heavy after a meal.
- Customizable and Versatile: While the traditional Black Forest profile is perfection, this recipe offers plenty of room for creative variations. From adding a hint of cherry liqueur to experimenting with different fruit toppings, you can easily adapt it to suit your taste preferences or whatever ingredients you have on hand. It’s a versatile recipe that encourages personalization.
Crafting Your Masterpiece: How to Make No-Bake Black Forest Cheesecake
Creating this stunning No-Bake Black Forest Cheesecake is much simpler than it looks. The key to its success lies in patience, allowing each layer ample time to chill and set properly. This ensures clean slices and a perfect texture every time. Follow these straightforward steps to assemble your decadent dessert:
Step 1: Prepare the Crunchy OREO Crust
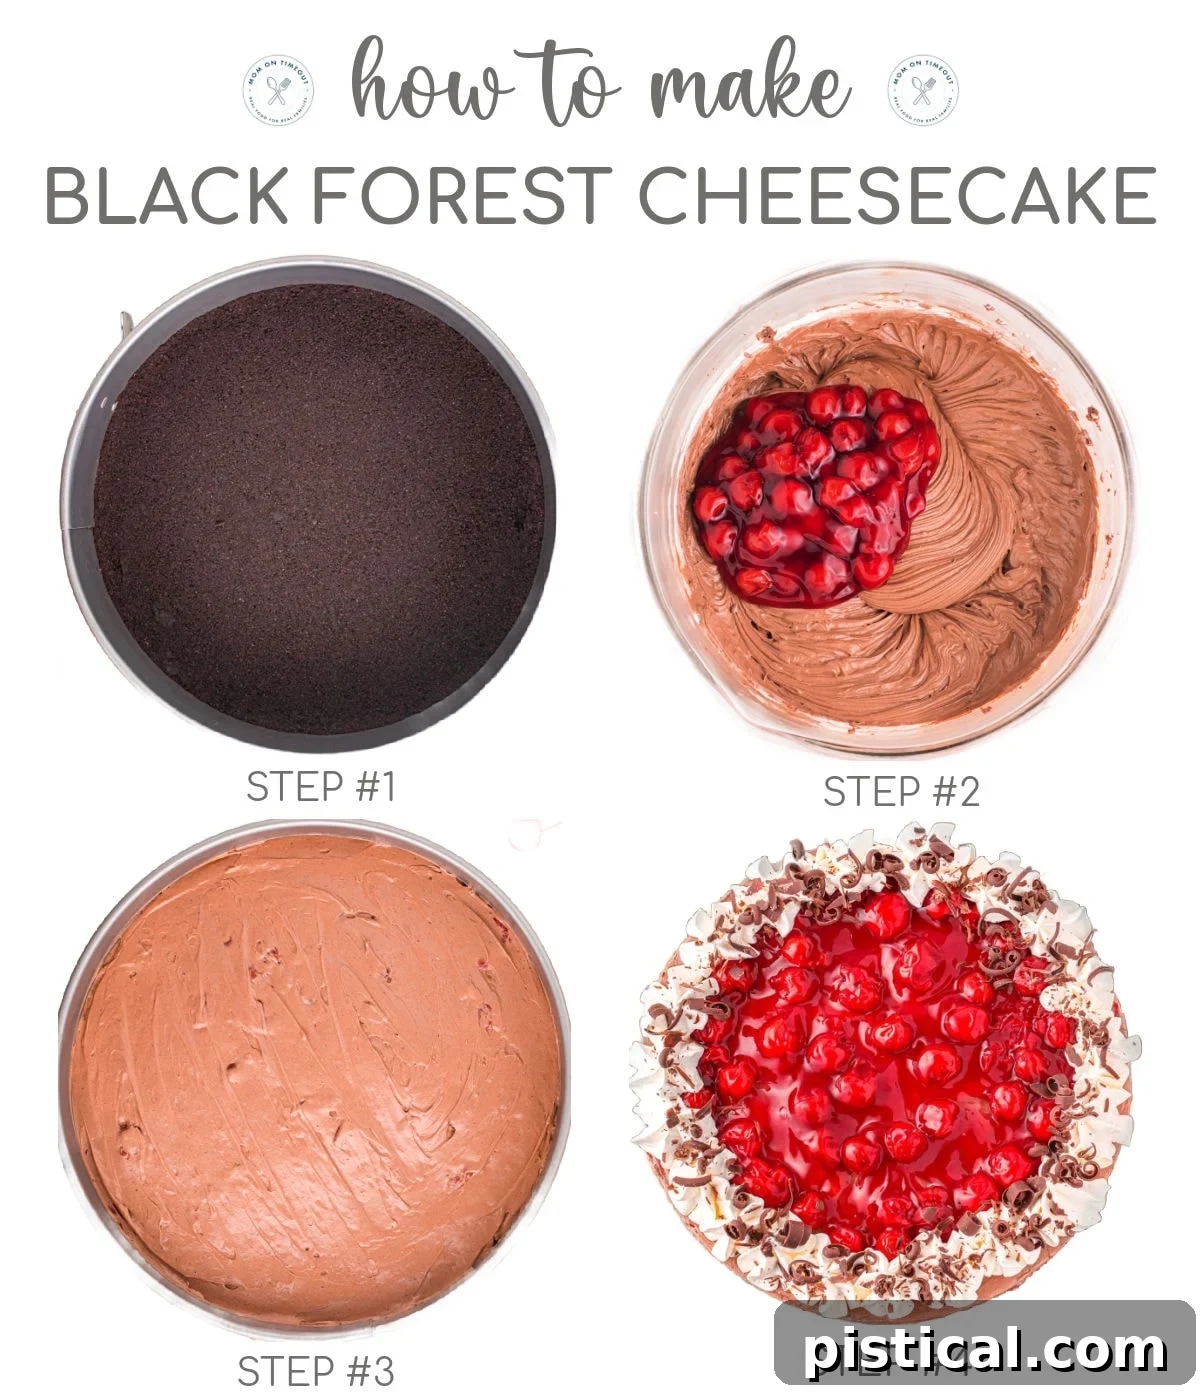
The foundation of any great cheesecake is its crust, and for our Black Forest creation, we’re using a delightfully simple OREO crust. Begin by finely crushing your OREO cookies, including the creamy filling. A food processor makes this task quick and easy, yielding uniform crumbs. If you don’t have one, simply place the cookies in a large zip-top bag and use a rolling pin or the bottom of a heavy glass to crush them until fine. Once crushed, combine the OREO crumbs with melted salted butter. The butter acts as a binder, ensuring your crust holds together perfectly. Press this mixture firmly into the bottom of a 9-inch springform pan. The tighter you press, the sturdier your crust will be. Once pressed, place the pan in the freezer. This crucial step allows the butter to solidify, creating a firm base that won’t crumble when you add the filling.
Step 2: Whisk Up the Velvety Chocolate Cheesecake Filling
Now for the star of the show: the rich chocolate cheesecake filling. In a large mixing bowl, combine softened cream cheese (ensure it’s at room temperature for a lump-free, smooth consistency), granulated sugar, and unsweetened cocoa powder. Using a hand mixer or a stand mixer with a paddle attachment, beat these ingredients together until the mixture is light, fluffy, and completely smooth, typically taking 3 to 5 minutes. This aeration is what gives the cheesecake its luscious texture. Next, incorporate the sour cream (or plain Greek yogurt for a slightly tangier note). Mix until just combined; overmixing at this stage can introduce too much air. Finally, gently fold in one cup of cherry pie filling and the thawed whipped topping. Be careful not to crush the cherries too much, allowing them to retain their shape and provide bursts of fruity flavor. The whipped topping gives the cheesecake its airy, light texture, while the sour cream adds a subtle tang that balances the sweetness.
Step 3: Chill to Perfection
Once your creamy chocolate filling is prepared, carefully spoon it over the chilled OREO crust in the springform pan. Use an offset spatula or the back of a spoon to spread the filling evenly, creating a smooth top surface. Cover the pan tightly with plastic wrap to prevent any odors from the fridge from permeating your cheesecake. Now, the hardest part: waiting! Refrigerate the cheesecake for at least 4 hours. For the best possible set and optimal flavor development, chilling it overnight is highly recommended. A longer chill time ensures the cheesecake is firm enough for clean slicing and allows the flavors to fully meld together, resulting in a truly decadent dessert.
Step 4: Garnish and Serve with Flair
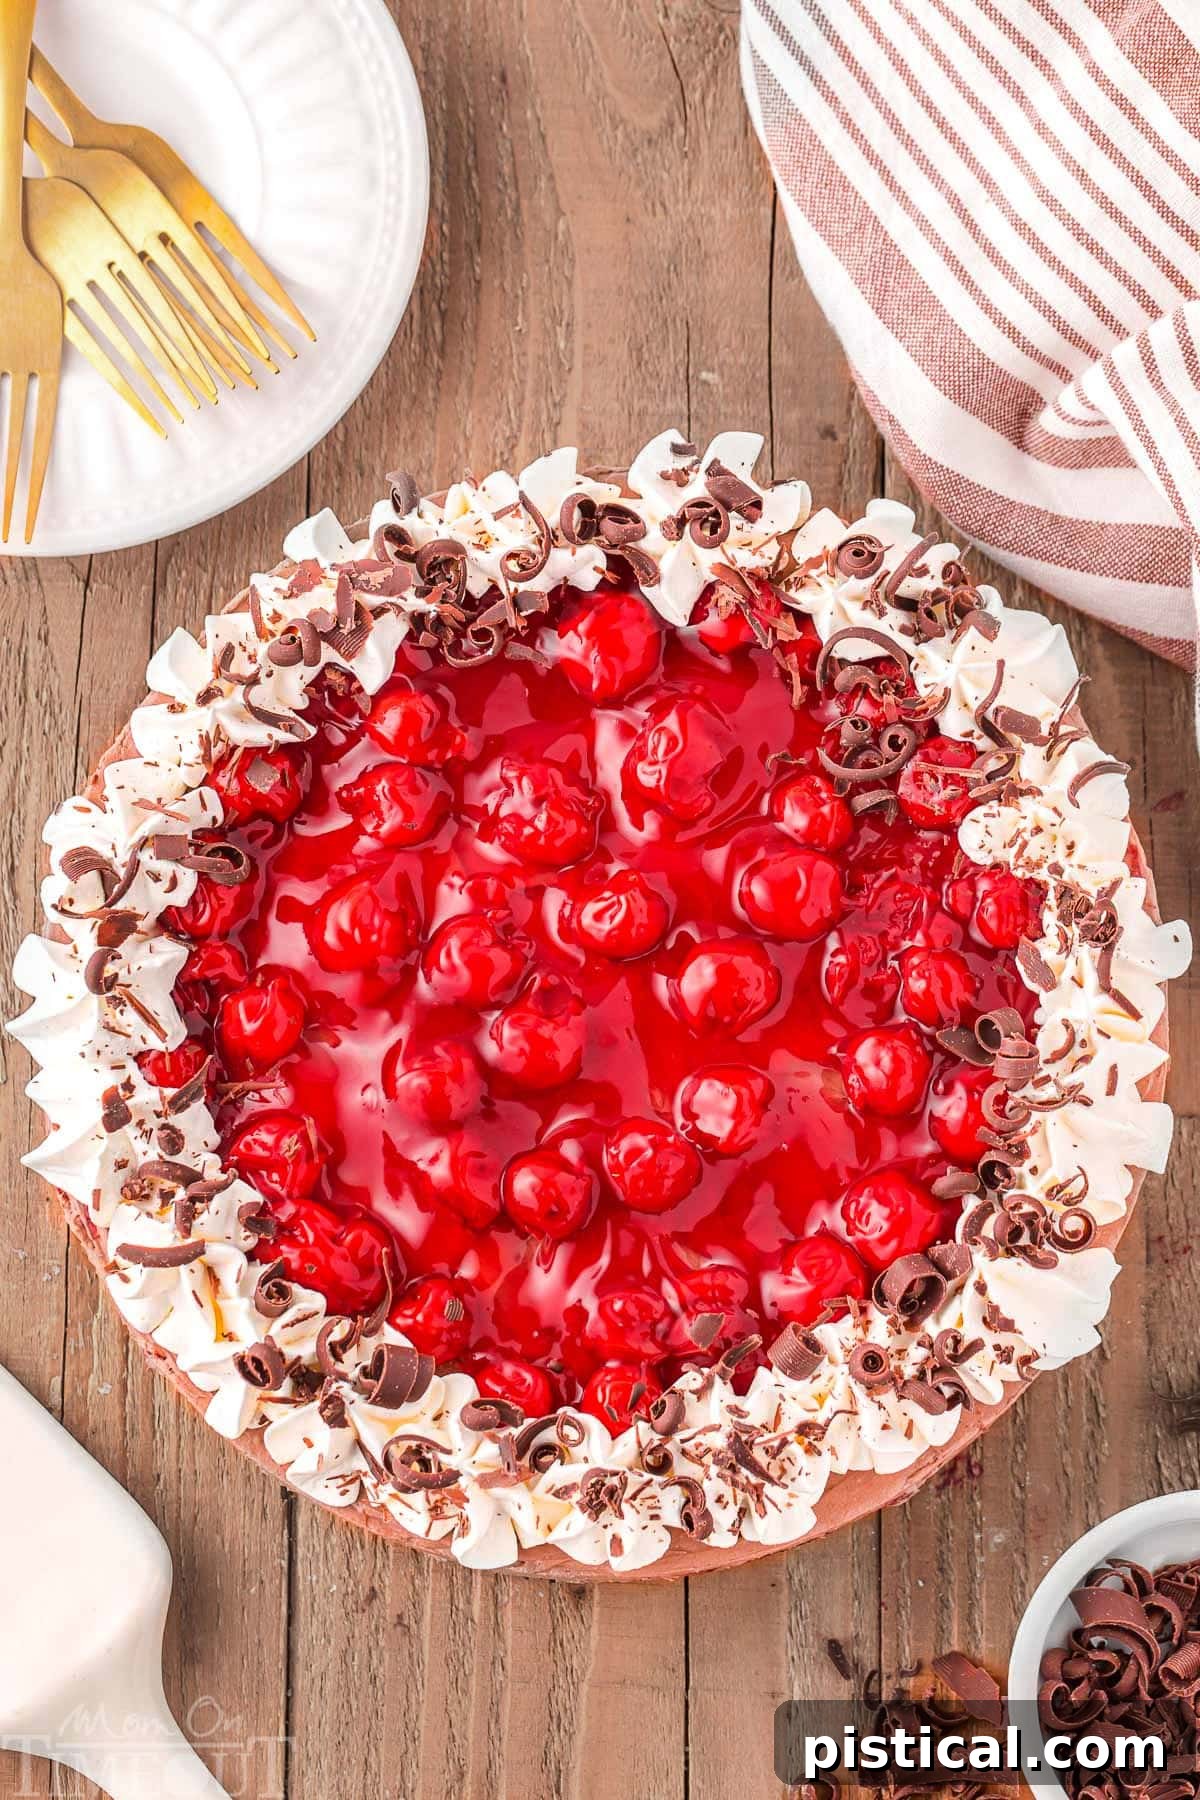
Once your No-Bake Black Forest Cheesecake has thoroughly chilled and set, it’s time for the final touches that make it truly spectacular. Carefully remove the cheesecake from the springform pan. Transfer homemade or store-bought whipped cream to a piping bag fitted with a star tip and pipe beautiful swirls around the outer edge of the cheesecake. Then, spoon the remaining cherry pie filling into the center, gently spreading it towards the piped whipped cream. For an authentic Black Forest look, generously sprinkle chocolate shavings over the top. Use a vegetable peeler on a block of chocolate for elegant curls, or finely chop a chocolate bar. Now, slice into generous portions using a sharp knife, wiping the blade clean between each cut for perfect presentation. Serve immediately and watch your guests delight in this stunning, delicious dessert!
Smart Storage & Make-Ahead Tips
One of the many advantages of this No-Bake Black Forest Cheesecake is its versatility for making ahead and easy storage. This makes it an ideal dessert for busy schedules or when you want to plan for entertaining.
- Make Ahead: You can prepare the entire cheesecake (crust and filling) up to 2 days in advance. Store it covered tightly with plastic wrap in the refrigerator. For the freshest look, always wait to add the whipped cream, cherry topping, and chocolate shavings just before you plan to serve it. This prevents the toppings from weeping or losing their pristine appearance.
- Storing Leftovers: Any leftover slices of cheesecake should be stored in an airtight container in the refrigerator. It will maintain its delicious flavor and creamy texture for up to 5 days.
- Freezing for Later Enjoyment: This cheesecake freezes exceptionally well! To freeze, ensure the cheesecake is fully set and chilled, then remove it from the springform pan. Wrap the entire cheesecake (without any toppings) tightly in several layers of plastic wrap, followed by a layer of aluminum foil. Place it in an airtight container or a freezer-safe zip-top bag. It can be frozen for up to 3 months. To serve, thaw the cheesecake overnight in the refrigerator, then add your fresh toppings before presenting.
Exciting Variations to Explore
While the classic chocolate and cherry combination in this No-Bake Black Forest Cheesecake is heavenly on its own, feel free to experiment with these variations to put your own unique spin on this delicious dessert:
- Embrace the Authentic Kirsch Flavor: For a more traditional Black Forest experience, stir in a tablespoon or two of Kirsch (cherry liqueur) into the chocolate cheesecake filling. This subtle alcoholic note enhances the cherry flavor and adds a layer of sophistication. Adjust the amount to your preference.
- Simplify with a Pure Chocolate Cheesecake: If cherries aren’t your favorite, or you simply crave an unadulterated chocolate experience, the no-bake chocolate cheesecake filling is absolutely divine on its own. You can omit the cherry pie filling from the main cheesecake layer and just use the delicious chocolate filling, perhaps topping it with chocolate ganache or extra chocolate shavings for an intensely chocolaty treat.
- Experiment with Other Fruit Toppings: Feeling adventurous? Replace the cherry pie filling with another fruit pie filling for a completely different flavor profile. Blueberry pie filling would create a beautiful purple contrast, while strawberry or raspberry pie filling would offer a delightful berry twist, perfect for summer.
- Add Mini Chocolate Chips: Boost the chocolate factor by folding mini chocolate chips into the cheesecake filling before chilling. Alternatively, sprinkle them over the top along with the chocolate shavings for added texture and visual appeal.
- Drizzle with Hot Fudge: For an even richer, more indulgent dessert, warm up some hot fudge sauce and drizzle it generously over individual slices just before serving. The warm fudge cascading over the cool cheesecake is truly exquisite.
Frequently Asked Questions About No-Bake Cheesecake
Can I make this cheesecake in a regular pie dish instead of a springform pan?
Absolutely! A deep-dish pie pan will work perfectly for this recipe. The main difference will be in serving – you’ll need to slice and serve it directly from the pie pan, much like you would a traditional pie, rather than lifting it out as a free-standing cake. The taste and texture will remain just as delightful!
What’s the best way to cut clean slices of cheesecake?
For pristine, bakery-quality slices, use a sharp, thin-bladed knife. For each cut, dip the knife into hot water and wipe it clean with a warm, damp cloth. Make your slice, then repeat the process (dip and wipe) before making the next cut. This prevents the cheesecake from sticking to the knife and creates beautifully smooth edges.
My cheesecake isn’t setting properly. What went wrong?
The most common reasons for a no-bake cheesecake not setting are insufficient chilling time or cream cheese that wasn’t at room temperature when mixed. Ensure your cream cheese is soft before beating, and always allow the cheesecake to chill for the minimum recommended time, or preferably overnight, for the best results. Adding a bit more whipped topping can also help with firmness.
Can I use homemade whipped cream in the filling?
While the recipe calls for thawed whipped topping for stability and convenience, you can certainly try using stabilized homemade whipped cream. If making your own, ensure it’s whipped to stiff peaks and consider adding a teaspoon of unflavored gelatin (dissolved as per package directions) to help it hold its shape within the filling, especially if it’s warm where you are.
Trish’s Top Tips for No-Bake Cheesecake Success
Achieving a perfect No-Bake Black Forest Cheesecake is simple when you keep a few key tips in mind. These insights from Trish – Mom On Timeout, will help ensure your dessert is a resounding success every time:
- Room Temperature Ingredients are Key: This cannot be stressed enough, especially for the cream cheese. Ensure your cream cheese is completely softened to room temperature before you begin mixing. Cold cream cheese will result in a lumpy filling, no matter how long you beat it. This also applies to sour cream.
- Gentle Folding for Intact Cherries: When incorporating the cherry pie filling and whipped topping into the cheesecake mixture, be gentle. Use a spatula to carefully fold them in, rather than vigorously mixing. This preserves the integrity of the cherries and maintains the airy texture of the whipped topping, contributing to the cheesecake’s overall creaminess.
- Invest in a Quality Springform Pan: Using a 9-inch springform pan is highly recommended. Its removable sides allow for effortless release of the cheesecake, ensuring a clean and impressive presentation without any mess or damage to your beautifully layered dessert.
- Chill the Crust Before Adding Filling: Don’t skip the step of freezing the OREO crust while you prepare the filling. This quick chill helps the butter solidify, making the crust firm and less likely to absorb moisture from the filling, resulting in a perfectly crisp base.
- Patience with Chilling Time Pays Off: For the absolute best results, allow your cheesecake to chill for as long as possible – preferably overnight. This extended refrigeration time allows the cream cheese mixture to fully set and firm up, ensuring clean slices and allowing the flavors to deepen and meld together beautifully.
- Add Toppings Just Before Serving: To ensure your cheesecake looks its absolute best and the toppings are fresh and vibrant, wait until just before you’re ready to serve to add the whipped cream, cherry pie filling, and chocolate shavings. This prevents the cream from weeping or the fruit from losing its glossy appeal.
More Delicious Cheesecake Recipes to Explore
If you’re a cheesecake enthusiast like us, you’ll love these other fantastic recipes. Each offers a unique flavor profile while promising the same creamy indulgence you adore:
- Triple Threat Chocolate Cheesecake
- Delightful Mini Cheesecakes
- Refreshing Lemon Blueberry Cheesecake
- Irresistible Peanut Butter Cheesecake
- Classic Lemon Meringue Cheesecake
No Bake Black Forest Cheesecake
This no-bake Black Forest Cheesecake recipe is incredibly creamy and rich, making it the perfect dessert for any occasion! It features a luscious chocolate cheesecake on an OREO crust, generously topped with cherry pie filling and fluffy whipped cream. A guaranteed hit with friends and family!
Equipment
- 9 Inch Springform Pan
Ingredients
Oreo Crust
- 32 Oreos (the whole cookie, filling included)
- 4 tablespoons salted butter (melted)
Chocolate Cheesecake Filling
- 16 ounces cream cheese (room temperature)
- ¾ cup granulated sugar
- ½ cup unsweetened cocoa powder
- 1 cup sour cream (or plain Greek yogurt)
- 1 cup cherry pie filling
- 8 ounces whipped topping (thawed)
Toppings
- 1 cup whipped cream (or whipped topping)
- 1 cup cherry pie filling
Optional Garnish
- chocolate shavings
Instructions
- Lightly spray a 9-inch springform pan with nonstick cooking spray. Set aside.
- Place 32 OREOS in a food processor and pulse until only small crumbs remain. (Alternatively, place in a large zip-top bag and crush with a rolling pin for a rustic texture.)
- Add in the 4 tablespoons of melted salted butter and pulse together until fully incorporated. The mixture should resemble wet sand.
- Evenly press the crust mixture into the prepared springform pan. Cover with plastic wrap and place in the freezer while you prepare the filling.
- Combine 16 ounces cream cheese (room temperature), ¾ cup granulated sugar, and ½ cup unsweetened cocoa powder in a large bowl. Using a hand or stand mixer, beat together for 3 to 5 minutes, or until the mixture is light, fluffy, and completely smooth.
- Add in the 1 cup sour cream (or Greek yogurt) and beat until thoroughly combined, ensuring no lumps remain.
- Gently fold in 1 cup of cherry pie filling, being careful not to crush the cherries too much. Then, carefully fold in the 8 ounces of thawed whipped topping until just combined.
- Transfer the filling to the frozen OREO crust and spread evenly using an offset spatula or the back of a spoon. Cover the pan again with plastic wrap and refrigerate for a minimum of 4 hours. For best results and optimal setting, chill overnight.
- Once fully chilled, transfer 1 cup of whipped cream to a piping bag fitted with your desired tip (a star tip works beautifully) and pipe large swirls around the edge of the cheesecake.
- Spoon the remaining 1 cup of cherry pie filling into the middle of the cheesecake and gently spread it towards the piped whipped cream.
- Garnish generously with chocolate shavings, then carefully cut into slices and serve immediately.
OREO Crust
Cheesecake Filling
Serving Day
Notes
Storage Information
- Make Ahead: This cheesecake can be made up to 2 days in advance and stored in the fridge covered with plastic wrap until ready to serve. Wait to add the toppings until ready to serve.
- Storing Leftovers: Keep leftovers stored in an airtight container in the fridge for up to 5 days.
- Freezing: You can freeze the cheesecake (without toppings) for up to 3 months wrapped in plastic wrap and foil, placed in an airtight container or freezer-safe zip-top bag. Thaw overnight in the fridge before serving.
Please see the post above for more information, recipe tips, and frequently asked questions.
Nutrition
Calories: 611 kcal | Carbohydrates: 68g | Protein: 7g | Fat: 37g | Saturated Fat: 20g | Polyunsaturated Fat: 3g | Monounsaturated Fat: 11g | Trans Fat: 0.2g | Cholesterol: 76mg | Sodium: 361mg | Potassium: 327mg | Fiber: 3g | Sugar: 39g | Vitamin A: 1048 IU | Vitamin C: 2mg | Calcium: 110mg | Iron: 5mg