
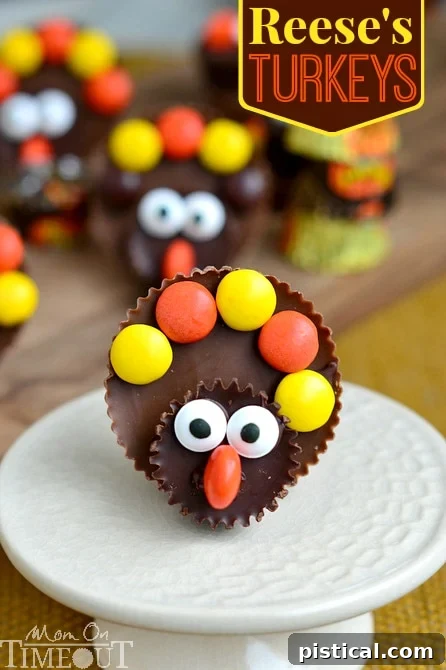
Reese’s Turkeys: The Ultimate Easy Thanksgiving Dessert
Calling all peanut butter and chocolate enthusiasts! Prepare to discover the most enchanting and effortlessly adorable Thanksgiving treat that will steal the show on your holiday table: our irresistible Reese’s Turkeys! This festive dessert combines everyone’s favorite candy with a charming holiday theme, making it a perfect project for bakers of all skill levels, especially those looking for a quick yet impactful addition to their Thanksgiving spread.
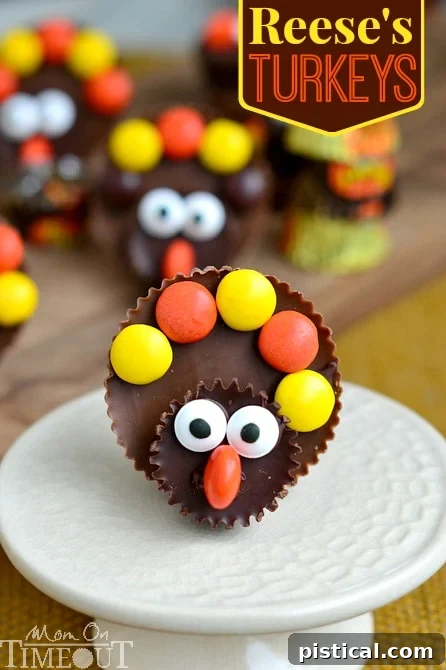
PIN THIS DELIGHTFUL THANKSGIVING RECIPE NOW!
It feels like an eternity since we last celebrated the magic of Reese’s here on the blog, but rest assured, the wait was worth it! Every recipe featuring the iconic peanut butter cup seems to vanish faster than I can capture its beauty with my camera – a true testament to its universal appeal. Creating and sharing delicious food is a labor of love, especially when the results are so eagerly devoured!
I had every intention of sharing these delightful little turkeys with you before my recent vacation, but as often happens, life had other plans. Between endless laundry piles, the mystery of missing shoes, and a general state of exhaustion, time simply slipped away. But I’m back, refreshed and brimming with new energy, even if the daily chaos persists! And with renewed vigor, I’m thrilled to finally unveil these adorable creations.
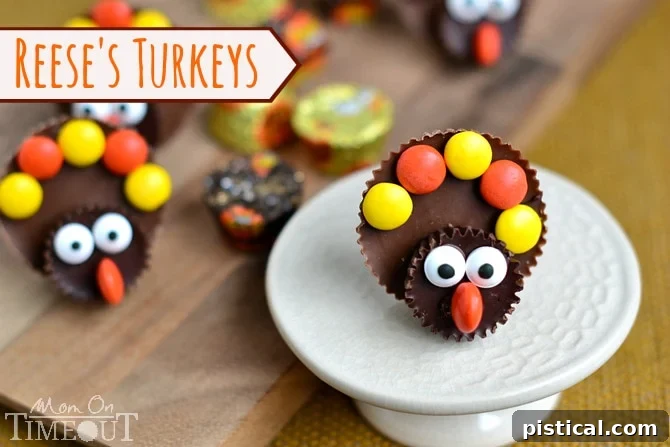
The Unrivaled Allure of Reese’s: A True Obsession
It’s no secret that my affection for Reese’s knows no bounds. These chocolate and peanut butter marvels are, without a doubt, my absolute favorite candy, ever! They transform ordinary desserts into extraordinary experiences. Whether incorporated into chewy cookies, rich cookie bars, decadent cheesecakes, layered trifles, or even comforting banana bread, Reese’s always adds that perfect touch of indulgence. These charming Reese’s Turkeys offer a unique opportunity to savor three distinct types of Reese’s in one delightfully festive package, making them an unparalleled addition to your holiday dessert lineup.
Choosing Your Reese’s: A Guide to Perfect Turkey Anatomy
When crafting these sweet gobblers, the choice of Reese’s for the turkey’s head is a detail that truly elevates their visual appeal. You might have noticed my preference for Reese’s Dark Miniatures for this specific component, and there are two excellent reasons for this:
- Color Contrast: The rich, darker hue of the miniature peanut butter cup provides a subtle yet effective contrast against the lighter milk chocolate of the main Reese’s Peanut Butter Cup body. This difference in color adds depth and definition, making your turkeys look even more realistic and appealing on the platter.
- Effortless Peeling: A significant advantage of the Dark Miniatures is how beautifully they peel from their wrappers. Unlike some other varieties that can leave frustrating bits of chocolate or peanut butter behind, the Dark Miniatures consistently release cleanly, ensuring a perfectly smooth and intact “head” for each turkey. This small detail saves time and ensures a professional-looking finish.
Of course, I understand the irresistible urge to lick every last sweet trace from a Reese’s wrapper – it’s a cherished part of the experience for many! However, for these particular edible art pieces, our goal is a pristine candy canvas, and the Dark Miniatures consistently deliver on that front. They provide the ideal foundation for the turkey’s expressive face.
The Magic of Candy Eyes (and Why They’re a Must!)
In earlier iterations of these turkeys, I would sometimes use yellow Reese’s Pieces to create the eyes. While certainly an option, the result was, shall we say, a bit “cray cray” – a charmingly quirky look, but perhaps not quite as polished. The game-changer came with the widespread availability of adorable candy eyes, now conveniently found in the baking aisle of most major retailers like Target!
These little edible eyeballs add an incredible amount of personality and charm to each turkey, transforming them from simple candy arrangements into endearing characters. They bring a playful touch that kids and adults alike will adore. Incorporating them has become a non-negotiable step in my Reese’s Turkey assembly process, and I always keep a stash on hand for all sorts of fun food crafting throughout the year.
The assembly itself is wonderfully straightforward. Each element – the expressive candy eyes, the tiny Reese’s Pieces nose, and the vibrant “feathers” – is meticulously held in place with a touch of melted chocolate, affectionately dubbed “chocolate glue.” This clever adhesive ensures every piece stays put, making the entire sweet bird completely edible and a glorious 99.9% Reese’s – exactly how any true fan would want it!
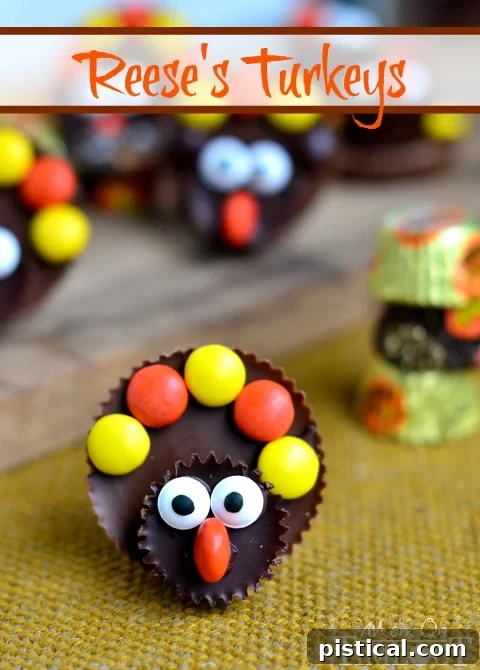
Crafting Perfect Reese’s Turkeys: Expert Tips & Tricks
While these Reese’s Turkeys are incredibly simple to make, a few insider tips can ensure your creations are picture-perfect and hassle-free:
- Chocolate Melting Mastery: When melting your semi-sweet chocolate chips for the “glue,” go low and slow. Use a microwave-safe bowl and heat in short bursts (15-20 seconds), stirring thoroughly after each interval. Chocolate can seize if overheated, becoming clumpy and unusable. Aim for a smooth, pourable consistency. If it’s too thick, add a tiny bit of coconut oil or shortening (about 1/4 teaspoon per 1/2 cup chocolate chips) to thin it out.
- Piping Bag Precision: Transferring the melted chocolate to a small plastic bag (like a ziploc sandwich bag) and snipping a tiny corner off is crucial for controlled application. A very small snip ensures fine lines and precise dots, preventing messy spills and giving your turkeys a neat, professional finish. You only need a pinhole-sized opening.
- Gentle Unwrap: Handle your Reese’s Peanut Butter Cups with care when unwrapping. The full-size cups can sometimes be a bit more delicate than the miniatures. Peel slowly and gently to keep them intact.
- Steady Hands for Assembly: Patience is key during assembly. Allow the chocolate glue a moment to set slightly after attaching each piece before moving on to the next. This prevents shifting and ensures everything stays firmly in place. You can even pop them in the fridge for a minute or two between steps if you’re working in a warm environment.
- Feather Placement: For the Reese’s Pieces feathers, experiment with different color combinations. You can arrange them in a rainbow pattern, use only fall colors (orange, yellow, brown), or let kids randomly place them for a vibrant, eclectic look. Typically, 5-6 pieces per turkey create a lovely fanned tail.
- Make Ahead Magic: These turkeys are fantastic for making in advance! Once the chocolate glue is fully firm, store them in an airtight container at room temperature for up to a week. This makes them an ideal dessert for busy holiday prep, allowing you to focus on other dishes on Thanksgiving Day.
Get Creative: Reese’s Turkey Variations and Serving Ideas
The beauty of these Reese’s Turkeys lies in their versatility. While the classic design is undeniably charming, feel free to unleash your creativity with these variations:
- Mix-and-Match Reese’s: Experiment with different Reese’s varieties for the body or head. White chocolate Reese’s for a lighter look, or seasonal shapes if available, could add an interesting twist.
- Sprinkle Fun: Before the chocolate glue on the body sets completely, you can sprinkle the base of the full-size Reese’s with autumn-colored sprinkles for extra festivity.
- Edible Markers: For older kids or adults, use edible food markers to draw tiny details on the candy eyes or even small “wings” on the side of the Reese’s body.
- Flavorful Additions: Consider adding a tiny, thin pretzel stick for “legs” if you want to give your turkeys a more grounded appearance. Secure with a dab of melted chocolate.
- Presentation is Key: Arrange your finished Reese’s Turkeys on a platter lined with festive napkins or edible “leaves” made from green and yellow candy melts. They also look fantastic nestled among other small treats or as individual place settings at your Thanksgiving feast.
Your New Thanksgiving Tradition Starts Here!
These Reese’s Turkeys are more than just a dessert; they’re a delightful, memorable activity to share with family and friends during the holiday season. They offer a moment of playful creativity amidst the busy kitchen and bring smiles to every face. From their charming appearance to their unbeatable flavor, these chocolate peanut butter turkeys are destined to become a beloved Thanksgiving tradition for years to come. Easy to make, incredibly cute, and bursting with the iconic taste of Reese’s, they truly are the perfect sweet ending to your Thanksgiving meal. Don’t wait – gather your ingredients and start gobbling up the fun!
More Thanksgiving Recipes to Delight Your Guests
Looking for more culinary inspiration to complete your holiday menu? We’ve got you covered with a selection of classic and comforting Thanksgiving dishes that are sure to impress:
- Creamy Dreamy Mashed Potatoes Recipe: The quintessential side dish, perfectly smooth and utterly delicious.
- Irresistible Mini Pecan Pies: A charming individual dessert that captures all the rich flavor of a traditional pecan pie in a convenient, bite-sized form.
- Homestyle Sweet Potato Casserole: A comforting blend of sweet potatoes, spices, and a crunchy topping – a holiday favorite!
- Classic Green Bean Casserole: A timeless and beloved side dish that never goes out of style, featuring tender green beans in a creamy sauce with crispy fried onions.
- The Best Homemade Turkey Gravy Recipe: Elevate your holiday meal with a rich, savory gravy that will perfectly complement your roasted turkey.

Print
Pin
Reese’s Turkeys
Ingredients
- 8 Reese’s Peanut Butter Cups full size
- 8 Reese’s Dark Peanut Butter Cups Miniatures
- 48 Reese’s Pieces
- 16 candy eyes
- 1/2 cup semi-sweet chocolate chips
Instructions
-
Carefully unwrap all the Reese’s Peanut Butter Cups, Reese’s Dark Peanut Butter Cups Miniatures, and have your Reese’s Pieces and candy eyes ready. Set them aside on a clean surface.
-
Place the semi-sweet chocolate chips in a small, microwave-safe bowl. Microwave on medium heat in 15-second intervals, stirring thoroughly after each interval, until the chocolate is completely melted and smooth. Be careful not to overheat it.
-
Transfer the melted chocolate to a small plastic bag (a Ziploc sandwich bag works perfectly). Snip a tiny piece off one corner of the bag; this will serve as your piping tool for the “chocolate glue.”
-
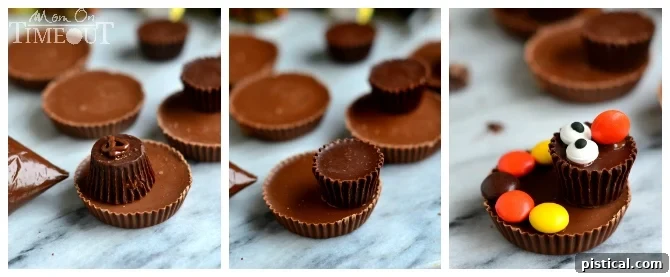
Pipe a small dot or line of melted chocolate onto the flat back of a Reese’s Dark Peanut Butter Cup Miniature (this will be the turkey’s head). Gently press it onto the far side of a full-size Reese’s Peanut Butter Cup, which forms the turkey’s body. Hold for a few seconds to secure.
-
Using your chocolate piping bag, apply a tiny dot of melted chocolate to the back of each candy eye. Carefully place two candy eyes onto the front of the miniature Reese’s cup to create the turkey’s face.
-
Select an orange Reese’s Piece for the turkey’s nose. Pipe a small amount of melted chocolate onto one side of the Reese’s Piece and attach it just below the candy eyes on the miniature cup.
-
For the turkey’s vibrant feathers, pipe a small amount of melted chocolate onto the back of 5-6 Reese’s Pieces. Arrange and press these onto the top, curved edge of the full-size Reese’s Peanut Butter Cup, fanning them out like a turkey’s tail. You can use a variety of colors or stick to a fall palette.
-
Allow the assembled Reese’s Turkeys to sit undisturbed at room temperature until the chocolate glue is completely firm, typically about 15-20 minutes. For faster setting, you can place them in the refrigerator for 5-10 minutes. Once firm, they are ready to serve and enjoy!