
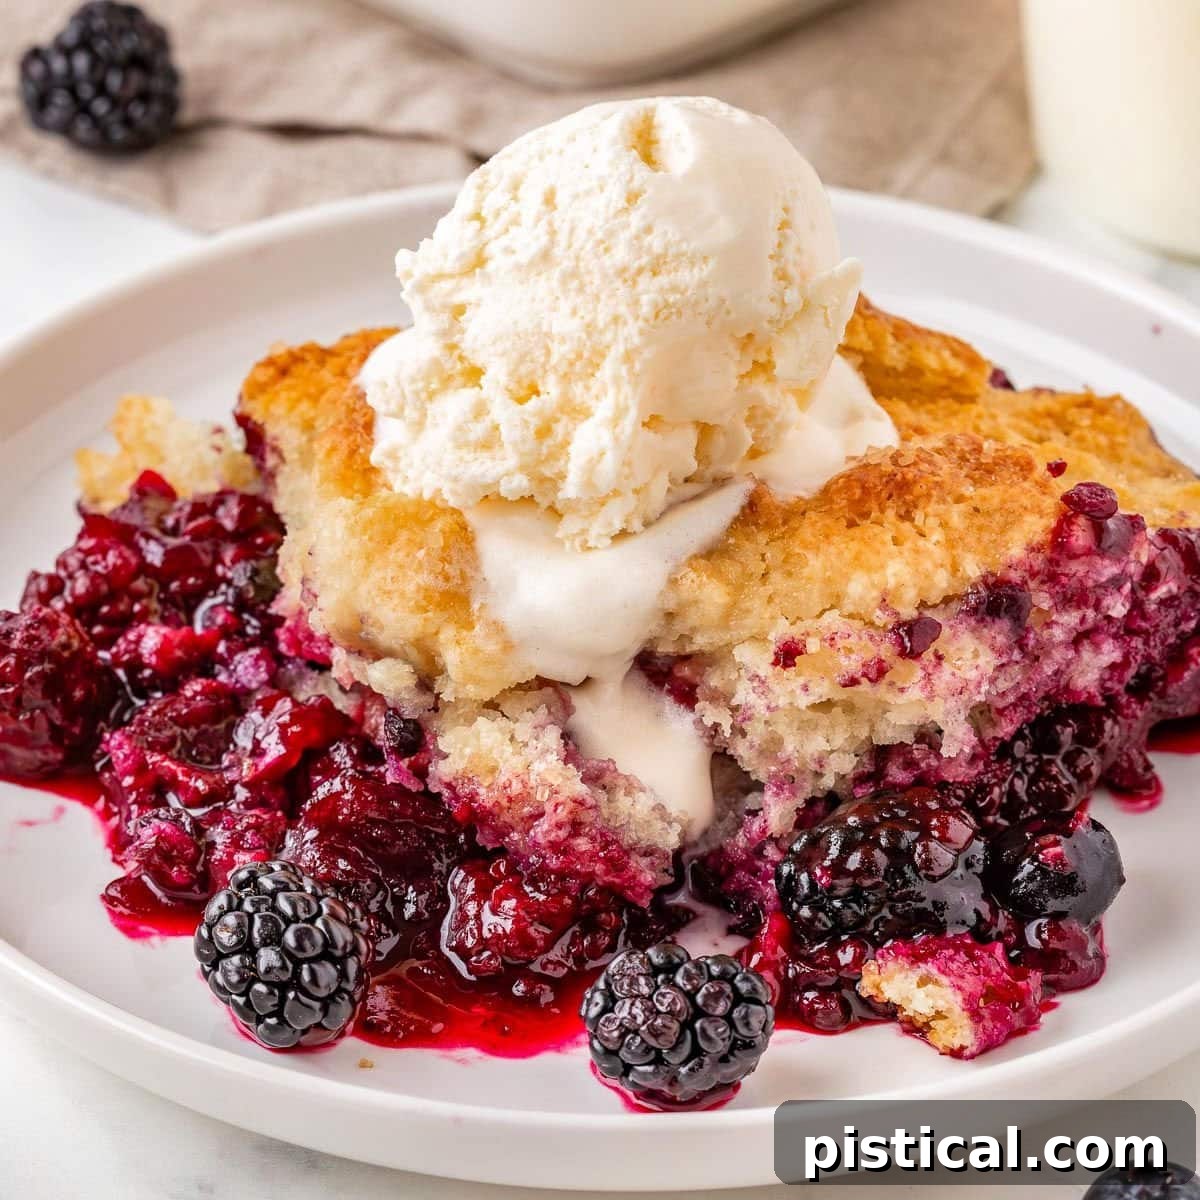
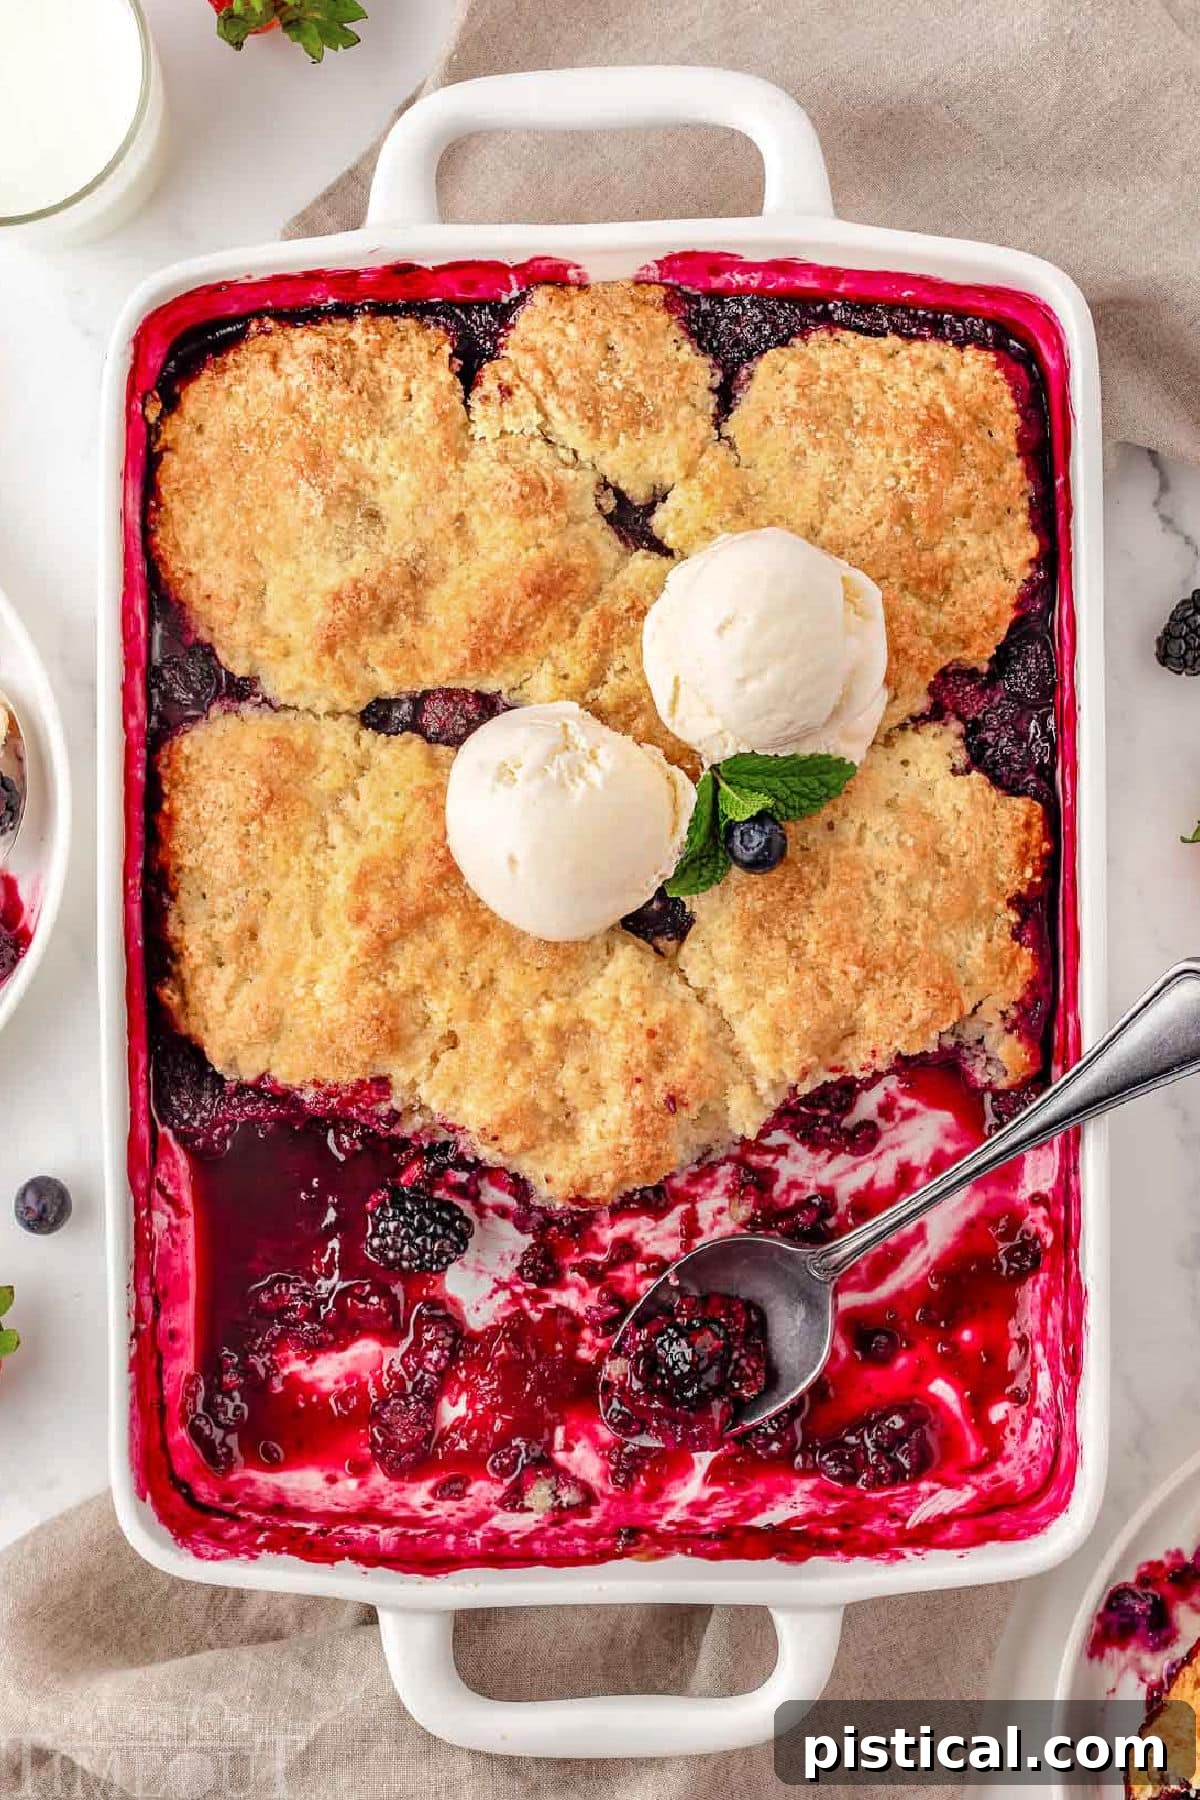
This easy Berry Cobbler recipe is a timeless delight, bringing together the vibrant sweetness of mixed berries with a perfectly buttery, tender biscuit topping. It’s the quintessential summer dessert, yet so versatile that it can be enjoyed all year long. Crafted with simple, readily available ingredients, this cobbler is designed to be a no-fuss favorite that consistently impresses. Serve it warm with a generous scoop of creamy vanilla ice cream or a cloud of freshly whipped cream, and watch it disappear!
Craving more delightful berry-filled treats? Be sure to explore our recipes for Classic Blueberry Cobbler, a rustic Berry Crumble, and the beloved Strawberry Shortcake Recipe!
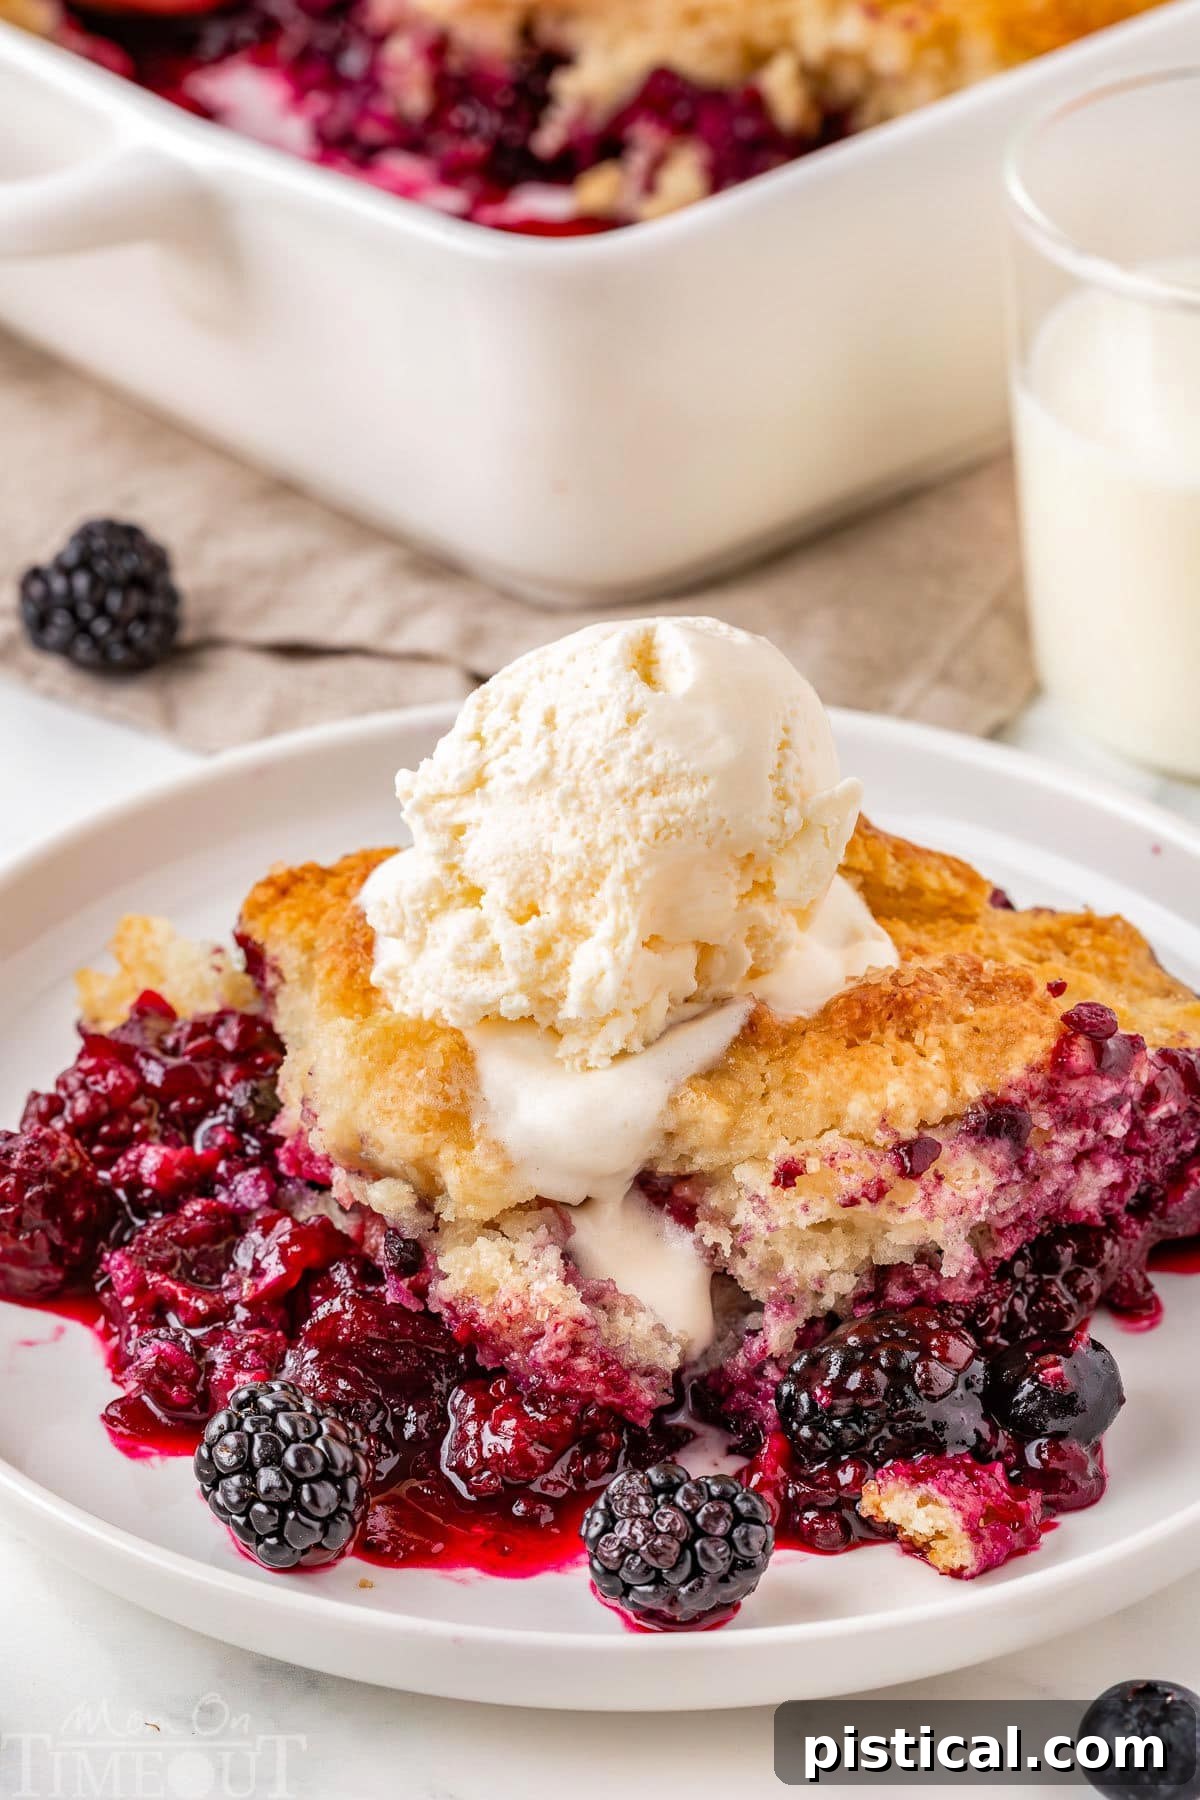
The Ultimate Easy Berry Cobbler Recipe
There’s an undeniable charm to a warm, bubbling berry cobbler, fresh from the oven, its inviting aroma filling your home. This classic dessert, with its luscious, jammy berry filling crowned by a golden, tender biscuit topping, offers pure comfort in every forkful. Whether you pick it in peak season or reach for a bag of frozen fruit, this easy berry cobbler recipe guarantees a delicious outcome, making it a cherished treat for any time of year.
This recipe is not just simple to follow; it’s a celebration of natural flavors and comforting textures. It requires minimal prep time and relies on common pantry staples, making it accessible for even novice bakers. As it bakes, the berries transform into a sweet, thick filling, beautifully contrasting with the slightly crisp, yet soft, biscuit crust. The magic truly happens when you pair a warm slice with a generous scoop of creamy vanilla ice cream or a dollop of homemade whipped cream – a combination that elevates this humble dessert to an extraordinary culinary experience.
Pro Tip: Don’t let seasonal availability stop you! This easy Berry Cobbler is just as delightful when made with frozen fruit, allowing you to enjoy it year-round.
What Makes This Berry Cobbler So Special?
This Berry Cobbler isn’t just another dessert; it’s a delightful concoction that wins hearts with its simplicity and incredible flavor. Here’s why it’s destined to become a staple in your recipe collection:
- Effortlessly Simple Ingredients: You won’t find any exotic or hard-to-pronounce items here. This recipe uses basic, everyday ingredients that come together to create extraordinary flavor. It’s perfect for when you want a homemade dessert without a trip to a specialty store.
- Remarkable Versatility: Whether it’s the peak of summer and your kitchen overflows with fresh berries, or the depths of winter and you’re relying on your freezer stash, this cobbler performs beautifully. Any mix of berries – strawberries, blueberries, raspberries, blackberries – works wonderfully, allowing for endless variations and year-round enjoyment.
- Perfectly Balanced Textures: The magic lies in the contrast: a sweet, tangy, and bubbly fruit filling nestled beneath a light, fluffy, and golden biscuit topping. The topping bakes to a tender perfection, soaking up just enough of the berry juices to create a sublime mouthful that’s both comforting and exciting.
- A True Crowd-Pleaser: From casual family dinners to festive holiday gatherings, summer BBQs, or unexpected guests, this cobbler always receives rave reviews. It’s a dessert that feels special, yet is incredibly easy to prepare, making you look like a seasoned baker with minimal effort.
Understanding Cobblers, Crumbles, and Crisps: A Sweet Distinction
While often used interchangeably, cobblers, crumbles, and crisps are distinct fruit desserts, primarily differentiated by their toppings. Understanding these differences can help you appreciate the unique qualities of each and expand your baking repertoire.
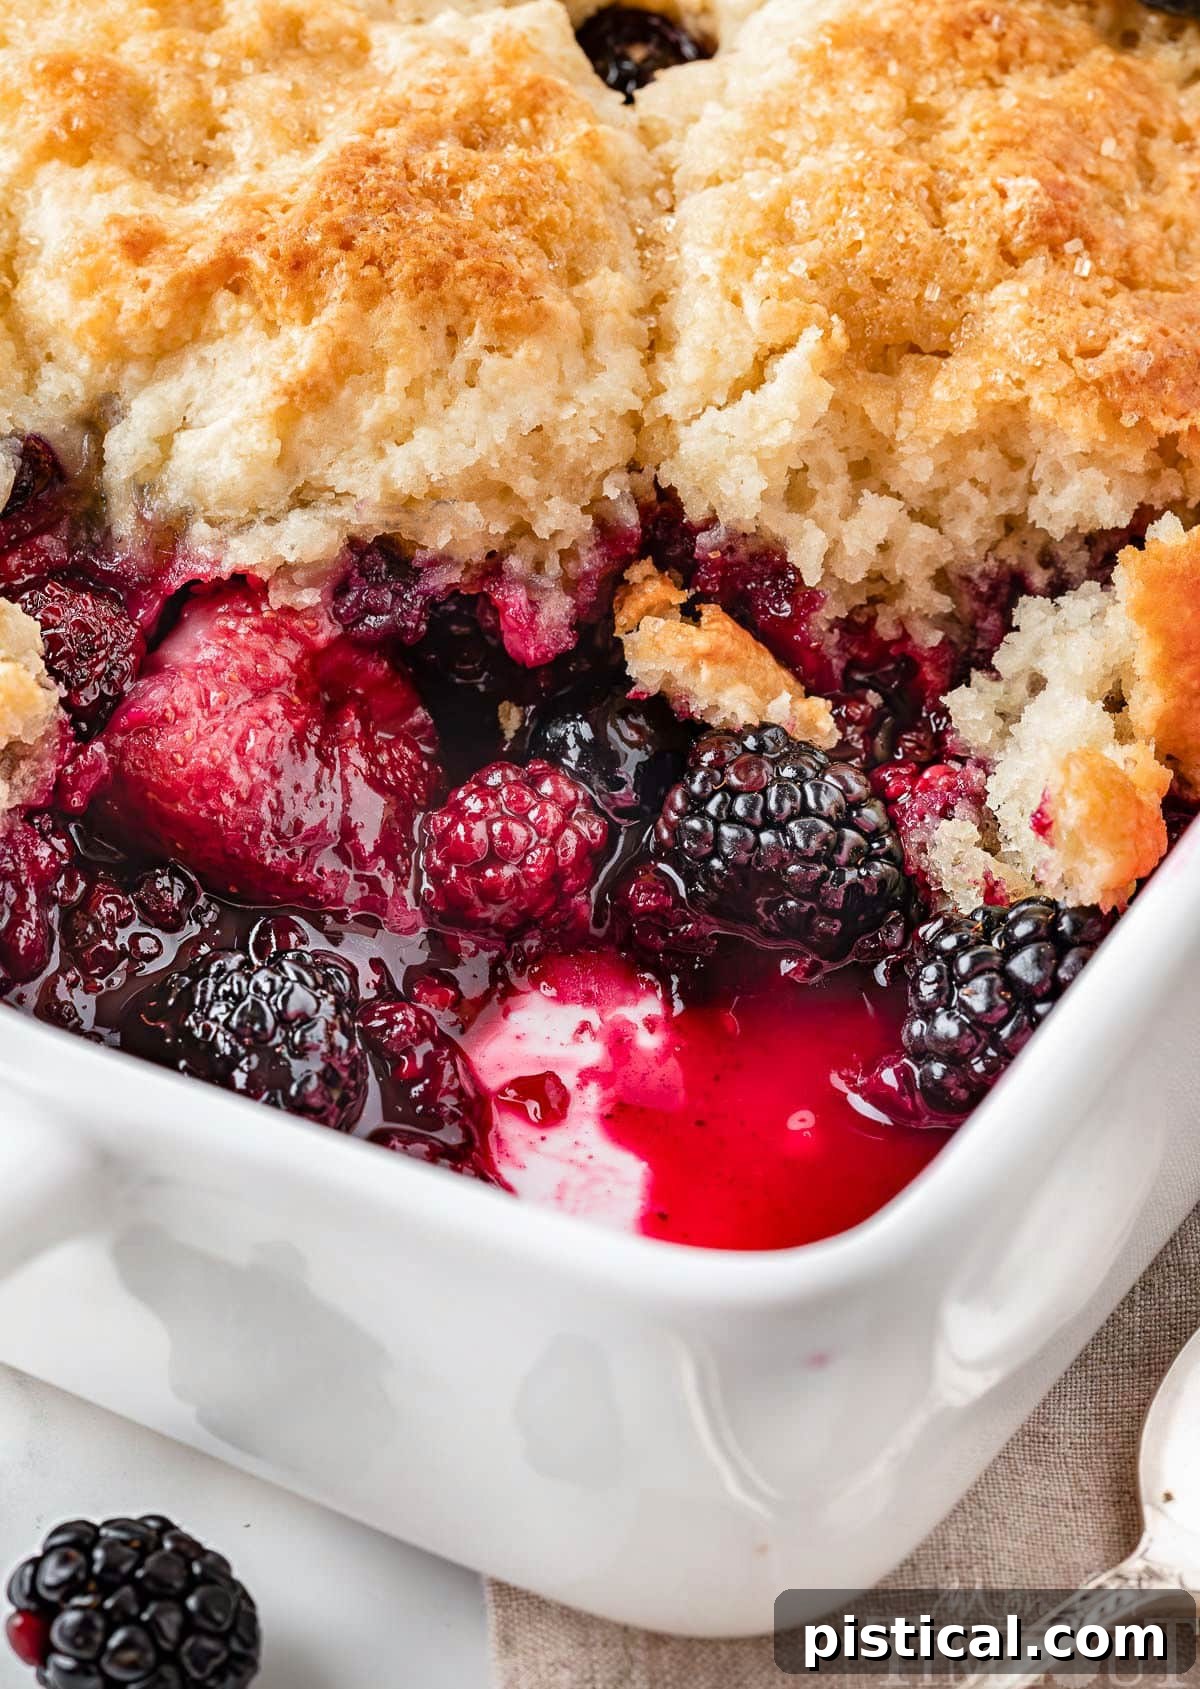
- Cobbler: As seen in this delightful recipe, a cobbler is characterized by its biscuit or scone-like topping. The topping is dropped onto the fruit in spoonfuls, which then expands and merges during baking, creating a somewhat “cobbled” or rustic appearance. The texture is typically soft, tender, and slightly chewy, similar to a sweet biscuit.
- Crumble: Historically, a crumble features a streusel-like topping made from a mixture of flour, sugar, and cold butter, often rubbed together until crumbly. This coarse mixture is then sprinkled evenly over the fruit filling. When baked, it yields a delightfully tender and slightly sandy texture, offering a gentle contrast to the soft fruit.
- Crisp: Similar to a crumble, a crisp also boasts a streusel topping, but with a key addition: oats. The oats not only add a wonderful nutty flavor but also contribute to a distinctly “crispy” and crunchy texture once baked. This extra crunch makes crisps a favorite for those who enjoy a textural contrast in their desserts.
Each of these desserts celebrates the fruit filling at its core, but the topping defines its character, offering a spectrum of textures and experiences. All are wonderful in their own right, but for that homey, comforting, biscuit-top goodness, a cobbler is simply unbeatable.
Essential Ingredients for Your Perfect Berry Cobbler
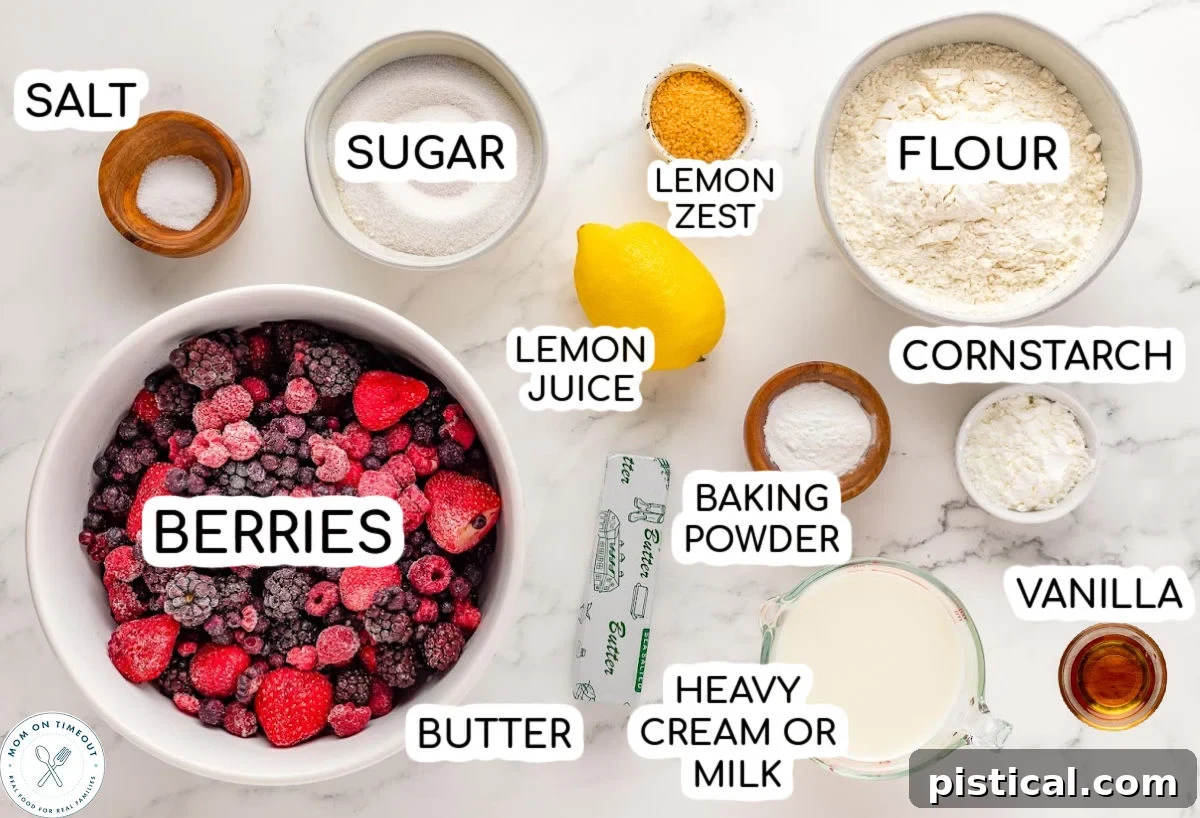
This berry cobbler recipe shines with its simplicity, relying on common ingredients to create layers of exquisite flavor. Let’s take a closer look at what you’ll need to create this comforting dessert. You’ll find the full printable recipe card with precise measurements at the end of this post.
For the Irresistible Berry Filling:
- Mixed Berries: The heart of our cobbler! While fresh berries are absolutely divine during summer, don’t hesitate to use frozen berries. They are typically picked at their peak ripeness and flash-frozen, locking in optimal flavor and sweetness, meaning you can enjoy this cobbler all year. A mix of strawberries, blueberries, raspberries, and blackberries offers a complex, balanced tart-sweet profile.
- Granulated Sugar: Enhances the natural sweetness of the berries and helps create that wonderful syrupy filling. It also plays a role in browning the biscuit topping.
- Cornstarch: This is our secret to a perfectly thickened berry filling that’s not too runny. It prevents the cobbler from becoming watery, ensuring a delightful texture. All-purpose flour can be used as a substitute, but cornstarch generally provides a clearer, glossier finish.
- Lemon Zest & Juice: A crucial ingredient! Lemon zest adds a bright, aromatic lift that cuts through the sweetness and enhances the natural fruit flavors. A touch of lemon juice further balances the sweetness with a pleasant tang, making the berry filling truly vibrant.
For the Fluffy Biscuit Topping:
This topping is a delightful hybrid of a classic biscuit recipe and tender scones, ensuring a rich, flaky, and moist texture.
- All-Purpose Flour: The foundation of our tender biscuits. For best results, measure flour by spooning it into your measuring cup and leveling it off, rather than scooping directly, which can compact the flour and lead to a dense topping. You can swap this for self-rising flour if you omit the baking powder and salt.
- Granulated Sugar: Sweetens the biscuit topping, giving it a delightful golden crust and a lovely flavor that complements the berries.
- Baking Powder: The primary leavening agent that gives the biscuits their characteristic lift and fluffiness. It reacts when wet and with heat to create air pockets.
- Salt: A pinch of salt is essential! It balances the sweetness and enhances all the other flavors in the topping, preventing it from tasting flat.
- Salted Butter: Cold butter is key for flaky biscuits! The small pockets of butter melt during baking, creating steam that separates the layers of dough. Using salted butter adds another layer of flavor, but unsalted butter works perfectly well if you prefer to control the salt content more precisely. For the best results, make sure your butter is very cold, ideally frozen for at least 10-15 minutes before use.
- Heavy Cream or Milk: Provides the necessary moisture to bring the biscuit dough together. Heavy cream lends a richer, more tender crumb, but whole milk, buttermilk, or even half-and-half can be successfully substituted, affecting the richness slightly but still yielding a delicious result. The colder the liquid, the better for a tender, flaky biscuit.
- Vanilla Extract: Adds a subtle warmth and aromatic depth to the biscuit topping, enhancing the overall flavor profile.
For Assembly and Garnish:
- Heavy Cream (for brushing): A small amount brushed over the biscuit topping before baking promotes a beautiful golden-brown crust and helps the sanding sugar adhere.
- Sanding Sugar: Optional, but highly recommended! Sprinkling sanding sugar (or turbinado sugar) on top of the biscuits adds a lovely sparkly finish and a delightful crunch, providing an extra textural dimension.
- Optional Garnishes: Fresh berries, mint leaves, vanilla ice cream, or whipped cream are perfect for serving.
Step-by-Step Guide: Crafting Your Easy Berry Cobbler
Get ready to create a dessert that embodies everything wonderful about warm, comforting flavors. This Mixed Berry Cobbler, loaded with juicy, sweet berries and topped with tender, golden biscuits, is deceptively easy to make and guaranteed to impress. Let’s walk through the process together. For complete, precise instructions, please refer to the full printable recipe card at the end of this post.
Remember: The full printable recipe with complete instructions and exact measurements is always available in the recipe card at the end of this post.
1. Preparing the Irresistible Berry Filling
- Preheat Your Oven & Prep Your Dish: Begin by preheating your oven to 350°F (175°C). Lightly spray a 9×13 inch baking dish with nonstick cooking spray and set it aside. This ensures a clean release and easy cleanup.
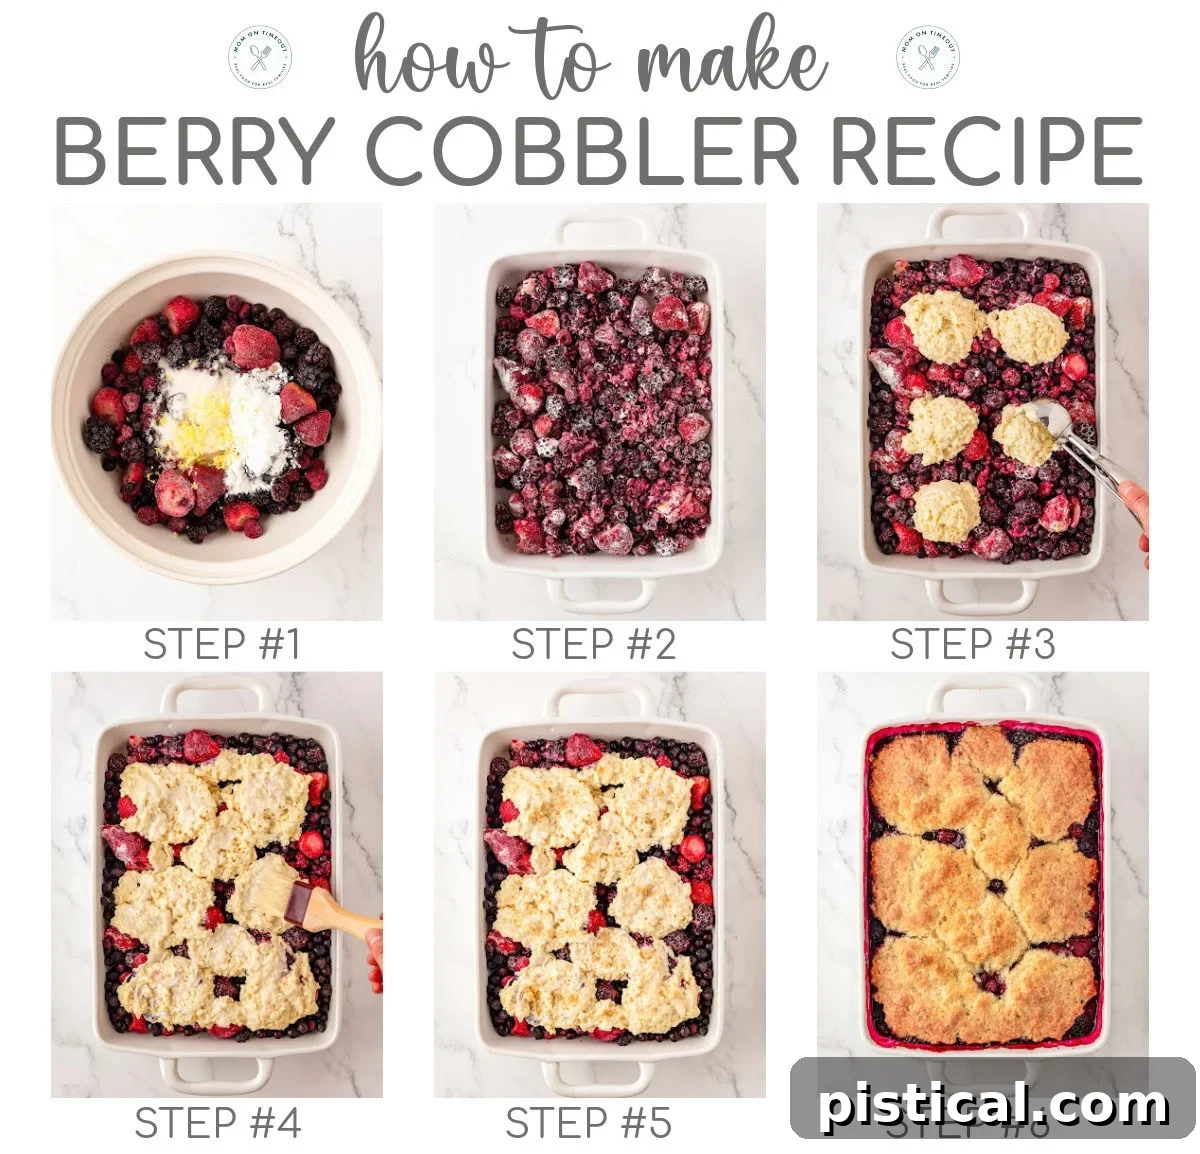
- Combine the Berries: In a large mixing bowl, gently combine your mixed berries (whether fresh or frozen), granulated sugar, cornstarch, lemon zest, and lemon juice. Toss them carefully until all the berries are thoroughly coated with the sugar and cornstarch mixture. This coating is crucial for thickening the juices and preventing a watery filling.
- Transfer to Baking Dish: Pour the berry mixture evenly into your prepared baking dish. Spread it out gently to form an even layer. Set this aside while you prepare the topping.
2. Creating the Fluffy Biscuit Topping
The secret to a light and tender biscuit topping lies in cold butter and minimal handling!
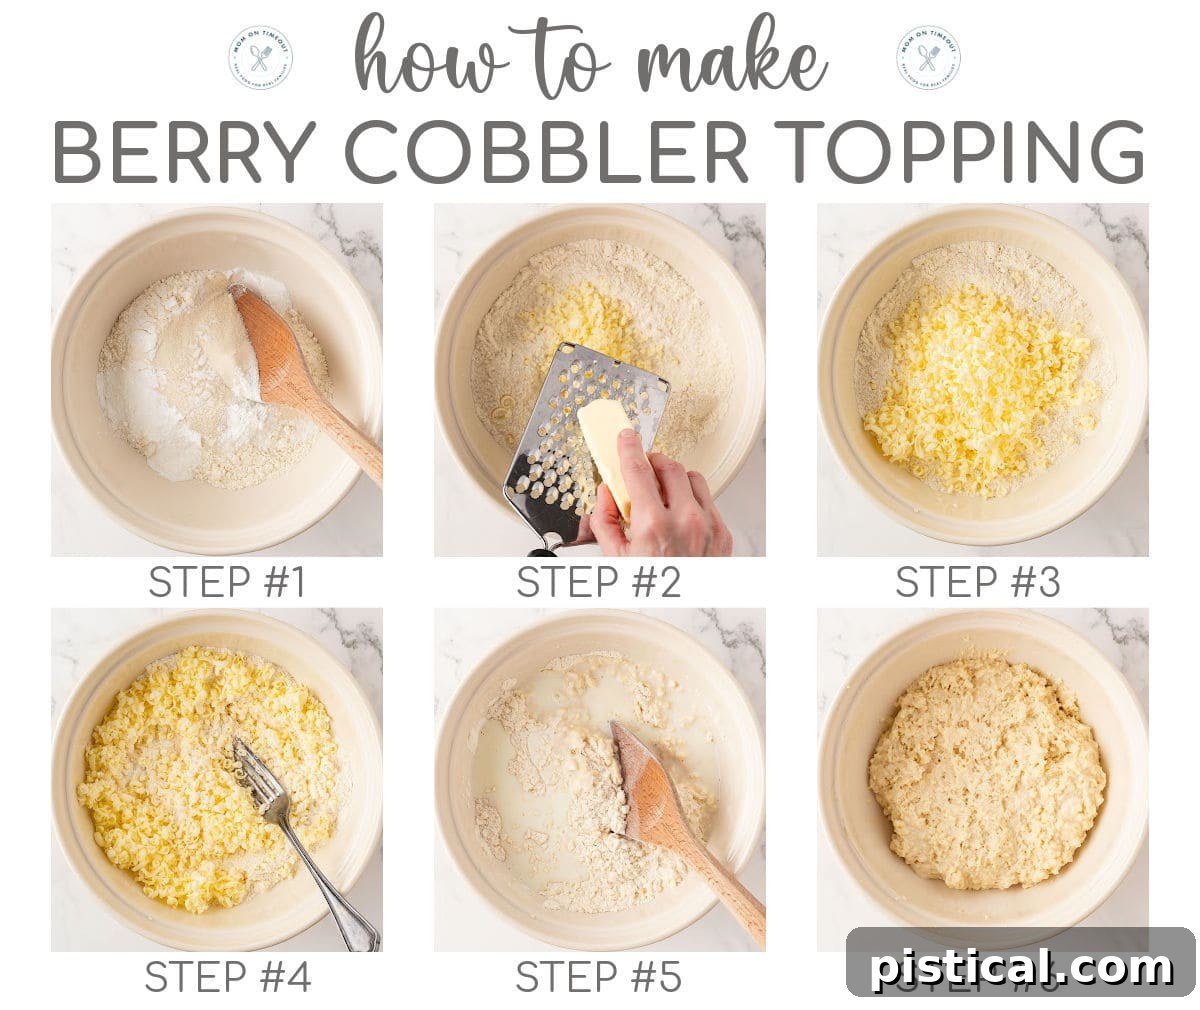
- Whisk Dry Ingredients: In another large bowl, whisk together the all-purpose flour, granulated sugar, baking powder, and salt. Whisking ensures these ingredients are evenly distributed, which is important for the biscuit’s rise.
- Incorporate Cold Butter: Take your pre-chilled (or frozen) salted butter and use a cheese grater to grate it directly into the flour mixture. This technique creates tiny flakes of butter that, when melted, produce pockets of steam for an incredibly tender and flaky biscuit.
- Mix Gently: Using a fork or your fingertips, gently mix the grated butter into the flour mixture until it resembles coarse crumbs. Be careful not to overwork the dough; small pieces of butter should still be visible. This step is crucial for flakiness.
- Add Wet Ingredients: In a small separate bowl, stir together the heavy cream (or your chosen milk substitute) and vanilla extract. Pour this cream mixture over the flour and butter mixture.
- Stir Until Just Combined: Gently stir with a fork or spatula until the ingredients are just combined. The dough should be shaggy and slightly sticky. Again, avoid overmixing, as this can lead to tough biscuits.
3. Assembling and Baking for Golden Perfection
- Scoop Topping onto Berries: Using a cookie scoop or a large spoon, dollop mounds of the biscuit dough over the berry filling in the baking dish. You don’t need to cover the berries completely; a rustic, “cobbled” look is part of its charm. Gently flatten each biscuit mound slightly with your hand or the back of a spoon.
- Brush and Sprinkle: Lightly brush the tops of the biscuit dough with the remaining two tablespoons of heavy cream. This helps achieve a beautiful golden crust. Then, generously sprinkle with sanding sugar (or turbinado sugar) for an extra touch of sweetness and crunch.
- Bake to Golden Perfection: Place the baking dish in your preheated oven and bake for 40 to 50 minutes. The cobbler is ready when the berry filling is visibly bubbling around the edges and through the topping, and the biscuits are golden brown and cooked through. If the topping starts to brown too quickly, you can loosely tent the cobbler with aluminum foil to prevent over-browning while the filling finishes cooking.
- Cool Before Serving: Once baked, remove the cobbler from the oven and transfer the pan to a wire rack. Let it cool for at least 10 to 15 minutes before serving. This crucial resting time allows the cornstarch to fully thicken the berry filling, ensuring it’s less runny and easier to serve.
Your Berry Cobbler can be served warm, straight from the oven, or at a pleasant room temperature. Don’t forget to pair it with a dollop of whipped cream or a scoop of vanilla ice cream for the ultimate treat!
Expert Tips for Berry Cobbler Success
While this Berry Cobbler recipe is straightforward, a few key tips from our kitchen can ensure your dessert is absolutely perfect every time. These insights will help you achieve that ideal balance of flaky topping and luscious filling.
- Freeze Your Butter for Flakiness: This is a game-changer for the biscuit topping! Grating frozen butter directly into your flour mixture creates tiny, distinct pockets of butter. As these melt in the oven, they release steam, which separates the layers of dough, resulting in an exceptionally tender and flaky biscuit. Don’t skip this step for the best texture.
- Keep Liquids Cold: Just like with butter, using very cold heavy cream, milk, or buttermilk for your topping mixture is vital. Cold liquids prevent the butter from melting prematurely, further contributing to that desired flaky texture and a light, airy biscuit.
- Don’t Overmix the Topping: Mix the biscuit dough just until the ingredients are combined and no dry streaks of flour remain. Overmixing develops the gluten in the flour, leading to tough, dense biscuits instead of light and tender ones. A slightly shaggy dough is perfectly acceptable!
- Consider the Cream and Sugar Topping: While optional, brushing the biscuit topping with a little extra heavy cream and sprinkling with sanding sugar before baking makes a noticeable difference. It contributes to a beautiful golden-brown color, a slight crispness, and an inviting sparkle that truly elevates the presentation and taste.
- Prevent Over-Browning: Keep an eye on your cobbler as it bakes. If the biscuit topping starts to get too dark before the filling is fully bubbling and set, simply tent the baking dish loosely with aluminum foil. This will protect the topping from burning while allowing the berries to continue cooking to perfection.
- Patience is Key: Let it Cool: It’s tempting to dive into a warm cobbler right out of the oven, but resisting for just 10-15 minutes is worth it. This cooling period allows the cornstarch in the filling to fully set and thicken. Your cobbler will be less runny, easier to scoop, and the flavors will meld beautifully.
- Measure Flour Correctly: For consistent results, especially in baking, proper flour measurement is crucial. Instead of scooping flour directly from the bag, which compacts it, use the “spoon and level” method. Fluff the flour in its container with a spoon, then gently spoon it into your measuring cup until overflowing. Use the back of a straight edge (like a butter knife) to level off the excess flour.
Serving Suggestions to Elevate Your Cobbler Experience
While this mixed berry cobbler is undeniably delicious on its own, pairing it with complementary toppings can transform it into an even more luxurious and memorable dessert. Here are a few options that will make your taste buds sing:
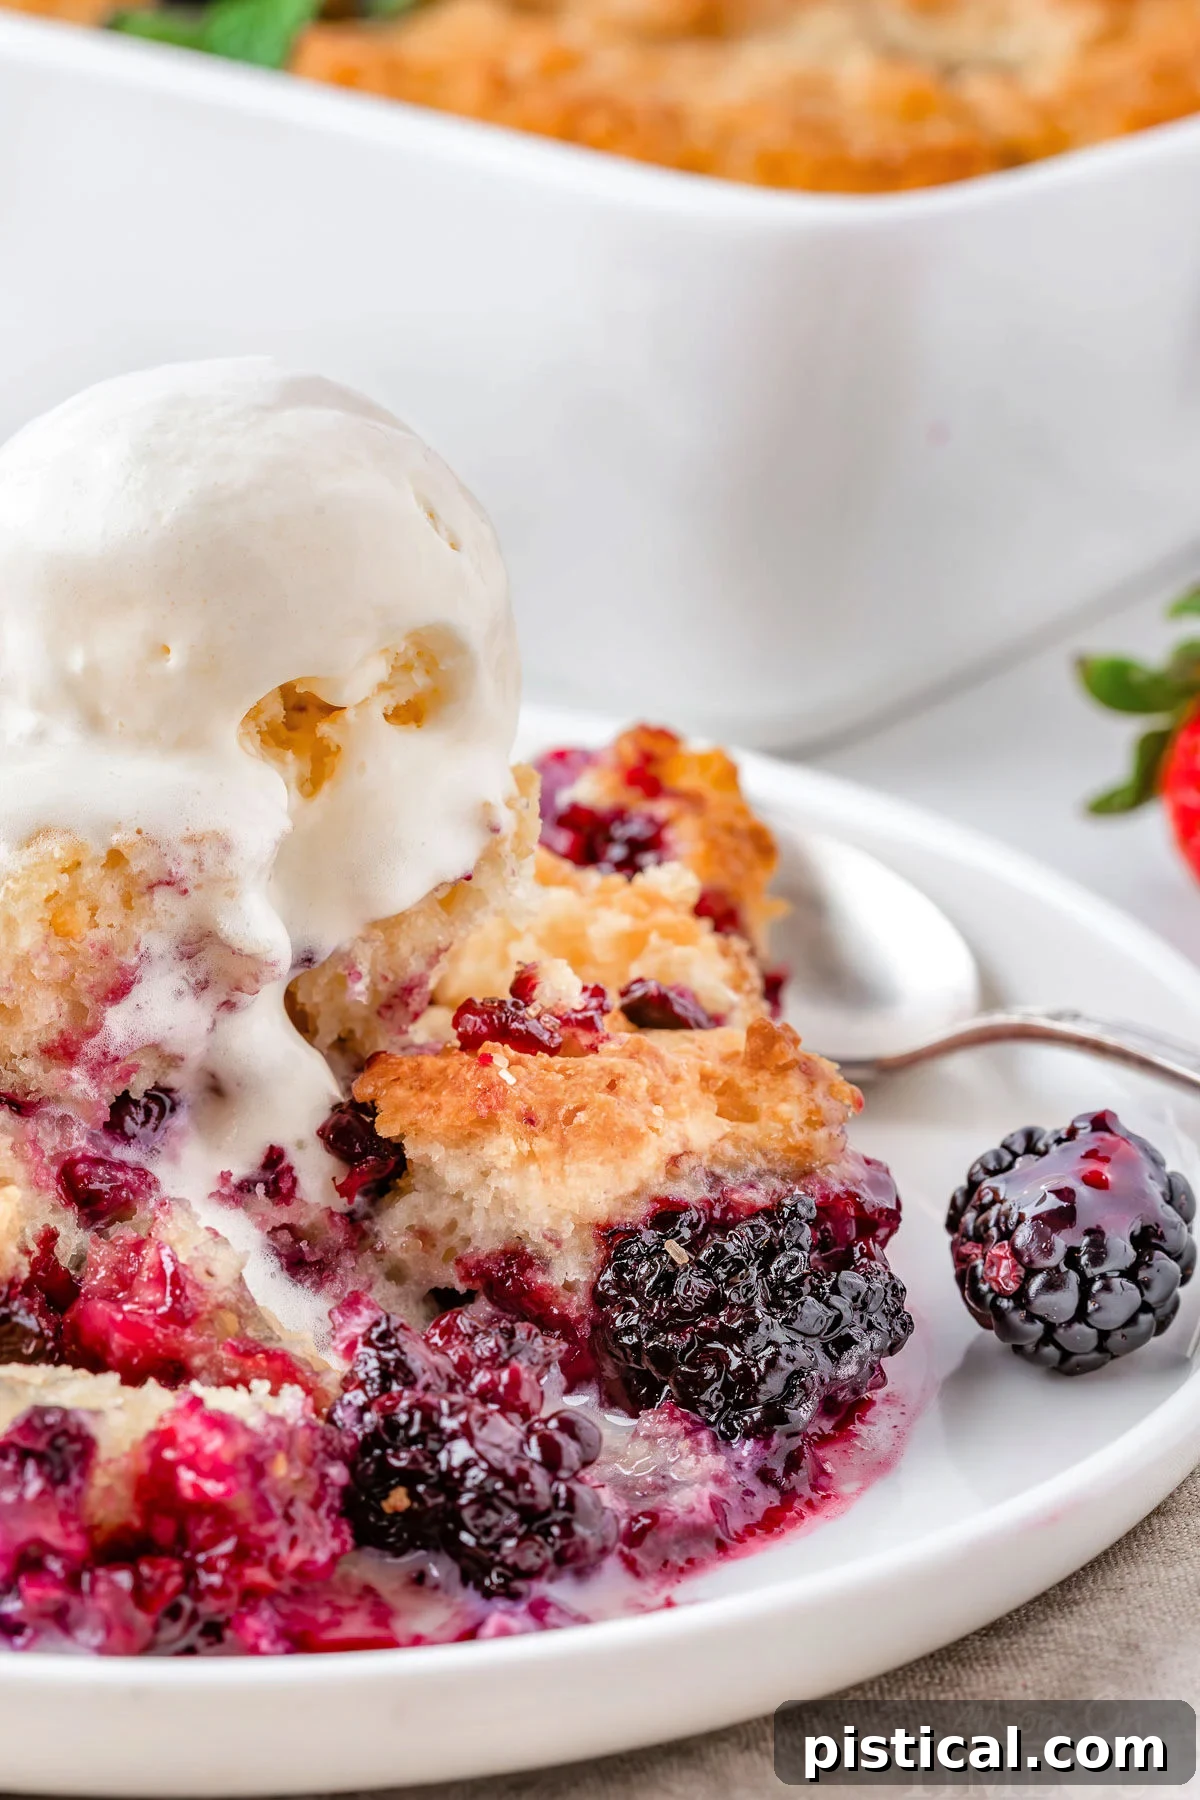
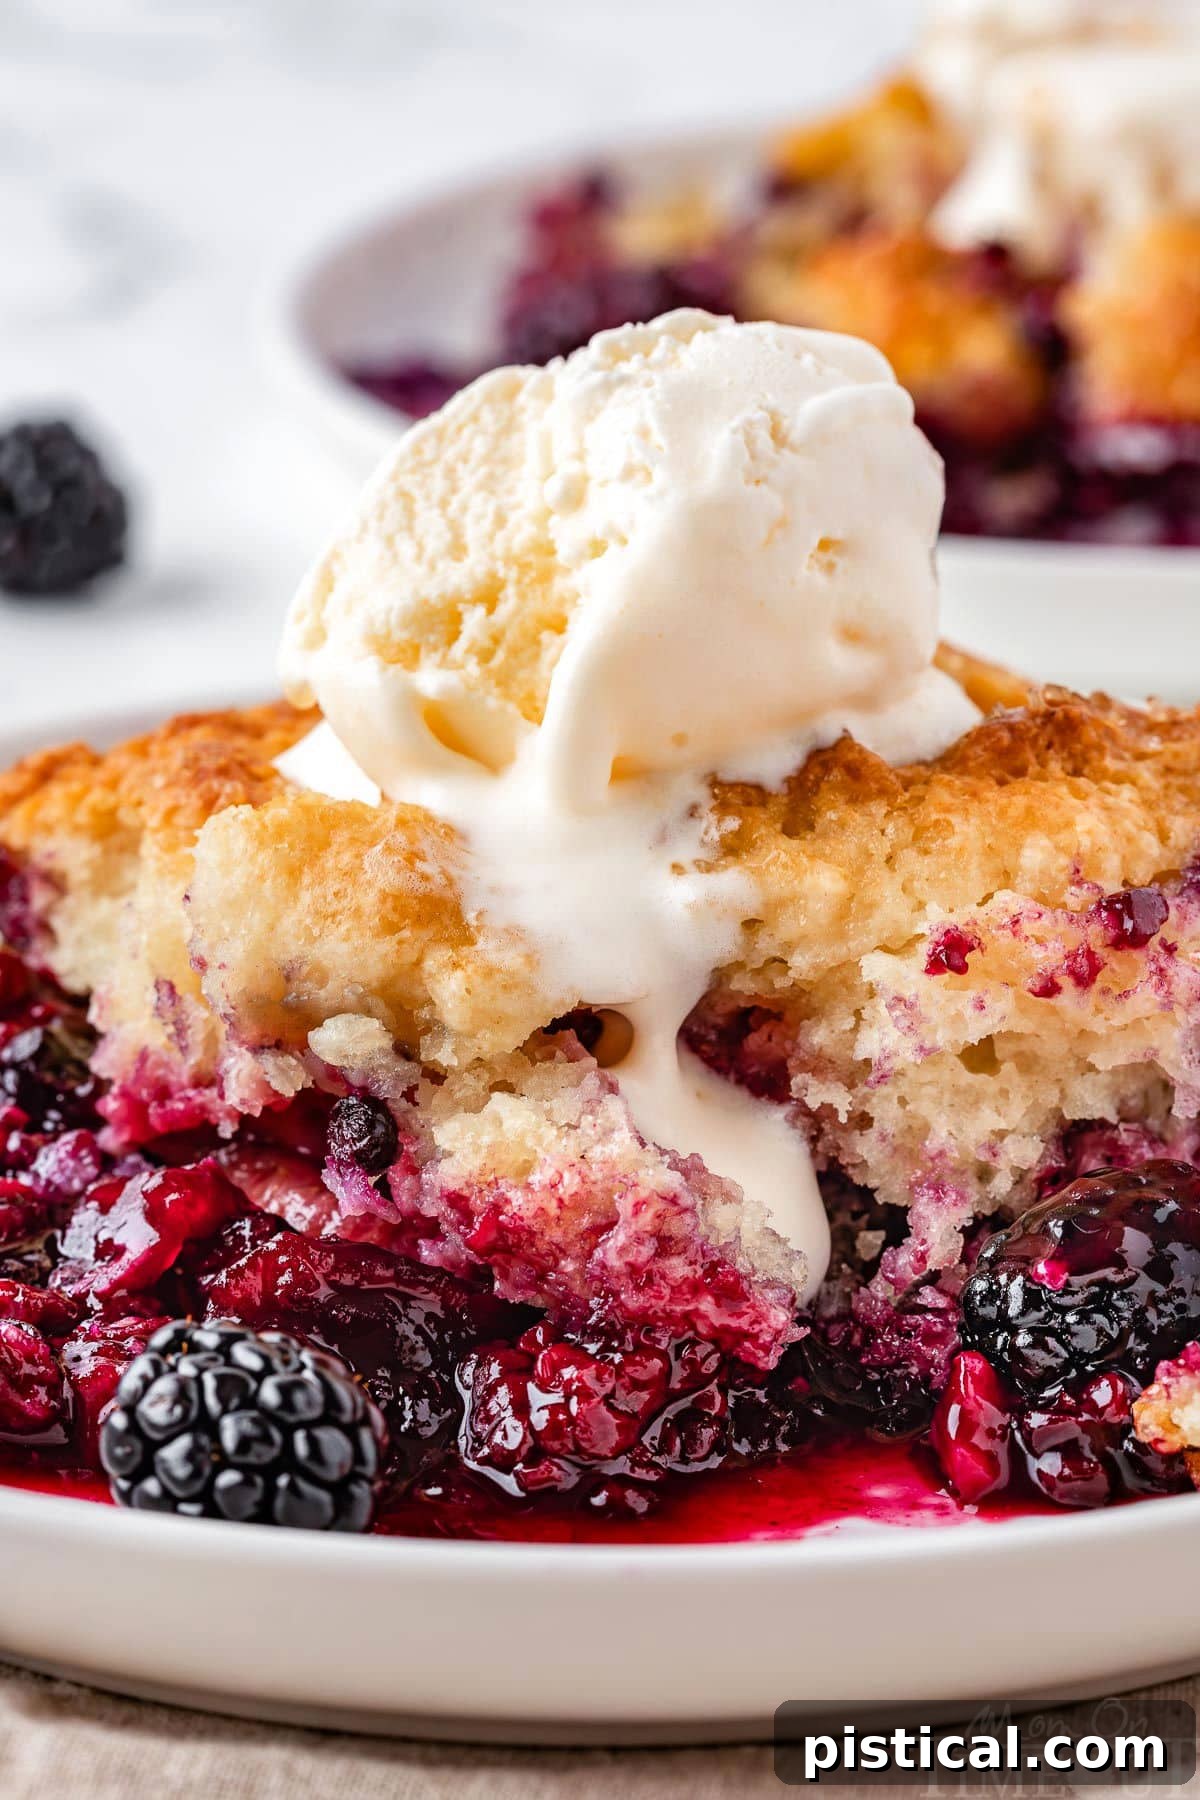
- Classic Vanilla Ice Cream: The ultimate pairing! A generous scoop of cold vanilla ice cream melting into the warm, bubbly berry cobbler creates an exquisite contrast of temperatures and textures. The creamy sweetness of the ice cream perfectly complements the tart-sweet fruit.
- Fresh Whipped Cream: For a lighter, airy touch, a dollop of homemade whipped cream is pure perfection. Its delicate texture and subtle sweetness enhance the berries without overpowering them. Whether you whip it yourself for extra freshness or use a store-bought version, it’s a delightful addition.
- A Sprig of Fresh Mint: Don’t underestimate the power of a simple garnish! A few fresh mint leaves add a touch of vibrant green color and a refreshing aroma. It’s an elegant finish that makes your homemade cobbler look like a restaurant-worthy treat.
- Berry Coulis or Sauce: Drizzle your cobbler with a quick homemade berry coulis (simply blend a handful of fresh berries with a touch of sugar and lemon juice, then strain) for an extra layer of concentrated berry flavor and a beautiful presentation.
- A Dusting of Confectioners’ Sugar: For a simple yet elegant finish, a light dusting of confectioners’ sugar adds a delicate sweetness and a pristine look, particularly when serving for guests.
Storage, Make-Ahead, and Freezing Options
This easy berry cobbler is not only delicious fresh from the oven but also wonderfully adaptable for making ahead, storing leftovers, or even freezing for future enjoyment. These options make it a practical choice for meal prep or feeding a crowd.
- Make Ahead: To save time on baking day, you can prepare the berry filling and the biscuit topping separately up to 24 hours in advance. Store the berry mixture covered in the refrigerator. Keep the biscuit dough in an airtight container in the fridge as well. When ready to bake, assemble as directed and proceed with the baking instructions.
- Storing Leftovers: Allow any leftover cobbler to cool completely to room temperature. Then, transfer it to an airtight container or cover the baking dish tightly with plastic wrap. Store in the refrigerator for up to 3-5 days.
- To Reheat:
- Oven: For the best texture, reheat the entire dish or individual portions in an oven preheated to 325°F (160°C) for about 20-25 minutes, or until warmed through and bubbly. This method helps crisp up the topping.
- Microwave: For a quicker option, individual servings can be reheated in the microwave for approximately 30-60 seconds on high power, or until hot. Be aware that the topping may soften slightly in the microwave.
- Freezing Cooked Cobbler: This recipe freezes beautifully, making it an excellent addition to your freezer prep collection.
- Allow the fully baked cobbler to cool completely.
- Wrap the entire baking dish tightly with several layers of plastic wrap, then an additional layer of aluminum foil to prevent freezer burn. Alternatively, if using a disposable 9×13 baking tray, cover as directed.
- Freeze for up to 2-3 months.
- To serve, thaw the frozen cobbler overnight in the refrigerator. Reheat in the oven at 325°F (160°C) until warmed through, about 30-45 minutes.
Troubleshooting Common Cobbler Questions
Even with an easy recipe, questions can arise. Here are answers to some common queries about making berry cobbler:
Why is my cobbler runny?
Cobblers, especially when hot, are meant to be a little runny, as the fruit juices are still very fluid. The filling naturally thickens as it cools, due to the cornstarch. If your cobbler remains excessively runny even after cooling, you can add an additional teaspoon of cornstarch to your berry mixture next time. Ensure you toss the berries thoroughly to coat them evenly. Also, make sure you let the cobbler cool for at least 10-15 minutes before serving; this is crucial for the cornstarch to fully set.
Can I make this cobbler gluten-free?
Absolutely! To make this cobbler gluten-free, simply swap the all-purpose flour in the biscuit topping for a 1:1 gluten-free flour blend. Ensure your chosen blend contains xanthan gum for proper texture, or add a quarter teaspoon if it doesn’t. The rest of the ingredients are naturally gluten-free.
Can I use only one type of berry?
Yes, you can! While a mixed berry cobbler offers a complex flavor profile, using a single type of berry like blueberries, raspberries, or peaches will also yield a delicious cobbler. Adjust the sugar content slightly if using very tart or very sweet fruits.
Creative Variations to Personalize Your Cobbler
One of the joys of baking is the ability to customize recipes to your taste. This easy berry cobbler is a fantastic canvas for creative variations. Here are some ideas to make it uniquely yours:
- Spice It Up: Add a pinch of warming spices like cinnamon, nutmeg, or even a touch of cardamom to the berry filling. These spices complement the fruit flavors beautifully, adding a cozy depth.
- Fruit Swaps and Combinations: While berries are classic, feel free to experiment with other fruits.
- Stone Fruits: Swap in sliced peaches, nectarines, or cherries (pitted, of course) for some or all of the berries.
- Apples or Pears: In fall, use thinly sliced apples or pears, perhaps with a sprinkle of apple pie spice.
- Rhubarb: For a tart and tangy twist, add chopped rhubarb to your berry mix.
- Nutty Topping: Fold some chopped nuts (like pecans, walnuts, or almonds) into your biscuit topping mixture for added crunch and flavor. You can also sprinkle them on top before baking.
- Citrus Zest: Beyond lemon, consider adding orange or lime zest to the berry filling for a different kind of bright, fresh aroma.
- Individual Servings: For elegant entertaining or portion control, bake the cobbler in individual ramekins or even muffin tins. Adjust baking time accordingly (likely shorter, around 20-30 minutes). This also makes for a charming presentation.
- Semi-Homemade Shortcut: If you’re really short on time but still want homemade taste, use a couple of cans of quality berry pie filling instead of making your own. This makes the easy berry cobbler recipe even easier, though fresh berries are always recommended for the best flavor.
- Cream Cheese Twist: For an extra rich topping, lightly mix in a few tablespoons of softened cream cheese to your biscuit dough before dropping it over the berries.
Discover More Delicious Berry Desserts
If you’ve fallen in love with the vibrant flavors of berries in this cobbler, you’ll be thrilled to explore more of our berry-focused dessert recipes. These are perfect for any occasion and showcase the versatility of these incredible fruits:
- No-Bake Berry Cheesecake: A refreshing and creamy dessert that’s perfect for warmer weather, packed with fresh berry goodness without needing to turn on the oven.
- Mini Strawberry Pies: Adorable and perfectly portioned, these small pies offer a burst of sweet strawberry flavor in every bite.
- Blackberry Turnovers: Flaky pastry filled with juicy blackberries, a simple yet satisfying treat for breakfast or dessert.
- Lemon Blueberry Scones: A delightful combination of tangy lemon and sweet blueberries in a tender scone, ideal for brunch or afternoon tea.
- Strawberry Tiramisu: A fruity twist on the classic Italian dessert, featuring layers of ladyfingers, creamy mascarpone, and fresh strawberries.
Easy Berry Cobbler Recipe
This easy Berry Cobbler recipe is a dream come true for dessert lovers! It’s brimming with a sweet, juicy mixed berry filling and crowned with a wonderfully buttery, tender biscuit topping. Perfect for any gathering, it uses simple ingredients and is delightful served warm with a scoop of creamy vanilla ice cream or a dollop of fresh whipped cream. This is a crowd-pleasing favorite you’ll want to make year-round, whether you choose fresh or frozen berries!

Print Recipe |
Pin Recipe
Course: Dessert | Cuisine: American | Keyword: blueberry cobbler, blueberry cobbler recipe, mixed berry cobbler
Prep Time: 15 minutes | Cook Time: 40 minutes | Total Time: 55 minutes
Servings: 12 servings | Calories: 349 kcal | Author: Trish – Mom On Timeout
Ingredients
Filling
- 2 pounds berries (fresh or frozen, mixed)
- ¾ cup granulated sugar
- 3 tablespoons cornstarch
- 1 tablespoon lemon zest (about 1 lemon)
- 2 tablespoons lemon juice (fresh squeezed, about 1 lemon)
Topping
- 2 cups all-purpose flour (spooned and leveled)
- ½ cup granulated sugar
- 1 tablespoon baking powder
- ½ teaspoon fine sea salt
- ½ cup salted butter (frozen for 10 or more minutes)
- 1 cup heavy cream (whole milk or buttermilk can be substituted)
- 1 teaspoon vanilla extract
Assembly
- 2 tablespoons heavy cream (milk can be substituted)
- 2 tablespoons sanding sugar (or turbinado sugar or granulated sugar)
Optional Garnishes:
- fresh berries
- mint leaves
- vanilla ice cream
- whipped cream
Instructions
- Preheat oven to 350°F (175°C). Lightly spray an 9×13 baking dish with nonstick cooking spray. Set aside.
Filling
- In a large bowl, combine the berries, granulated sugar, cornstarch, lemon zest, and lemon juice. Stir to combine until the berries are fully coated. Transfer to prepared baking dish and set aside.
Topping
- In a large bowl, whisk together flour, granulated sugar, baking powder, and salt.
- Use a cheese grater to grate the butter and mix everything together with a fork or your fingers.
- Stir the cream and vanilla extract together. Pour cream mixture over flour mixture and stir just until combined.
Assembly
- Scoop out biscuits with a cookie scoop or large spoon and place on top of the berries in the baking dish. Flatten slightly with your hands or the back of a spoon. Repeat until you have mostly covered the berries; it’s fine to have some peeking out.
- Brush the heavy whipping cream over the top of the biscuits and sprinkle with sugar.
- Bake for 40 to 50 minutes or until the berry filling is bubbling and the biscuits are lightly golden brown and cooked through. (Note: Check halfway through cooking, and if the topping is too dark, lightly tent with foil and finish cooking.)
- Remove from oven and transfer the pan to a wire rack and let cool for at least 10 minutes before serving. Cobbler can be served warm or at room temperature. Enjoy with whipped cream or vanilla ice cream.
Notes
Storage Information
- Make Ahead: You can prep the filling and topping separately and refrigerate them for up to 24 hours before baking.
- Leftovers: Store cooled cobbler in an airtight container in the refrigerator for up to 4 days.
- To Reheat: Warm individual portions in the microwave or reheat the whole dish in the oven at 325°F (160°C) until warmed through.
- Freezing: You can freeze the fully baked cobbler. Let it cool completely, then wrap tightly and freeze for up to 2 months. Thaw overnight in the fridge and reheat before serving.
Can I make this ahead of time and freeze it?
This recipe freezes and thaws well, making it the perfect addition to your freezer prep collection. Prepare as directed, but use a disposable 9×13 baking tray, and allow to cool completely. Cover the tray with foil and plastic wrap and keep in the freezer for up to 3 months. Thaw completely in the refrigerator before reheating (if desired) and serving. Reheat at 325°F (160°C) until warmed through.
Make sure you let the cobbler cool for at least 10-15 minutes before serving. It will still be hot, but this will give the cornstarch extra time to firm up the filling so it’s less runny.
If the topping starts to get too brown, tent the cobbler with foil until it finishes cooking.
Tools and Equipment (affiliate links): 9×13 Baking Dish | Glass Mixing Bowls | Whisk | Silicone Spatula | Lemon Zester | Lemon Juicer
Please see post above for more information, step-by-step process photos, recipe tips, and frequently asked questions.
Nutrition Information
Calories: 349kcal | Carbohydrates: 49g | Protein: 3g | Fat: 17g | Saturated Fat: 10g | Polyunsaturated Fat: 1g | Monounsaturated Fat: 4g | Trans Fat: 0.3g | Cholesterol: 46mg | Sodium: 166mg | Potassium: 192mg | Fiber: 3g | Sugar: 28g | Vitamin A: 600IU | Vitamin C: 4mg | Calcium: 71mg | Iron: 1mg