
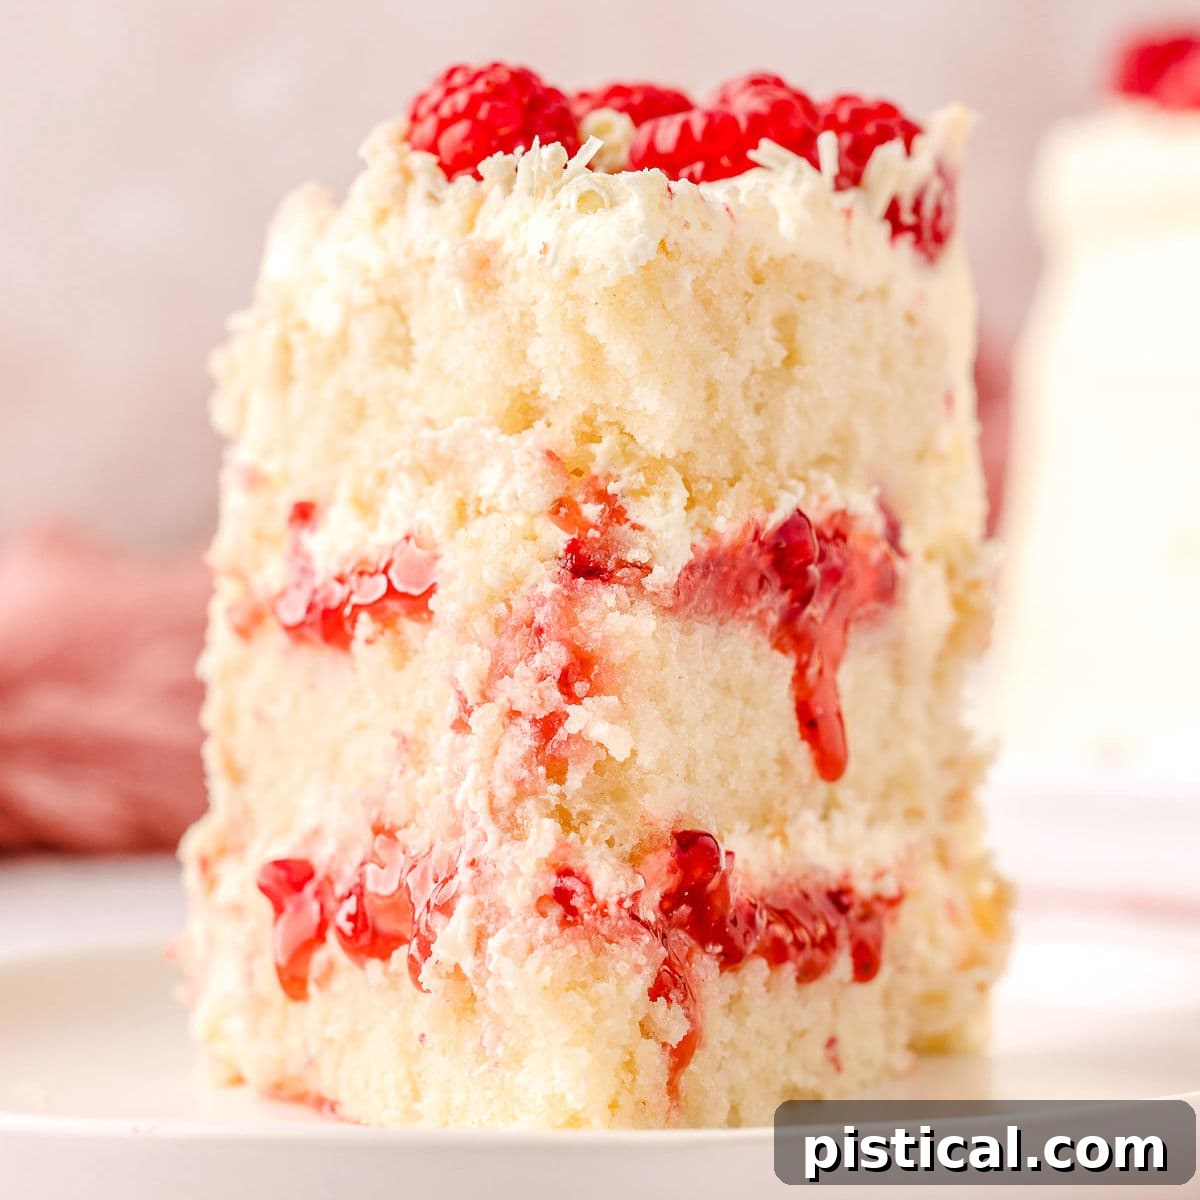
Indulge in Elegance: The Ultimate White Chocolate Raspberry Cake Recipe
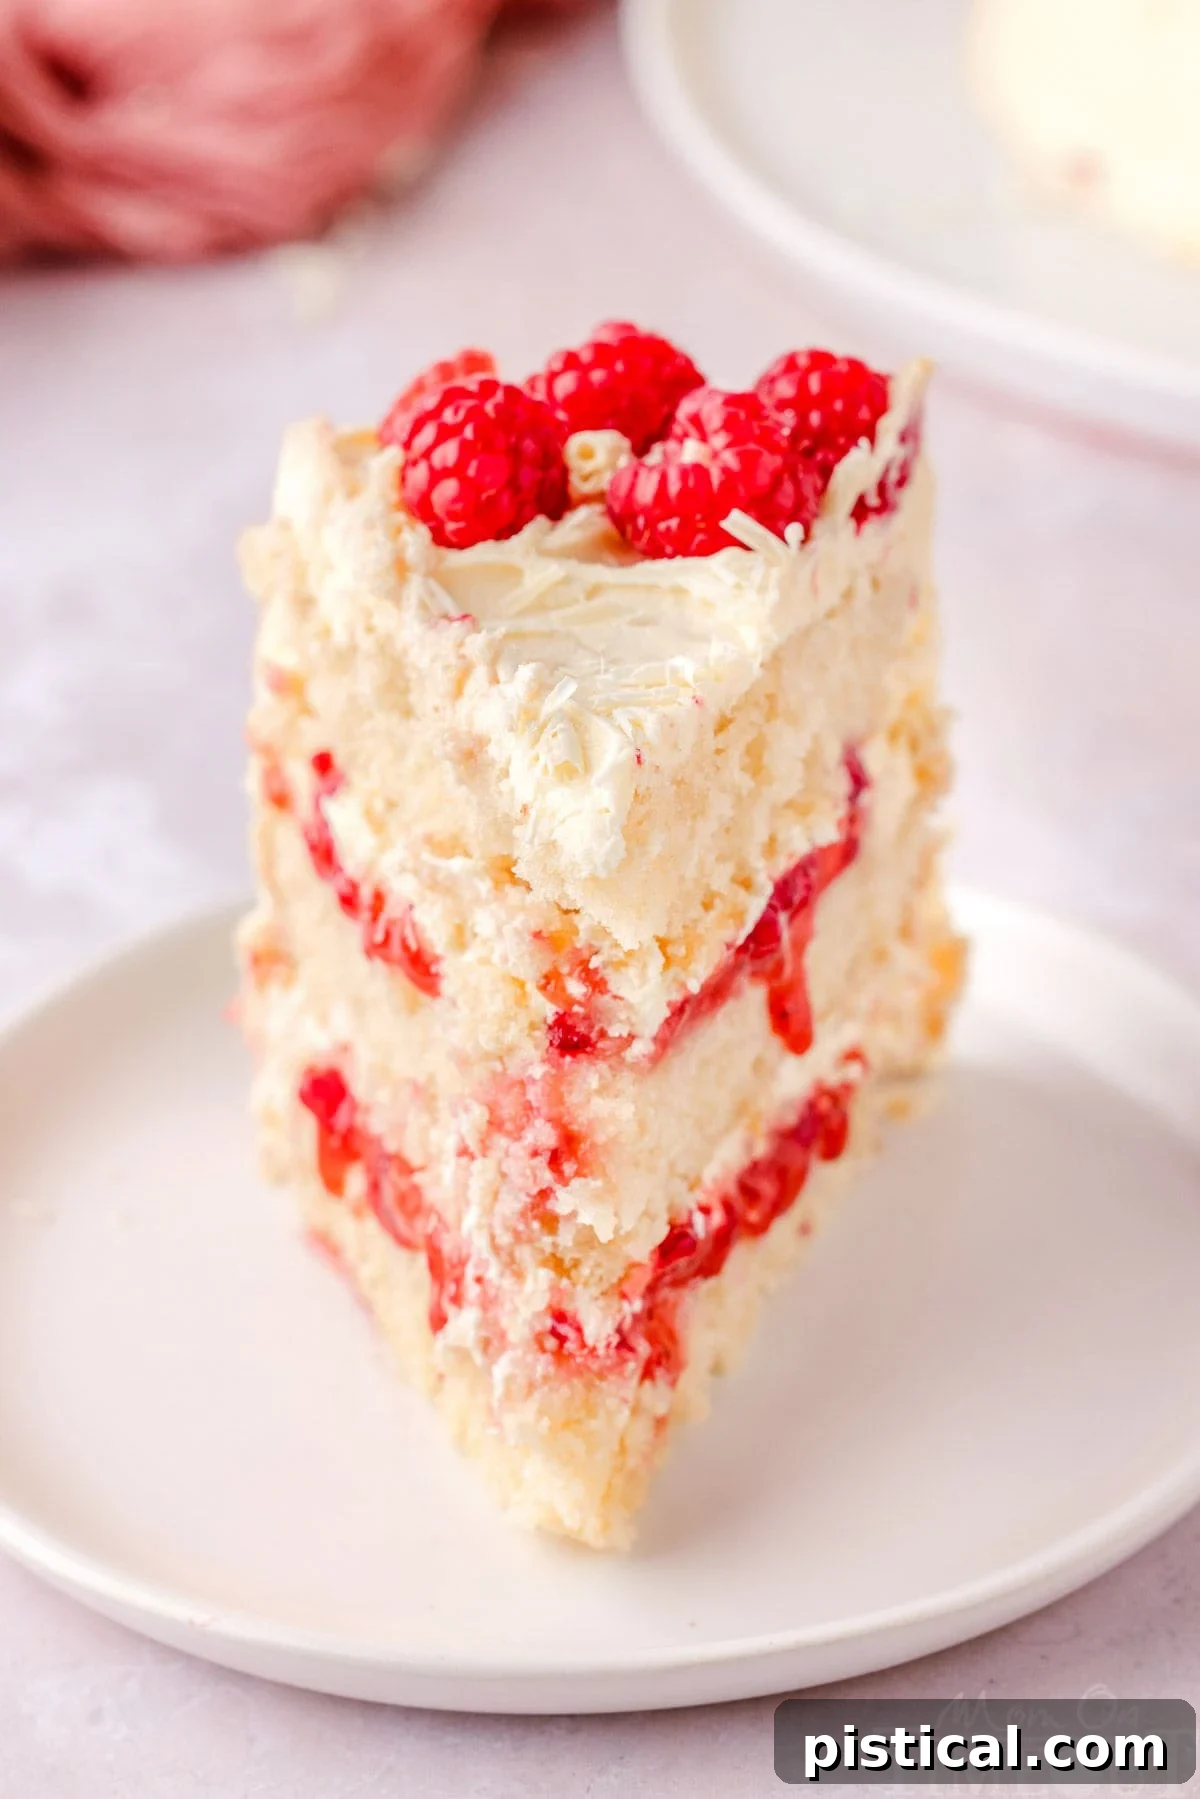
Prepare to be captivated by this show-stopping White Chocolate Raspberry Cake, a dessert that promises to be as visually stunning as it is irresistibly delicious. This culinary masterpiece features tender layers of moist vanilla cake, generously filled with bright and tangy raspberry preserves, all enveloped in a rich, velvety white chocolate buttercream frosting. Crowned with an artful scattering of fresh, sweet raspberries and delicate white chocolate curls, this impressive layer cake transcends the ordinary, making it the quintessential centerpiece for holidays, celebrations, and any moment deserving of an extraordinary treat.
If your heart beats for the delightful combination of raspberries, you’re in for a treat! Explore other delectable raspberry recipes like these Raspberry Crumble Cookies, the luxurious Raspberry Truffles, or this effortlessly elegant No-Bake Raspberry Cheesecake!
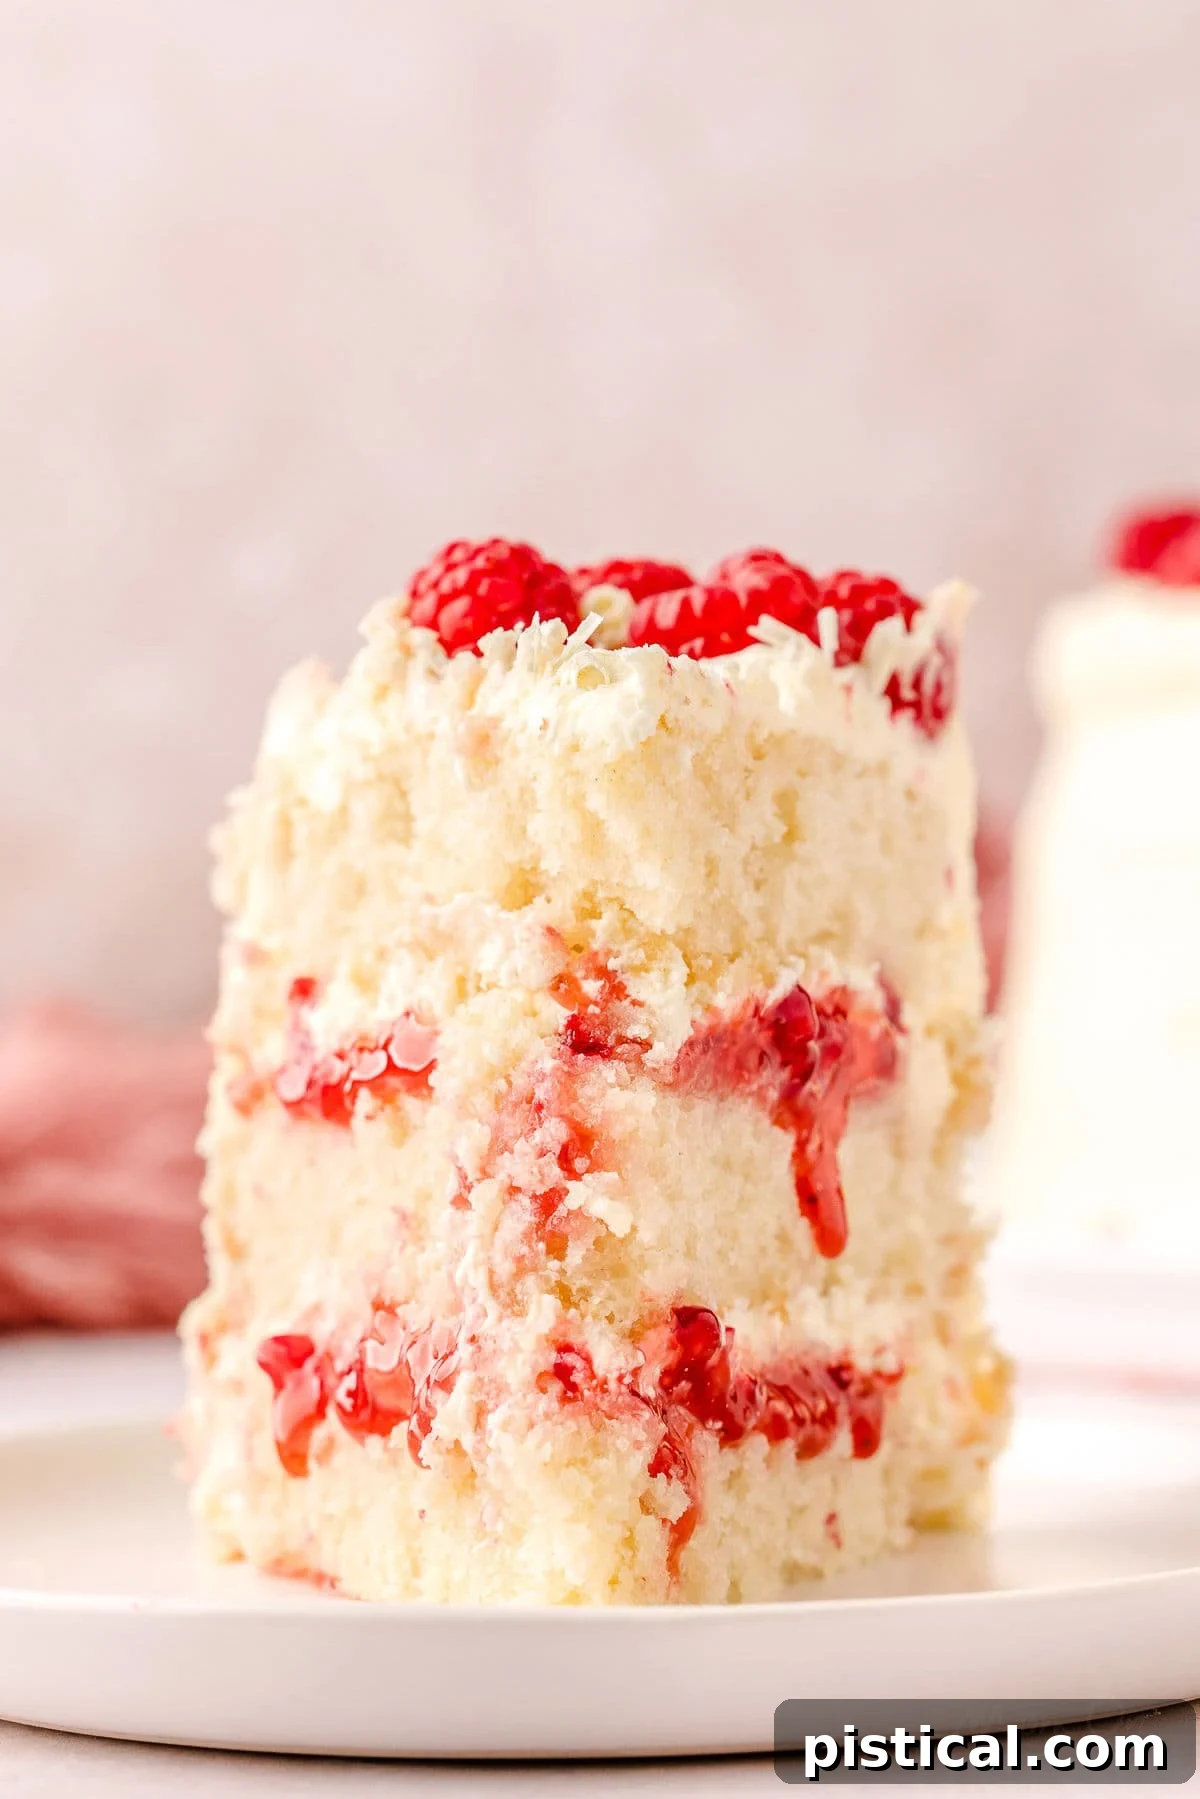
Experience Dessert Perfection: White Chocolate and Raspberry Cake
This cake is more than just a dessert; it’s an experience. A harmonious blend of textures and tastes, it celebrates the classic pairing of white chocolate and raspberry with unparalleled finesse. Each bite delivers a symphony of moist, airy vanilla cake, bursting with the vibrant sweetness and subtle tartness of raspberry preserves, all beautifully complemented by a luscious, smooth white chocolate buttercream frosting. It’s a treat for all senses, embodying the very essence of dessert perfection.
But the indulgence doesn’t stop with the exquisite layers. The final flourish of fresh, ruby-red raspberries and delicate white chocolate curls elevates this cake from simply delicious to truly magnificent. These simple yet elegant garnishes add a touch of sophistication and fresh contrast, making it an undeniable show-stopper. Picture this stunning creation gracing your holiday table or serving as the grand finale to a special occasion – it’s destined to be the perfect centerpiece for any celebration, sparking joy and admiration in equal measure.
Among the myriad of dessert options, few command attention quite like a beautifully decorated layer cake. When that visual splendor is matched by an exceptional flavor profile, you’ve truly found perfection. This cake delivers on every front, offering an unmatched flavor experience with its soft, fluffy vanilla cake layers, the bright tang of raspberry preserves, and the creamy, luxurious embrace of the white chocolate frosting. It’s a sensory delight that is every bit as heavenly as it sounds. The striking visual contrast of the vivid red raspberries against the pristine white cake and frosting is an absolute feast for the eyes, promising a treat for the tastebuds that is just as memorable.
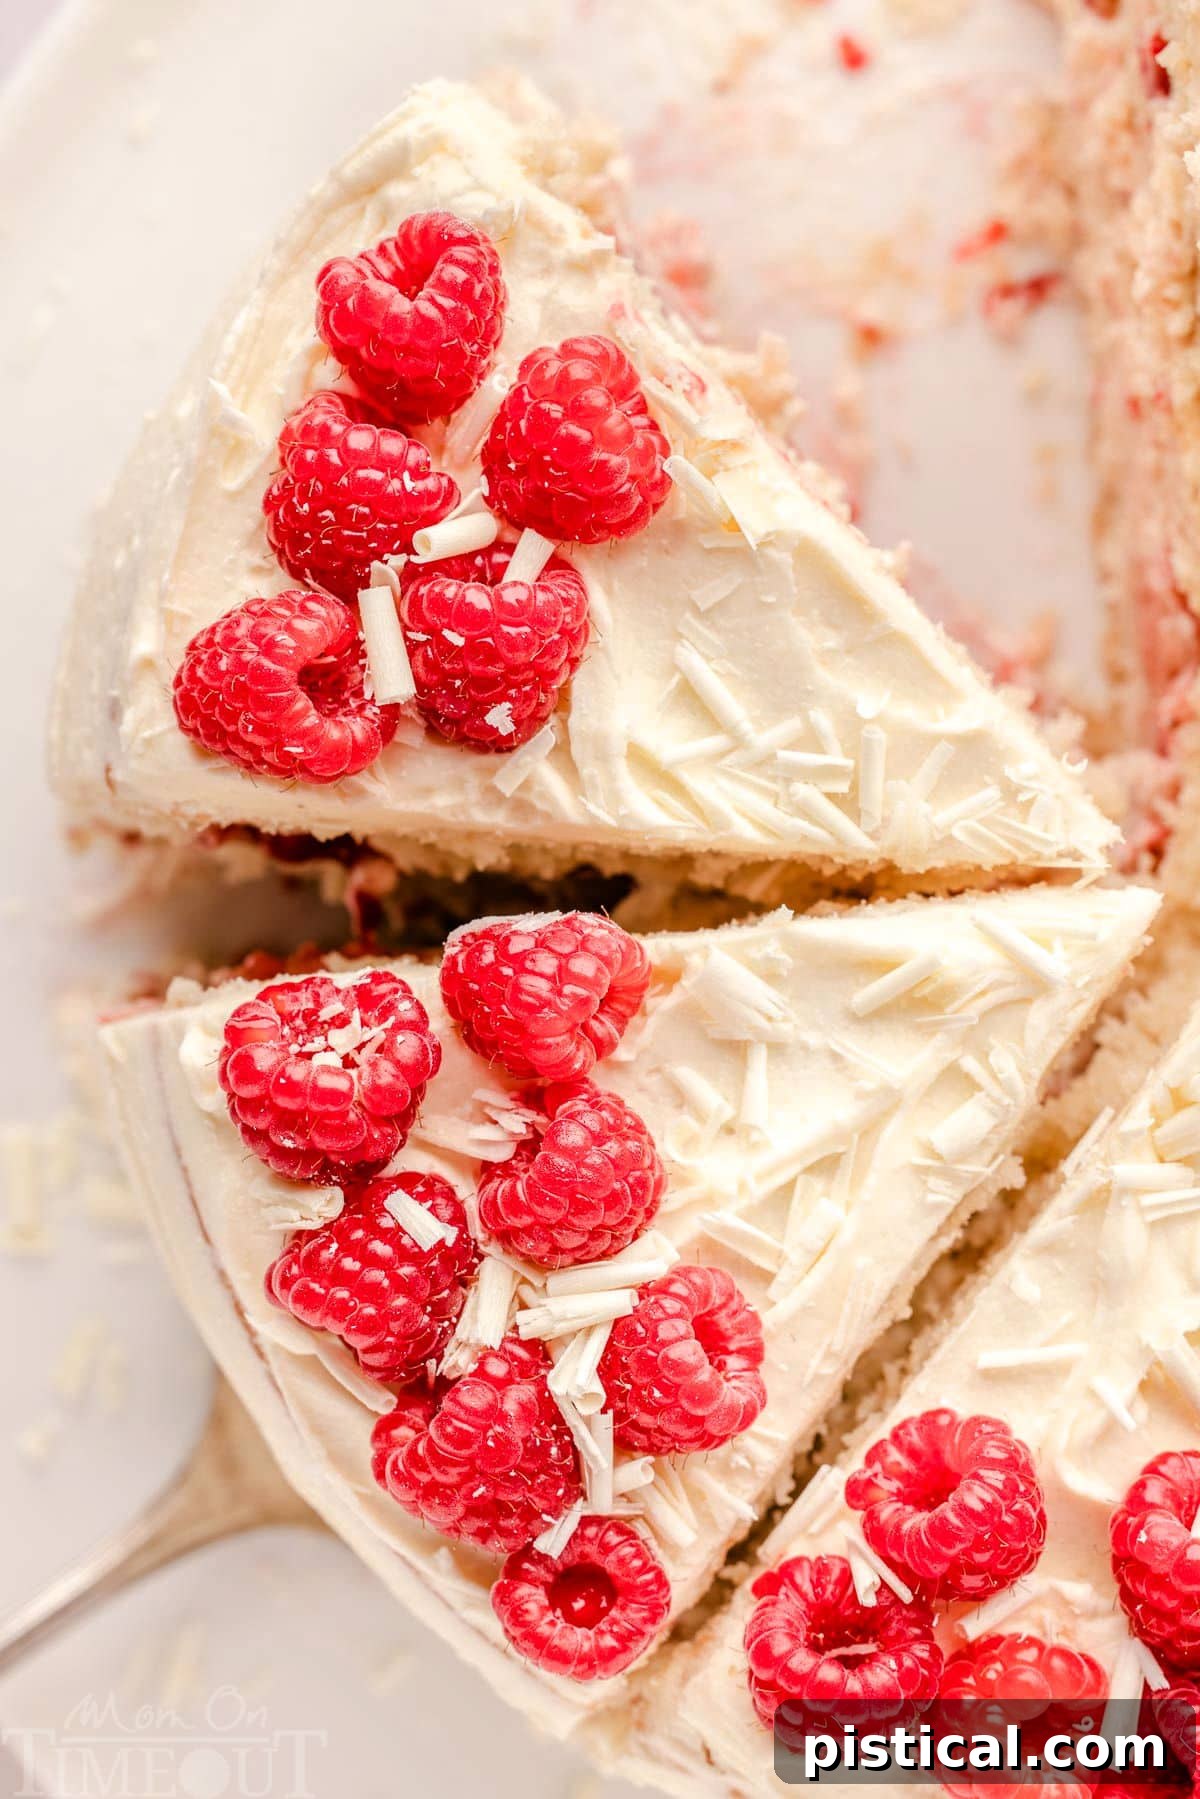
Why This White Chocolate Raspberry Cake Recipe Will Become Your Favorite
This exceptional cake is not just a recipe; it’s an invitation to elevate your baking and impress your guests. It’s designed to be a beloved addition to your repertoire after just one delightful bite. Here’s why you’re absolutely going to adore crafting and savoring this magnificent white chocolate raspberry cake:
- Effortlessly Elegant Presentation: The dramatic contrast between the bold, vibrant red of the fresh raspberries and the pristine white chocolate frosting creates an eye-catching display. Achieving those delicate white chocolate curls is surprisingly simple—just use a vegetable peeler on a good quality bar of white chocolate. These small details contribute to a cake that looks professionally made, yet is entirely achievable for the home baker.
- Ideal for Any Celebration: Whether it’s a milestone birthday, a cherished anniversary, a festive holiday gathering, or simply an occasion that calls for something truly special, this cake rises to the challenge. Its stunning appearance and universally adored flavor profile make it a memorable centerpiece that will garner compliments and requests for the recipe.
- A Symphony of Fabulous Flavors: The pairing of white chocolate and raspberry is a match made in culinary heaven. The smooth, sweet, and creamy richness of decadent white chocolate harmonizes exquisitely with the sweet yet tart burst of fresh raspberries. This balance creates a dynamic flavor experience that is neither too sweet nor too sharp, hitting all the right notes for an unforgettable dessert.
- Accessible for All Skill Levels: Despite its grand appearance, this recipe is crafted with clear, concise instructions, making it approachable for bakers of varying experience levels. From preparing the moist cake layers to whipping up the silky buttercream, each step is designed for success, ensuring a rewarding baking journey.
How To Master the Art of White Chocolate Raspberry Cake
Crafting this delightful white chocolate raspberry cake is a truly rewarding experience. While the instructions may seem detailed, the process itself uses easily accessible ingredients and comes together more smoothly than you might expect. Let’s walk through the main steps to create this stunning dessert. Remember, for the most comprehensive guidance, you’ll find the complete printable recipe with detailed instructions in the dedicated recipe card section at the very end of this post.
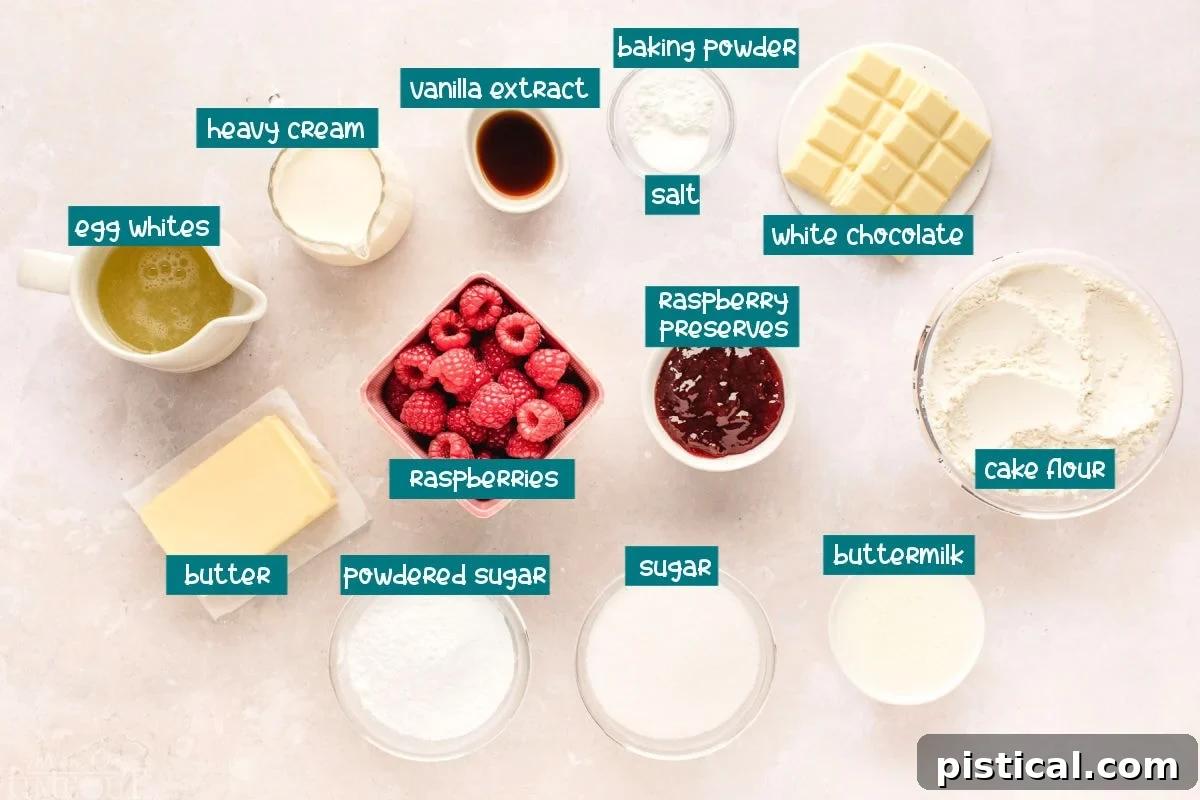
Step-by-Step: Preparing Your Moist Vanilla Cake Layers
- Combine Dry Ingredients: In the large bowl of a stand mixer, whisk together the granulated sugar, flour, baking powder, and salt until well combined. This ensures even distribution of leavening agents and seasoning throughout your cake.
- Incorporate Butter: Add the softened unsalted butter to the dry mixture. Beat on medium speed for approximately 3 minutes. Continue mixing until the mixture resembles damp sand, indicating the butter is fully integrated.
- Add Wet Ingredients: Gradually pour in the heavy cream, buttermilk, and vanilla extract while the mixer is on its lowest speed. This slow addition helps prevent splashing and ensures smooth incorporation.
- Develop the Batter: Increase the mixer speed to medium and beat for 2 minutes. The batter will appear wonderfully thick and luxurious at this stage.
- Scrape and Re-mix: Stop the mixer and thoroughly scrape down the sides and bottom of the mixing bowl. This crucial step ensures all ingredients are evenly incorporated. Mix again on medium speed for 30 seconds.
- Fold in Egg Whites: With the mixer on its lowest setting, add the egg whites in three separate additions. Beat for just 20 seconds after each addition. Be careful not to overmix at this stage; the goal is a silky-smooth batter.
- Divide and Bake: Evenly divide the prepared cake batter among three greased and parchment-lined cake pans. Bake in the preheated oven for 20-22 minutes, or until the cakes achieve a very pale golden hue, pull slightly away from the pan edges, and spring back gently when touched. A toothpick inserted into the center should come out clean.
- Cool Completely: Allow the cakes to cool in their pans for 10 minutes before inverting them onto a wire rack. Ensure they are completely cool before attempting to frost.
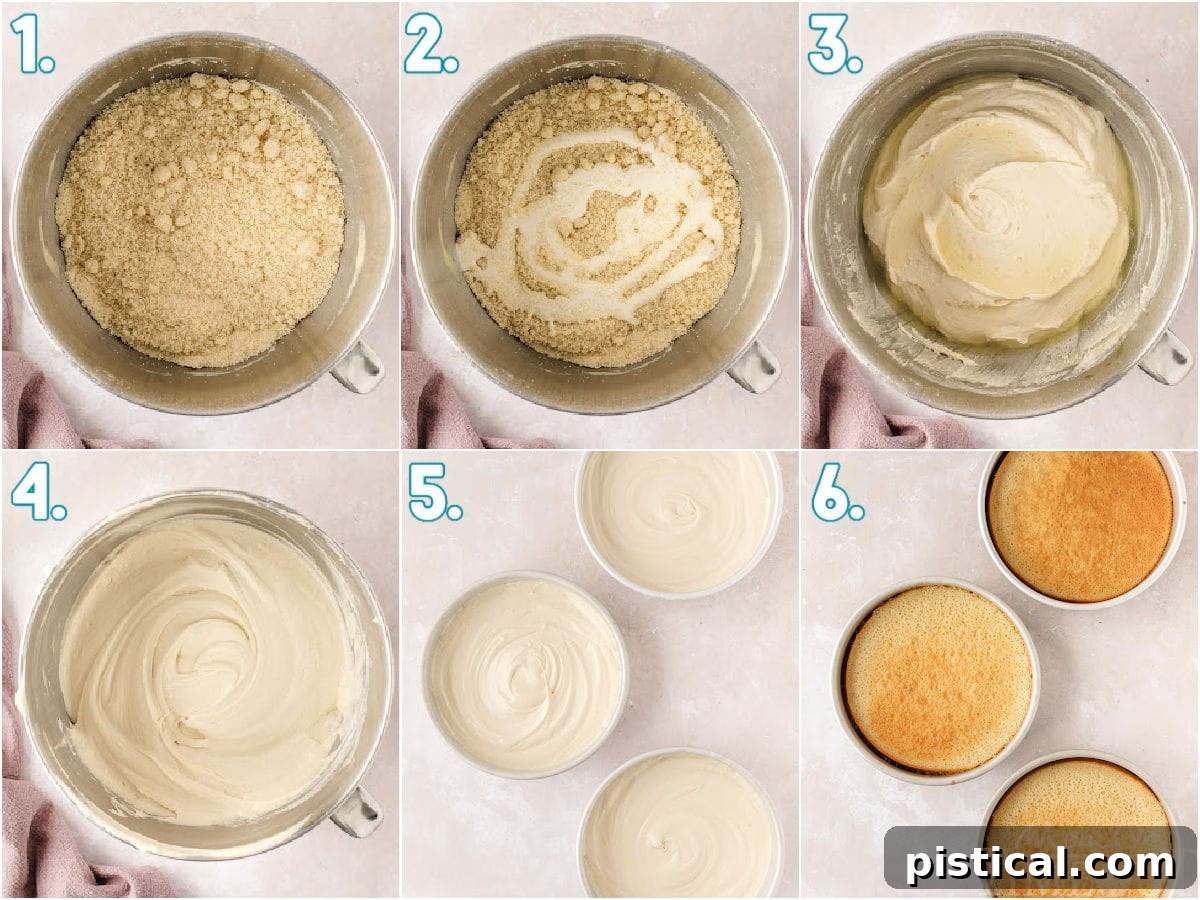
Crafting the Silky White Chocolate Buttercream Frosting
- Melt White Chocolate: Place finely chopped white chocolate in a microwave-safe bowl. Melt in 30-second intervals at 50% power, stirring diligently after each interval until the chocolate is smooth and completely melted. Set it aside to cool to room temperature. This prevents it from melting your butter later.
- Cream the Butter: In the large bowl of your stand mixer fitted with the paddle attachment, beat the softened unsalted butter on medium speed for several minutes until it becomes wonderfully creamy and light.
- Gradually Add Powdered Sugar: With the mixer on its lowest speed, slowly add the powdered sugar, about a cup at a time. Once all the sugar is incorporated, increase the speed to high and beat for 2 minutes. Stop the mixer and scrape down the sides of the bowl to ensure thorough mixing.
- Incorporate Cooled White Chocolate: Add the cooled, melted white chocolate to the buttercream mixture. Beat on medium speed for another 2 minutes until fully combined and fluffy.
- Achieve Perfect Consistency: Finally, pour in the heavy cream (or whole milk, if you’re using it as a substitute) and beat for 1 minute more. Continue mixing until the buttercream reaches a light, airy, and fluffy consistency. Transfer about one-third of the buttercream to a piping bag with the end snipped off, ready for assembly.
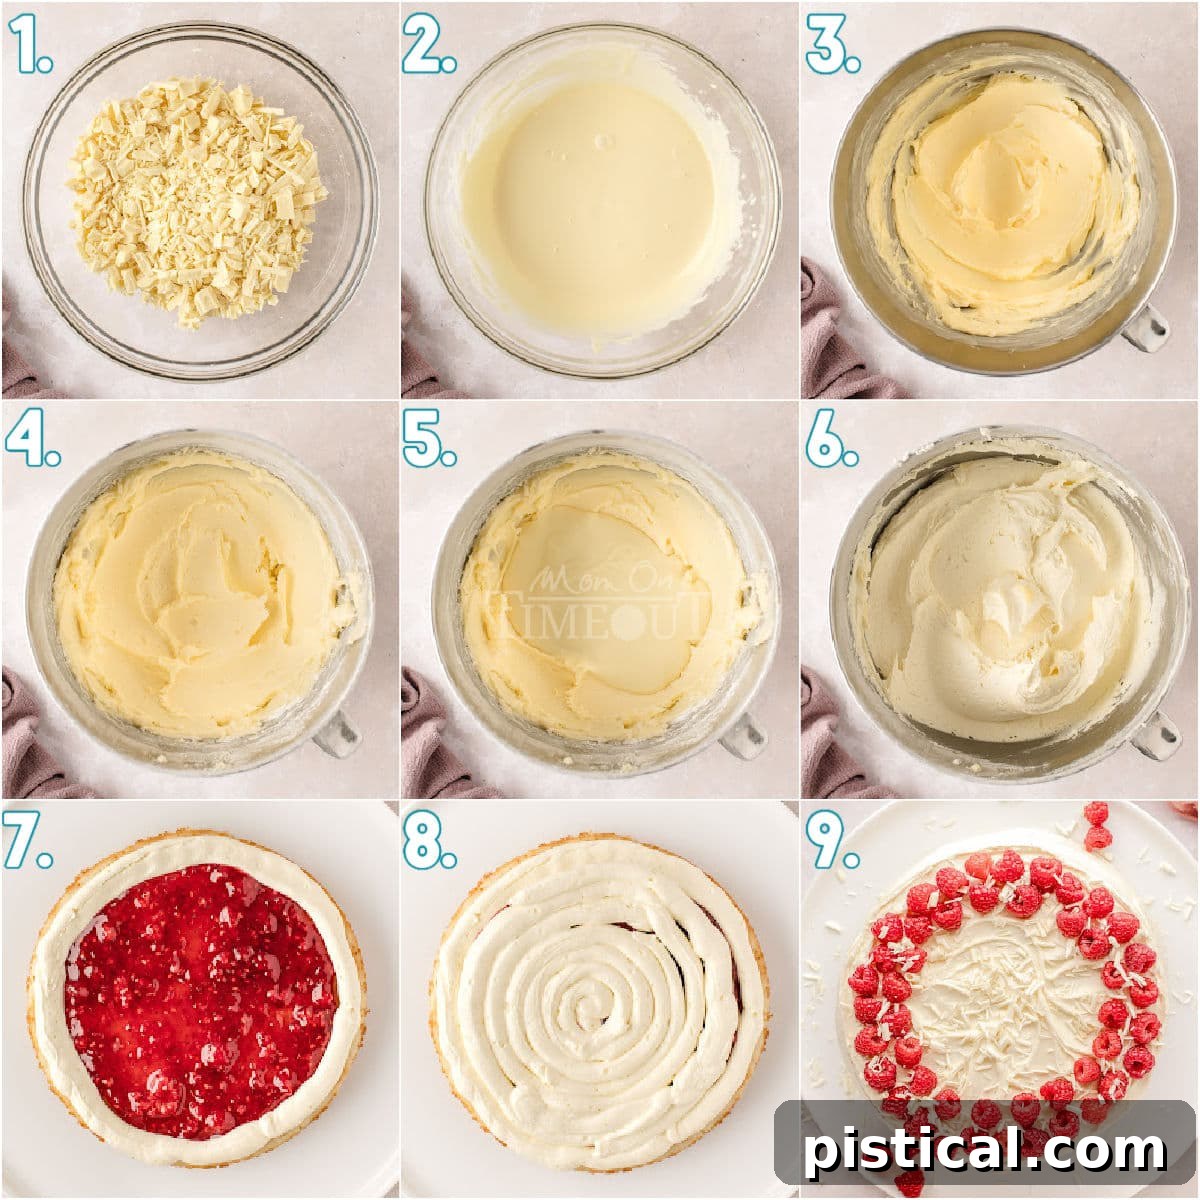
Assembling Your Masterpiece: The White Chocolate Raspberry Cake
- First Layer Foundation: Carefully place one completely cooled cake layer onto your chosen serving plate or cake stand.
- Create the Raspberry Well: Using your piping bag, pipe a sturdy ring of white chocolate buttercream around the outside edge of this first cake layer. This creates a dam to hold in the delicious filling.
- Fill with Preserves & Frost: Spoon approximately ¼ cup of raspberry preserves inside the buttercream ring. Then, pipe a generous layer of buttercream directly on top of the raspberry preserves, spreading it gently to create an even surface.
- Second Layer Placement: Gently place the second cake layer on top of the filled first layer, pressing down lightly to ensure the layers settle together and adhere.
- Repeat the Filling Process: Pipe another ring of buttercream around the edge of the second cake layer. Fill the center with the remaining ¼ cup of raspberry preserves, and then pipe another layer of buttercream on top.
- Top with Final Layer & Crumb Coat: Position the last cake layer on top. Using an offset spatula, spread a very thin layer of buttercream over the top and around the sides of the entire cake. This is your “crumb coat,” which traps any loose crumbs, ensuring a smooth final finish. Refrigerate the cake for at least 30 minutes to firm up this crumb coat. This step is crucial for easy and neat decorating.
- Apply Final Frosting Layer: After chilling, retrieve the cake and spread the remaining buttercream in a thick, even layer over the top and sides. Use a cake scraper or a clean offset spatula dipped in hot water (then wiped dry) to achieve a beautifully smooth and professional finish.
- Garnish with Freshness: Arrange fresh raspberries elegantly around the outside edge of the cake. Scatter your homemade white chocolate curls generously over the top for a final flourish.
- Slice and Savor: Your magnificent White Chocolate Raspberry Cake is now ready to be admired, sliced, and enjoyed!
Pro Tip for Pristine Slices: For perfectly clean and elegant slices, dip a sharp knife in hot water, wipe it completely dry, and then make your cut. Repeat this simple process for each slice to ensure a beautiful presentation every time.
Storage Solutions & Make-Ahead Planning for Your Cake
Planning ahead or managing leftovers is simple with this robust White Chocolate Raspberry Cake. Its components are designed for convenience, allowing you to enjoy this delicious dessert over several days or even prepare parts in advance.
- Make Ahead Advantage: The vanilla cake layers can be baked up to a day in advance. Once fully cooled, wrap them tightly in plastic wrap and store them at room temperature. This saves time on baking day, allowing you to focus on the fun of frosting and decorating.
- Room Temperature Longevity: The white chocolate buttercream frosting used in this recipe is wonderfully stable. This means your assembled cake can be safely stored in an airtight container at cool room temperature for up to 3 days. Ensure it’s away from direct sunlight or heat sources.
- Refrigerator Storage: To extend its freshness, store any leftover cake in an airtight container in the refrigerator for up to 5 days. Chilling the cake can also help firm up the frosting, making for neater slices.
- Freezing for Future Indulgence: This cake freezes exceptionally well, allowing you to enjoy a slice of perfection weeks or even months later. Wrap individual slices or the entire cake (after crumb coating) thoroughly in plastic wrap, followed by a layer of aluminum foil. It will keep beautifully in the freezer for up to three months. To serve, thaw the cake overnight in the refrigerator before bringing it to room temperature for the best flavor and texture.
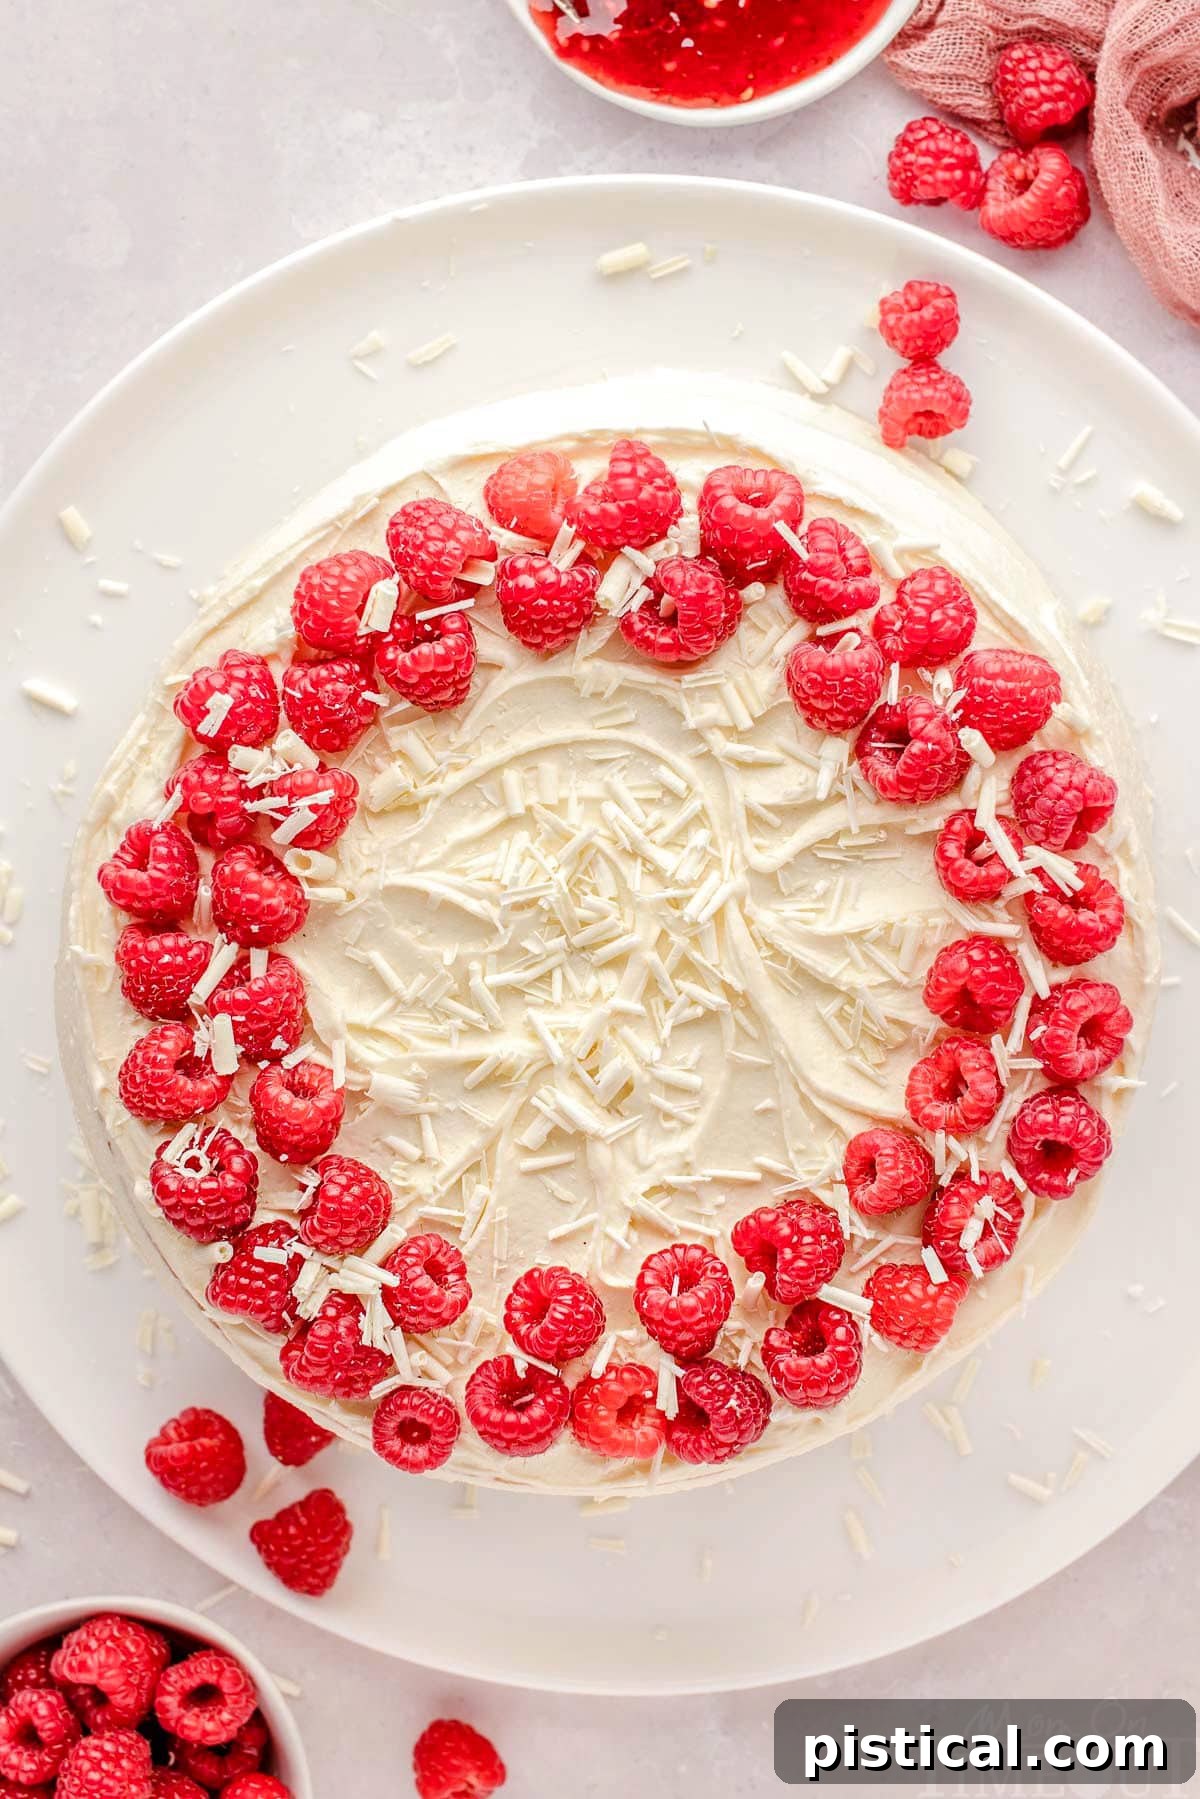
Exciting Variations to Customize Your Cake
While the White Chocolate Raspberry Cake is exquisite as is, it also serves as a fantastic canvas for creative adaptations. Feel free to experiment with these delicious variations to suit your taste preferences or the occasion:
- Embrace Your Inner Chocoholic: For a more intense chocolate experience, swap the vanilla cake layers for rich chocolate cake and complement it with a decadent chocolate frosting instead of the white chocolate buttercream. The raspberry filling will still provide a delightful fruity contrast.
- Berry Bliss Alternatives: This cake is incredibly versatile and equally delicious with other berries! Substitute the raspberry preserves and fresh raspberries with strawberries or cherries. Use a high-quality cherry pie filling or cherry preserves with fresh cherries for a lush cherry version, or opt for sweet strawberry preserves and fresh strawberries for a summery strawberry rendition.
- Brighten with Zest: Introduce a vibrant, refreshing twist by adding a touch of lemon zest to both the cake batter and the buttercream frosting. The subtle citrus notes will beautifully enhance the sweetness of the white chocolate and the tartness of the raspberries. You could even garnish the cake with delicate lemon curls for an extra zing and visual appeal.
- Nutty Almond Raspberry Cake: Transform this dessert into an Almond Raspberry Cake by simply replacing the vanilla extract with almond extract in both the cake and the buttercream. The nutty aroma and flavor of almond pair exceptionally well with the bright, fruity notes of raspberries, creating a sophisticated and unique taste experience.
Frequently Asked Questions About Baking This Cake
Here are some common questions to help you confidently bake your perfect White Chocolate Raspberry Cake:
How do I make those beautiful white chocolate curls?
Creating elegant white chocolate curls is surprisingly simple! Start with a solid block or a good quality bar of white chocolate. Hold the chocolate firmly and use a standard vegetable peeler to gently shave along its edge. For the best results and easier curling, ensure the chocolate is slightly warmer than room temperature – not melted, but not rock-hard straight from the fridge. A little warmth helps the chocolate bend into beautiful curls rather than breaking into flakes.
Can I prepare the buttercream frosting in advance?
Absolutely! Preparing the buttercream a day ahead is a fantastic time-saver. Store the prepared buttercream in an airtight container in the refrigerator. When you’re ready to use it, allow it to come to room temperature first. Then, re-whip it with your stand mixer or hand mixer for a few minutes until it regains its smooth, light, and fluffy consistency. This will make it much easier to spread and decorate your cake.
Is cake flour essential, or can I use regular all-purpose flour?
Cake flour is recommended for this recipe because its lower protein content results in a lighter, more tender, and finer crumb, giving your cake that delicate bakery-style texture. However, don’t fret if you don’t have it! You can easily make a substitute: for every cup of all-purpose flour, remove 2 tablespoons of flour and replace it with 2 tablespoons of cornstarch, then sift them together. Alternatively, this recipe has also been successfully tested using only all-purpose flour in the same measured quantity as the cake flour, so you can certainly proceed with that if it’s what you have on hand.
What if my buttercream is too thick or too thin? How do I fix it?
Buttercream consistency can vary based on factors like butter temperature or humidity. If your buttercream is too thick, simply add heavy cream or milk, one tablespoon at a time, beating well after each addition until you achieve your desired spreadable consistency. If it turns out too thin, gradually add more powdered sugar, a quarter cup at a time, beating until it thickens to the perfect consistency. Patience is key when adjusting!
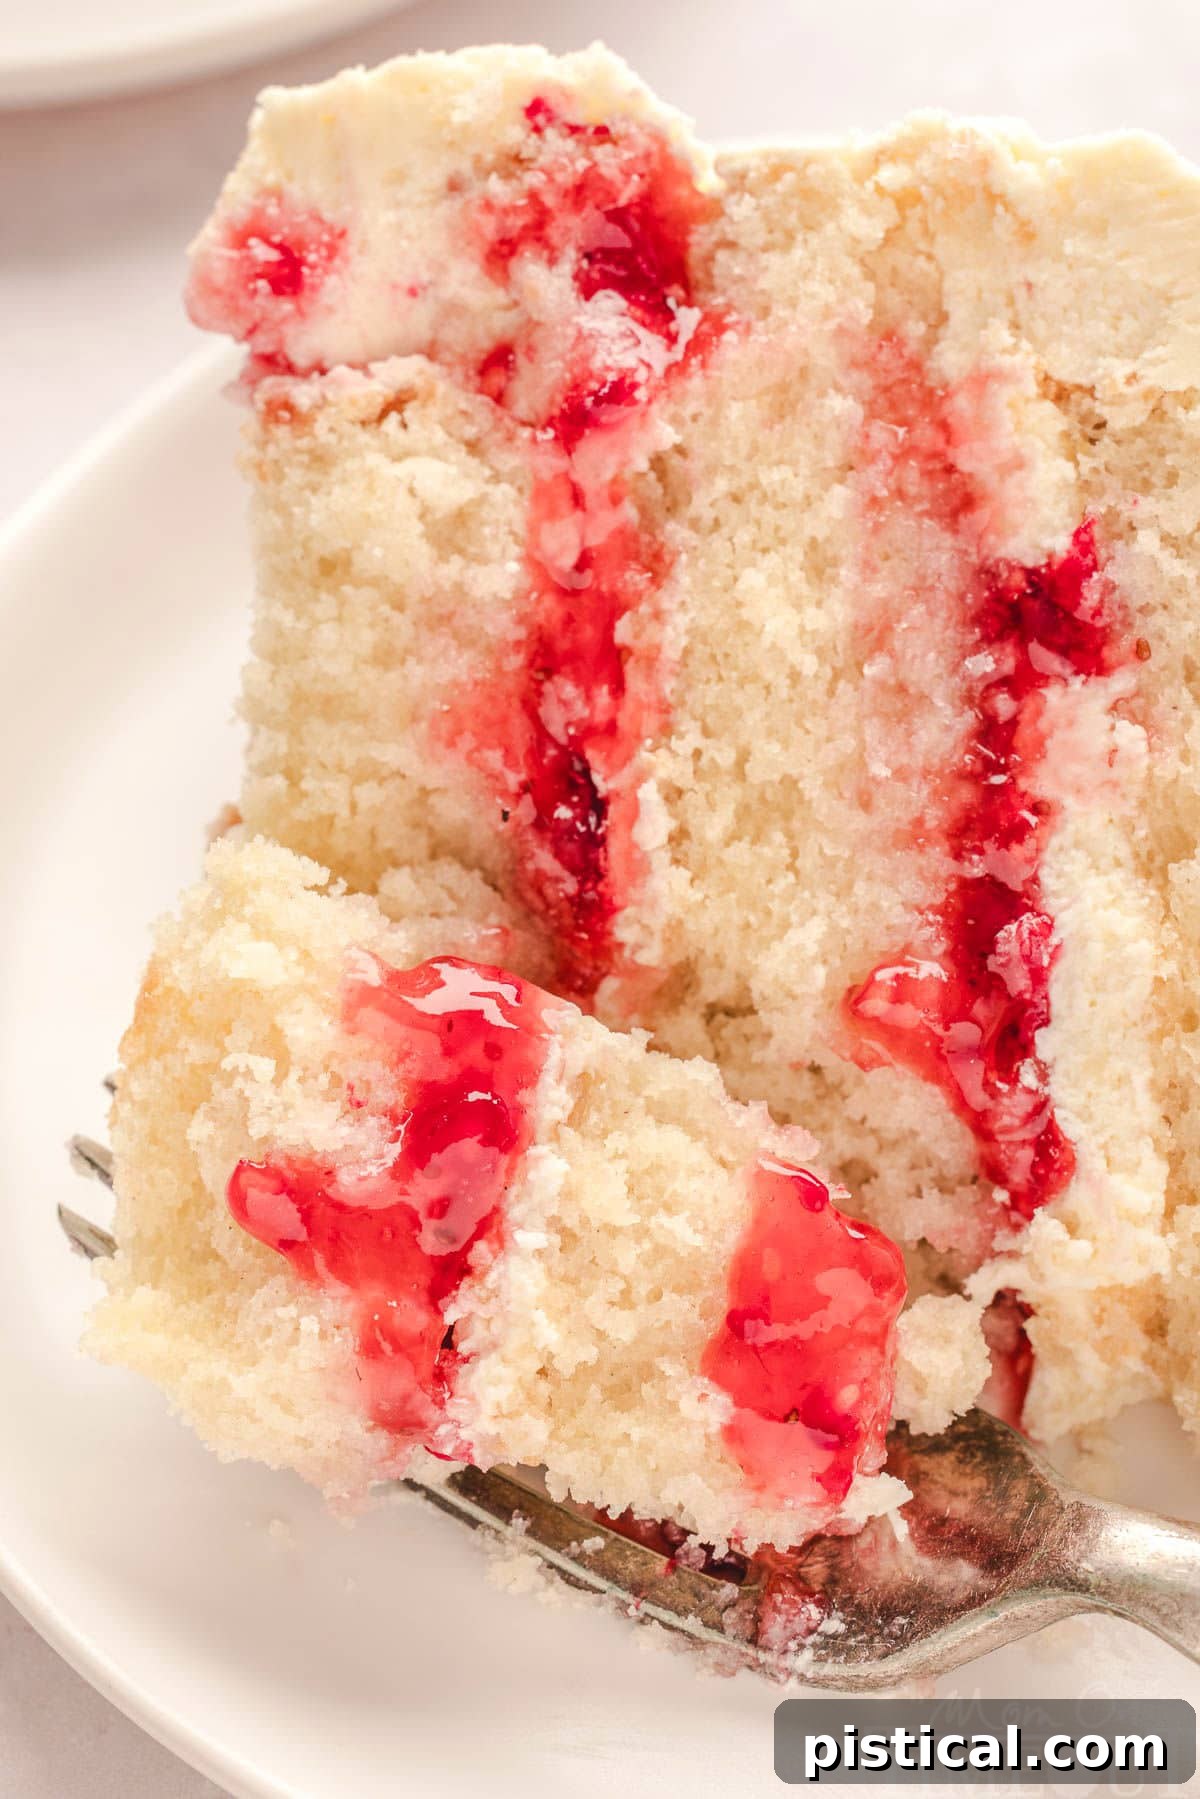
Trish’s Expert Tips for Baking Success
Achieving a bakery-worthy White Chocolate Raspberry Cake is within your reach with these helpful tips from Trish, a seasoned baker. Pay attention to these details, and your cake will be nothing short of spectacular:
- The Cake Flour Difference: For an exceptionally light and fluffy crumb, I strongly recommend using cake flour in this recipe. Its lower protein content produces a more delicate texture compared to regular all-purpose flour. However, if cake flour isn’t available, don’t despair! This recipe has also been successfully tested with an equal amount of all-purpose flour, yielding a delicious cake, albeit with a slightly denser crumb.
- Egg White Convenience: To save time and minimize waste, we used pasteurized liquid egg whites from a carton. This is a perfectly acceptable and convenient option. Of course, you can always separate whole eggs and measure out the equivalent amount of fresh egg whites if you prefer.
- Precision Mixing is Key: The mixing timings specified in the recipe for the cake batter are crucial. Adhering to these instructions will produce the best crumb structure and texture for your cake layers, ensuring they are moist and tender, never tough.
- Baking in Batches: If you don’t own three cake pans or can’t fit them all in your oven simultaneously, you can bake the cakes in batches. Rest assured, the cake batter is stable and can be safely left in the mixing bowl at room temperature for up to two hours without negatively impacting the final result.
- Cooling is Non-Negotiable: It is absolutely essential to allow your cake layers to cool completely before you attempt to frost them. Rushing this step will result in a messy, sliding frosting job as the heat from the cake will melt your beautifully prepared buttercream. Patience here yields perfection!
- Buttercream Quantity Control: The recipe quantities provided for the white chocolate buttercream are generous, designed to create a very thick, decadent layer of frosting. If you prefer a lighter amount of frosting on your cake, you can easily halve the stated amounts. This reduced quantity will still be ample to fill and frost the cake with thinner, yet still delicious, layers.
- Invest in Quality White Chocolate: The quality of your white chocolate directly impacts the flavor of your buttercream. For the richest, most decadent frosting, use a high-quality white chocolate. We particularly love using Lindt white chocolate for its superior taste and smooth melting properties.
- Cool Melted Chocolate: After melting your white chocolate, ensure it has cooled completely to room temperature before adding it to your buttercream. If the melted chocolate is still warm, it will cause your butter to melt, resulting in a runny, unstable frosting.
- Achieving a Smooth Finish: To get that impeccably smooth, professional-looking finish on your frosting, dip your offset spatula or cake scraper in hot water, wipe it thoroughly dry, and then gently smooth the buttercream. The warmth helps glide the spatula effortlessly over the frosting.
- Effortless White Chocolate Curls: As mentioned before, for charming white chocolate curls, simply take a square or block of your chosen white chocolate and use a vegetable peeler to shave along the edges. The delicate curls will fall away, ready to adorn your cake.
More Delicious Raspberry Recipes to Try
If you’re anything like us, you can’t get enough of the sweet and tart magic of raspberries. Here are more delightful recipes that feature this incredible berry:
- Refreshing Raspberry Iced Tea
- Irresistible Raspberry Coconut Magic Bars
- Decadent Chocolate Raspberry Crumb Bars
- Comforting Raspberry Peach Crumble
- Zesty Raspberry Vinaigrette
Print Recipe
White Chocolate Raspberry Cake
This White Chocolate Raspberry Cake is as stunning as it is delicious with layers of moist and fluffy vanilla cake, raspberry preserves and a decadent white chocolate buttercream frosting. Finished with fresh, sweet raspberries and white chocolate curls, this impressive layer cake is perfect for holidays and special occasions.
Course: Dessert
Cuisine: American
Keyword: raspberry white chocolate cake, white chocolate and raspberry cake, white chocolate raspberry cake
Prep Time: 30 minutes
Cook Time: 30 minutes
Servings: 10
Author: Trish – Mom On Timeout
Equipment
- 8 inch round cake pans
- stand mixer
- offset spatula
Ingredients
Vanilla Cake
- 2 cups granulated sugar
- 2¾ cups cake flour (spooned and leveled)
- 2½ teaspoons baking powder
- ½ teaspoon salt
- ¾ cup unsalted butter (at room temperature)
- 1 cup heavy cream
- ½ cup buttermilk
- 2 teaspoons vanilla extract
- 1 cup egg whites (at room temperature)
Filling
- ½ cup raspberry preserves (divided)
White Chocolate Buttercream Frosting (can be halved)
- 12 ounces white chocolate (finely chopped)
- 2 cups unsalted butter (softened)
- 4 cups powdered sugar
- ¼ cup heavy cream (or whole milk)
Garnish (Optional)
- 1 cup fresh raspberries
- white chocolate curls
Instructions
Vanilla Cake
- Preheat the oven to 350°F (175°C). Lightly grease three 8-inch round cake pans and line with parchment paper. Set aside.
- In the large bowl of a stand mixer fitted with the paddle attachment, add the granulated sugar, cake flour, baking powder, and salt. Turn the mixer to a low speed and mix to combine.
- Add the softened unsalted butter and increase the mixer speed to medium. Beat for 3 minutes or until the texture of the ingredients resembles damp sand.
- Turn the mixer to its lowest speed and gradually pour in the heavy cream, buttermilk, and vanilla extract.
- Increase the speed to medium and beat the ingredients together for 2 minutes. The cake batter will appear very thick.
- Stop the mixer and thoroughly scrape down the sides and bottom of the mixing bowl. Turn the mixer back on and mix on a medium speed for 30 seconds.
- With the mixer on its lowest speed, add the egg whites in thirds, beating for 20 seconds after each addition. At this stage, the cake batter should look silky smooth. Be careful not to overmix.
- Divide the cake batter evenly between the three prepared pans. Bake in the preheated oven for 20-22 minutes, or until the cakes are a very pale golden color, shrinking slightly from the edges of the pan, and feel springy when lightly touched. A toothpick inserted into the middle should come out clean.
- Leave the cakes to cool in their pans for 10 minutes before inverting them onto a wire cooling rack to cool completely.
White Chocolate Buttercream
- To a large heatproof, microwave-safe bowl, add the finely chopped white chocolate. Melt it in 30-second increments in the microwave at 50% power, stirring well each time until fully melted and smooth. Set aside to cool completely to room temperature.
- In the large bowl of a stand mixer fitted with the paddle attachment, add the softened unsalted butter. Beat on a medium speed for a few minutes until the butter is creamy and light.
- With the mixer on its lowest speed, gradually add the powdered sugar. Once the sugar is incorporated into the butter, increase the speed to high and beat for 2 minutes. Turn the mixer off and scrape down the sides of the bowl.
- Add the cooled, melted white chocolate and beat on a medium speed for 2 minutes until fully combined and fluffy.
- Lastly, add the heavy cream (or milk if using) and beat again for 1 minute or until the buttercream is very light and fluffy. Transfer one-third of the buttercream to a piping bag (without a tip, just snip the end off with scissors).
Cake Assembly
- Place a completely cooled cake layer on a serving plate or cake stand.
- Pipe a ring of buttercream around the outside edge of the cake. Fill the inside with ¼ cup of raspberry preserves, then pipe a layer of buttercream on top of the preserves.
- Set the next cake layer on top and press the layers gently to sandwich them together.
- Pipe another ring of buttercream around the outside edge of this second cake layer. Fill the inside with the remaining ¼ cup of raspberry preserves, then pipe a layer of buttercream on top of the preserves.
- Place the last layer on top of the cake. Use an offset spatula to spread a thin layer of buttercream on top of the cake and around the sides. This is your “crumb coat.” To make final decorating easier, place the entire cake into the refrigerator for 30 minutes to chill and firm up the crumb coat.
- After 30 minutes, spread the remaining buttercream in a thick, even layer on the top and around the sides of the cake. Use a cake scraper or an offset spatula to smooth it out evenly for a professional finish.
- Add fresh raspberries around the outside edge of the top of the cake and scatter white chocolate curls generously on top.
- Slice, serve, and enjoy your beautiful creation!
Notes
Storage Information
- Make Ahead: The cake layers can be baked a day in advance and stored tightly wrapped in plastic at room temperature.
- Room Temperature: The buttercream used for this recipe is stable, which means the assembled cake can be safely stored in an airtight container at cool room temperature for 3 days.
- Refrigerator: Store leftover cake in an airtight container in the refrigerator for up to 5 days.
- Freezing: This cake will freeze well for up to three months. Wrap it well in plastic wrap and aluminum foil. Thaw overnight in the refrigerator before serving.
The recipe for the white chocolate buttercream will yield a large batch of buttercream for a very thick layer. If you prefer less buttercream, you can halve the amounts stated, which will still be enough to fill and frost the cake with thinner layers.