
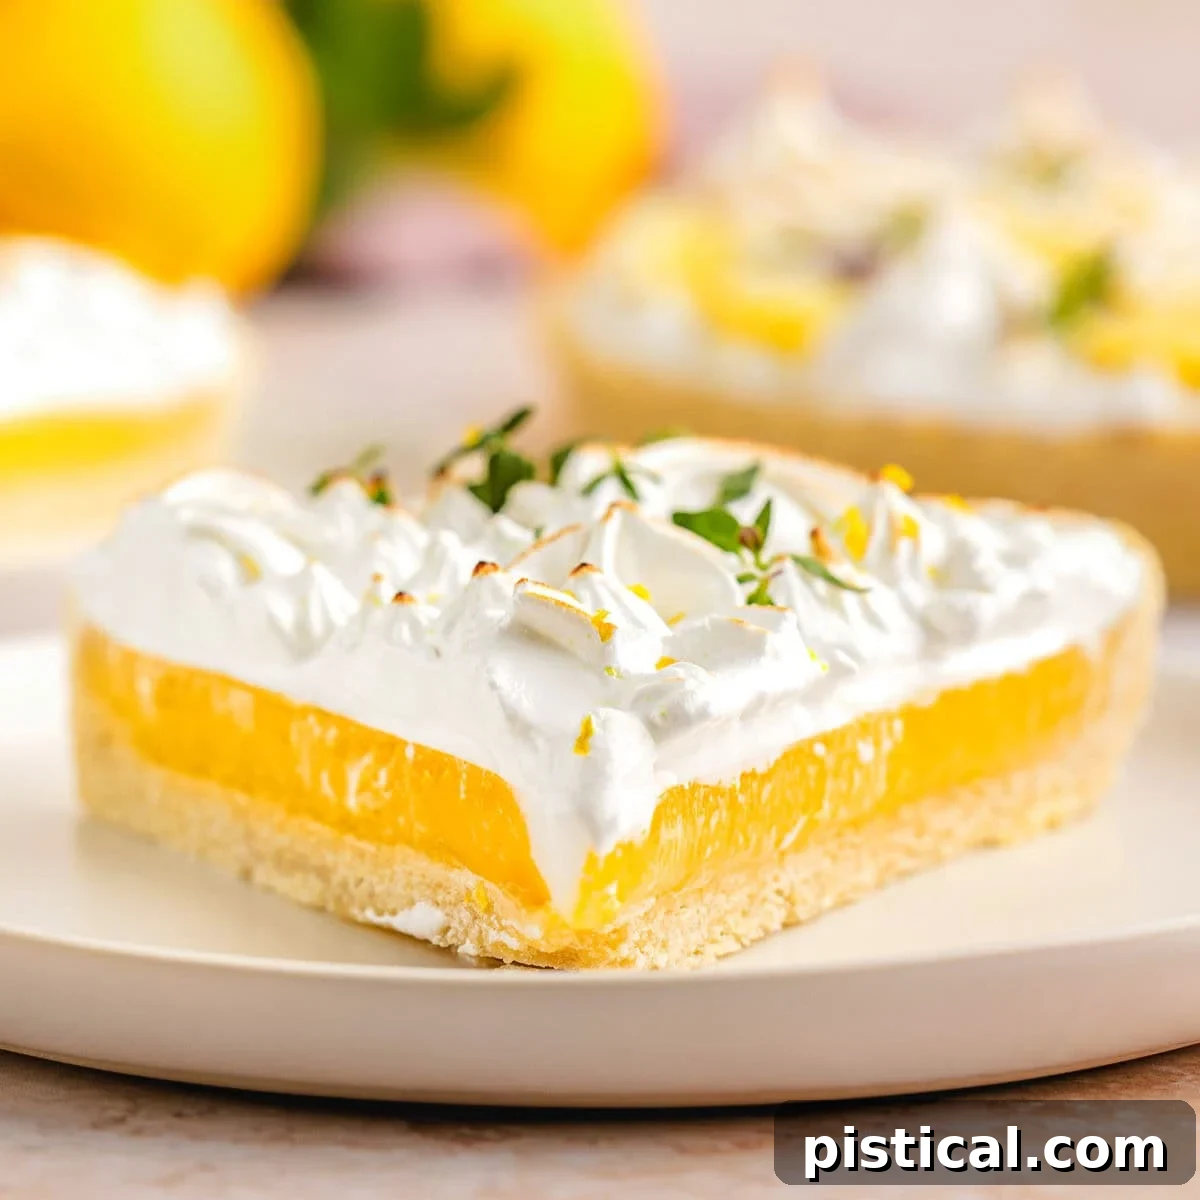
This Lemon Meringue Tart is a celebration of citrus – bright, refreshing, perfectly balanced between sweet and tart, and utterly irresistible. Featuring a crisp, buttery shortcrust pastry, a velvety smooth and luscious lemon filling, and a cloud-like, toasted meringue topping, this dessert is a true showstopper. It not only looks magnificent, promising a sophisticated treat for any occasion, but it also delivers an unforgettable taste experience that will delight every lemon lover.
If you adore the classic combination of lemon and meringue, you’re in for a treat. Explore more of our beloved lemon meringue creations: delve into our delightful Lemon Meringue Cupcakes, savor the richness of our Lemon Meringue Cheesecake, and discover the charming Lemon Meringue Cookie Cups!
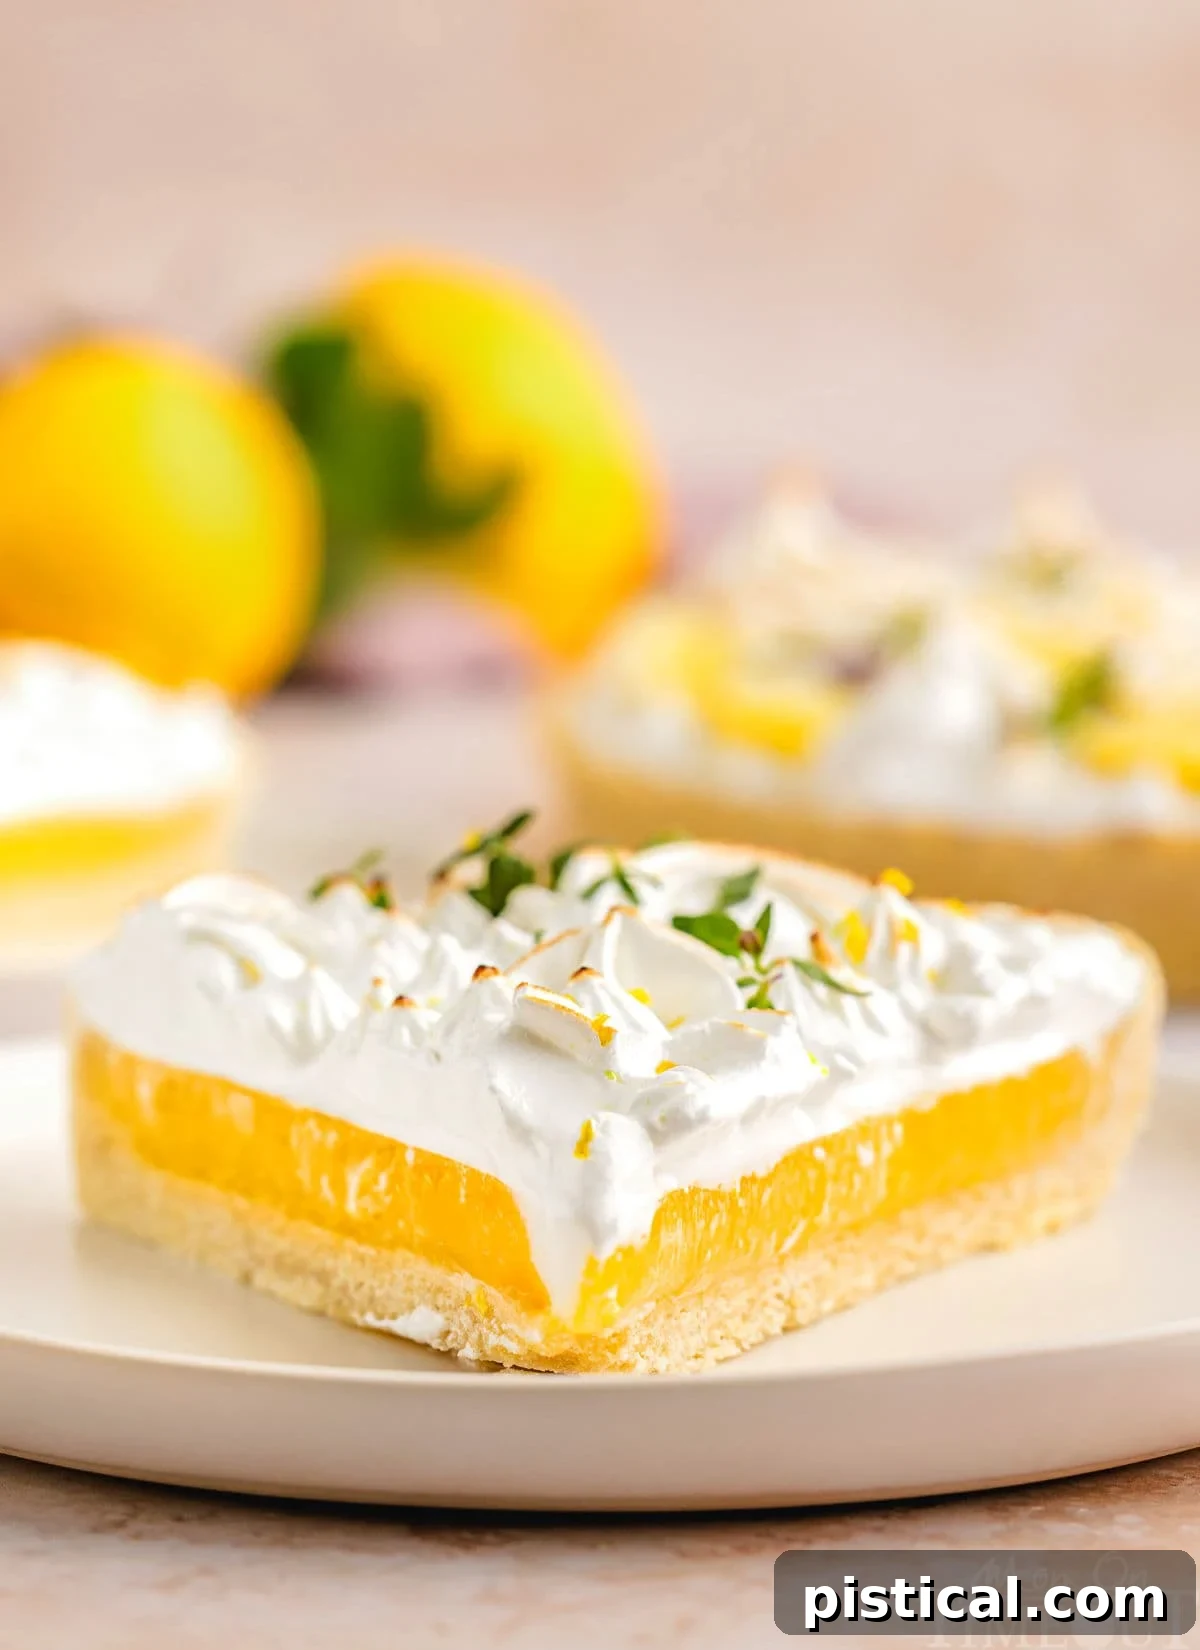
The Quintessential Lemon Meringue Tart: A Recipe to Cherish
Infuse your kitchen with the joyous aroma of fresh lemons and the promise of pure delight with this exquisite Lemon Meringue Tart recipe. There’s something truly magical about the contrast between the delicate, buttery shortcrust pastry and the invigorating, silky-smooth lemon filling. Each spoonful offers a harmonious blend of sweet and tangy notes, creating a dessert that is both comforting and exhilarating.
And let’s not forget the meringue – a towering crown of fluffy, toasted perfection that melts in your mouth, leaving a sweet finish to the bright citrus. This tart is more than just a dessert; it’s a centerpiece, a conversation starter, and a guaranteed crowd-pleaser, suitable for everything from casual family dinners to elegant holiday gatherings. Its sophisticated appearance might suggest a challenging bake, but we promise, this recipe breaks down into manageable steps, making it surprisingly achievable for home bakers of all skill levels. You’ll impress everyone with your homemade masterpiece!
Why This Lemon Meringue Tart Recipe Will Become Your New Favorite
Beyond its undeniable beauty, this Lemon Meringue Tart offers a multitude of reasons to fall in love. It’s a versatile dessert that brings a burst of “sunshine” to any table, whether for a spontaneous afternoon treat, a festive party, or a special celebration. Here’s why you’ll adore making (and devouring) this tart:
- A Symphony of Flavors: Sweet & Tart Perfection: The foundational appeal of any great lemon meringue dessert lies in its perfect sweet-tart balance. Our recipe features a boldly tangy lemon curd, vibrantly flavored with fresh lemon juice and zest, beautifully offset by a generous topping of sweet, pillowy meringue. This contrast creates an incredibly dynamic and satisfying flavor profile that lemon enthusiasts simply cannot resist.
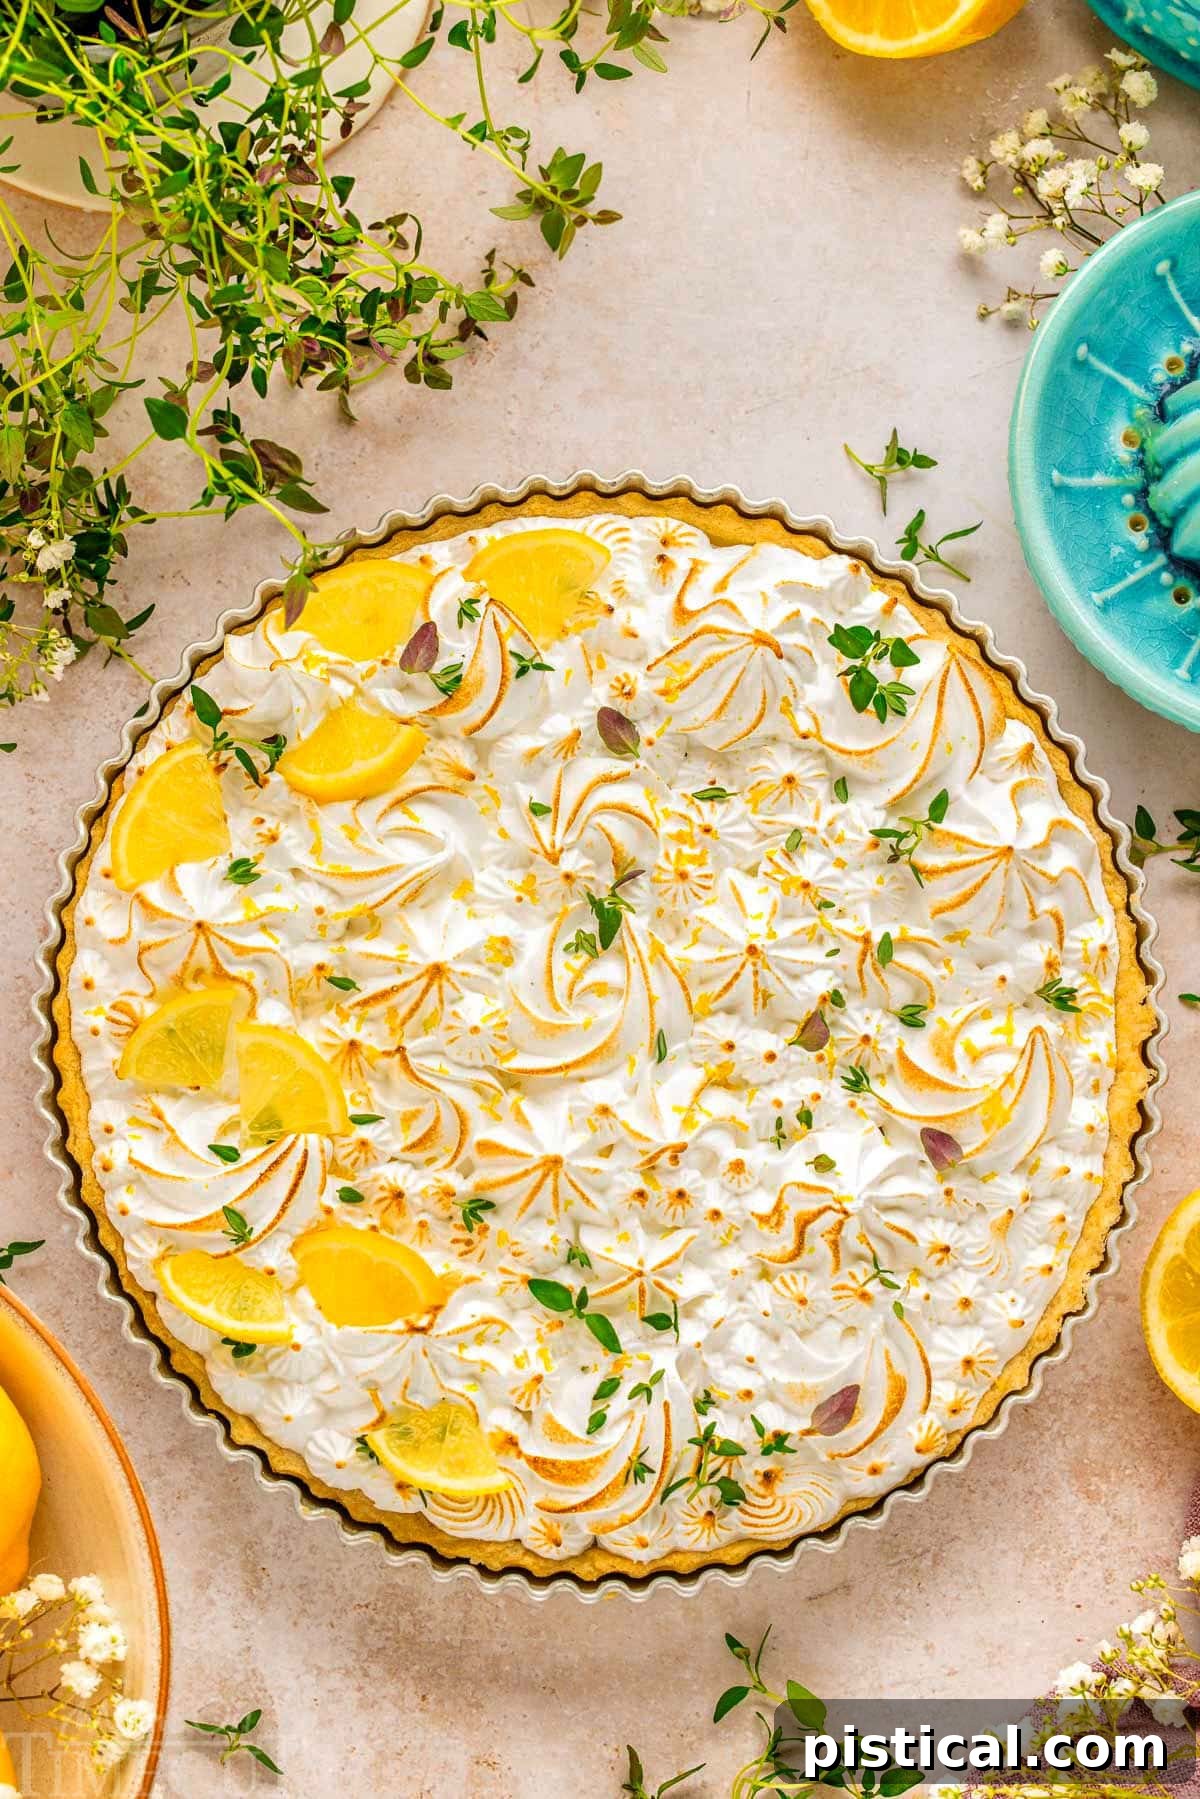
- Elegance for Every Occasion: Perfect for Parties: This tart is a true showstopper. Its golden toasted meringue peaks and sunny yellow filling make it an eye-catching centerpiece for any gathering. Whether you’re hosting a spring brunch, a summer barbecue, or a festive holiday meal, this elegant dessert is sure to garner compliments and leave a lasting impression on your guests. It’s festive, fun, and irresistibly delicious.
- Effortlessly Customizable: Unleash Your Creativity: While the classic recipe is a masterpiece on its own, this Lemon Meringue Tart is wonderfully adaptable to your preferences. Want to experiment with different citrus notes? Swap out lemons for zesty limes or sweet oranges. Looking for a quicker crust? A crunchy graham cracker base offers a delightful textural contrast. You can even infuse the lemon curd with a touch of lavender for an aromatic twist or sprinkle toasted coconut flakes over the meringue for added tropical flair. The possibilities are truly endless, allowing you to make this tart uniquely yours.
Unveiling the Magic: A Step-by-Step Guide to Crafting Your Lemon Meringue Tart
While a Lemon Meringue Tart might appear intricate at first glance, this recipe breaks it down into three distinct components: the shortcrust pastry, the lemon filling, and the meringue. Each component comes together more quickly than you might imagine, culminating in a legendary, mouth-watering dessert that’s easier to achieve than you think. For precise measurements and a fully printable version, please refer to the detailed recipe card at the very end of this post.
Master the Perfect Shortcrust Pastry
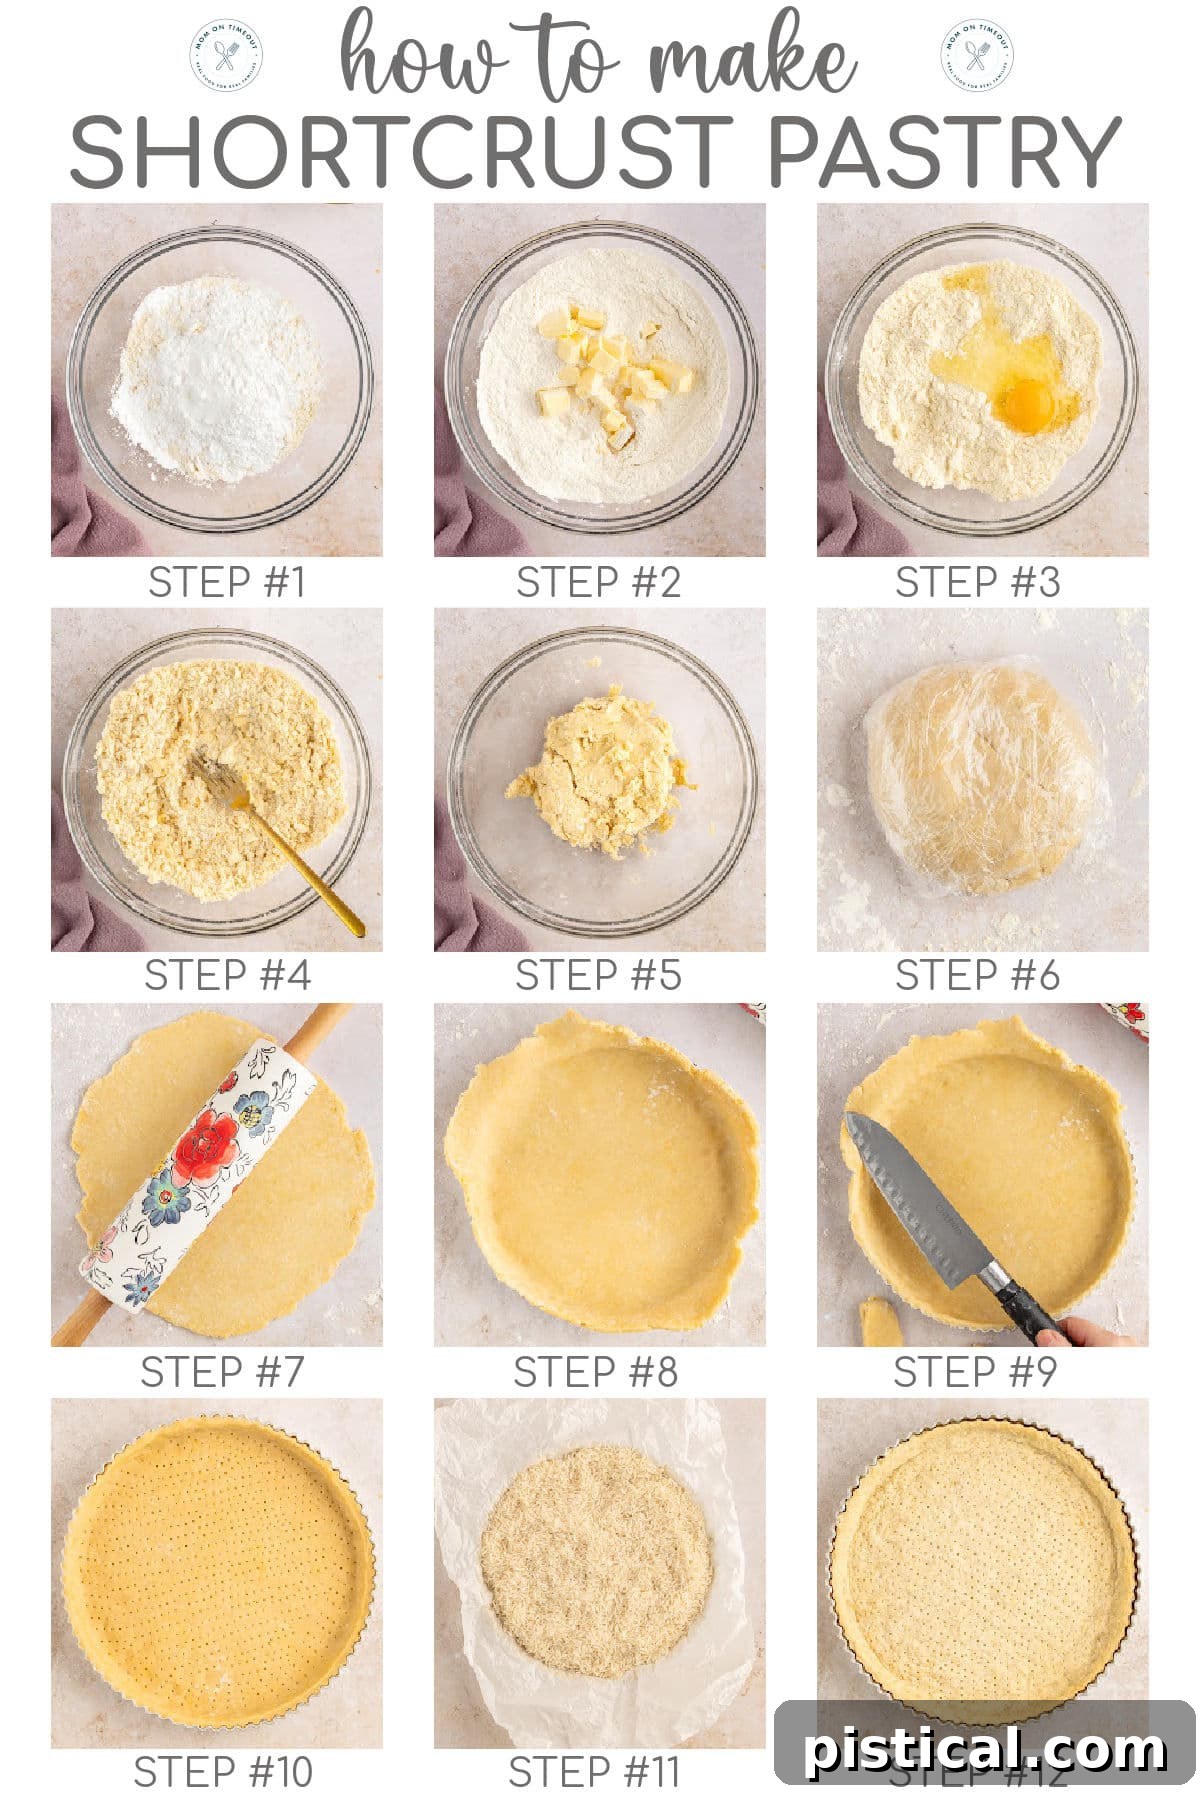
The foundation of any great tart is its crust. This buttery shortcrust pastry is tender, flaky, and provides the perfect counterpoint to the vibrant lemon filling. Follow these steps for a perfect base:
- Combine Dry Ingredients: In a large mixing bowl, whisk together the all-purpose flour, powdered sugar, and a pinch of salt until well combined. This ensures even distribution of flavors.
- Incorporate Butter: Add the cold, cubed unsalted butter to the flour mixture. Using your fingertips, quickly rub the butter into the dry ingredients until the mixture resembles coarse breadcrumbs, with a few pea-sized pieces of butter remaining. The key here is to work quickly to keep the butter cold.
- Add Wet Ingredients: Create a well in the center of the mixture. Add the large egg and cold water. Using a fork, gently mix the ingredients until they just start to come together. Avoid overmixing.
- Form the Dough: Use your hands to bring the dough together into a ball, briefly kneading it in the bowl until it forms a cohesive mass. If the dough is too crumbly, add a few extra drops of ice-cold water, one at a time, until it comes together.
- Chill the Dough: Lightly flour your work surface and turn the dough out. Form it into a flat disc, then wrap it tightly in plastic wrap. Refrigerate for at least one hour. Chilling is crucial as it prevents the butter from melting and helps the dough hold its shape during rolling and baking.
- Prepare for Rolling: Remove the chilled dough from the refrigerator and let it sit at room temperature for about 15 minutes. This makes it more pliable and prevents cracking during rolling. Preheat your oven to 350°F (175°C).
- Roll the Pastry: Lightly flour your work surface again. Using a rolling pin, roll the dough out evenly to a thickness of about 3mm (⅛ inch) and a diameter of approximately 12 inches (30 cm).
- Transfer to Tart Pan: Carefully transfer the rolled dough into a 9-inch tart pan with a removable base. Gently press the dough onto the bottom and up the sides of the pan, ensuring it fits snugly into all the fluted edges. Use a sharp knife to trim any excess pastry from the edges.
- Prick the Base: Prick the bottom of the dough all over with a fork. This prevents air bubbles from forming and keeps the crust flat during baking.
- Blind Bake the Crust: Line the pastry with a sheet of baking parchment and fill the entire pan with pie weights or uncooked rice. Blind bake for 15 minutes. This step helps to set the crust and prevent it from becoming soggy when the filling is added.
- Final Bake for Crust: Remove the pie weights/rice and baking parchment, then return the crust to the oven for another 15 minutes, or until it turns a pale golden brown and feels dry to the touch. Remove from the oven and allow to cool completely before adding the filling.
Crafting the Zesty Lemon Filling
The heart of this tart is its vibrant, tangy lemon filling – a silky, intensely flavored curd that perfectly balances the sweetness of the meringue.
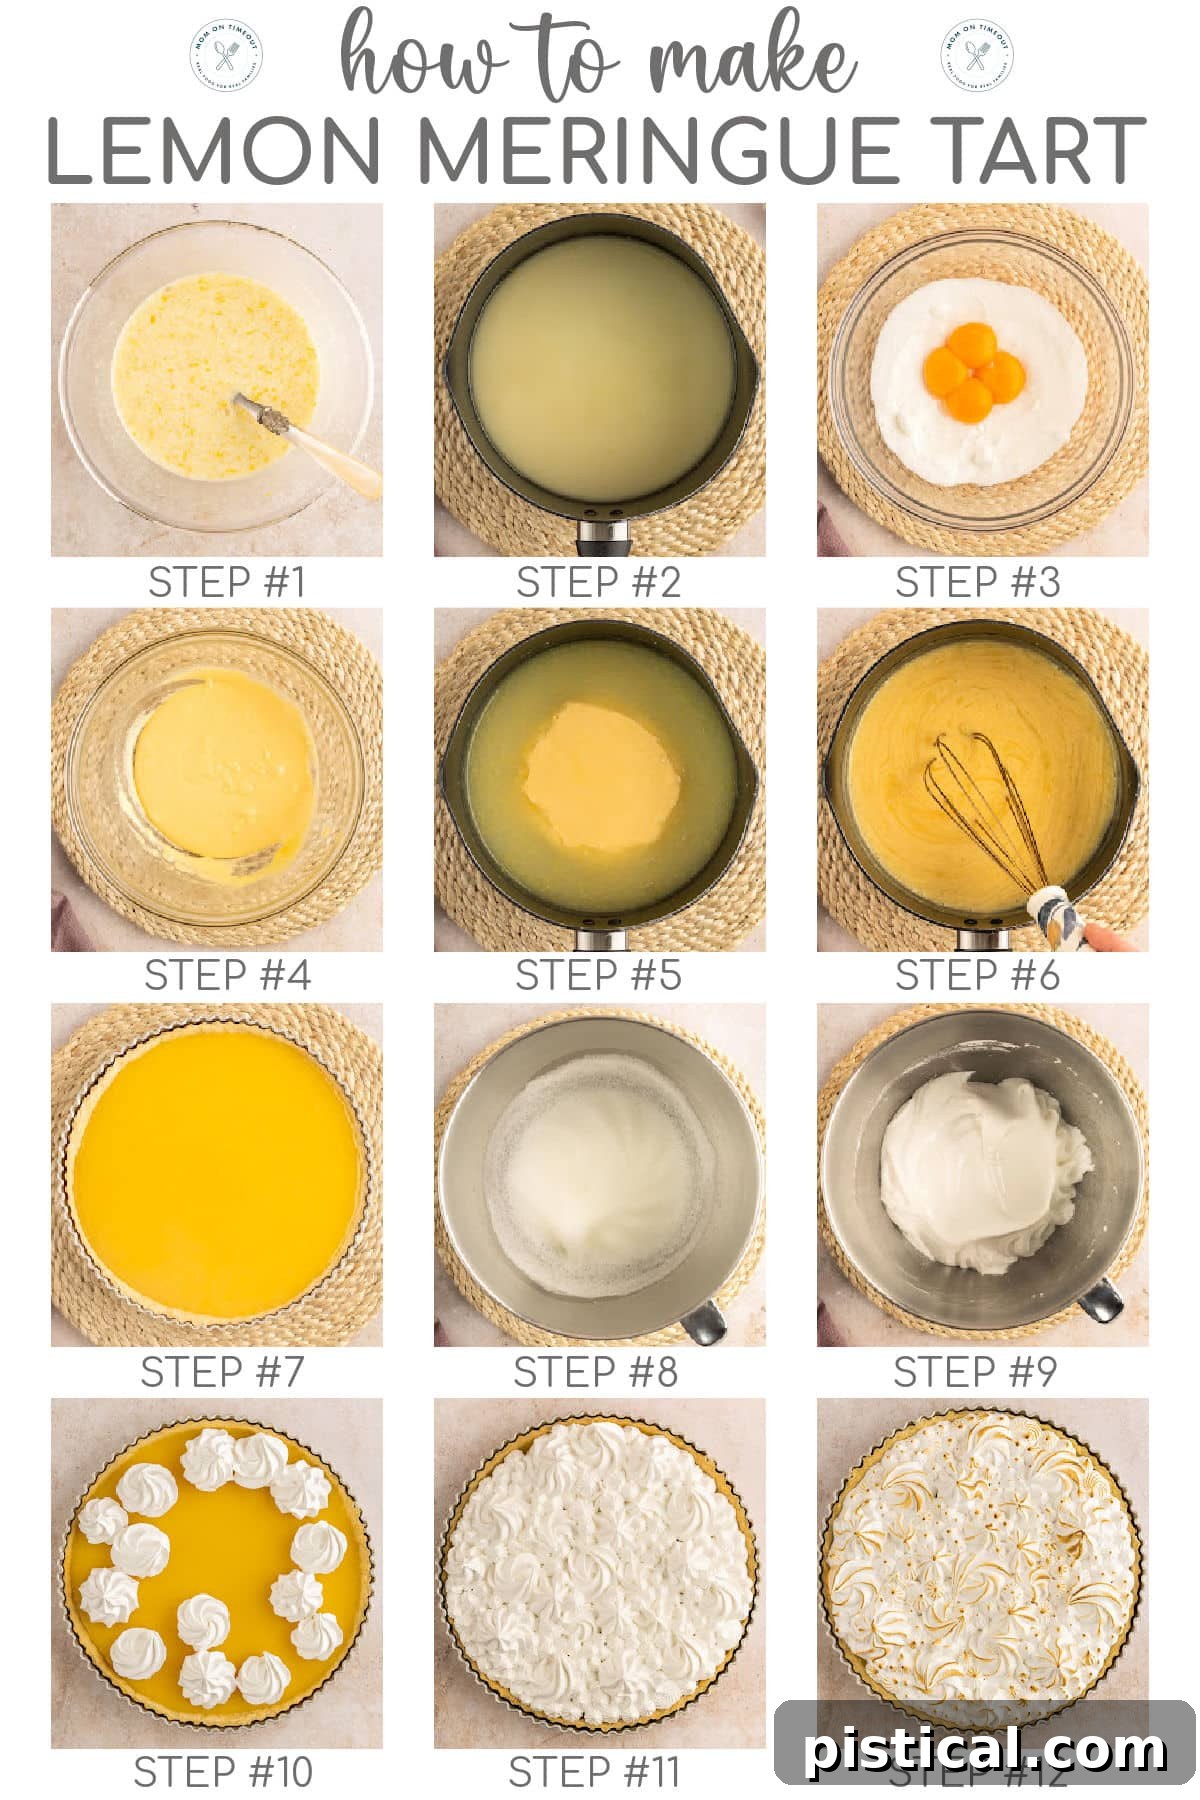
- Prepare Lemon-Cornstarch Slurry: In a small bowl, combine the fresh lemon zest, fresh lemon juice, and cornstarch. Whisk thoroughly until the cornstarch is fully dissolved and no lumps remain. This slurry is key for thickening the filling.
- Boil Water & Add Lemon Mixture: Bring 1½ cups of water to a boil in a medium saucepan over high heat. Once boiling, reduce the heat to medium-low and slowly pour in the lemon-cornstarch mixture while continuously stirring. Continue stirring until the mixture visibly thickens to a glossy consistency. Remove from heat and set aside.
- Combine Sugar & Egg Yolks: In a separate mixing bowl, whisk together the granulated sugar and egg yolks until the mixture is completely smooth and pale yellow. This step is crucial for achieving a smooth, rich curd.
- Temper Egg Yolks: Gradually add a small amount of the warm lemon mixture to the egg yolk and sugar mixture, whisking constantly. This “tempers” the egg yolks, slowly raising their temperature and preventing them from scrambling. Once tempered, gradually pour the egg yolk mixture back into the main lemon mixture in the saucepan, stirring gently.
- Thicken the Filling: Return the saucepan to medium-low heat. Cook, stirring continuously, and slowly bring the mixture to a low boil. It will take approximately 5-7 minutes for the filling to thicken significantly. Continue stirring until it becomes very thick and coats the back of a spoon.
- Cool & Chill: Remove the thickened lemon filling from the heat and allow it to cool for about 10 minutes before pouring it into the completely cooled shortcrust pastry shell. Refrigerate the tart for at least one hour, or until the lemon filling is fully set.
Whipping Up the Cloud-Like Meringue
The grand finale! This light, airy meringue adds a delightful sweetness and stunning visual appeal to your tart.
- Prepare Egg Whites: Ensure your mixing bowl and whisk attachment for your stand mixer are spotlessly clean and free of any grease, which can prevent the egg whites from whipping properly. Add the egg whites to the bowl and begin beating on a low speed until frothy bubbles form.
- Achieve Soft Peaks: Increase the mixer speed to medium and continue beating until the egg whites reach soft peaks. This means that when you lift the whisk, the peaks gently fold over.
- Add Sugar Gradually: With the mixer still running on medium speed, gradually add the superfine sugar, one tablespoon at a time, allowing each addition to fully incorporate before adding the next. This slow addition helps the sugar dissolve and creates a stable meringue.
- Whip to Stiff, Glossy Peaks: Once all the sugar is added, stop the mixer and scrape down the sides of the bowl. Increase the speed to high and beat for 5 minutes. The meringue should become bright white, thick, and glossy, forming stiff peaks when the whisk is lifted. You shouldn’t feel any sugar grains when rubbing a small amount between your fingers.
- Pipe the Meringue: Transfer the prepared meringue into piping bags fitted with your choice of open star nozzles (we used various sizes for visual interest). Pipe decorative swirls and peaks over the completely cooled and set lemon filling, ensuring the meringue extends all the way to the pastry edges to prevent weeping.
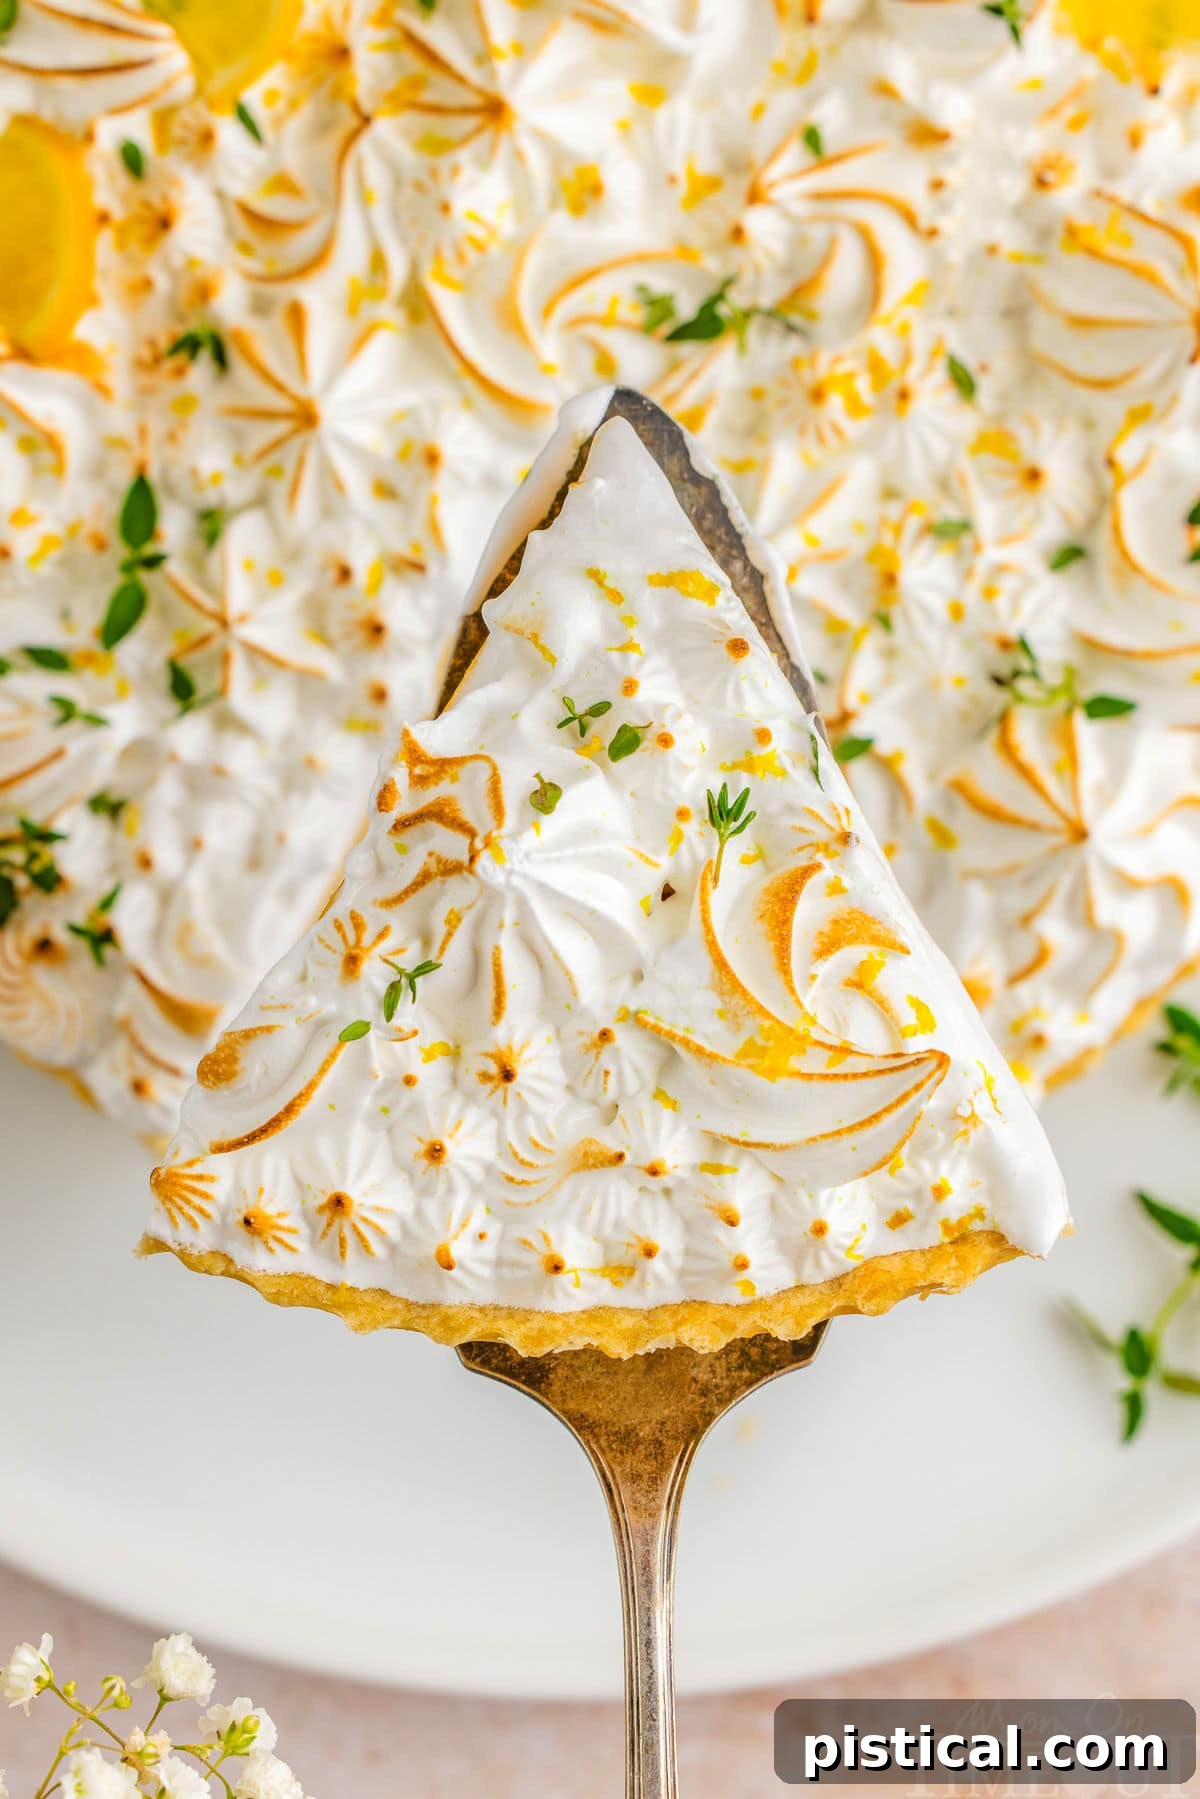
- Toast the Meringue: Use a chef’s blow torch to carefully scorch the meringue until the peaks are beautifully golden brown. If you don’t have a torch, place the tart under a hot broiler for 1-2 minutes, watching it very closely to prevent burning.
- Garnish and Serve: For a final elegant touch, garnish your finished Lemon Meringue Tart with fresh lemon slices and delicate sprigs of lemon thyme. Slice, serve, and enjoy this magnificent dessert!
Essential Tips for Lemon Meringue Tart Success
Achieving a perfect Lemon Meringue Tart is all about attention to detail. These expert tips will help you master each component and ensure a stunning, delicious result every time:
- Cold Ingredients for Pastry: Always use very cold butter, cut into small cubes, and ice-cold water for your shortcrust pastry. Cold ingredients are essential for creating a flaky, tender crust. Warm butter will melt too quickly, leading to a tough pastry. Work quickly with your fingertips only, as the warmth of your palms can melt the butter.
- Don’t Skip Chilling the Dough: Chilling the pastry dough for at least an hour (or even overnight) is non-negotiable. This allows the gluten to relax, preventing shrinkage during baking, and firms up the butter, which creates those desirable flaky layers.
- Allow Dough to Rest Before Rolling: After chilling, let the dough sit at room temperature for about 15 minutes before rolling. This makes it more pliable and prevents it from cracking, making it easier to work with.
- Prick and Blind Bake Thoroughly: Pricking the bottom of the raw pastry shell with a fork prevents it from puffing up unevenly. Blind baking with pie weights or rice is crucial to prevent a soggy bottom crust, ensuring it’s beautifully crisp and golden.
- Separate Eggs Carefully: When separating egg yolks for the filling and whites for the meringue, be meticulously careful. Even a tiny speck of egg yolk in the whites can prevent the meringue from whipping to its full volume and stability.
- Clean Meringue Bowl: Just like with separating eggs, ensure your mixing bowl and whisk for the meringue are impeccably clean and grease-free. Wipe them down with a paper towel dampened with lemon juice or vinegar if you’re unsure.
- Gradual Sugar Addition for Meringue: Add the sugar to the egg whites slowly, one tablespoon at a time, while the mixer is running. This allows the sugar to dissolve properly, creating a smooth, stable, and glossy meringue that is less likely to weep. Superfine sugar dissolves faster, making it an excellent choice for meringue.
- Meringue Texture: Beat the egg whites until they form stiff, glossy peaks. You should be able to invert the bowl without the meringue moving. If you rub a small amount between your fingers, you shouldn’t feel any sugar granules.
- Seal the Meringue: When piping the meringue, make sure it touches and seals all the way to the edges of the pastry crust. This creates a barrier that helps prevent the meringue from “weeping” and separating from the filling.
- Fresh Lemon Juice is Best: While bottled lemon juice can be used in a pinch, fresh lemon juice and zest provide a far superior, brighter, and more vibrant flavor that truly elevates the tart.
- Immediate Serving for Meringue: For the best texture and appearance, this tart is ideally enjoyed on the day it’s made. Meringue, especially traditional meringue, can start to weep or soften after a few hours, affecting its pristine quality.
Frequently Asked Questions About Lemon Meringue Tart
Why is my lemon filling runny?
A runny lemon filling typically means it hasn’t been cooked long enough to activate the cornstarch and allow it to thicken properly. When heating the lemon mixture on the stove, ensure it reaches a gentle boil and continues to simmer, stirring constantly, until it becomes visibly thick and glossy. The cornstarch needs sufficient heat and time to fully hydrate and set. Patience and continuous stirring are key here; don’t rush the thickening process.
How do I keep my meringue from weeping?
Weeping, where liquid collects between the meringue and the filling, is a common concern. To prevent it, ensure your meringue is properly made: beat the egg whites to firm, glossy peaks, and gradually add the sugar so it fully dissolves. Crucially, when applying the meringue, spread it all the way to the edges of the pastry crust, creating a good seal. This prevents air pockets and moisture from getting trapped, which can lead to separation and weeping. Baking or torching the meringue also helps to seal the surface.
Can I use bottled lemon juice instead of fresh?
While bottled lemon juice can be used as a last resort, we highly recommend using freshly squeezed lemon juice for the best flavor. Fresh lemons provide a much brighter, more vibrant, and complex citrus profile that truly elevates the tart’s taste. Bottled juice can sometimes have a slightly duller or more artificial flavor that will be noticeable in a dessert where lemon is the star.
Do I need a kitchen torch for the meringue?
A chef’s blow torch is excellent for precise control and creating beautiful, evenly toasted peaks on your meringue, adding a professional finish. However, it’s not strictly necessary. You can achieve a similar golden-brown topping by placing the tart under a hot broiler for 1-2 minutes. The most important thing is to watch it constantly and closely, as meringue can burn very quickly under a broiler. Turn the tart frequently for even browning.
Serving Suggestions and Creative Variations
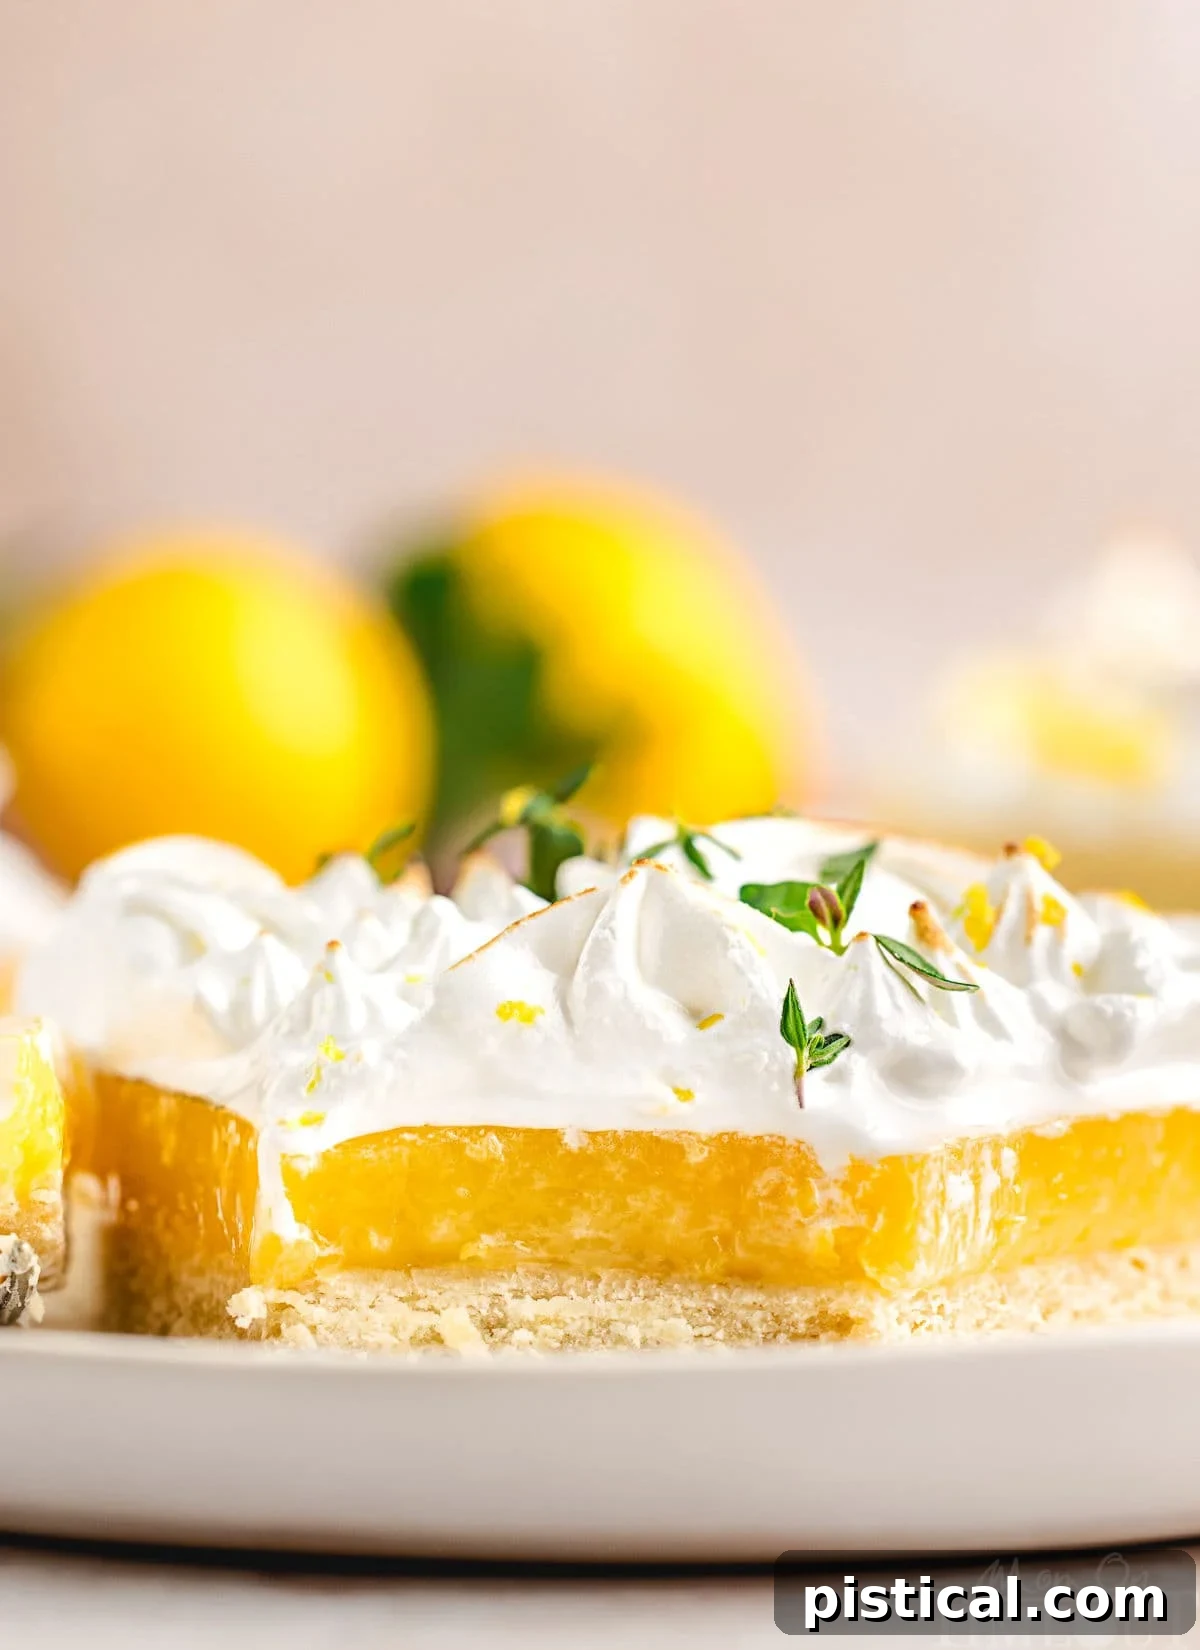
This Lemon Meringue Tart is a showstopper on its own, but a few thoughtful touches can elevate your dessert even further. Serve chilled for the best texture and flavor. Pair it with a cup of freshly brewed coffee or a light herbal tea for a sophisticated treat. For a truly decadent experience, a dollop of fresh whipped cream or a scattering of fresh berries like raspberries or blueberries makes a wonderful accompaniment.
Feel free to get creative and customize your tart:
- Citrus Swap: For a delightful twist, experiment with other citrus fruits. Replace lemons with tangy limes for a Key Lime Meringue Tart, or use oranges for a sweeter, milder Orange Meringue Tart. The vibrant flavors are equally enchanting.
- Alternative Crusts: Short on time or looking for a different texture? Skip the shortcrust pastry and opt for a ready-made graham cracker crust. Its crunchy texture and subtle sweetness pair wonderfully with the zesty lemon filling, offering a quicker, fuss-free option.
- Coconut Infusion: Introduce a tropical note by stirring a tablespoon or two of finely shredded coconut into your pastry dough. Alternatively, sprinkle toasted coconut flakes over the meringue topping just before serving for an irresistible crunch and flavor.
- Chocolate Base: For a more indulgent version, brush the inside of your baked and cooled tart shell with a thin layer of melted white or dark chocolate before adding the lemon filling. The chocolate acts as a delicious barrier and adds another layer of flavor.
- Individual Delights: Create adorable, individual-sized treats by using a muffin tin or mini tart pans. Adjust baking times accordingly. These are perfect for parties or portion control.
- Swiss Meringue Magic: For an exceptionally smooth, glossy, and incredibly stable meringue with a marshmallow-like texture, consider making a Swiss meringue. It involves gently heating the egg whites and sugar over a double boiler before whipping, resulting in a robust topping that holds up beautifully.
More Zesty Lemon Desserts to Enjoy
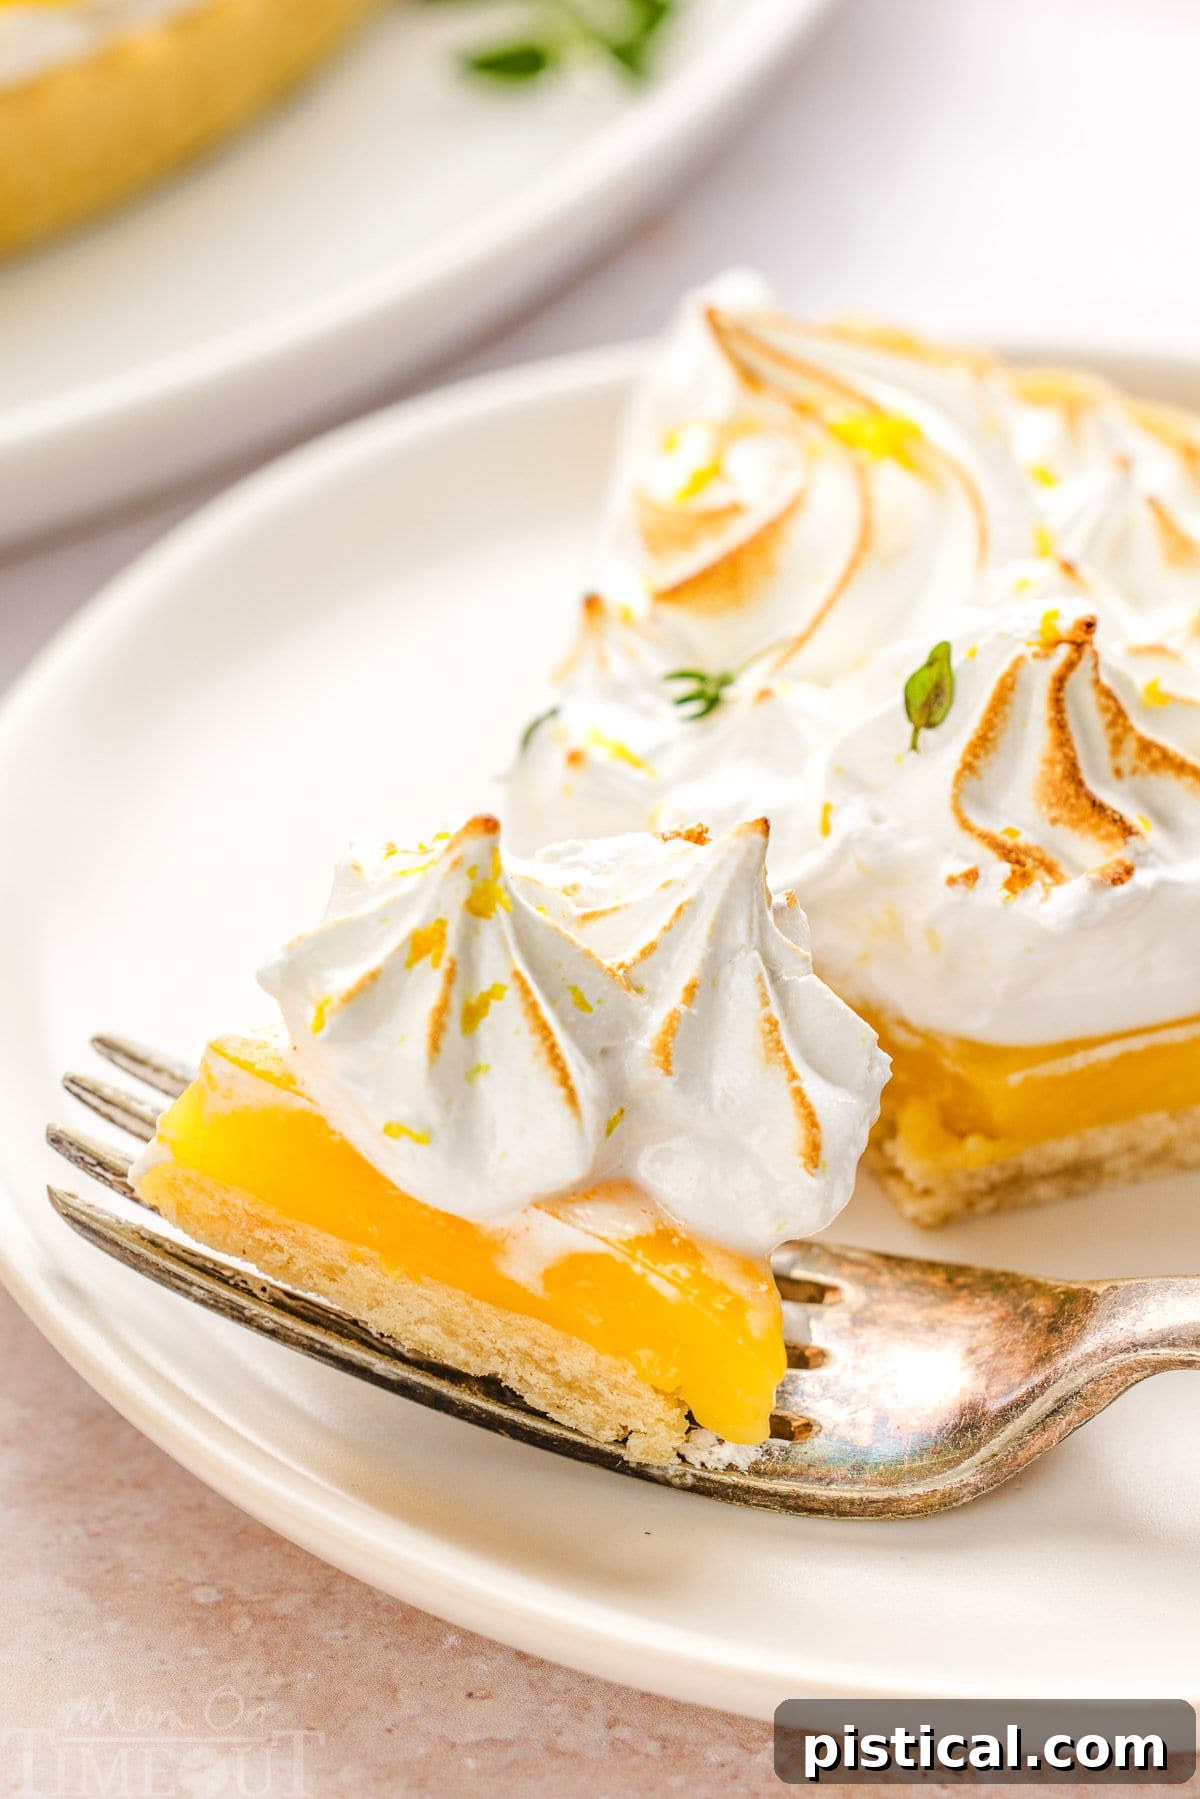
If you’re a true lemon enthusiast, our collection of lemon-infused desserts doesn’t stop here. Be sure to explore these other fantastic recipes that celebrate the bright and tangy flavor of lemons:
- Lemon Cupcakes
- Lemon Blueberry Mini Cheesecakes
- No Bake Lemon Pie
- Lemon Bars
- Lemon Tiramisu
Lemon Meringue Tart Recipe
This Lemon Meringue Tart is a bright, refreshing, sweet, and tart treat that is simply irresistible! With a crisp, buttery shortcrust, a luscious lemon filling, and a fluffy toasted meringue topping, it’s a stunning dessert that tastes just as amazing as it looks and is perfect for welcoming warm weather.
- Course
- Dessert
- Cuisine
- American
- Keyword
- lemon meringue tart
- Prep Time
- 1 hour
- Cook Time
- 30 minutes
- Chilling and Resting Time
- 2 hours 15 minutes
- Total Time
- 3 hours 45 minutes
- Servings
- 6 servings
- Calories
- 652 kcal
- Author
- Trish – Mom On Timeout
Ingredients
Shortcrust Pastry
- 1 ¾ cups all purpose flour (spooned and leveled)
- ¼ cup powdered sugar
- ¼ teaspoon salt
- ½ cup unsalted butter (cold and cut into cubes)
- 1 large egg
- 1 ½ tablespoons cold water
Lemon Filling
- 4 lemons (zested and juiced)
- ⅓ cup cornstarch
- 1 ½ cups water
- 1 cup granulated sugar
- 4 egg yolks (save the whites for meringue)
Meringue
- 4 egg whites
- 1 cup superfine sugar (can use granulated – see notes)
- Lemon slices (for garnish)
- Lemon thyme (for garnish)
Instructions
To Make the Shortcrust Pastry
- In a large mixing bowl, add the flour, powdered sugar and salt and mix together until combined.
- Add the cubed butter and use your fingertips to rub it into the flour mixture. It should look like mostly fine breadcrumbs but a few larger pieces of butter are acceptable.
- Add the egg and water to the mixing bowl. Use a fork to mix all the ingredients together until thoroughly combined.
- Bring the dough together with your hands and briefly knead it in the mixing bowl. If the dough looks and feels very crumbly, you can add a few more drops of cold water – just enough so that the dough comes together easily into a ball.
- Lightly flour your surface and turn the dough out onto it. Cover the dough ball in plastic wrap then use your hands or a rolling pin to press it into a flat disc shape, which will make rolling out the dough easier later on. Put the dough into the refrigerator for one hour.
- Remove the chilled dough from the refrigerator and leave at room temperature for 15 minutes. Preheat the oven to 350°F (175°C).
- Lightly flour your surface. Use a rolling pin to roll the dough to 3mm in thickness. It should be a circle about 12 inches (30 cm) in diameter.
- Carefully transfer the dough into a 9-inch tart pan with a removable base. Use your fingers to press the dough onto the bottom and into the edges of the pan. Use a very sharp knife to trim the edges of the pastry then prick the dough all over the bottom with a fork.
- Add a sheet of baking parchment and fill the entire tart pan with pie weights or uncooked rice.
- Blind bake the pastry for 15 minutes then remove the pie weights/rice and baking parchment and bake for a further 15 minutes or until the pastry looks pale golden brown and feels dry to the touch. Remove from the oven and leave to cool completely.
To Make the Lemon Filling
- In a small bowl, add the lemon zest, lemon juice and cornstarch. Thoroughly mix until there are no lumps remaining.
- Add the water to a medium sized pan set over a high heat. Bring the water to a boil then add the lemon mixture. Reduce the heat to medium low and stir the mixture continuously. When it has thickened, remove it from the heat and set aside.
- In a mixing bowl, add the sugar and egg yolks. Mix until completely smooth then gradually add it to the lemon mixture, gently mixing as you do so. Return to the heat and slowly bring to a low boil. It will take around 5 minutes for the mixture to visibly thicken but can take longer. When the mixture is very thick, remove from the heat and set aside to cool for 10 minutes before pouring into the pastry shell. Refrigerate for one hour or until the filling is set.
To Make the Meringue
- In the large mixing bowl of a stand mixer fitted with the whisk attachment, add the egg whites. Beat on a low speed at first until frothy bubbles have formed then increase the speed to medium and beat until the egg whites are at soft peaks.
- Add the sugar a tablespoon at a time, allowing it to be fully mixed in before adding more. When you have added all of the sugar, stop the mixer and scrape down the bowl then increase the speed to high and beat for 5 minutes.
- After 5 minutes, check the texture of the meringue between your fingers. You should not be able to feel grains of sugar – if you can, keep mixing. At this stage, the meringue should look bright white, thick, and glossy.
- When the meringue is ready, it’s time to pipe it on top of the filling. We used 3 piping bags fitted with various sizes of open star nozzles, but you can use whatever you have. Use the piping bag to add swirls of meringue on top of the tart, ensuring the meringue extends to the edges of the crust. When you’ve finished, use a chef’s blow torch to scorch the meringue. Alternatively, you can place the tart under a hot broiler for a couple of minutes, watching carefully.
- For a final flourish, add some slices of lemon and sprigs of lemon thyme.
- Slice, serve, and enjoy!
Notes
Storage Information
- Make Ahead – Once this tart has been fully assembled, it should ideally be eaten on the day it is made, as the meringue topping may start to weep after a few hours. If you wish to prepare components ahead of time, you can make the shortcrust pastry the day before you plan to make the lemon filling and meringue.
- Refrigerator – If you absolutely must save leftovers, place the tart in an airtight container or loosely cover it with foil or plastic wrap and store in the refrigerator for up to 3 days. Be aware that the meringue’s texture and appearance will degrade over time.
You can use regular white sugar in your meringue, but it will take longer to dissolve into the egg whites. Superfine sugar speeds up the process, and it’s our preference for meringue making for a smoother result.
For a quicker, fuss-free option, skip the homemade shortcrust pastry and use a store-bought graham cracker crust. It adds a delicious crunch and pairs perfectly with the lemon filling!
Recommended Tools and Equipment (affiliate links for convenience): Rolling Pin | Tart Pan with Removable Base | Pie Weights | Chef’s Blow Torch | Glass Mixing Bowls | Whisk | Electric Mixer (Hand Mixer or Stand Mixer) | Piping Bag (Reusable or Disposable) | Wilton 1M Piping Tip | Wilton 32 Piping Tip | Piping Tip Set (Large)
Please refer to the detailed sections above for more information, additional recipe tips, and frequently asked questions.
Nutrition
- Calories: 652kcal
- Carbohydrates: 113g
- Protein: 10g
- Fat: 20g
- Saturated Fat: 11g
- Polyunsaturated Fat: 1g
- Monounsaturated Fat: 6g
- Trans Fat: 1g
- Cholesterol: 198mg
- Sodium: 155mg
- Potassium: 200mg
- Fiber: 3g
- Sugar: 74g
- Vitamin A: 701IU
- Vitamin C: 38mg
- Calcium: 53mg
- Iron: 3mg