
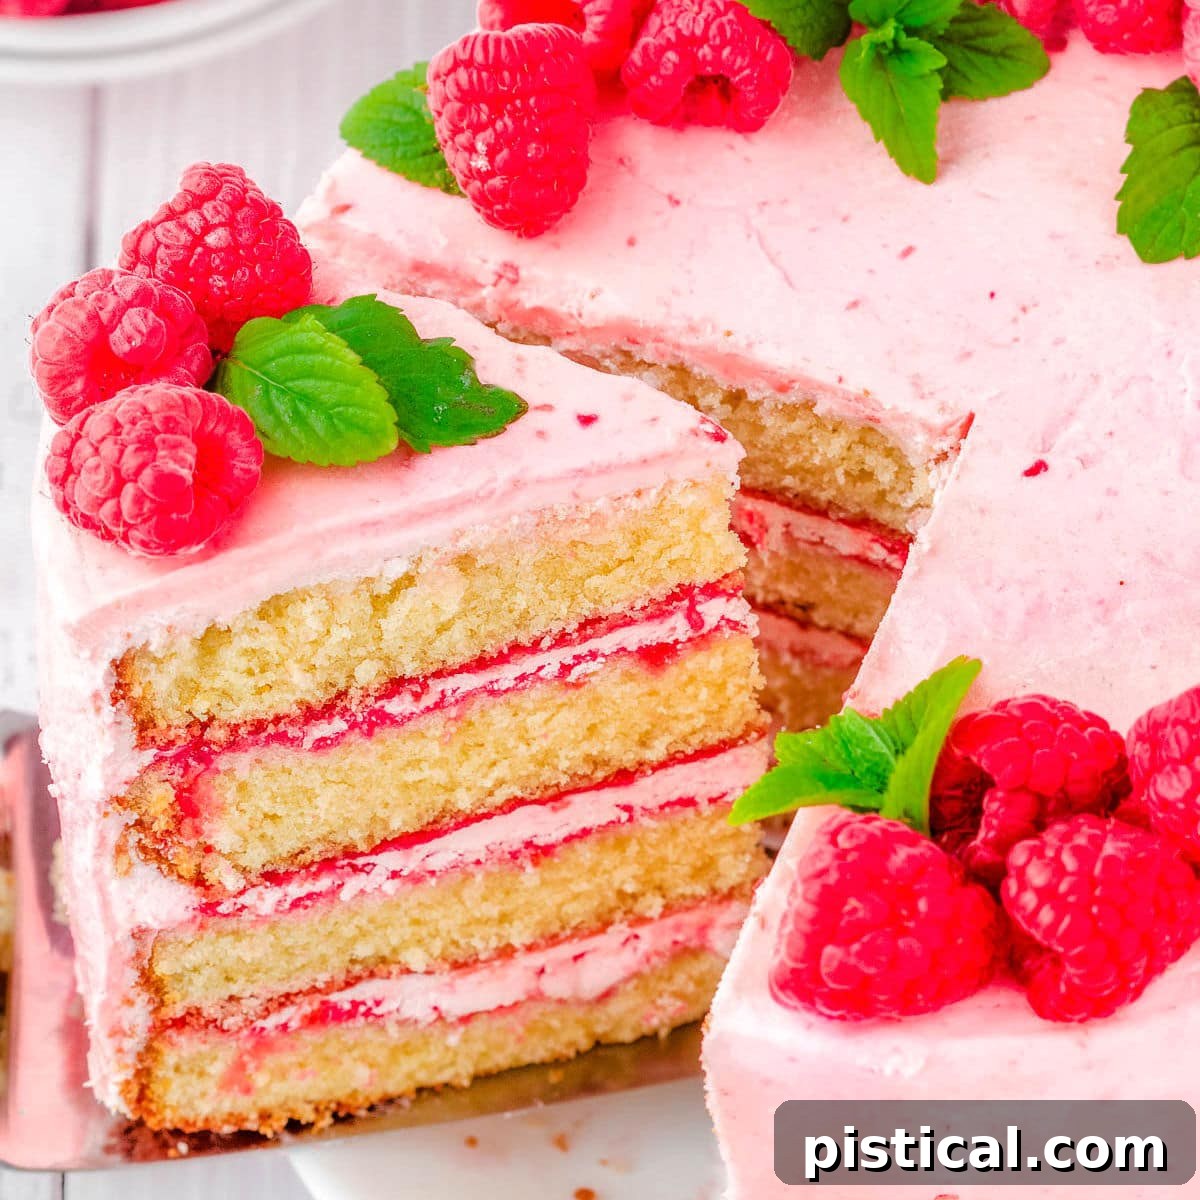
There’s something truly magical about a beautifully crafted layer cake, and this Raspberry Vanilla Cake is no exception. Imagine four layers of perfectly moist, homemade vanilla cake, each generously spread with a rich, velvety raspberry buttercream frosting and a bright, tangy raspberry filling. This divine creation isn’t just a dessert; it’s a celebration for your senses, culminating in a topping of fresh, ripe raspberries that make it almost too stunning to cut into! Whether you’re planning an intimate gathering or a grand event, this exquisite cake promises to be the show-stopping centerpiece, perfect for any occasion that calls for a touch of elegance and irresistible flavor.
If your heart beats for the delightful combination of vanilla and raspberry, you’re in for a treat! Beyond this magnificent cake, explore other raspberry-infused delights like these delightful Raspberry Crumble Cookies, luxurious Raspberry Truffles, or this effortlessly elegant No-Bake Raspberry Cheesecake. Each offers a unique way to savor the vibrant taste of fresh raspberries.
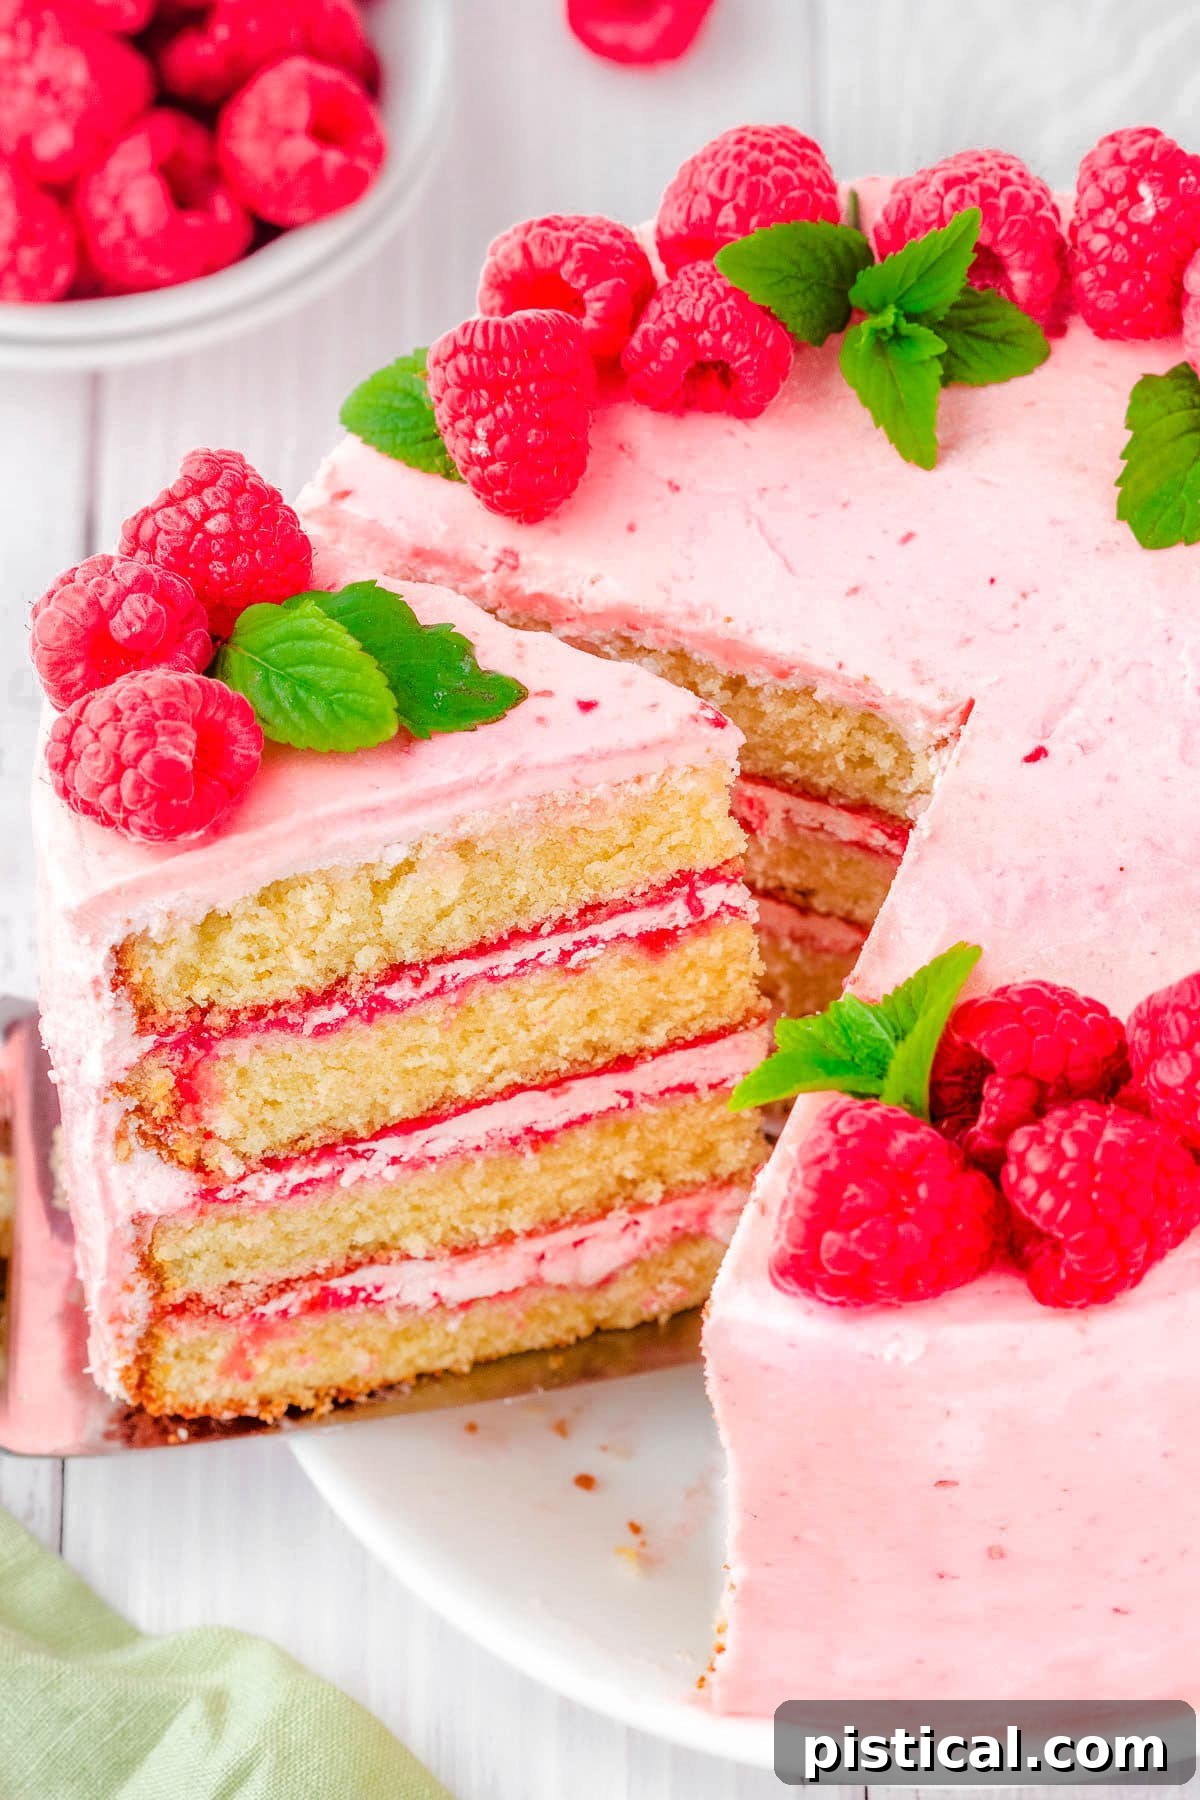
An Unforgettable Raspberry Vanilla Layer Cake Experience
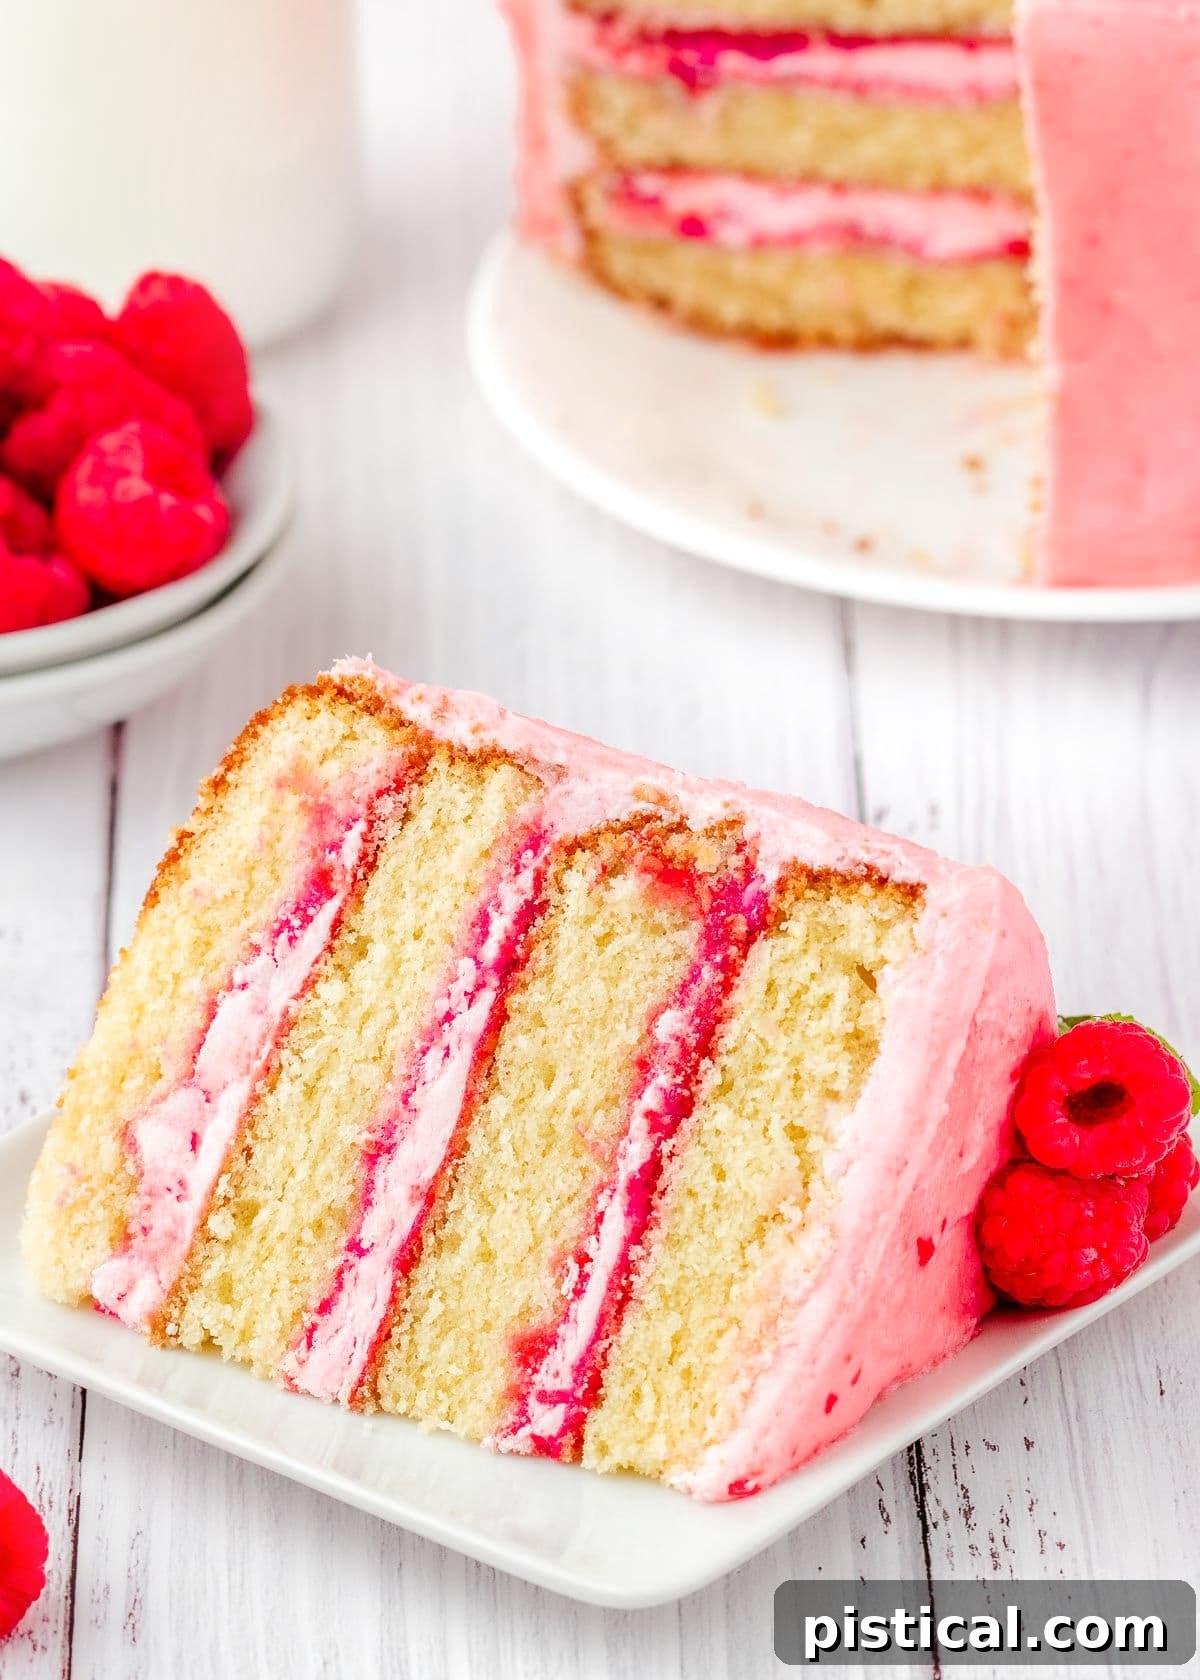
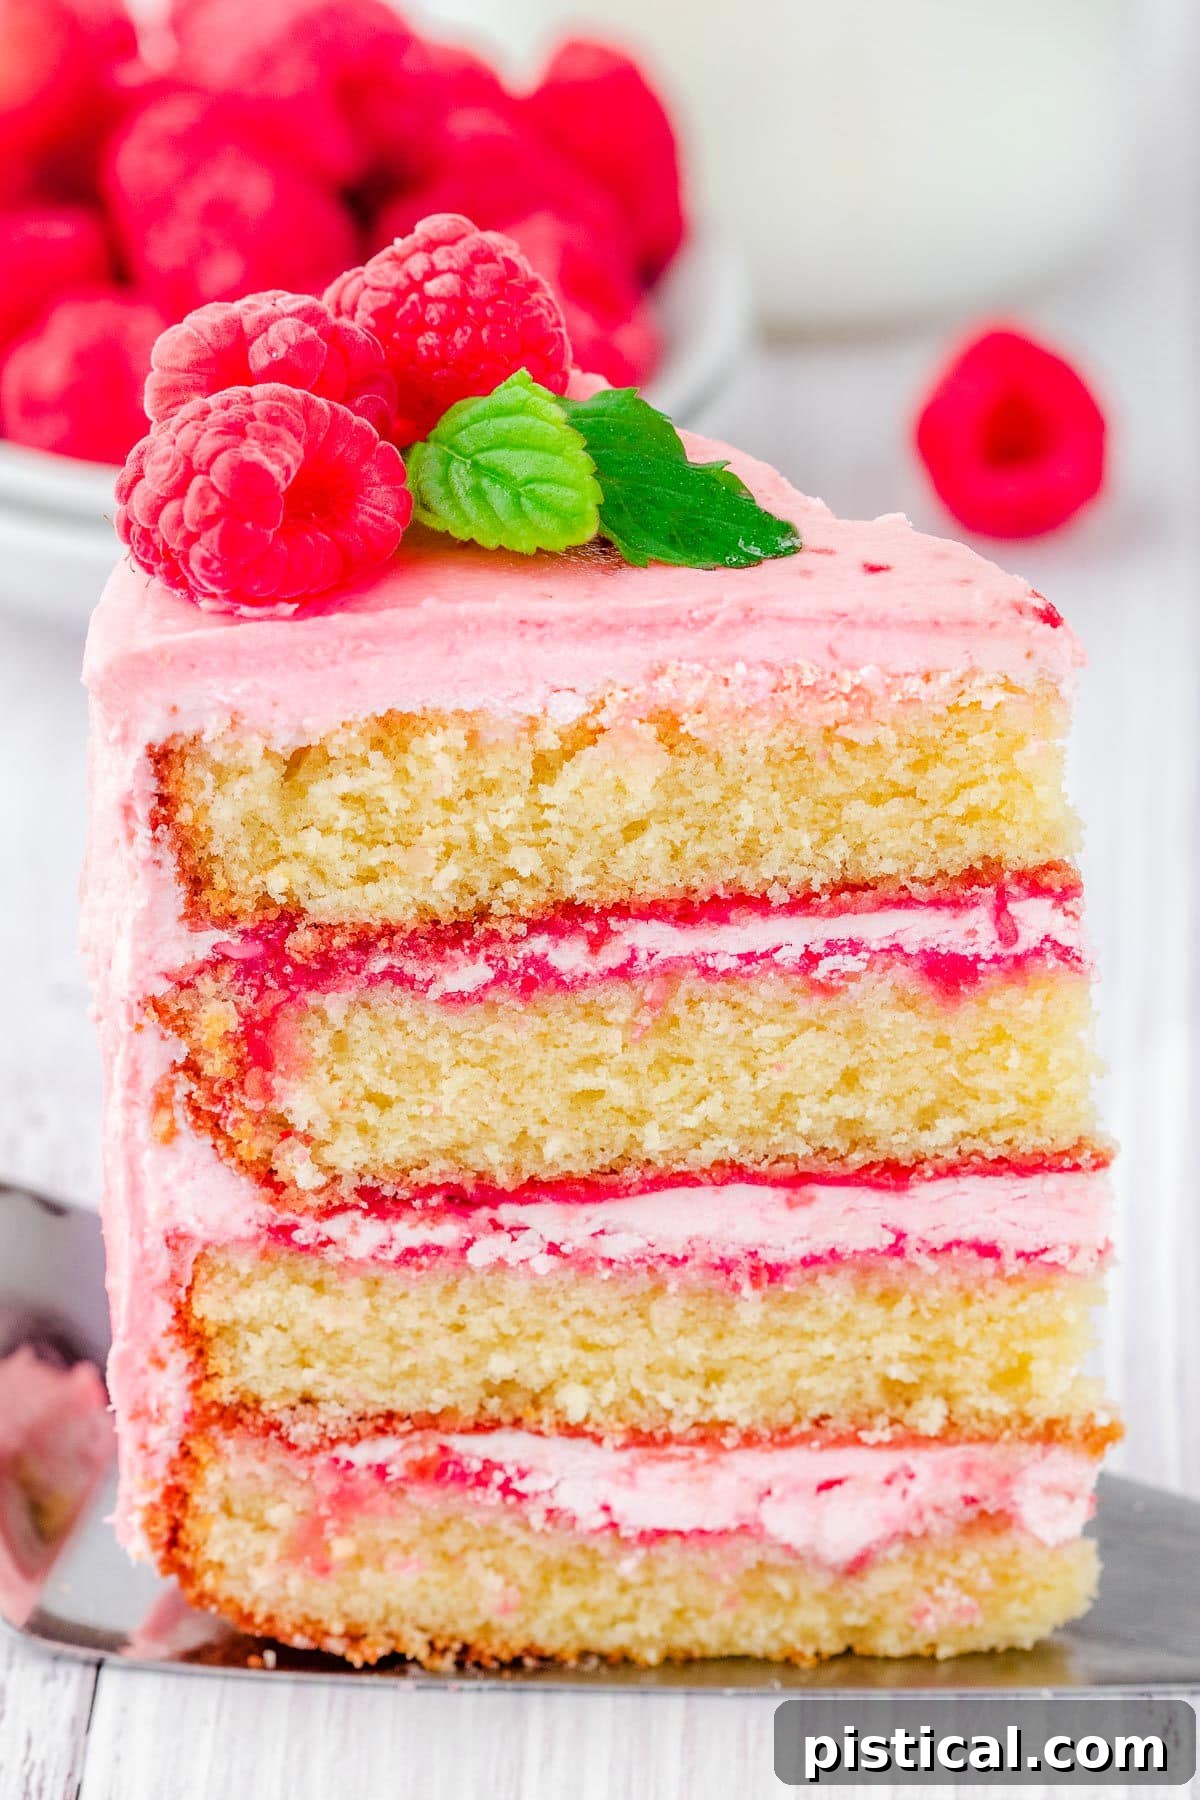
This remarkable layer cake, with its impressive four-tiered structure and sumptuously smooth raspberry buttercream, truly stands out from the crowd. From the moment you present it, its elegant simplicity captivates, but the real magic unfolds with the first slice. Gaze upon the perfectly stacked layers, each a testament to homemade perfection. Every forkful delivers an exquisite medley of textures and tastes: the delicate moisture of the vanilla cake, the burst of tangy sweetness from the vibrant raspberry filling, and the cloud-like richness of the raspberry buttercream. It’s a symphony of flavors that will leave your taste buds yearning for more, transforming any meal into a memorable occasion.
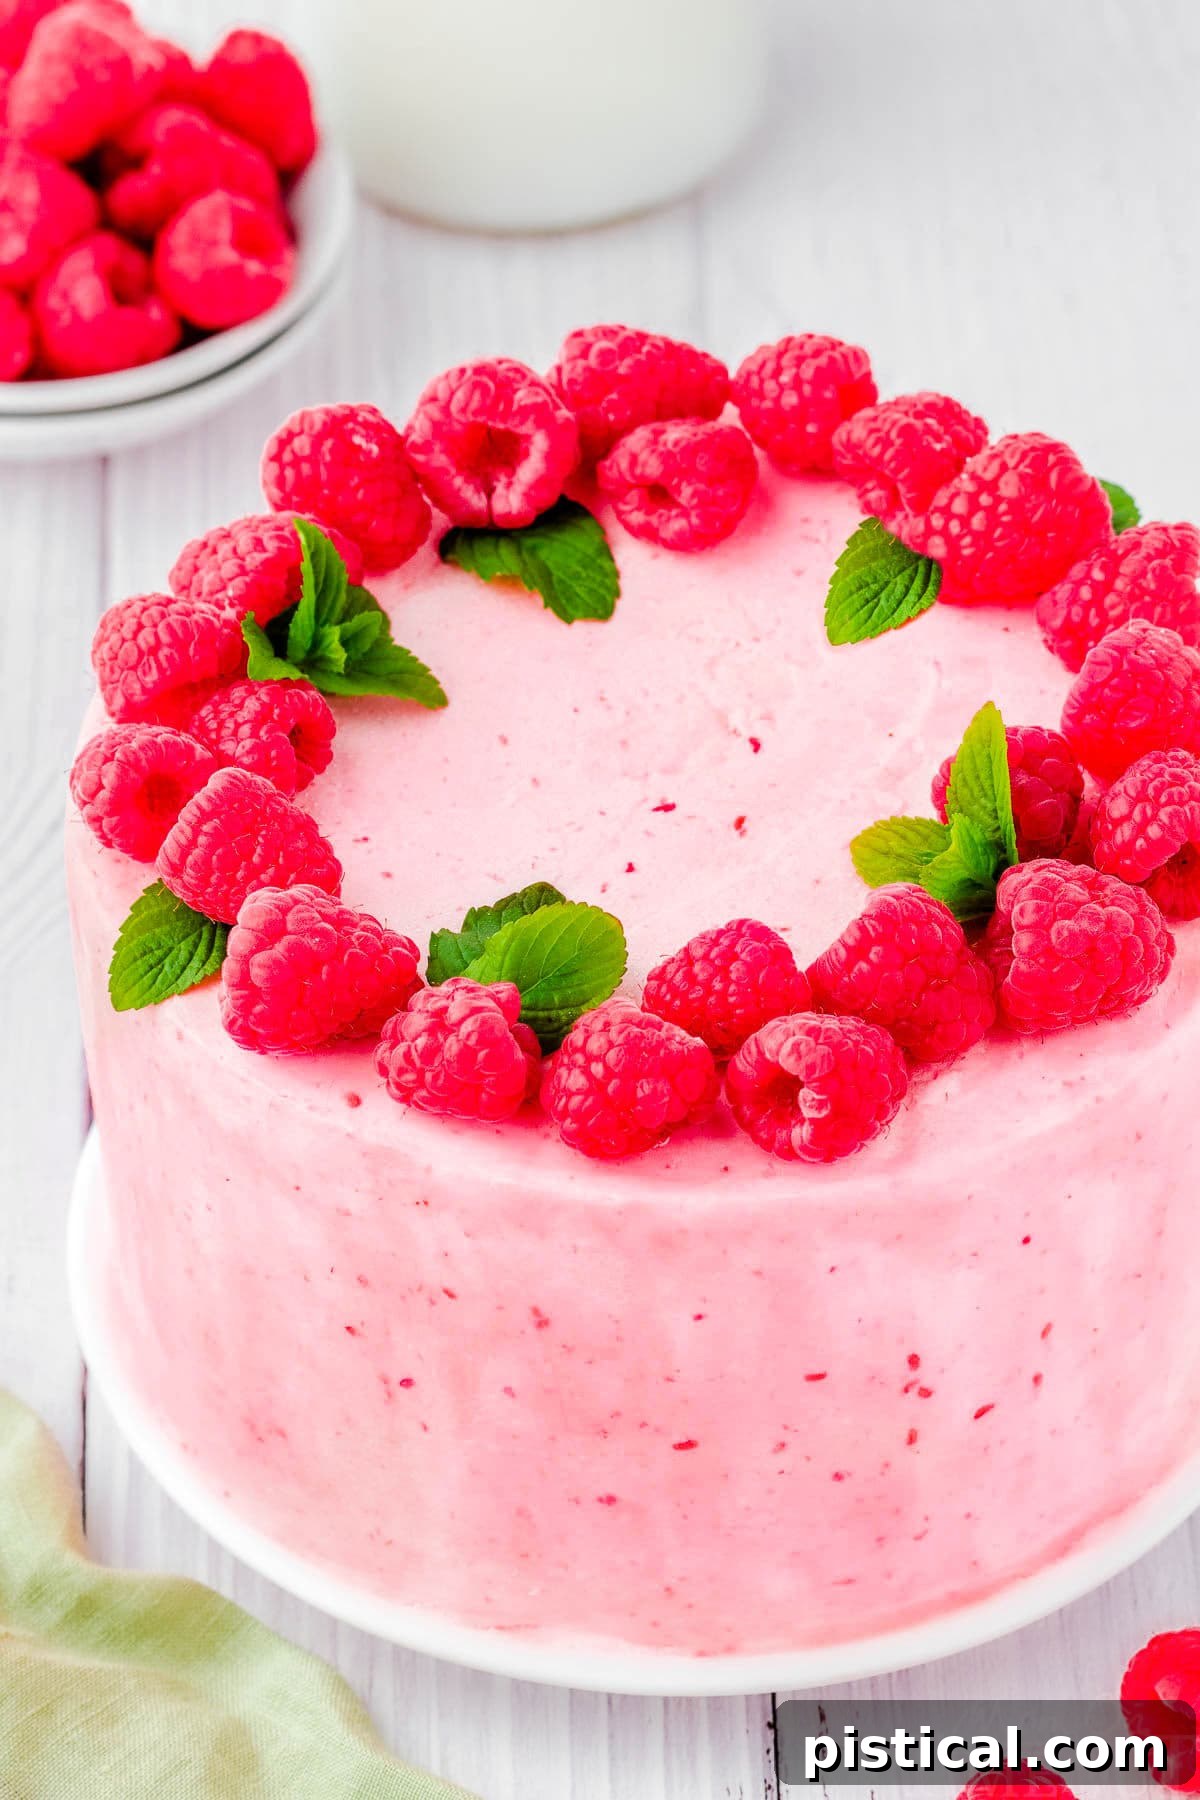
The enchanting blush pink hue of the frosting, coupled with the fresh ruby-red raspberries meticulously placed on top, makes this cake an ideal choice for a plethora of spring and summer celebrations. Imagine it gracing the table at a joyous bridal shower, a heartwarming baby shower, a lively birthday party, a festive Easter brunch, or any cherished holiday gathering. This Raspberry Vanilla Cake isn’t just a dessert; it’s a versatile culinary masterpiece designed to impress and delight. Despite its elaborate appearance, the entire process, from preparing the individual layers to assembling and frosting, is surprisingly simple and streamlined. You can achieve this bakery-quality creation in just a few hours, making it an accessible luxury for any home baker.
Why You’ll Fall in Love with This Vanilla Raspberry Cake
Prepare to be utterly charmed by this Vanilla Raspberry Cake. It’s more than just a recipe; it’s an invitation to create something truly special, effortlessly. Here are the compelling reasons why this cake will quickly become your new favorite:
- Unquestionably Stunning Presentation: This cake isn’t merely pretty; it’s a showstopper. Its elegant layers, delicate pink frosting, and vibrant fresh raspberry garnish elevate it beyond a simple dessert into a work of art. It’s sophisticated enough for a formal bridal or baby shower, an engagement party, or simply to add a touch of gorgeous flair to any spring or summer gathering. Guests will be amazed by its beauty before they even take the first delectable bite.
- Homemade Excellence, Effortless Execution: Don’t let the exquisite appearance fool you. While every component of this cake – from the moist vanilla layers to the luscious raspberry filling and the dreamy buttercream – is made entirely from scratch, the recipe is thoughtfully designed for ease. Even if you’re a novice baker, you’ll find the step-by-step instructions straightforward and the assembly process manageable, empowering you to create a truly impressive dessert without the stress.
- Remarkable Versatility for Any Event: This beautiful cake boasts incredible adaptability, making it suitable for an extensive range of occasions. Whether you’re hosting a festive Easter dinner, celebrating Mother’s Day, marking a significant milestone like a graduation, throwing a memorable baby or bridal shower, or simply need the perfect birthday cake, this recipe is an undeniable winner. Its universally adored flavors and captivating aesthetics ensure it will be a hit, no matter the celebration.
- A Symphony of Perfectly Balanced Flavors: The genius of this cake lies in its harmonious flavor profile. The sweet, comforting notes of classic vanilla provide a delightful foundation, perfectly complemented by the bright, slightly tart burst of fresh raspberries. This exquisite contrast prevents the cake from being overly sweet, creating a refreshing and satisfying taste experience that appeals to virtually everyone.
Explore More of Our Favorite Spring and Summer Desserts
As the days grow longer and warmer, our cravings turn to light, fresh, and fruity treats. If you adore the refreshing qualities of this Raspberry Vanilla Cake, you’ll be thrilled to discover these other seasonal favorites, each promising a burst of sunshine and sweetness:
- Lemon Meringue Cupcakes: Zesty lemon cake topped with a cloud of toasted meringue.
- Blueberry Cobbler: A rustic, comforting classic brimming with juicy blueberries.
- Strawberry Shortcake Recipe: The ultimate summer dessert, featuring fresh strawberries and whipped cream.
- Banana Pudding: A creamy, old-fashioned favorite that’s always a crowd-pleaser.
- Coconut Cream Pie: A tropical dream in pie form, rich and irresistibly smooth.
The Essential Ingredients for Your Delightful Raspberry Vanilla Cake
Crafting this exquisite Raspberry Vanilla Cake begins with selecting the finest ingredients. The perfect balance of sweet vanilla and tart raspberries creates a truly satisfying and memorable dessert. Below is a detailed breakdown of what you’ll need for each component of this scrumptious cake. Remember, the full printable recipe card with exact measurements and complete instructions awaits you at the end of this post, ready to guide you to baking perfection.
For the Fluffy Vanilla Cake Layers:
- All-Purpose Flour: This forms the essential structure of your cake. For the lightest and most tender crumb, ensure you sift the flour meticulously. Sifting not only removes any lumps but also aerates the flour, contributing to a wonderfully light cake texture.
- Baking Powder: A crucial leavening agent, baking powder is responsible for that beautiful rise and airy texture, giving your cake its desirable fluffiness.
- Salt: Just a small pinch of salt works wonders. It’s not just for seasoning; it thoughtfully balances the sweetness, prevents the cake from tasting bland, and significantly enhances the vibrant flavors of both the vanilla and raspberry.
- Unsalted Butter: Make sure your butter is softened to room temperature. Unsalted butter allows you to control the total salt content in the recipe, while softened butter creams smoothly with sugar, incorporating air for a light cake.
- Vegetable Oil: Or another neutral-flavored oil like canola oil. Incorporating oil alongside butter helps ensure a supremely moist cake, as oil remains liquid at room temperature, contributing to a tender crumb that stays fresh longer.
- Granulated Sugar: Provides the perfect level of sweetness to the cake layers, ensuring they are delightful without being overpowering, allowing the vanilla to shine.
- Large Eggs: At room temperature. Room temperature eggs emulsify better with the other ingredients, leading to a smoother batter and a more evenly baked cake. They also add richness and structure.
- Pure Vanilla Extract: This is a vanilla cake, so real, high-quality vanilla extract is paramount! It infuses the cake with its classic, warm, and inviting aroma and flavor. Avoid imitation extracts for the best, most authentic taste.
- Whole Milk: The higher fat content in whole milk contributes to a richer flavor and a more tender, moist crumb, providing a stable and delicious foundation for your cake.
For the Bright Raspberry Filling:
- Fresh Raspberries: Essential for a vibrant, flavorful filling. Opt for fresh berries over canned or frozen, as fresh ones will yield the best texture and taste. Carefully pick through them, discarding any that show blemishes or feel overly soft, to ensure peak quality.
- Granulated Sugar: Sweetens the raspberries and helps them break down into a luscious puree. For a deeper, more nuanced flavor profile, you could experiment with brown sugar.
- Freshly Squeezed Lemon Juice: Absolutely key! The natural acid in fresh lemon juice not only brightens the stunning red color of the raspberries, preventing them from turning dull, but also adds a crucial tangy counterpoint that elevates the overall flavor, making the filling wonderfully zesty and refreshing.
For the Decadent Raspberry Buttercream:
- Unsalted Butter: Softened to perfection. This forms the creamy, rich base of your buttercream. As with the cake, unsalted butter gives you control over the seasoning.
- Pure Vanilla Extract: A touch of vanilla adds warmth and depth to the buttercream, harmonizing beautifully with the raspberry flavor.
- Powdered Sugar (Confectioners’ Sugar): Sifted. This finely milled sugar is essential for sweetening and thickening the buttercream, creating that smooth, pipeable consistency. Sifting ensures a lump-free, silky frosting.
- Raspberry Filling: About 2 tablespoons from the fresh, homemade mixture you just prepared. This is what infuses your buttercream with that gorgeous pink hue and irresistible fruity flavor. Adjust the amount to achieve your desired color intensity and raspberry essence.
How To Create Your Exquisite Raspberry Vanilla Layer Cake: A Step-by-Step Guide
Baking this stunning cake is a joyful and rewarding experience. Follow these detailed instructions to ensure every layer, every filling, and every swirl of frosting is absolutely perfect. Precision and patience are your best friends in the kitchen!
Step 1: Master the Moist Vanilla Cake Layers
- Prepare Your Pans & Oven: Begin by preheating your oven to a steady 350°F (175°C). Take four 8-inch round cake pans. Generously coat them with cooking spray, then lightly flour them, tapping out any excess. This crucial step prevents sticking and ensures your cakes release cleanly. Set these prepared pans aside.
- Combine Dry Ingredients: In a medium-sized mixing bowl, whisk together your sifted all-purpose flour, baking powder, and a pinch of salt until well combined. Set this dry mixture aside.
- Cream Wet Ingredients: In the bowl of a stand mixer fitted with the paddle attachment, or using a large mixing bowl with an electric hand mixer, beat the softened unsalted butter, vegetable oil, and granulated sugar together. Beat on medium-high speed until the mixture is visibly lightened in color and wonderfully fluffy, typically 3-5 minutes. This creaming process incorporates air, essential for a tender cake.
- Add Eggs and Vanilla: Scrape down the sides of the bowl. Add the room temperature eggs one at a time, beating well after each addition until fully incorporated. Stir in the pure vanilla extract. Continue to beat until the mixture is smooth and fully combined, but avoid overmixing.
- Alternate Dry and Wet: With the mixer on low speed, gradually add one-third of your flour mixture to the wet ingredients, mixing just until barely combined. Then, add one-third of the whole milk, mixing until incorporated. Repeat this process, alternating between the dry mixture and milk, ending with the dry ingredients. Mix only until no streaks of flour remain. Crucially, do not overmix the batter, as this can lead to a tough, dense cake.
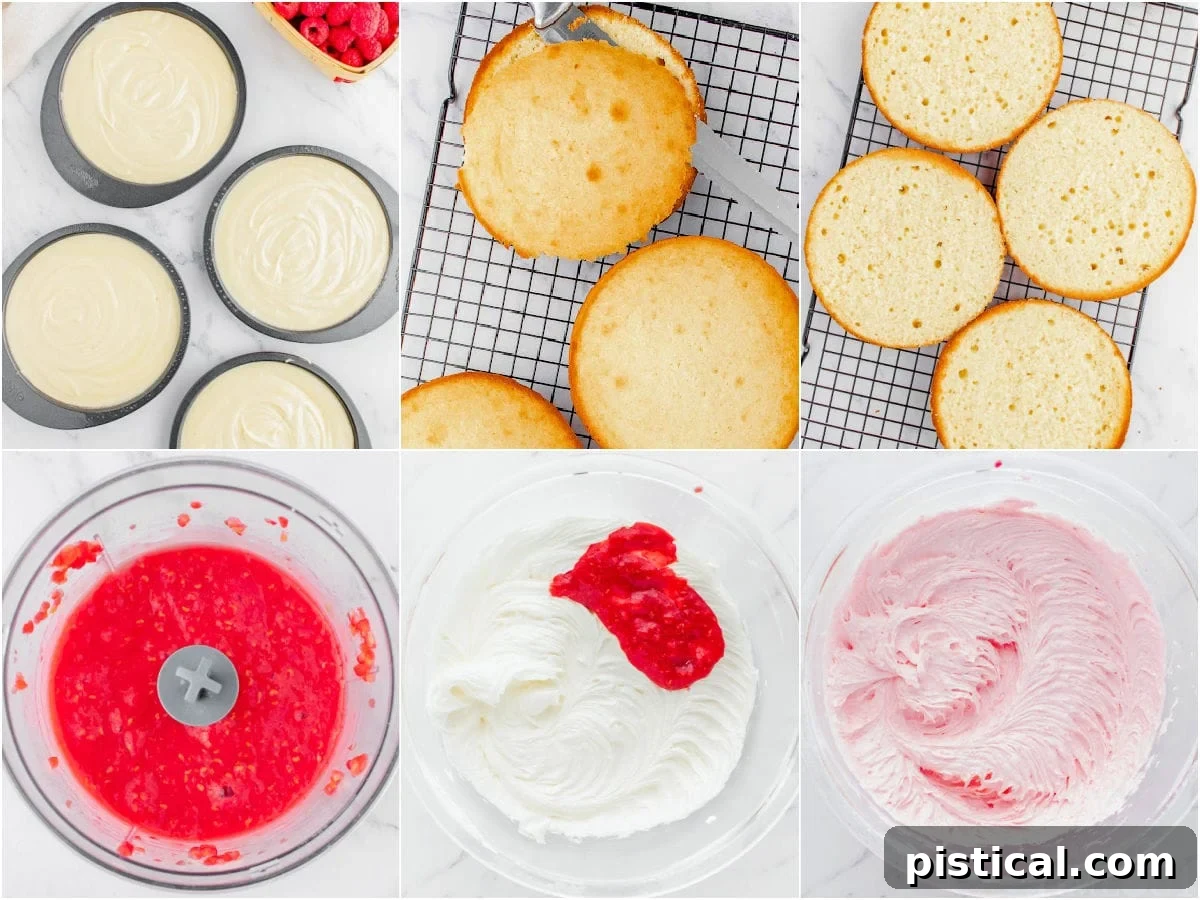
- Divide and Bake: Evenly divide the cake batter among your four prepared 8-inch cake pans. Bake for approximately 20-25 minutes. The cakes are done when their edges are a delicate golden brown, and a wooden skewer or toothpick inserted into the center comes out clean or with just a few moist crumbs attached.
- Cooling Process: Once baked, remove the cakes from the oven and allow them to cool in their pans on a wire rack for precisely 10 minutes. This resting period helps the cakes set without collapsing. After 10 minutes, carefully invert the cakes onto wire racks to cool completely. It is absolutely vital that the cake layers are entirely cool before you attempt to assemble or frost them, to prevent the frosting from melting.
Step 2: Craft the Bright and Tangy Raspberry Filling
- Puree the Berries: In a blender or food processor, combine the fresh raspberries, granulated sugar, and freshly squeezed lemon juice. Pulse the mixture until it forms a smooth puree.
- Strain for Smoothness: To achieve a silky-smooth filling, pour the raspberry puree through a fine-mesh sieve set over a medium bowl. Use a spatula to press the pulp against the sieve, ensuring all the liquid is extracted and leaving behind only the seeds.
- Thicken on the Stove: Transfer the seedless raspberry puree to a small saucepan. Place it over medium heat and bring it to a gentle simmer. Reduce the heat to low and continue to simmer for about 10 minutes, stirring frequently, until the filling visibly thickens to a spoonable consistency. It should coat the back of a spoon.
- Chill for Setting: Pour the thickened raspberry filling into a clean, heat-proof bowl. Cover it tightly with plastic wrap, pressing the wrap directly onto the surface of the filling to prevent a skin from forming. Refrigerate the filling until it is thoroughly chilled and set, ready for assembly. This can be done several hours or even a day in advance.
Step 3: Whip Up the Decadent Raspberry Buttercream
- Cream the Butter: In a large mixing bowl or the bowl of a stand mixer fitted with the paddle attachment, beat the softened unsalted butter on medium-high speed. Continue beating for 3 to 5 minutes until the butter is noticeably lighter in color, very creamy, and airy.
- Infuse with Vanilla: Add the pure vanilla extract to the creamed butter and beat until it is fully combined, adding another layer of flavor to your frosting.
- Gradually Add Sugar: With the mixer on low speed, gradually add the sifted powdered sugar, one cup at a time. Beat thoroughly after each addition until the sugar is completely incorporated and the frosting is smooth. Once all the sugar is in, increase the speed to medium-high and beat for another 2-3 minutes until the buttercream is light, fluffy, and voluminous.
- Add Raspberry Filling: Now for the magic! Spoon in the chilled raspberry filling, one tablespoon at a time, into the buttercream. Beat after each addition, observing the color and tasting for flavor. Continue adding until you achieve your desired beautiful pink hue and a delightful raspberry flavor that shines through without making the buttercream too thin.
Step 4: Artfully Assemble Your Raspberry Vanilla Cake
This is where your cake truly comes to life! A careful assembly process ensures a professional-looking and incredibly delicious result.
- Level the Cake Layers: Using a large serrated knife or a cake leveler, carefully trim the domed tops off your cooled vanilla cake layers. This step is essential for creating perfectly flat surfaces that will stack neatly and create a stable, even cake.
- Build the Layers: Place your first leveled vanilla cake layer on your serving plate or cake stand. Spread a thin, even layer of the chilled raspberry filling over the cake. Follow this with a generous layer of the raspberry buttercream, spreading it smoothly to the edges. Repeat this sequence: cake layer, thin raspberry filling, raspberry buttercream, thin raspberry filling, until all four cake layers are stacked and beautifully filled.
- Apply the Crumb Coat: Using a large, offset spatula, apply a very thin layer of raspberry buttercream to the entire outside of the stacked cake – both the top and the sides. This is known as a “crumb coat,” and its purpose is to trap any loose crumbs, preventing them from mixing into your final, pristine layer of frosting. Don’t worry about perfection at this stage; thin and even is the goal.
- Chill to Set: Transfer the crumb-coated cake to the freezer for about 15 minutes, or place it in the refrigerator for at least 1 hour. This chilling time is crucial, allowing the crumb coat to firm up completely, creating a stable base for your final frosting layer.
- The Final Frosting Flourish: Once the crumb coat is firm, retrieve the cake from the freezer or fridge. Use the remaining raspberry buttercream to apply a thick, smooth, and even final layer of frosting to the entire cake. Take your time to achieve a polished finish, using your offset spatula or a cake scraper.
- Garnish and Serve: For a breathtaking presentation and an extra burst of freshness, elegantly garnish the top of your frosted cake with an abundance of fresh, whole raspberries and a few delicate sprigs of fresh mint. Slice, serve, and bask in the admiring glances (and delicious bites!) of your guests. Enjoy your homemade masterpiece!
Storage Solutions for Your Raspberry Vanilla Cake
To ensure your delightful Raspberry Vanilla Cake remains fresh and delicious for as long as possible, proper storage is key. Following these guidelines will help preserve its wonderful texture and flavor:
Refrigerator Storage: Any leftover slices or the entire cake (if uncut) should be stored in an airtight container. Place it in the refrigerator, where it will maintain its peak freshness and flavor for up to 4 days. Before serving chilled cake, allow it to sit at room temperature for about 20-30 minutes to let the buttercream soften slightly, enhancing its creamy texture and flavor.
Freezing for Future Enjoyment: This cake freezes beautifully, allowing you to prepare it in advance or save leftovers for another occasion. To freeze, ensure the cake is completely cooled. First, wrap the entire cake (or individual slices) tightly in plastic wrap, ensuring no air can reach the surface. Then, wrap it again securely with aluminum foil for an extra layer of protection against freezer burn. Place the double-wrapped cake in an airtight freezer-safe container or a heavy-duty freezer bag. It can be stored in the freezer for up to three months without compromising quality. When you’re ready to enjoy, defrost the cake slowly in the refrigerator overnight, or for a few hours at room temperature, until completely thawed. This gradual thawing helps maintain moisture and texture.
Frequently Asked Questions (FAQs) About Raspberry Vanilla Cake
Got questions about baking this delectable Raspberry Vanilla Cake? We’ve got answers! Here are some common queries to help you on your baking journey:
Do I need to use fresh raspberries for the filling?
While fresh raspberries are highly recommended for the best flavor and texture in your filling, you can certainly use frozen raspberries if fresh ones are out of season or unavailable. If using frozen, allow them to thaw completely first. It’s crucial to gently pat them dry with a paper towel to remove any excess water. Too much added moisture can prevent your puree from thickening properly on the stove. As an alternative, for a quicker option, you could use a high-quality raspberry jam in place of the homemade filling, though the homemade version offers unparalleled freshness.
My cake layers sunk in the middle! What went wrong?
Cake layers sinking often occurs when the oven door is opened too early during the baking process. This causes a sudden drop in temperature, which can make the unset cake batter collapse. To prevent this, try to resist the urge to open the oven door until at least two-thirds of the baking time has passed. Use your oven light to observe the cakes without letting out heat. We do level the cake layers to create even surfaces, so a slightly sunken center might not be the end of the world for the final appearance of this specific cake, but it could result in thinner individual layers. Ensure your baking powder isn’t expired, as old leavening agents can also lead to sinking.
Can I freeze this Raspberry Vanilla Cake?
Absolutely! This cake is wonderfully freezer-friendly. To freeze, allow the cake to cool completely after baking and frosting. Wrap the entire cake (or individual slices) tightly in plastic wrap, followed by a second layer of aluminum foil. This double wrapping is essential to prevent freezer burn and maintain freshness. Store the wrapped cake in an airtight, freezer-safe container or bag for up to three months. To serve, simply transfer the frozen cake to the refrigerator to thaw overnight, or let it sit at room temperature for a few hours until fully defrosted.
Can I make cupcakes using this Raspberry Vanilla Cake recipe?
Yes, you absolutely can! This versatile recipe adapts beautifully to cupcakes. Simply prepare the vanilla cake batter as directed in the recipe. Line your muffin tins with cupcake liners, then fill each liner about two-thirds full with the batter. Adjust the baking time significantly: cupcakes typically bake for a shorter duration, usually 18 to 22 minutes, or until a wooden skewer or toothpick inserted into the center of a cupcake comes out clean or with only a few moist crumbs. Once cooled, you can core the cupcakes and fill them with the raspberry filling before topping them with the delightful raspberry buttercream.
Trish’s Expert Tips and Tricks for Cake Perfection
Achieving a truly professional and delicious Raspberry Vanilla Cake is easier than you think with these insider tips and tricks:
- Avoid Overbaking for Ultimate Moistness: This is perhaps the most critical tip for any cake. You want your cake layers to be just turning a light golden brown around the edges when you remove them from the oven. Remember, the cakes will continue to cook slightly during that initial 10-minute cooling period in their pans. The ideal doneness is when a toothpick inserted into the center comes out with just a few moist crumbs attached, indicating a perfectly moist, tender crumb, not a dry, tough one.
- Serve at the Perfect Temperature: While you can chill the completed cake in the refrigerator, allowing it to sit out at room temperature for about 20-30 minutes before slicing and serving is highly recommended. This brief resting period allows the buttercream to soften slightly, achieving its optimal creamy texture and releasing its full, delightful flavors.
- The Crumb Coat is Non-Negotiable: Do not skip this vital step! Applying a thin “crumb coat” of frosting to the entire cake and then chilling it is the secret to achieving that smooth, flawless, bakery-quality finish. It effectively seals in any loose crumbs, preventing them from marring your final, beautiful layer of frosting. It makes the final decorating much easier and cleaner.
- Always Opt for Real Vanilla Extract: Especially in a cake where vanilla is a prominent flavor, like this Raspberry Vanilla Cake, the quality of your vanilla extract makes a noticeable difference. Invest in pure vanilla extract rather than imitation. You’ll be able to taste the rich, complex, and authentic vanilla notes that elevate the entire cake’s flavor profile.
- Room Temperature Ingredients are Key: For both the cake batter and the buttercream, ensure your butter, eggs, and milk are at room temperature. This allows them to emulsify properly, creating a smooth, homogenous batter and a light, airy buttercream, resulting in a superior cake texture.
- Sift Your Dry Ingredients: While mentioned in the ingredients, it bears repeating: sifting your flour, baking powder, and powdered sugar is essential. It prevents lumps and aerates the dry ingredients, leading to a lighter cake crumb and a smoother, lump-free buttercream.
- Don’t Rush the Cooling Process: Patience is a virtue in baking, especially when cooling cake layers. Attempting to frost warm cakes will lead to a melted, messy disaster. Ensure your cake layers are completely cool to the touch before leveling and assembling to ensure a beautiful, stable structure.
More Irresistible Cake Recipes to Bake and Enjoy
If you’ve enjoyed baking and tasting this delightful Raspberry Vanilla Cake, you’re likely a fellow cake enthusiast! Here’s a curated selection of other beloved cake recipes from our collection, perfect for inspiring your next baking adventure. Each promises unique flavors and a truly satisfying dessert experience:
- Classic Carrot Cake: Richly spiced and unbelievably moist, often topped with cream cheese frosting.
- Easy Strawberry Pineapple Cake: A light and fruity cake, perfect for summer gatherings.
- Nostalgic Orange Creamsicle Cake: Captures the beloved flavor of the classic frozen treat.
- Tropical Piña Colada Cake: A delightful blend of pineapple and coconut, reminiscent of a beach vacation.
- Simple Cherry Pineapple Dump Cake: An incredibly easy, flavorful dessert that comes together quickly.
- Elegant Lemon Meringue Cheesecake: The best of two worlds – tangy lemon cheesecake with a fluffy meringue topping.
- Decadent Caramel Cake: Layers of moist cake drenched in rich, buttery caramel.
Raspberry Vanilla Cake Recipe Card
Raspberry Vanilla Cake
This Raspberry Vanilla Cake features four layers of moist, homemade vanilla cake that is layered to perfection with a decadent raspberry buttercream frosting and a vibrant raspberry filling. This heavenly cake is finished off with fresh raspberries and is almost too beautiful to eat! Perfect for any occasion!
Course: Cake, Dessert
Cuisine: American
Keyword: raspberry vanilla cake
Prep Time: 30 minutes
Cook Time: 20 minutes
Servings: 16 slices
Author: Trish – Mom On Timeout
Ingredients
Vanilla Cake
- 3 cups all-purpose flour
- 1 tablespoon baking powder
- ½ teaspoon salt
- ½ cup unsalted butter, softened
- ½ cup vegetable oil or canola oil
- 1 ½ cups granulated sugar
- 4 large eggs, room temperature
- 1 tablespoon vanilla extract
- 1 cup whole milk
Raspberry Filling
- 2 ½ cups fresh raspberries
- 3 tablespoons granulated sugar
- 2 tablespoons lemon juice, fresh squeezed
Raspberry Buttercream
- 2 cups unsalted butter, softened
- 1 teaspoon vanilla extract
- 4 cups powdered sugar, sifted
- 2 tablespoons raspberry filling, from above
Optional Garnishes
- fresh raspberries
- mint
Instructions
Make the Vanilla Cakes
- Preheat the oven to 350°F. Grease and lightly flour four 8-inch round cake pans. Set aside.
- Whisk together the flour, baking powder and salt in a medium mixing bowl. Set aside.
- In a large mixing bowl or the bowl of a stand mixer, beat the butter, oil, and sugar together until light and fluffy.
- Add the eggs and vanilla extract and beat until thoroughly incorporated.
- Add one-third of the dry mixture, alternating with one-third of the milk, mixing just until combined. Do not over mix.
- Evenly divide the batter into the prepared cake pans. Bake for 20 to 25 minutes or until the edges just begin to turn golden and an inserted toothpick comes out clean.
- Remove the cakes from the oven and let cool for 10 minutes in their pans. Invert onto a cooling rack and let the cakes cool completely before frosting.
Raspberry Filling
- Combine the raspberries, granulated sugar and lemon juice in the bowl of a food processor or a blender. Pulse until pureed.
- Pour through a fine mesh sieve to remove any raspberry seeds.
- Transfer the mixture to a small saucepan over medium heat. Bring to a simmer and let simmer, stirring frequently, for about 10 minutes or until it thickens.
- Place in a heat proof bowl, cover and refrigerate until ready to use.
Raspberry Buttercream
- In a large mixing bowl or bowl of a stand mixer, beat the softened butter until it has lightened in color and is nice and creamy, about 3 to 5 minutes.
- Beat in the vanilla extract until combined.
- Gradually add the powdered sugar, beating each time until completely incorporated.
- Add the chilled raspberry filling, one tablespoon at a time, until the desired color, consistency and flavor is achieved.
Assemble Cake
- Level the cooled cakes by cutting off the domes of the cakes using a large serrated knife to create a flat surface.
- Stack the cakes with a thin layer of raspberry filling, followed by raspberry buttercream and then another thin layer of raspberry filling between each cake layer.
- Use a large, offset spatula to apply a thin layer of frosting around and top of the cake, creating a crumb coat.
- Place the cake in the freezer for 15 minutes or refrigerate for 1 hour (minimum) to allow the crumb coat to set up.
- Use the remaining frosting to frost the cake and garnish with fresh raspberries if desired. Enjoy!
Notes
Storage Information:
Leftovers should be stored in an airtight container in the refrigerator for up to 4 days.
To freeze, first let the cake cool completely. Wrap the cake in plastic wrap and then wrap again with aluminum foil. Place the cake in an airtight freezer safe container or bag for up to three months. Defrost the cake in the refrigerator overnight or at room temperature for a few hours.
Nutrition
Calories: 636kcal | Carbohydrates: 72g | Protein: 5g | Fat: 38g | Saturated Fat: 20g | Polyunsaturated Fat: 5g | Monounsaturated Fat: 10g | Trans Fat: 1g | Cholesterol: 119mg | Sodium: 100mg | Potassium: 180mg | Fiber: 2g | Sugar: 52g | Vitamin A: 977IU | Vitamin C: 6mg | Calcium: 75mg | Iron: 2mg