
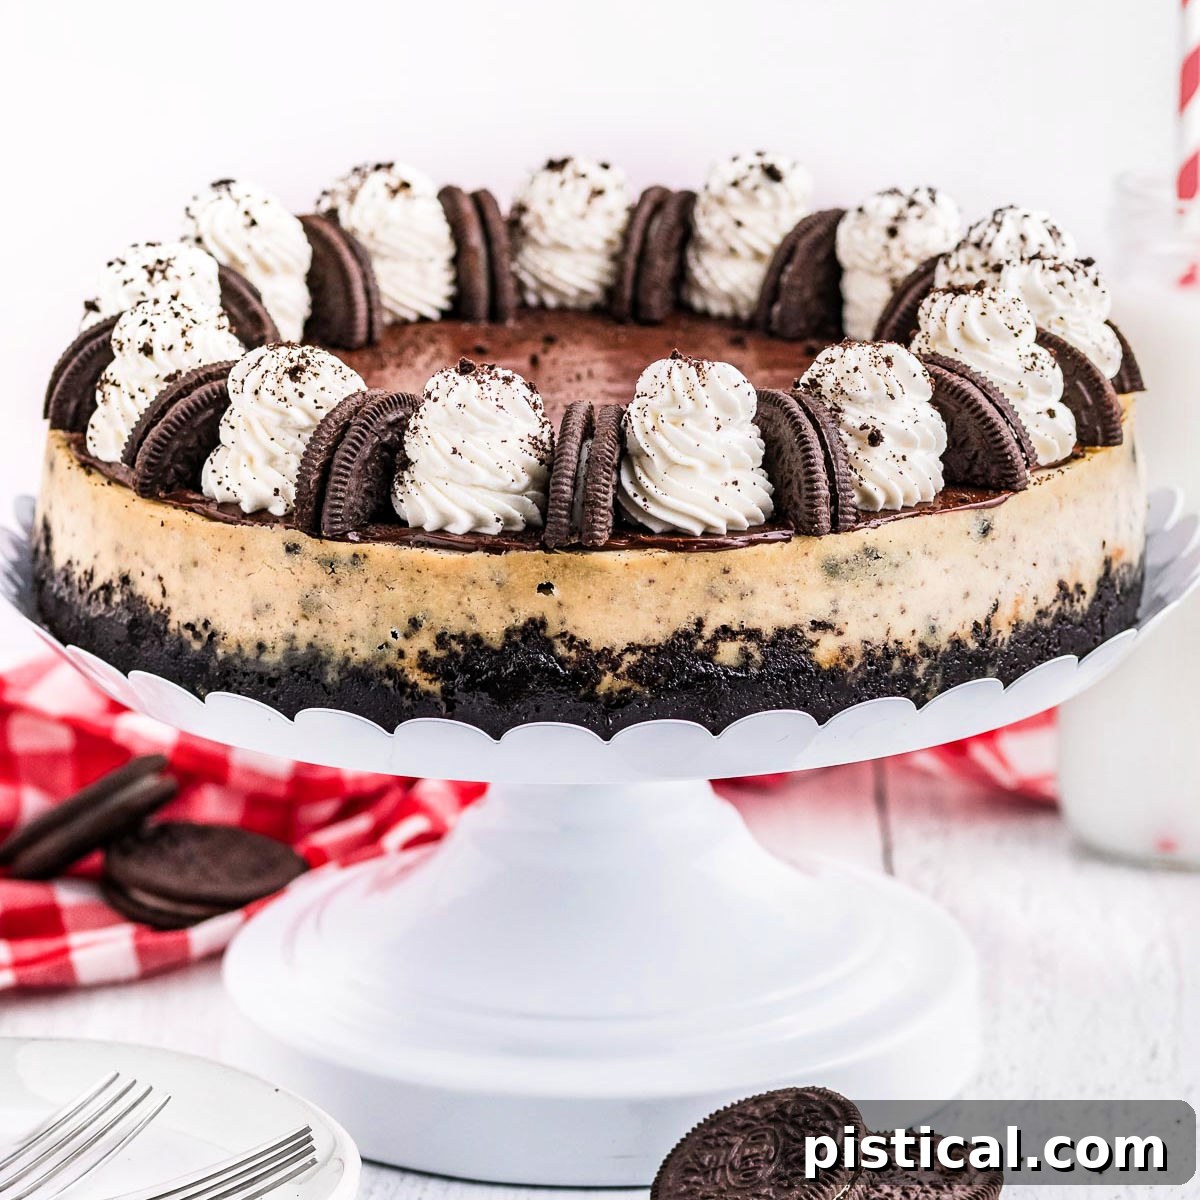
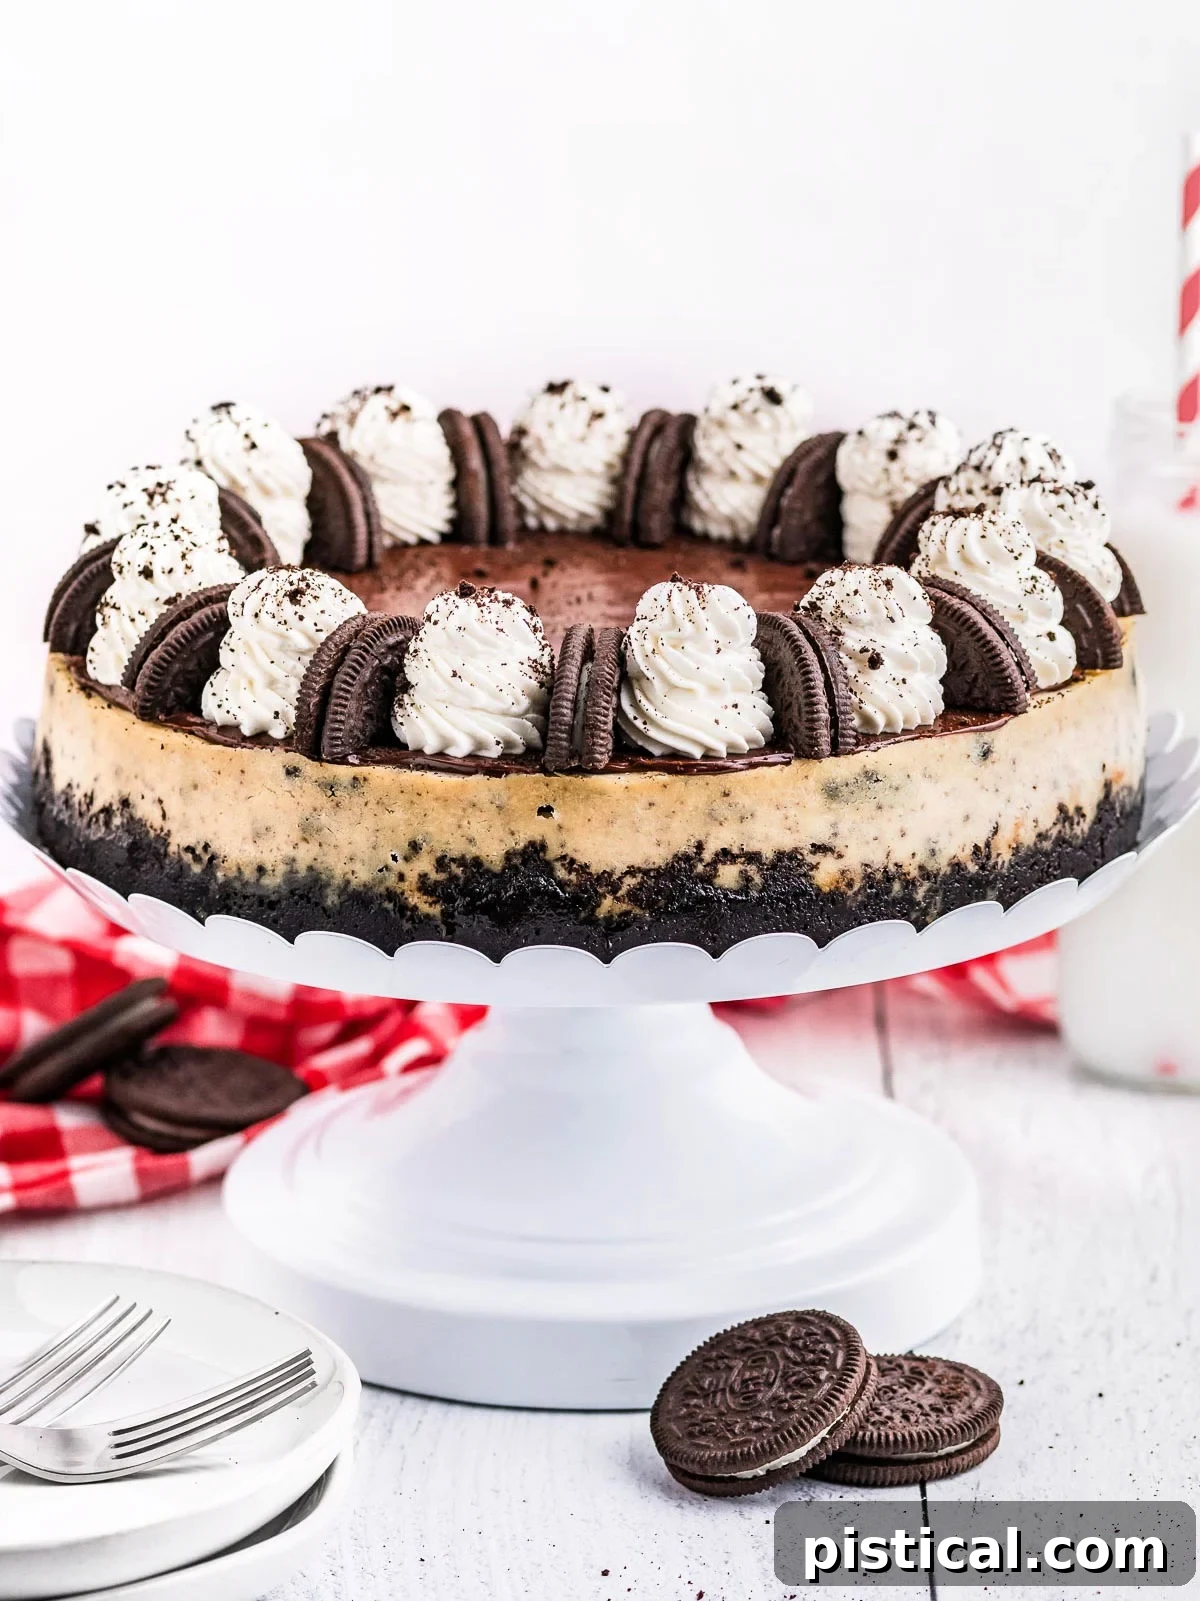
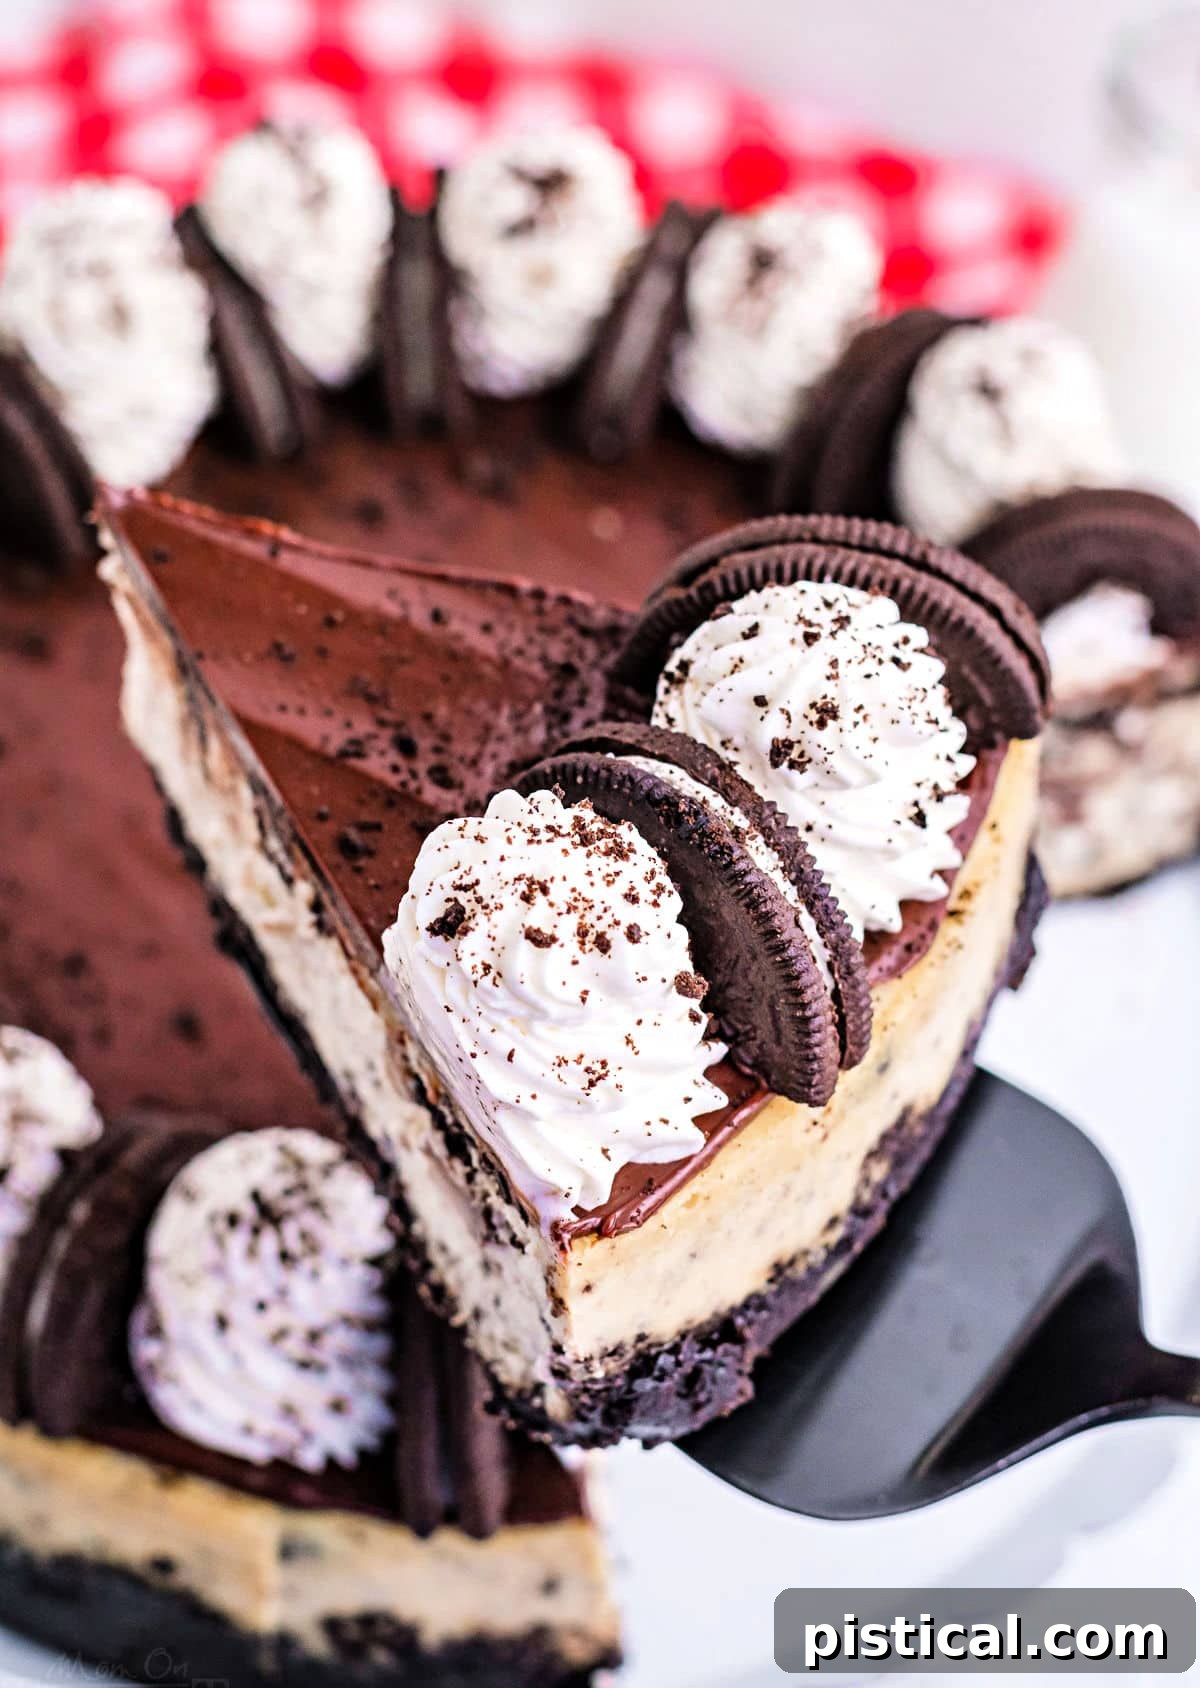
Indulge in the ultimate dessert experience with this truly **decadent Oreo Cheesecake recipe**. Imagine a rich, creamy cheesecake, generously studded with chunks of America’s favorite cookie, all resting on a perfectly crisp Oreo crust. To elevate this masterpiece, it’s crowned with a luscious, shiny chocolate ganache and adorned with delicate, pillowy swirls of homemade whipped cream. This isn’t just a dessert; it’s a celebration of flavor and texture, guaranteed to be a showstopper at any gathering and an absolute dream come true for all Oreo enthusiasts.
If your heart beats for irresistible cheesecake, you’ll also adore my Triple Threat Chocolate Cheesecake and the effortlessly delightful Chocolate Chip No-Bake Cheesecake!
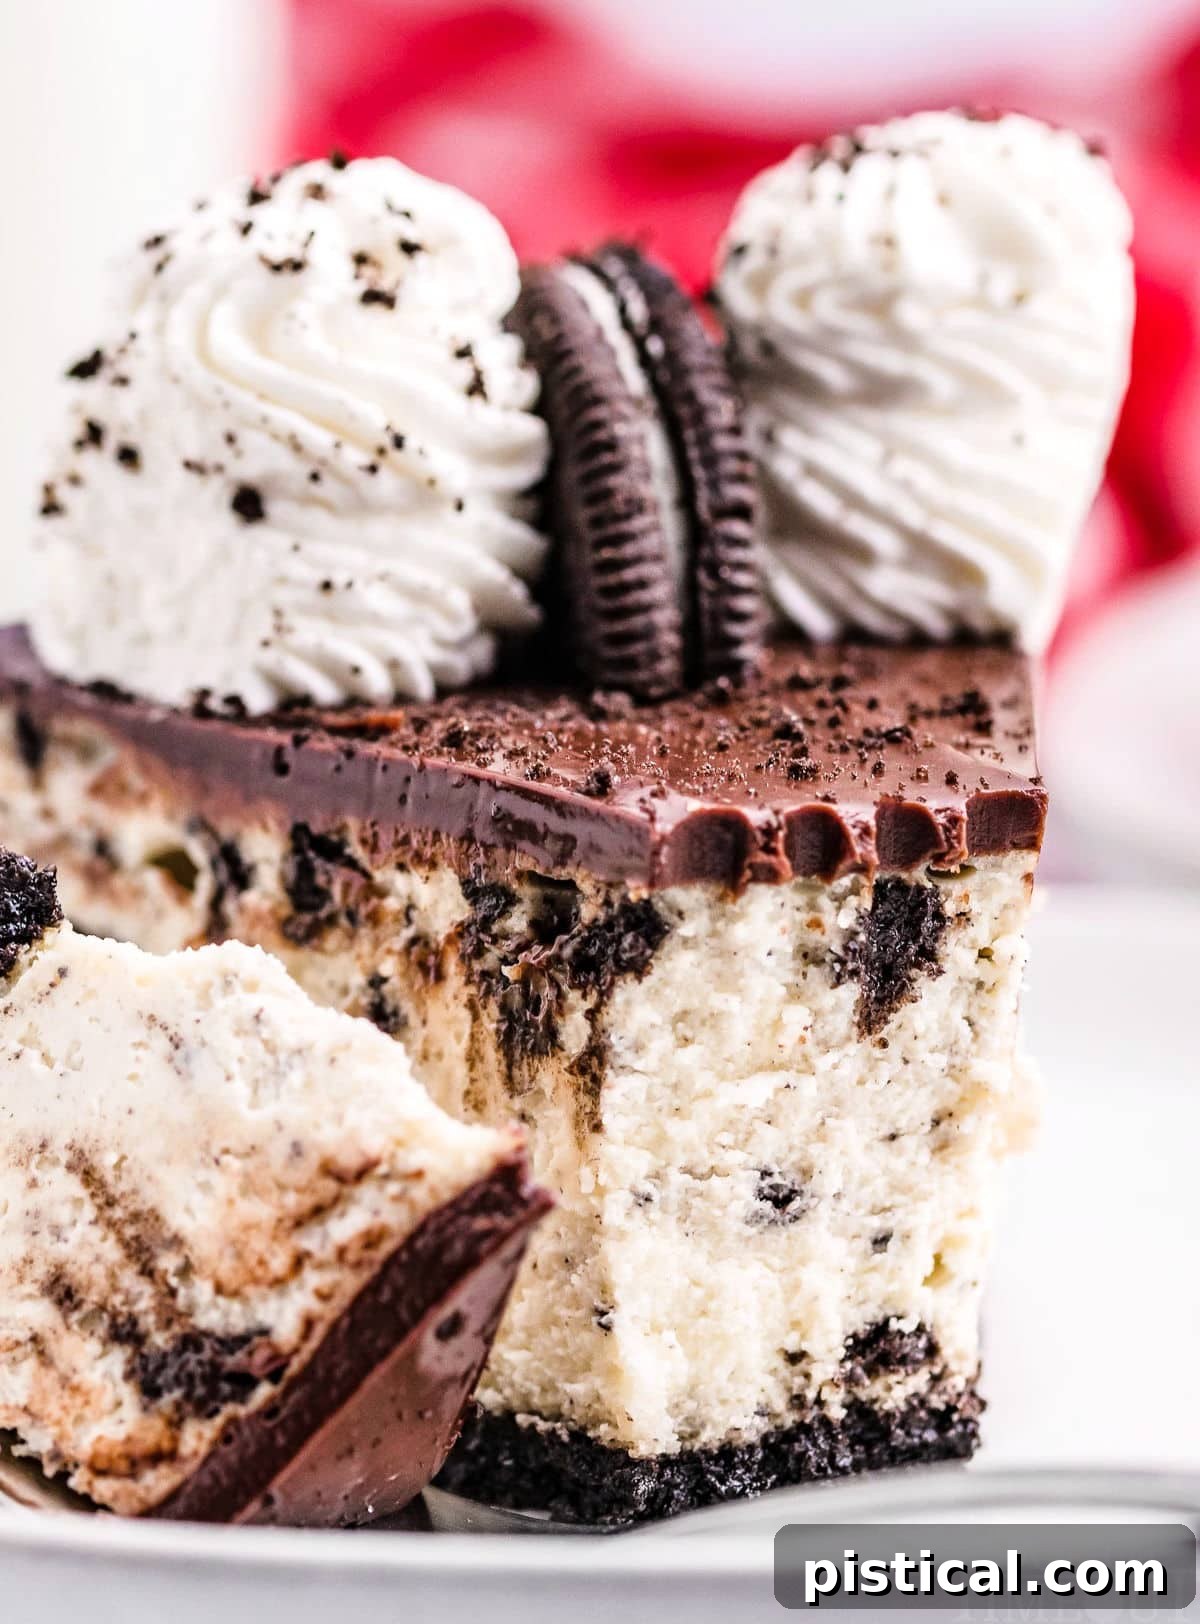
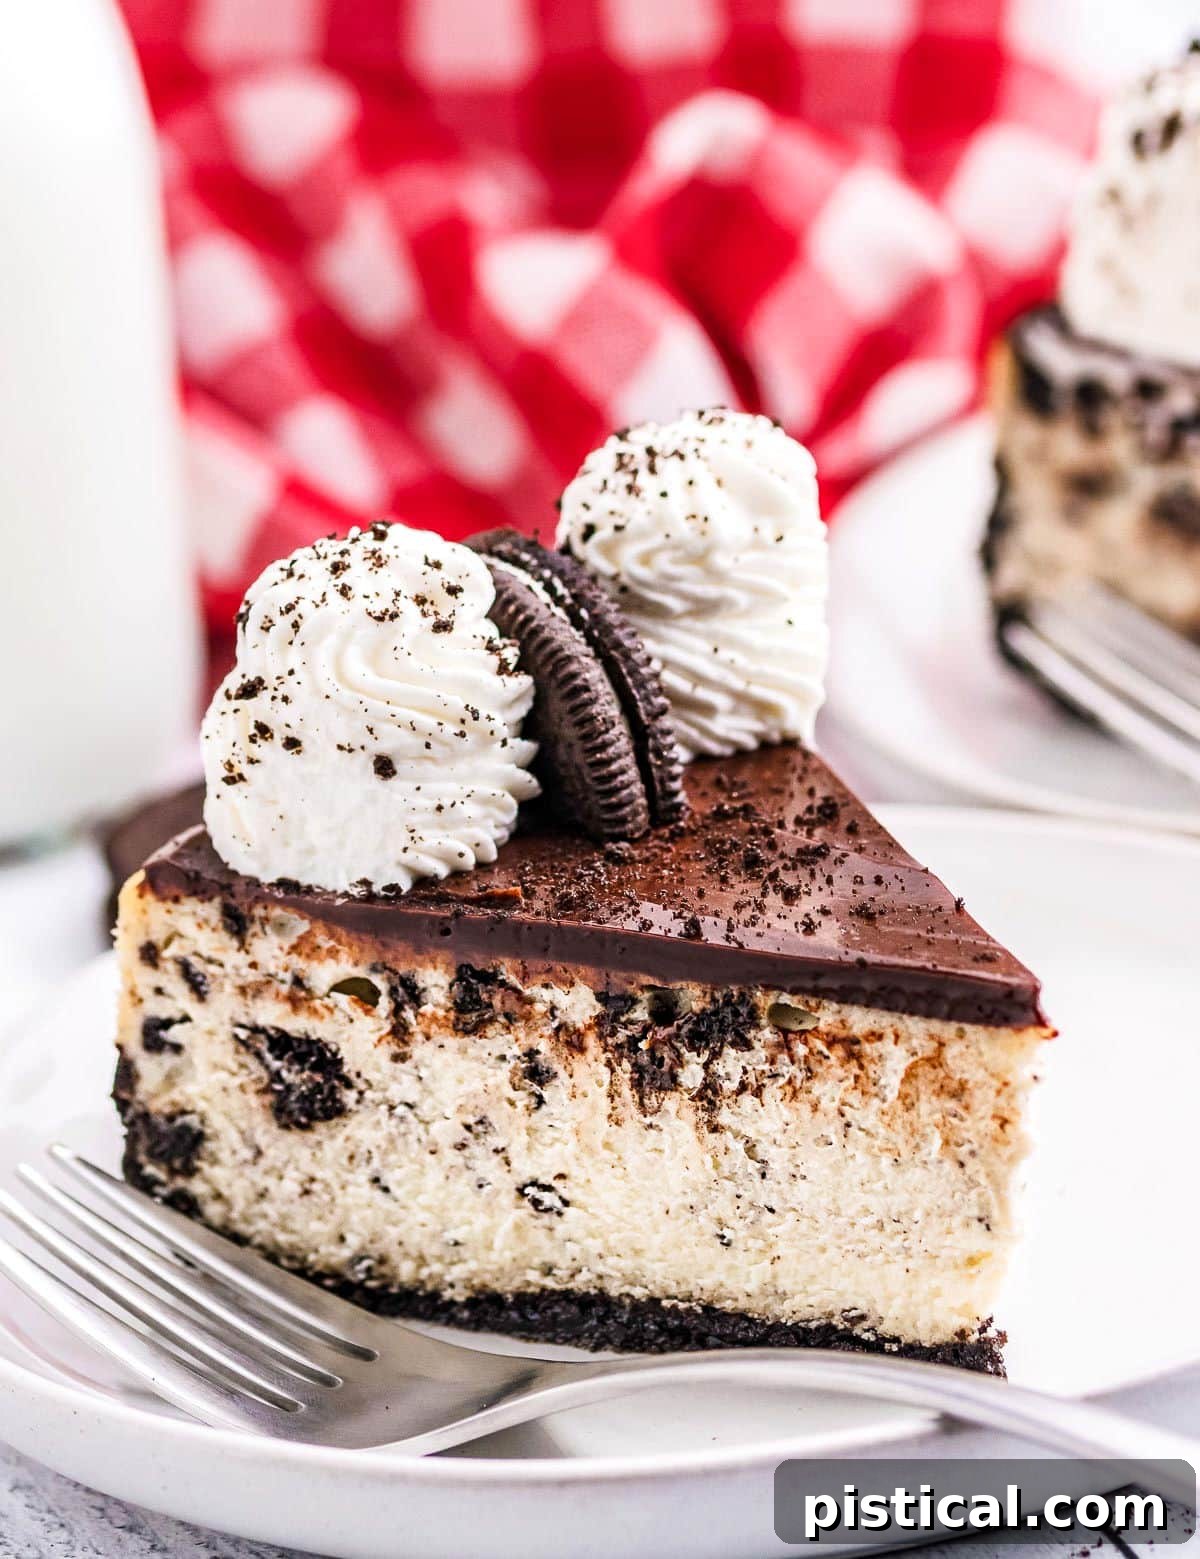
Prepare to discover your new favorite dessert! This Oreo cheesecake recipe offers an unparalleled blend of creamy indulgence and intense Oreo flavor. From the moment you taste the sturdy, chocolatey Oreo crust to the luscious cheesecake filling brimming with cookie bits, you’ll be captivated. The final touch of extra crushed Oreos sprinkled on top not only enhances the flavor but also adds a wonderfully festive and appealing look to this extraordinary dessert.
This cheesecake strikes a perfect balance: it’s sophisticated and special enough for holidays, anniversaries, or a romantic date night, yet straightforward enough to prepare for a casual family dinner or potluck. Its crowd-pleasing appeal ensures it will quickly become a cherished recipe in your culinary repertoire. Every bite is an experience of pure bliss, making it truly unforgettable.
The Ultimate Oreo Cheesecake Experience
For a dessert that effortlessly combines crumbly texture with rich, creamy goodness, this Oreo Cheesecake stands in a league of its own. Oreos hold a special place in many hearts, evoking nostalgic childhood memories of that iconic blue snack bag. This recipe transforms those fond memories into a sophisticated, yet fun, dessert.
Our Oreo Cheesecake is a luxurious creation, featuring a velvety cheesecake batter generously infused with coarsely chopped Oreo cookies. It sits atop a dark, buttery Oreo crumb crust, providing the perfect foundation of chocolatey crunch. The cheesecake is then elegantly coated with a shimmering pool of smooth chocolate ganache, adding another layer of rich cocoa flavor. Finally, it’s adorned with light and airy dollops of whipped cream, making each slice a perfectly balanced symphony of flavors and textures. This is more than just a cheesecake; it’s a delectable tribute to America’s favorite cookie, reimagined into a truly show-stopping dessert that promises to impress and delight every single time.
More Irresistible Oreo Recipes
Are you an undeniable fan of Oreo cookies? So are we! Their versatility makes them incredibly fun to eat on their own and even more exciting to bake with. If you’re looking for more ways to incorporate these beloved chocolatey delights into your desserts, explore some of our other favorite Oreo-inspired creations:
- Cookies and Cream Oreo Cake
- Easy Oreo Ice Cream Cake
- Homemade Oreo Pie Crust (a staple for many desserts!)
- Holiday Dipped Peppermint Oreos
- Funfetti Oreo Cheesecake Bars
- Butterscotch Peanut Butter Oreo Fudge
Essential Ingredients for Your Oreo Cheesecake
Crafting an Oreo Cheesecake that looks and tastes like it came from a gourmet bakery requires a few key components. Here’s a closer look at what you’ll need to create this show-stopping dessert. The full, printable recipe card with precise measurements is conveniently located at the end of this comprehensive guide.
- Oreos, of Course! This cheesecake is an ode to the Oreo, so we use them in abundance! You’ll need them finely crushed to form the perfect, sturdy crust, and then coarsely chopped for folding directly into the creamy cheesecake filling. For an extra touch of Oreo magic, I love to sprinkle any leftover crumbs generously over the finished dessert. If you prefer a milder chocolate flavor, or simply wish to try something different, Golden Oreos make an excellent substitute, offering a delightful vanilla twist.
- Cream Cheese: The heart of any great cheesecake! You’ll need several blocks of softened cream cheese to achieve that signature silky-smooth, slightly tangy filling. Ensuring your cream cheese is at proper room temperature is crucial for a lump-free batter. Along with the cream cheese, key supporting ingredients like all-purpose flour (to help prevent cracks and add structure), granulated sugar (for sweetness), pure vanilla extract (for depth of flavor), and heavy cream (to enhance richness and smooth consistency) work in harmony to create a perfectly balanced and stable cheesecake.
- Semi-Sweet Chocolate Chips: These little morsels are the foundation for our luxurious ganache. When gently melted with warm heavy cream, they transform into a glistening, pourable chocolate topping that adds an incredible layer of indulgence. It’s astonishing how just two ingredients can create such a beautiful, professional-looking glaze.
- Heavy Cream for Whipped Topping: While store-bought whipped cream can be convenient, I can’t stress enough how much better homemade whipped cream is for this recipe. It takes just a few minutes to literally whip up and offers a richer, fresher flavor and a much thicker, more stable texture than anything from a can. For an extra-stable topping that holds its shape beautifully for longer, especially when piping, consider making stabilized whipped cream with a touch of gelatin, as detailed in the recipe card. Alternatively, a classic homemade whipped cream works perfectly too!
Step-by-Step Guide: Crafting Your Oreo Cheesecake
Like any truly indulgent baked good, this Oreo cheesecake recipe is a labor of love, but one that is immensely rewarding. While the hands-on preparation time is manageable, allowing extra time and care during the baking and chilling phases will ensure a decadent dessert that’s perfect for your next dinner party or special occasion. Remember, patience is key, as the cheesecake will require a minimum of 6 hours of chilling before it’s ready to be served.
The Perfect Oreo Crust
- Prepare Your Pan and Preheat Oven: Begin by preheating your oven to 350°F (175°C). Lightly coat a 9-inch springform pan with non-stick baking spray. For an extra layer of protection against sticking, especially when removing the cheesecake, cut a round piece of parchment paper to fit the bottom of the pan and place it inside. This simple step can save you a lot of hassle!
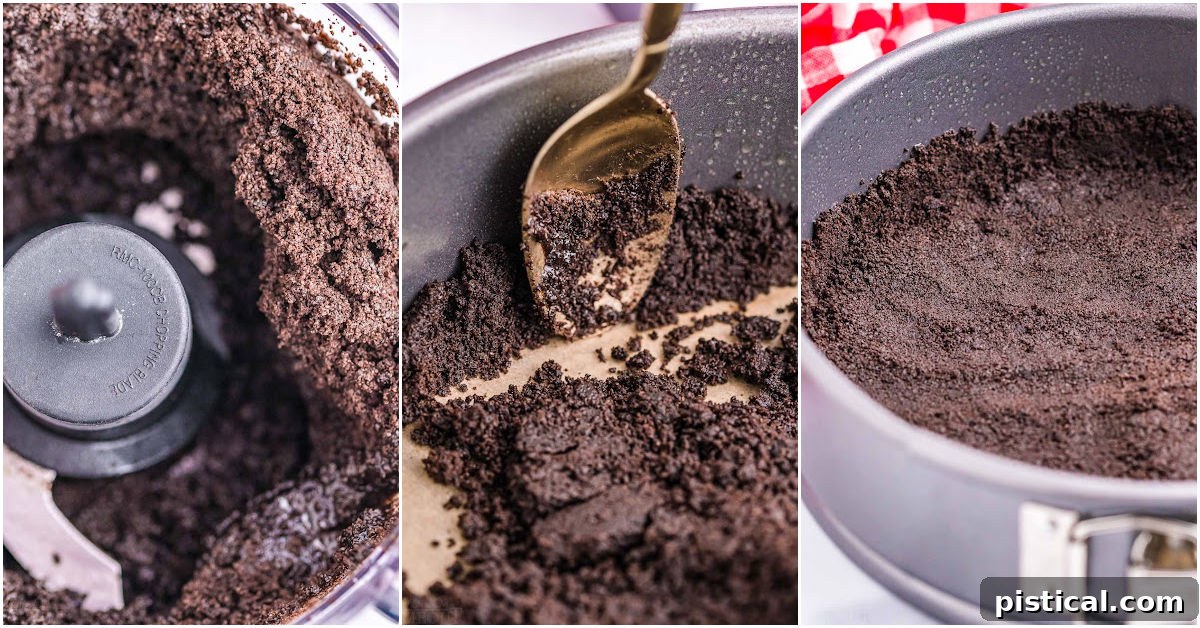
- Craft the Oreo Crumb Mixture: Take your Oreo cookies and place them in a food processor. Pulse until they are finely crushed, yielding approximately 2 cups of crumbs. Once finely crushed, add the melted butter to the food processor and pulse again until the crumbs are thoroughly moistened and well combined.
- Form the Crust: Transfer this buttery Oreo crumb mixture into your prepared springform pan. Using the back of a spoon, the bottom of a drinking glass, or a measuring cup, gently but firmly press the mixture evenly across the bottom and about 1 inch up the sides of the pan. A well-pressed crust is essential for holding its shape.
- Bake and Cool the Crust: Bake the formed crust in the preheated oven for 10 minutes. This helps to set the crust and makes it nice and sturdy. After baking, remove the pan from the oven and place it on a wire rack to cool completely while you prepare the filling.
Velvety Cheesecake Filling
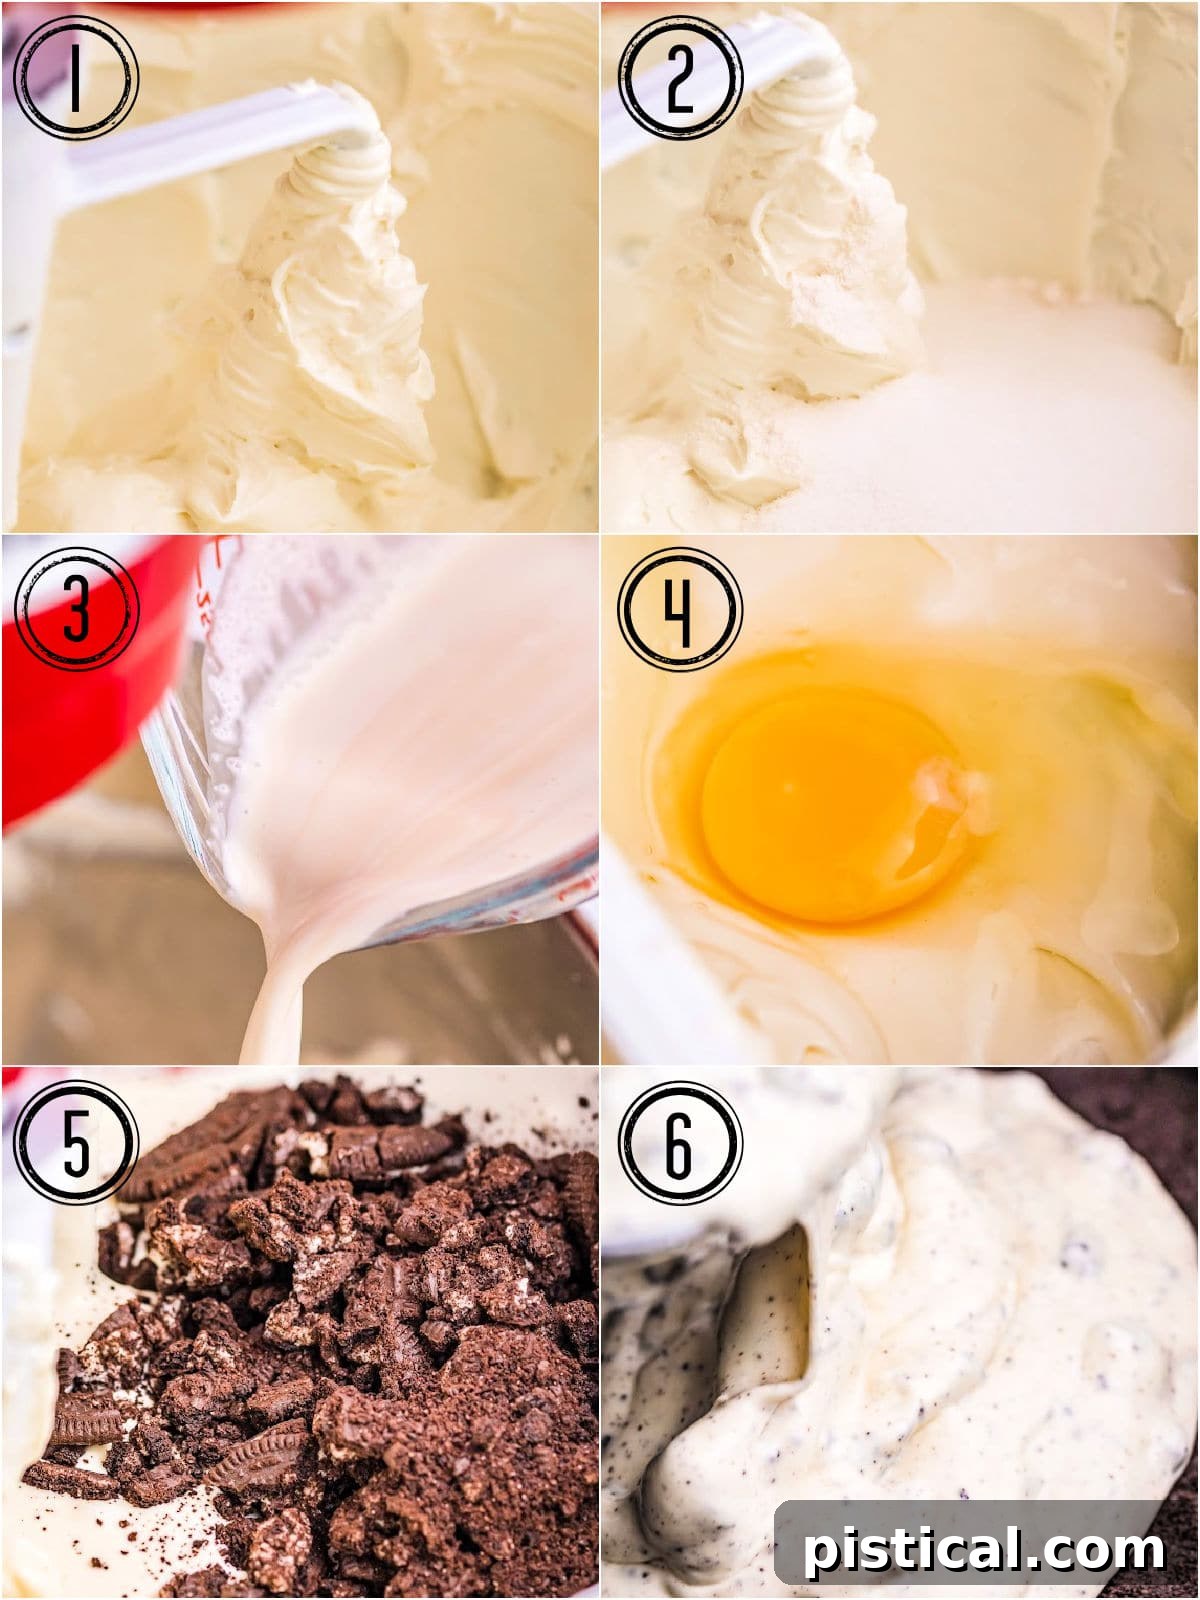
- Beat the Cream Cheese to Perfection: In the bowl of a stand mixer fitted with a paddle attachment, add the softened cream cheese. Beat the cream cheese on medium speed for about 5 to 7 minutes until it becomes incredibly light, fluffy, and completely smooth. This step is critical for achieving a lump-free and airy cheesecake texture. Remember to stop and scrape down the sides and bottom of the bowl frequently to ensure even mixing.
- Incorporate Sugar and Flour: With the mixer set to low speed, gradually add the granulated sugar and all-purpose flour to the cream cheese mixture. Mix until just combined, then increase the speed to medium and beat for another 1 to 2 minutes, allowing the sugar to fully dissolve.
- Add Vanilla, Cream, and Eggs: Pour in the vanilla extract and heavy cream. Mix on low speed until they are just incorporated. Increase the speed to high for about 1 to 2 minutes to ensure everything is thoroughly blended, then scrape down the sides and bottom of the bowl one last time. Reduce the mixer speed to low and add the eggs one at a time, mixing only until each egg is fully incorporated into the batter. Be very careful not to overmix after adding the eggs, as this can introduce too much air and lead to cracks.
- Fold in the Oreos: Gently fold the roughly chopped Oreo cookies into the cheesecake batter using a spatula. Mix until the cookie pieces are evenly distributed throughout the rich, creamy filling.
- Pour and Prepare for Baking: Carefully pour the cheesecake batter over the cooled Oreo crust in the springform pan. Use your spatula to gently smooth the top surface. Then, lightly tap the pan on your counter 2 to 3 times to release any trapped air bubbles, which can help prevent cracking during baking.
- Bake the Cheesecake (The Crucial Step!): Place the pan in the preheated oven and bake for 15 minutes. After this initial bake, *without opening the oven door*, reduce the oven temperature to 200°F (95°C) and continue baking for an additional 50 to 55 minutes. The cheesecake is done when the edges are set but the center still jiggles slightly, resembling the consistency of Jell-O – it should not be runny or watery. If the center appears too loose, bake for an additional 5-10 minutes, checking frequently. Keep in mind that the cheesecake will firm up considerably as it cools.
- Cool Slowly in the Oven: To prevent cracking, a slow cooling process is essential. Turn off the oven, crack the oven door open slightly, and allow the cheesecake to cool inside the oven for 15 to 20 minutes.
- Chill for Perfection: Remove the cheesecake from the oven and transfer it to a wire rack to cool completely to room temperature. Once cooled, move the cheesecake to the refrigerator and chill for at least 6 hours, or ideally, overnight. This crucial chilling period allows the cheesecake to fully set and develop its rich flavor and firm texture.
Silky Chocolate Ganache Topping
- Prepare the Ganache: Once your cheesecake is thoroughly chilled, it’s time to make the glossy chocolate ganache topping. In a small saucepan or microwave-safe bowl, bring the heavy cream just to a simmer (do not boil). Pour the hot cream over your semi-sweet chocolate chips and let it sit undisturbed for 1 to 2 minutes. This allows the heat from the cream to melt the chocolate. Then, whisk gently until the mixture is completely smooth and luscious.
- Apply and Set the Ganache: Allow the ganache to cool for 2 to 3 minutes, just enough for it to slightly thicken but still be pourable. Carefully pour it over the top of your chilled cheesecake, using an offset spatula to gently spread it evenly to the edges. Return the cheesecake to the refrigerator to allow the ganache to set completely, which will take at least 30-60 minutes.
Optional: Stabilized Whipped Cream for Piping
For a beautiful, piped topping that holds its shape for extended periods, stabilized whipped cream is a fantastic choice. If you prefer a more traditional, unstabilized whipped cream, you can refer to my classic homemade whipped cream recipe.
- Dissolve Gelatin: In a small, microwave-safe bowl, combine the unflavored gelatin powder and cold water. Let it sit for 5 minutes to bloom. Then, microwave for 30 to 45 seconds, or until the gelatin is completely dissolved and clear. Set aside to cool slightly (it should still be liquid).
- Whip the Cream: In the clean, chilled bowl of a stand mixer fitted with a whisk attachment, combine the cold heavy whipping cream and powdered sugar. Begin whipping on medium-high speed.
- Add Gelatin for Stability: As the cream mixture starts to thicken and soft peaks begin to form, reduce the mixer speed to medium. Slowly and steadily pour the cooled, dissolved gelatin down the sides of the bowl while the mixer is running.
- Whisk to Stiff Peaks: Increase the mixer speed back to high and continue to whisk until stiff peaks form. The whipped cream should be firm and hold its shape beautifully.
- Pipe and Garnish: Transfer your stabilized whipped cream to a piping bag fitted with a large star tip (or your favorite decorative tip). Pipe elegant swirls or dollops around the top edge of the cheesecake. For the ultimate finish, sprinkle additional crushed Oreo pieces over the whipped cream just before serving.
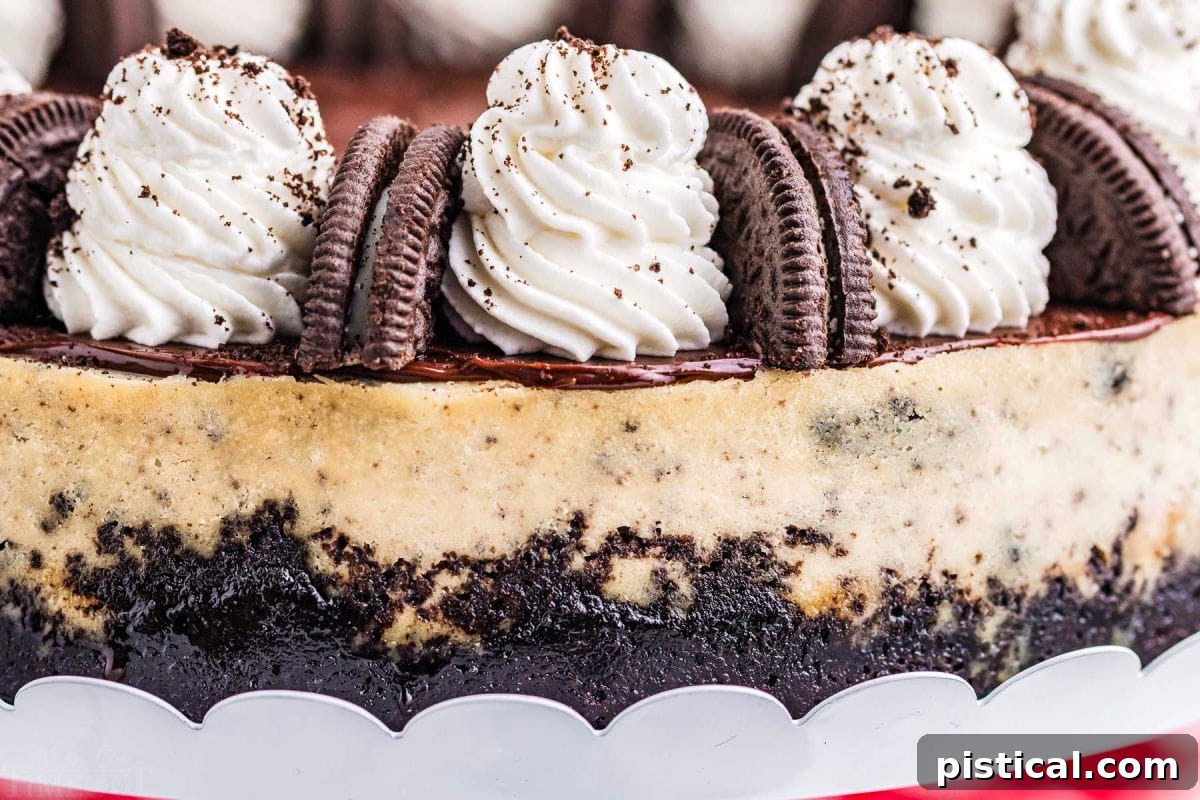
Before serving, carefully release the springform pan and remove it. For an extra touch of visual appeal and flavor, garnish with additional crushed Oreos (optional, but highly recommended!). Slice your magnificent cheesecake and prepare to savor every indulgent bite! Store any leftover slices in an airtight container in the refrigerator for up to three days to maintain freshness.
Pro Tips and Tricks for a Flawless Cheesecake
Achieving a bakery-worthy cheesecake at home is entirely possible with a few insider tips and tricks. Here’s how to ensure your Oreo Cheesecake turns out perfectly smooth, creamy, and crack-free every time:
- Room Temperature is Key for Cream Cheese: This is perhaps the most critical tip! Ensure your cream cheese reaches proper room temperature before you begin mixing. Straight from the fridge, it will be too cold and lead to a lumpy batter. Warming it in the microwave can make it too hot and runny, resulting in a “cheesecake soup.” The ideal consistency is soft enough to yield to gentle pressure but still holds its shape. For that perfect “just right” texture, leave your cream cheese out on the counter for about 90 minutes.
- For a Silky Smooth Filling, Mix Smart: To guarantee a consistently smooth cheesecake filling, take your time creaming the softened cream cheese initially. Beat it alone for a good 5 to 7 minutes *before* adding any other ingredients. This creates a light and airy base. When it comes to the eggs, always add them *last* and mix only until they are just incorporated – not a second more! Overmixing after adding the eggs introduces too much air, which expands during baking and contracts during cooling, often leading to cracks.
- DO NOT Overbake Your Oreo Cheesecake! Overbaking is the arch-nemesis of a creamy cheesecake. If your cheesecake bakes until it’s completely firm in the middle, it will likely turn out dry, dense, and granular – precisely what we want to avoid. You’ll know it’s perfectly done when the edges are set and firm, but the very center still has a slight, delicate jiggle, much like a set Jell-O. Trust this gentle wobble; it means a perfectly moist and creamy interior.
- Prevent Cracks with Gradual Cooling: To achieve a flawlessly smooth surface on your cheesecake, slow and gradual cooling is paramount. Once the cheesecake has finished baking (and you’ve verified the “jiggle test”), turn off the oven completely. Immediately crack the oven door open about an inch or two and allow the cheesecake to cool inside the oven for 15-20 minutes. This prevents a sudden temperature drop, which can cause cracking. Even if a small crack does appear (it happens to the best of us!), don’t despair! Your luscious ganache layer is on standby to beautifully cover any imperfections.
- Gentle Springform Removal: When it’s time to remove the springform ring, be extra gentle to avoid damaging the crust. For a clean release, run a thin knife or offset spatula (heated under very hot water and wiped dry) carefully around the inner edge of the pan 2-3 times before unclasping. This helps to loosen the crust from the pan sides.
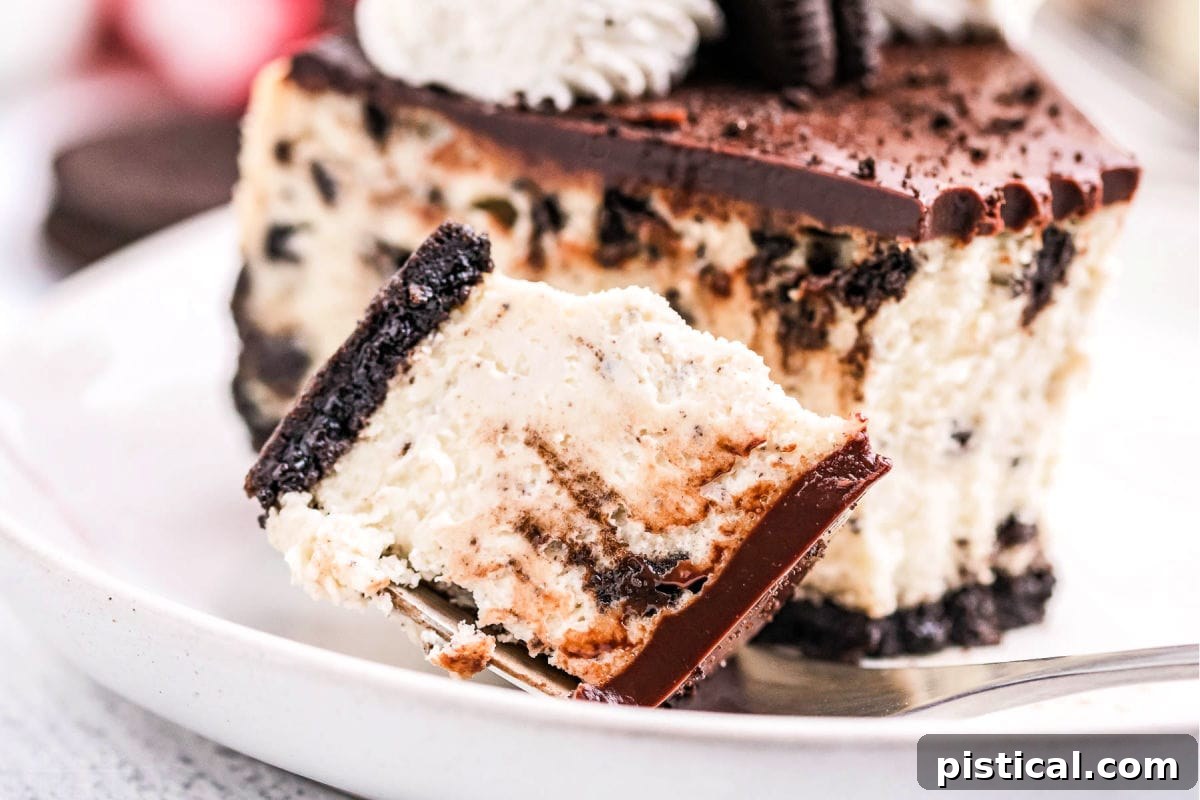
- For Picture-Perfect Cheesecake Slices: To achieve clean, professional-looking slices, use a large, straight-blade knife. Immerse the blade in very hot water for a few seconds, then wipe it completely dry. Make your first cut, then repeat the process – heat, wipe, cut – for each subsequent slice. This ensures a smooth, non-stick cut every time.
Oreo Cheesecake FAQs
You’ve got questions, we’ve got answers! Here are some common queries about making and enjoying your magnificent Oreo Cheesecake:
How do I store leftover cheesecake? To keep your leftover cheesecake fresh and delicious, the most convenient method is to cut it into individual, pre-portioned slices. Place these slices in an airtight container, ensuring they don’t get squished, and store them in the refrigerator. The cheesecake will maintain its optimal freshness for about 2 to 4 days.
Can I freeze this Oreo cheesecake? Absolutely! Cheesecake freezes wonderfully. If you plan to freeze it, allow the baked cheesecake to cool completely, but *wait to add any toppings* (like ganache or whipped cream). For best results and easy serving, freeze it in pre-portioned slices. Cut your cheesecake, then individually wrap each slice tightly in parchment paper, followed by a layer of plastic wrap, and then aluminum foil. Place the well-wrapped slices in a freezer-safe Ziplock bag or an airtight container. They will keep beautifully in the freezer for up to 3 months. To enjoy, simply remove the desired number of slices from the freezer and thaw them gently in the refrigerator overnight before adding your fresh toppings.
Do I need a water bath for this cheesecake? This particular recipe is designed to bake beautifully without a water bath, thanks to the controlled baking temperature and specific ingredient ratios. However, a water bath is a great technique to ensure an even more moist texture and further reduce the risk of cracks, especially for very large cheesecakes or if your oven tends to run hot. If you choose to use one, wrap the bottom of your springform pan tightly with several layers of heavy-duty aluminum foil to prevent water from seeping in, then place it in a larger roasting pan filled with about an inch of hot water before baking.
Can I make this cheesecake ahead of time? This cheesecake is an excellent make-ahead dessert! In fact, it’s encouraged. Preparing it a day in advance allows ample time for it to chill completely, which is crucial for its texture and flavor to fully develop and for it to slice cleanly. Just cover it loosely with plastic wrap after it’s cooled, and store it in the refrigerator. Add the ganache and whipped cream toppings just a few hours before serving for the freshest presentation.
Explore More Cheesecake Delights
Can’t get enough of that rich, creamy cheesecake goodness? We understand completely! Dive into these other incredible dessert recipes that feature cheesecake in all its delightful forms:
- Decadent Espresso Cheesecake
- Quick Chocolate Chip No-Bake Cheesecake
- Irresistible Cheesecake Brownies
- Creamy Peanut Butter Cup Cheesecake Fudge
- Scrumptious Chocolate Chip Cookie Cheesecake Bars
- Effortless No-Bake Banana Cream Pudding Cheesecake
- Triple Threat Chocolate Cheesecake (for the ultimate chocolate lover!)
- Elegant Chocolate Marble Mini Cheesecakes
- Delightful Cheesecake Chocolate Chip Muffins
How To Make Oreo Cheesecake: The Recipe Card
Print
Pin
Oreo Cheesecake Recipe
Ingredients
Crust
- 2 cups Oreo crumbs (about 18 cookies with cream)
- 4 tablespoons butter (melted)
Cheesecake Filling
- 32 ounces cream cheese (4x 8 ounce packages, softened)
- ¾ cup granulated sugar
- 3 tablespoons all purpose flour
- 2 teaspoons vanilla extract
- ¾ cup heavy whipping cream
- 3 eggs (room temperature)
- 12 Oreos (roughly chopped)
Chocolate Ganache
- 1 cup semi-sweet chocolate chips
- ½ cup heavy whipping cream
Stabilized Whipped Cream
- 4 teaspoons water
- 1 teaspoon unflavored gelatin
- 1 cup heavy whipping cream
- ⅓ cup powdered sugar
Instructions
Crust:
-
Preheat your oven to 350°F (175°C) and prepare a 9-inch springform pan by spraying with non-stick spray and setting aside. For added protection against sticking, you can also add a round of parchment paper to the bottom of the springform pan.
-
Add Oreos to a food processor and pulse until you yield 2 cups of fine crumbs. Then, add in the melted butter and pulse again until the mixture is well combined and moistened. Dump this mixture into the sprayed pan and form the crust by using the back of a spoon, the bottom of a glass, or a measuring cup to gently but firmly press it into the pan. Be sure to bring the crumbs up approximately 1 inch up the sides of the pan to create a sturdy border.2 cups Oreo crumbs, 4 tablespoons butter
-
Bake the prepared crust for 10 minutes, then remove it from the oven and allow it to cool completely on a wire rack while you prepare the filling.
Filling:
-
To prepare the cheesecake filling, add the softened cream cheese to the bowl of a stand mixer equipped with a paddle attachment. Cream the softened cream cheese until it is light and fluffy, about 5 to 6 minutes, ensuring you scrape down the sides and bottom of the mixing bowl frequently to achieve an even, lump-free consistency.32 ounces cream cheese
-
With the mixer on low speed, slowly add the granulated sugar and all-purpose flour. Once these ingredients are combined, increase the mixer to medium speed and mix for an additional 1 to 2 minutes until fully integrated.¾ cup granulated sugar, 3 tablespoons all purpose flour
-
Add the vanilla extract and heavy whipping cream and mix on low speed until just combined. Slowly increase the speed to high for about 1 to 2 minutes to ensure thorough blending. Scrape the sides and bottom of the bowl again if needed before adding the eggs. Reduce the mixer to low speed and add the eggs one at a time, mixing only until each egg is fully incorporated. It is crucial not to overmix after adding the eggs, as this can lead to cracks in your finished cheesecake.2 teaspoons vanilla extract, ¾ cup heavy whipping cream, 3 eggs
-
Gently fold in the roughly chopped Oreo cookies using a spatula until they are well incorporated and evenly distributed throughout the batter.12 Oreos
-
Pour the smooth batter into the prepared springform pan over the cooled crust and gently smooth the top surface with your spatula. Lightly tap the pan on the counter 2 to 3 times to help release any trapped air bubbles, which can prevent cracks during baking.
-
Bake for 15 minutes at 350°F (175°C). Then, *without opening the oven door*, reduce the heat to 200°F (95°C) and continue to bake for an additional 50 to 55 minutes, or until the center jiggles slightly (like Jell-O) and the edges are set. If the center still appears too loose, bake for an additional 5-10 minutes, checking often. Remember, the cheesecake will continue to firm up as it cools.
-
Once baked, turn off the oven and crack the oven door open slightly to allow the cheesecake to cool slowly for 15 to 20 minutes before removing it. This gradual cooling helps prevent cracks.
-
Transfer the cheesecake to a wire rack to cool completely to room temperature. Once cooled, move it to the refrigerator to chill for at least 6 hours. For the best possible texture and flavor, I highly recommend letting it chill overnight.
Chocolate Ganache
-
Once the cheesecake is thoroughly chilled, prepare the chocolate ganache topping. Bring the heavy cream just to a simmer (you can do this on the stove top or in the microwave). Carefully pour the hot cream over the semi-sweet chocolate chips and allow it to sit undisturbed for 1 to 2 minutes. Then, whisk gently until the mixture is completely smooth and glossy.1 cup semi-sweet chocolate chips, ½ cup heavy whipping cream
-
Allow the ganache to cool for 2 to 3 minutes; it should still be pourable but slightly thickened. Pour it evenly over the top of the chilled cheesecake. After smoothing the ganache with an offset spatula, return the cheesecake to the refrigerator to allow the ganache to set completely, typically about 30-60 minutes.
Whipped Cream
-
Combine the gelatin powder and cold water in a small microwave-safe bowl. Let it bloom for 5 minutes. Microwave for 30 to 45 seconds, or until the gelatin is completely dissolved and clear. Set aside to cool slightly, ensuring it remains liquid.1 teaspoon unflavored gelatin, 4 teaspoons water
-
In the chilled bowl of a stand mixer equipped with a whisk attachment, add the cold heavy whipping cream and powdered sugar. Whip on medium-high speed until the mixture starts to thicken and soft peaks form.⅓ cup powdered sugar, 1 cup heavy whipping cream
-
Once the mixture begins to thicken, reduce the mixer to medium speed, and slowly pour the cooled, dissolved gelatin down the sides of the bowl. Increase the mixer to high speed and whisk until stiff peaks form. The whipped cream should be firm and hold its shape.
-
Transfer your whipped cream to a piping bag fitted with a large star tip (or your chosen decorative tip). Pipe beautiful swirls or dollops around the top edge of the cheesecake. Garnish with additional crushed Oreo pieces and serve immediately.