
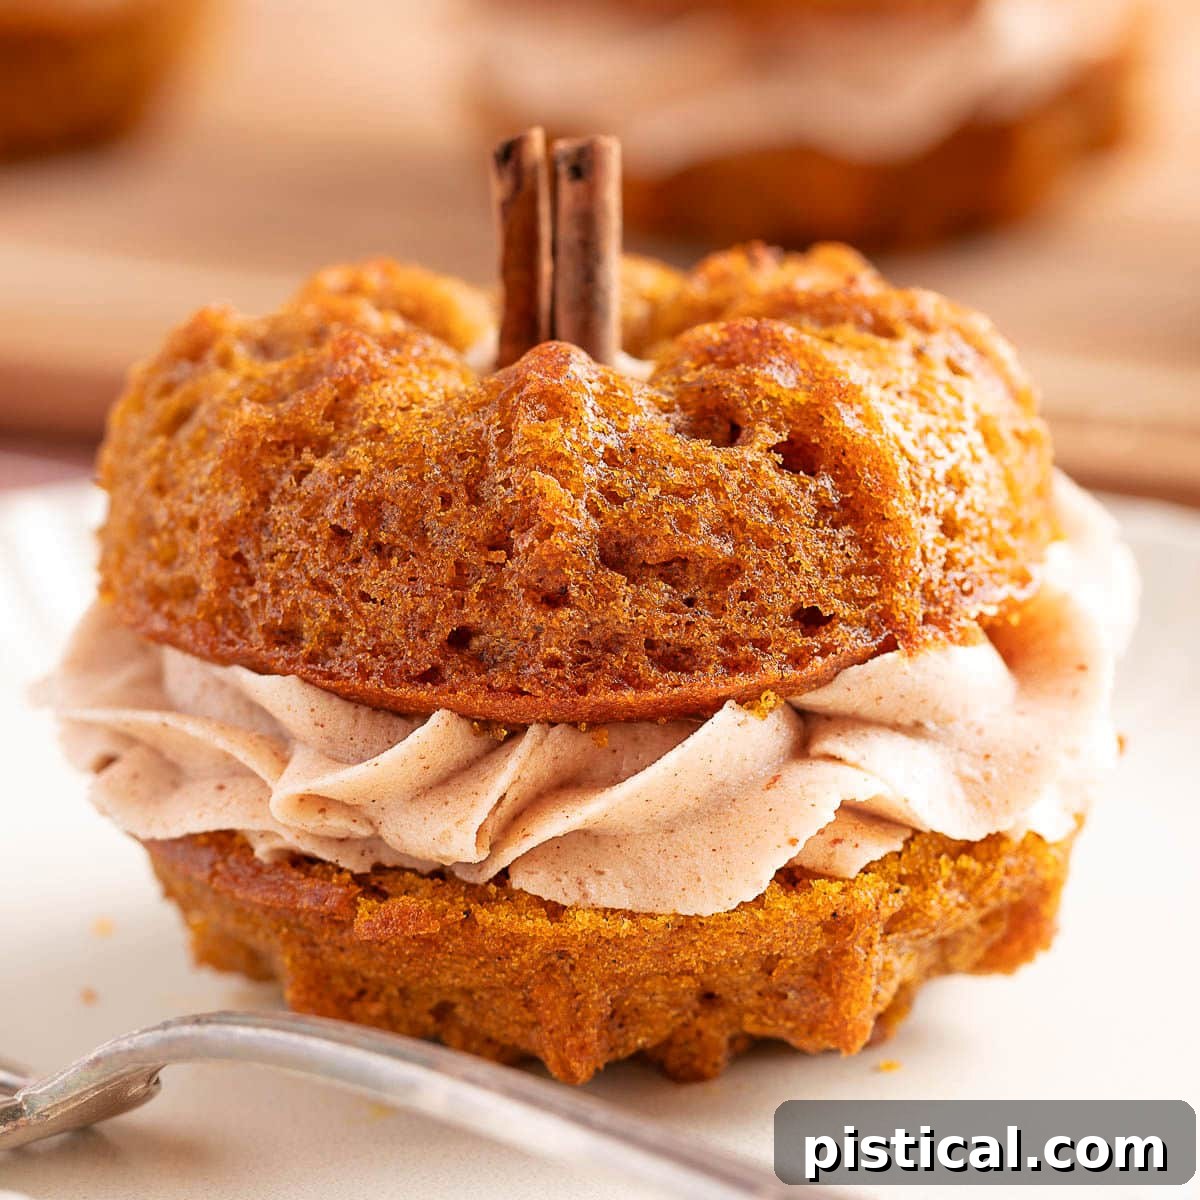
Prepare to fall in love with these adorable Mini Pumpkin Bundt Cakes – a delightful seasonal treat that brings together tender, moist pumpkin cake with an unforgettable cinnamon brown butter frosting. Each bite is a symphony of warm fall spices, real pumpkin puree, and the rich, nutty notes of browned butter, culminating in a dessert that’s both comforting and elegant. These enchanting Mini Pumpkin Bundt Cakes are perfect for gracing your holiday dessert tables, adding a festive touch to any autumn gathering, or simply enjoyed as a cozy indulgence with a steaming cup of coffee or tea. Their individual size makes them incredibly charming and easy to serve, ensuring every guest feels special. If you’re eager to explore more delicious pumpkin creations, don’t miss our other favorites like the luscious Pumpkin Delight, charming Mini Pumpkin Pies, and wonderfully soft Pumpkin Cupcakes!
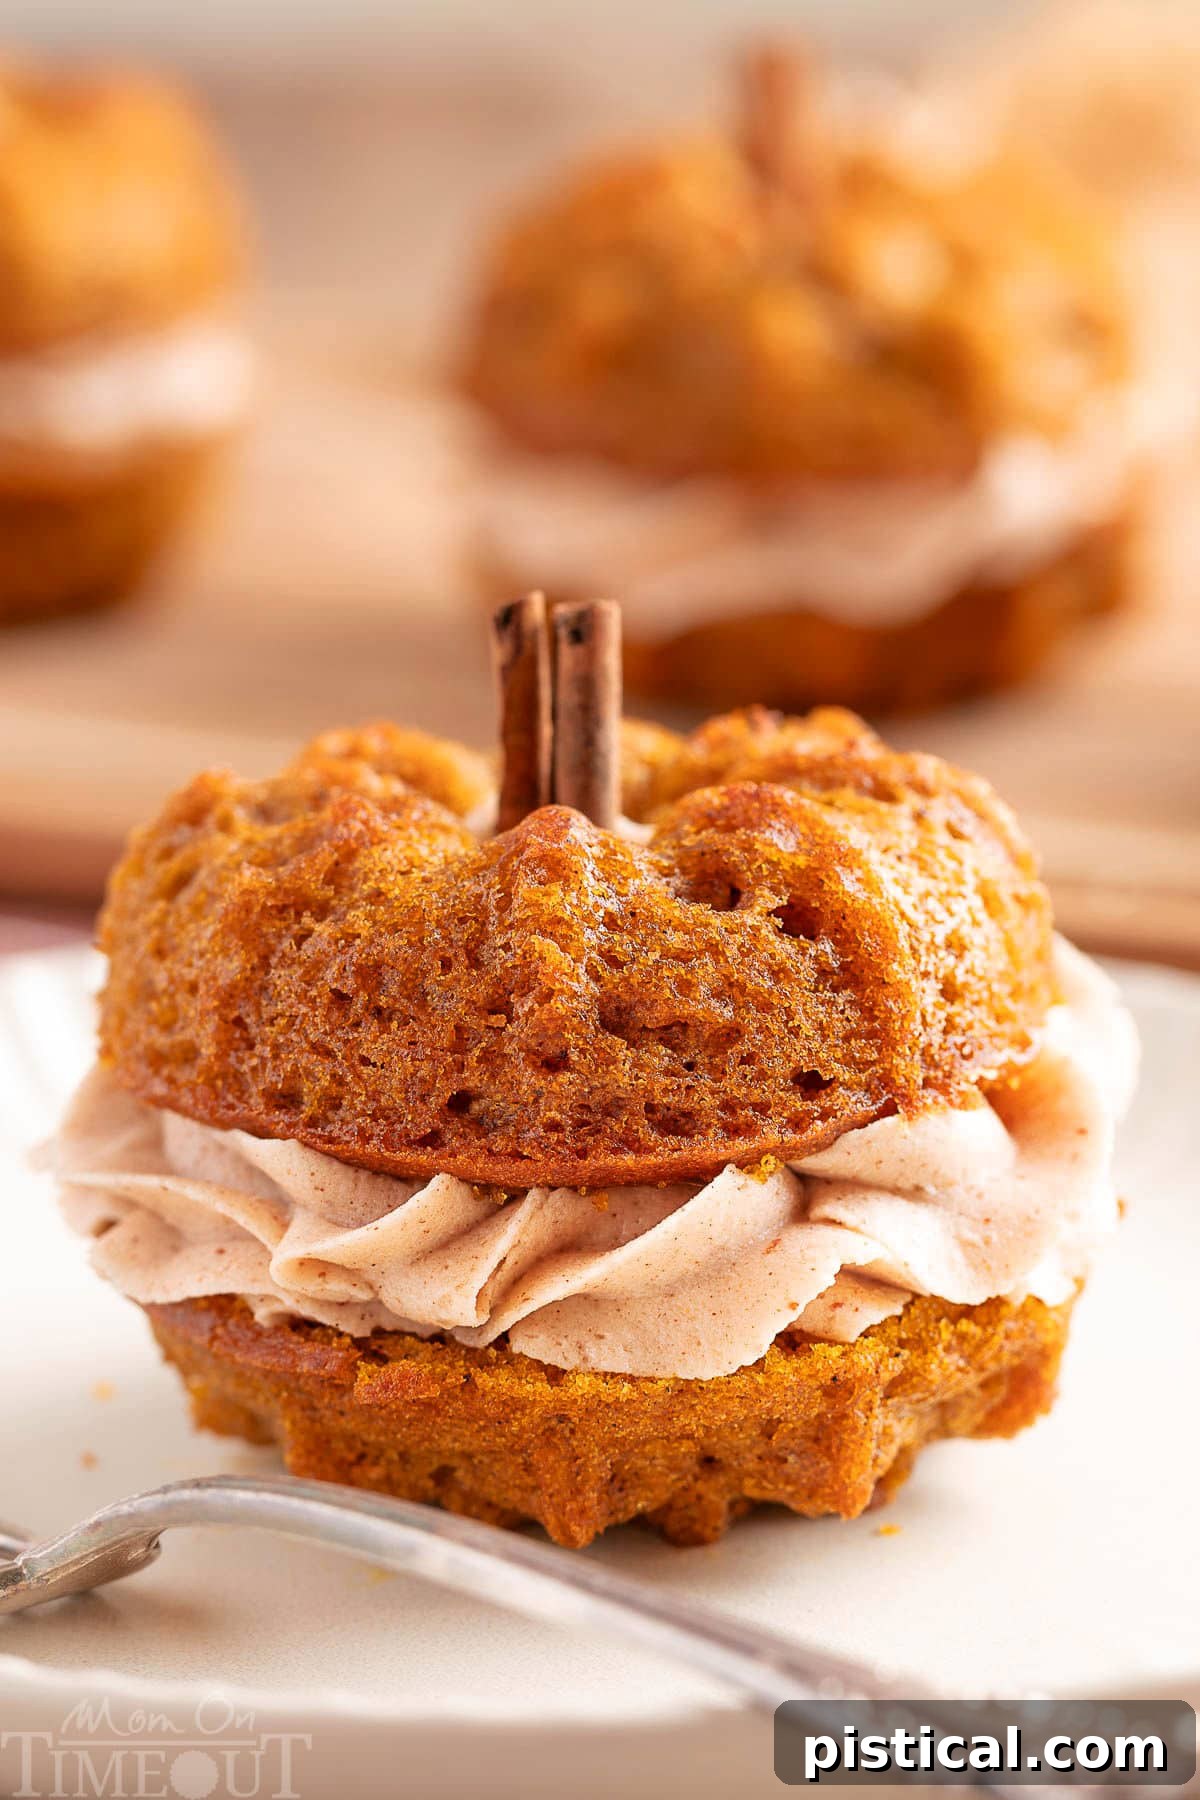
Mini Pumpkin Bundt Cakes: A Recipe for Fall’s Favorite Treat
These mini Pumpkin Bundt Cakes are more than just a dessert; they are an embodiment of autumn itself. So irresistibly cute and twice as delicious, they make an ideal centerpiece for fall and winter celebrations, bringing a touch of homemade warmth to any occasion. Each miniature bundt cake boasts an incredibly soft and tender crumb, generously infused with the classic, comforting aroma of pumpkin and a delicate blend of warm spices. Imagine the cozy scent filling your kitchen as these bake!
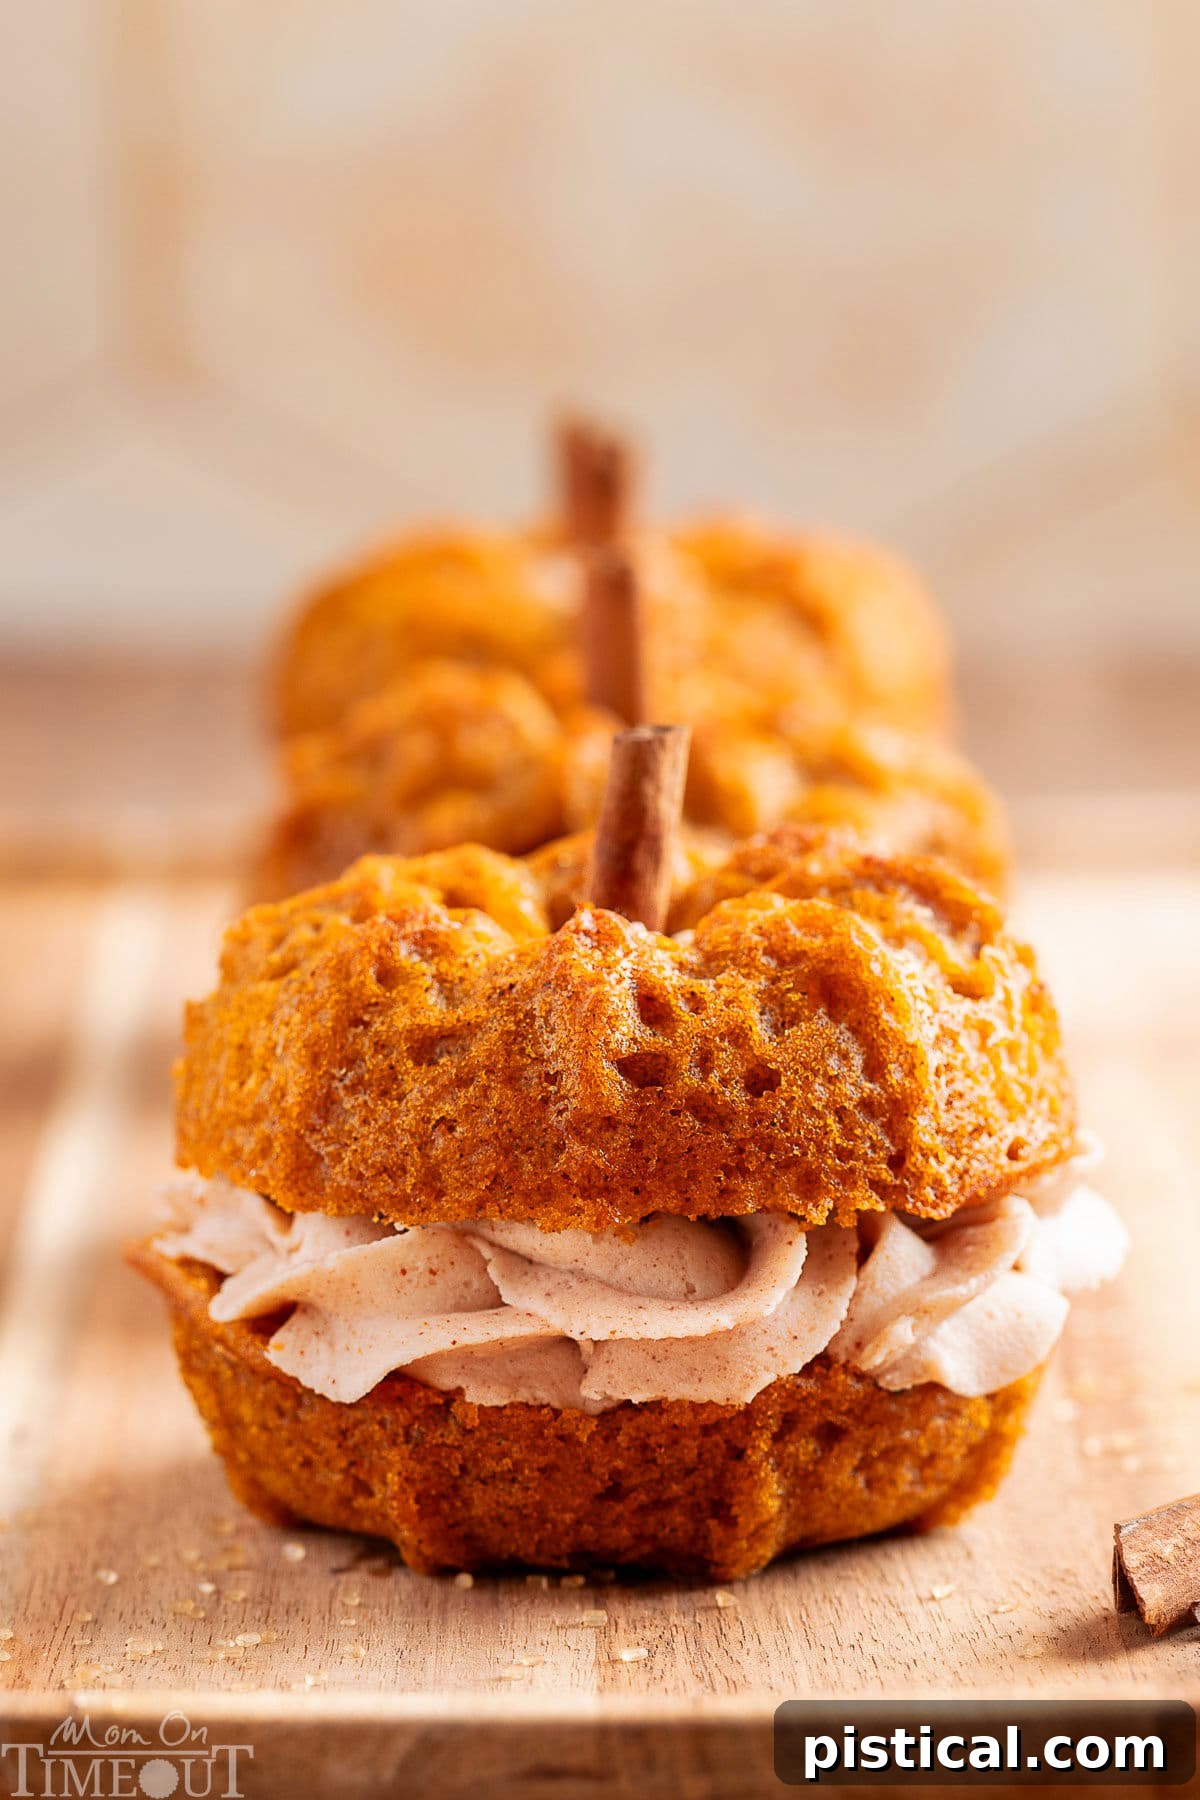
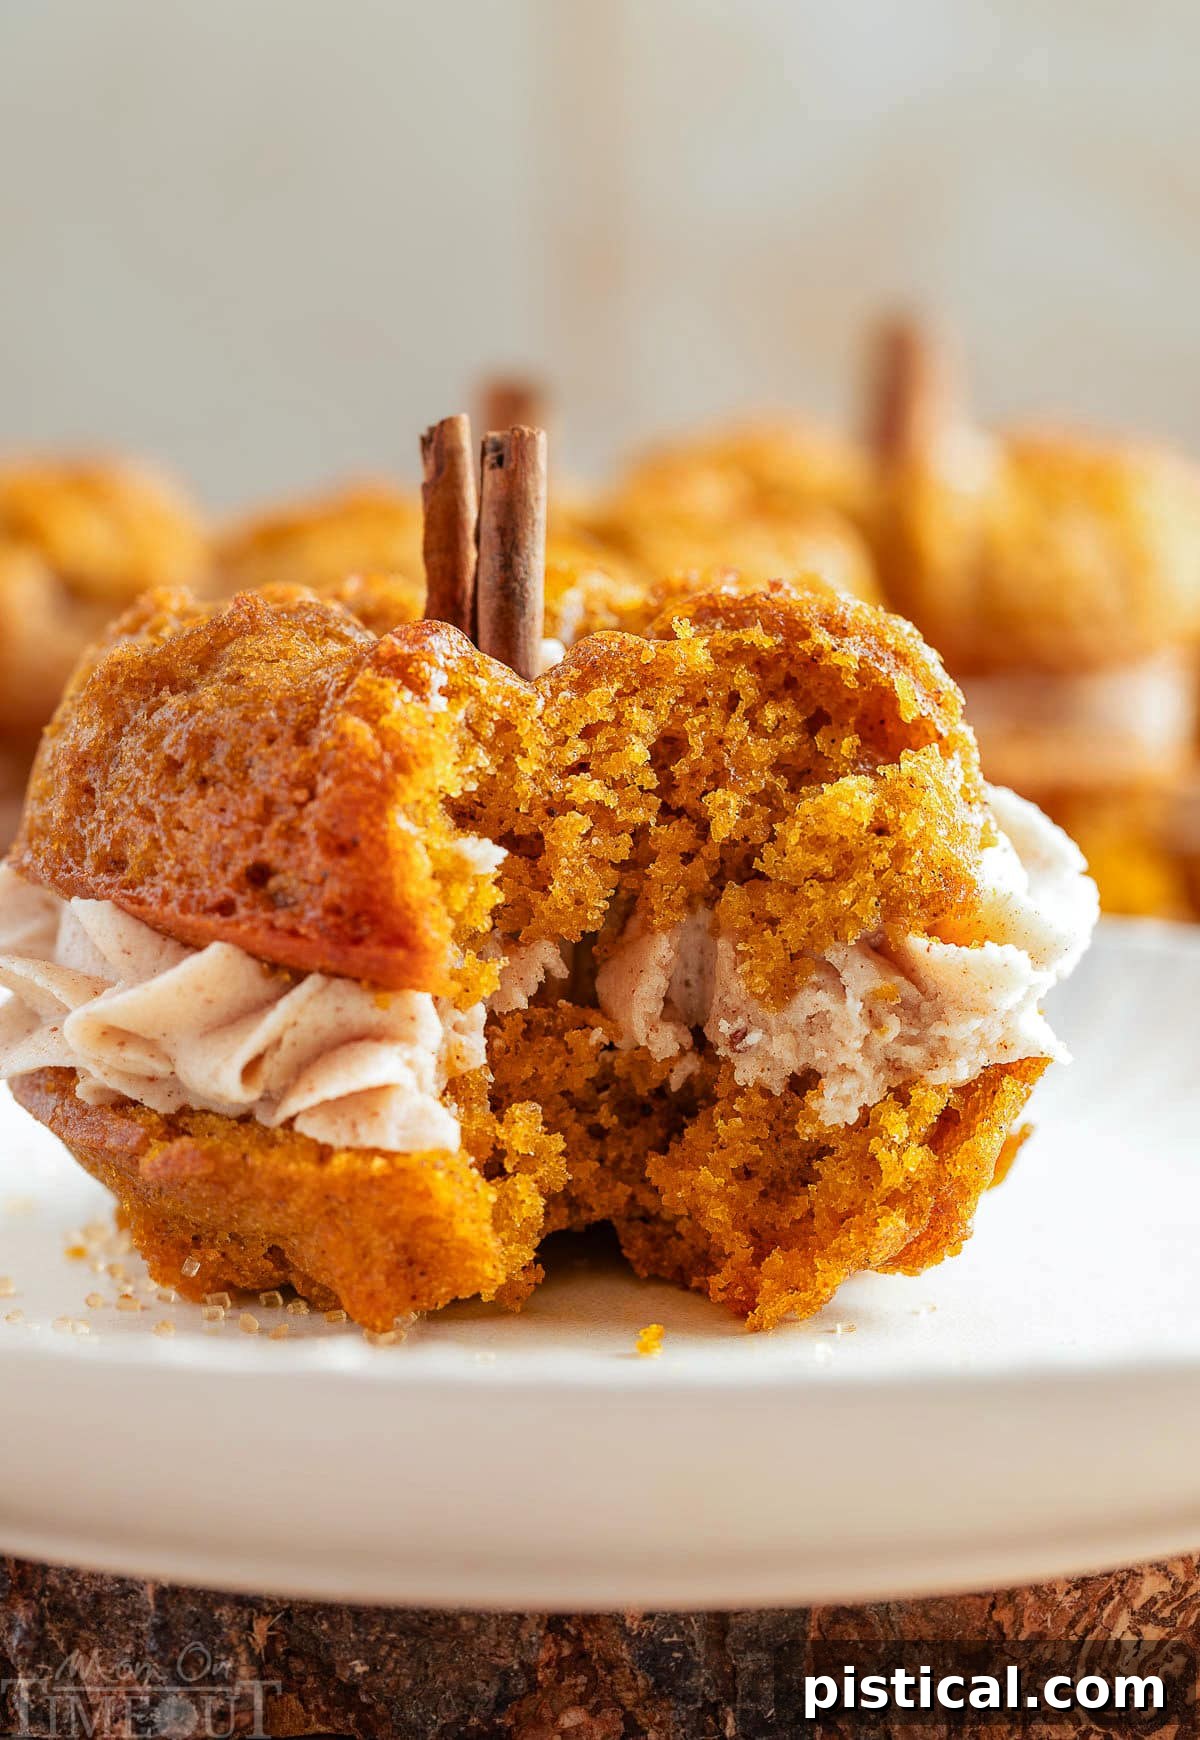
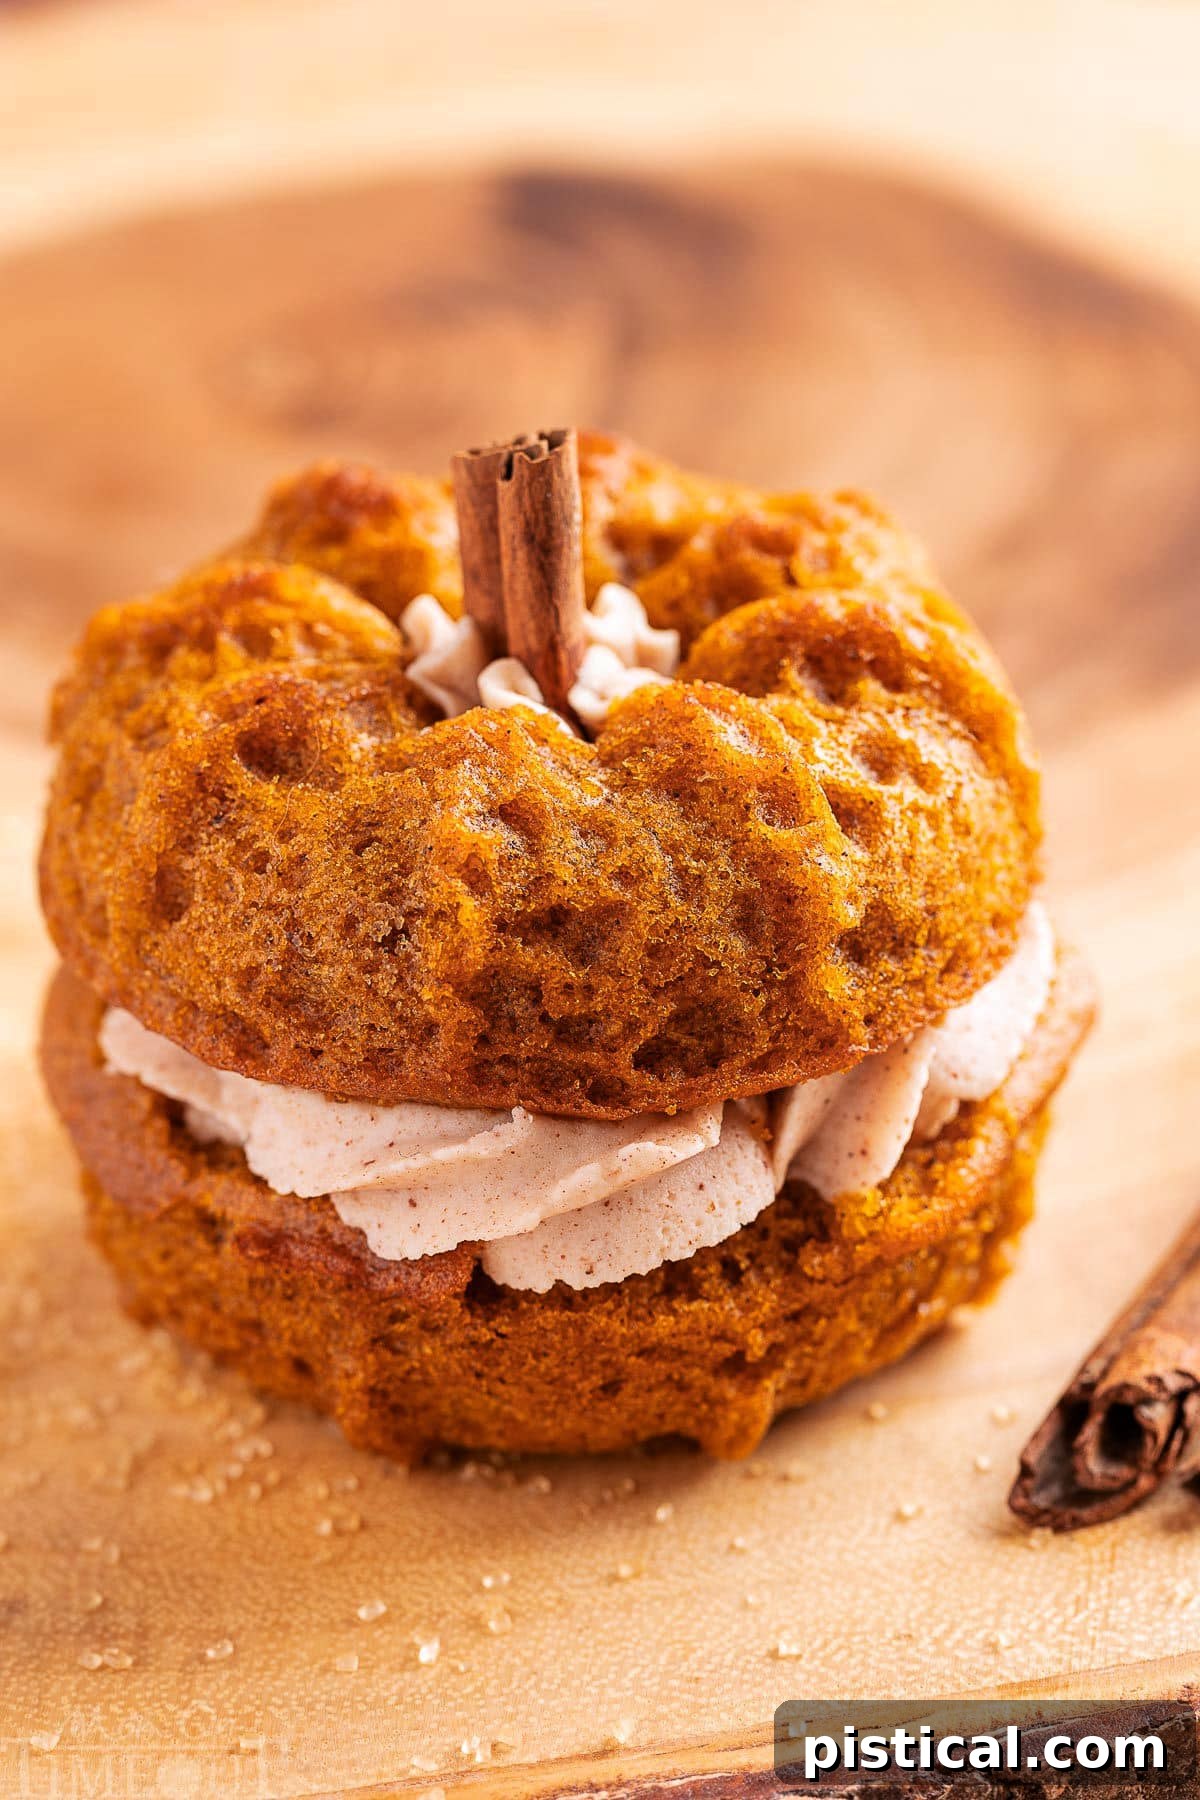
Designed to resemble adorable miniature pumpkins, these cakes are thoughtfully stacked. Between the two halves, a generous swirl of our signature cinnamon brown butter buttercream creates a creamy, nutty, and subtly sweet filling. This rich frosting perfectly harmonizes with the spiced pumpkin flavor, elevating each bite into a truly memorable experience. Their charming appearance makes them an instant hit at any gathering, eliciting smiles and compliments from guests of all ages. They’re not just a dessert; they’re a conversation starter and a symbol of seasonal cheer!
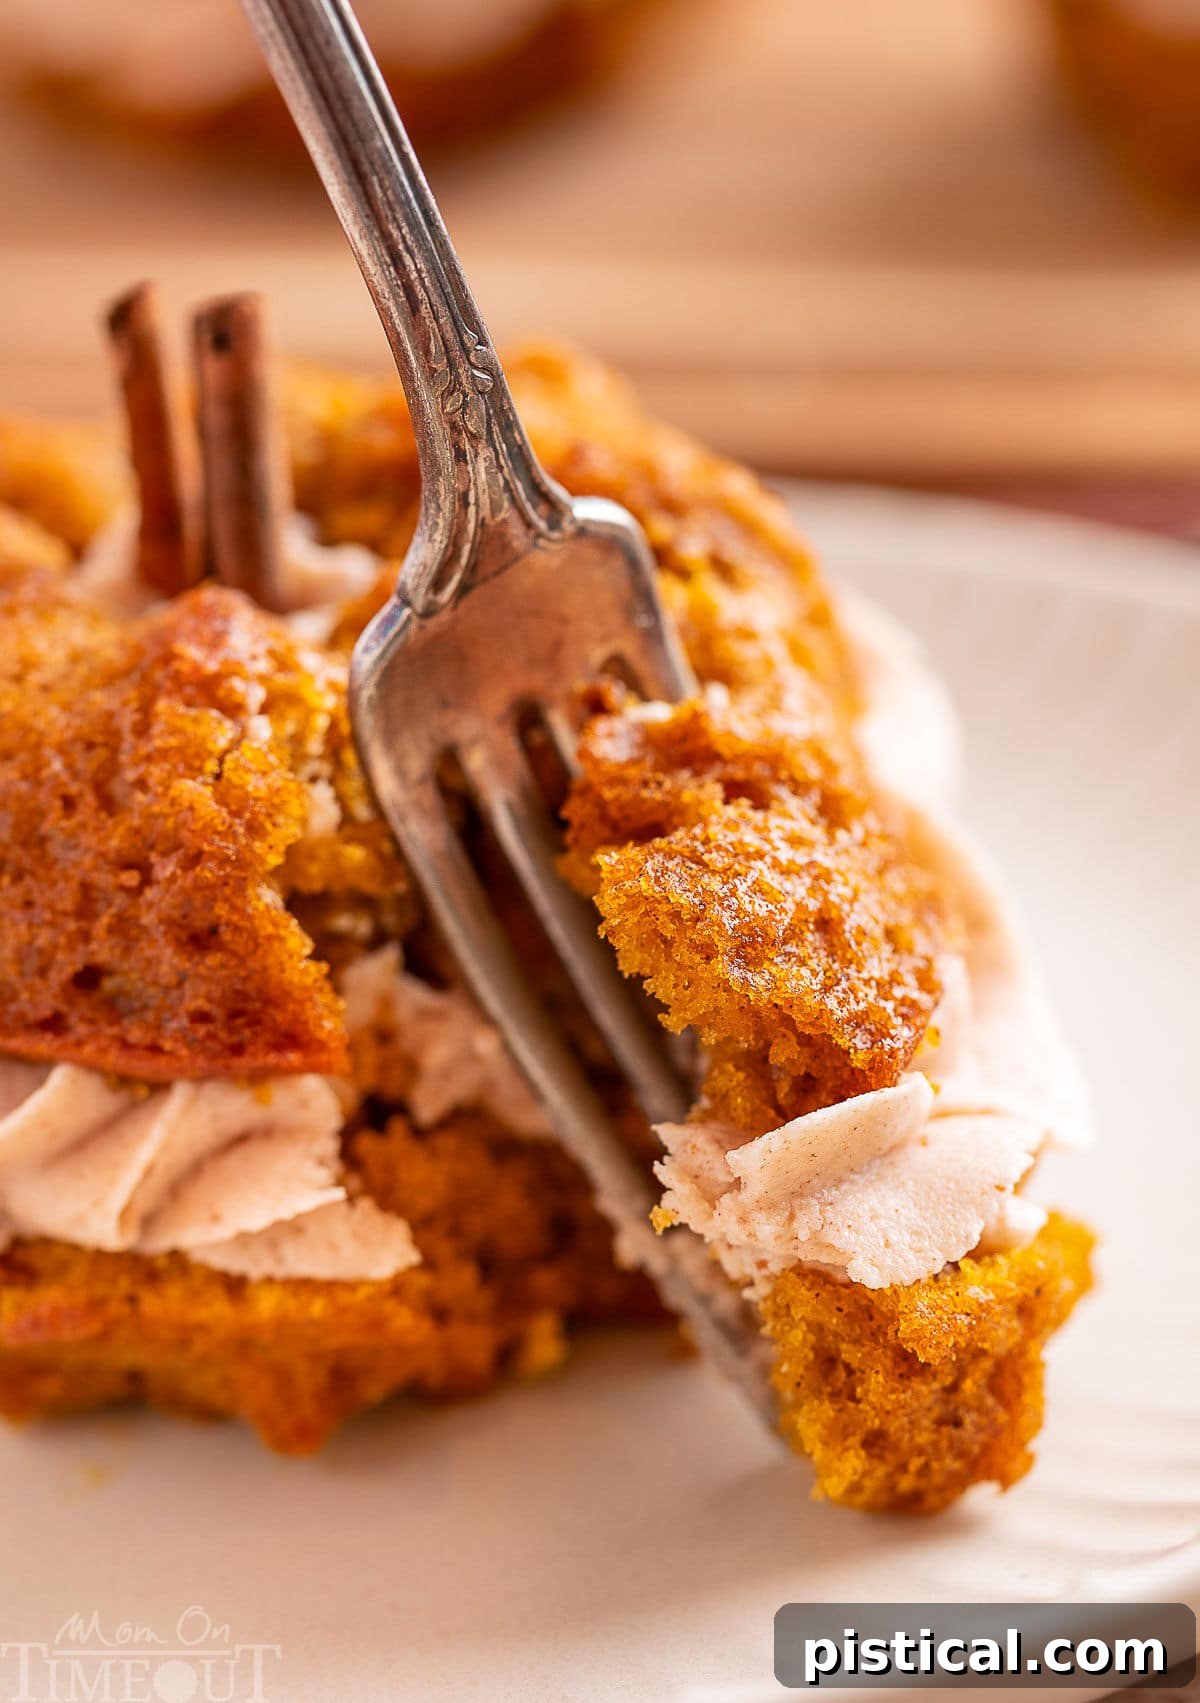
The secret to their exceptional moisture and tenderness lies in the use of real pumpkin puree. This key ingredient ensures that every mouthful is packed with authentic fall flavors, transporting you to crisp autumn days and festive holidays. Furthermore, their individual, mini size offers unparalleled convenience, making them effortless to serve and delightful for everyone to enjoy their very own special treat. Whether I’m baking for intimate family dinners or larger gatherings with friends, these mini bundt cakes consistently earn a “Wow!” reaction and, without fail, disappear from the dessert table remarkably fast!
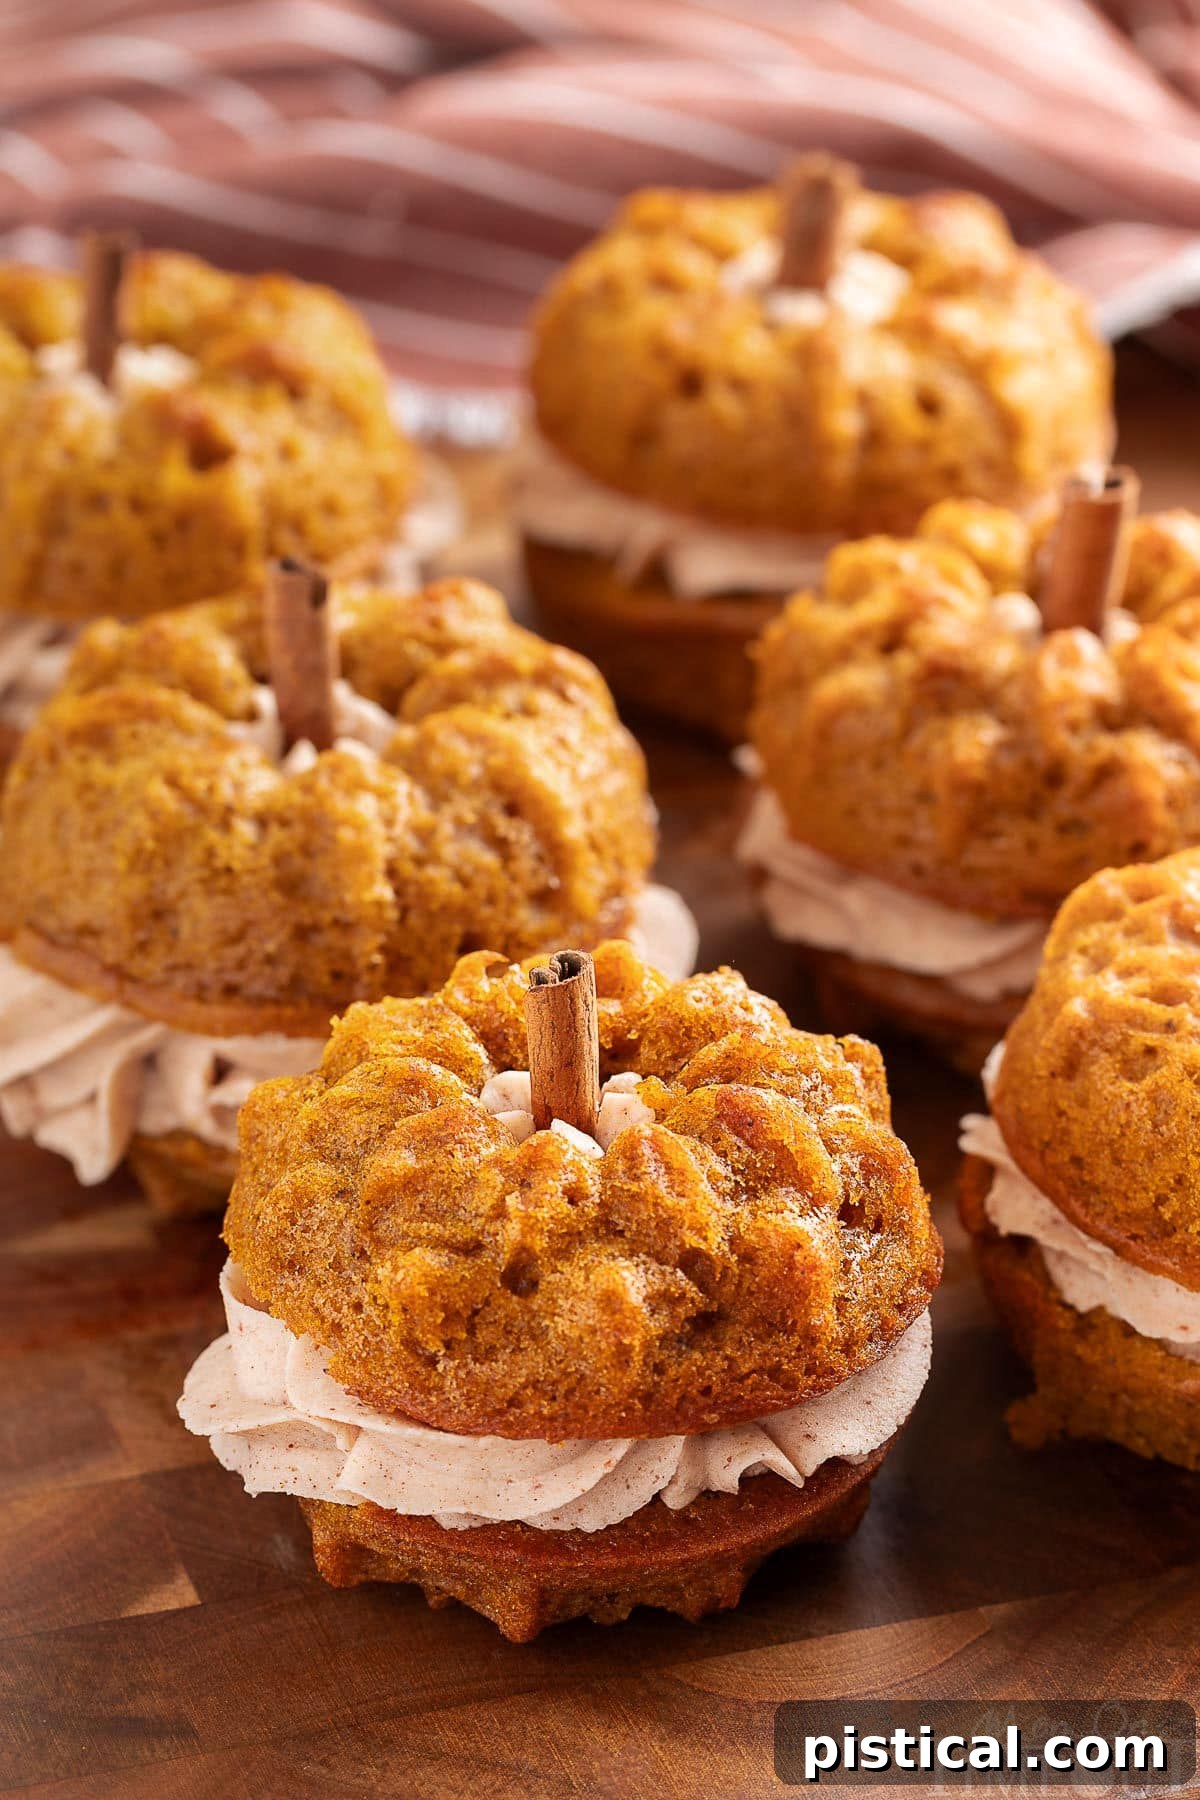
Crafting the Dreamy Cinnamon Brown Butter Buttercream Frosting
Let’s take a moment to truly appreciate the star of this show: the frosting. Our creamy brown butter frosting, delicately spiced with cinnamon, is not merely an accompaniment; it’s a perfect partner to the robust pumpkin cake. It contributes a layer of nuanced sweetness without ever overpowering the rich, warm flavors of the pumpkin. What I particularly adore about this frosting is its subtle, yet distinct, cinnamon hint. This hint is meticulously balanced to just enough to elevate each bite, weaving together the distinct flavors of pumpkin and butter in a harmonious blend that feels both familiar and extraordinary.
Beyond its incredible taste, this frosting plays a crucial role in the visual appeal of these mini cakes. It’s skillfully used to sandwich two individual mini bundt cakes together, ingeniously creating the charming, unmistakable shape of a pumpkin. The result is a dessert that is not only a dream to taste but also wonderfully fun and festive to behold. Their miniature size also contributes to their charm, making them incredibly easy to serve and delightful for guests to pick up and enjoy. Once you experience the magic of this brown butter frosting combined with the tender pumpkin cake, these mini bundt cakes will undoubtedly secure a permanent spot as a cherished fall favorite in your recipe collection!
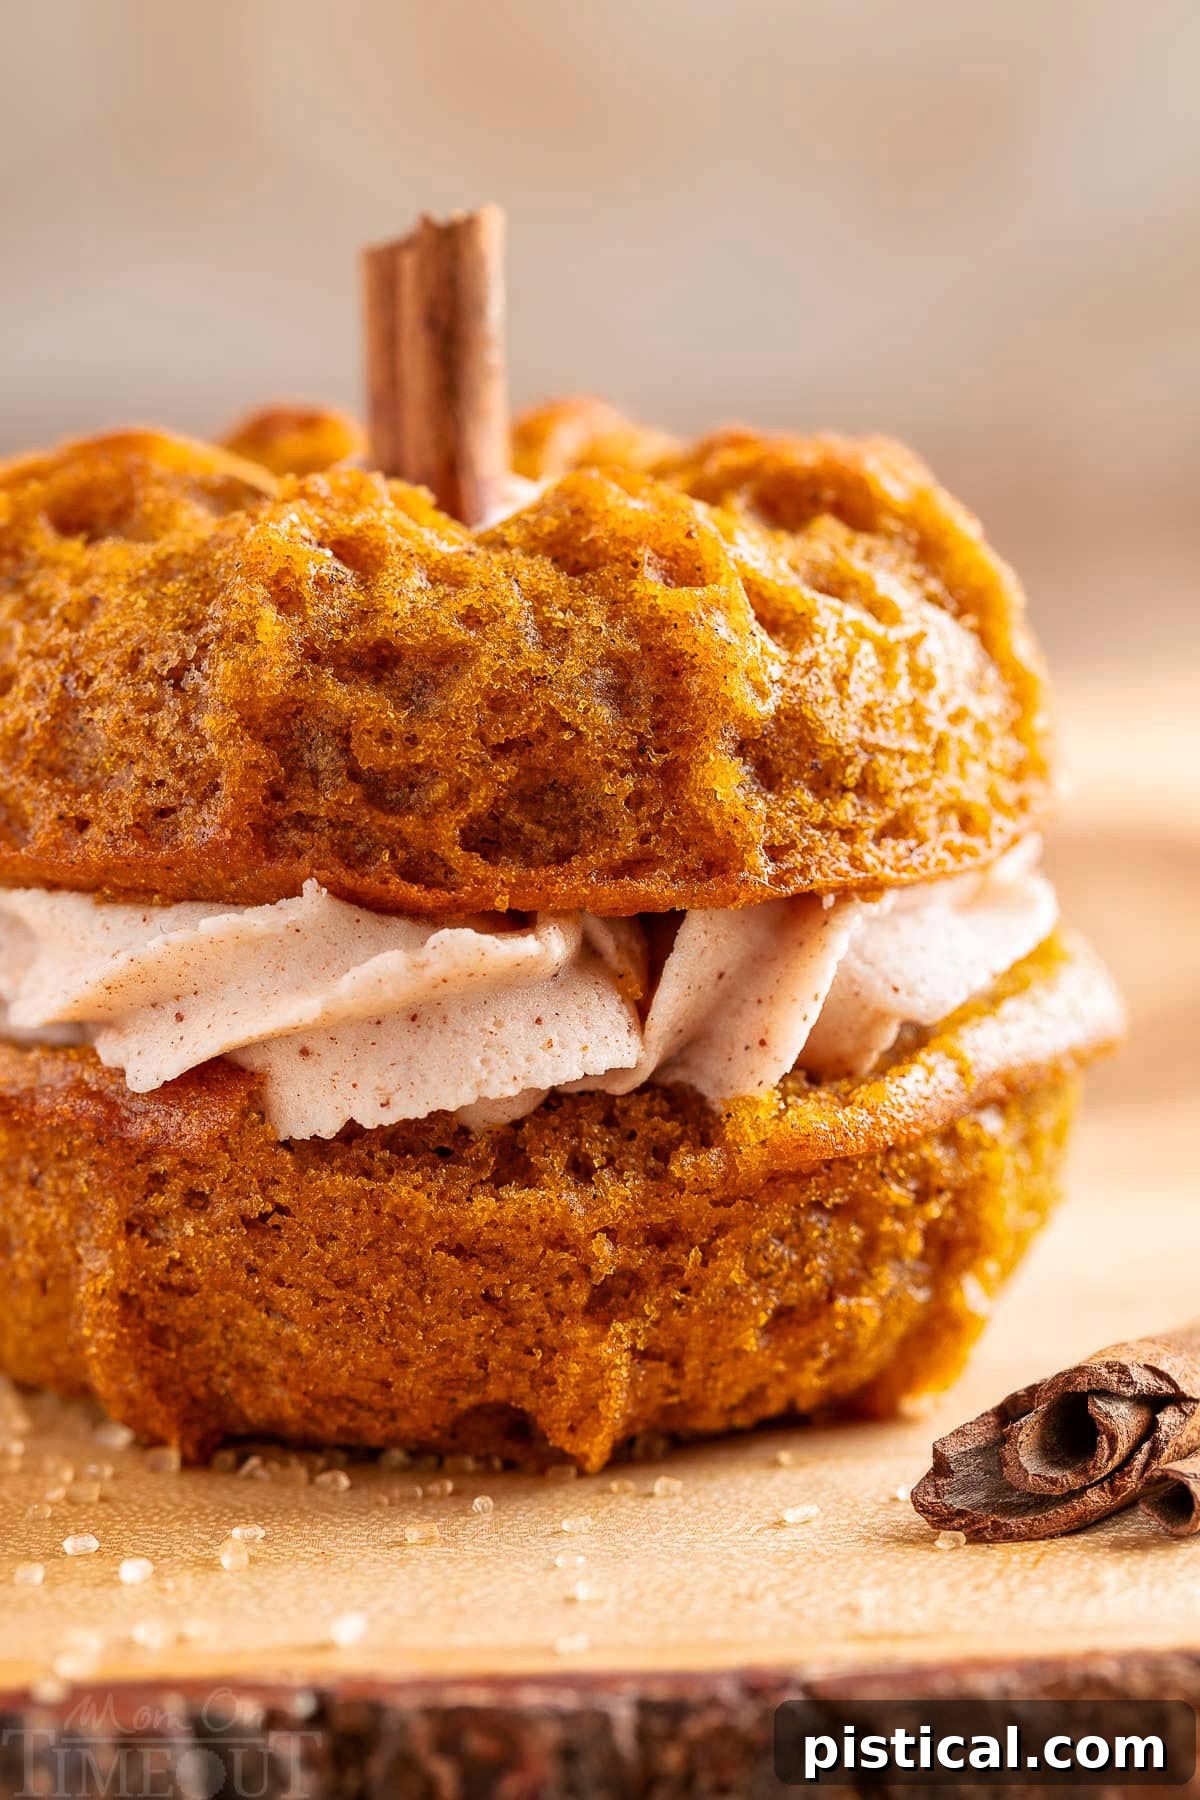
Why These Mini Pumpkin Bundt Cakes Will Become Your Go-To Fall Dessert
If you’re looking for a dessert that truly captures the essence of autumn and delights everyone, look no further. Here’s why these mini pumpkin bundt cakes are an absolute must-try:
- An Explosion of Warm Fall Flavors in Every Bite: These mini pumpkin bundt cakes are a celebration of autumn’s bounty. We combine the classic richness of pumpkin pie spice—a harmonious blend of cinnamon, nutmeg, ginger, and cloves—with generous amounts of real pumpkin puree. This ensures that every single bite is deeply flavorful and wonderfully aromatic, instantly transporting you to a cozy fall evening. They offer the perfect way to truly embrace and savor the season’s best flavors, whether you’re hosting a grand dinner party or simply enjoying a quiet moment of self-indulgence.
- Brown Butter Frosting: A Perfection That Elevates the Ordinary: What truly sets these cakes apart is our decadent brown butter frosting. The process of browning butter transforms it, imparting a deep, complex, and intensely nutty flavor profile that perfectly complements the spiced pumpkin cake. Its rich, caramel-like notes add an unparalleled depth that takes these cakes to an entirely new level of gourmet deliciousness. This creates a unique and sophisticated flavor combination that you simply won’t find in ordinary fall desserts, making these bundt cakes truly exceptional.
- Simple to Master, Stunning to Serve: While these mini bundt cakes boast a sophisticated and “fancy” appearance, don’t let their elegance intimidate you! They are surprisingly easy to make, and with our clear, step-by-step instructions, they consistently turn out beautifully every single time, even for novice bakers. Their perfectly portioned individual size not only makes them incredibly easy to handle and serve but also ensures that each guest feels uniquely catered to, receiving a special treat crafted just for them. This combination of ease and elegance makes them an ideal choice for any occasion.
How to Make These Delightful Mini Pumpkin Bundt Cakes
Creating these adorable mini pumpkin cakes is a truly enjoyable process, and eating them is even better! Before you dive into mixing, it’s crucial to brown the butter first. This essential step allows ample time for the browned butter to cool sufficiently before being incorporated into the frosting, ensuring the perfect texture and flavor. Don’t worry, the entire process is straightforward and rewarding. As always, you’ll find the full printable recipe card with exact measurements and detailed steps at the end of this post for your convenience.
The Art of Browning Butter for Your Frosting
The very first and most crucial step in this recipe is browning the butter for your incredible frosting. This needs to be done early on to give it sufficient time to cool completely and return to room temperature, which is essential for achieving the right frosting consistency. While the process itself is quite simple, it requires your full attention and a keen eye to prevent burning.
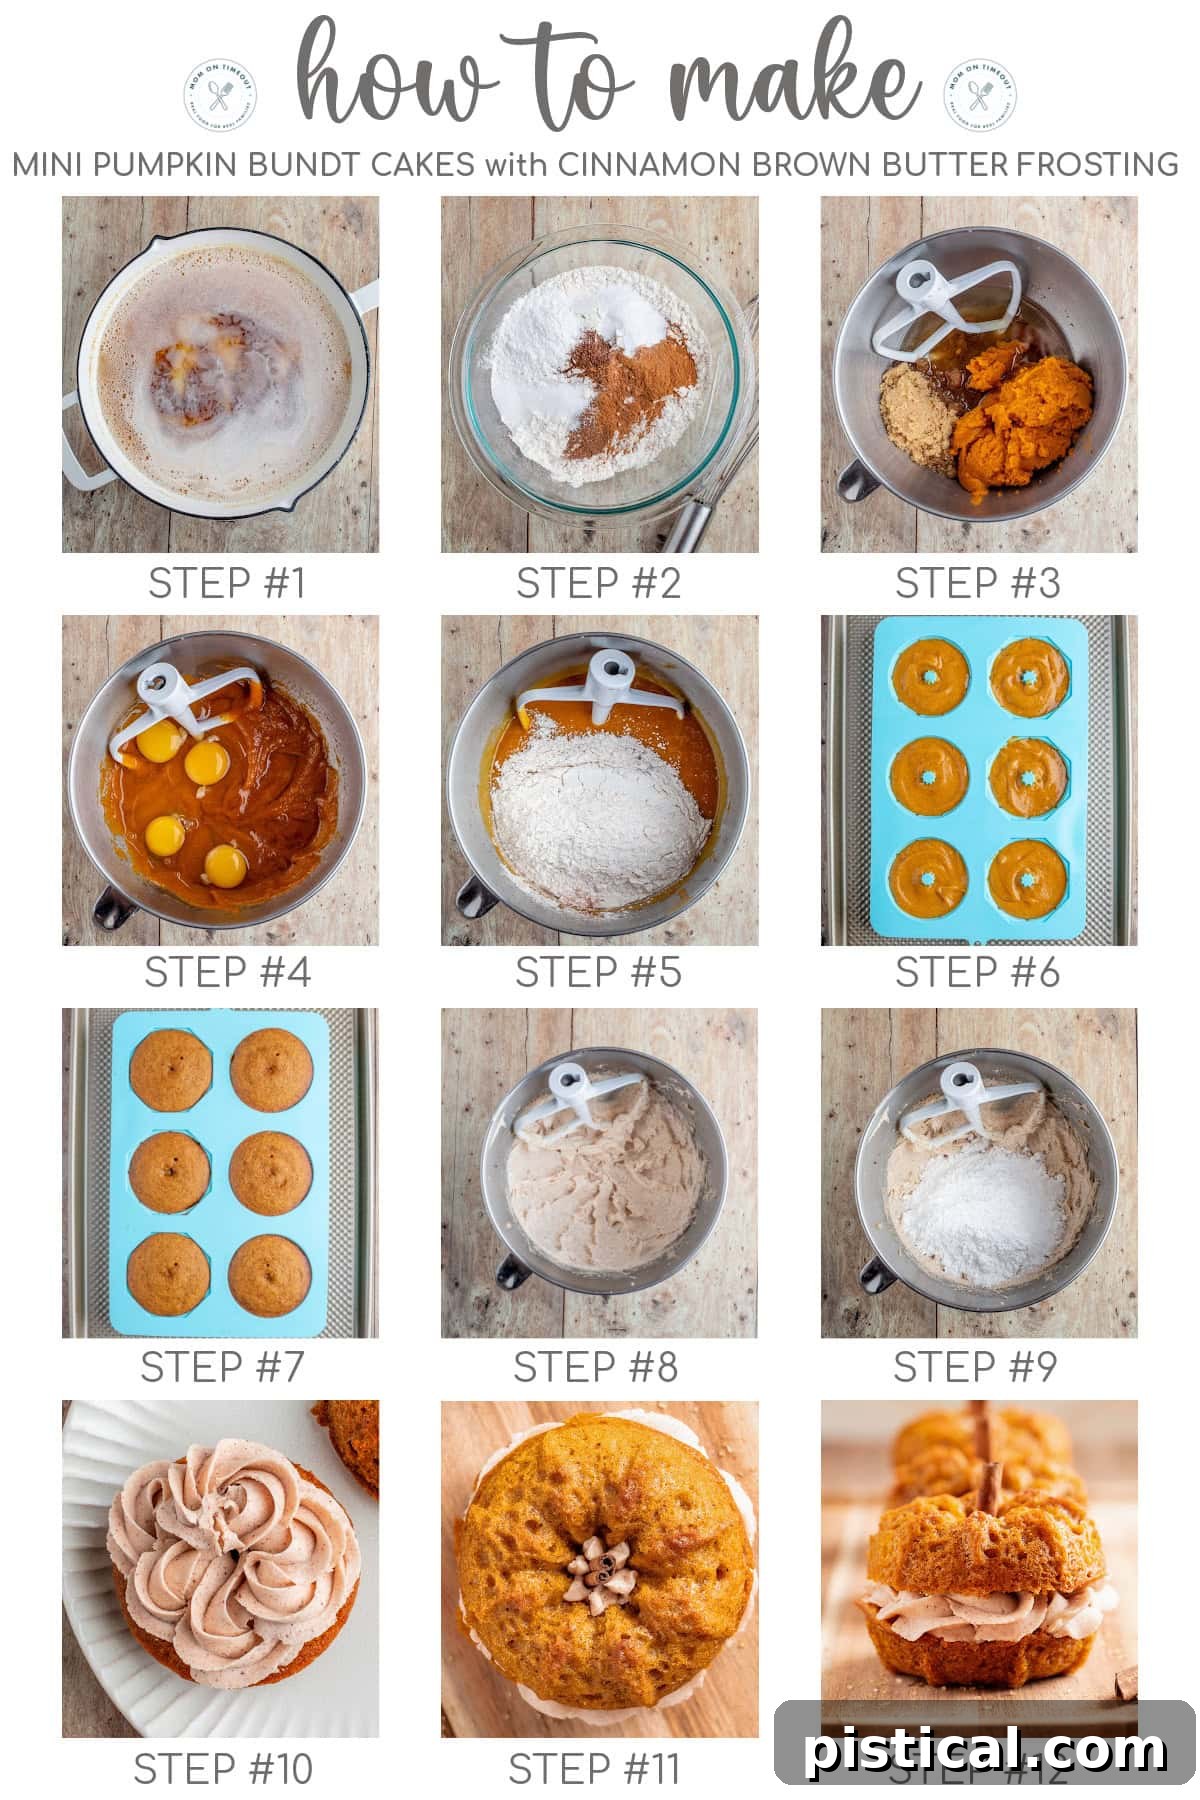
- Melt and Watch: Begin by melting the unsalted butter in a light-colored skillet (a stainless steel pan works perfectly as it allows you to clearly see the color change) over medium heat. Stir the butter frequently as it melts and begins to bubble.
- Foaming Stage: Initially, the butter will melt, then it will start to foam. This foam indicates that the water content in the butter is evaporating. Continue stirring gently during this stage.
- Golden Transformation: Once the foam begins to subside, the milk solids at the bottom of the pan will start to turn a beautiful golden brown. At this point, you’ll notice a distinct, irresistible nutty and caramel-like fragrance filling your kitchen. This aroma is your key signal that the butter is perfectly browned.
- Immediate Removal and Cooling: The moment you detect that rich, nutty scent and see the golden brown specks, immediately remove the skillet from the heat. Carefully pour the browned butter (including all the lovely brown bits) into a separate heat-safe bowl. Allow it to cool completely to a soft, room temperature consistency before you proceed with making the frosting. This cooling process is vital for the frosting’s structure.
Preparing the Tender Pumpkin Bundt Cakes
With your browned butter cooling, it’s time to create the moist and flavorful pumpkin cake batter.
- Combine Dry Ingredients: In a medium bowl, thoroughly whisk together the all-purpose flour, baking soda, baking powder, a pinch of salt, and the aromatic pumpkin pie spice. Ensuring these dry ingredients are well combined helps with even distribution in the final cake. Set this mixture aside.
- Mix Wet Ingredients (Phase 1): In a large mixing bowl (or the bowl of a stand mixer), combine the light brown sugar, granulated sugar, rich pumpkin puree, and vegetable oil. Mix these ingredients together until they are well combined and smooth, creating a luscious base for your cake.
- Mix Wet Ingredients (Phase 2): To the pumpkin mixture, add the vanilla extract and the room-temperature eggs. Continue mixing until all these ingredients are fully incorporated and the mixture is consistently smooth and creamy.
- Combine Wet and Dry: Gradually add the reserved dry ingredients to the pumpkin mixture. Mix gently just until everything is combined. Be careful not to overmix; overmixing can lead to a tough cake. A few small lumps are perfectly fine!
- Fill the Pans: Prepare your mini bundt pan by spraying each mold generously with nonstick cooking spray. Evenly fill each mold with the cake batter, aiming for about ¼ inch from the top to allow for proper rising.
- Bake to Perfection: Bake the mini bundt cakes in your preheated oven for approximately 15-20 minutes, or until they are golden brown and a toothpick inserted into the center comes out clean or with just a few moist crumbs. Once baked, remove them from the oven and let the cakes cool in the pan for about 10 minutes. This crucial resting period helps them firm up, making them easier to carefully remove from the molds. Transfer them to a wire rack and allow them to cool completely before you begin the fun part of decorating.
Whipping Up the Cinnamon Brown Butter Frosting
Now for the star of the show! Ensure your browned butter has cooled to a soft, room temperature consistency before starting this step.
- Beat the Brown Butter: In the bowl of a stand mixer fitted with the paddle attachment (or using a hand mixer), beat the cooled brown butter until it becomes light, fluffy, and noticeably paler in color. This process incorporates air, giving the frosting a wonderful texture.
- Gradually Add Sugar and Flavor: Add the powdered sugar, about 2 cups at a time, mixing on low speed until each addition is fully combined before adding more. Once all the powdered sugar is incorporated, add the vanilla extract, ground cinnamon, and a pinch of fine sea salt. Mix again until the frosting is smooth and creamy. If you find the icing is a bit too stiff for piping, you can gradually add 2 to 4 tablespoons of heavy whipping cream, one tablespoon at a time, mixing until you achieve your desired soft, spreadable consistency.
Assembling Your Adorable Pumpkin Cakes
This is where the mini bundt cakes transform into charming little pumpkins!
- Prepare for Piping: Transfer your finished cinnamon brown butter buttercream frosting into a piping bag fitted with a large decorator’s tip of your choice. This will make assembly clean and precise.
- Create the “Pumpkin” Shape: Take one cooled mini bundt cake and place it upside down on your serving plate or cooling rack. Pipe a generous, even amount of buttercream onto the flat top of this bundt. Carefully take a second mini bundt cake and place it right-side up directly on top of the frosted first bundt. Press down gently to sandwich the two cakes together, forming the distinctive, rounded “pumpkin” shape.
- The Finishing Touch: To truly complete the pumpkin look, insert a small cinnamon stick directly into the middle hole of the top bundt cake, mimicking a natural pumpkin stem. For an extra whimsical touch, you can add a few small green candies (like green M&Ms) or small pieces of flattened Tootsie Rolls shaped into leaves around the cinnamon stick.
Important Tip for Browning Butter: Always keep a close eye on your butter while browning, as it can quickly go from perfectly golden brown to burned in a flash! The process unfolds in stages: the butter will first melt, then it will begin to foam, and finally, the milk solids will settle and turn a rich golden brown color. The nutty aroma is your most reliable indicator that it’s done – once you smell that distinct fragrance, remove it from the heat immediately to prevent any burning and preserve its delightful flavor.
Storage Information for Freshness
Proper storage ensures your delicious mini pumpkin bundt cakes and frosting remain fresh and flavorful for as long as possible. Follow these guidelines to keep your treats perfect:
Storing Mini Pumpkin Bundt Cakes
- Room Temperature: If you plan to indulge in your cakes within a day or two, they can be stored in an airtight container at room temperature. Place them away from direct sunlight or any heat sources to maintain their quality and prevent the frosting from melting. They will stay fresh for up to 2 days.
- Refrigerator: For extending their freshness, place the completely cooled cakes in an airtight container and refrigerate them. This method will help them retain their delightful moisture and flavor for up to 5 days.
- Freezer: To enjoy these treats much later, wrap each individual cooled cake tightly in plastic wrap, then place them in a freezer-safe container or a heavy-duty zip-top freezer bag. They can be frozen for up to 3 months. When you’re ready to enjoy, simply thaw them overnight in the refrigerator before serving.
Storing Brown Butter Frosting
- Refrigerator: Any leftover brown butter frosting can be stored in an airtight container in the refrigerator for up to 1 week. Before you plan to use it again, allow it to come to room temperature to soften. If needed, give it a quick re-whip with an electric mixer to restore its fluffy texture.
- Freezer: Yes, you can freeze this delicious frosting too! Transfer it to a freezer-safe container or a zip-top bag, and it will keep beautifully for up to 3 months. Thaw it in the refrigerator, and then re-whip it thoroughly before piping or spreading.
Delicious Variations to Try for Your Mini Bundt Cakes
While these Mini Pumpkin Bundt Cakes are absolutely perfect as is, they also lend themselves beautifully to creative variations. Feel free to experiment with these ideas to personalize your batch and discover new favorite flavor combinations:
- Maple Brown Butter Frosting: For an extra touch of autumnal sweetness, consider mixing a tablespoon or two of pure maple syrup into your brown butter frosting. This will add a rich, earthy sweetness that perfectly complements the pumpkin. You might need to adjust the amount of powdered sugar slightly to maintain the ideal piping consistency.
- Nutty Texture and Flavor: Enhance both the texture and the nutty profile of your cakes by folding in some finely chopped toasted nuts. Pecans or walnuts are fantastic choices, as their earthy crunch adds a wonderful contrast to the soft cake and complements the brown butter frosting beautifully. Add them to the cake batter during the final mixing stage.
- Boosted Spice in the Frosting: If you adore a truly spiced flavor, feel free to add an extra dash of pumpkin pie spice or an additional teaspoon of cinnamon to the frosting. This extra layer of warmth will tie all the flavors together even more exquisitely, creating an even more aromatic and comforting dessert.
- Cream Cheese Twist: For a tangier frosting, consider making a brown butter cream cheese frosting. Reduce the unsalted butter slightly and incorporate softened cream cheese for a rich, tangy, and utterly decadent alternative.
- Citrus Zest Brightness: A touch of fresh orange or lemon zest folded into the cake batter or even lightly sprinkled over the finished frosting can add a bright, refreshing counterpoint to the rich, warm flavors.
Frequently Asked Questions About Mini Pumpkin Bundt Cakes
Here are some common questions you might have when preparing these delightful mini bundt cakes:
What if I don’t have mini bundt pans?
No mini bundt pans? No problem at all! You can absolutely still make this delicious recipe. A standard muffin tin or cupcake pan works perfectly as an alternative. When using muffin tins, simply adjust the baking time to approximately 15-20 minutes. Keep an eye on them, and test for doneness by inserting a toothpick into the center of a cupcake; it should come out clean or with only a few moist crumbs attached.
Can I make a full-size bundt cake with this recipe?
Yes, absolutely! This versatile recipe scales beautifully for a full-sized bundt cake or even layered cakes. Keep in mind that the baking time will significantly increase for larger cakes. A full-sized bundt cake (10-12 cups capacity) will typically require around 60-75 minutes in the oven. For two 8-inch layer cakes, expect a baking time of about 25-30 minutes. To determine if they are done, insert a toothpick into the middle of the cake; it should come out with some moist crumbs, but no wet batter.
What can I use instead of vegetable oil in the cake batter?
If you prefer an alternative to vegetable oil, you have a few excellent options. You can replace it with an equal amount of melted coconut oil for a subtle tropical hint, or use melted butter for an even richer, buttery flavor. For a lower-fat option, unsweetened applesauce can also be a good substitute. Just remember that each substitute may slightly alter the final flavor and texture of your pumpkin bundt cakes.
Do I have to brown the butter for the frosting?
While you certainly don’t *have* to brown the butter for the frosting, I wholeheartedly recommend it! Using regular, softened unsalted butter will still yield a delicious buttercream. However, browning the butter is a step that truly transforms the frosting, imparting a unique, rich, and nutty depth of flavor that complements the spiced pumpkin cakes in an extraordinary way. It adds an extra layer of complexity that elevates the entire dessert, making it undeniably special.
Trish’s Essential Tips for Perfect Mini Pumpkin Bundt Cakes
Achieving bakery-quality mini pumpkin bundt cakes at home is entirely possible with a few simple tips and tricks. Follow these expert recommendations to ensure your baking experience is smooth and your results are spectacular:
- Room Temperature Ingredients are Key: For the best results, always ensure that your eggs and any other refrigerated ingredients (like butter for the cake batter, if using) are brought to room temperature before you begin mixing. This seemingly small step helps the ingredients emulsify and combine more smoothly and evenly, resulting in a lighter, more uniform cake texture.
- Don’t Overfill Your Pans: When filling your mini bundt pan molds, remember to only fill each cavity about 2/3 full. This crucial allowance provides ample room for the cakes to rise beautifully during baking without the risk of overflowing, which can lead to messy edges and uneven shapes.
- Grease Your Pans Thoroughly: To guarantee an easy release and perfectly shaped cakes, generously coat your mini bundt pans with nonstick cooking spray. Make sure to get into all the nooks and crannies of the intricate bundt design. If you have a high-quality non-stick bundt pan, this step becomes even simpler, but proper greasing is always a good practice.
- Use a Baking Sheet for Silicone Molds: If you opt to use a silicone mold, always place it on top of a sturdy baking sheet before filling and transferring to the oven. Silicone molds are flexible, and the baking sheet will provide the necessary support, preventing spills and ensuring your cakes bake evenly.
- Cool in the Pans First: After baking, resist the urge to immediately flip your cakes out of the pans. Allow them to cool in the pans for about 10 minutes. This critical resting period helps the cakes set and firm up, making them much less likely to break or stick when you transfer them to a wire rack for complete cooling.
- Level Your Cakes for Perfect Pumpkins: Sometimes, bundt cakes can dome up slightly in the oven. For a perfect “pumpkin” shape, where two bundt halves sit flush together, you can gently level them once they are fully cooled. Use a serrated knife to carefully trim off any rounded tops, creating a flat surface that allows the two halves to fit together seamlessly when assembled.
- Taste and Adjust Your Frosting: When preparing the brown butter frosting, remember to taste it as you go. Adjusting the sweetness by adding a bit more powdered sugar, or enhancing the flavor balance with an extra pinch of salt or cinnamon, can make all the difference in achieving your ideal flavor profile.
More Irresistible Pumpkin Desserts to Explore
If you’ve fallen in love with the comforting flavors of pumpkin, there’s a whole world of delightful pumpkin desserts waiting for you to discover. Here are some of my other cherished recipes that perfectly capture the essence of fall and winter:
- Pumpkin Chocolate Chip Cookies: A soft, chewy cookie bursting with pumpkin spice and melty chocolate chips.
- Pumpkin Snickerdoodle Cheesecake Cookies: The classic snickerdoodle meets creamy cheesecake and warm pumpkin flavors in one amazing cookie.
- Praline Pumpkin Roll: An elegant and impressive dessert featuring a tender pumpkin cake rolled with a sweet praline cream cheese filling.
- Pumpkin Pull Apart Bread: A warm, gooey, and spiced bread that’s perfect for sharing (or not!).
- Pumpkin Oatmeal Cookies: Hearty and wholesome, these cookies are packed with pumpkin goodness and comforting oats.
Print Recipe
Pin Recipe
Mini Pumpkin Bundt Cakes with Brown Butter Buttercream Frosting
Equipment
-
Mini Bundt Pan
-
Silicone Mini Bundt Pan
Ingredients
Cake
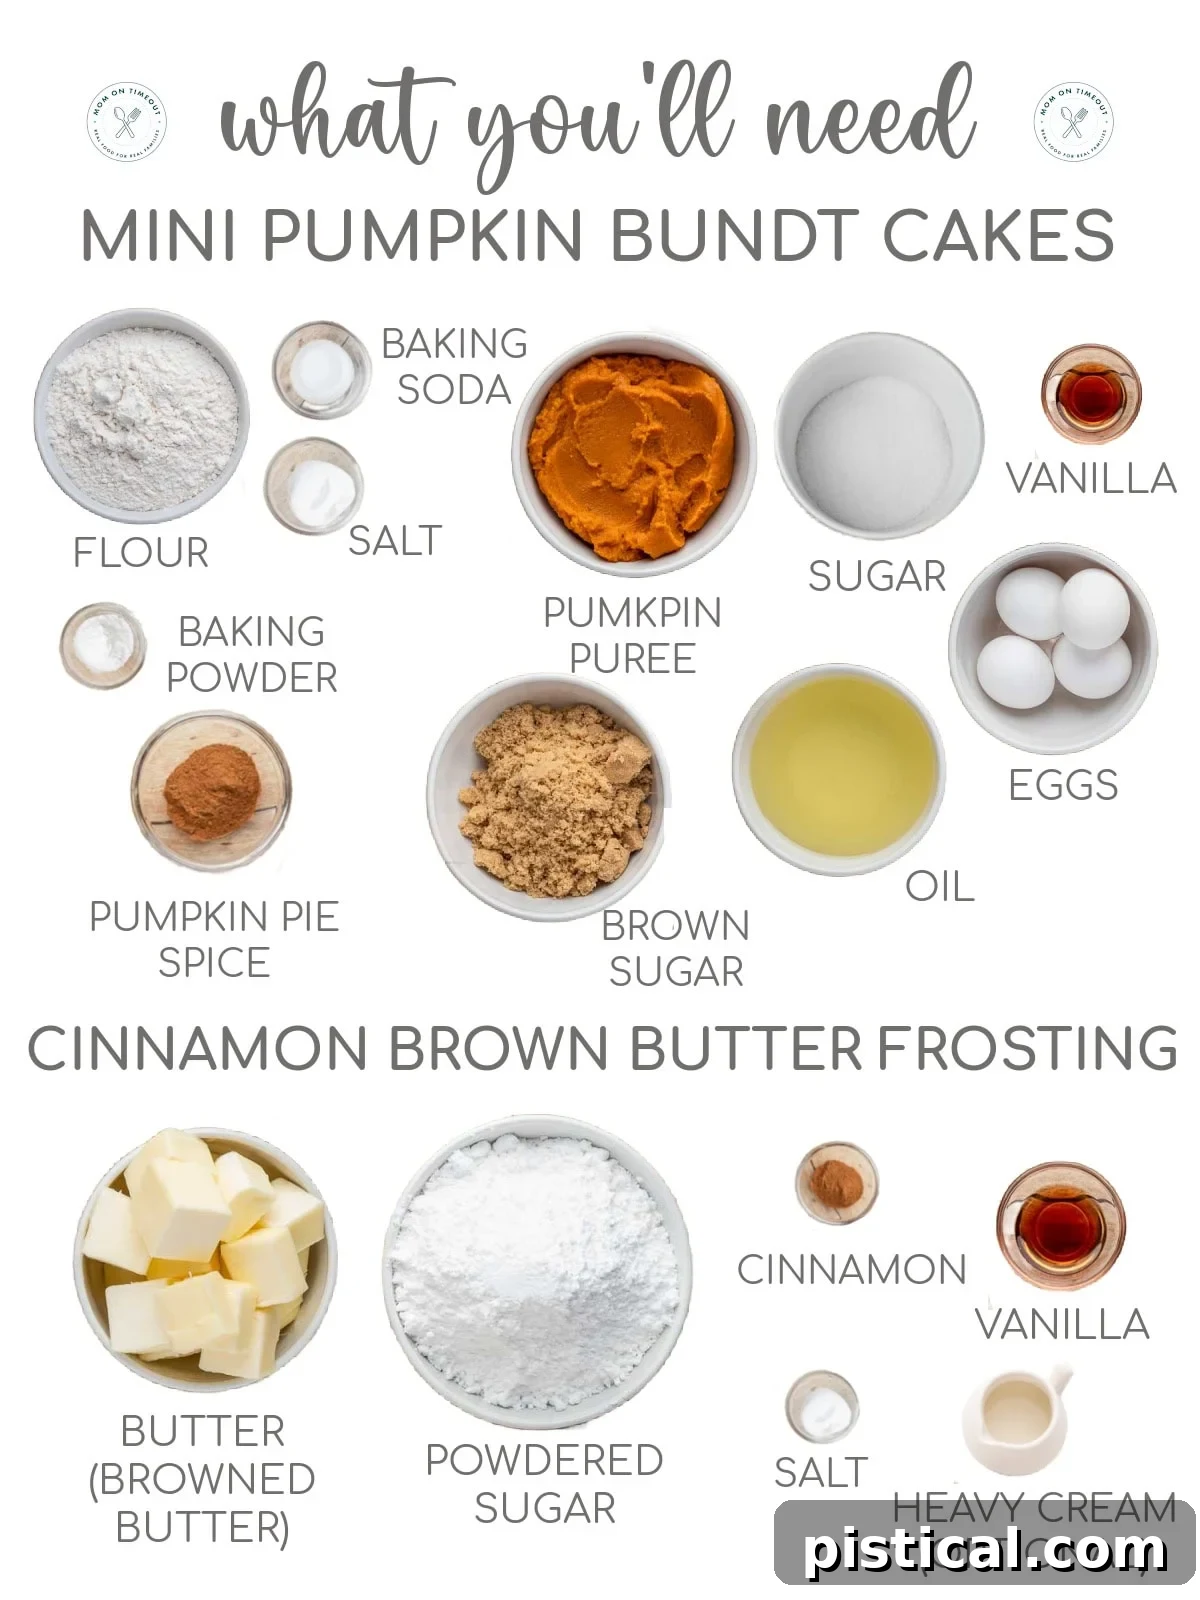
- 2 cups all-purpose flour 250g
- 2 teaspoons baking powder
- 1 teaspoon baking soda
- 1 teaspoon sea salt
- 1 tablespoon pumpkin pie spice
- 1 cup light brown sugar packed, 200g
- ½ cup granulated sugar 100g
- 15 ounces pumpkin puree 1 can
- 1 cup vegetable oil 240ml
- 1 teaspoon vanilla extract
- 4 large eggs room temperature
Frosting
- 1 ½ cups unsalted butter room temperature, 340g
- 4 to 5 cups powdered sugar 520-650g
- 1 tablespoon vanilla extract
- 2 teaspoons ground cinnamon
- ¼ teaspoon fine sea salt
- 2 to 4 tablespoons heavy whipping cream optional
Assembly (Optional)
- cinnamon sticks
- tootsie rolls
- green M&Ms
Instructions
Brown Butter
-
Use a light-colored or stainless steel skillet to easily monitor the butter’s color change.
-
Place butter into the skillet. Turn the heat to medium and let the butter melt completely. Stir occasionally to help it melt evenly.
-
As the butter melts, it will begin to foam. This is the water content evaporating. Stir gently during this stage.
-
After the foaming subsides, keep stirring. The milk solids will begin to brown, turning from yellow to golden brown.
-
The butter will release a nutty, caramel-like fragrance when it reaches the browning stage. This is a key indicator it’s ready.
-
Once the butter is browned, immediately remove the skillet from the heat to prevent burning.
-
Once finished, pour it into a bowl and set it in the fridge or freezer until it is back to a soft room temperature and not melted.
Cake
-
Preheat your oven to 350°F.
-
Whisk together the flour, baking soda, baking powder, salt and pumpkin pie spice in a separate bowl. Set aside.
-
In the bowl of a stand mixer or large mixing bowl, mix together the brown sugar, granulated sugar, pumpkin puree and vegetable oil until combined and smooth.
-
Add the vanilla extract and eggs and mix together until well combined.
-
Add the dry ingredients to the pumpkin mixture and mix just until combined.
-
Spray the mini bundt pan with nonstick cooking spray and fill each mold to about 1⁄4” from the top.
-
Bake for 15-20 minutes or until golden brown and set. Set aside and let the cakes cool in the pan for 10 minutes before carefully removing from the mold. Le the cakes cool completely before decorating.
Prepare the frosting. Make sure that your brown butter has cooled enough that it’s at a soft room temperature.
-
In the bowl of a stand mixer or medium mixing bowl, beat the brown butter until it’s light and fluffy.
-
Add in the powdered sugar 2 cups at a time and mix until combined.
-
Add in the vanilla extract, cinnamon and salt. Mix again. If the icing is a bit stiff, you can add 2 to 4 tablespoons of heavy whipping cream to the frosting.
Assemble Cake
-
Place the frosting into a piping bag fitted with the large decorators tip of your choice.
-
Place one bundt upside down and pie a generous amount of butter cream onto the top. Place another bundt right-side up on top of this to form a “pumpkin”.
-
A cinnamon stick in the middle of the bundt completes the pumpkin look! Finish with a few green candies for leaves if you like.
Notes
Please refer to the “Storage Information” section above in the main post for detailed guidance on how to store your mini pumpkin bundt cakes and brown butter frosting to maintain their freshness and flavor.
Tools and Equipment (affiliate links): Mini Bundt Pan | Silicone Mini Bundt Pan | Kitchen Scale | Glass Mixing Bowls | Whisk | Electric Mixer (Hand Mixer or Stand Mixer) |
Please see post above for more information, recipe tips and frequently asked questions.