
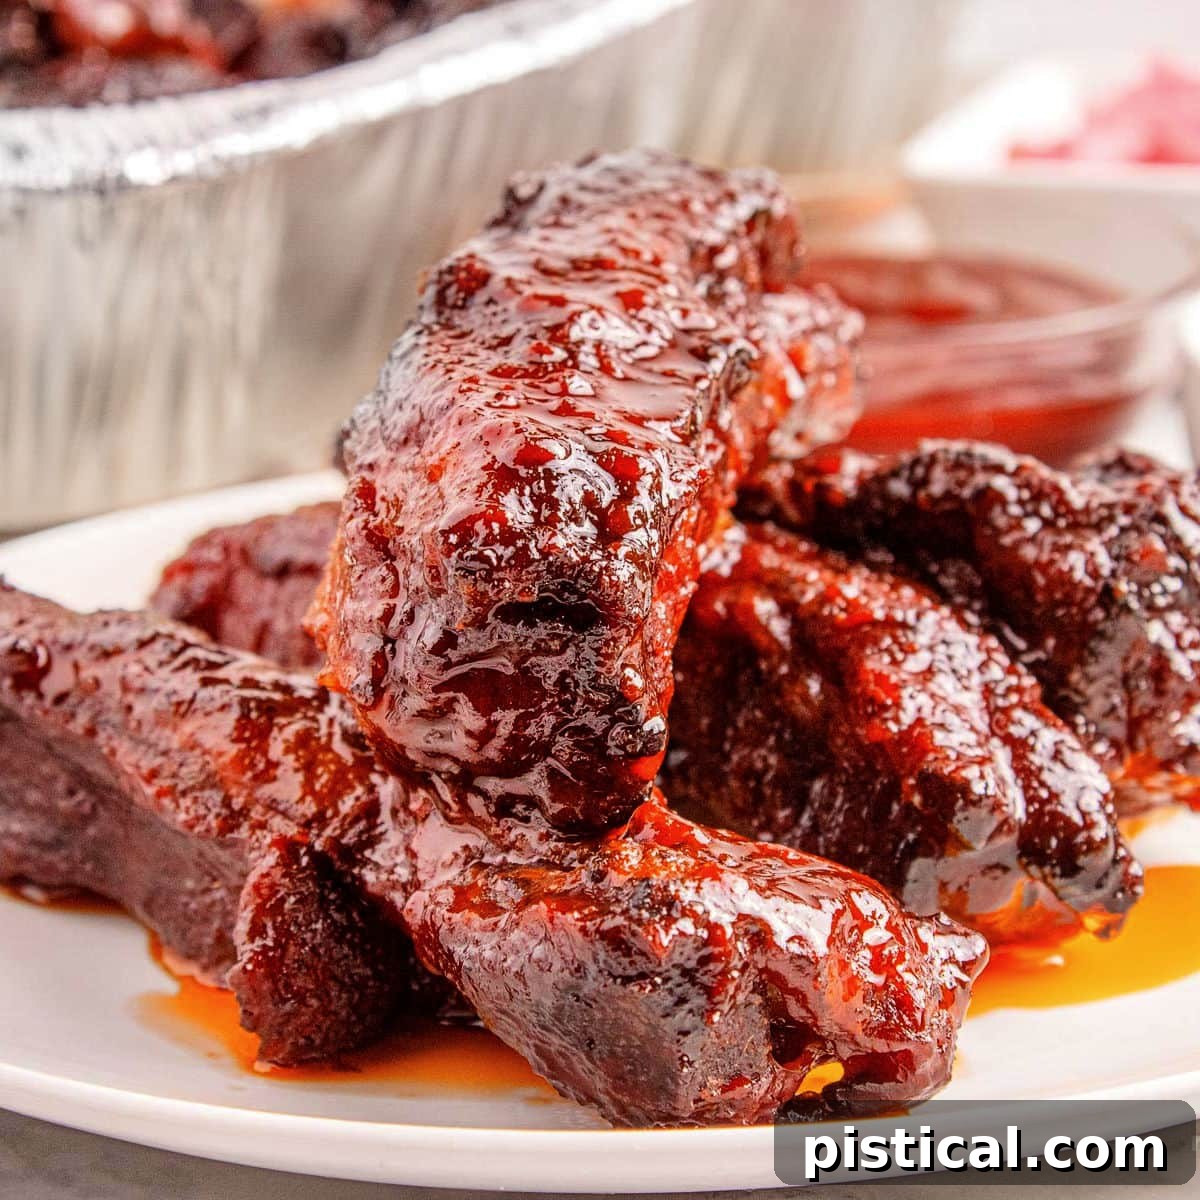
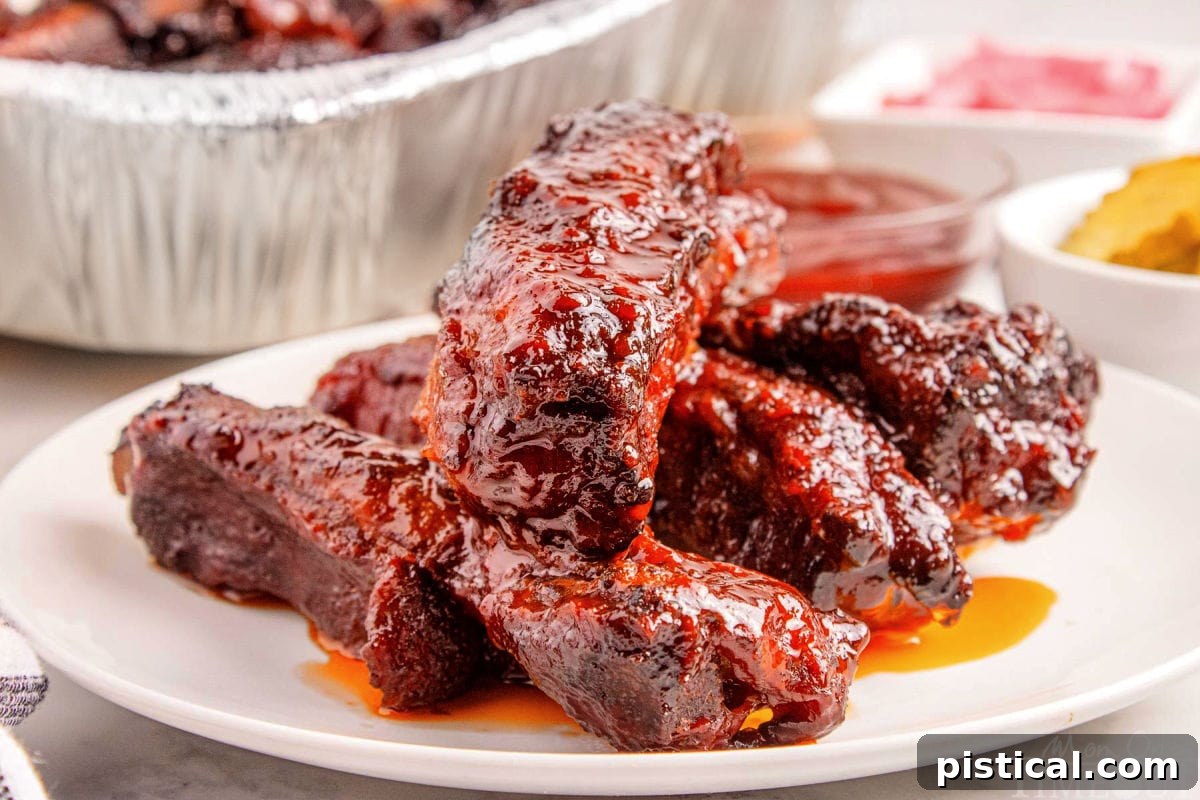
Get ready to elevate your barbecue game with these incredible St. Louis Style Party Ribs! Imagine perfectly seasoned ribs, slow-cooked to an unmatched tenderness, then glazed with a sweet and tangy BBQ sauce that will have everyone reaching for more. These aren’t just ribs; they’re an experience – designed to be fall-off-the-bone delicious and easy to share, making them the ultimate crowd-pleaser for any gathering. From lively parties and casual BBQs to special holidays and cherished family dinners, these ribs promise big flavor and unforgettable moments.
Transform your next cookout into a culinary event with these fantastic complementary recipes: a versatile Chicken Marinade, the ultimate Steak Marinade, and a perfectly grilled Ribeye Steak!
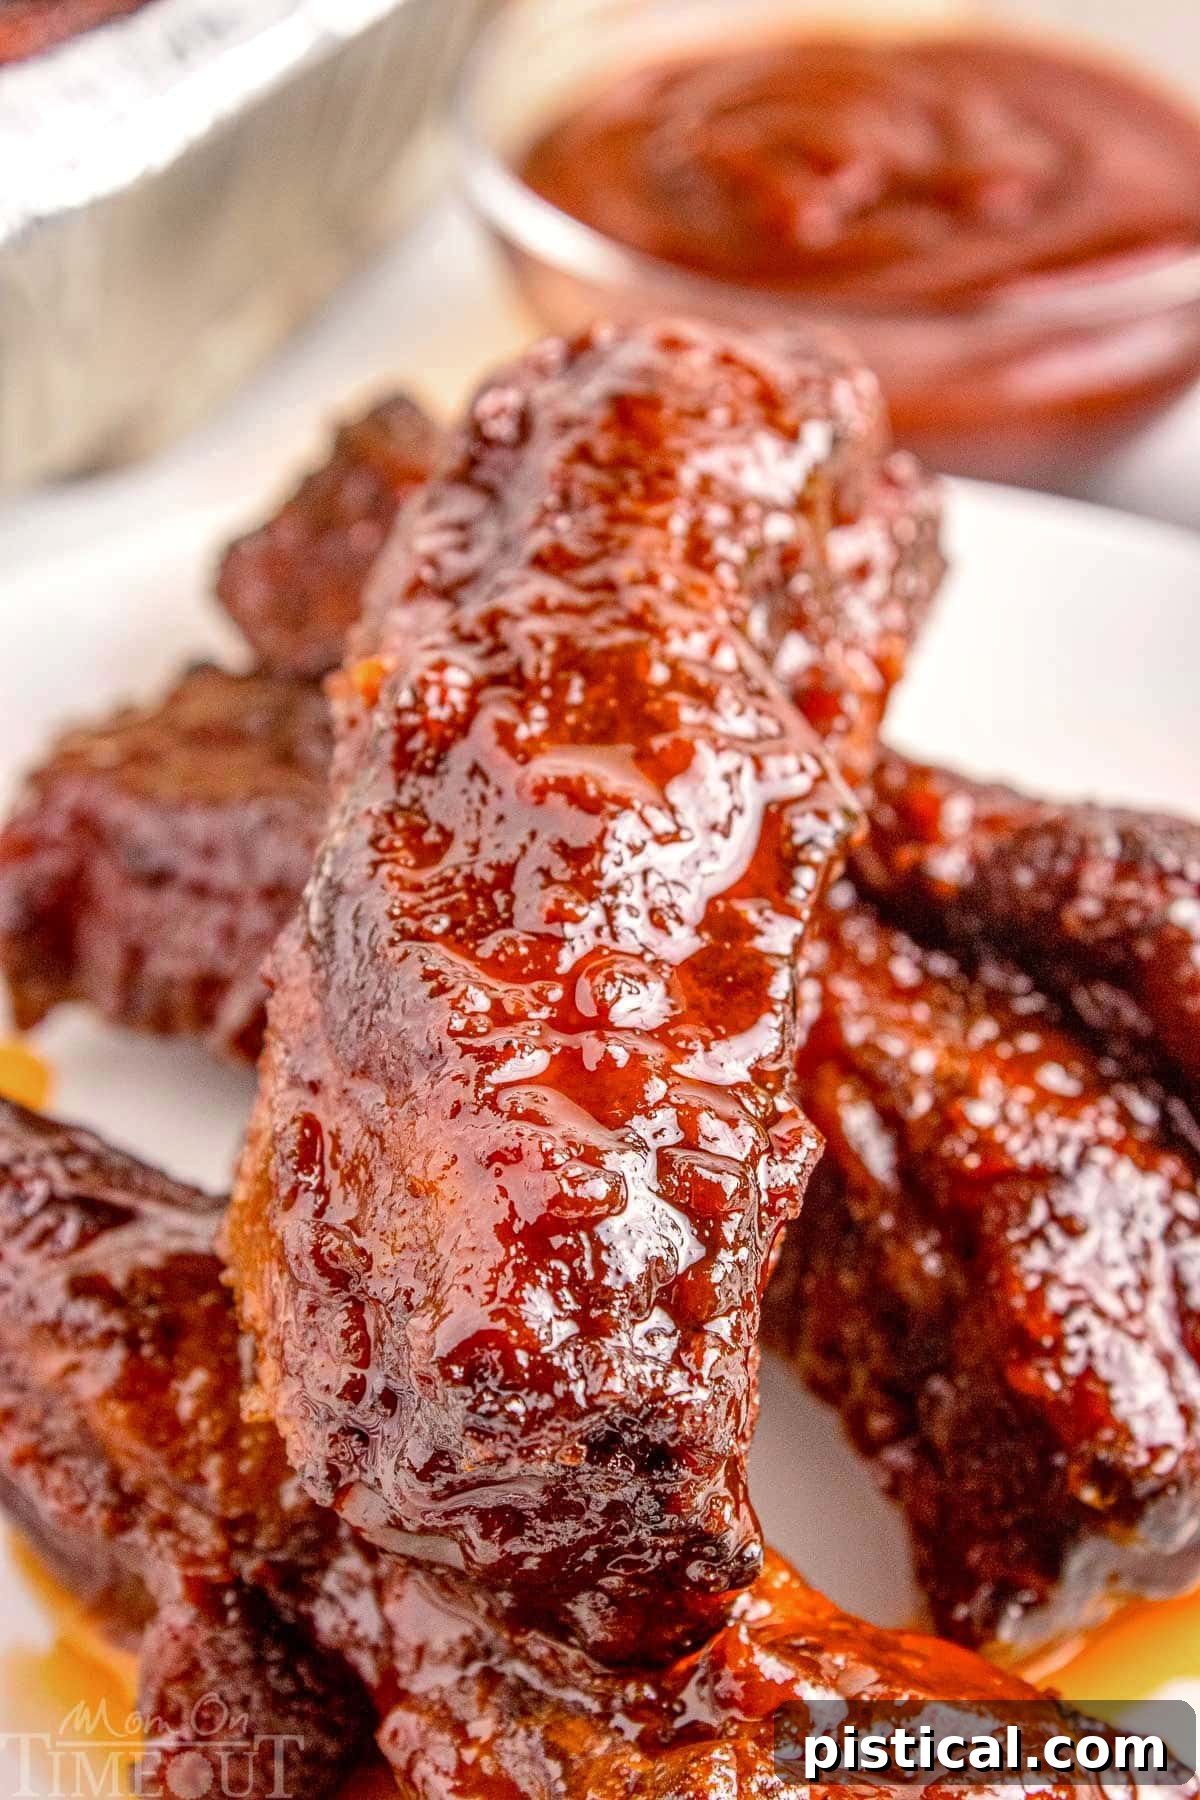
Unforgettable St. Louis Ribs: Your Guide to Perfect BBQ
There’s a special kind of magic in perfectly cooked ribs – tender, juicy, and so flavorful they practically melt in your mouth. Our St. Louis Style Party Ribs embody this magic, bringing together rich, smoky flavors with a luscious sweet and tangy BBQ glaze that will quickly become a household favorite. Whether you’re planning a grand summer cookout, a lively game-day party, or simply treating your loved ones to an extraordinary meal, these ribs are guaranteed to be the star of the show.
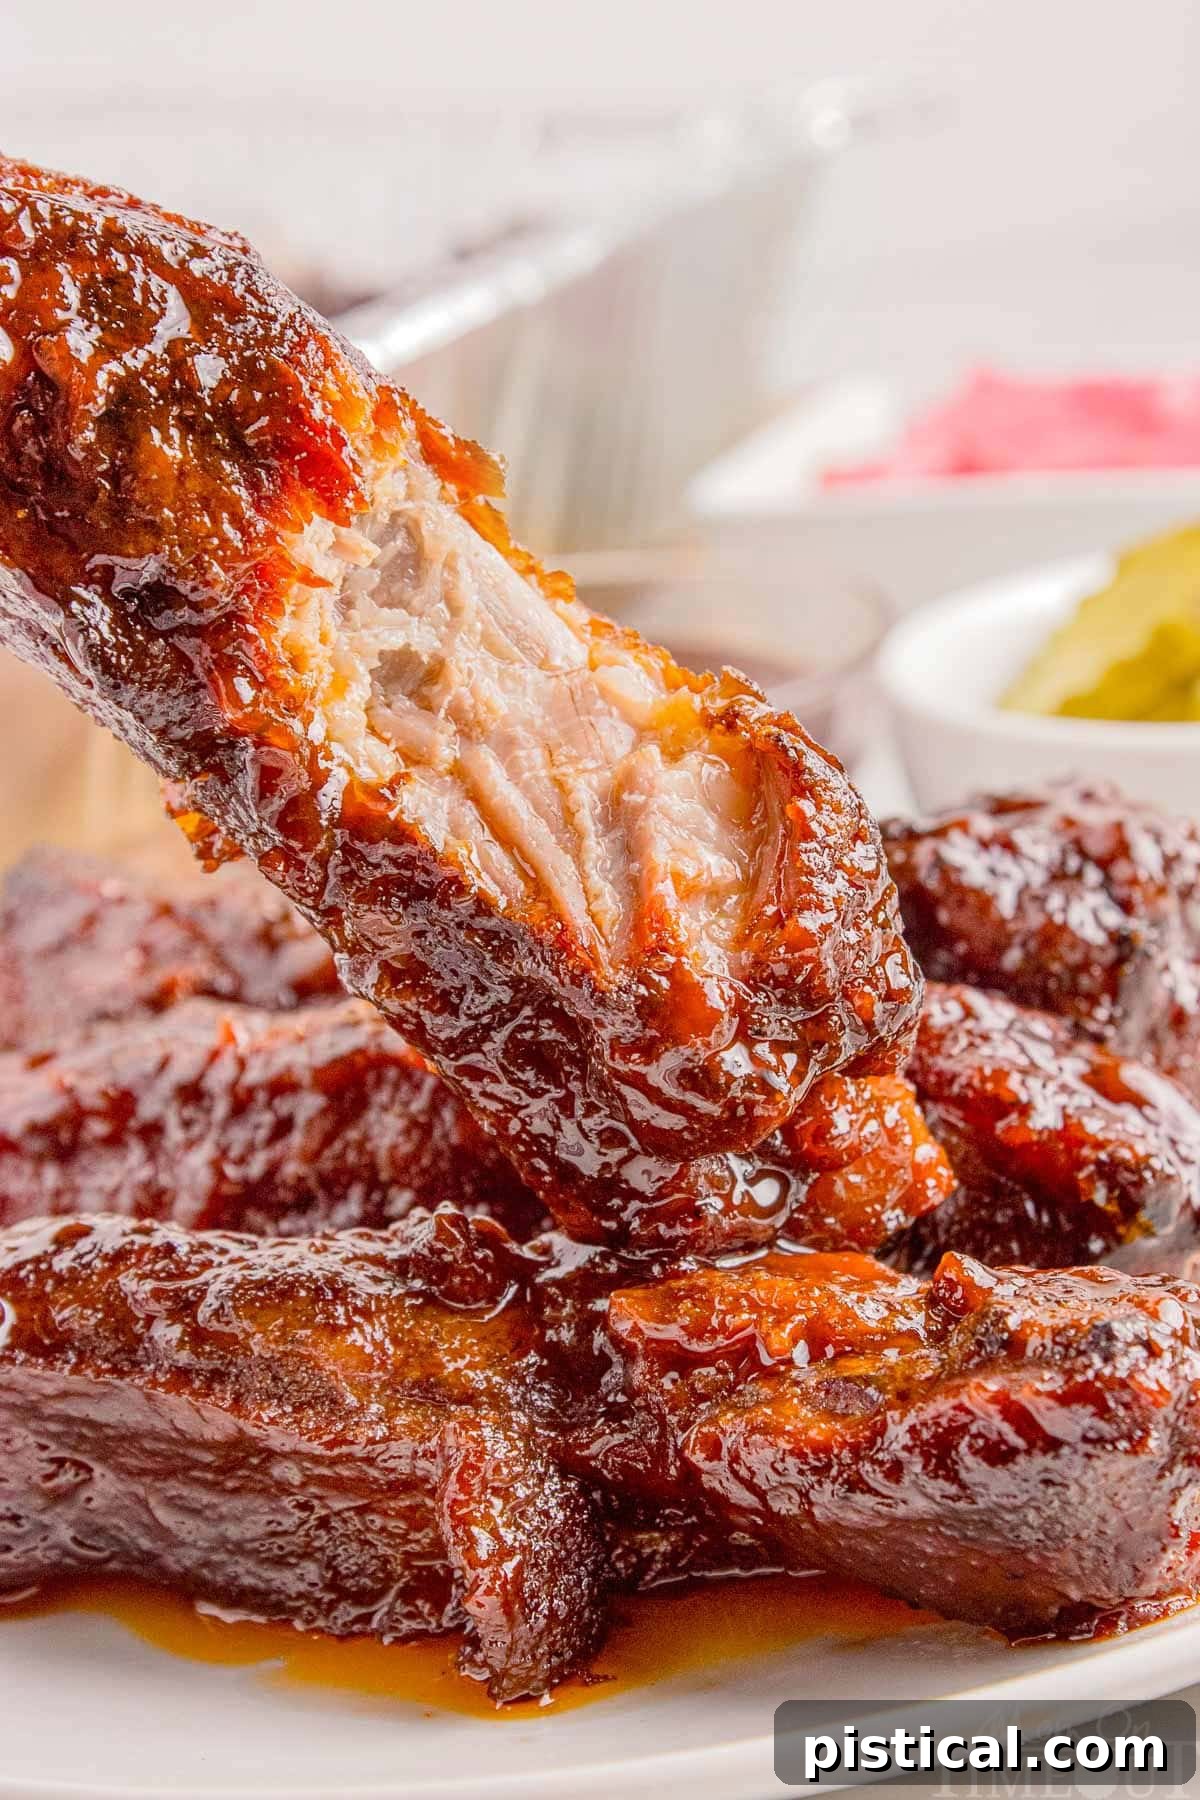
The secret to their irresistible taste lies in the “low and slow” cooking method, which allows the meat to become incredibly tender. Each rib is first generously coated with a simple yet potent dry rub, infused with aromatic spices. Then, they’re grilled to smoky perfection before being coated in a divine glaze made with butter, brown sugar, and your favorite BBQ sauce. The result? Finger-licking good ribs that are beautifully saucy, deeply smoky, and utterly addictive. Prepare for clean plates and requests for seconds!
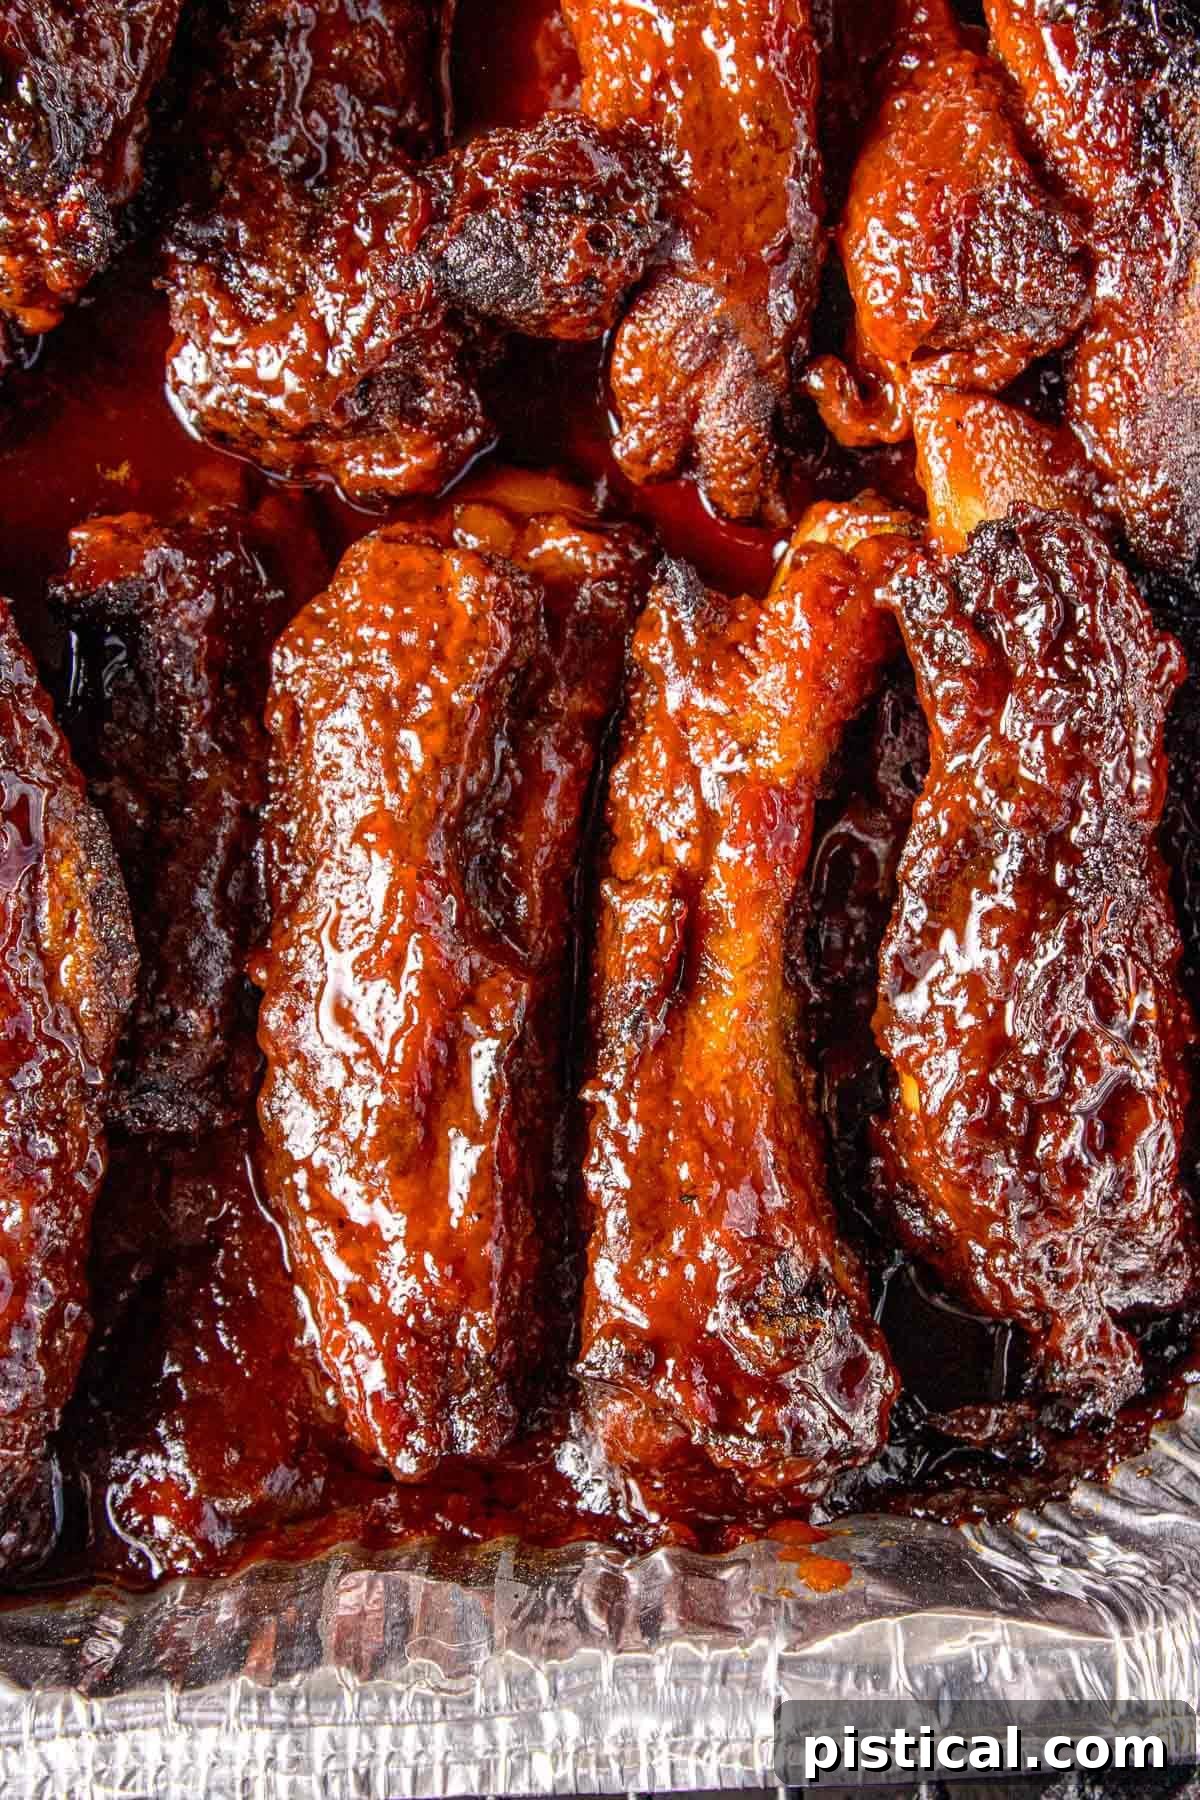
Decoding St. Louis-Style Ribs: The Butcher’s Cut
To truly appreciate St. Louis-style ribs, it helps to understand their origin and characteristics. These ribs are derived from the belly side of the pig, specifically from the sparerib section. Unlike baby back ribs, which come from the loin area closer to the spine and are smaller and leaner, St. Louis-style ribs are larger, flatter, and boast a higher fat content. This generous marbling and robust meatiness are precisely what makes them so forgiving and flavorful when cooked “low and slow.” They are expertly trimmed into a neat, rectangular slab, removing the brisket bone, cartilage, and other less desirable bits, leaving behind a uniform cut perfect for consistent grilling and smoking. This particular cut is a favorite among barbecue enthusiasts for its ability to absorb smoke and seasonings deeply, resulting in an exceptionally tender and juicy eating experience.
What Makes Them “Party Ribs”? The Ultimate Entertaining Hack
The term “Party Ribs” simply refers to St. Louis-style ribs that have been cut into individual pieces *before* cooking. Instead of serving an entire rack, each rib is separated from the bone, seasoned, and cooked on its own. This ingenious method offers several distinct advantages, especially when entertaining. Firstly, it ensures that every single rib gets maximum exposure to the dry rub and smoky flavors, resulting in a more intensely seasoned and flavorful bite. The increased surface area also allows for a more consistent glaze, coating each piece beautifully.
Beyond flavor, the “party cut” significantly enhances convenience. Individual ribs are much easier to handle, serve, and eat – no more wrestling with a full slab at the table! This makes them absolutely perfect for casual parties, lively game days, backyard gatherings, or any event where guests want to effortlessly grab a delicious, mess-free rib and dig in. It’s a thoughtful touch that streamlines the eating experience and makes these ribs an instant hit with any crowd. Hence the name, Party Ribs!
Why You’ll Absolutely Love This St. Louis Ribs Recipe
Prepare to be amazed by your new go-to St. Louis ribs recipe! These party ribs are a symphony of smoky, saucy, and irresistibly tender flavors, making them perfect for sharing with friends and family at your next get-together. Here’s why this recipe stands out:
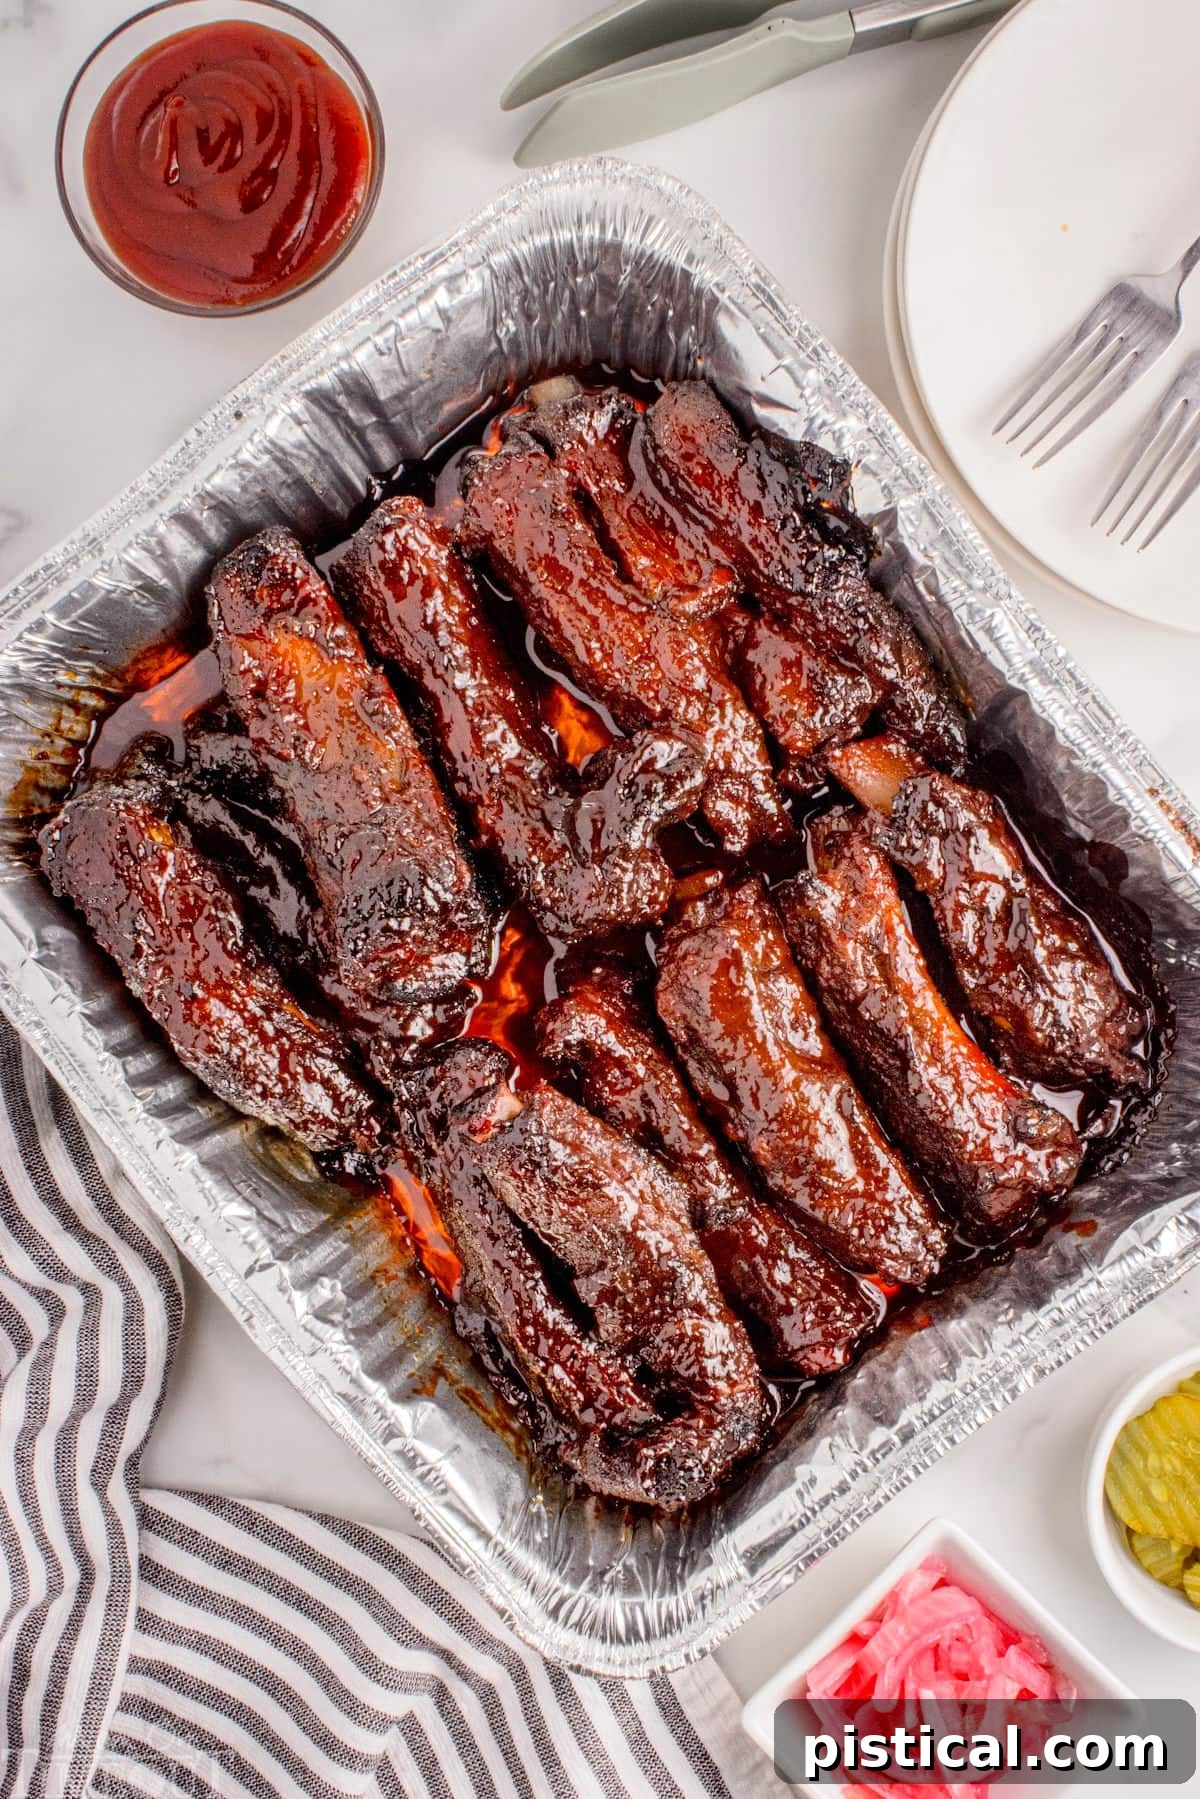
- Effortlessly Party Perfect: By cutting the ribs into individual pieces before grilling, these party ribs become incredibly easy to grab and enjoy. They eliminate the fuss of slicing at the table, making them the ultimate crowd-pleaser for cookouts, game days, and casual family dinners. Each juicy rib is a self-contained delight, ensuring everyone gets a perfect bite at any backyard BBQ or tailgate party. They’re casual, deliciously messy, and profoundly satisfying.
- Unbeatable Flavor Profile: The journey to incredible flavor begins with a simple yet powerful dry rub crafted from pantry staples. This rub creates a savory base that deeply penetrates the meat. The grand finale is an exquisite glaze, a magical combination of rich butter, sweet brown sugar, and your favorite BBQ sauce, which caramelizes beautifully and takes the ribs over the top with a perfect balance of sweet, smoky, and tangy goodness.
- Guaranteed Fall-Off-the-Bone Tenderness: The secret to achieving ribs that literally fall off the bone is our “low and slow” cooking method. This gentle, extended cooking process breaks down the tough connective tissues in the pork, transforming them into succulent, tender meat every single time. You’ll achieve that melt-in-your-mouth texture that is the hallmark of truly exceptional ribs.
- Surprisingly Easy to Master: Don’t let the idea of cooking ribs intimidate you! With our clear, step-by-step instructions and readily available ingredients, you’ll feel completely confident making this recipe. Whether you’re a seasoned grilling veteran or a complete beginner, you’ll find this process straightforward and rewarding.
- Highly Customizable for Every Palate: This recipe is wonderfully versatile, allowing you to tailor it to your family’s specific tastes. Feel free to adjust the dry rub seasoning, experiment with different BBQ sauces (spicy, sweet, tangy), or even add a kick of heat with a pinch of cayenne. Make them exactly how you like them!
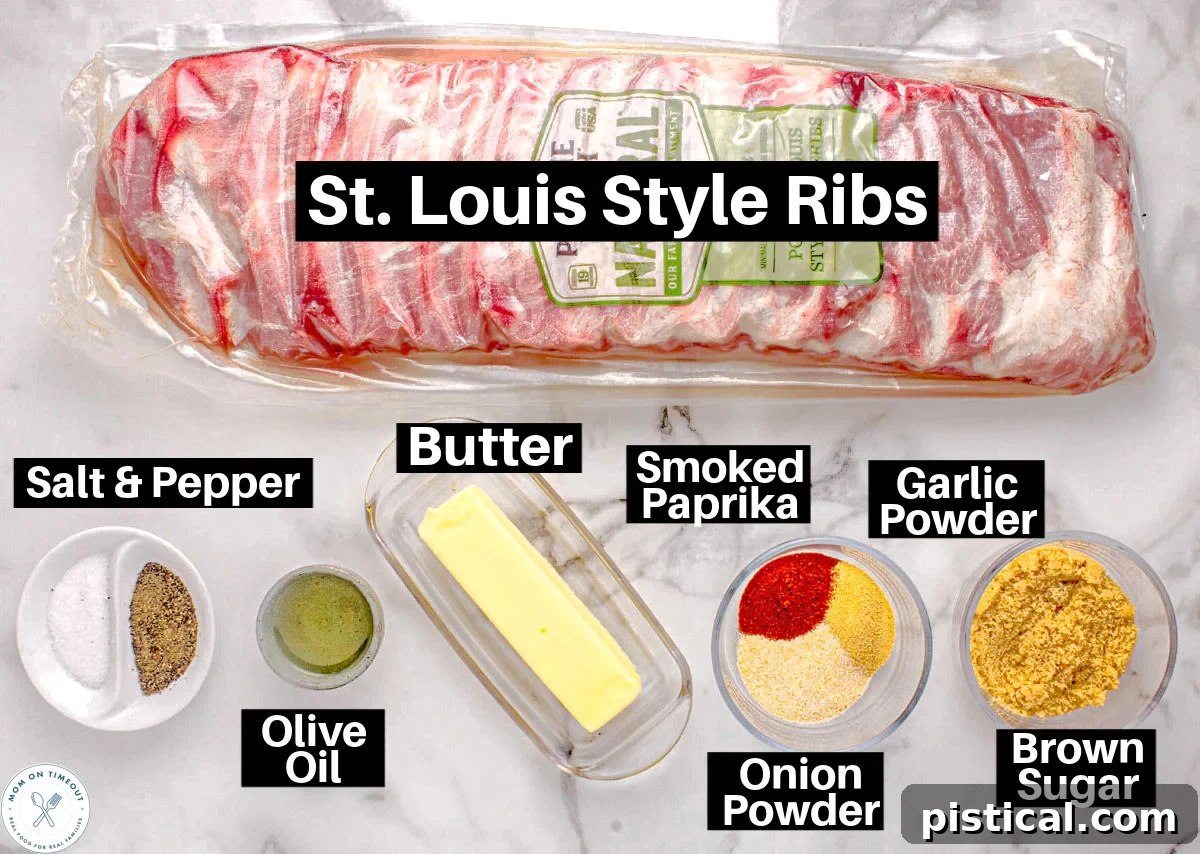
Essential Ingredients and Smart Substitutions
These St. Louis Style Party Ribs are renowned for being juicy, fall-off-the-bone tender, and bursting with smoky flavor. Cooked low and slow, then perfectly finished with a sweet BBQ glaze, they are ideal for any cookout, party, or family dinner. You only need a handful of accessible ingredients to create these next-level ribs!
- St. Louis Style Pork Ribs: This cut is celebrated for its tenderness and substantial meatiness, which cooks beautifully and provides an excellent surface for seasoning and forming a crust. Its balanced fat content keeps the ribs moist and flavorful during the long cooking process. If St. Louis style ribs are unavailable, you can confidently use spare ribs (which are essentially untrimmed St. Louis ribs) or even baby back ribs, though cooking times might need slight adjustment. For those who prefer alternatives to pork, beef ribs can also be prepared using a similar method for equally delicious results.
- BBQ Sauce: For ultimate convenience, a good quality store-bought BBQ sauce is perfectly acceptable and yields fantastic results. However, if you’re feeling ambitious and want to truly personalize your ribs, don’t hesitate to whip up your own homemade version. The beauty of this recipe is its adaptability to different flavor profiles. Consider swapping in an umami-rich Japanese BBQ sauce, adding a fiery kick with a spicy chipotle-infused sauce, or opting for an extra-sweet variety to cater to your preference.
- Brown Sugar: This ingredient is a game-changer for the glaze. Brown sugar adds a deep, molasses-rich sweetness that not only balances the tangy and spicy notes of the BBQ sauce but also aids in caramelization during cooking, creating that beautiful, shiny, and slightly sticky exterior. If you find yourself without brown sugar, granulated sugar can be used in a pinch, or for a different depth of sweetness, try natural alternatives like maple syrup or honey.
- Garlic and Onion Powder: These pantry powerhouses are essential for building the foundational savory flavor of our dry rub. They provide robust, aromatic notes without the added time and effort of finely chopping fresh garlic and onions. However, if you prefer the vibrant intensity of fresh ingredients, feel free to substitute with minced garlic and very finely chopped onions – they will definitely amplify the flavor profile.
- Smoked Paprika: This spice is non-negotiable for achieving that authentic, deep smoky flavor and a beautiful reddish hue on your ribs, even without a smoker. Smoked paprika adds a complex, earthy warmth that enhances the barbecue experience. If genuine smoked paprika isn’t on hand, regular paprika can be used for color, but you might want to compensate with a touch of liquid smoke if you desire a smokier profile.
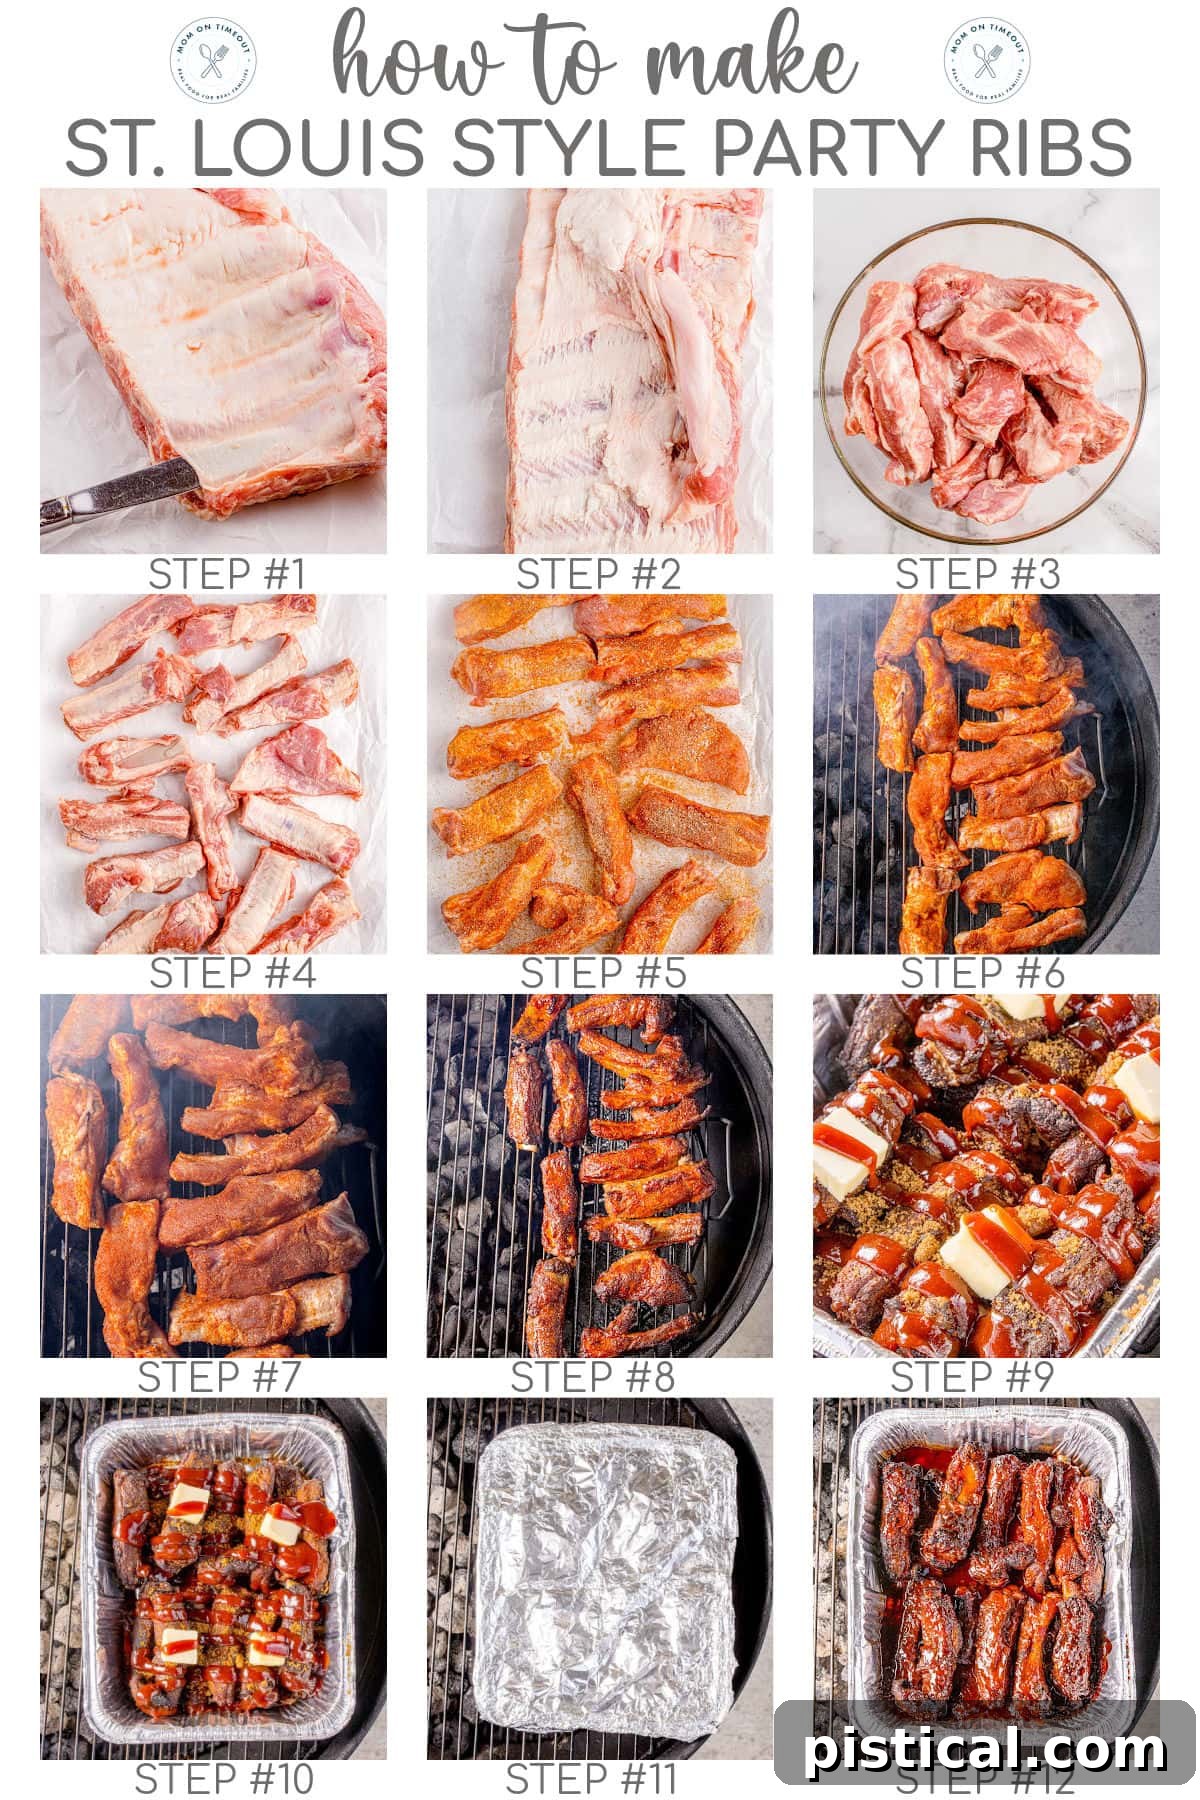
How to Prepare Perfect St. Louis Style Party Ribs
Get ready for tender, flavorful, and saucy St. Louis Style Party Ribs! This easy, crowd-pleasing recipe utilizes common pantry staples to create unbelievably delicious ribs, perfect for backyard barbecues or even a special weeknight dinner. Below is a detailed guide; remember, the full printable recipe card is available at the end of this post for your convenience.
Let’s take a quick look at how to make the recipe and as always, you’ll find the full printable recipe card at the end of this post.
Step 1: Prepare the Ribs for Maximum Tenderness
- Remove the Membrane: Begin by placing the full rack of ribs bone-side up. Locate the thin, silvery membrane covering the back of the bones. Using a butter knife, carefully slide it under the membrane at one end to lift a small section. Grip this loosened membrane firmly with a paper towel (it can be slippery!) and slowly peel it away completely. This crucial step ensures the dry rub penetrates deeply and prevents the ribs from becoming tough and chewy.
- Slice into Individual Ribs: Once the membrane is removed, use a sharp knife to carefully slice between each bone, separating the rack into individual “party” ribs. This allows for more even seasoning and cooking, and makes them incredibly easy to serve.
Step 2: Season the Ribs to Perfection
- Oil and Toss: Place the individual rib pieces into a large bowl or a disposable aluminum pan. Drizzle them with about 2 tablespoons of extra virgin olive oil. Toss thoroughly to ensure each rib is lightly coated, helping the dry rub adhere better.
- Apply the Dry Rub: In a small separate bowl, combine your dry rub ingredients: onion powder, garlic powder, smoked paprika, salt, and black pepper to taste. Sprinkle this mixture generously over all sides of the ribs. Rub it in gently to ensure full coverage.
- Bring to Room Temperature: Allow the seasoned ribs to sit at room temperature for 30 to 45 minutes before placing them on the grill. This helps the meat cook more evenly and prevents it from seizing up when it hits the heat. For an even deeper flavor, you can let them marinate with the dry rub in the refrigerator overnight.
Step 3: Set Up Your Grill for “Low and Slow” Cooking (Two-Zone Method at 250°F)
The “low and slow” two-zone cooking method is key to achieving incredibly tender ribs, as it prevents direct burning and ensures even heat distribution. Here’s how to set up different grill types:
- For Traeger Grills or Wood Pellet Grills: These grills are ideal for consistent low and slow cooking. Simply fill the hopper with your favorite premium wood pellets (hickory, applewood, or cherry work wonderfully for pork), then preheat your grill to a steady 250°F.
- Charcoal Grill: Light your charcoal in a chimney starter. Once the coals are hot and covered with a light ash, carefully transfer them to one side of the grill. Leave the other side empty to create a cool zone for indirect cooking. Adjust both the bottom and top vents to maintain a consistent internal grill temperature of 250°F.
- Gas Grill: Turn on the burners on one side of your gas grill only, leaving the burners on the opposite side off. Preheat your grill to a stable 250°F. The side with the burners off will be your cool, indirect cooking zone where the ribs will cook.
Step 4: Grill the Ribs and Achieve That Irresistible Glaze
- Begin Indirect Cooking: Place the seasoned ribs on the cool side of your grill grate, ensuring they are away from any direct heat source.
- Close the Lid and Cook: Close the grill lid and let the ribs cook low and slow for approximately 2 to 2½ hours. During this time, the connective tissues will break down, and the ribs will develop a beautiful mahogany color. For precise doneness, aim for an internal temperature of 190-203°F. You’ll know they’re ready when they feel tender when gently poked with tongs.
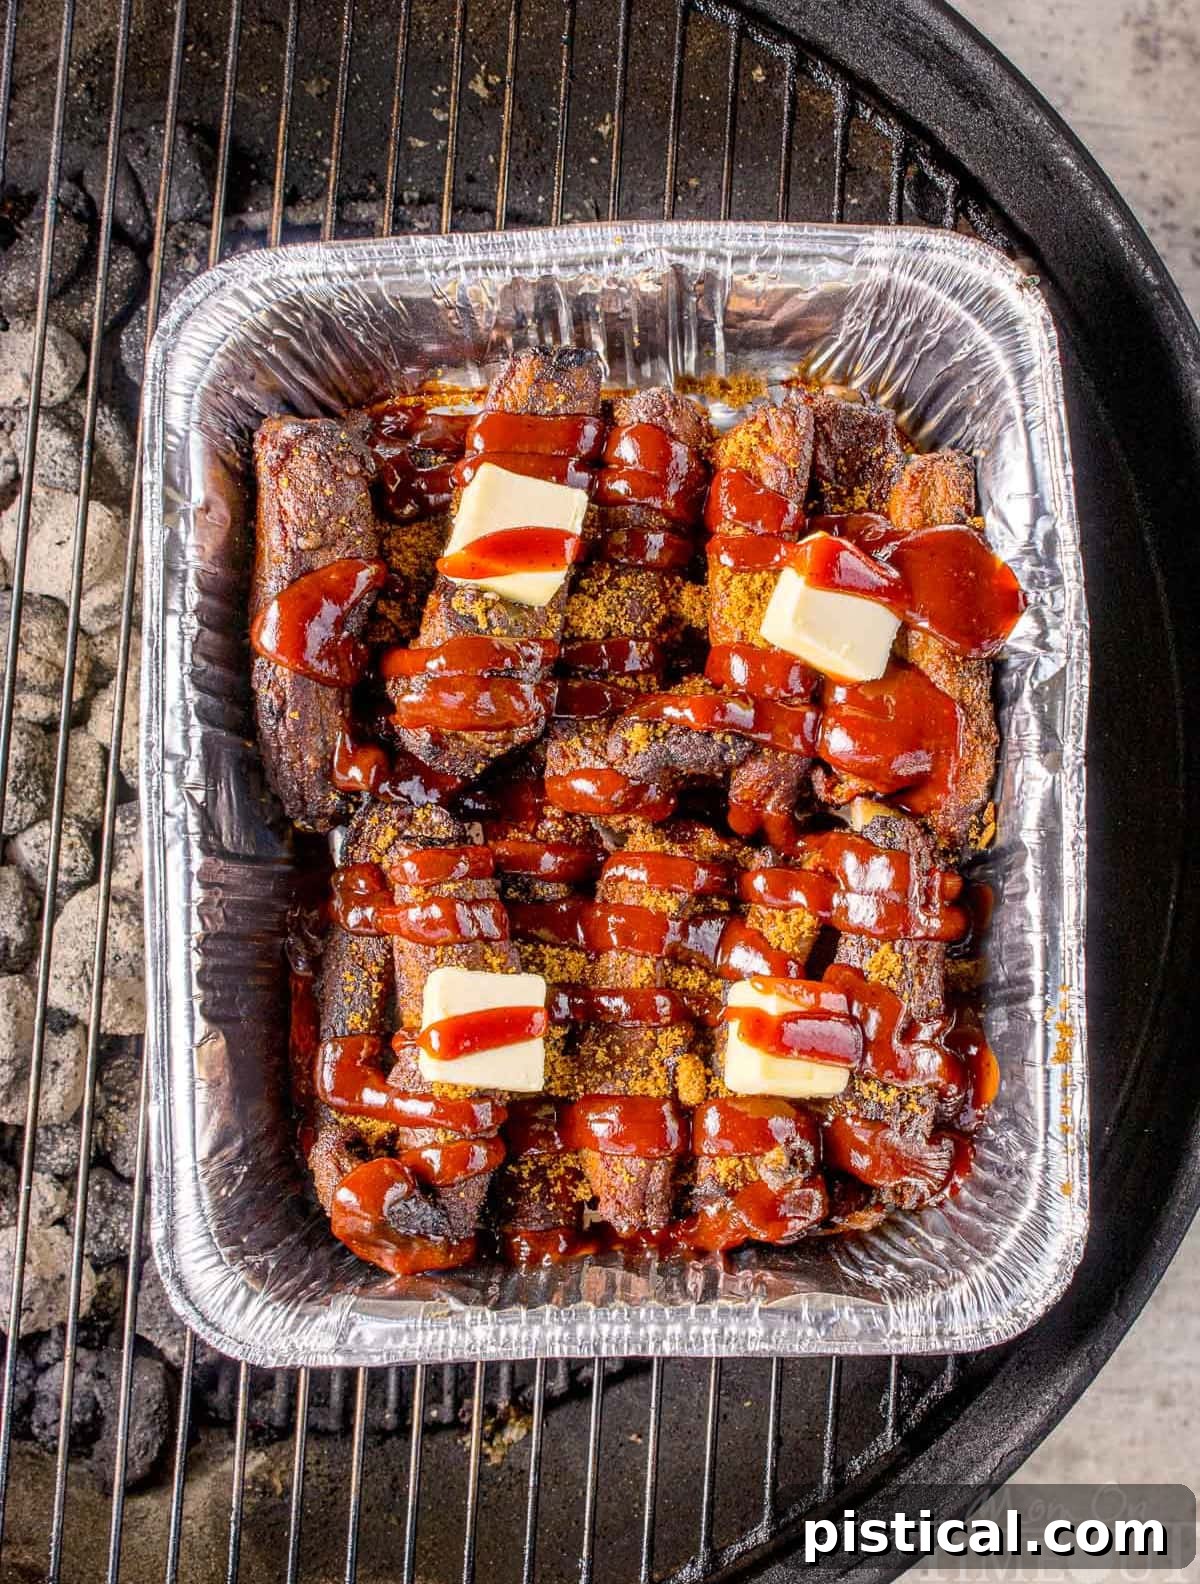
- Prepare the Glaze: Carefully transfer the partially cooked ribs from the grill to a disposable aluminum pan. Evenly sprinkle brown sugar over the ribs, then dot them with small pieces of salted butter. Finally, pour ½ cup (or more, if you love extra saucy ribs!) of your favorite BBQ sauce over everything.
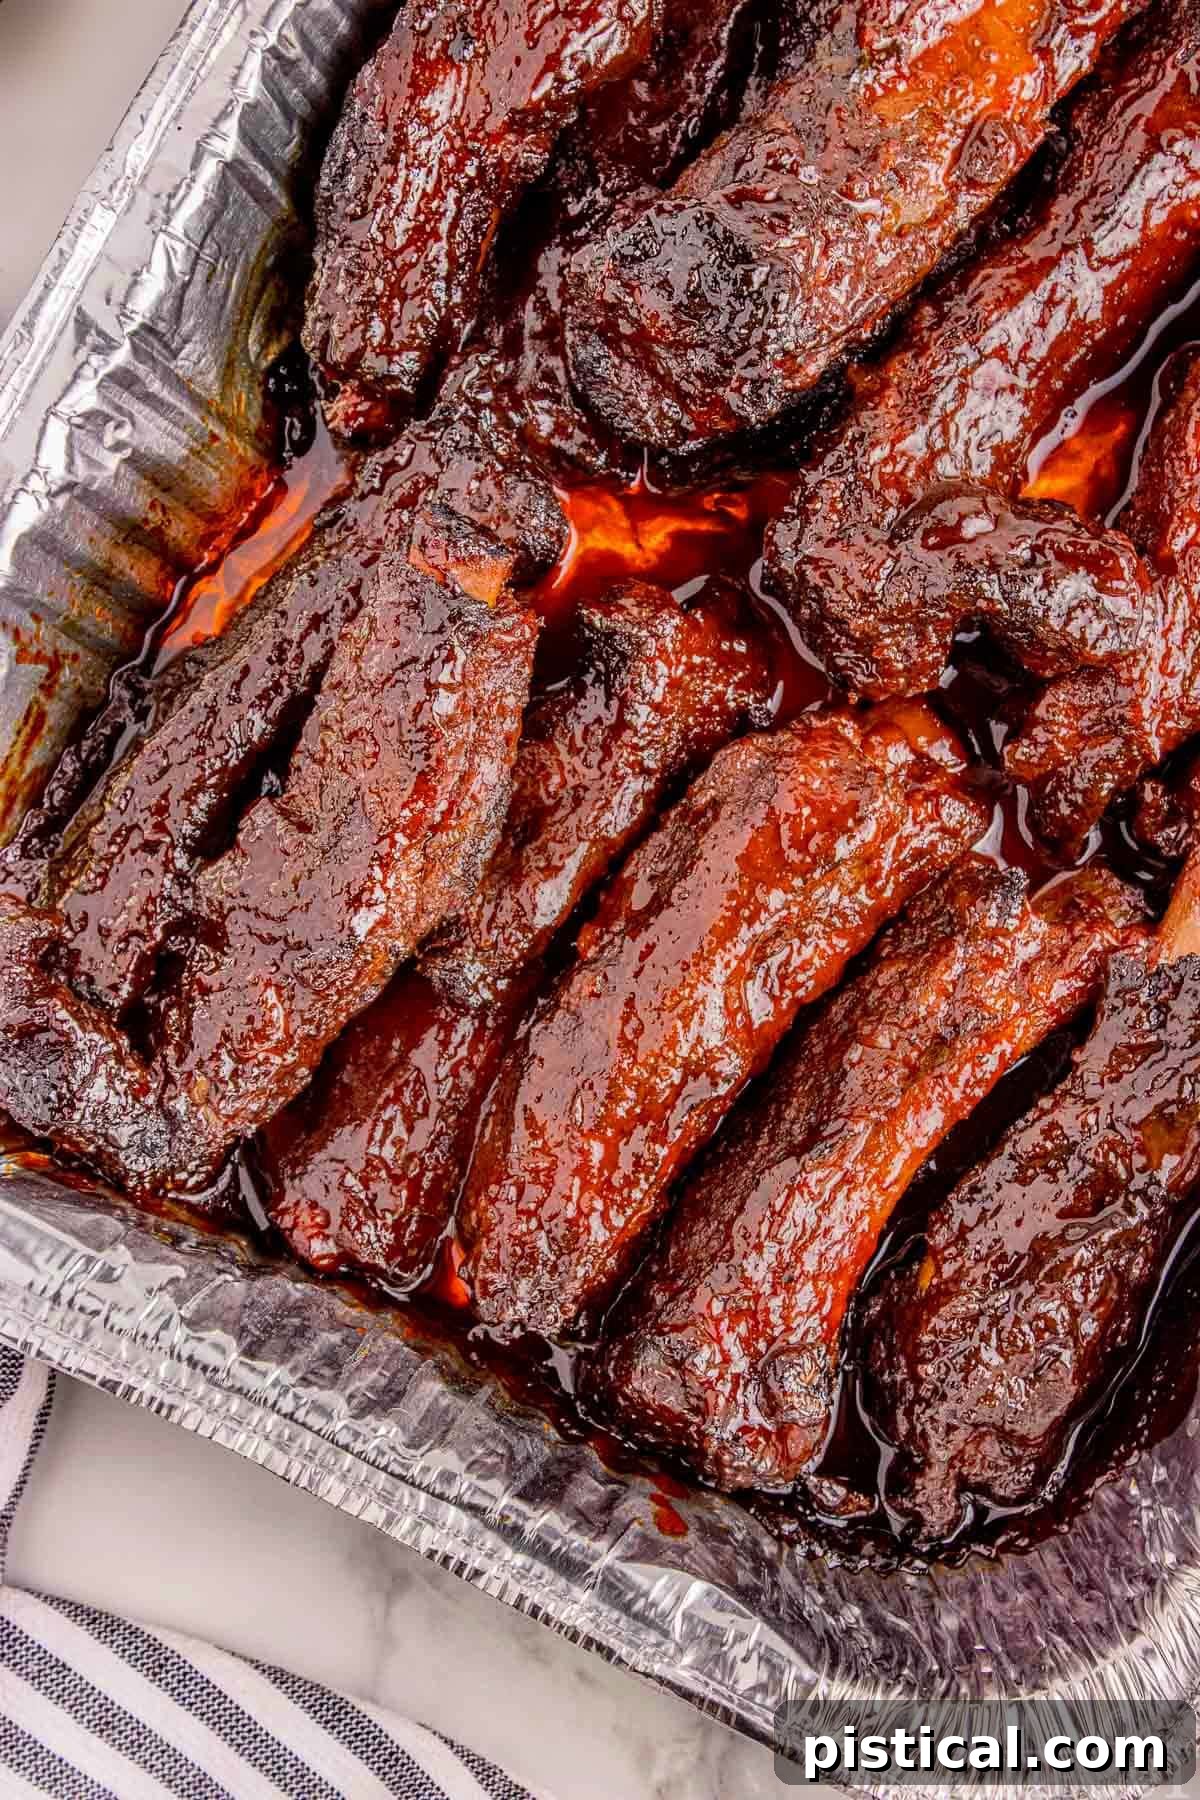
- Glaze and Caramelize: Place the pan back on the grill, still on the indirect heat side. Close the lid and allow the ribs to cook for another 15 to 20 minutes. This period allows the brown sugar to melt and caramelize, the butter to infuse, and the BBQ sauce to thicken and create that glossy, irresistible glaze.
- Rest and Serve: Once glazed to perfection, remove the pan of delicious ribs from the grill. Let them rest for a few minutes before serving. This short rest allows the juices to redistribute, ensuring every bite is moist and flavorful. Serve warm with your favorite BBQ sides.
Plan Ahead: For the deepest flavor, allow your ribs to marinate with the dry rub overnight or for at least a few hours in the refrigerator. This extended time enables the spices to truly penetrate the meat, enhancing its flavor far beyond what a quick rub can achieve.
Storage and Reheating Best Practices
While these Party Ribs are undoubtedly at their peak freshness on the day they’re made, any leftovers can be conveniently stored in the refrigerator or freezer for future enjoyment. Proper storage and reheating techniques will ensure they remain delicious.
- Refrigerator Storage: Allow any leftover ribs to cool completely to room temperature before storing. Transfer them to an airtight container and refrigerate for up to 3 days.
- Freezer Storage: For longer preservation, wrap cooled ribs tightly in heavy-duty aluminum foil. Then, place the foil-wrapped ribs into a freezer-safe bag or an airtight container. They can be frozen for up to 2 months. When you’re ready to enjoy them, thaw the ribs in the refrigerator overnight before reheating.
- Make Ahead Tip: You can season the ribs with the dry rub up to 24 hours in advance. Simply cover them tightly and refrigerate until you’re ready to grill, allowing the flavors to meld even more deeply.
How To Reheat Leftover Ribs
- Oven Method (Recommended for Best Results): Preheat your oven to 300°F (150°C). Arrange the ribs in a disposable aluminum pan. For added moisture and flavor, you can pour a little extra BBQ sauce over them. Cover the pan tightly with foil to prevent the ribs from drying out. Heat for about 20-30 minutes, or until thoroughly warmed through. Reheating gently without overcooking is key to maintaining their juiciness.
- Microwave Method (Quick Option): For a faster reheat, place individual ribs on a microwave-safe plate. Cover them with a damp paper towel to help retain moisture. Heat on medium power in 1-minute bursts, checking and flipping them as needed, until they are heated through. Be cautious not to overcook, as this can lead to dryness.
- Grill Method (For Smoky Flavor Revival): Preheat your grill to medium heat. Place the ribs in a disposable aluminum pan, add a splash of BBQ sauce, and cover with foil. Warm them on the indirect heat zone of the grill for 10-15 minutes, until heated through. This method can help revive some of that grilled flavor.
Delicious Variations to Try
These St. Louis Style Party Ribs are a foundational dish that can turn any casual get-together into something truly special. Smoky, saucy, and bursting with flavor, they’re destined to become a cookout favorite! Here are some creative variations to customize your rib experience:
- Spice It Up: For those who love a bit of heat, consider adding a pinch of cayenne pepper to your dry rub mix. Alternatively, infuse your favorite BBQ sauce with a dash of hot sauce or some finely minced jalapeños for a spicy kick that complements the sweetness beautifully.
- Sweet & Sticky Alternative: Instead of brown sugar, experiment with pure honey or maple syrup when glazing the ribs. These natural sweeteners will create an even stickier, richer, and uniquely flavored finish that’s utterly delicious.
- Go Au Naturel (Sauce-Free): If you prefer to let the robust flavor of the pork and the smoky dry rub truly shine, you can skip the final BBQ sauce glaze altogether. The seasoned, slow-cooked ribs will still be incredibly flavorful and tender on their own.
- Enhance the Smoke: For an even more authentic smoked flavor, especially if you have a dedicated smoker, experiment with different types of wood. Applewood imparts a mild, sweet, fruity smoke, while hickory offers a stronger, more traditional smoky profile. Cherry wood provides a beautiful color and a subtly sweet flavor.
- Herbal Infusion: Add dried herbs like thyme or rosemary to your dry rub for an aromatic twist. These herbs pair wonderfully with pork and can introduce a Mediterranean-inspired nuance to your barbecue.
- Citrus Zest Brightness: Before applying the dry rub, lightly rub the ribs with fresh orange or lemon zest. The citrus notes will add a subtle brightness that cuts through the richness of the pork and complements the smoky flavors.
Frequently Asked Questions About Ribs
Do I have to remove the membrane from the ribs?
Yes, removing the thin, silvery membrane from the bone side of the ribs is highly recommended. This crucial step allows the dry rub and seasonings to penetrate the meat more effectively, resulting in a deeper flavor. More importantly, it ensures the ribs cook up incredibly tender, preventing them from having a tough or chewy texture.
What’s the key difference between St. Louis-style ribs and baby back ribs?
The main difference lies in their cut and location on the pig. St. Louis-style ribs are cut from the belly section of the pig, making them larger, flatter, meatier, and generally fattier than baby back ribs. Their higher fat content contributes to their juicy tenderness when cooked low and slow, making them superb for grilling and smoking. Baby back ribs, on the other hand, come from the loin area near the spine, are shorter, more curved, and leaner.
Can I make these ribs in the oven instead of on the grill?
Absolutely! The oven is a fantastic alternative for achieving wonderfully tender ribs. To do so, preheat your oven to 250°F. Place the seasoned ribs on a foil-lined baking sheet (you might want to cover them loosely with foil to prevent drying). Bake for approximately 2½ to 3 hours, or until very tender. Then, proceed with the glazing step: add the butter, brown sugar, and BBQ sauce, and continue baking for another 15–20 minutes, uncovered, until the glaze is sticky and caramelized.
What’s the best way to tell when ribs are perfectly done?
There are a few indicators for perfectly cooked ribs. Visually, the meat should have pulled back from the ends of the bones by about ¼ to ½ inch. For tenderness, when you lift a rib with tongs, it should bend easily without breaking apart, and the meat should yield with a slight tug, but not completely fall off the bone (unless you prefer “fall-off-the-bone” style, which means cooking them a bit longer). The most reliable method is to check the internal temperature with a reliable meat thermometer: aim for 190-203°F in the thickest part of the meat, avoiding the bone. At this temperature, the connective tissues have broken down, resulting in tender, succulent ribs.
Can I use a slow cooker for this recipe to get tender ribs?
Yes, a slow cooker is an excellent tool for achieving incredibly tender ribs with minimal effort. After seasoning the ribs with the dry rub, place them in your slow cooker. Cook on low for 6-8 hours, or on high for 3-4 hours, until the ribs are fork-tender. Once cooked, you can transfer them to a baking sheet or the grill, brush with BBQ sauce, and finish under the broiler or over direct heat for a few minutes to get that desirable char and crispy, caramelized glaze.
Trish’s Expert Tips for the Best Ribs Ever
If you’re aiming to serve a show-stopping dish at your next cookout or family gathering, these St. Louis Style Party Ribs are guaranteed to deliver! Following these expert tips will ensure you achieve the best possible results every single time:
- Achieve Even Cooking with Room Temperature Ribs: Always allow your seasoned ribs to come to room temperature for at least 30-45 minutes before placing them on the grill. This simple step helps the meat cook more uniformly, preventing the exterior from overcooking while the interior remains undercooked.
- The Essential Membrane Removal: This step is non-negotiable for tender, flavorful ribs. Before applying any seasoning, take the time to peel off the thin, silvery membrane from the back of the ribs. Removing it ensures that your dry rub can deeply penetrate the meat and prevents the ribs from becoming tough and rubbery.
- Ensure Adequate Grill Space: Make sure your grill offers sufficient cooking space to accommodate all your ribs without overcrowding. Overcrowding the grill can lower the temperature, create uneven cooking, and prevent the ribs from developing a beautiful crust.
- Pair with Classic BBQ Sides: Complete your meal with classic barbecue accompaniments. Serve your ribs alongside creamy coleslaw, fluffy cornbread (or its spicy cousin, jalapeño cornbread), or sweet and savory baked beans for a perfectly balanced and satisfying feast.
- Don’t Skip the Rest! Once the ribs are off the grill, resist the urge to immediately dig in. Letting the ribs rest for 5-10 minutes before serving allows the meat fibers to relax and the delicious juices to redistribute throughout the ribs, ensuring every bite is moist and tender.
- For the Extra Saucy Crowd: If your guests adore extra saucy ribs, prepare a little more of the butter-brown sugar-BBQ sauce mix and warm it gently. Serve it on the side for dipping, allowing everyone to customize their sauciness.
- Temperature Control is King: Maintaining a consistent and steady grill temperature of 250°F is the ultimate secret to achieving perfectly tender ribs. Fluctuations in temperature can lead to uneven cooking and tougher meat. Use a reliable grill thermometer to monitor closely.
- Prevent Burning with Foil: If you notice your ribs are darkening too quickly before they’ve reached their desired tenderness, loosely wrap them in aluminum foil. This will protect them from direct heat and prevent burning while allowing them to finish cooking through.
- Patience is a Virtue for Ribs: Especially if you’re new to grilling ribs, remember that patience is absolutely key. Ribs are at their best when cooked “low and slow.” This extended, gentle cooking time is essential for breaking down the tough connective tissues, resulting in meat that is incredibly tender and juicy.
- Master the Two-Zone Cooking Method: Utilizing a two-zone cooking setup (direct and indirect heat) is crucial for ribs. Keeping the ribs on the indirect heat side prevents them from drying out or burning on the outside before they’ve had a chance to become tender on the inside.
- Invest in a Quality Meat Thermometer: A reliable instant-read meat thermometer is your best friend when cooking ribs. It takes the guesswork out of determining doneness. Once the ribs consistently register in the perfect 190-203°F range (in the thickest part, away from the bone), you’ll know they’re ready to be enjoyed!
- Maximize Flavor with Extended Dry Rub Time: For the deepest and most complex flavors, allow your ribs to sit with the dry rub overnight or for at least a few hours in the refrigerator. This prolonged contact gives the spices ample time to truly soak into the meat, infusing every fiber with deliciousness, rather than just flavoring the surface.
Perfect Pairings: What to Serve with Your Ribs
These magnificent ribs pair exceptionally well with a variety of classic barbecue side dishes. Together, these sides transform your ribs into a complete, harmonious meal that’s ideal for summer cookouts, festive backyard parties, or a satisfying weekend family feast. Try serving with these crowd-pleasing favorites:
- Creamy Coleslaw – The cool, crunchy, and tangy notes of coleslaw provide a refreshing contrast to the rich sweetness of the ribs, balancing the flavors beautifully.
- Baked Mac and Cheese – A universally loved side dish, cheesy and comforting mac and cheese offers a creamy, savory counterpoint that complements the smoky ribs perfectly.
- Fluffy Cornbread or Tender Biscuits – These absorbent breads are perfect for soaking up every last drop of the delicious BBQ sauce, ensuring no flavor goes to waste.
- Spicy Jalapeño Cornbread – For those who enjoy a little heat, this cornbread variation adds a delightful spicy kick that creates an exciting contrast with the sweet BBQ glaze on the ribs.
- Deviled Egg Macaroni Salad – A quintessential BBQ favorite, this creamy and flavorful salad combines two picnic classics into one irresistible side.
- Sweet and Smoky Baked Beans – The deep, molasses-rich sweetness and smoky undertones of classic baked beans make them an absolute perfect match for barbecue ribs, enhancing the overall flavor profile.
- Crunchy Broccoli Salad or Refreshing Cucumber Salad – For a lighter, fresher option, these vibrant salads offer a crisp texture and bright flavors that perfectly cut through the richness of the ribs.
Print Recipe | Pin Recipe
Grilled Party Ribs Recipe
These St. Louis Style Party Ribs are all about big flavor and melt-in-your-mouth tenderness! Each rib is seasoned to perfection, grilled low and slow and finished with an irresistible glaze. These fall-off-the-bone ribs are perfect for parties, BBQs, holidays and family dinners!
Course: Main Course, Main Dish
Cuisine: American
Keyword: party ribs, party ribs recipe, st louis ribs, st louis style ribs
Prep Time: 15 minutes
Cook Time: 2 hours
Resting Time: 30 minutes
Total Time: 2 hours 45 minutes
Servings: 6
Author: Trish – Mom On Timeout
Ingredients
Ribs & Dry Rub
- 1 rack St. Louis style pork ribs
- 2 tablespoons extra virgin olive oil
- 4 teaspoons onion powder
- 4 teaspoons garlic powder
- 1½ teaspoons smoked paprika
- Salt, to taste
- Black pepper, to taste
BBQ Glaze
- ¼ cup packed brown sugar
- 4 tablespoons salted butter, cut into small pieces
- ½ cup barbecue sauce, plus more as needed
Instructions
Prep the Ribs
- Flip the whole rack so the bone side is up, then slide a butter knife under the thin layer of white membrane at one end to loosen it. Grip it with a paper towel and peel it off completely.
- Slice between the bones to separate the rack into individual ribs.
Season Ribs
- Place the ribs in a large bowl or foil pan and drizzle with olive oil over them. Toss them well.
- In a small bowl, prepare the dry rub by whisking together onion powder, garlic powder, smoked paprika, salt and pepper to taste.
- Sprinkle the dry rub all over the ribs, ensuring both the meat side and bone side are covered. Let the seasoned ribs come to room temperature for 30 to 45 minutes before grilling.
Set Up the Grill (Two-Zone Method at 250°F)
- For Traeger Grills or Wood Pellet Grills: Fill the hopper with premium wood pellets, then preheat the grill to 250°F.
- Charcoal Grill: Light the charcoal and then move it to one side of the grill. Leave the other side empty for indirect cooking. Adjust the bottom and top vents to keep the grill at 250°F.
- Gas Grill: Turn the burners on one side only, leaving the other side off. Preheat your grill to 250°F, using the cool side for the ribs.
Grill the Ribs
- Place the ribs on the cool side of the grill grate, away from direct heat. Close the lid. Cook them low and slow for about 2 to 2½ hours, or until the cooked ribs have a beautiful mahogany color and reach an internal temperature of 190-203°F and feel tender when poked with tongs.
Glaze
- Move the ribs to a disposable aluminum pan. Sprinkle brown sugar over the ribs, then top them with butter pieces and ½ cup or more of your favorite BBQ sauce.
- Place the pan on the grill, close the lid. Let the sauce glaze and the butter melt over the ribs for about 15 to 20 minutes.
Serve and Enjoy
- Remove the delicious ribs from the grill, let them rest for a few minutes, and serve warm alongside your favorite sides.
Nutrition Information
Calories: 797kcal | Carbohydrates: 22g | Protein: 34g | Fat: 63g | Saturated Fat: 22g | Polyunsaturated Fat: 9g | Monounsaturated Fat: 24g | Trans Fat: 1g | Cholesterol: 193mg | Sodium: 486mg | Potassium: 642mg | Fiber: 1g | Sugar: 17g | Vitamin A: 533IU | Vitamin C: 0.5mg | Calcium: 58mg | Iron: 2mg