

Delightfully Simple Easter Cake Mix Cookies: Your Ultimate Springtime Treat!
Get ready to whip up a batch of the easiest and most adorable cookies this spring! These Easter Cake Mix Cookies are a phenomenal shortcut to bakery-quality treats, requiring just a few pantry staples and your favorite box of cake mix. Imagine soft, chewy cookies, perfectly dipped in vibrant chocolate and adorned with festive candies or sprinkles, making them an irresistible addition to any Easter celebration, springtime party, or casual potluck. They’re so simple, yet so impressive, they’re sure to become a holiday staple!
Can’t get enough of the incredible convenience and deliciousness of cake mix cookies? Explore more exciting variations to keep your cookie jar full of delightful surprises:
- Strawberry Cake Mix Cookies
- Funfetti Cake Mix Cookies
- Rolo Stuffed Chocolate Cake Mix Cookies

Why You’ll Adore These Easy Easter Cake Mix Cookies
You don’t need to be a seasoned pastry chef to create dazzling desserts that taste like they came straight from a gourmet bakery. These Easter Cake Mix Cookies are a testament to that! They harness the magic of a boxed cake mix to deliver a uniquely soft and delightfully chewy texture, unlike traditional cookies. This clever hack simplifies the baking process immensely, allowing you to focus on the fun part: decorating!
The elegant touch of melted almond bark or Ghirardelli melting wafers, combined with cheerful, colorful M&M’s or sprinkles, adds a sweet and unmistakably festive flair. Loved by adults, cherished by children, and even approved by the Easter Bunny himself, these cookies are a guaranteed crowd-pleaser for any spring gathering.
The Perfect Treat for Easter Celebrations
These Easter Cake Mix Cookies aren’t just delicious; they’re also incredibly practical and versatile, making them an ideal choice for your holiday festivities:
- Effortless and Speedy: The secret lies in the boxed cake mix, which transforms into a unique cookie dough, offering a distinct texture and flavor profile. With just a handful of common ingredients, you can have a fresh batch of oven-baked cookies ready in record time. It’s significantly faster and simpler than baking from scratch, yet every bit as flavorful and satisfying.
- Guaranteed Party Hit: A tray brimming with these brightly decorated cookies is bound to capture the attention and admiration of every guest, whether it’s during the Easter holidays or any joyous springtime event. The extra step of dipping the cookies in melted chocolate or candy melts before adding the embellishments elevates their appearance, making them look far more sophisticated than a standard chocolate chip or sugar cookie. They offer a vibrant visual appeal that perfectly complements the cheerful spirit of spring.
- Kid-Friendly Fun: This recipe is a fantastic way to involve younger family members in the kitchen. From mixing the simple dough to dipping and sprinkling, kids will love contributing to these festive treats, creating lasting memories along with delicious cookies.
- Customizable for Any Occasion: While designed for Easter, these versatile cookies can be adapted for any holiday or theme. Simply swap out the pastel M&M’s or sprinkles for colors that match birthdays, baby showers, or other seasonal events. They’re a blank canvas for your creative decorating ideas.
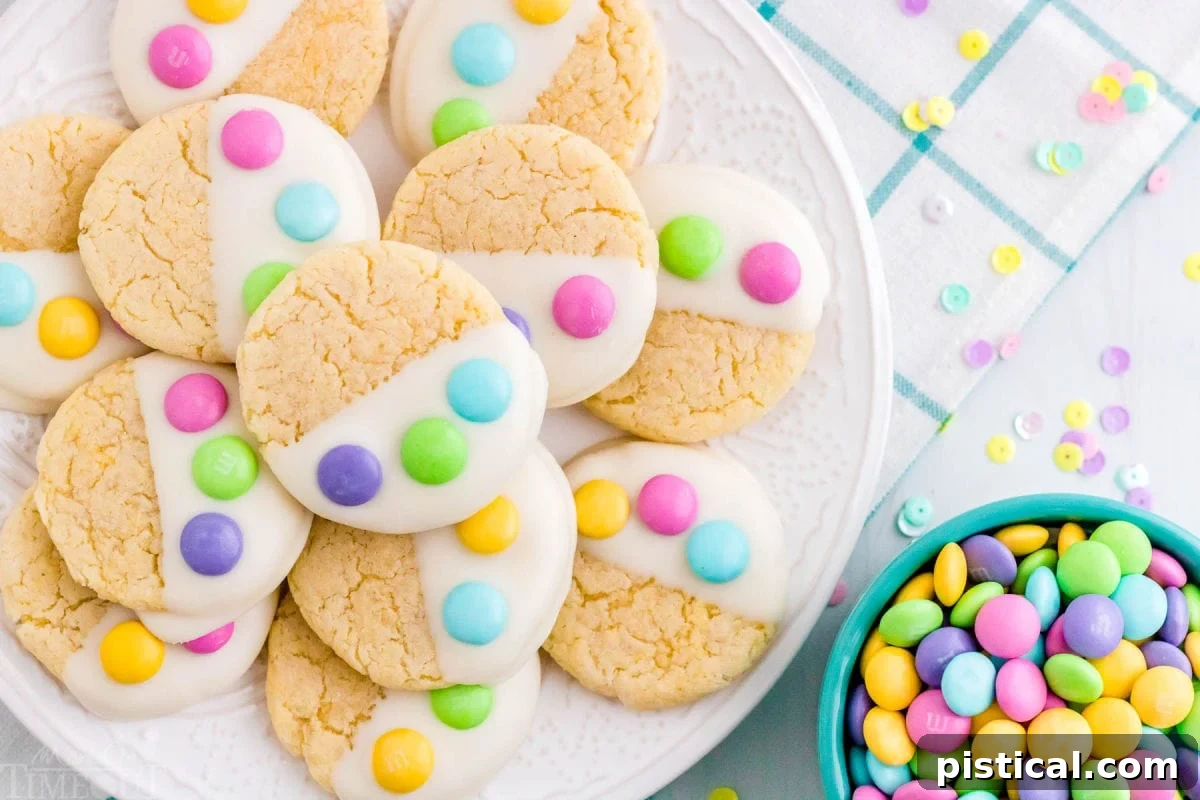
Essential Ingredients for Your Easter Cookie Masterpiece
These soft, chewy, and utterly adorable Easter Cake Mix Cookies come together with ease, thanks to a straightforward list of ingredients. You can find the complete printable recipe with detailed instructions at the end of this post, but here’s a breakdown of what you’ll need to create these delightful treats:
- White Cake Mix: The foundation of our cookies! Any standard box brand of white cake mix will work perfectly. It’s the secret to their unique soft and tender crumb.
- Vegetable Oil: This provides the essential moisture and richness for the cookie dough. For a slightly different flavor profile or if you prefer, you can easily substitute with an equal amount of coconut oil or melted butter, ensuring a similar delightful consistency.
- Eggs: You’ll need two large eggs to bind the ingredients and contribute to that ideal soft and chewy texture that makes these cookies so irresistible. Ensure they are at room temperature for best mixing results.
- Vanilla Extract: A touch of pure vanilla extract enhances the overall flavor profile, adding a warm, inviting, and subtly sweet undertone that complements the cake mix beautifully.
- Candy Melts or Almond Bark: This is where the magic of dipping happens! I personally recommend white Ghirardelli melting wafers for their smooth consistency and easy melting. However, you have the creative freedom to choose candy melts in various assorted colors to introduce even more vibrant hues to your Easter cookies. Pink, yellow, or light blue candy melts would be absolutely charming!
- M&M’s: These iconic chocolate candies are perfect for creating festive designs. For a classic Easter bunny paw print, use three M&M’s. Alternatively, feel free to swap them out for themed sprinkles, nonpareils, or other small candies that match your desired Easter aesthetic.
Step-by-Step Guide: How to Bake and Decorate Your Easter Cake Mix Cookies
Making these charming Easter Cake Mix Cookies is a breeze! Follow these simple steps for perfectly baked and beautifully decorated treats:
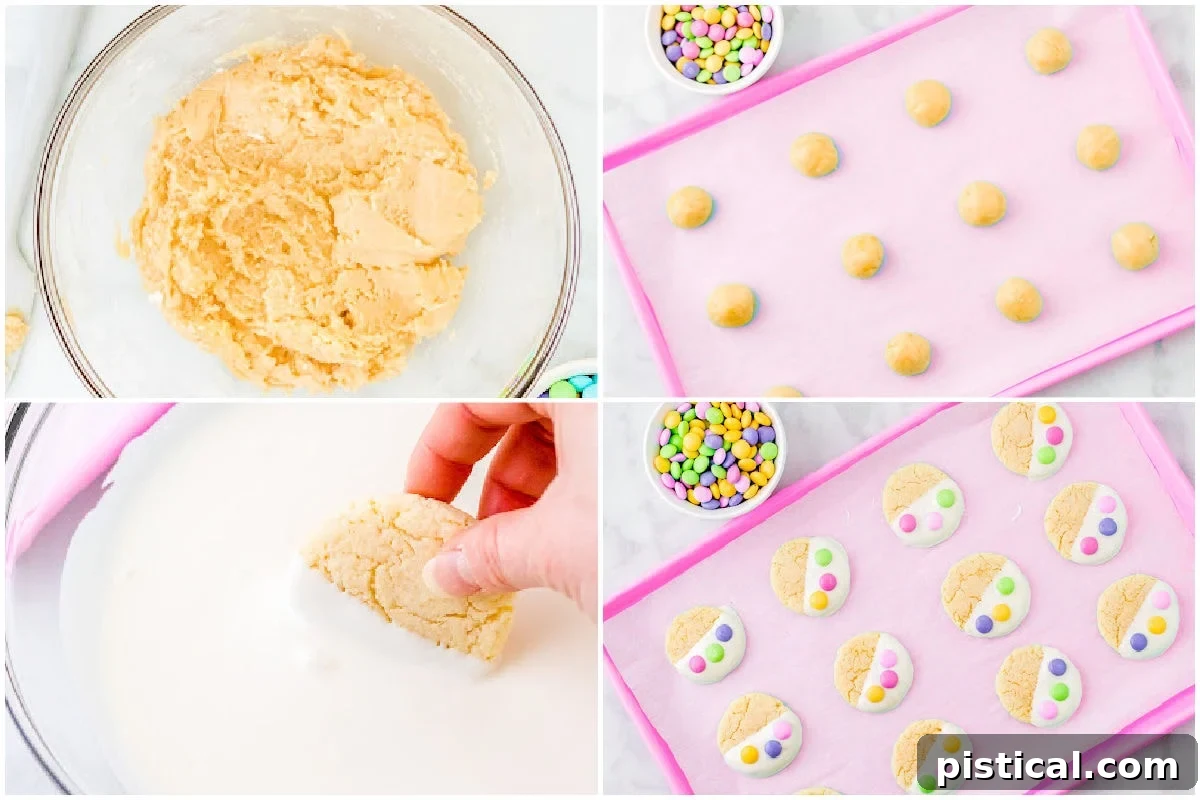
- Prepare the Dough: In a spacious mixing bowl, combine the white cake mix, vegetable oil, room temperature eggs, and vanilla extract. Stir these ingredients thoroughly until a soft, uniform dough forms. It will be thicker than cake batter, but softer than traditional cookie dough.
- Chill the Dough: Cover your bowl of cookie dough tightly with plastic wrap and refrigerate it for a minimum of 30 minutes. This chilling step is crucial as it helps the dough firm up, making it much easier to handle and preventing the cookies from spreading too much during baking.
- Preheat and Prep: While the dough chills, preheat your oven to 350°F (175°C). Line a large baking sheet with parchment paper or a silicone baking mat. This ensures your cookies won’t stick and will bake evenly.
- Form the Cookies: Once the dough is chilled, use a small cookie scoop or your hands to form the dough into uniform 1-inch balls. Consistency in size is key for even baking.
- Arrange on Sheet: Place the dough balls onto the prepared baking sheet, making sure to leave approximately 2 inches of space between each one to allow for proper spreading.
- Bake to Perfection: Transfer the baking sheet to the preheated oven and bake for 8 to 10 minutes. Keep a close eye on them! You want the edges to be lightly golden, but the centers should still look slightly soft and gooey. Overbaking will result in hard, dry cookies.
- Cool Completely: Allow the cookies to cool on the baking sheet for 2-3 minutes before carefully transferring them to a wire cooling rack. It’s essential that the cookies cool completely before you proceed with dipping, as warm cookies will cause the melted chocolate to run or melt.
- Melt the Coating: Follow the package instructions to melt your Ghirardelli wafers or almond bark in the microwave. Stir frequently until smooth and creamy.
- Dip and Decorate: Take each completely cooled cookie and dip one-third to halfway into the melted chocolate. Gently tap off any excess chocolate to achieve a smooth finish. Immediately place the dipped cookies back onto the parchment-lined baking sheet or cooling rack. While the chocolate is still wet, carefully place three M&M’s on each cookie to create a charming bunny paw print design, or sprinkle with your chosen festive sprinkles.
- Allow to Set: Let the chocolate and decorations set completely before serving. For a quicker set, you can refrigerate the cookies for about 5-10 minutes.
Quick Tip for Handling: Cake mix cookies can be more delicate than traditional cookies. To make them sturdier for dipping, consider refrigerating the baked and cooled cookies for a few minutes before you begin the dipping process.
Pro Tips for Flawless Cake Mix Cookies
- Avoid Overbaking: This is the most critical tip for soft, chewy cookies. Pull them from the oven when the edges are just barely set and starting to brown, but the centers still look slightly underdone. They will continue to cook and set as they cool on the hot baking sheet, ensuring a perfectly tender interior. Overbaked cookies will be hard and crumbly.
- Mind the Dough Ball Size: When forming the dough, aim for consistent 1-inch balls. If the cookie dough balls are too large, the cookies tend to flatten excessively during baking, making them more challenging to handle and decorate effectively.
- Cool Completely Before Dipping: Patience is a virtue here! Ensure your cookies are entirely cooled before attempting to dip them into the melted candy bark. Dipping warm cookies will cause the coating to melt, creating a messy and inconsistent finish, and could even cause the delicate cookies to fall apart.
- Speed Up Setting Time: If you’re in a hurry and want the chocolate coating to harden faster, simply place the dipped and decorated cookies into the refrigerator for about 5 to 10 minutes. This will quickly firm up the candy melts, allowing you to serve or store them sooner.
- Year-Round Versatility: Don’t limit this fantastic recipe to just Easter! These cake mix cookies are incredibly adaptable. By simply changing the colors of your M&M’s or sprinkles, you can easily tailor them to suit any holiday or special occasion. Use red and green for Christmas, orange and black for Halloween, or simply use regular, assorted M&M’s for a delightful treat any day of the year.
These cookies are a joy to make and share year-round! Feel free to experiment with different cake mix flavors and decoration themes to keep things exciting.
Storing Your Delicious Easter Treats
Proper storage ensures your delightful Easter Cake Mix Cookies remain as fresh and delicious as the day you baked them.
Countertop Storage for Freshness
Place any leftover baked and decorated cookies in an airtight container at room temperature. They will maintain their delightful softness and flavor for up to 3 days. Here’s a clever old trick to keep them extra soft: place a slice of fresh bread in the container with your cookies. The cookies will absorb moisture from the bread, keeping them wonderfully tender!
To Freeze Baked Cookies for Later Enjoyment
Once your cookies have cooled completely and their decorations are fully set, you can easily freeze them for extended freshness. Arrange them in a single layer in a freezer-safe container, separating layers with parchment paper, or place them directly into a freezer-safe zip-top bag. They will stay perfectly fresh for up to 3 months. When you’re ready to enjoy them, simply let them thaw on the counter at room temperature for an hour or two, and they’ll be ready to savor.
To Freeze Cookie Dough for Future Baking
Freezing the cookie dough is an excellent way to prepare ahead for future baking sessions. Form the dough into 1-inch balls as directed in the recipe, then place them on a tray lined with parchment paper. Freeze the dough balls until they are completely solid, which usually takes about 30 minutes to an hour. Once firm, transfer the frozen dough balls to a freezer-safe container or zip-top bag. The dough can be stored in the freezer for up to 3 months. When you’re ready to bake, you can either thaw the dough balls on the counter for about 30 minutes before baking as directed, or bake them directly from frozen, adding a few extra minutes to the baking time until golden. Decorate them as usual once cooled!
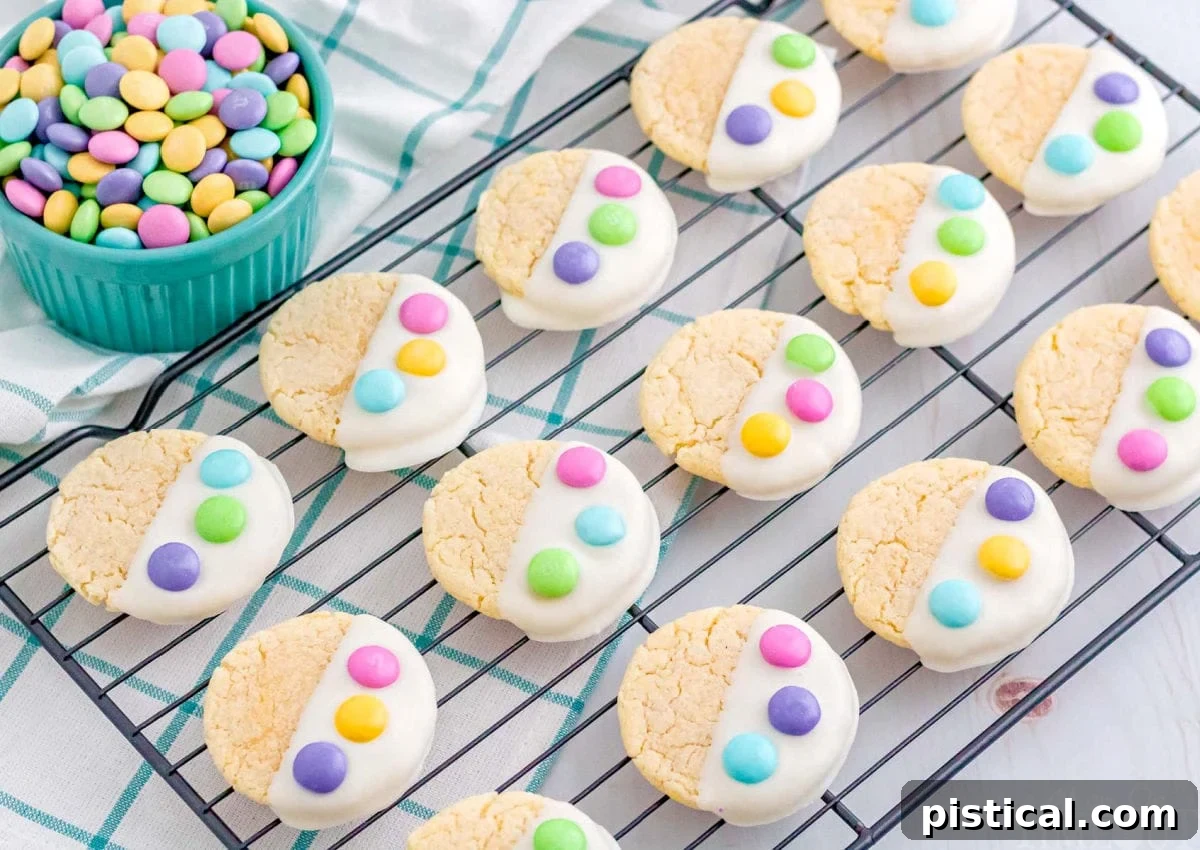
Frequently Asked Questions About Cake Mix Cookies
Can You Freeze These Easter Cake Mix Cookies?
Absolutely, these cookies are excellent candidates for freezing! You can freeze both the baked cookies and the raw cookie dough. For baked cookies, ensure they are completely cooled and the chocolate topping is set. Then, place them in a freezer-safe airtight container or a heavy-duty freezer bag. They will remain fresh for up to 3 months. To enjoy, simply let them thaw on the counter for a few hours. For freezing the dough, form it into balls as per the recipe, freeze them solid on a tray, and then transfer to a freezer bag. You can bake them from frozen (add a few minutes to the bake time) or thaw them first. Then, decorate as normal!
What’s The Key Difference Between Cake Mix and Cake Mix Cookies?
The transformation from a traditional cake mix into a delightful cookie dough is surprisingly simple. The main distinction lies in the liquid content and additional binding agents. When making cookies from a cake mix, you eliminate the extra egg and water typically called for in standard cake mix instructions. By reducing these wet ingredients, you achieve a much thicker consistency that resembles dough rather than a liquid batter. This intentional adjustment creates an incredibly easy and pliable cookie base that bakes up into a beautifully wide, flat cookie – perfect for dipping and decorating – without the need for extensive rolling or intricate shaping, as often required with traditional cookie recipes.
Can I Use A Different Flavor Cake Mix for These Cookies?
You certainly can, and it’s a fantastic way to experiment with flavors! Keep in mind that using a different flavor will result in a different cookie color, which can be part of the fun. For Easter, a strawberry cake mix would create lovely pink cookies, lemon cake mix would yield sunny yellow treats, or even a funfetti mix for an extra sprinkle of joy. Chocolate, red velvet, or spice cake mixes would also be delicious for other seasons and holidays!
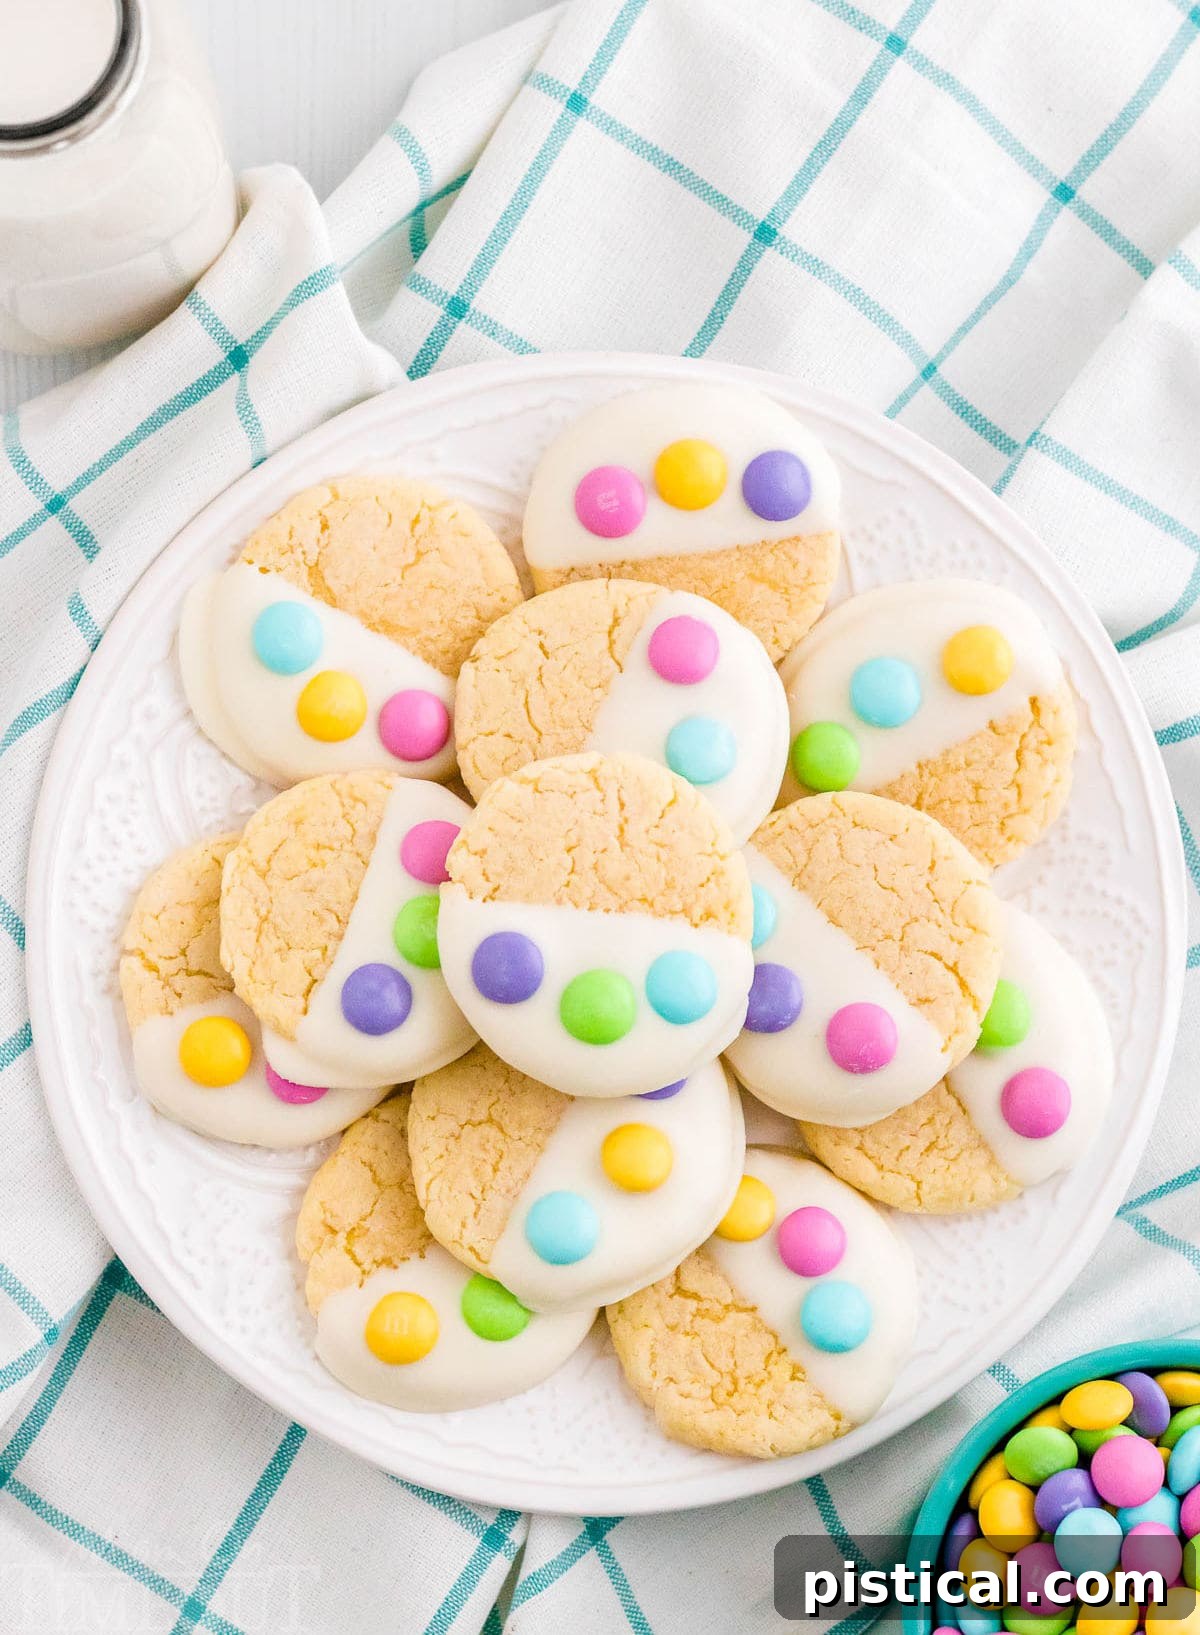
More Festive Easter Dessert Ideas
Looking for more sweet inspiration to complete your Easter feast? Here are some other delightful recipes to try:
- Italian Easter Cookies
- Carrot Cake
- Coconut Cream Pie
- Jell-O Divinity
- Easter Chocolate Chip Cookies
- Three Minute Easter Fluff
- Speckled Egg Easter Cake
- Cream Cheese Mints
- Bunny Bait
The Complete Easter Cake Mix Cookie Recipe

Print Recipe
Easter Cake Mix Cookies
These soft and chewy Easter Cake Mix Cookies are incredibly easy to make, dipped in chocolate, and decorated with festive M&M’s for a charming holiday treat!
Course: Dessert
Cuisine: American
Keyword: cake mix cookies, Easter cake mix cookies, Easter cookies
Prep Time: 5 minutes
Cook Time: 10 minutes
Chill Time: 30 minutes
Servings: 24 cookies
Calories: 131 kcal
Author: Trish – Mom On Timeout
Ingredients
For the Cake Mix Cookies
- 15.25 ounces white cake mix (any brand)
- ⅓ cup vegetable oil
- 2 large eggs (room temperature)
- 1 teaspoon vanilla extract
To Decorate
- 12 ounces candy melts (I used white Ghirardelli melting wafers, but assorted colors work great)
- M&M’s (or sprinkles of your choice for festive designs)
Instructions
- In a large bowl, stir together the white cake mix, vegetable oil, eggs, and vanilla extract until a cohesive dough forms.
- Cover the cookie dough and chill it in the refrigerator for 30 minutes. This step helps the dough to firm up and prevents excessive spreading during baking.
- Preheat your oven to 350°F (175°C). Line a large baking sheet with parchment paper or a silicone baking mat and set it aside.
- Scoop the chilled cookie dough and roll it into uniform 1-inch balls. Place these dough balls on the prepared baking sheet, ensuring you leave approximately 2 inches of space between each cookie for proper spreading.
- Bake the cookies for 8 to 10 minutes. It’s crucial not to overbake; the edges should be lightly golden, but the centers should still appear slightly soft. The cookies will continue to set as they cool.
- Let the baked cookies cool on the baking sheet for 2 to 3 minutes before carefully transferring them to a wire cooling rack to cool completely. This full cooling is essential before dipping.
- Melt the Ghirardelli wafers or almond bark according to the package instructions. Stir until smooth and free of lumps.
- Once the cookies are completely cool, dip about one-third to halfway into the melted chocolate. Gently tap off any excess chocolate. Place the dipped cookies on the parchment-lined baking sheet or back on the cooling rack.
- Immediately top each dipped cookie with three M&M’s to create a charming bunny paw print design, or sprinkle with your preferred festive sprinkles. Allow the chocolate to set completely before serving. For faster setting, refrigerate for 5-10 minutes.
Nutrition
Calories: 131kcal | Carbohydrates: 19g | Protein: 1g | Fat: 6g | Saturated Fat: 2g | Polyunsaturated Fat: 2g | Monounsaturated Fat: 1g | Trans Fat: 1g | Cholesterol: 14mg | Sodium: 136mg | Potassium: 16mg | Fiber: 1g | Sugar: 11g | Vitamin A: 20IU | Calcium: 42mg | Iron: 1mg
There you have it – a truly delightful and incredibly simple recipe for Easter Cake Mix Cookies that will bring joy to everyone who tastes them! From their effortlessly chewy texture to their charming, customizable decorations, these cookies are the perfect way to add a touch of homemade sweetness to your spring celebrations without any stress. So gather your ingredients, enlist some eager helpers, and bake a batch of these festive treats. Happy Easter and happy baking!