
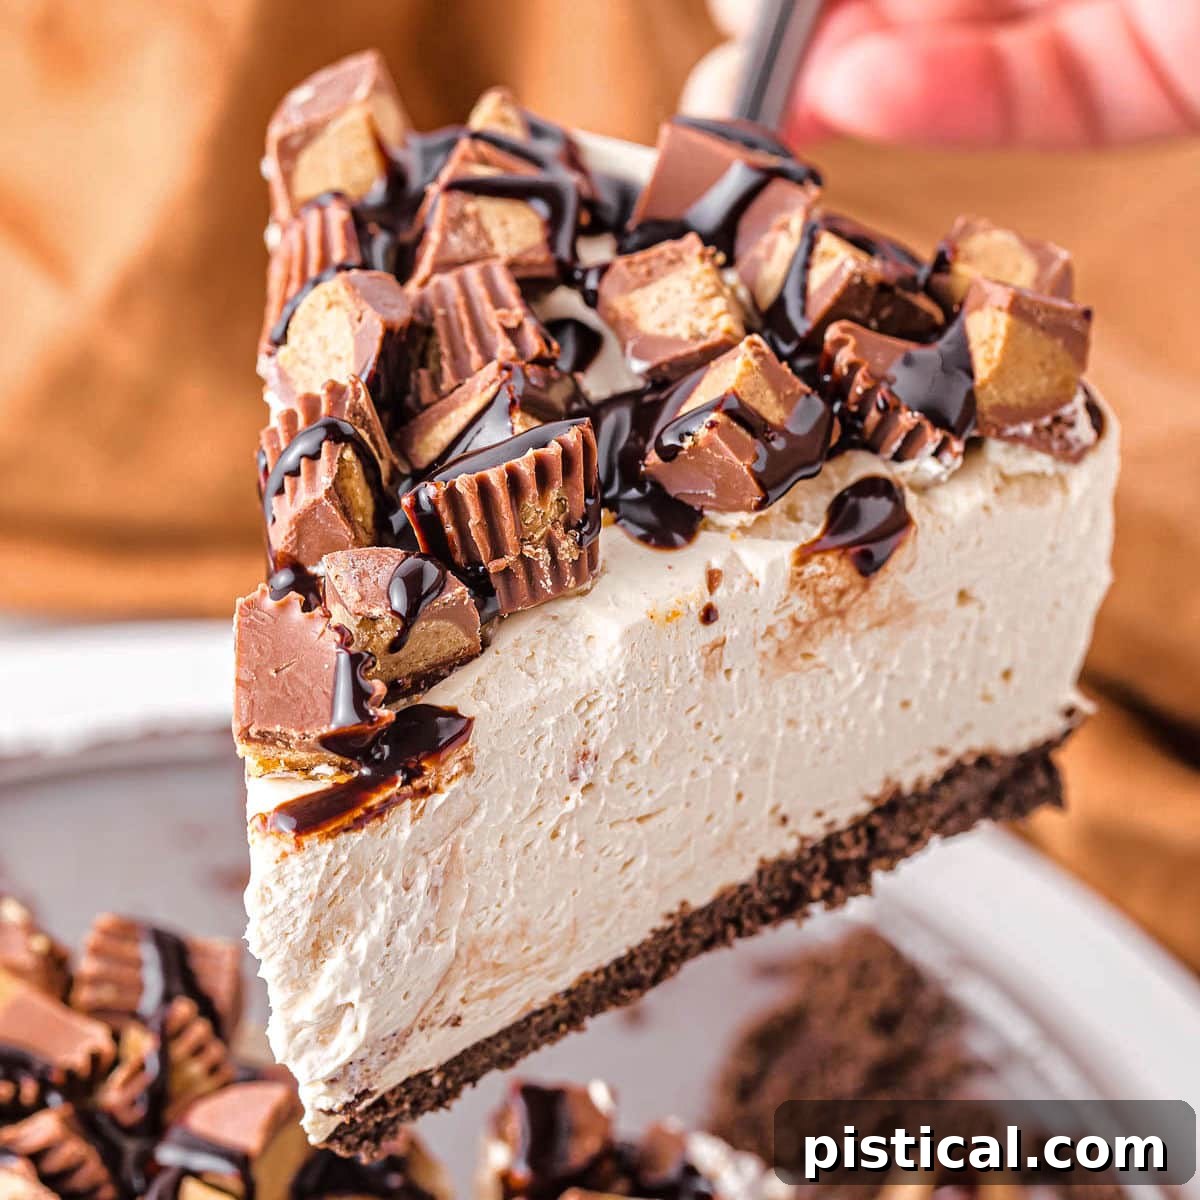
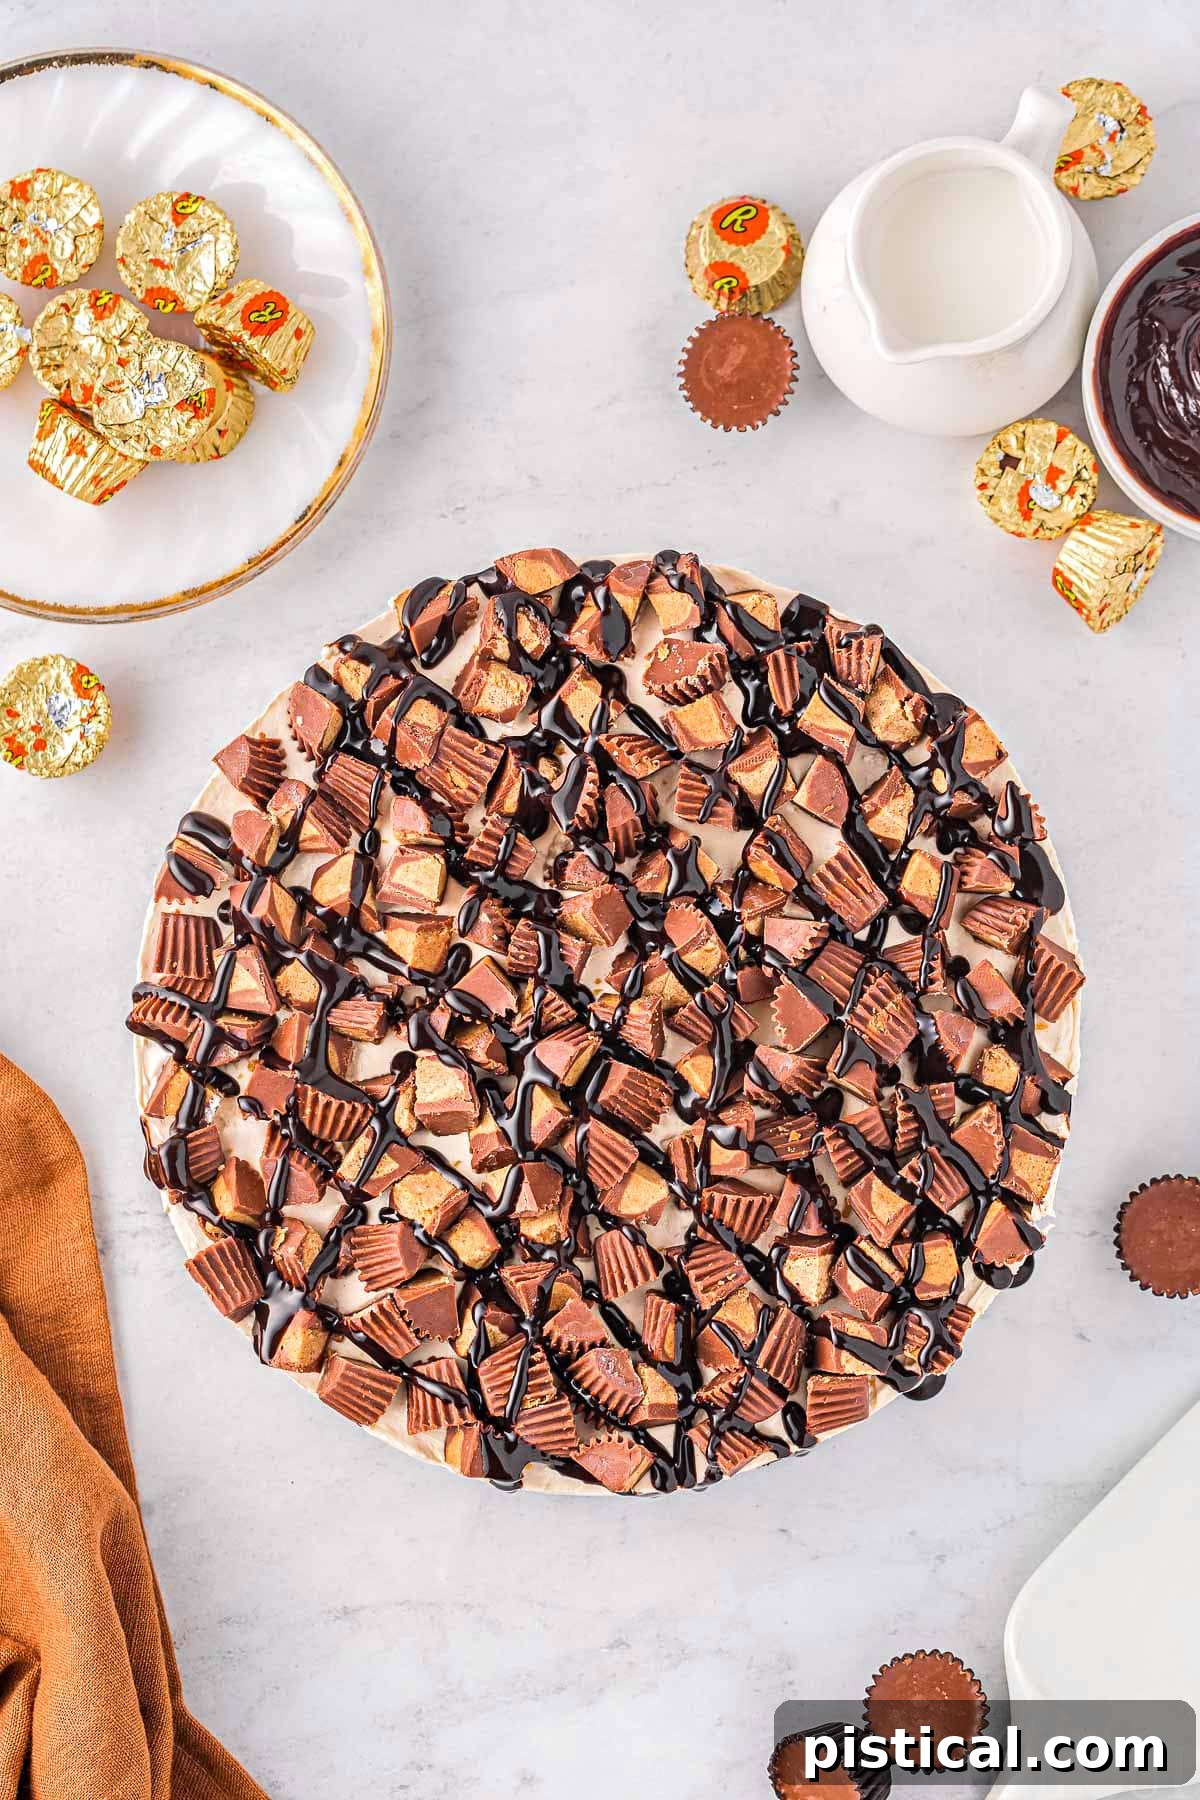
Welcome to the ultimate indulgence for peanut butter and chocolate enthusiasts: an incredibly easy Reese’s No-Bake Peanut Butter Cheesecake! This tantalizing dessert brings together the rich, creamy texture of classic cheesecake with the irresistible flavor of peanut butter, all crowned with beloved Reese’s Peanut Butter Cups and a luscious drizzle of hot fudge. It’s a decadent treat that requires no oven, making it perfect for any time of the year, especially when you crave something cool, refreshing, and utterly satisfying.
Forget the complexities of traditional cheesecakes. This recipe is designed for simplicity without compromising on taste or elegance. In about 10 minutes of active prep time, you can assemble a dessert that looks like it took hours, impressing family and friends with minimal effort. Its delightful creaminess and perfect balance of sweet and tangy notes, thanks to a touch of sour cream, make it a standout choice for gatherings, celebrations, or simply treating yourself.
Why This No-Bake Peanut Butter Cheesecake is a Must-Try
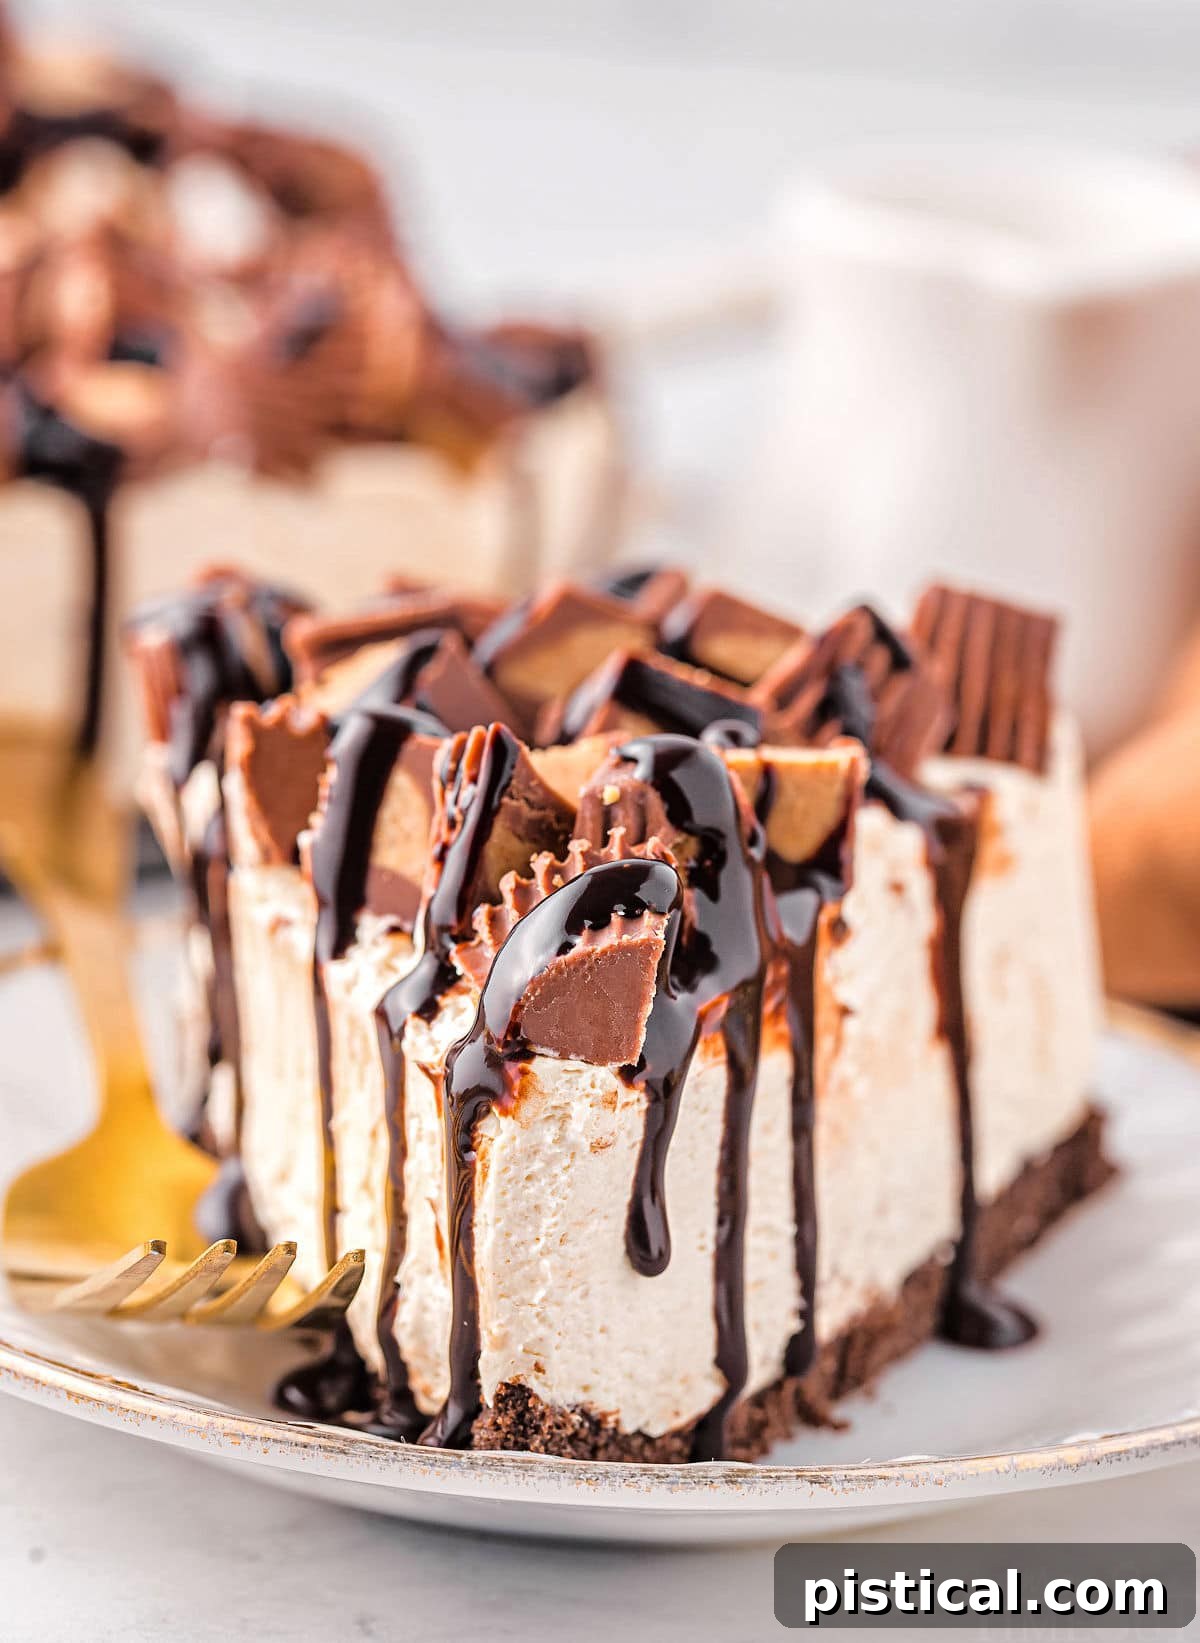
There’s a special magic to a no-bake dessert, especially when it’s as spectacular as this Reese’s Peanut Butter Cheesecake. The absence of an oven makes it an ideal choice for hot summer days, holiday gatherings when oven space is precious, or any occasion when you simply want a quick and impressive dessert. Its light and fluffy texture, combined with an intense peanut butter flavor, creates a culinary experience that’s both comforting and exciting.
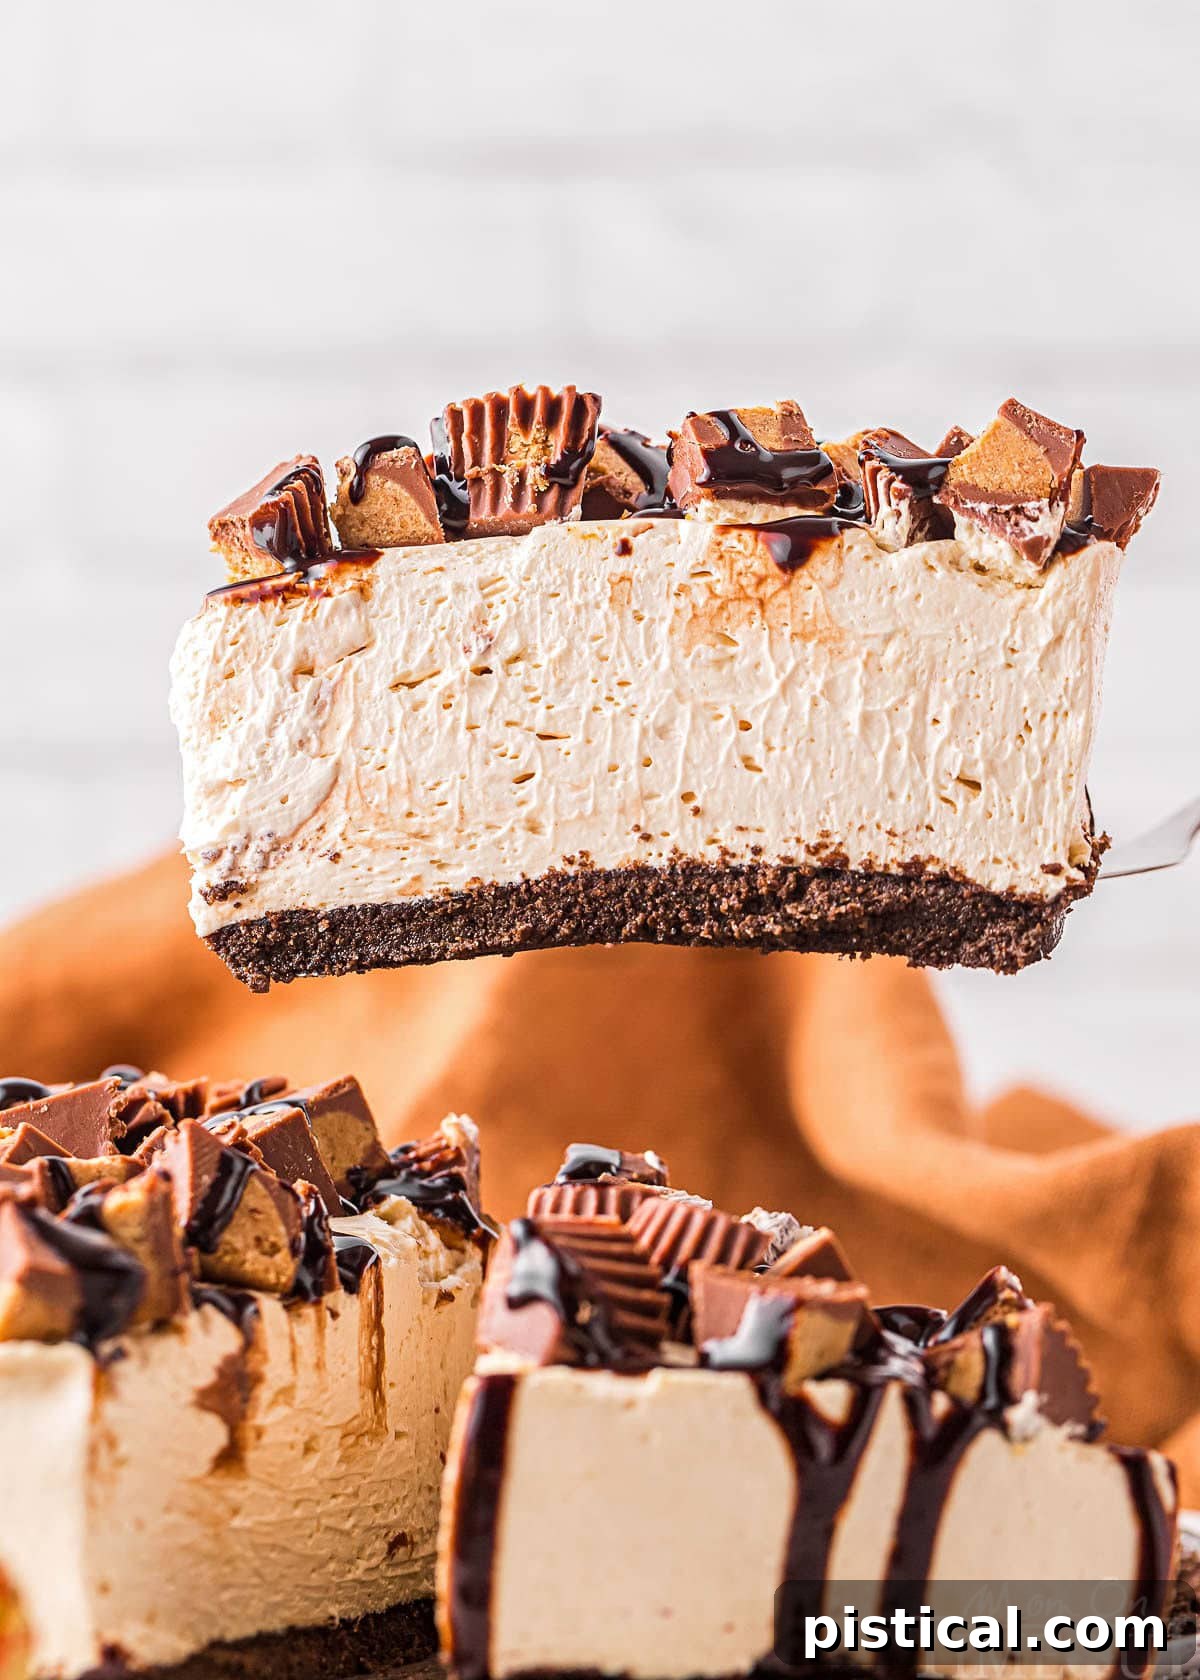
This cheesecake stands out for several reasons. Firstly, its effortless preparation means less time in the kitchen and more time enjoying. Secondly, the flavor profile is meticulously balanced: the salty-sweetness of peanut butter, the deep richness of chocolate from the crust, and the creamy tang of the cheesecake filling come together in perfect harmony. Finally, the vibrant presentation, with chopped Reese’s cups and a glossy hot fudge topping, makes it an absolute showstopper. It’s a versatile dessert that appeals to all ages and is guaranteed to become a household favorite.
The Undeniable Charm of Peanut Butter and Chocolate
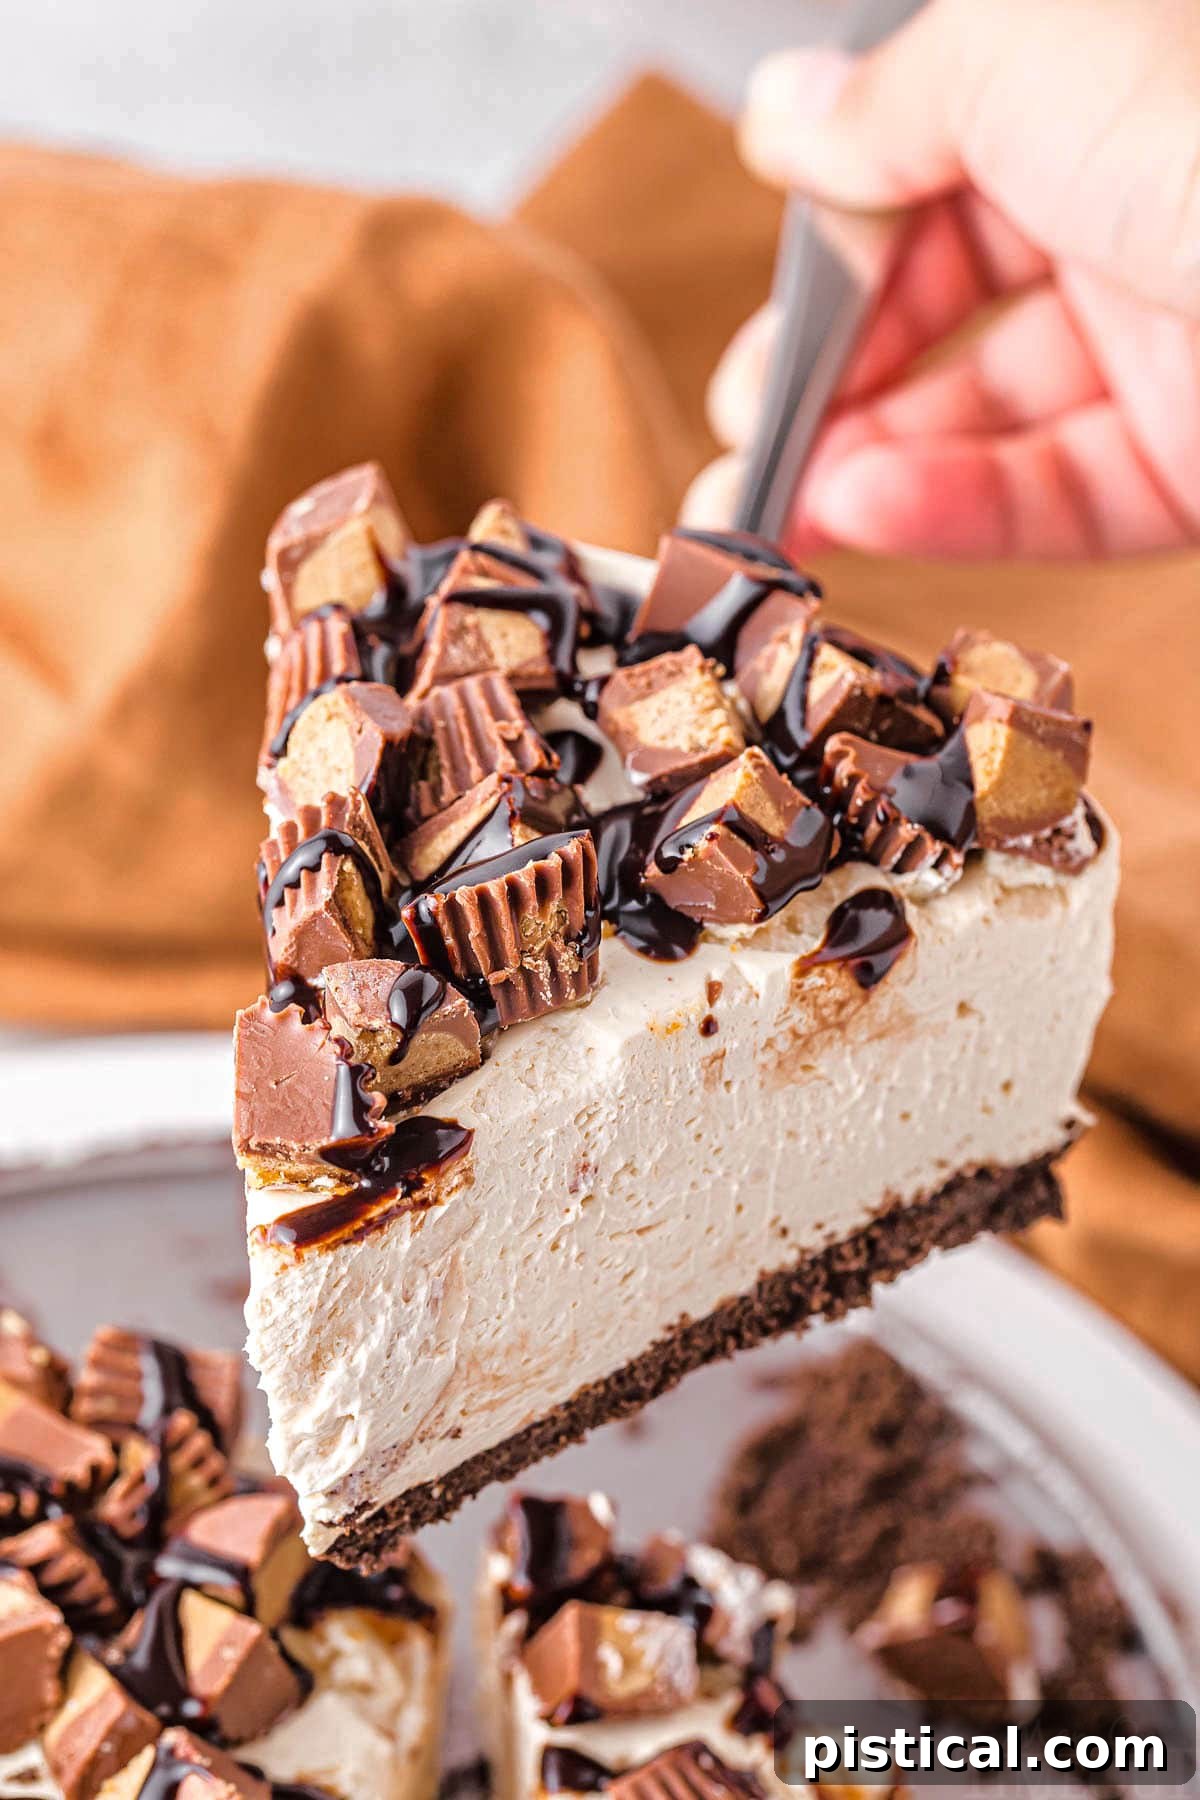
Is there any combination more iconic than peanut butter and chocolate? These two flavors are truly best friends, and this no-bake cheesecake celebrates their perfect synergy. The foundation of this dessert is a rich chocolate graham cracker crust, providing a subtly crisp base that beautifully contrasts with the smooth, velvety peanut butter filling. Each bite offers a harmonious blend of textures and tastes, making it an incredibly satisfying treat.
Beyond the crust, the creamy peanut butter filling takes center stage, bursting with nutty goodness. And to elevate this classic duo even further, a generous sprinkling of Reese’s Peanut Butter Cups on top ensures that every slice delivers that unmistakable Reese’s flavor explosion. A final flourish of hot fudge weaves through the entire creation, adding an extra layer of chocolatey decadence that ties everything together. It’s a celebration of a beloved flavor combination, crafted into an easy-to-make, show-stopping dessert.
Simplifying Dessert: No-Bake Cheesecake Shortcuts
One of the greatest appeals of this Reese’s Peanut Butter Cheesecake is its simplicity, and we’ve built in optional shortcuts to make it even easier to prepare. While a completely homemade version is certainly an option (with instructions for fresh whipped cream included in the recipe notes), these clever hacks significantly reduce prep time without sacrificing quality or taste.
- Pre-Made Pie Crust: Save yourself valuable time and a few ingredients by opting for a store-bought pie crust. While the recipe includes instructions for a homemade chocolate graham cracker crust, using a pre-made crust means you can move straight to preparing the delicious filling. For those who enjoy experimenting, consider an OREO crust or a Nilla Wafer crust for a different flavor dimension. Each variation offers a unique base that complements the peanut butter filling beautifully.
- Whipped Topping for Lightness: Using a store-bought whipped topping not only shaves off about 8 minutes of prep but also consistently delivers a light and fluffy texture to your cheesecake. We understand that some prefer homemade whipped cream, and for those purists, detailed instructions are provided in the recipe card’s notes section. Whichever you choose, the goal is a perfectly airy and creamy filling.
These shortcuts allow you to tailor the recipe to your schedule and preferences, ensuring that a decadent peanut butter cheesecake is always within reach.
Key Ingredients for an Unforgettable No-Bake Cheesecake
Crafting this incredible peanut butter cheesecake requires just a handful of thoughtfully selected ingredients. The magic truly happens when these components come together to create a filling that’s exceptionally creamy, rich, and incredibly easy to achieve. You’ll find the full, printable recipe with precise measurements at the very bottom of this post, but let’s delve into what makes each ingredient essential:
The Perfect Chocolate Crust
- Chocolate Graham Crackers: These are the backbone of our crust, providing a deep cocoa flavor that harmonizes perfectly with the peanut butter. While chocolate graham crackers are recommended for their robust taste, regular graham crackers can certainly be used if preferred.
- Granulated Sugar: A touch of sugar ensures the crust has a delightful sweetness, complementing the natural flavors of the graham crackers and peanut butter.
- Creamy Peanut Butter: Essential for binding the graham cracker crumbs together, the creamy peanut butter also infuses the crust with an extra layer of nutty flavor. While creamy is preferred for a smooth texture, crunchy peanut butter can be used in a pinch, though you might need to adjust the quantity slightly to achieve the right consistency for pressing into the pan.
Velvety Peanut Butter Cheesecake Filling
- Cream Cheese: The star of any cheesecake! Ensure your full-fat cream cheese is softened to room temperature. This is crucial for achieving a perfectly smooth, lump-free filling that blends effortlessly with the other ingredients. Full-fat cream cheese also guarantees the richest, most decadent texture.
- Granulated Sugar: Sweetens the filling, balancing the tang of the cream cheese and sour cream, and enhancing the overall peanut butter flavor.
- Creamy Peanut Butter: For the filling, creamy peanut butter is non-negotiable if you desire that silky-smooth cheesecake texture. While crunchy can technically work, it will introduce a different, less uniform texture to the filling.
- Sour Cream: This unsung hero adds a crucial tanginess that cuts through the richness of the cream cheese and peanut butter, preventing the dessert from being overly sweet. It also contributes to the filling’s luxurious, extra-creamy consistency. Full-fat sour cream is highly recommended for the best results, but plain Greek yogurt can be a suitable alternative.
- Whipped Topping: This ingredient is key to making the cheesecake light, airy, and wonderfully fluffy. It’s a convenient shortcut, but for those who prefer, a homemade whipped cream alternative is detailed in the notes section of the recipe card, ensuring a similar light texture when carefully folded in.
Craving an OREO crust? Our easy OREO crust recipe is a perfect match for this decadent peanut butter filling, adding another layer of chocolatey delight!
Decadent Toppings
- Miniature Reese’s Peanut Butter Cups: These are the ultimate embellishment, reinforcing the Reese’s theme. Quartering them ensures that each bite includes a perfect piece of this iconic candy. If using larger cups, simply cut them into small, manageable pieces.
- Hot Fudge: A warm, rich hot fudge drizzle elevates this cheesecake to new heights. You can use a quality store-bought variety for convenience, or truly impress by making your own homemade hot fudge – our recipe is sensational and surprisingly simple!
Crafting Your Reese’s No-Bake Cheesecake: A Step-by-Step Guide
Creating this show-stopping dessert is a delightful and straightforward process. Follow these steps to achieve a perfectly set, irresistibly creamy Reese’s No-Bake Peanut Butter Cheesecake.
First, We Build the Flavorful Crust
- Prepare the Crumbs: Begin by placing your chocolate graham crackers (approximately 18 full sheets or 2 sleeves) into a food processor. Pulse them until they are finely ground into crumbs. This fine texture is essential for a cohesive crust.
- Sweeten and Combine: Add ¼ cup of granulated sugar to the graham cracker crumbs in the food processor and pulse briefly until well combined. The sugar adds a pleasant sweetness to the base.
- Bind with Peanut Butter: Transfer the crumb mixture to a medium-sized bowl. Incorporate ⅔ cup of creamy peanut butter, mixing thoroughly until the mixture is uniformly moist and holds together when pressed firmly between your fingers. If it seems too dry, you might need a tiny bit more peanut butter, especially if using a different brand or type.
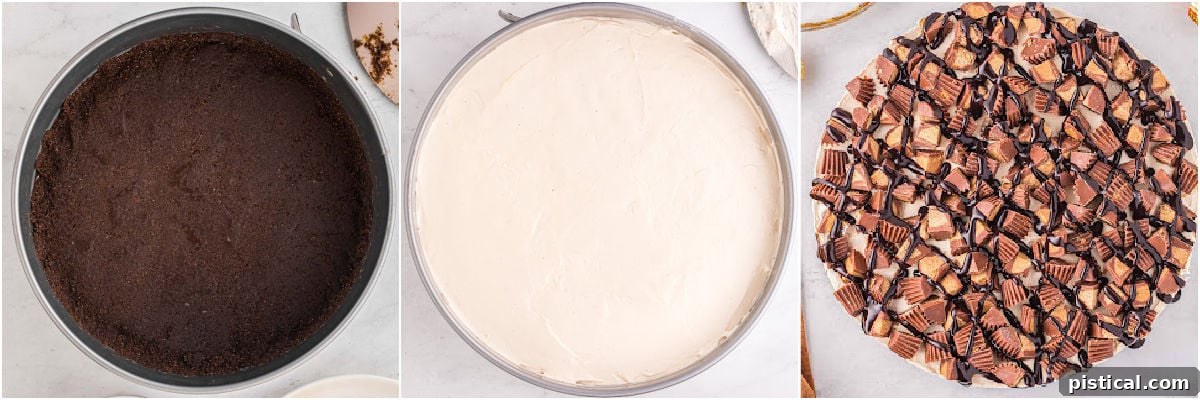
- Form the Crust: Press the peanut butter-infused crumb mixture evenly into the bottom of a 9-inch springform pan. Extend the crust slightly up the sides of the pan to create a beautiful edge for your cheesecake. Use the back of a spoon or your fingers to compact it firmly.
- Chill the Crust: Cover the formed crust with plastic wrap and freeze it for 20 to 30 minutes. This crucial step helps the crust set, ensuring it’s firm enough to hold the creamy filling without crumbling when sliced.
Next, We Create the Silky Peanut Butter Cheesecake Filling
- Cream Cheese and Sugar: In a large mixing bowl, beat the softened cream cheese (16 ounces) and ¾ cup of granulated sugar together using an electric hand mixer or stand mixer. Beat for about 2 to 3 minutes until the mixture is completely smooth, light, and free of lumps.
- Incorporate Peanut Butter: Add ¾ cup of creamy peanut butter to the cream cheese mixture. Continue beating for another 1 to 2 minutes until the peanut butter is fully incorporated, and the filling appears light and fluffy.
- Add Sour Cream and Whipped Topping: Gently fold in ¾ cup of full-fat sour cream and 16 ounces of thawed whipped topping. Beat until just combined and the mixture is uniformly light and creamy. Important Note: If you are using homemade whipped cream instead of whipped topping, it is essential to fold it in gently with a spatula, rather than beating it, to maintain its airy texture and prevent deflation.
- Assemble the Cheesecake: Retrieve the chilled crust from the freezer. Evenly spread the peanut butter cheesecake filling into the springform pan, smoothing it out with an offset spatula or the back of a spoon. Aim to fill the pan to about ¼ inch from the top. (You might have a small amount of extra filling; it makes a fantastic fruit dip for apples and strawberries!)
- Add Reese’s Topping: Generously sprinkle the top of the cheesecake with your quartered miniature Reese’s Peanut Butter Cups, ensuring an even layer for maximum peanut butter chocolate goodness in every bite.
- Chill to Perfection: Cover the assembled cheesecake tightly with plastic wrap. Refrigerate for a minimum of 6 hours, or ideally, overnight. This chilling period is crucial for the cheesecake to firm up and develop its perfect texture. Serve chilled for the best experience.
Storage and Freezing for Lasting Enjoyment
This Reese’s Peanut Butter No-Bake Cheesecake is designed to be savored, and proper storage ensures its deliciousness lasts. For optimal freshness, the cheesecake should be stored tightly wrapped in plastic wrap in the refrigerator until you’re ready to serve. Any leftovers will also keep well in the refrigerator for 2 to 3 days, maintaining their creamy texture and rich flavor.
Planning ahead or want to save some for later? This cheesecake freezes beautifully! To freeze, wrap the entire cheesecake (or individual slices) tightly in several layers of plastic wrap, then place it in an airtight container or a heavy-duty freezer bag. It can be stored in the freezer for up to 2 months. When you’re ready to enjoy, simply thaw the cheesecake overnight in the refrigerator for a perfectly delicious treat that tastes as fresh as the day it was made.
Frequently Asked Questions About Reese’s Peanut Butter Cheesecake
Do I have to add Reese’s Peanut Butter Cups?
While Reese’s Peanut Butter Cups are a fantastic addition that truly makes this cheesecake special, they are entirely optional. If you prefer, you can top your cheesecake with a different type of candy, a rich chocolate ganache, a sprinkle of chopped nuts, or even fresh fruit for a lighter touch. Feel free to customize the toppings to suit your taste or what you have on hand.
Can I freeze this Reese’s cheesecake?
Absolutely! This cheesecake freezes exceptionally well. To do so, wrap the cheesecake tightly in plastic wrap, then place it in an airtight container. It can be stored in the freezer for up to 2 months. When you’re ready to indulge, simply transfer it to the refrigerator and allow it to thaw overnight.
Can I make this Reese’s cheesecake in advance?
Yes, making this cheesecake in advance is highly recommended! For the best texture and flavor, the cheesecake should ideally be made one day ahead to allow for optimal chilling time. You can prepare it up to 2 days in advance if needed. Just remember to hold off on adding the hot fudge drizzle until just before you plan to serve it, ensuring a fresh and appealing presentation.
Is homemade whipped cream a good substitute for whipped topping?
Homemade whipped cream is an excellent, more luxurious substitute for store-bought whipped topping. However, it requires a slightly different technique during preparation. When incorporating homemade whipped cream into the cheesecake filling, it is crucial to gently fold it in with a spatula rather than beating it. This method helps maintain its airy texture and prevents it from deflating. Refer to the detailed notes in the recipe card for instructions on making and using homemade whipped cream.
Trish’s Expert Tips for No-Bake Cheesecake Perfection
To ensure your Reese’s No-Bake Peanut Butter Cheesecake turns out absolutely perfect every time, keep these expert tips in mind:
- Plan Ahead for Chilling: The most crucial step for a perfectly set no-bake cheesecake is adequate chilling time. While 6 hours is the minimum, I strongly recommend letting your cheesecake chill overnight. This extended period allows the filling to fully firm up, resulting in an optimal, sliceable texture and enhanced flavor.
- Room Temperature Cream Cheese is Key: Always ensure your cream cheese is completely softened to room temperature before you begin mixing. Cold cream cheese will result in a lumpy filling that is difficult to blend smoothly, impacting the overall texture of your cheesecake.
- Get Creative with Mini Cheesecakes: For adorable individual portions, try making mini cheesecakes! Simply pipe the filling into a muffin tin lined with paper or silicone cups. For an extra easy mini crust, press an OREO cookie into the bottom of each liner before adding the filling. These are perfect for parties or portion control.
- Layer on the Reese’s Flavor: For an even more intense Reese’s experience, consider adding a thin layer of finely chopped Reese’s Peanut Butter Cups directly on top of the chilled crust before you spread in the filling. This adds an unexpected burst of flavor and texture with every bite.
- Don’t Overmix the Whipped Topping/Cream: Once the whipped topping or homemade whipped cream is added, mix only until just combined. Overmixing can cause the filling to lose its airy texture. If using homemade whipped cream, always fold it in gently.
Essential Tools for Effortless Preparation
While this no-bake cheesecake is incredibly simple, having a few key kitchen tools will make the process even smoother and more enjoyable:
- Offset Spatula: This handy tool is perfect for spreading the cheesecake filling evenly into the springform pan and creating a beautifully smooth top. Its angled blade makes it easy to maneuver and achieve a professional finish.
- Hand Mixer or Stand Mixer: While a hand mixer works wonderfully for combining the cream cheese and other ingredients until light and fluffy, a stand mixer offers the convenience of hands-free operation. Either will get the job done efficiently.
- 9-Inch Springform Pan: This specialized pan is essential for cheesecakes, allowing you to easily release the sides once the cheesecake is set, revealing its perfectly formed shape without damage.
- Food Processor: A food processor makes quick work of grinding graham crackers into fine crumbs for the crust, ensuring a consistent texture. If you don’t have one, you can crush the crackers by placing them in a Ziploc bag and using a rolling pin.
More Irresistible Cheesecake & Peanut Butter Desserts to Explore
If you’re a true cheesecake aficionado or simply can’t get enough of the delightful combination of peanut butter and chocolate, you’re in for a treat! This Reese’s No-Bake Peanut Butter Cheesecake is just the beginning. Dive into these other mouth-watering recipes that feature the creamy goodness of cheesecake or the magical pairing of peanut butter with chocolate:
- Chocolate Chip No Bake Cheesecake
- Cherry Cheesecake Dip
- No Bake Apple Cheesecake
- Oreo Cheesecake
- Cheesecake Brownies
- Peanut Butter Cup Cheesecake Fudge
- Triple Threat Chocolate Cheesecake
- Espresso Cheesecake
And for those who simply adore peanut butter, check out these additional favorites where it takes center stage:
- Peanut Butter Balls with Rice Krispies
- Reese’s Peanut Butter Cup Mini Cheesecakes
- Reese’s Peanut Butter Fluff
- Peanut Butter Blossoms
- Peanut Butter Icebox Cake
Reese’s No Bake Peanut Butter Cheesecake Recipe
This easy Reese’s No Bake Peanut Butter Cheesecake is the perfect dessert for peanut butter lovers. A tantalizing combination of cheesecake, peanut butter and chocolate, this no bake cheesecake is perfectly creamy and topped with Reese’s peanut butter cups and hot fudge for an irresistibly decadent dessert that’s perfect all year round!
Course: Dessert | Cuisine: American | Prep Time: 26 minutes | Chill Time: 6 hours | Servings: 12 | Calories: 746kcal | Author: Trish – Mom On Timeout
Ingredients
Chocolate Crust
- 18 chocolate graham crackers (full sheets, about 2 sleeves)
- ¼ cup granulated sugar
- ⅔ cup creamy peanut butter
Peanut Butter Cheesecake Filling
- 16 ounces cream cheese, softened
- ¾ cup granulated sugar
- ¾ cup creamy peanut butter
- ¾ cup sour cream (full fat is best)
- 16 ounces whipped topping, thawed (see notes below for using whipped cream)
Cheesecake Toppings
- 8 tablespoons hot fudge
- 10 ounces miniature Reese’s peanut butter cups, quartered (about 1 cup)
Instructions
Chocolate Crust
- Place chocolate graham crackers in a food processor and pulse until they are fine crumbs. Add in sugar and pulse until combined.
- Transfer to a bowl and mix in the peanut butter until the mixture holds together when pressed between your fingers.
- Press mixture into a 9-inch springform pan, making sure the crust goes up a little bit on the sides as well.
- Cover the crust with plastic wrap and freeze for 20 to 30 minutes.
Peanut Butter Cheesecake
- Beat softened cream cheese and granulated sugar together until fully combined, about 2 to 3 minutes.
- Beat in the creamy peanut butter until light and fluffy, about 1 to 2 minutes.
- Add in the sour cream and whipped topping (or whipped cream, see notes below) and beat until combined. Mixture should be light and creamy. (If using whipped cream, whipped cream should be folded into the mixture, not beaten in.)
- Remove the crust from the freezer and evenly spread the filling in the springform pan up to about ¼ inch from the top of the pan. (You may have extra filling, if so use for a fruit dip with apples and strawberries.)
- Sprinkle the top of the cheesecake with cut up Reese’s miniatures in an even layer.
- Cover the cheesecake with plastic wrap. Refrigerate 6 hours or overnight. Serve cheesecake chilled.
Notes
Storage Information
This Reese’s Peanut Butter No Bake Cheesecake should be stored tightly wrapped in the refrigerator until ready to serve. Leftovers should also be stored in the refrigerator. The cheesecake will stay good for 2 to 3 days.
To Freeze: Wrap tightly in plastic wrap and then store in an airtight container in the freezer for up to 2 months. Thaw overnight in the fridge.
To substitute homemade whipped cream for the whipped topping:
You will need 6 cups total of whipped cream.
- 3 cups heavy cream
- ⅔ cup powdered sugar
- 1 ½ teaspoons vanilla extract
- Chill the mixing bowl and whisk attachment in the freezer for 5 to 10 minutes.
- Pour heavy whipping cream into mixing bowl and beat on medium-high speed until the cream gets bubbly and starts to thicken.
- Gradually add the powdered sugar and vanilla extract. Continue beating on medium-high speed until stiff peaks form.
- Use in place of the whipped topping in the recipe but make sure to carefully fold in so the whipped cream does not get deflated.
Nutrition
Calories: 746kcal | Carbohydrates: 72g | Protein: 15g | Fat: 47g | Saturated Fat: 20g | Polyunsaturated Fat: 6g | Monounsaturated Fat: 16g | Cholesterol: 49mg | Sodium: 548mg | Potassium: 432mg | Fiber: 3g | Sugar: 51g | Vitamin A: 639IU | Vitamin C: 0.2mg | Calcium: 134mg | Iron: 2mg