

Weekends often call for a special touch, and nothing quite delivers that warm, comforting feeling like a batch of freshly baked, soft, and impossibly flaky biscuits. If you’ve been craving that homemade goodness but don’t need a huge quantity, this easy Small Batch Biscuits recipe is your ultimate answer. It’s specifically designed to yield six perfect biscuits, making it ideal for smaller households or when you simply want to enjoy warm biscuits without a pile of leftovers. And the best part? No buttermilk required! Elevate your breakfast or brunch with these delightful morsels, perhaps alongside some perfectly baked bacon and a hearty Easy Hashbrown Breakfast Casserole.

Small Batch Biscuits: Your Go-To Recipe for Flaky Perfection Without Buttermilk
There’s a reason why homemade biscuits evoke such a profound sense of nostalgia and comfort. A few years ago, I shared my go-to biscuit recipe, and it quickly became a fan favorite, garnering over 350,000 pins and remaining one of the most beloved posts on my site. While that recipe makes a generous dozen, I frequently found myself wishing for a smaller yield. Sometimes, 12 biscuits are simply more than what’s needed for a quick weekend treat or a weeknight side. That’s why I’m thrilled to introduce this small batch version today – it delivers all the buttery, flaky perfection you love, but in a more manageable quantity.
This recipe consistently yields six impeccably light, tender, and buttery biscuits. For our family, it’s the ideal amount – enough for everyone to enjoy without a pile of leftovers going stale. These biscuits are truly everything you could wish for in a homemade pastry: golden on the outside, soft and layered on the inside, with that unmistakable rich butter flavor permeating every bite. Forget complicated techniques; with these simple steps and common ingredients, you’re just minutes away from a warm, bakery-quality biscuit experience right in your own kitchen.
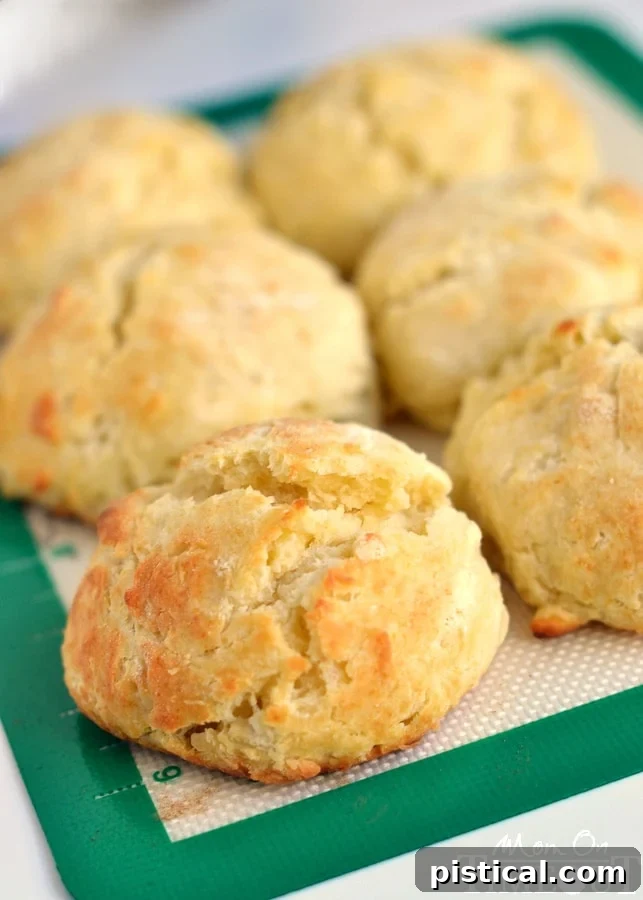
Biscuits have become a treasured staple in our home, gracing our breakfast table almost every weekend, and sometimes even making an appearance during the week. Their incredible versatility makes them a perfect companion to virtually any breakfast or brunch spread. We often transform them into delicious and satisfying biscuit sandwiches, layering them with fluffy scrambled eggs, melted cheese, and a slice of savory ham or crispy bacon. Alternatively, they’re simply delightful served alongside a plate of fluffy scrambled eggs, or topped generously with rich, creamy sausage gravy for a true Southern comfort meal. No matter how you choose to enjoy them, these homemade biscuits are guaranteed to be a comforting and delicious hit.
The Undeniable Appeal of Small Batch Baking: Why Six is the Ideal Number
In a culinary landscape often dominated by recipes designed for large gatherings or meal prep, the charm and practicality of a small batch recipe often gets overlooked. This particular recipe, yielding just six perfect biscuits, is a genuine game-changer for several compelling reasons, making it a favorite in my kitchen:
- Eliminate Waste: For smaller households, couples, or individuals, a full dozen biscuits can often be far too much. This recipe ensures you have just enough to savor fresh, warm biscuits without the worry of them drying out or going stale before they can all be enjoyed.
- Peak Freshness, Always: There’s an unparalleled joy in biting into a biscuit straight from the oven. Baking a small batch means you can enjoy that moment of peak freshness more frequently, perhaps even several times a week, without the significant effort or time commitment required for a larger batch.
- Effortless Portion Control: It naturally aids in managing portion sizes, offering a delightful treat that satisfies your craving for something homemade and comforting without the temptation of overindulging.
- Quick & Convenient: Less dough to prepare means less mixing, less rolling, and a significantly streamlined process overall. This inherent simplicity makes homemade biscuits an incredibly accessible and enjoyable option, even on the busiest of mornings when time is a precious commodity.
Embrace the pure joy of baking fresh, warm goods without the pressure or excess of a large production. These six buttery, flaky wonders are about to become your new favorite tradition, proving that sometimes, less truly is more when it comes to homemade treats.
Buttermilk Dilemma Solved: Achieve Perfect Biscuits Without Buttermilk!
One of the most common questions, and often a significant hurdle, in the realm of biscuit making is the perceived necessity of buttermilk. Let’s be honest, how often do you find a carton of buttermilk readily available in your refrigerator? For many of us, it’s a specialty item we rarely keep on hand. This recipe brilliantly sidesteps that issue by not calling for buttermilk at all, making it incredibly convenient and accessible for those spontaneous, last-minute biscuit cravings.
However, if you happen to be a buttermilk aficionado and have some on hand, or if you simply prefer that signature tangy flavor and incredibly tender crumb that buttermilk is known for, you absolutely have the option to make a substitution. You can certainly use buttermilk in place of the regular milk in this recipe. Just be aware that buttermilk has a slightly different, thicker consistency compared to regular milk, so you might need to adjust the quantity slightly. Add a little more or less liquid as needed until your dough reaches the ideal shaggy, soft, and slightly sticky consistency – avoiding a dry or overly wet dough is key. For those who want to replicate the tangy flavor of buttermilk but don’t have any in the fridge, a quick homemade substitute works wonderfully: simply add one tablespoon of white vinegar or lemon juice to a liquid measuring cup, then fill the rest with regular milk (preferably whole milk) until you reach the required ½ cup. Let it sit for 5-10 minutes until it visibly curdles – voilà, you’ve got instant “buttermilk” ready for your biscuits!
Essential Biscuit Ingredients: Pantry Staples for Unforgettable Flavor and Texture
Another fantastic and appealing aspect of making homemade biscuits, especially this small batch version, is that the list of required ingredients is incredibly short and consists almost entirely of items you likely already have tucked away in your pantry and refrigerator. There’s no need for specialty or hard-to-find items, just simple, wholesome components that, when brought together with the right technique, transform into something truly magical. Here’s a closer look at what you’ll need for these delightful, tender, and flaky small batch biscuits:
- All-Purpose Flour: This forms the fundamental structure of our biscuits. While some bakers opt for self-rising flour, using all-purpose flour provides greater control over the leavening agents, ensuring a consistent and predictable rise.
- Granulated Sugar: A modest amount adds a subtle hint of sweetness, beautifully complementing the rich, buttery flavor. It also assists in achieving that desirable golden-brown crust.
- Salt: A non-negotiable flavor enhancer, salt plays a crucial role in balancing the richness of the butter and bringing out the very best in every other ingredient, preventing a bland biscuit.
- Baking Powder: Our primary leavening agent. This is what’s responsible for the impressive rise and the wonderfully airy texture of the biscuits. Always ensure your baking powder is fresh for optimal results; an old one can lead to flat biscuits.
- Cream of Tartar: This often-overlooked ingredient is a true secret weapon in biscuit making! It works synergistically with baking powder to provide an extra boost of lift, contributing significantly to a more tender crumb and a bright white interior. It’s key for that superior flakiness.
- COLD Butter: Arguably the most critical ingredient for achieving those coveted flaky layers. Very cold butter, cut into small pieces, creates tiny pockets within the dough. As it melts in the hot oven, it releases steam, pushing apart the layers of dough. If your butter is too warm, it will simply blend into the flour, resulting in a dense, cake-like biscuit instead of a light, flaky one.
- Egg: A single, lightly beaten egg adds a lovely richness to the dough, helps bind the ingredients together, and contributes to a wonderfully tender texture and a beautiful golden-brown exterior. (However, don’t fret if you’re out of eggs or prefer to omit it, as my brother and sister prove, the biscuits are still absolutely delicious without it!)
- Milk: This provides the necessary liquid component to bring all the dry ingredients and butter together into a cohesive dough. For the richest flavor and best overall texture, whole milk is highly recommended.
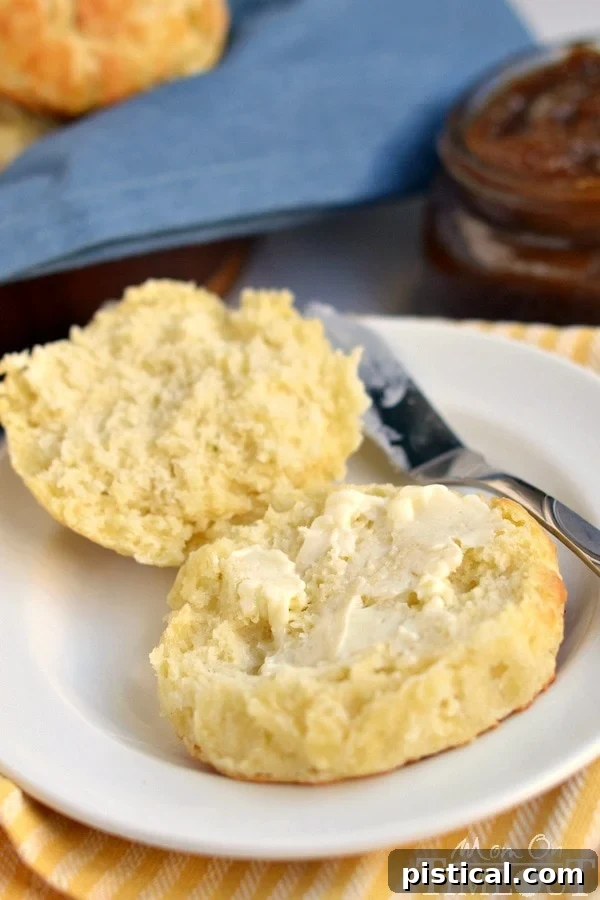
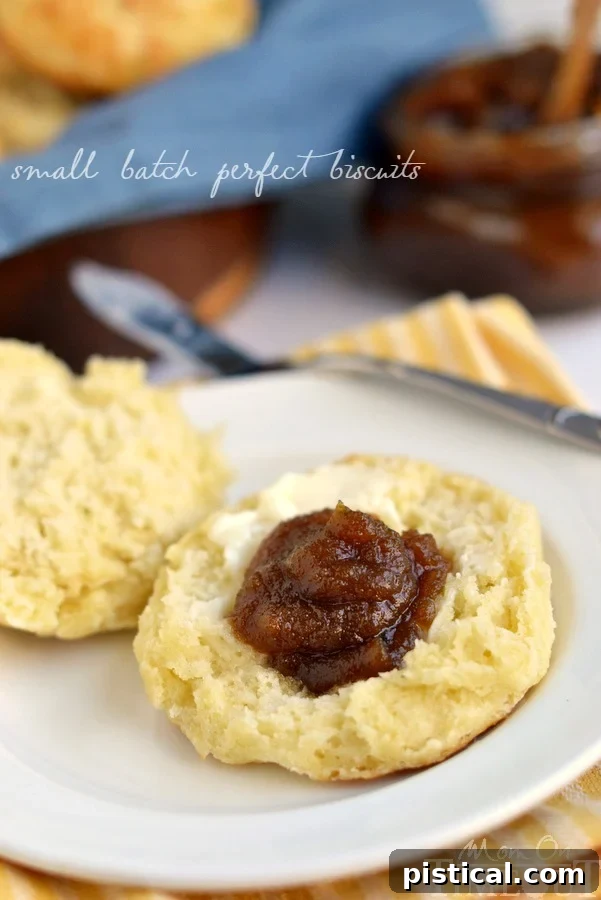
These simple, readily available ingredients, when combined with careful technique, transform into a breakfast treat so delightful, you won’t want to miss it. These biscuits are truly perfect served warm with a generous smear of butter and a dollop of homemade plum jelly, or for a delightful seasonal twist, some luscious slow cooker pumpkin butter.
Mastering the Art: Essential Biscuit Making Tips & Tricks for Unbeatable Results
Creating truly exceptional biscuits is less about complicated steps and more about adhering to a few fundamental principles with a bit of care and attention. I’ve compiled a wealth of information in my original, more comprehensive biscuit post, which is highly recommended for an even deeper dive into biscuit mastery. However, for these convenient small batch wonders, here are the indispensable tips and tricks you absolutely shouldn’t miss:
- Maintain Extreme Cold: This tip cannot be emphasized enough. Very cold butter is absolutely paramount for achieving flaky biscuits. As it melts in the hot oven, the moisture in the butter rapidly turns to steam, which creates pockets and pushes apart the layers of dough. If your butter is too warm and soft, it will simply blend into the flour, resulting in a dense, cake-like biscuit instead of a wonderfully light and flaky one.
- The Grating Trick for Butter: If you don’t own a pastry cutter (or simply prefer an alternative method that’s often quicker), grating frozen butter is a fantastic technique. The small, cold butter shreds are incredibly easy to incorporate quickly and evenly into the flour mixture, minimizing the risk of the butter warming up and the dough being overworked.
- Handle with Utmost Care – Avoid Overworking the Dough: Overworking the biscuit dough is the cardinal sin of biscuit making! Excessive handling develops gluten, which is desirable for chewy bread but detrimental to the tender, melt-in-your-mouth texture we seek in biscuits. Mix just until the ingredients are barely combined and a shaggy, slightly sticky dough begins to form. Minimal handling equals maximum tenderness and flakiness.
- Press Straight Down When Cutting: When using a biscuit cutter, always press straight down into the dough without twisting or rotating the cutter. Twisting the cutter can seal the edges of the biscuit, which prevents it from rising to its full potential and creating those beautiful, distinct layers.
- Resist the Urge to Overbake: Biscuits bake relatively quickly, so vigilant monitoring is key. Keep a close eye on them, especially during the last few minutes. You’re looking for tops that are just golden brown. Overbaking, even by a minute or two, can quickly lead to dry, hard, and unappealing biscuits.
- The Glorious Butter Brush Finish: For an extra layer of irresistible richness and a truly golden, inviting crust, brush the tops of your hot biscuits with a little melted butter immediately after they come out of the oven. This simple step adds incredible flavor, a beautiful sheen, and helps keep them soft.
- Consider a Quick Chill Before Baking: For an extra boost of flakiness, after cutting your biscuits, arrange them on the prepared baking sheet and pop them into the freezer for about 10-15 minutes before baking. This extra chilling step further solidifies the butter, enhancing that crucial steam-creating process in the oven.
Essential Tools for Biscuit Success: Equipping Your Kitchen for Perfect Results
Having the right tools in your kitchen can make the biscuit-making process not only much smoother but also far more enjoyable and lead to more consistent, professional-looking results. While many of these items can be improvised, they certainly contribute to ease and perfection:
- A sturdy baking sheet that can comfortably accommodate your six biscuits without overcrowding them. Proper spacing ensures even baking and browning.
- A reliable biscuit cutter is essential for achieving perfectly round, evenly sized biscuits that will bake uniformly. If you don’t have one, a drinking glass with a thin rim and a diameter of about 2-2.5 inches can serve as an excellent substitute.
- Parchment paper is a true baker’s best friend. Lining your baking sheet with it ensures a completely non-stick surface, making removal of your delicate biscuits painless and guaranteeing they come off in one perfect piece, plus it makes clean-up a breeze.
- A quality pastry cutter (also known as a pastry blender or dough blender) is specifically designed to efficiently cut cold butter into flour, creating those crucial pea-sized pieces without melting the butter with the warmth of your hands. If you don’t have one, you can effectively use two knives, two forks, or a box grater for frozen butter.
- A small pastry brush is incredibly handy for applying that final, luxurious layer of melted butter to your hot biscuits, further enhancing their flavor and giving them a beautiful, appetizing sheen.
More Delicious Breakfast Recipes You’ll Absolutely LOVE!
If you’ve enjoyed the simple pleasure of these homemade small batch biscuits and are eager to expand your breakfast repertoire, here are some other delightful recipes from our collection that are sure to become new family favorites:
- Best Fluffy Buttermilk Pancakes: For those special mornings when only a stack of light, airy, and truly fluffy pancakes will do.
- Cranberry Almond Breakfast Cookies: A healthier, grab-and-go breakfast option that doesn’t compromise on delicious flavor or satisfying texture.
- Easy Hash Brown Breakfast Casserole: A hearty, comforting, and conveniently make-ahead dish that’s perfect for feeding a crowd or for easy meal prepping throughout the week.
- Lemon Blueberry Scones: Another delightful baked good, bursting with vibrant fruity flavor and a bright, zesty lemon tang, perfect with your morning tea or coffee.
- Baking Bacon: A How-To Guide to Making Perfect Bacon Every Time: Master the simple art of preparing perfectly crispy bacon in the oven, the ideal savory accompaniment to any sweet breakfast treat.
The Recipe: How To Make These Incredible Small Batch Biscuits

Print
Pin
Small Batch Perfect Biscuits
Ingredients
- 1 1/2 cups all-purpose flour
- 3 tbsp all-purpose flour additional, for dusting
- 5 tsp granulated sugar
- 1/4 tsp salt
- 2 tsp baking powder
- 1/2 tsp cream of tartar
- 6 tbsp unsalted butter very cold, cut into small pieces
- 1 large egg lightly beaten (optional, for richness)
- 1/2 cup milk very cold (whole milk recommended)
Instructions
-
Preheat your oven to 450°F (230°C). Prepare a baking sheet by lightly greasing it or lining it with parchment paper for easy removal.
-
In a large mixing bowl, thoroughly whisk together the 1 1/2 cups all-purpose flour, granulated sugar, salt, baking powder, and cream of tartar until well combined. Add the very cold, cubed butter pieces. Using a pastry cutter, two knives, or your fingertips (working very quickly to keep the butter cold), cut the butter into the dry ingredients until the mixture resembles coarse crumbs with some distinct pea-sized pieces of butter still visible throughout. Alternatively, grate frozen butter directly into the flour mixture for quick, even distribution.
-
Create a well in the center of the flour and butter mixture. Add the lightly beaten egg (if you’re using it) and the very cold milk. Mix gently with a fork or your hands just until the dry ingredients are moistened and a shaggy, soft dough begins to form. Be extremely careful not to overmix; the dough will be sticky, but this is exactly the desired consistency for tender biscuits.
-
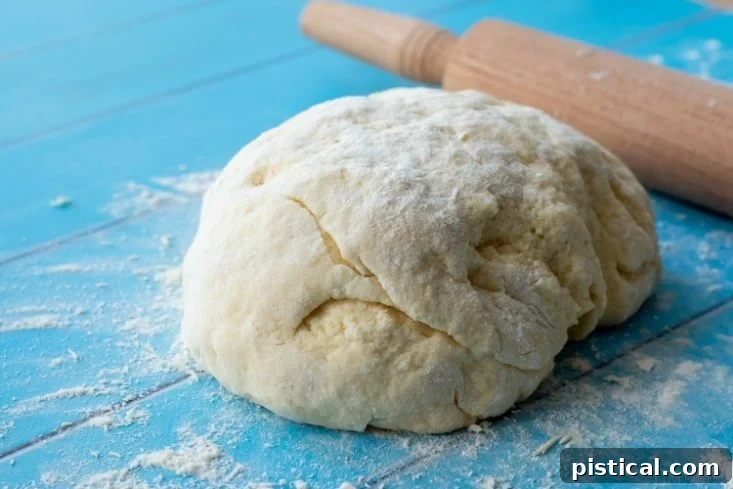
Turn the sticky dough out onto a generously floured surface (using the additional 3 tablespoons of flour). Sprinkle a little more flour on top of the dough to prevent it from sticking to your fingers or rolling pin. Gently knead the dough 10-15 times. This brief kneading helps bring the dough together and begins to create those wonderful flaky layers. If it feels too sticky, sprinkle a tiny bit more flour, but always err on the side of less flour rather than more.
-
Roll or gently pat the dough out evenly to a thickness of approximately 3/4 to 1 inch. Using a biscuit cutter (or a floured drinking glass), press straight down firmly to cut out the biscuits. It’s crucial not to twist the cutter, as this can seal the edges of the biscuit and inhibit its rise and flakiness. Gather any dough scraps, gently press them together (again, avoiding overworking), and cut out any remaining biscuits. You should be able to get 6 perfectly sized biscuits.
-
Place the cut biscuits onto your prepared baking sheet. For biscuits with softer, taller sides, place them relatively close together. If you prefer crispier sides, space them further apart. Bake for 8 to 10 minutes, or until the tops are beautifully golden brown and the biscuits have risen significantly and look flaky.
-
Immediately after taking them out of the oven, for an ultimate buttery finish and extra yumminess, generously brush the tops of the hot biscuits with a little melted butter. Serve warm and enjoy these truly perfect small batch biscuits!
Nutrition
Storing and Reheating Your Homemade Biscuits for Continued Enjoyment
While these small batch biscuits are undoubtedly at their absolute best when enjoyed fresh from the oven, still warm and tender, it’s sometimes necessary to store a few leftovers or even prepare them slightly ahead of time. Here’s how to ensure they remain delightful even after the initial bake:
- Proper Storage: Once your biscuits have completely cooled to room temperature, store them in an airtight container. They will maintain their deliciousness and soft texture at room temperature for up to 2-3 days. To help prevent them from drying out, you can wrap each biscuit individually in aluminum foil or plastic wrap before placing them in the container.
- Freezing Raw Dough for Later: For ultimate convenience and future quick treats, you can easily prepare and cut the biscuit dough as instructed. Then, arrange the raw biscuits on a baking sheet and freeze them until they are solid. Once frozen solid, transfer them to a freezer-safe bag or container and store for up to 1 month. When you’re ready to bake, simply place the frozen biscuits on a parchment-lined baking sheet and bake as directed, adding an extra 3-5 minutes to the baking time, or until golden brown.
- Reheating Baked Biscuits: To bring leftover baked biscuits back to their warm, comforting glory, wrap them loosely in aluminum foil and reheat them in a preheated 300°F (150°C) oven for about 10-15 minutes, or until they are warmed through and softened. You can also quickly warm them in the microwave for 15-30 seconds, but be aware that this method might make them a bit chewier rather than preserving their flaky texture.
Troubleshooting Common Biscuit Problems: Solutions for Perfect Baking
Even the most experienced bakers can occasionally encounter issues when making biscuits. Don’t worry if your first batch isn’t absolutely perfect; with a little understanding, you can easily troubleshoot common problems and achieve biscuit perfection every time. Here are a few typical biscuit dilemmas and how to address them:
- Biscuits are Tough or Hard: This is almost universally caused by overworking the dough. Too much kneading or excessive handling develops gluten, which is excellent for chewy bread but detrimental to the tender, delicate texture of biscuits. Remember to mix just until the ingredients are combined and handle the dough as little as possible.
- Biscuits are Flat and Don’t Rise: Several factors can contribute to flat biscuits. A very common culprit is old or inactive baking powder or cream of tartar – always check the freshness date. Insufficiently cold butter will also prevent a good rise, as it won’t create enough steam to lift the layers. Lastly, twisting the biscuit cutter when cutting can seal the edges of the dough, inhibiting its ability to puff up.
- Biscuits are Dry or Crumbly: This issue typically arises from adding too much flour or overbaking the biscuits. If possible, use a kitchen scale to measure flour accurately. When mixing, ensure the dough is just sticky enough. For baking, watch them closely and remove them from the oven as soon as they’re golden brown, rather than waiting for them to get too dark.
- Biscuits Don’t Have Flaky Layers: Again, the temperature of your butter is paramount here. If the butter melts into the flour too much before the biscuits hit the hot oven, you won’t get those distinct, airy, flaky layers. Using very cold butter and incorporating it quickly is key. Not pressing straight down with the cutter can also contribute to a lack of flakiness.
Originally published on November 7, 2014, this beloved recipe has been continuously refined, expanded, and updated to ensure you achieve biscuit perfection every single time you bake it.


For all our delicious breakfast recipes, explore our comprehensive collection HERE.
Don’t miss out on any new, mouth-watering recipes! Sign up to receive our exclusive email updates directly to your inbox.
For even more daily culinary inspiration, tips, and behind-the-scenes fun, be sure to follow us on Facebook – Pinterest – Instagram – Twitter – and Bloglovin’.
Happy Baking, and have a truly wonderful day!