
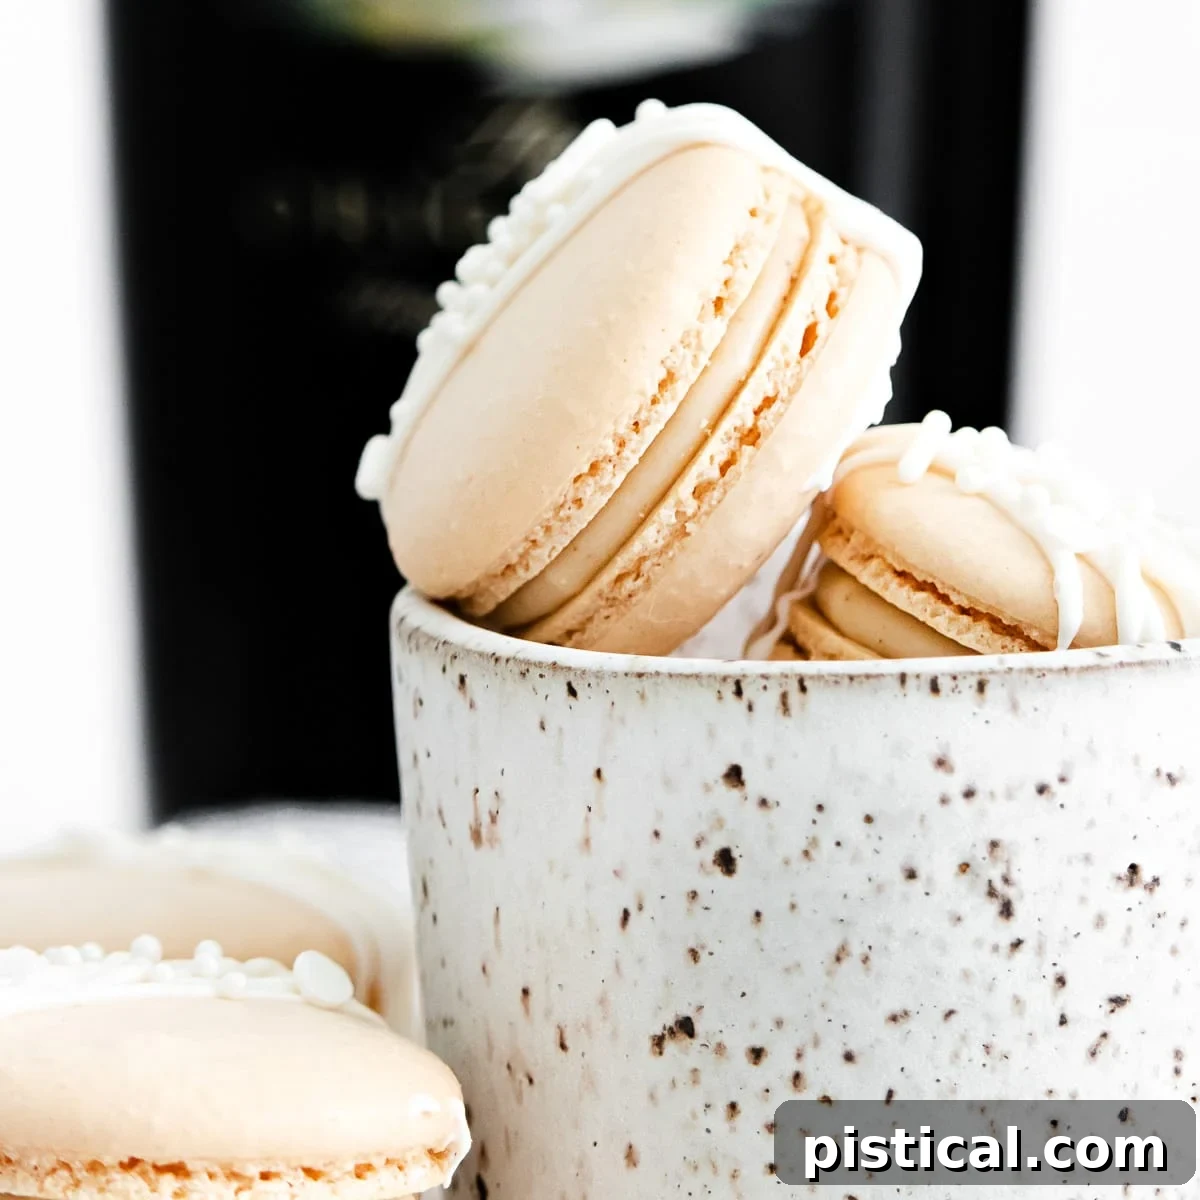
Step into a world of delicate delights with our exquisite Irish Cream Macarons. These ethereal cookies are celebrated for their distinctive light and airy shells, which yield to a perfectly chewy interior. But what truly sets them apart is the rich, velvety Irish Cream filling, transforming a classic French treat into an unforgettable indulgence. Prepare to captivate your guests with these picturesque confections, ideal for St. Patrick’s Day celebrations or any occasion demanding a touch of elegance and festive spirit. If you’re seeking more delightful cookies to bring you luck this St. Patty’s Day, explore our recipes for Rainbow Pinwheel Cookies or these charming Mint Chocolate Chip Snowball Cookies.
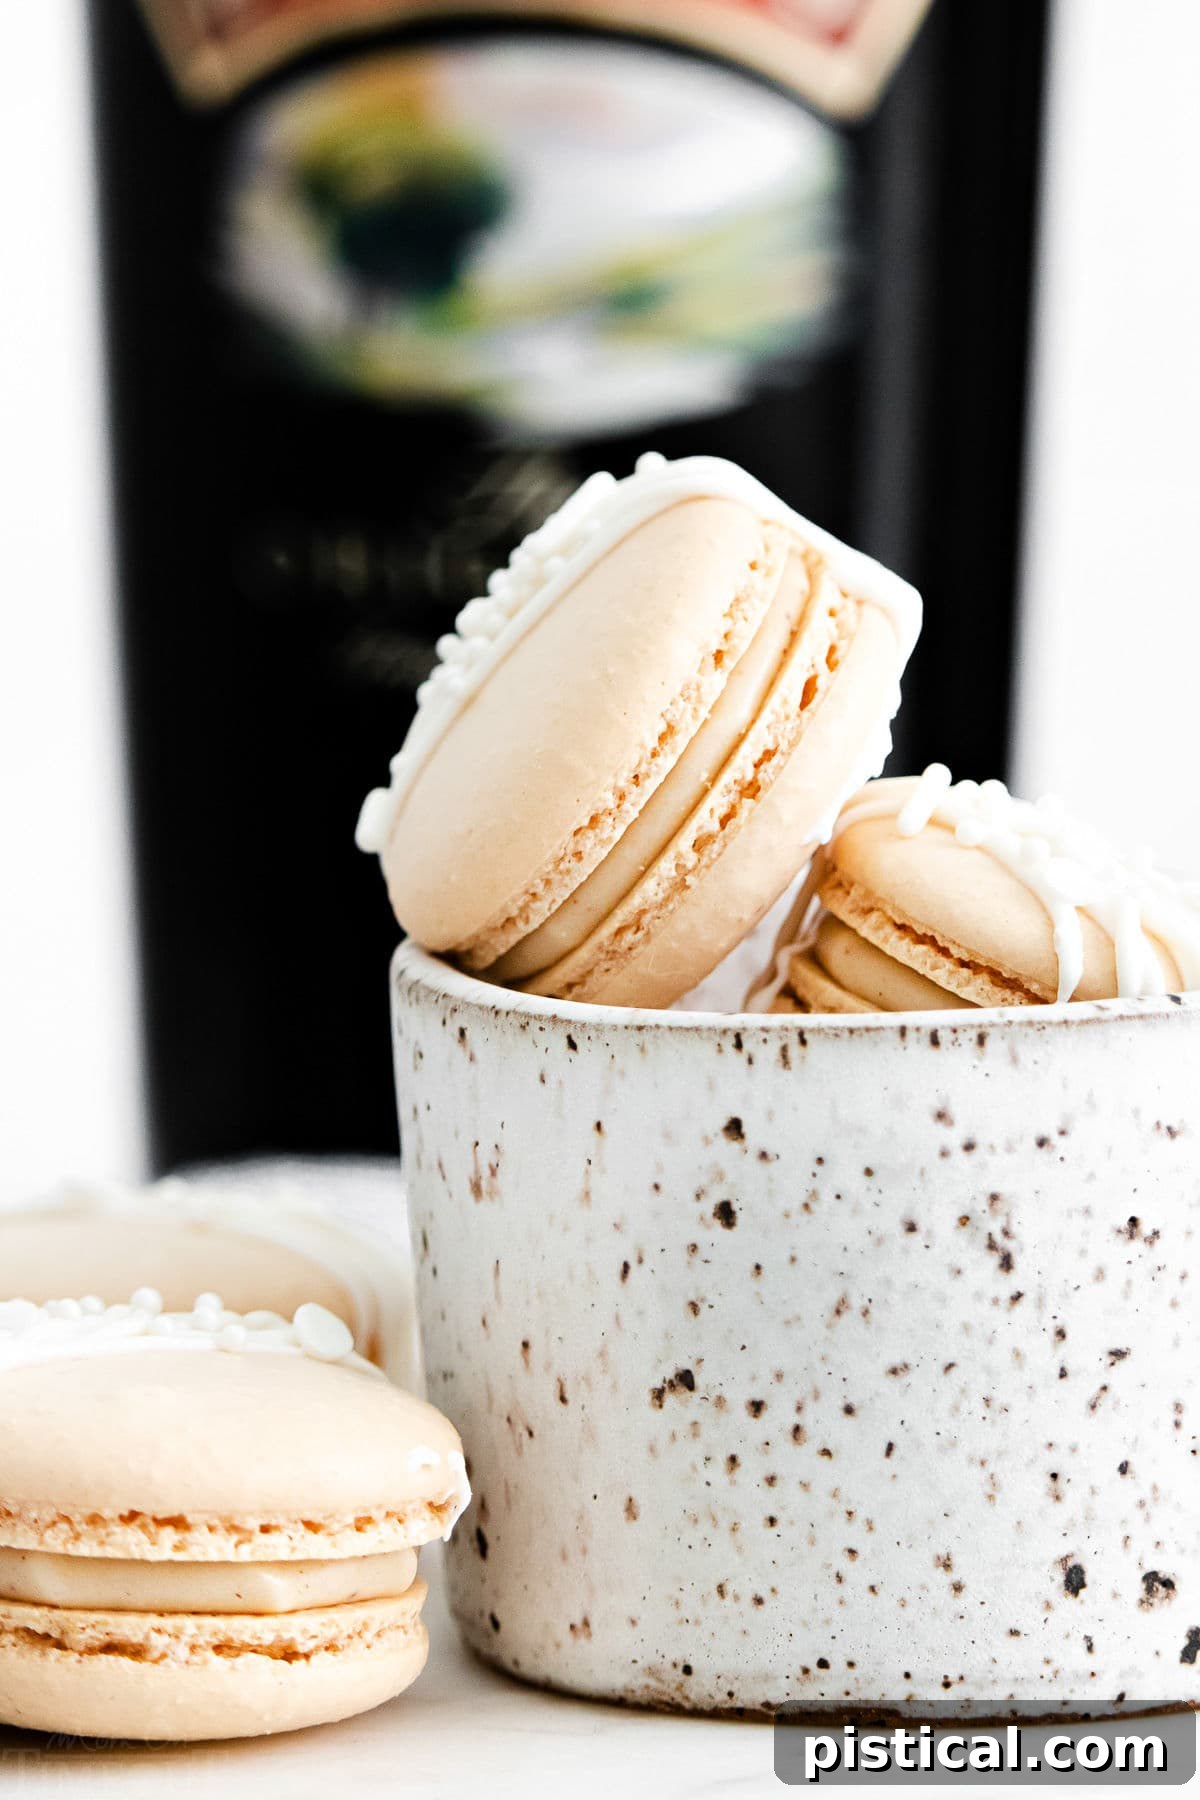
Beyond their undeniable beauty, Irish cream macarons offer an enchanting blend of textures and flavors. The satisfying crunch of their delicate shell, giving way to a soft, melt-in-your-mouth center filled with luscious Irish cream, is a culinary experience like no other. While mastering the art of macarons might seem daunting at first glance, requiring a certain precision and technique, my straightforward, easy-to-follow steps will guide you to success. You’ll be crafting these elegant cookies with confidence in no time.
While these sweet and creamy macarons are an absolute must-make for St. Patrick’s Day, their heavenly taste makes them a delightful treat to enjoy throughout the year. Once you savor their exquisite balance of sweetness and rich, boozy undertones, you’ll find them utterly irresistible and impossible not to crave.
Unveiling the Macaron: A Culinary Masterpiece
Macarons are iconic French confections, though some culinary historians trace their origins back to 8th-century Italy. These small, exquisite meringue-based cookies have graced European tables since at least the 19th century, gaining widespread popularity for their delicate structure and vibrant flavors. It’s important to distinguish them from “macaroons,” which are dense coconut cookies – macarons are in a league of their own!
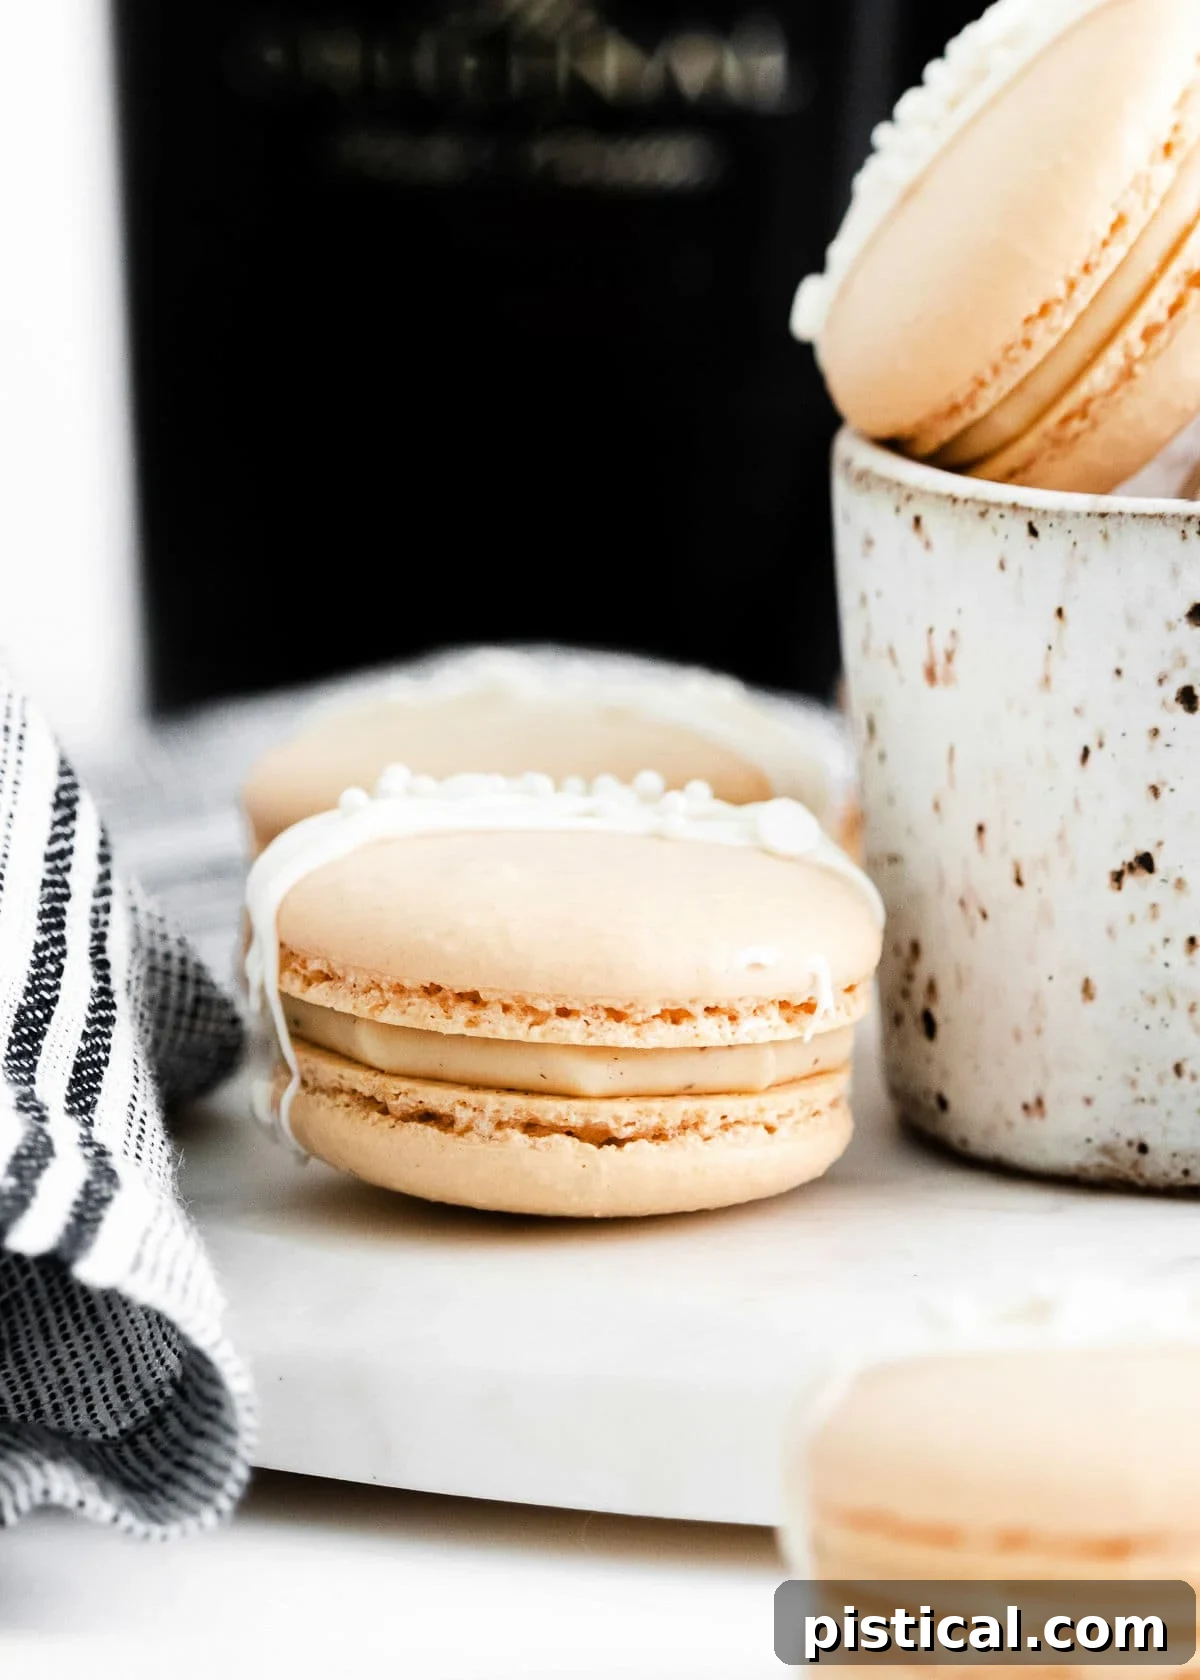
The delicate shells of a macaron are typically crafted from a precise blend of egg whites, finely granulated sugar, powdered sugar, and blanched almond flour. This unique combination gives them their signature crisp exterior and slightly chewy interior, characterized by the distinctive “foot” around the base. The magic truly happens when two perfectly baked shells are brought together by a rich, flavorful filling. In this particular recipe, we elevate the classic macaron with a luxurious Irish cream filling, transforming it into a sophisticated dessert with a festive twist.
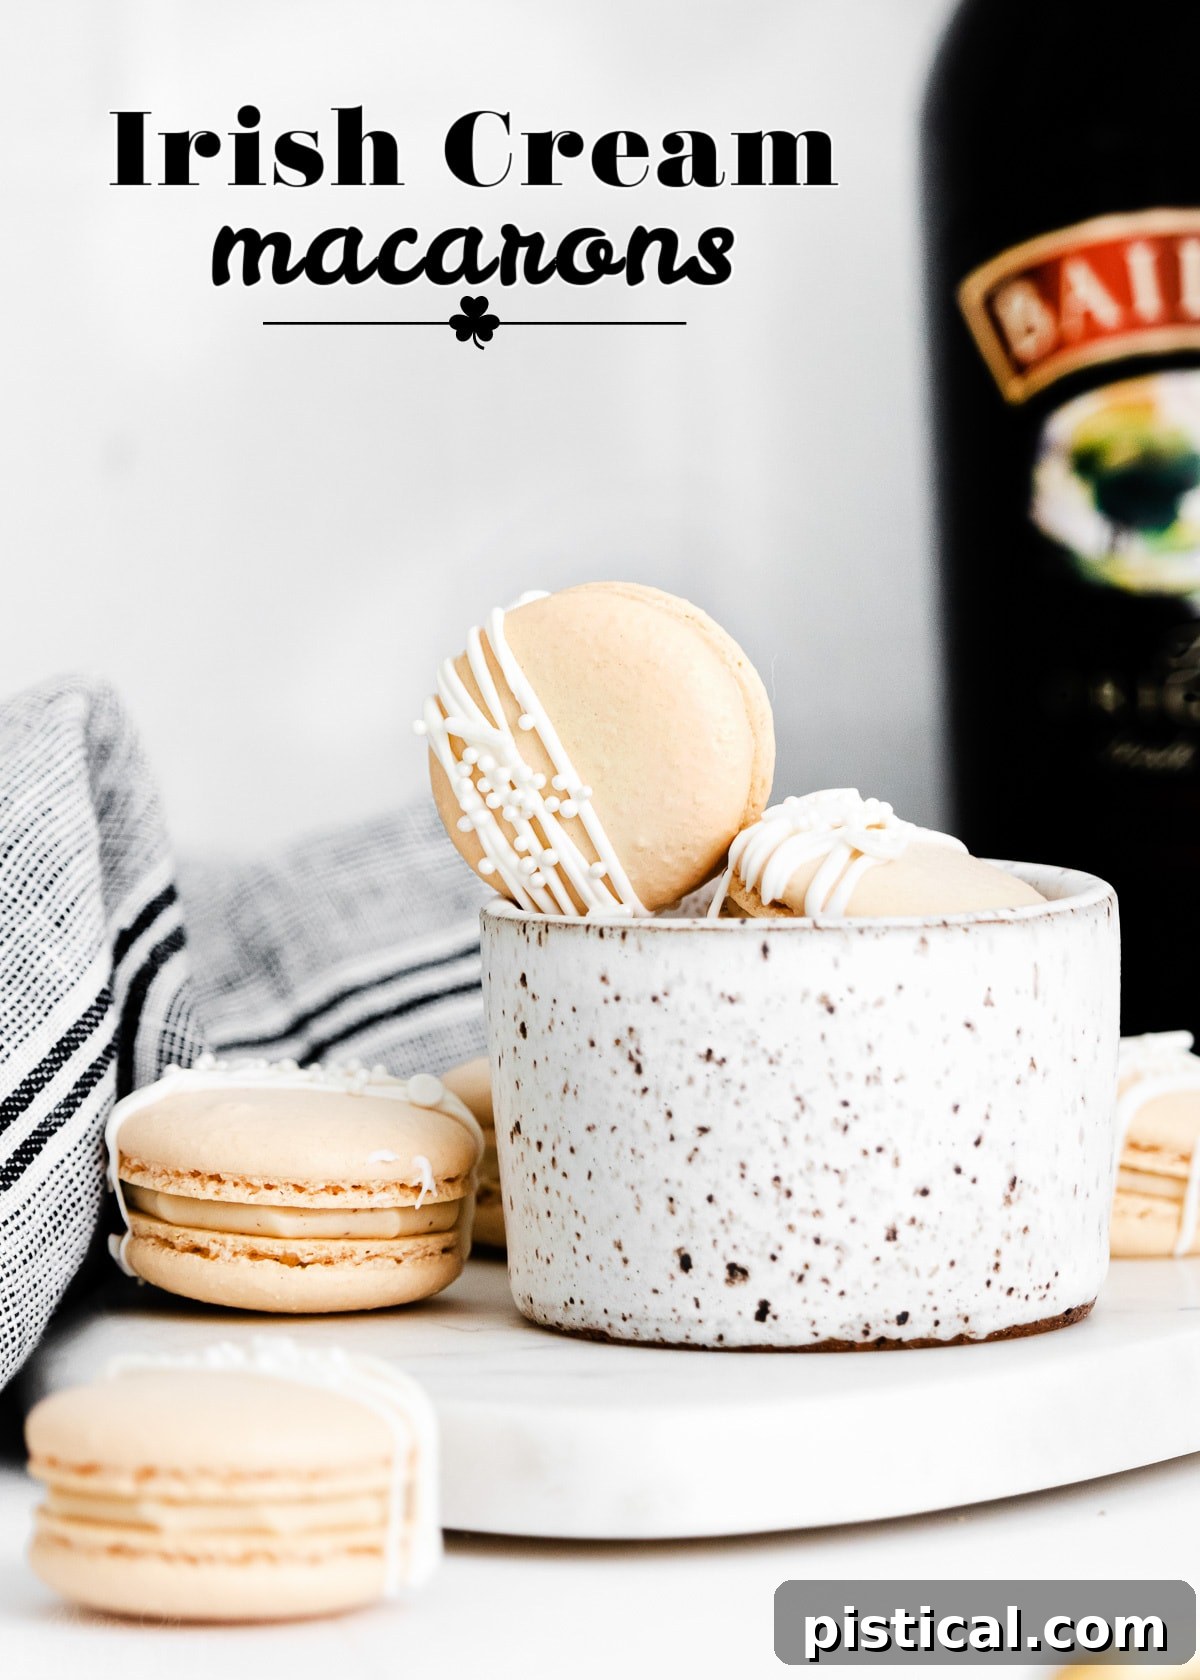
Essential Ingredients for Your Irish Cream Macarons
You might be surprised to find that the ingredient list for these seemingly intricate treats is quite straightforward! The simplicity of the components allows the quality of each to shine, creating truly impressive Irish cream cookies.
For the Delicate Macaron Shells, You’ll Need:
- Egg Whites: These are the undisputed star of macaron shells, forming the stable meringue backbone. For optimal whipping volume and stability, allow your egg whites to come to room temperature before use. This makes them much easier to whip into stiff, glossy peaks.
- Granulated Sugar: This isn’t just for sweetness; it plays a critical role in stabilizing the egg whites, helping them stretch and form a resilient meringue that holds its structure.
- Powdered Sugar (Confectioners’ Sugar): Essential for creating light, airy, and delicately sweet shells. Its fine texture contributes to the smooth surface of the macaron.
- Almond Flour: Specifically, blanched almond flour is crucial. Its fine, uniform grind is key to achieving the macaron’s unique, slightly chewy, and tender texture, along with its characteristic subtle nutty flavor.
The Luscious Irish Cream Filling Requires:
- Cream Cheese: The secret to a sumptuously creamy and stable filling. Using softened cream cheese ensures a smooth, lump-free consistency that pipes beautifully.
- Irish Cream Liqueur: The star flavor of our filling! Select a good quality brand, such as Bailey’s, to ensure a rich, authentic taste. Lesser quality brands may lack the depth of flavor needed to truly make these macarons sing.
- Powdered Sugar (Confectioners’ Sugar): Added for a delicate touch of sweetness, balancing the richness of the cream cheese and Irish cream, and also contributes to the filling’s texture.
- Cinnamon: Just a pinch of ground cinnamon adds a warm, subtle spice that beautifully complements and enhances the complex notes of the Irish cream, adding depth to every bite.
Crafting the Perfect Irish Cream Macarons: A Step-by-Step Guide
If this marks your maiden voyage into the world of macaron making, don’t let the detailed steps intimidate you. While the process may appear a bit challenging initially, I assure you that with patience and a methodical approach, you are absolutely capable of achieving macaron perfection. Simply follow these clear, actionable steps one at a time, and you’ll soon be delighting in your very own batch of flawless Irish Cream Macarons.
Phase One: Preparing the Macaron Shell Batter
- Begin by lining two half-sheet baking trays with high-quality silicone baking mats or parchment paper. If using parchment, ensure it lies perfectly flat to prevent lopsided macarons; you can secure it temporarily with a tiny bit of batter or tape corners before piping and remove before baking.
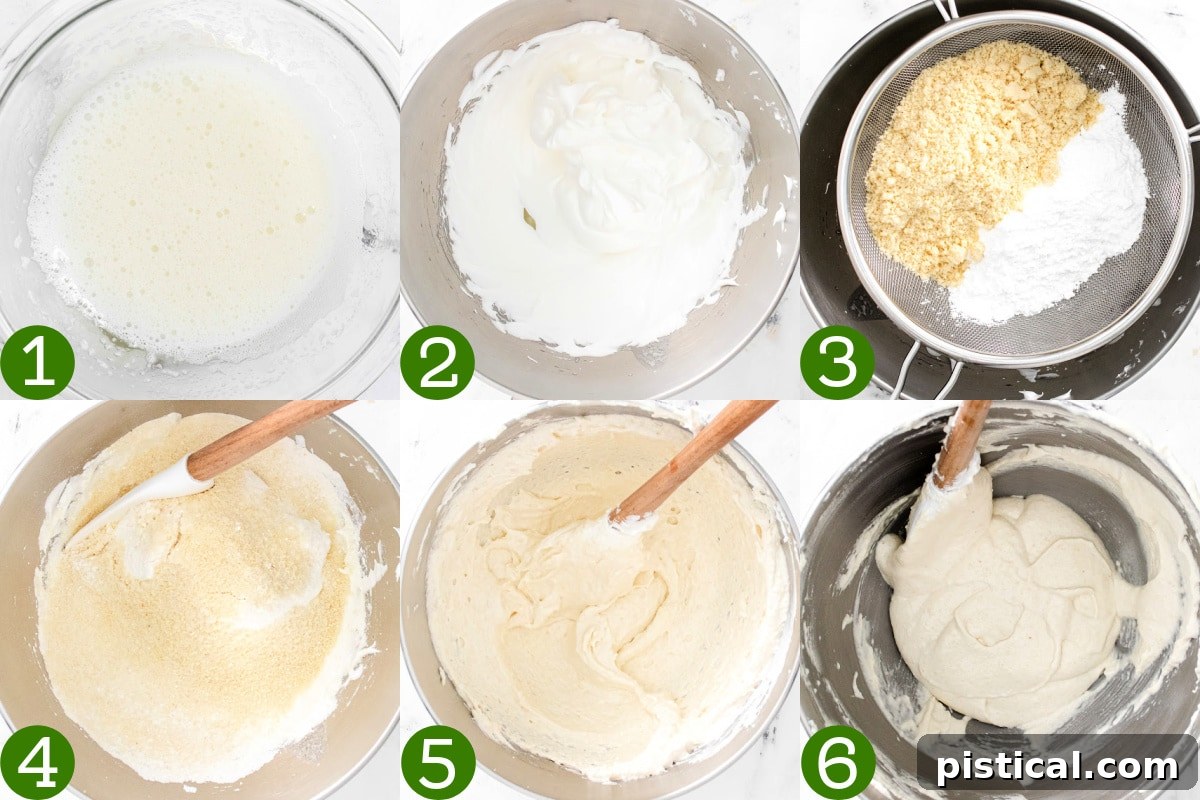
- Fill a small saucepan halfway with water and bring it to a gentle simmer over medium heat. Place a heatproof bowl (preferably stainless steel) over the saucepan, ensuring the bottom of the bowl does not touch the simmering water. This creates a double boiler, or “bain-marie.”
- Add the room-temperature egg whites and granulated sugar to the heatproof bowl. Whisk continuously and gently until all the sugar has completely dissolved. This typically takes about 2 to 3 minutes. Test for dissolution by rubbing a small amount of the mixture between your fingers; if it feels completely smooth without any grittiness, it’s ready.
- Carefully transfer the warm egg white mixture to the clean, dry bowl of a stand mixer fitted with the whisk attachment. Beat on medium-high speed until the mixture transforms into a glossy, stiff-peaked meringue. The peaks should hold their shape firmly when the whisk is lifted, without drooping.
- Into the meringue, gently sift the powdered sugar and almond flour together. This step is crucial for achieving smooth macaron tops, preventing lumps in the batter.
- Using a silicone spatula, begin to gently fold the dry ingredients into the meringue. Use a folding motion, scraping down the sides of the bowl as you work. At this stage, be very careful not to deflate the delicate egg whites too much.
- Once the dry ingredients are just incorporated, transition to the “macaronage” process. Gently “smush” or press the batter against the sides of the bowl in a circular motion, then scrape it down and fold it back together. Repeat this deflating process, carefully observing the batter’s consistency.
The “Figure 8 Test” is your best friend for macaronage readiness! Slowly lift your spatula and let the batter flow off it. If you can continuously draw a “figure 8” with the flowing batter without it breaking or falling in clumps, your batter has reached the perfect consistency. If it’s too thick, continue the smushing and folding process a few more times until this smooth, ribbon-like flow is achieved. Be cautious not to overmix, as this can lead to runny batter and flat macarons.
Phase Two: Piping and Baking Your Macaron Shells
- Once your batter is perfectly macaronaged, transfer it into a piping bag fitted with an open round tip (a #10 or #12 piping tip works wonderfully).
- Hold the piping bag strictly perpendicular to your baking surface. Pipe 1-inch circles onto your prepared baking sheets, leaving approximately 2 inches between each macaron. If you’re using a silicone macaron mat with pre-marked circles, this step becomes significantly easier for achieving uniform size.
- After piping a full tray of macarons, firmly tap the baking sheet several times on your counter. This crucial step helps release any trapped air bubbles within the batter, which can prevent cracking and encourage the formation of smooth tops and the characteristic “feet.” You will notice the piped circles flatten slightly.
- Allow the piped macaron shells to “rest” for approximately 30 minutes to an hour, or until their tops feel completely dry to the touch. This process, known as developing a “skin,” is vital for preventing cracked shells and promoting the iconic “feet” during baking. The exact resting time depends on the humidity of your environment.
- While your shells are resting, preheat your oven to 325°F (160°C).
- Bake the macaron shells one baking sheet at a time for 12 to 15 minutes. If your oven has hot spots, rotate the baking sheet halfway through the baking time to ensure even cooking. The shells are perfectly baked when they no longer wobble or jiggle when the baking sheet is gently moved.
- Once baked, remove the trays from the oven and allow the macaron shells to cool completely on the baking sheet before attempting to remove them. This prevents breakage and ensures they detach cleanly.
Phase Three: Crafting the Irresistible Irish Cream Filling
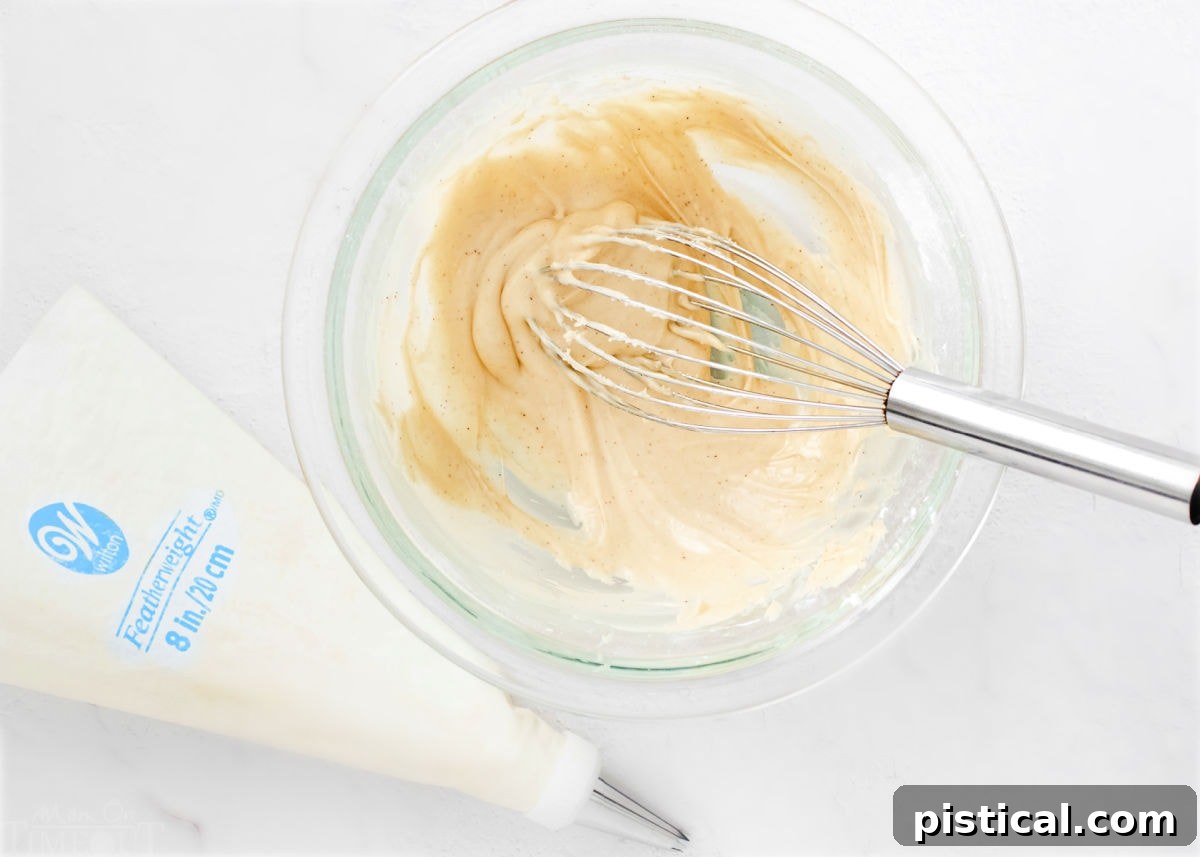
- In a medium bowl, whisk together the softened cream cheese and Irish cream liqueur until the mixture is completely smooth and free of lumps.
- Add the powdered sugar and cinnamon to the cream cheese mixture. Continue whisking until all ingredients are thoroughly combined and the filling is light, creamy, and uniform.
- Transfer this delightful Irish cream filling into a clean piping bag, ready for assembly, and set it aside.
Phase Four: Assembling and “Aging” Your Macarons
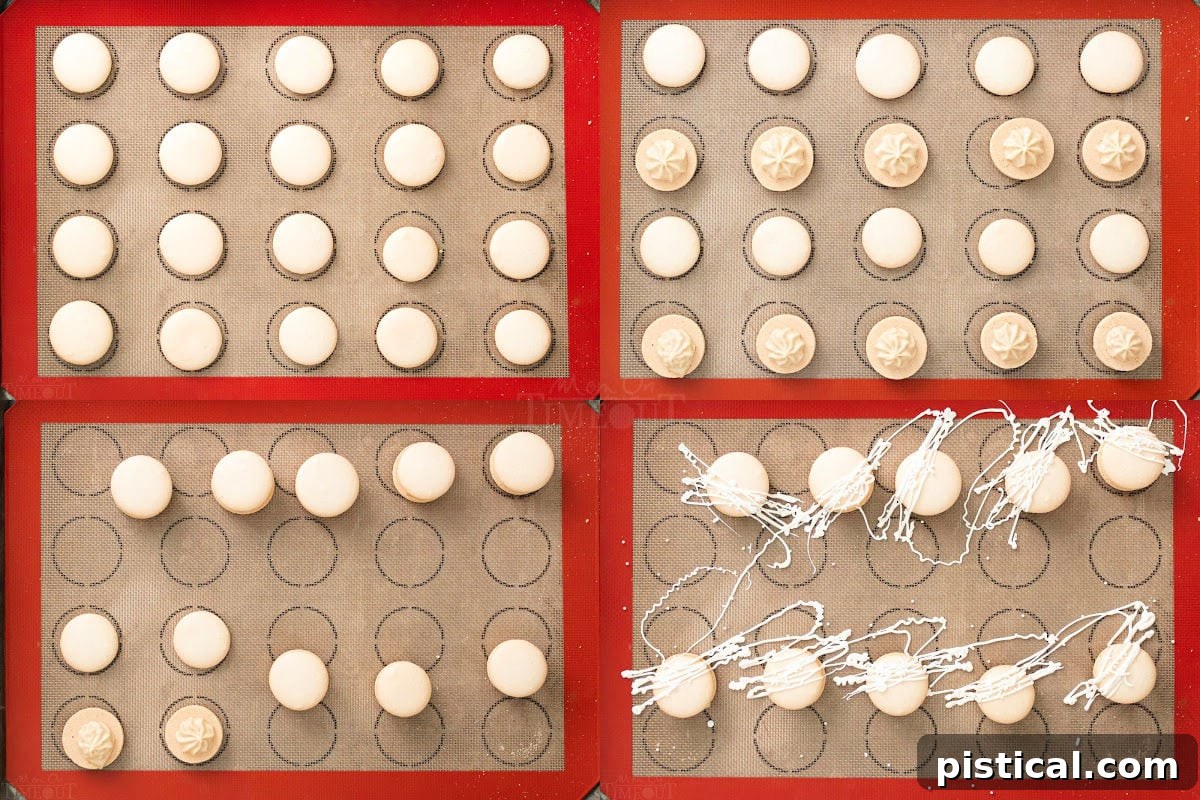
- Once your macaron shells are completely cooled, carefully match them into similar-sized pairs. This creates a professional and aesthetically pleasing finish for your assembled macarons.
- Take one macaron shell, pipe a small dollop of the Irish cream filling onto its flat side, centering the filling.
- Gently place the second matching macaron shell on top, pressing down very lightly until the filling just begins to reach the edges of the shells. Avoid pressing too hard to prevent the filling from oozing out excessively.
- Arrange the assembled macarons in an airtight container and place them in the refrigerator to “age” overnight. This crucial step allows the moisture from the filling to subtly soften the shells, creating that signature crisp yet chewy texture that defines a perfect macaron.
- Before serving, allow the macarons to come to room temperature for about 30 minutes to an hour. This enhances both their flavor and texture, ensuring the filling is creamy and the shells are perfectly tender.
Frequently Asked Questions About Macarons
How should I store my Irish Cream Macarons?
To preserve their delicate texture and exquisite flavor, your homemade Irish Cream Macarons should be stored in an airtight container in the refrigerator. They will remain fresh and delicious for up to 4 days. Always bring them to room temperature before serving for the best experience.
Why might my macarons turn out lopsided?
Achieving perfectly round and even macarons every time requires attention to detail. The most common reason for lopsided macarons is holding the piping bag at an angle rather than strictly perpendicular to the baking sheet during piping. An angled bag will cause the batter to spread unevenly. Additionally, uneven macaronage (over or under mixing the batter) or a warped baking sheet can also contribute to lopsided shapes. While still delicious, consistent piping technique will yield the aesthetically perfect macarons you desire.
Is aging macarons overnight really necessary?
While technically optional, I cannot stress enough the importance of aging your macarons overnight. This step is a game-changer! The process allows the moisture from the creamy filling to migrate into the crisp macaron shells, resulting in a harmonious texture that is perfectly crisp on the outside and wonderfully chewy and tender on the inside – the hallmark of a truly authentic and delicious macaron. It deepens the flavor profile and creates that desirable melt-in-your-mouth experience.
What causes hollow macaron shells?
Hollow shells are a common challenge for macaron bakers. They often result from incorrect meringue consistency (under-whipped egg whites that lack structure), under-mixed macaron batter (not enough macaronage), or baking at too high a temperature. Ensuring your meringue is stiff and glossy, performing adequate macaronage, and baking at the correct temperature can help prevent hollows.
Trish’s Expert Tips for Macaron Perfection
Whip Egg Whites to Stiff Peaks: The Foundation of Flawless Macarons.
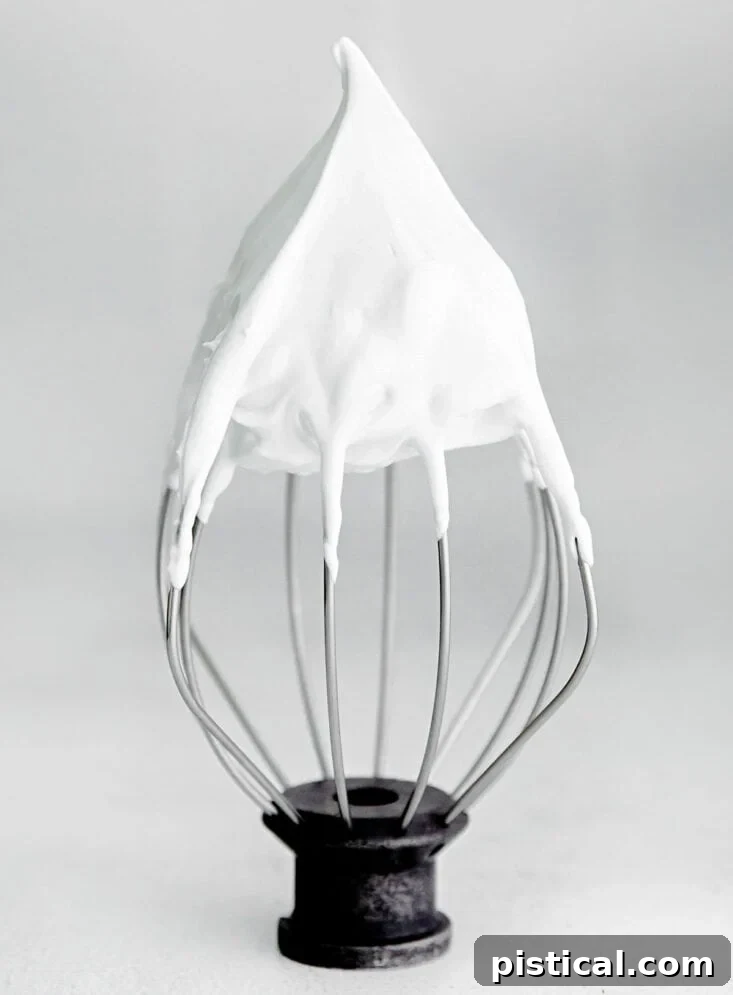
Achieving the correct meringue consistency is arguably the most critical step in macaron making. It is paramount to beat the egg whites until they form stiff, upright peaks. “Stiff peaks” means that when you lift the whisk attachment, the peaks stand tall and firm without any tips falling over or drooping. A stable, properly whipped meringue provides the necessary structure and airiness for perfect macaron shells, ensuring they rise beautifully and develop those coveted “feet.”
Embrace the Silicone Baking Mat for Uniform Results.
Silicone baking mats are an invaluable tool for macaron bakers of all skill levels. They offer excellent non-stick properties and, specifically, silicone macaron mats come with pre-printed circles. These circles serve as a fantastic guide, helping you pipe consistently sized macarons every single time, which is key for professional-looking results.
For more experienced bakers who prefer the slightly slicker surface of parchment paper, here’s a smart trick: place a silicone macaron mat *underneath* your parchment paper. The outlines of the circles will be visible through the parchment, allowing you to use the guides while still benefiting from parchment’s unique release properties. This method gives you the best of both worlds!
Allow Macarons to Reach Room Temperature Before Enjoying.
While tempting to devour them straight from the fridge, the texture and nuanced flavors of your Irish Cream Macarons truly blossom after they’ve sat out for approximately an hour at room temperature. This allows the filling to soften slightly and the shells to reach their optimal crisp-chewy balance, offering a more delightful sensory experience.
Match Up Shell Sizes for a Professional Finish.
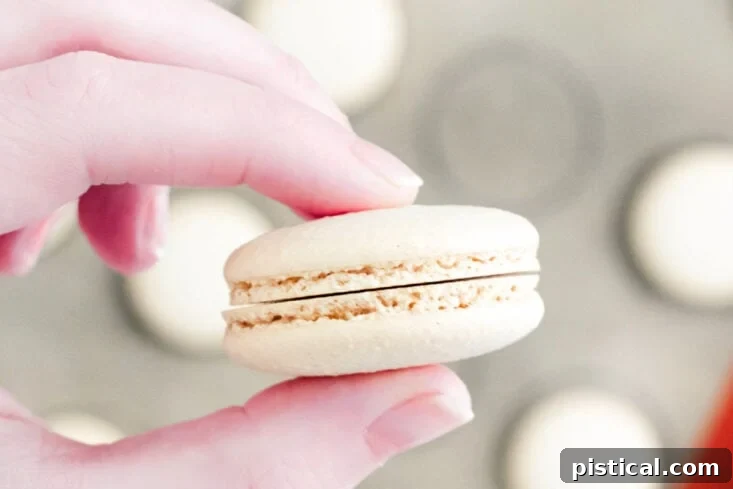
Before you begin assembling, take a moment to sort through your baked macaron shells and pair them up by similar size. This simple step significantly elevates the final appearance of your macarons, giving them a polished, professional look. Matching shells also ensures that the filling is evenly distributed and less likely to ooze out, contributing to a clean and beautiful presentation.
Creative Variations and Serving Suggestions to Try
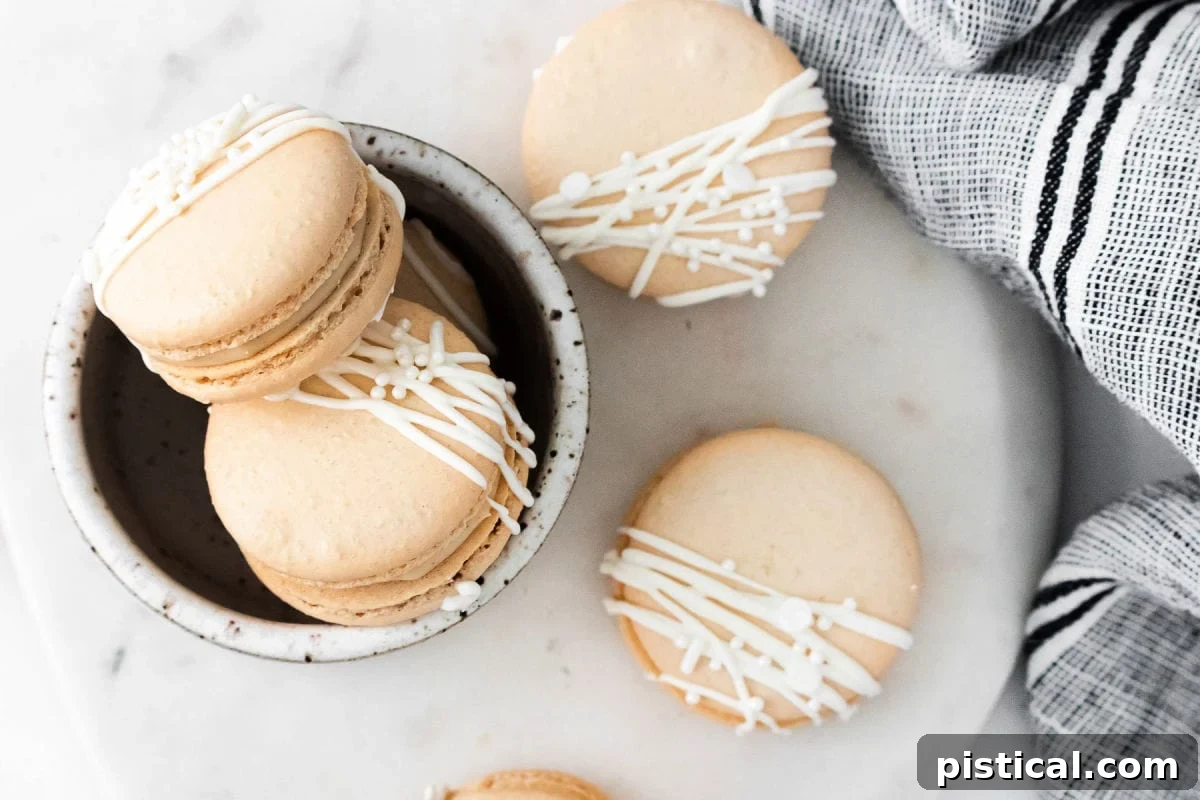
- Embrace Decoration! Have immense fun personalizing your homemade macarons. I chose to adorn mine with a delicate drizzle of melted white chocolate and a scattering of festive sprinkles, which is entirely optional but adds a lovely touch of elegance. Macarons are absolutely delicious in their purest form, but a little external flair can make them even more special, especially if you have the time and inclination. Consider green or gold sprinkles for St. Patrick’s Day, or a contrasting chocolate drizzle. You could even tint the macaron shells with food coloring for a vibrant look!
- Spice It Up with Nutmeg: For those who appreciate a deeper spice profile, try adding just a tiny pinch of freshly grated nutmeg along with the cinnamon in your Irish cream filling. Nutmeg’s warm, earthy notes harmonize beautifully with the rich flavors of Irish cream, adding another layer of complexity to these delightful treats.
- Alternative Fillings: While Irish cream is divine, don’t hesitate to experiment with other fillings once you’ve mastered the shells. A simple ganache, buttercream (with a touch of coffee or chocolate), or even a fruit curd could offer exciting new flavor profiles.
More Festive St. Patrick’s Day Recipes
- Mint Chocolate Bark
- St. Patrick’s Day Jello Cups
- Lemon Lime Jello Salad
- Easy Rainbow Pretzel Wands
- Rainbow Sugar Cookie Bark
- Mint Chocolate Chip Cheese Ball
Printable Recipe: Irish Cream Macarons

Irish Cream Macarons
Light and airy Irish Cream Macarons are delicate cookies with a chewy texture. The Irish Cream filling takes them over the top! These picturesque treats will impress everyone you serve them to!
- Course: Dessert
- Cuisine: French
- Keywords: Irish cream macaron, macaron, macaron recipe
- Prep Time: 20 minutes
- Cook Time: 12 minutes
- Servings: 24 macarons
- Author: Trish – Mom On Timeout
Ingredients
For the Shell
- 90 grams egg whites (room temperature)
- 90 grams granulated sugar
- 95 grams powdered sugar
- 95 grams almond flour (finely ground, blanched)
For the Filling
- 20 grams cream cheese (softened, either whipped or block cream cheese)
- 20 grams Irish cream liqueur (good quality, e.g., Bailey’s)
- 40 grams powdered sugar
- 1/8 teaspoon ground cinnamon (find here)
Instructions
Prepare the Shells
- Line two half-sheet baking sheets with silicone baking mats or parchment paper. (If using parchment, ensure it lays perfectly flat. You can tape the corners temporarily while piping and remove the tape before baking to prevent lopsided macarons.)
- Fill a small saucepan halfway with water and set it over medium heat to simmer gently. Place a heatproof bowl over the pan, ensuring the bottom of the bowl does not touch the water.
- Add the egg whites and granulated sugar to the bowl and whisk constantly until the sugar has completely dissolved. This will take approximately 2 to 3 minutes. (Test by rubbing a small amount of the mixture between your fingers; it should feel perfectly smooth, not grainy.)
- Transfer the warm egg white mixture to a clean, dry bowl of a stand mixer fitted with the whisk attachment. Beat on medium-high speed until the mixture forms stiff, glossy peaks.
- Sift the powdered sugar and almond flour into the egg whites.
- Gently fold the mixture together using a silicone spatula, ensuring you scrape down the sides of the bowl as you fold. Be careful not to deflate the egg whites prematurely.
- Once the dry ingredients are fully incorporated into the egg whites, begin the “macaronage” process. Smush the batter against the sides of the bowl in a circular motion, then scrape down the sides and fold it all back together. Repeat this deflating process until the batter flows smoothly off the spatula. (On average, this takes about 5 “smush and fold” cycles, but it depends on how much you deflate the egg whites each time.)
- Test the batter’s consistency by slowly drawing a figure 8 with the flowing batter. If you can create a continuous “8” without the stream breaking or falling in clumps, it’s ready! If it breaks or clumps, continue smushing and folding a few more times until the desired consistency is achieved.
- When the meringue batter flows smoothly, transfer the mixture to a piping bag fitted with an open round tip (a #12 or #10 piping tip works perfectly).
- Pipe 1-inch circles approximately 2 inches apart, holding the piping bag perpendicular to the surface. Using a silicone macaron mat with guides will greatly assist this step. Once a tray is piped, firmly tap the tray several times on the counter to release any trapped air bubbles. The shells will flatten slightly.
- Let the piped shells rest for about 30 minutes to an hour, or until their tops feel dry to the touch (this is known as developing a “skin”). This step is crucial for achieving distinct “feet” and preventing cracked shells.
- While the shells rest, preheat your oven to 325°F (160°C).
- Bake the shells one baking sheet at a time for 12 to 15 minutes, rotating the baking sheet halfway through if necessary for even baking. The macarons are done when they do not move or jiggle when the baking sheets are gently nudged. Allow the macarons to cool completely on the tray before carefully removing them.
Prepare the Irish Cream Filling
- Whisk together the softened cream cheese and Irish cream liqueur until smooth and well combined.
- Whisk in the powdered sugar and ground cinnamon until the mixture is uniform and creamy. Transfer the filling to a piping bag and set aside.
Assemble and Age
- Pair up the cooled macaron shells by similar size. Pipe the Irish cream filling onto the center of the flat side of one shell.
- Place a second matching shell on top, gently pressing until the filling reaches the edges.
- Place the assembled macarons in an airtight container and refrigerate overnight to age. Bring them to room temperature for at least 30 minutes before serving. Store any remaining macarons in the fridge for up to four days.
Notes
- Always hold your piping bag perpendicular to the baking sheet when piping to help prevent lopsided macarons.
- Aging the macarons overnight in the refrigerator is highly recommended. This step allows the moisture from the filling to soften the shells, creating that perfectly crisp, yet chewy and tender texture that authentic macarons are known for.
Nutrition Information
- Calories: 66 kcal
- Carbohydrates: 10g
- Protein: 1g
- Fat: 2g
- Saturated Fat: 1g
- Cholesterol: 1mg
- Sodium: 9mg
- Potassium: 7mg
- Fiber: 1g
- Sugar: 10g
- Vitamin A: 11 IU
- Vitamin C: 1mg
- Calcium: 10mg
- Iron: 1mg