
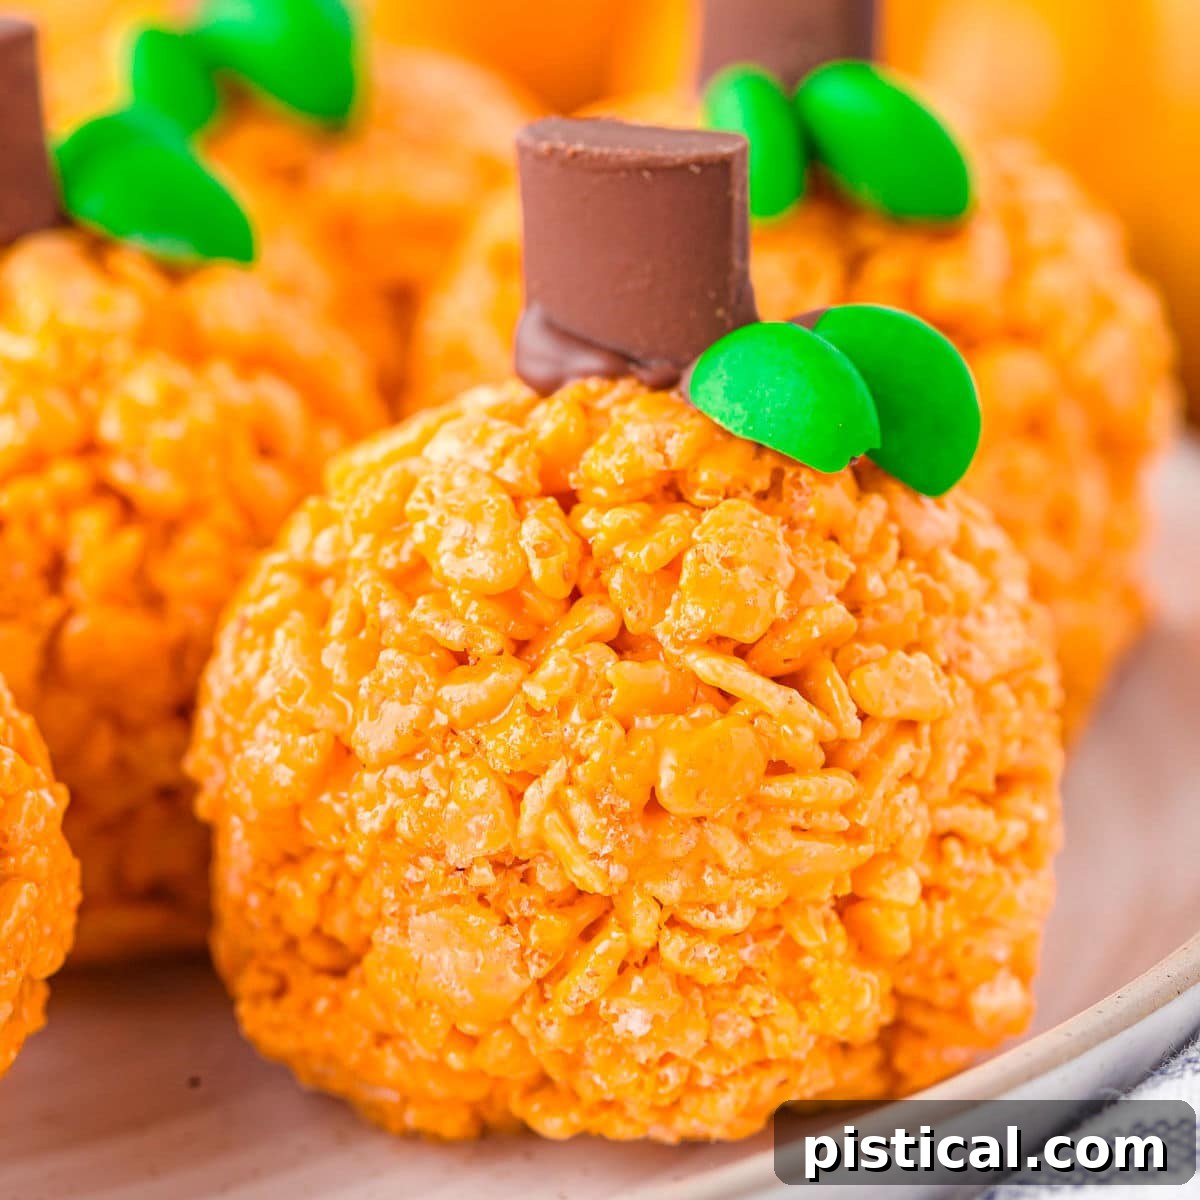
Easy Pumpkin Rice Krispie Treats: The Ultimate Fall Dessert
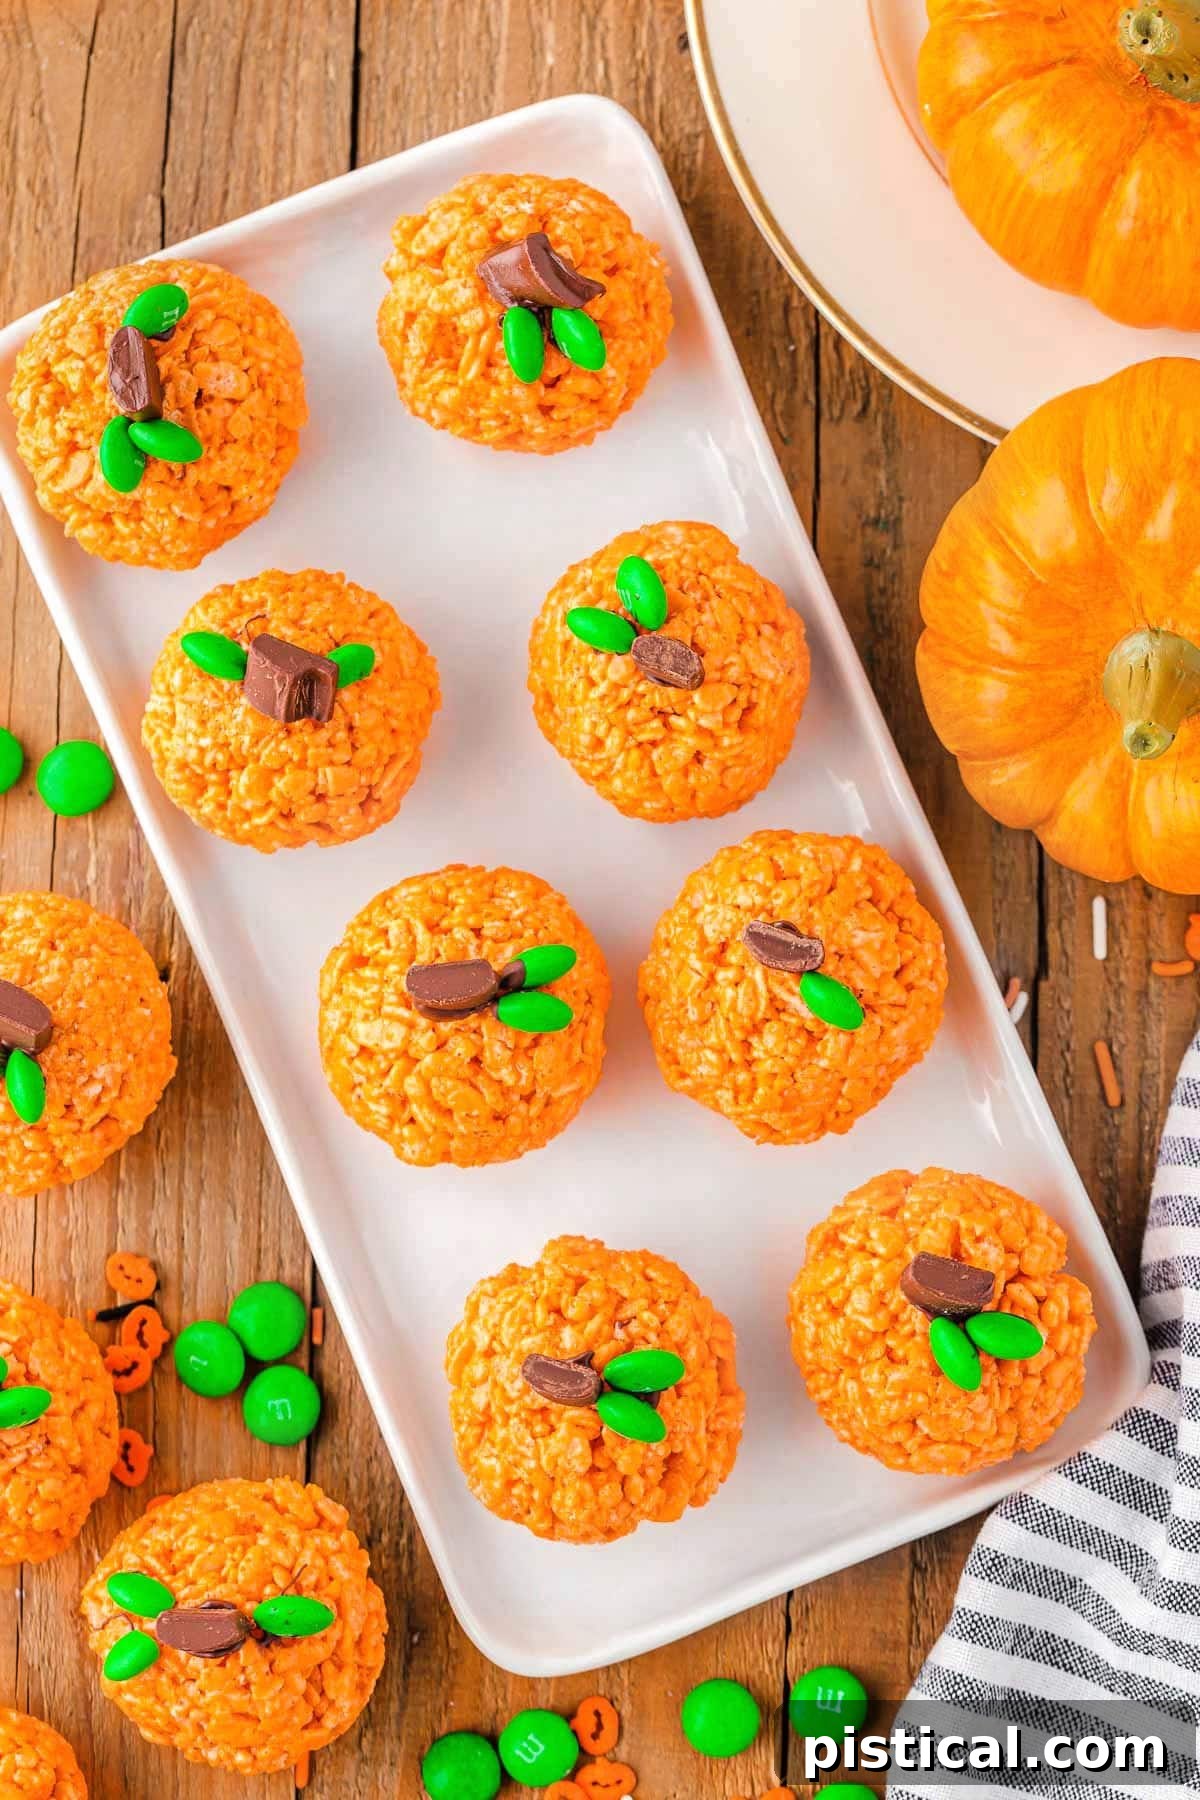
Embrace the cozy spirit of autumn with these delightful Pumpkin Rice Krispie Treats! A festive twist on the timeless classic, these treats capture everything we love about fall: the rich colors, comforting flavors, and joy of sharing. Each bite offers the perfect balance of gooey marshmallow sweetness and satisfying crispy crunch, making them an irresistible addition to any fall gathering, from casual get-togethers to spooktacular Halloween parties and bountiful Thanksgiving feasts.
Looking to round out your fall festivities with more seasonal delights? Be sure to explore other crowd-pleasing recipes like Witch Hat Halloween Cookies, a refreshing Halloween Punch, and spooky Black Widow Brownie Bites!
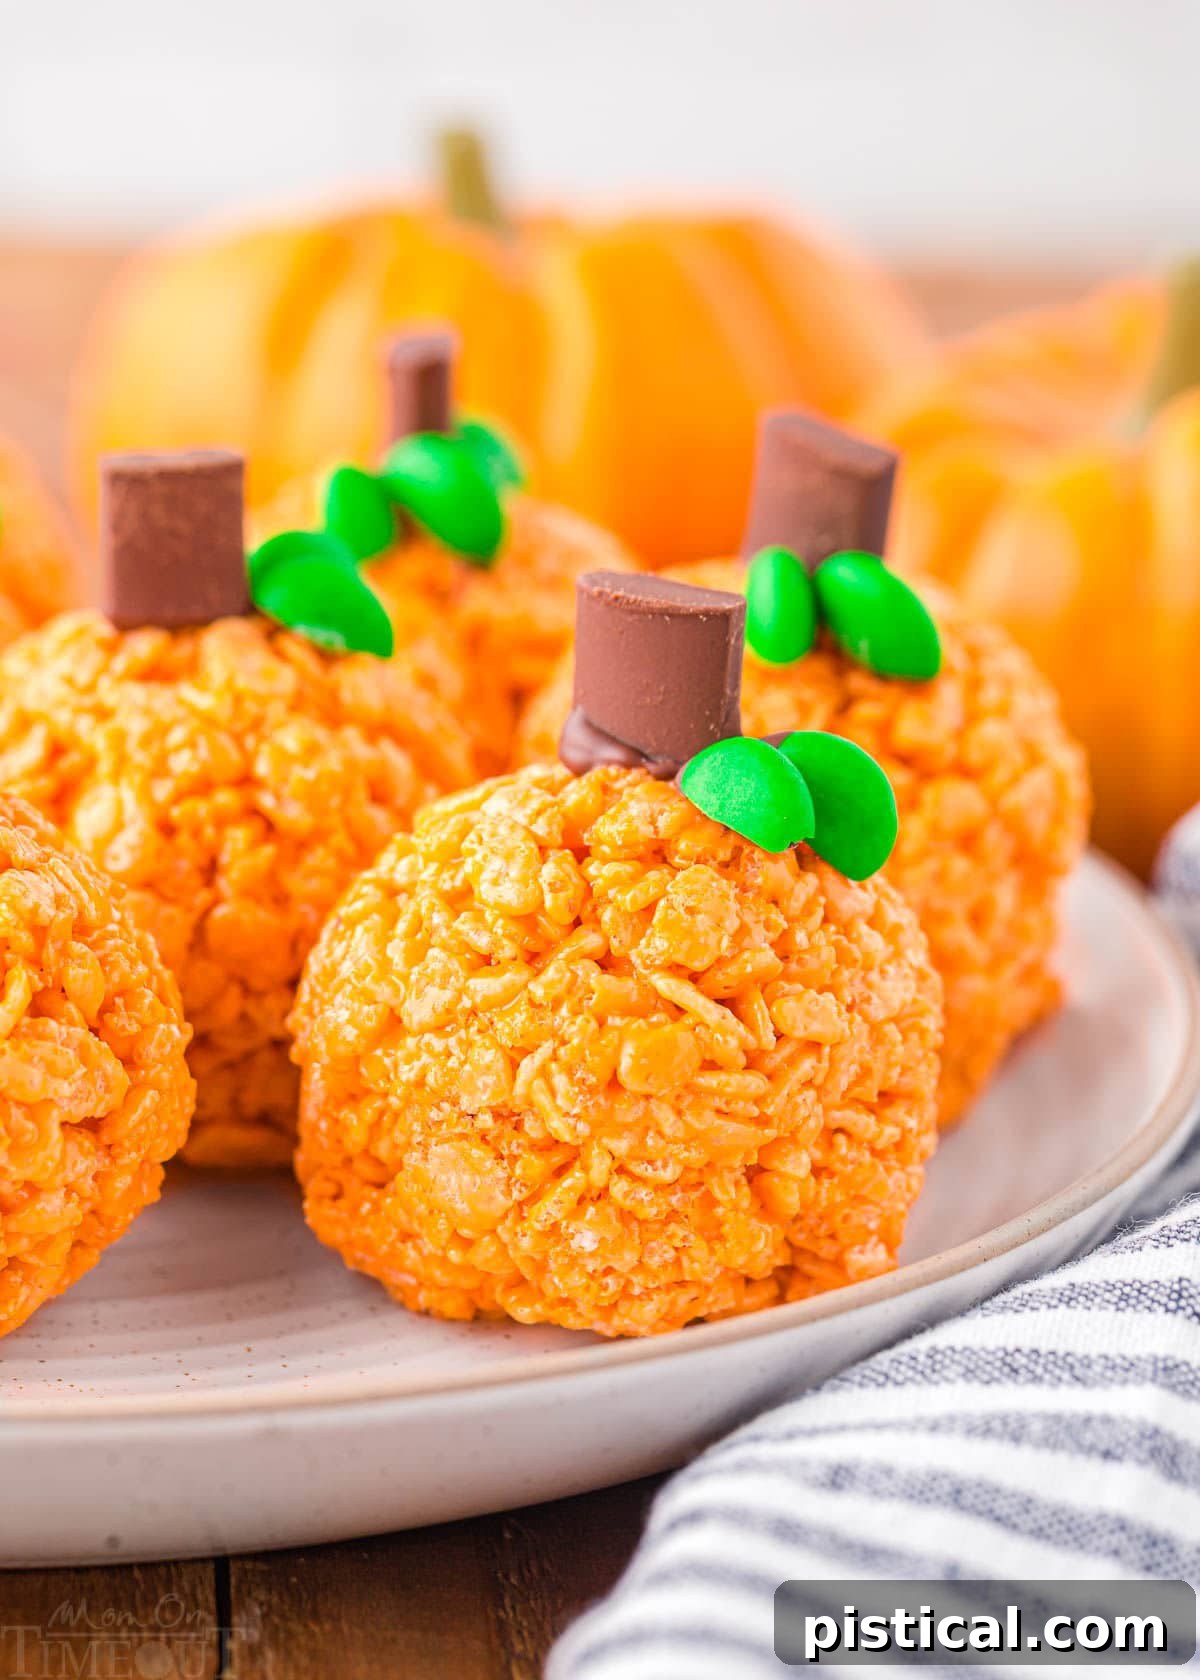
Why You’ll Adore These Pumpkin Rice Krispie Treats
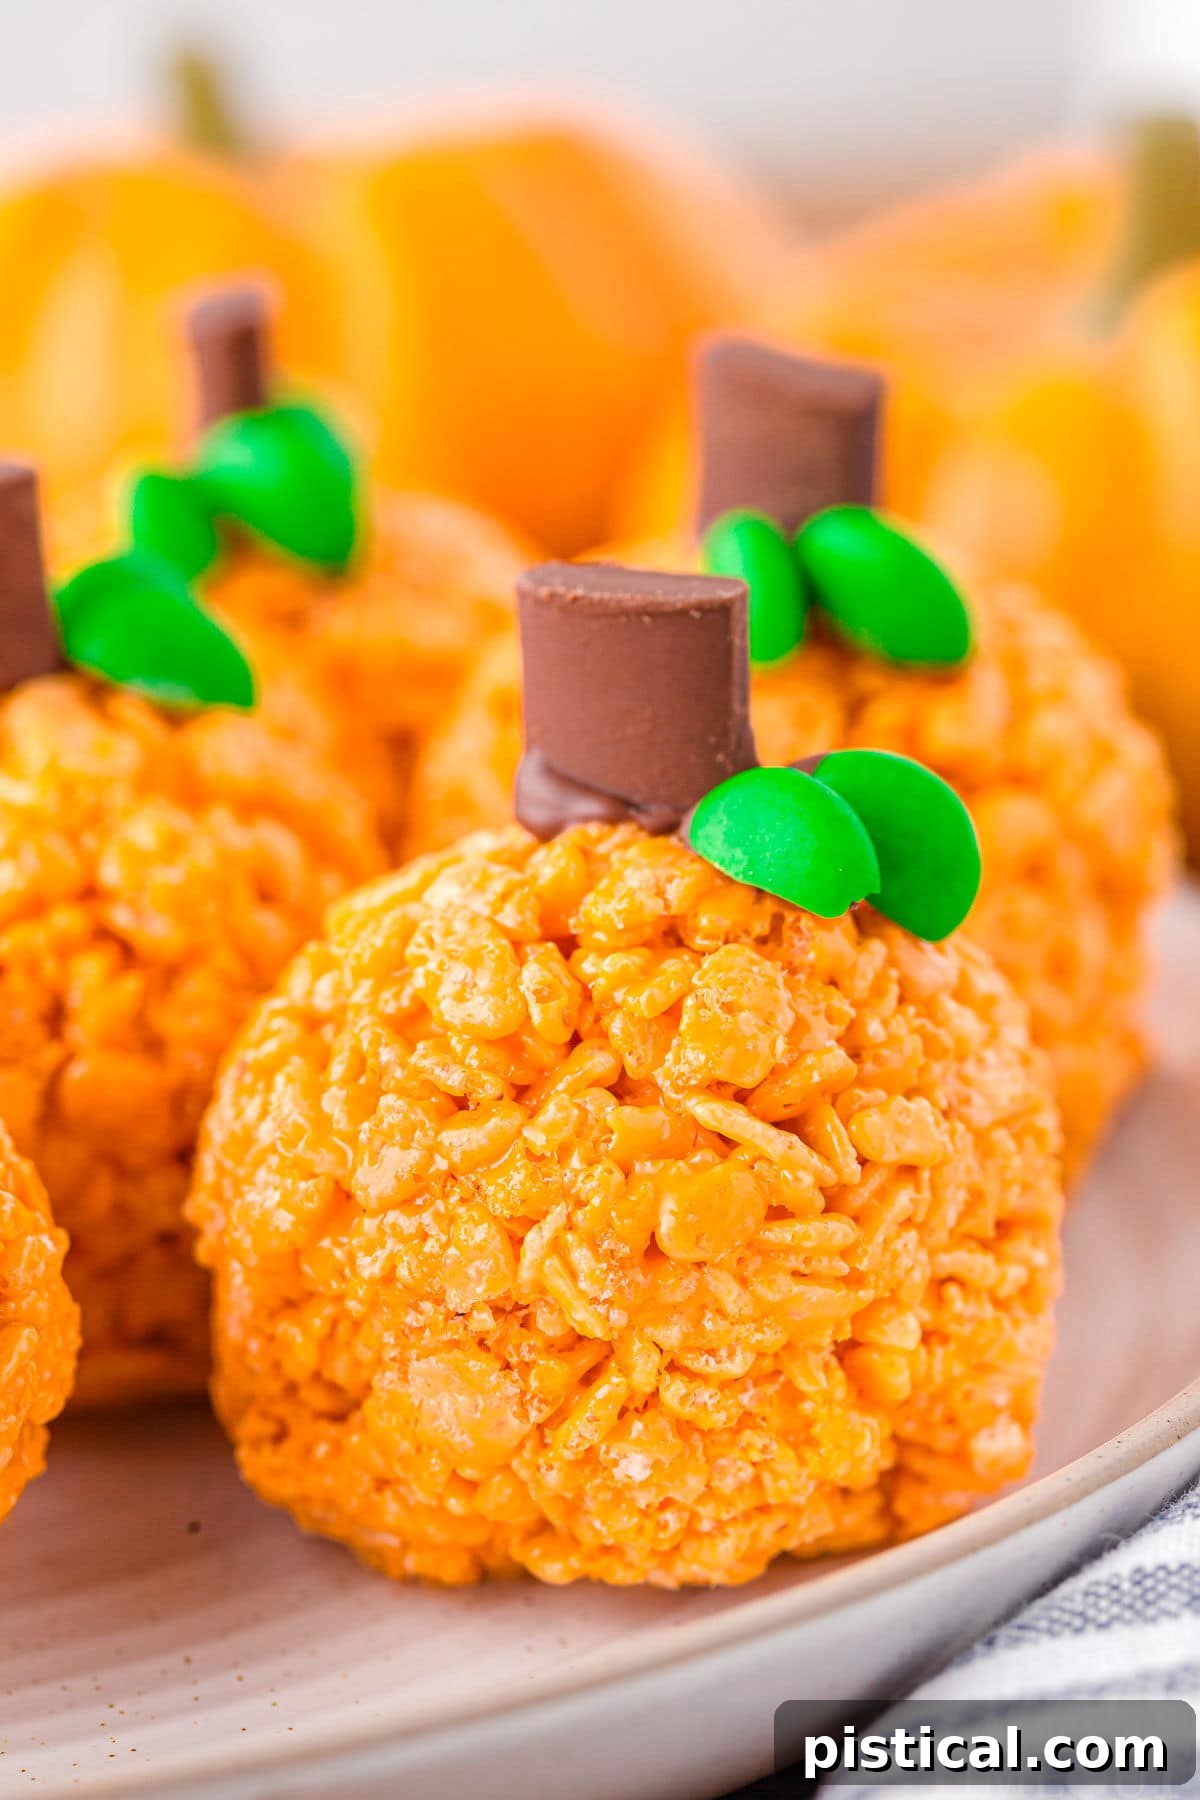
These adorable rice krispie pumpkins aren’t just visually appealing; they’re a celebration of everything wonderful about the fall season. Combining the beloved texture of classic rice krispie treats with a vibrant pumpkin hue, they embody the warmth and fun of autumn. Here’s why they’ll become your new favorite fall dessert:
- Irresistibly Festive: The charming pumpkin shape and vivid orange color instantly evoke the festive atmosphere of Halloween and Thanksgiving. They make a striking centerpiece on any dessert table and bring a cheerful touch to holiday celebrations.
- A Classic, Simplified: Everyone has a soft spot for rice krispie treats, and for good reason! This recipe takes that universally loved appeal and infuses it with seasonal charm. Best of all, they’re incredibly quick and straightforward to prepare, making them accessible for bakers of all skill levels.
- Guaranteed Crowd-Pleaser: From the youngest trick-or-treaters to the most seasoned Thanksgiving guests, these sweet, gooey, and crunchy delights are sure to win hearts. Their playful appearance and comforting taste make them an instant hit, ensuring there are never any leftovers!
- Perfect for Any Fall Occasion: Whether you’re hosting a casual fall picnic, a vibrant Halloween costume party, or a heartwarming Thanksgiving dinner, these pumpkin treats are versatile enough to fit right in. They’re easy to transport and serve, making them ideal for school parties, potlucks, or simply a fun family activity.
These Pumpkin Rice Krispies Treats are truly as delicious as they are adorable! This simple recipe offers a fantastic opportunity for family fun in the kitchen and yields a delightful treat that everyone will enjoy.
Essential Ingredients for Your Pumpkin Treats
Crafting these delectable rice krispie pumpkins requires just four core ingredients for the treats themselves, plus a few creative additions for decorating. Quality ingredients contribute significantly to the final taste and texture, so choose wisely. The full printable recipe with precise measurements and instructions can be found in the recipe card below, but let’s take a closer look at what you’ll need to create these festive goodies:
- Butter: This is more than just a flavor enhancer; butter provides a rich, smooth base for melting your marshmallows. Opt for salted butter to subtly balance the sweetness, or unsalted if you prefer to control the salt content yourself. Ensure it’s fresh for the best results.
- Miniature Marshmallows: The hero ingredient! Mini marshmallows are the “glue” that holds these treats together, imparting that iconic gooey, stretchy texture we all love. They melt more quickly and evenly than larger marshmallows, leading to a smoother mixture. Always use fresh marshmallows for maximum gooeyness and pliability. Stale marshmallows can result in hard, crumbly treats.
- Orange Food Coloring: To achieve that perfect, vibrant pumpkin hue, orange food coloring is essential. Gel food coloring is highly recommended over liquid food coloring as it provides a richer, more concentrated color with less product, preventing excess moisture that could alter the texture. If orange isn’t readily available, a simple mix of red and yellow food coloring will yield the same beautiful shade. Adjust the amount gradually until your desired pumpkin orange is achieved.
- Crispy Rice Cereal: The “krispie” in Rice Krispie Treats! For that signature satisfying crunch, it’s paramount to use fresh crispy rice cereal. Stale cereal will result in a chewy, rather than crunchy, treat. Both generic and brand-name crispy rice cereals work wonderfully, as long as they are fresh and aren’t crushed or broken.
Creative Decorating Essentials
The beauty of these pumpkin rice krispie treats lies in their customizability! While the basic pumpkin shape is charming on its own, adding stems and leaves truly brings them to life. You can also unleash your creativity by transforming them into whimsical jack-o’-lanterns. Here are some fantastic ideas for decorating:
- For the Stems:
- Chocolate Baking Chunks: Semi-sweet or dark chocolate chunks make excellent, edible stems that complement the sweetness of the treats.
- Pretzel Rods: For a salty-sweet contrast and a rustic look, break pretzel rods into small pieces.
- Rolos or Tootsie Rolls: These candies can be gently pressed into the top for a soft, chewy stem that adds another layer of flavor.
- Nutella or Melted Chocolate: Pipe small mounds of Nutella or melted chocolate for soft, edible stems.
- For the Leaves:
- Green M&Ms: Whole or cut in half, green M&Ms provide a pop of color and a satisfying candy crunch.
- Green Skittles: Similar to M&Ms, skittles offer a fruity alternative for colorful leaves.
- Green Frosting: Use a small star tip or simply a knife to create piped or spread frosting leaves for a softer texture.
- Green Spice Drops or Jelly Beans: Cut these in half or use small pieces to mimic the look of pumpkin leaves.
- Edible Green Fondant: For a more refined look, small cut-outs of green fondant can be used.
- Melted Chocolate (Optional but Recommended): A small amount of melted chocolate (the same kind used for the stems) acts as a delicious adhesive. While you can simply press most stems and leaves into the still-warm rice krispie treats, dipping them in melted chocolate ensures they stay firmly in place, especially if the treats have cooled. It also adds a nice finishing touch.
- For Jack-o’-Lantern Faces: Use black or brown icing pens, melted dark chocolate in a piping bag with a fine tip, or small pieces of black licorice or mini chocolate chips to create eyes, noses, and mouths for spooky or silly jack-o’-lanterns.
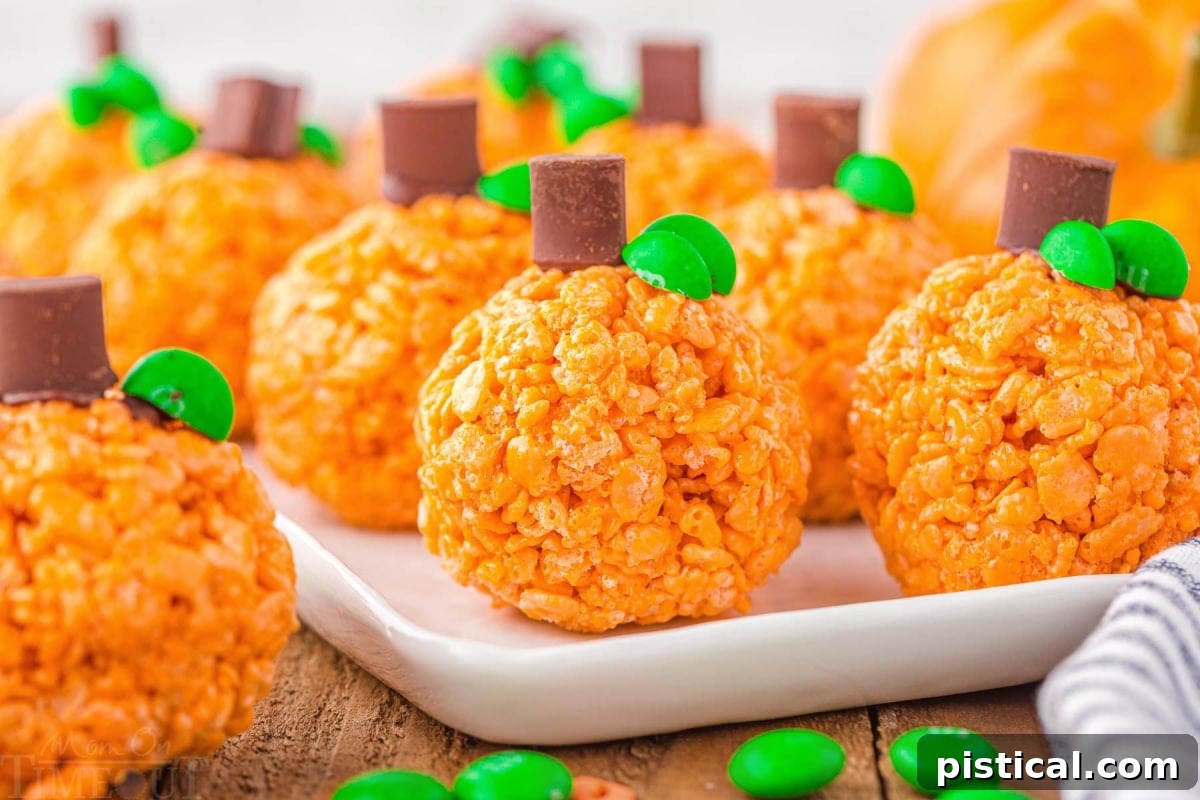
Step-by-Step Guide: How To Make Pumpkin Rice Krispie Treats
There’s an undeniable, universal charm to Rice Krispie treats, and these festive pumpkin-shaped versions are no exception! No matter their form, they consistently bring smiles. Not only are they incredibly yummy to eat, but they are also a breeze to create, making them perfect for fun fall baking sessions. They are a fantastic addition to Halloween parties, school events, and Thanksgiving dessert tables. Follow these simple steps for perfectly gooey and crunchy pumpkin treats. The full printable recipe with complete instructions and exact measurements is available in the recipe card at the end of this post.
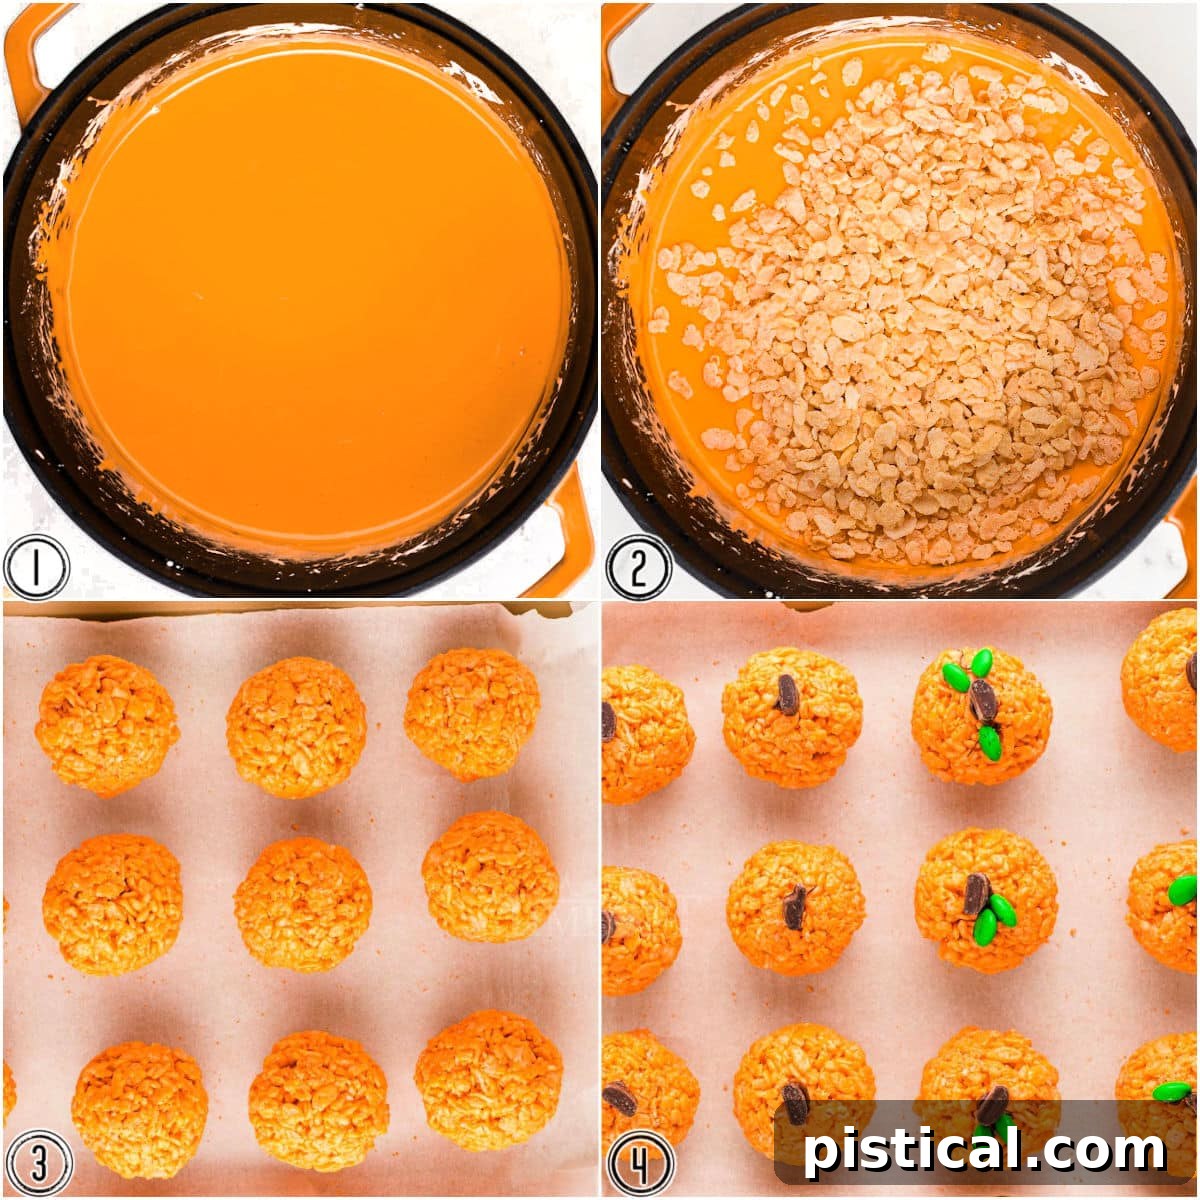
- Prepare Your Workspace: First, line a large sheet pan with parchment paper or a silicone baking mat. This will prevent your formed pumpkin treats from sticking and make cleanup a breeze. Set this aside.
- Melt Butter and Marshmallows: In a large pot or Dutch oven, melt the butter over medium-low heat. This gentle heat is crucial for slow, even melting, which helps maintain the marshmallows’ gooey texture. Once the butter is melted, add the miniature marshmallows. Stir continuously until the marshmallows are completely melted and smooth. Avoid high heat, as it can cause the marshmallows to become tough.
- Add Color: Remove the pot from the heat. Add several drops of orange gel food coloring to the melted marshmallow mixture. Stir until the color is thoroughly incorporated and evenly distributed. For a deeper, more vibrant pumpkin color, add a few more drops until your desired shade is achieved.
- Combine with Cereal: Gently fold in the crispy rice cereal with the vibrant marshmallow mixture. Stir carefully until all the cereal is coated. Overmixing can crush the cereal and reduce the crispiness. Once combined, let the mixture cool for 15 to 20 minutes. It should be cool enough to handle comfortably without being too sticky or hot.
- Form the Pumpkins: Lightly spray a large cookie scoop or ice cream scoop with nonstick cooking spray. You can also lightly butter or spray your hands to prevent sticking. Scoop out the rice krispie mixture and gently form it into large balls. Make sure to press the mixture together firmly but not too tightly to create a dense, cohesive pumpkin shape. Place each formed pumpkin onto your prepared parchment-lined baking sheet.
- Melt Chocolate for Stems: Place ⅓ cup of semi-sweet chocolate baking chunks (or semi-sweet chocolate chips) in a small, microwave-safe bowl. Microwave the chocolate in 30-second increments at 50% power, stirring thoroughly after each interval, until the chocolate is fully melted and smooth. This method prevents the chocolate from burning.
- Attach the Stems: For each pumpkin, dip one of your chosen chocolate baking chunks (or other stem options like Rolos or pretzel pieces) into the melted chocolate. Gently press the chocolate-dipped stem into the top center of each rice krispie pumpkin. The melted chocolate will help secure the stem in place.
- Add the Leaves: Take two halves of green M&Ms (or other green candy leaf options) for each pumpkin. If the pumpkins have cooled significantly, you may need to dip the flat side of the M&M halves into the melted chocolate before pressing them gently next to the stem to create the leaves. This ensures they adhere well.
- Allow to Set: Let the decorated pumpkin treats set up at room temperature for at least 10 minutes (or longer if needed) before serving. This allows the chocolate to firm up and the treats to hold their shape perfectly.
Storage Guidelines
Proper storage ensures your Pumpkin Rice Krispie Treats remain fresh and delicious. Leftover pumpkin rice krispie treats should be stored in an airtight container at room temperature. They will maintain their best quality for up to 3 days. To prevent them from sticking together and to preserve their individual freshness, it is highly recommended to wrap each treat individually in plastic wrap before placing them in the container. Avoid refrigerating these treats, as the cold air can cause them to become hard and lose their signature gooey texture. Freezing is also not recommended for the same reason.
Exciting Variations to Try
While these Pumpkin Rice Krispie Treats are perfect as is, they also serve as a wonderful canvas for creative culinary experimentation. Don’t hesitate to personalize them with these delightful variations:
- Pumpkin Spice Marshmallows: During the autumn season, many grocery stores stock flavored marshmallows, including pumpkin spice. Substituting these for regular miniature marshmallows will infuse your treats with an extra layer of seasonal flavor, deepening the fall experience.
- Jack-o’-Lantern Faces: Unleash your artistic side! Once your pumpkin treats have set, use edible markers, black gel icing, or melted dark chocolate in a piping bag to draw spooky or friendly jack-o’-lantern faces. Add candy eyes for an even more whimsical touch, perfect for Halloween parties.
- Sprinkle Fun: Incorporate sprinkles in two ways for added festivity! You can gently fold fall-themed or Halloween-themed sprinkles into the rice cereal mixture along with the marshmallows, ensuring they are evenly distributed. Alternatively, once the pumpkins are formed but before they fully set, roll them in a bowl of sprinkles for a vibrant, sparkly coating.
- Flavor Boost: Add a teaspoon of vanilla extract or a few drops of maple extract to the melted marshmallow mixture for an enhanced flavor profile that complements the pumpkin theme beautifully.
- Chocolate Drizzle: After attaching the stems and leaves, melt some white chocolate or dark chocolate and drizzle it decoratively over the finished pumpkins for an elegant touch and extra indulgence.
- Nutty Crunch: For added texture and flavor, gently fold in a quarter cup of finely chopped pecans or walnuts with the crispy rice cereal. This adds a sophisticated dimension, especially appealing for Thanksgiving.
Trish’s Top Tips and Tricks for Success
Achieving perfectly gooey, crunchy, and beautifully shaped Pumpkin Rice Krispie Treats is easy with a few insider tips. Follow these suggestions to ensure your treats are nothing short of spectacular:
- Master the Melt: Always melt your butter and marshmallows over medium-low heat. This controlled temperature is key to preventing the marshmallows from caramelizing too quickly or becoming hard and brittle. A slow, even melt ensures the final treats will be wonderfully soft and gooey.
- Freshness is Key: For the absolute best crunchy texture, always use really fresh crispy rice cereal. Stale cereal loses its snap and can result in chewy, disappointing treats. Check the expiry date and ensure the box has been recently opened or sealed tightly.
- Cool Down Quickly (But Not Too Much): If your marshmallow mixture is too hot, it can be difficult to handle and shape. To speed up the cooling process slightly, you can place the pot in the refrigerator for about 10 minutes. However, be careful not to let it cool completely, or it will become too stiff to mold. The goal is warm and pliable, not hot and sticky.
- Prevent Sticking: The sticky nature of the marshmallow mixture can be a challenge. To combat this, liberally spray your hands and any tools you’re using (like a cookie scoop or spatula) with nonstick cooking spray. Alternatively, lightly wetting your hands with water also works wonders to prevent the mixture from adhering to you or your tools, allowing for easy shaping.
- Firm but Gentle Shaping: When forming your pumpkins, apply enough pressure to ensure the mixture holds together firmly and creates a cohesive ball. However, avoid pressing too hard, which can compress the cereal too much and make the treats overly dense and less airy.
- Even Coloring: When adding food coloring, stir thoroughly to ensure the orange hue is consistent throughout the marshmallow mixture. This creates a uniform and appealing pumpkin color.
Can I use regular-sized marshmallows instead of miniature?
Absolutely! While miniature marshmallows are preferred because they melt more quickly and evenly, regular-sized marshmallows can certainly be used. You will need to chop them into smaller pieces or extend the melting time slightly to ensure they fully incorporate into a smooth mixture.
More Festive Fall Treats to Explore
The fall season is a bounty of delicious flavors and fun baking opportunities. If you enjoyed making these Pumpkin Rice Krispie Treats, you’ll love these other festive recipes that celebrate the best of autumn:
- Pumpkin Popcorn Balls
- Candy Corn Fudge
- Acorn Cookies
- Pumpkin Hand Pies
- Halloween Popcorn Balls
Pumpkin Rice Krispie Treats
These easy Pumpkin Rice Krispie Treats are the perfect fall twist on a classic, beloved treat! The ultimate combination of festive, gooey, sweet and crunchy makes these rice krispie pumpkins perfect for fall get togethers, Halloween and Thanksgiving!
Course: Dessert
Cuisine: American
Keyword: pumpkin rice krispie treats, rice krispie pumpkins, rice krispies pumpkin treats
Prep Time: 10 minutes
Cook Time: 10 minutes
Chill Time: 15 minutes
Total Time: 35 minutes
Servings: 12
Calories: 136kcal
Author: Trish – Mom On Timeout
Ingredients
- 4 tablespoons salted butter
- 10 ounces miniature marshmallows
- orange gel food coloring
- 5 cups rice krispies cereal
Stems and Leaves
- 12 green M&Ms (or skittles or green spice drops cut in half)
- ⅓ cup semi sweet chocolate baking chunks
- 12 semi sweet chocolate baking chunks for the stems (or use tootsie rolls, pretzels or rolos)
Instructions
- Line a large sheet pan with parchment paper or a silicone baking mat. Set aside.
- In a large pot or Dutch oven, add the butter and stir over medium-low heat until melted. Add the marshmallows and stir until melted.
- Add several drops of orange food coloring and stir until incorporated. Add more food coloring if needed. Remove from heat.
- Add the rice krispies cereal and gently stir together with the marshmallow mixture until fully combined. Let mixture cool for 15 to 20 minutes or until cool enough to handle.
Stems and Leaves Instructions
- Cut the M&Ms in half for the leaves. You can also leave them whole and just press into the pumpkin.
- Spray a large cookie scoop or ice cream scoop lightly with cooking spray and use it to scoop out the rice krispie mixture and form into large balls, making sure to press the ball together firmly so they hold their shape. Place on the parchment paper. (Butter or spray your hands so they don’t stick to you!)
- Place ⅓ cup of semi-sweet baking chunks in a small, microwave-safe bowl. (You can also use semi-sweet chocolate chips.) Microwave in 30-second increments at 50% power, stirring in between, until chocolate is fully melted.
- For each pumpkin, dip a chocolate baking chunk into the melted chocolate and then gently press it into the top of one of the rice krispie pumpkins.
- Place two green M&M halves next to the “stem” for leaves (dipping in the melted chocolate if they do not stick).
- Allow the pumpkins to set up for 10 minutes or so before serving.
Notes
Storage Information
Leftover pumpkin rice krispie treats can be stored in an airtight container at room temperature for up to 3 days. I do recommend wrapping them individually in plastic wrap. I do not recommend freezing the treats.
Nutrition
Calories: 136kcal | Carbohydrates: 26g | Protein: 1g | Fat: 3g | Saturated Fat: 2g | Cholesterol: 8mg | Sodium: 113mg | Potassium: 18mg | Fiber: 1g | Sugar: 12g | Vitamin A: 1020IU | Vitamin C: 9mg | Calcium: 1mg | Iron: 4mg
Originally published October 12, 2011. This content has been updated and expanded for clarity and comprehensiveness.