
Craft Charming Fall Decor: Easy DIY Scrappy Pumpkins
Discover how to create unique and vibrant Scrappy Pumpkins with this fun, step-by-step guide. Perfect for adding a personalized touch to your Fall and Halloween decorations!
As the crisp autumn air heralds the arrival of the Fall season, thoughts naturally turn to cozy home decor and festive crafting. Among the myriad of charming projects, Scrappy Pumpkins stand out as a delightful and incredibly versatile way to infuse your home with seasonal cheer. This unique craft takes a nostalgic spin on classic pumpkin-making, combining the simplicity of recycled cardboard rolls with the vibrant beauty of decorative scrapbook paper and the soft texture of felt. It’s not just a craft; it’s an opportunity to express your creativity and personalize your fall and Halloween decorations.
The beauty of Scrappy Pumpkins lies in their adaptability. By simply adjusting the height of your cardboard roll, you can create a diverse array of shapes and sizes, from petite desk accents to grand centerpieces. Furthermore, the choice of scrapbook paper allows for endless color palettes and patterns, ensuring each pumpkin you craft is a truly one-of-a-kind creation. Whether you prefer traditional autumn hues, whimsical pastels, or bold contemporary designs, these DIY pumpkins offer boundless possibilities for customization. They’re an economical, eco-friendly, and engaging project suitable for crafters of all ages, perfect for a cozy afternoon of creativity.
Essential Materials for Your Scrappy Pumpkin Project
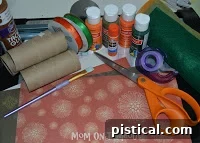
Gathering your supplies is the first exciting step in any crafting adventure. For our Scrappy Pumpkins, you’ll find that many items are readily available around your home or can be easily sourced from a local craft store. Here’s what you’ll need to transform simple materials into charming fall decor:
- 12×12 Scrapbook Paper: This is where your pumpkin’s personality shines! Choose papers with varying patterns, textures, and colors that appeal to your aesthetic. Double-sided paper is ideal as both sides will be visible, but don’t worry if you only have single-sided – we have a trick for that!
- Cardboard Rolls: Repurpose toilet paper or paper towel rolls. These form the core of your pumpkins and dictate their initial shape.
- Tape: Strong, clear tape works best for securing paper strips firmly.
- Glue: Craft glue or a glue stick will be essential for covering your cardboard roll and attaching felt.
- Scissors or Paper Cutter: A paper cutter ensures precise, straight strips, which can make the assembly process smoother and the final pumpkin more uniform. Scissors are perfect for freehand cutting and detailing.
- Assorted Card Stock for Stems: Brown or green card stock is typically used, but feel free to experiment with colors that complement your chosen papers. Twigs or small branches can also make excellent natural stems.
- Felt (Optional): Adds a soft, tactile dimension to your pumpkin base. Choose colors that coordinate with your scrapbook paper.
- Paint (Optional): Acrylic craft paint can be used to color your cardboard roll if you prefer a painted base over felt or paper.
Step-by-Step Guide to Crafting Your Scrappy Pumpkins
Step 1: Preparing Your Cardboard Base
The foundation of your Scrappy Pumpkin is a simple cardboard roll. You can use rolls from toilet paper for smaller pumpkins or paper towels for larger ones. First, decide on the desired height of your pumpkin. For a taller, more elegant pumpkin, you might use a full paper towel roll or cut it down to about 8 inches. For a shorter, wider pumpkin, a toilet paper roll or a very short paper towel segment works perfectly.
Once you’ve determined the height, it’s time to decorate the base. You have several options: paint, felt, or paper. For a rustic yet refined look, I chose brown felt and an 8-inch cut paper towel roll for one of my pumpkins. If you opt for paint, apply a thin, even coat and allow it to dry completely. For felt or paper, measure and cut your material to the width of the roll and long enough to wrap around it with a slight overlap. Apply a generous amount of craft glue to the felt or paper, then carefully wrap it around the cardboard roll, smoothing out any bubbles or wrinkles as you go. Secure the overlap with a dab of glue for a seamless finish. This covered base provides a neat, finished look and enhances the overall sturdiness of your pumpkin.
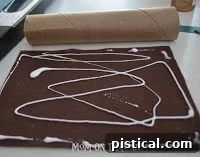
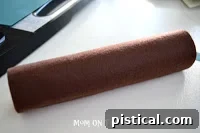 To cover your roll with felt, cut the felt as wide as the roll and then as long as it takes to cover the roll, ensuring a slight overlap. Apply glue evenly to the felt and carefully roll it around the cardboard base, pressing firmly to smooth out any air pockets and create a clean surface. Let the glue dry completely before moving to the next step.
Step 2: Selecting and Preparing Your Paper Strips
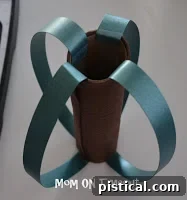
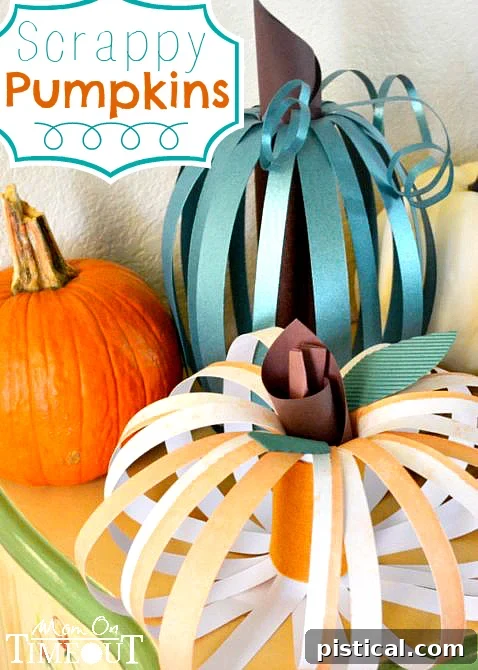
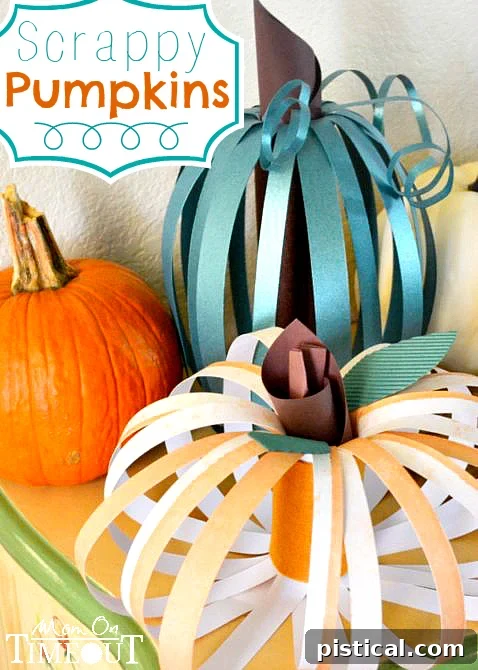
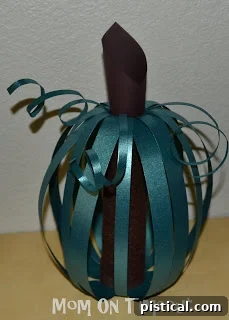
Now for the fun part: choosing your paper! This is where the “scrappy” aspect truly comes to life. I used a variety of 12×12-inch scrapbook papers, finding that double-sided metallic teal paper created a particularly stunning effect due to its sheen and contrasting interior. If you’re working with single-sided paper and don’t want the white reverse side to show, here’s a handy tip: use a glue stick to adhere two pieces of paper back-to-back. This not only eliminates the white but also allows for exciting color and pattern combinations, adding extra dimension and visual interest to your pumpkin.
Once you’ve chosen your papers, it’s time to cut them into strips. The width of your strips significantly impacts the final look of your pumpkin. I started with 3/4-inch strips and then transitioned to 1/2-inch strips to create a varied texture, but feel free to experiment. Wider strips will result in a bolder, more pronounced pumpkin ‘rib’ effect, while narrower strips will give a finer, more intricate appearance. A paper cutter is highly recommended for achieving clean, consistent strip widths, which will make the assembly process much easier and yield a more professional-looking pumpkin.
Step 3: Assembling Your Pumpkin Body with Paper Strips
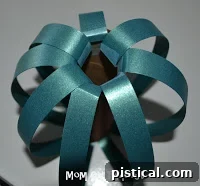
This step brings your pumpkin to life! Take one of your cut paper strips. Apply a piece of strong tape to one end of the strip and firmly press it to the inside top rim of your cardboard roll. Then, gently arc the strip outwards, creating the rounded curve of the pumpkin. Apply another piece of tape to the other end of the strip and press it firmly to the inside bottom rim of the roll. Ensure the strip is taut but not so tight that it distorts the cardboard base.
Continue this process, attaching strips around the entire circumference of the roll. You can vary the spacing between strips for different effects – closer strips will create a denser, fuller pumpkin, while wider spacing will give a more open, airy look. Experiment with alternating different patterns or colors of paper strips to create a truly dynamic and appealing design. The more strips you add, the fuller and more traditional your pumpkin will appear. Keep repeating until your pumpkin achieves the desired fullness and visual appeal.
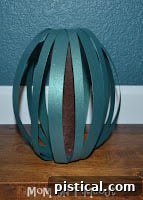
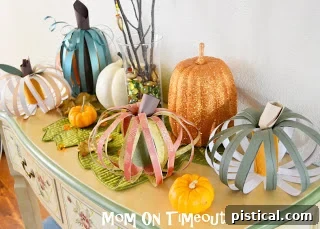
Remember, the initial height of your cardboard roll will directly influence the final shape and size of your pumpkin. A taller roll will naturally lead to a taller, more slender pumpkin, mimicking varieties like butternut squash, while a shorter, wider roll will produce a squat, classic pumpkin silhouette, perfect for a traditional Halloween display. This simple variation allows for incredible diversity in your pumpkin patch!
Step 4: Crafting the Stem
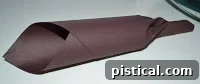
Every pumpkin needs a sturdy stem! For a classic look, I rolled up a piece of brown cardstock into a tight cylinder and gently pressed it into the opening at the top of the pumpkin. You can also use a small twig for a more natural, rustic feel, or even a piece of green pipe cleaner twisted into shape. Secure your chosen stem with a dab of hot glue or strong craft glue to ensure it stays in place.
Step 5: Adding Whimsical Tendrils
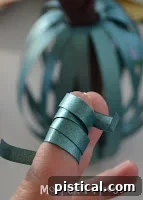
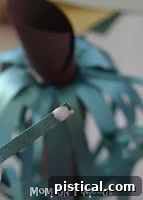 To complete the look, add some charming tendrils. Cut a few very thin strips of paper – green cardstock or a coordinating scrapbook paper works well. Take each strip and gently roll it around your finger or a pencil to create a spiral curl. Apply a small dot of glue to one end of the curled strip and carefully press it to the inside of the roll, near the stem. Add as many tendrils as you like, arranging them to spill playfully around the stem for an organic, whimsical touch.
Showcasing Your Finished Scrappy Pumpkin Masterpieces
And there you have it – your very own Scrappy Pumpkins, ready to adorn your home! Here is one of the finished products, radiating autumnal charm:
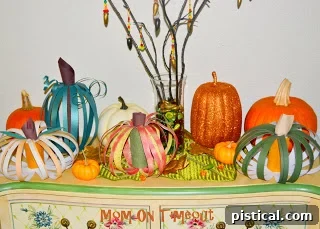
The true joy of this craft lies in seeing how different paper choices and base sizes result in unique and captivating pumpkins. Here are some others that we made, demonstrating the variety you can achieve:
Tips for Success and Creative Variations
- Experiment with Paper: Don’t limit yourself to traditional scrapbook paper. Try old book pages for a vintage look, maps for an adventurous theme, or even magazine pages for a vibrant, eclectic pumpkin.
- Add Embellishments: Consider adding glitter, buttons, small faux leaves, or even tiny beads to your pumpkins for extra flair.
- Theme Your Pumpkins: Create a set of pumpkins with a specific theme, such as “rustic farmhouse,” “glam fall,” or “spooky Halloween” by carefully selecting papers and embellishments.
- Group for Impact: Display your Scrappy Pumpkins in clusters of varying heights and sizes on a mantel, bookshelf, or as a centerpiece to create a captivating visual display.
- Involve the Family: This is a fantastic craft for kids and adults alike. Let younger crafters pick their favorite papers and help with taping the strips (with supervision for cutting).
Why Choose DIY Scrappy Pumpkins for Your Fall Decor?
Beyond the simple pleasure of crafting, Scrappy Pumpkins offer numerous benefits:
- Cost-Effective: Using recycled cardboard rolls and readily available scrapbook paper makes this an incredibly budget-friendly decoration option.
- Eco-Friendly: Repurposing materials gives new life to items that might otherwise be discarded, contributing to sustainable crafting practices.
- Highly Customizable: With endless combinations of paper, felt, and embellishments, you can truly make these pumpkins reflect your personal style and match any existing home decor.
- Versatile Decor: Perfect for Thanksgiving tablescapes, Halloween displays, autumn mantel decorations, or simply adding a touch of fall charm to any room.
- Engaging Activity: Crafting is a wonderful way to relax, unleash creativity, and even bond with family and friends.
I hope this guide inspires you to get crafty this week and make yourself some beautiful, personalized Scrappy Pumpkins!
Looking for more Fall fun and DIY inspiration? Check out these related crafts:
FREE Fall Subway Art Printable
Stained Glass Fall Leaves
B-Witchin’ Pumpkins

Connect with me for more inspiration and creative ideas!
Linking up at some of these parties.