
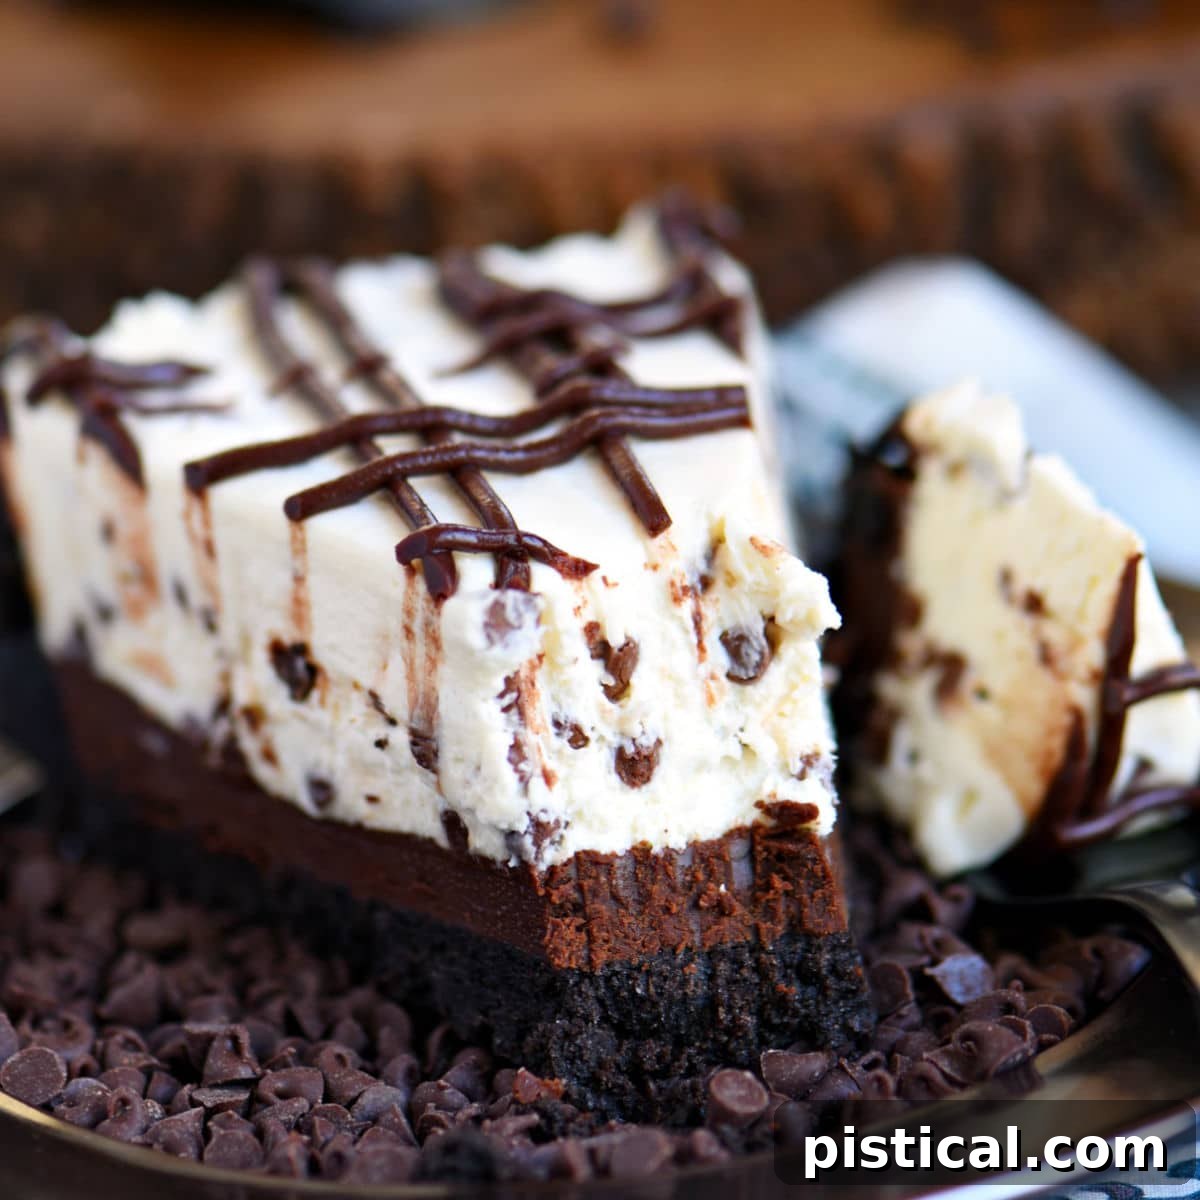
Welcome to your new favorite dessert: the incredibly easy and irresistibly delicious No-Bake Cheesecake! This recipe delivers a perfectly creamy, delightfully sweet, and robustly structured cheesecake that rivals its baked counterparts, all without ever needing to turn on your oven. Crafted with real, high-quality ingredients, this dessert boasts an authentic, rich flavor that will have everyone asking for seconds. If you’re a true cheesecake connoisseur, you’ll also adore our Chocolate Marble Mini Cheesecakes and the decadent Triple Threat Chocolate Cheesecake.
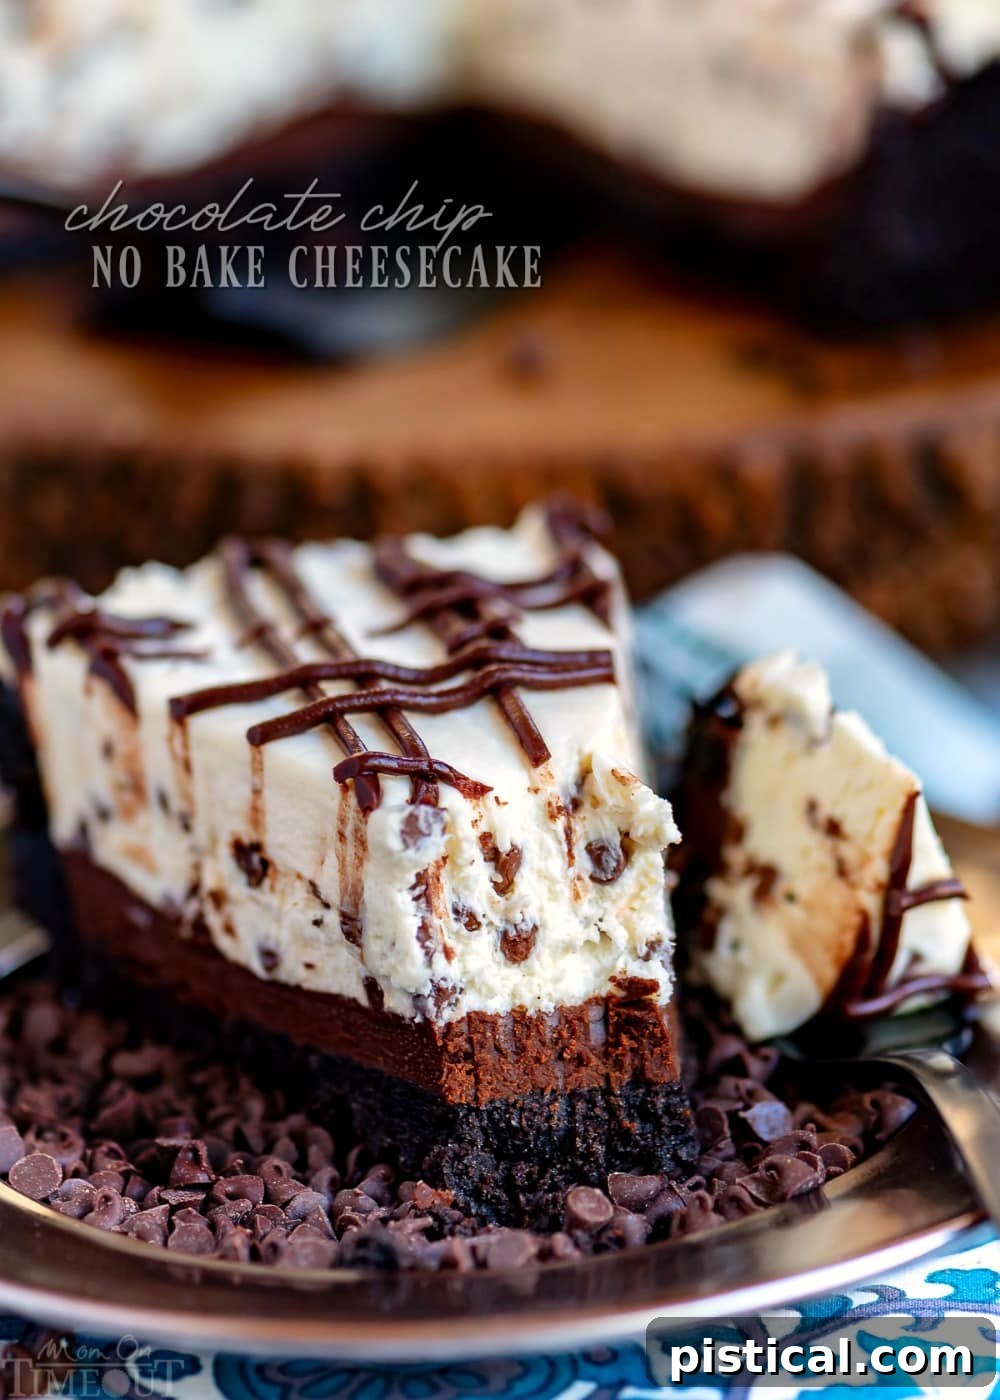
The Ultimate No-Bake Cheesecake Recipe
As summer temperatures soar and the thought of firing up the oven becomes less appealing, no-bake desserts become absolute saviors. Here in Sacramento, where triple-digit heatwaves are a standard greeting from June through October, having a repertoire of cool, refreshing treats is essential. That’s why this particular No-Bake Cheesecake has earned its spot as a household favorite. It’s not just a seasonal indulgence; it’s a creamy, dreamy masterpiece that requires minimal effort and delivers maximum satisfaction, especially when the mercury rises.
I’m not exaggerating when I say I’ve sampled dozens of no-bake cheesecake recipes over the years, always on the hunt for one that truly captures the essence of a classic baked cheesecake without the fuss. And I can confidently tell you, this recipe is hands-down the best No-Bake Cheesecake I’ve ever tasted. It’s a game-changer for anyone who loves the luxurious texture and tangy-sweet balance of a traditional cheesecake but prefers the convenience of a no-bake preparation.
What Makes This No-Bake Cheesecake Unbeatable?
Many no-bake cheesecakes fall short, often ending up too soft, overly sweet, or lacking that distinct cheesecake tang. This recipe, however, stands head and shoulders above the rest due to several key factors that deliver an unparalleled dessert experience:
- Remarkably Thick and Sturdy Filling: Unlike many flimsy no-bake versions, the filling in this cheesecake is wonderfully firm. It slices cleanly, holds its shape beautifully, and genuinely mimics the substantial texture of a traditionally baked cheesecake. Just look at the photos – that fork is standing upright on its own, showcasing the incredible stability of this dessert!
- Extra Creamy with the Perfect Tang: A truly great cheesecake strikes a delicate balance between sweetness and a subtle, refreshing tang. This recipe achieves that equilibrium flawlessly, offering an incredibly smooth and creamy texture that melts in your mouth, complemented by just the right amount of tanginess to prevent it from being overly rich.
- Made with Real, Quality Ingredients: The secret to its authentic flavor and superior texture lies in using proper, wholesome ingredients. By avoiding shortcuts like sweetened condensed milk in the filling, we ensure a taste and consistency that’s as close to the real deal as possible, without any compromise on flavor or integrity.
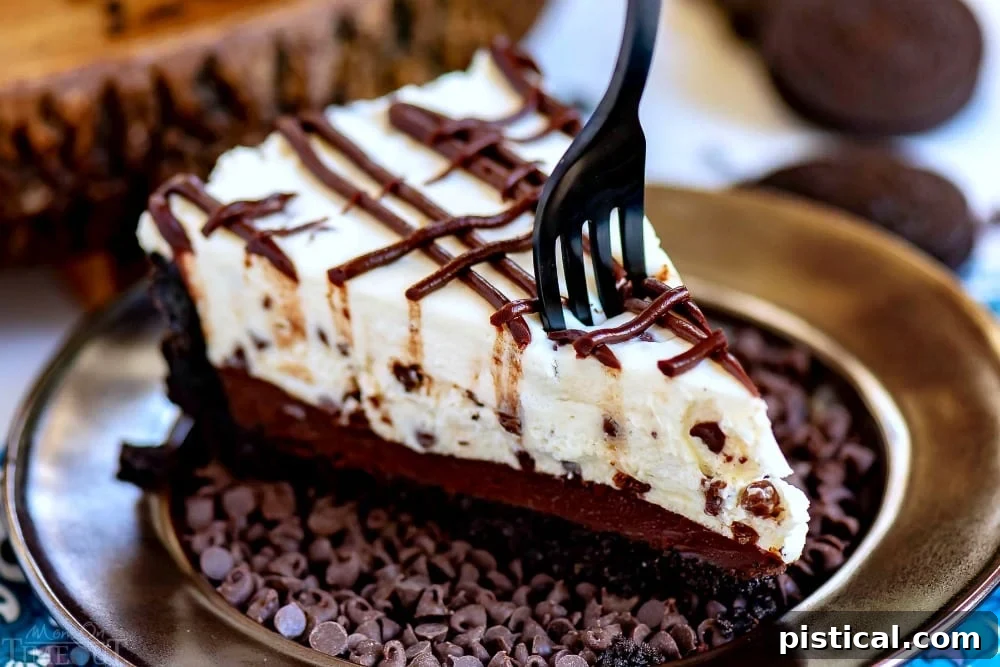
Through extensive testing, I discovered early on that omitting sweetened condensed milk from the cheesecake filling was crucial. While it’s a fantastic ingredient for many desserts, it simply doesn’t belong in a no-bake cheesecake if you’re aiming for that classic, dense, and creamy consistency. Recipes that rely on it often result in a filling that’s far too soft and has a flavor profile that deviates too much from traditional cheesecake. So, trust me on this: steer clear of those recipes!
Real Ingredients for Real Cheesecake Flavor
This cheesecake is a testament to the power of authentic ingredients. The simple, yet incredibly effective, five-ingredient no-bake cheesecake filling is what truly sets it apart. It’s extra creamy, decadently rich, and delivers an authentic cheesecake taste unlike any other no-bake version you’ll find. Let’s dive into what makes each component so important:
- Cream Cheese: This is the heart and soul of any cheesecake. For the best results, always opt for full-fat cream cheese. It provides the essential richness and creamy texture. Crucially, ensure it’s at room temperature before you start beating it. This allows it to soften properly and whip into a light, fluffy, lump-free base, which is fundamental for a smooth filling.
- Heavy Whipping Cream: Whipped to stiff peaks, heavy cream is indispensable. It adds an incredible lightness and airiness to the filling, contributing to its luxurious creaminess and helping to achieve that desired thick and sturdy consistency. It literally lifts the cheesecake to new heights!
- Powdered Sugar: Also known as confectioners’ sugar, this finely milled sweetener does more than just sweeten the cheesecake. Its fine texture dissolves seamlessly, preventing any grittiness, and its starch content helps to gently thicken the filling by absorbing excess moisture, contributing to the cheesecake’s structure.
- Sour Cream: An absolutely essential ingredient for no-bake cheesecakes! Sour cream provides that signature tangy note that is characteristic of traditional baked cheesecakes. It brilliantly balances the richness and sweetness of the other ingredients, adding a layer of complex flavor that elevates the entire dessert and prevents it from being one-dimensionally sweet.
- Vanilla Extract: Don’t skimp on quality here. A good vanilla extract can make a significant difference in the overall flavor profile of your cheesecake. It enhances and rounds out all the other flavors. For an extra touch of sophistication and depth, consider using vanilla bean paste – it’s truly next-level!
- Mini Chocolate Chips: While entirely optional for a plain cheesecake, these tiny morsels add a delightful textural contrast and bursts of chocolatey goodness, making this dessert extra special, especially for chocolate lovers. You can fold them into the filling or sprinkle them on top.
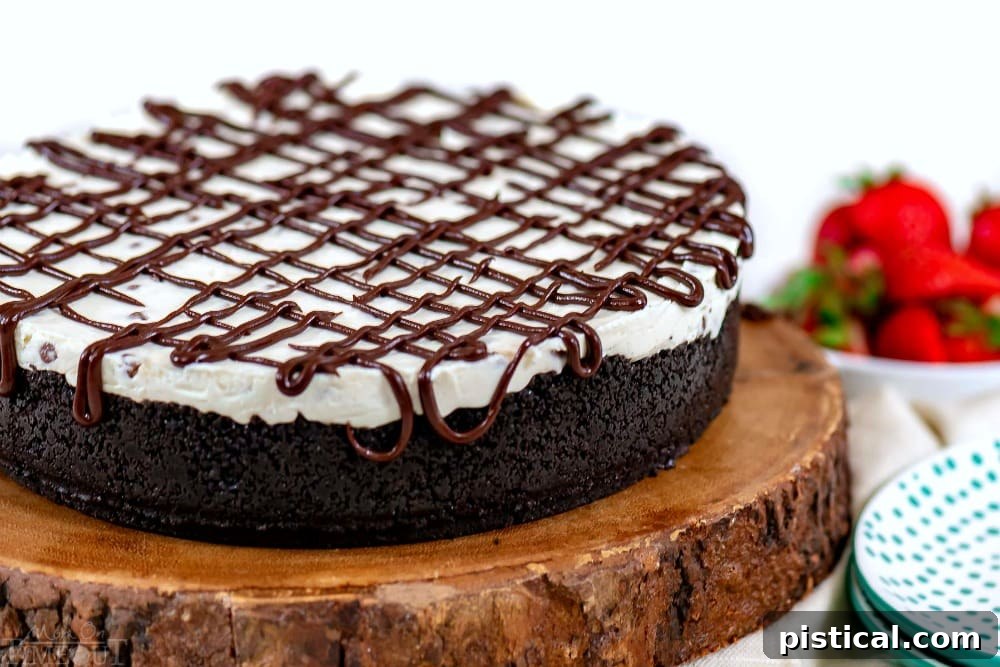
Craving a Classic? Make it a Plain No-Bake Cheesecake!
Absolutely! One of the best features of this recipe is its incredible versatility and ease of customization. If you prefer a more traditional, simpler cheesecake experience, you can easily adapt this recipe:
- Crust Swap: Instead of the Oreo cookie crust, opt for a classic graham cracker crust (you’ll find a detailed recipe in the notes section below).
- Skip the Chocolate: Simply eliminate the ganache layer and omit the mini chocolate chips from the filling.
When I prepare the cheesecake this way, I love to garnish it with fresh, vibrant berries like strawberries or raspberries. Another fantastic option is to serve it alongside a generous drizzle of this luscious homemade strawberry ice cream topping for a burst of fresh fruit flavor.
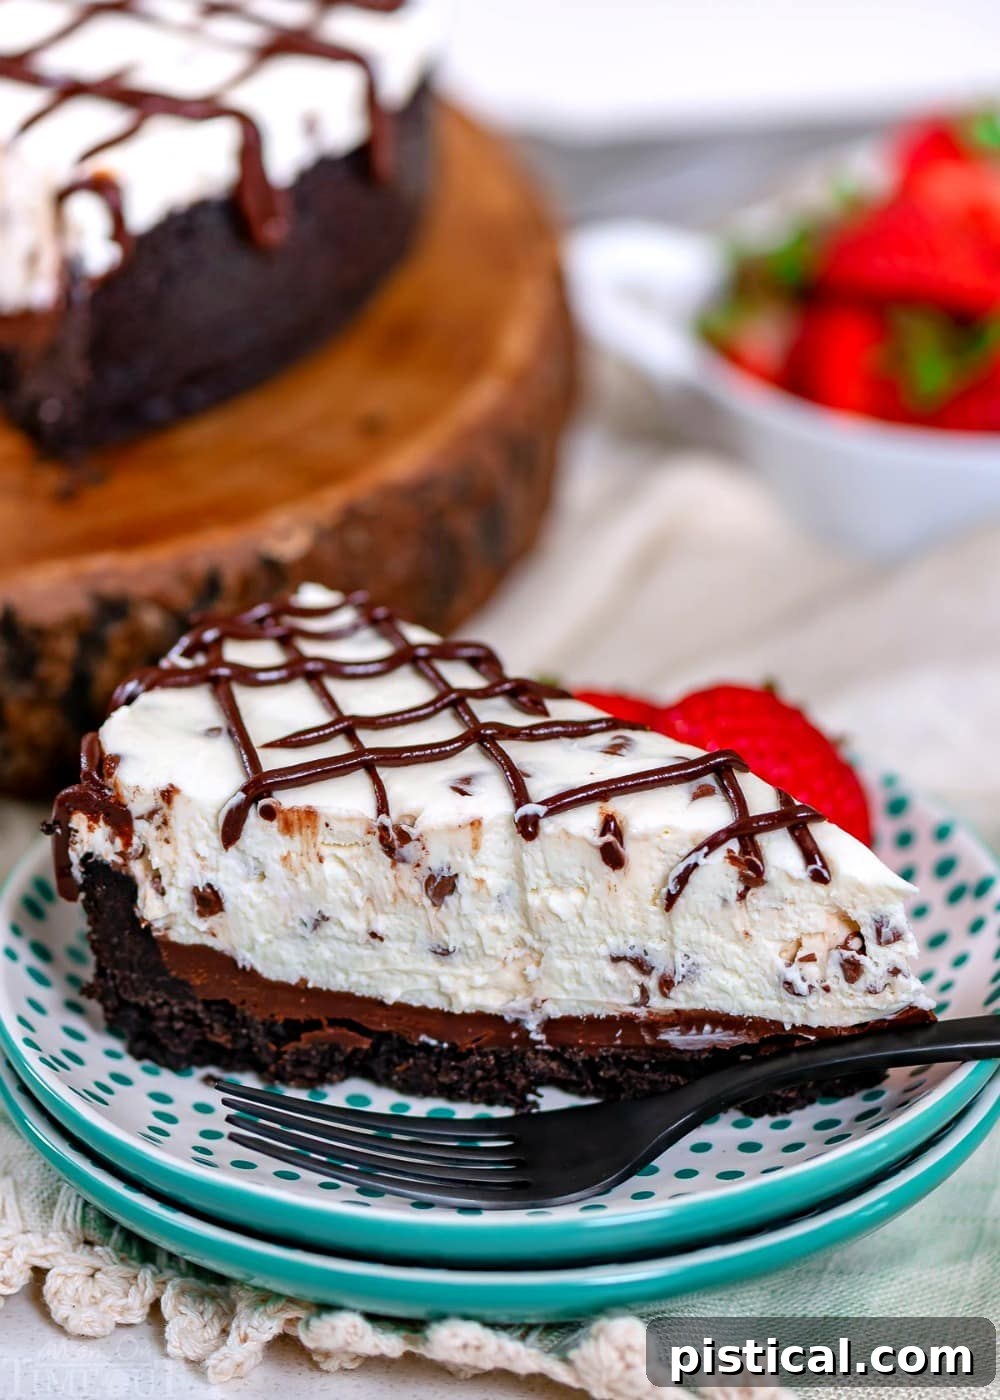
The Delectable Layers of This No-Bake Masterpiece
Crafting this incredible no-bake cheesecake involves assembling a few distinct, yet complementary, layers that come together to create a harmonious symphony of flavors and textures:
- The Perfect Crust: For a no-bake cheesecake, the crust needs to be sturdy enough to hold its shape when sliced but tender enough to be easily enjoyed. Options like the rich Oreo cookie crust used here, a buttery graham cracker crust (recipe in the notes), or even a sweet Nilla Wafer crust work beautifully. The key is to press the crumbs firmly into the springform pan and chill thoroughly to ensure it sets perfectly.
- Decadent Ganache Layer: This is where we elevate the cheesecake from great to extraordinary, especially for chocolate enthusiasts! A smooth, rich layer of ganache spread over the crust adds an incredible depth of chocolate flavor and a luxurious texture that provides a wonderful counterpoint to the creamy cheesecake filling. It’s a layer of pure indulgence that will have your guests scraping their plates clean.
- Velvety No-Bake Cheesecake Filling: This is the star of the show. Comprised of full-fat cream cheese, heavy whipping cream, tangy sour cream, powdered sugar, and a generous splash of vanilla extract, this filling is whipped to perfection. It’s light yet dense, sweet yet balanced, and utterly irresistible. The combination of these ingredients creates a filling that is both stable and incredibly smooth.
- Elegant Ganache Drizzle (Optional): While the cheesecake is already a showstopper, a final drizzle of ganache over the top adds a touch of elegance and an extra hint of chocolatey goodness. It’s an optional step, but it truly finishes off the presentation and enhances the overall experience, making your no-bake cheesecake look as professional as it tastes.
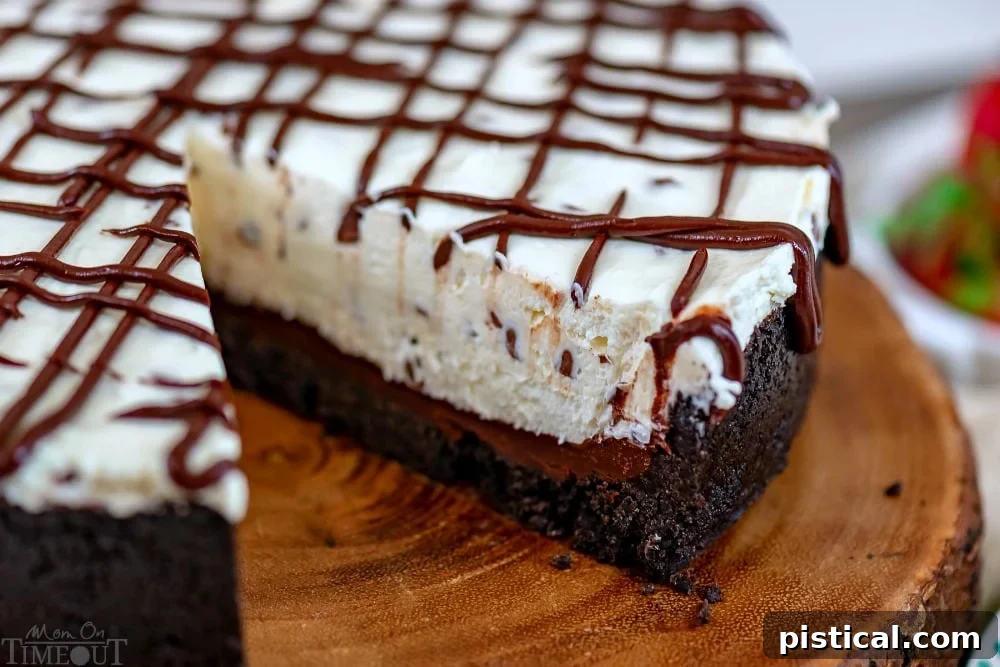
Essential Tools for a Flawless No-Bake Cheesecake
While this recipe is incredibly easy, having the right tools can make the process even smoother and ensure a perfect result every time:
- Springform 9″ Pan: This type of pan is indispensable for cheesecakes, allowing you to easily release the sides without disturbing the delicate dessert. I recommend either this one or this one for reliable performance.
- Offset Spatula: This handy tool is perfect for spreading the ganache and cheesecake filling into smooth, even layers, giving your cheesecake a polished, professional finish.
- Hand Mixer or Stand Mixer: While a hand mixer works perfectly well (as seen in the accompanying video), a stand mixer makes the process even easier, especially when beating the cream cheese until light and fluffy and whipping the heavy cream to stiff peaks.
Can I Freeze a No-Bake Cheesecake?
This is a common question, especially for those eager to enjoy their cheesecake sooner! While it might be tempting to freeze a no-bake cheesecake to speed up the setting process, I strongly advise against it for initial chilling. I’ve tried this before, and the results are simply not as good. Freezing to set often leads to a less ideal texture once thawed, which can be somewhat crumbly or watery.
For the best texture and consistency, patience is key. Allow your cheesecake a minimum of 4 hours of refrigeration to properly set, though chilling it overnight is always preferred for optimal firmness and flavor development.
However, once your cheesecake has fully chilled and set in the refrigerator, you absolutely can freeze it for longer storage! To do so, wrap the cheesecake tightly in plastic wrap, then again with a layer of aluminum foil. When properly stored this way, it will keep beautifully in the freezer for up to 3 months. When you’re ready to enjoy it, simply transfer it to the refrigerator and allow it to thaw slowly for several hours or overnight.
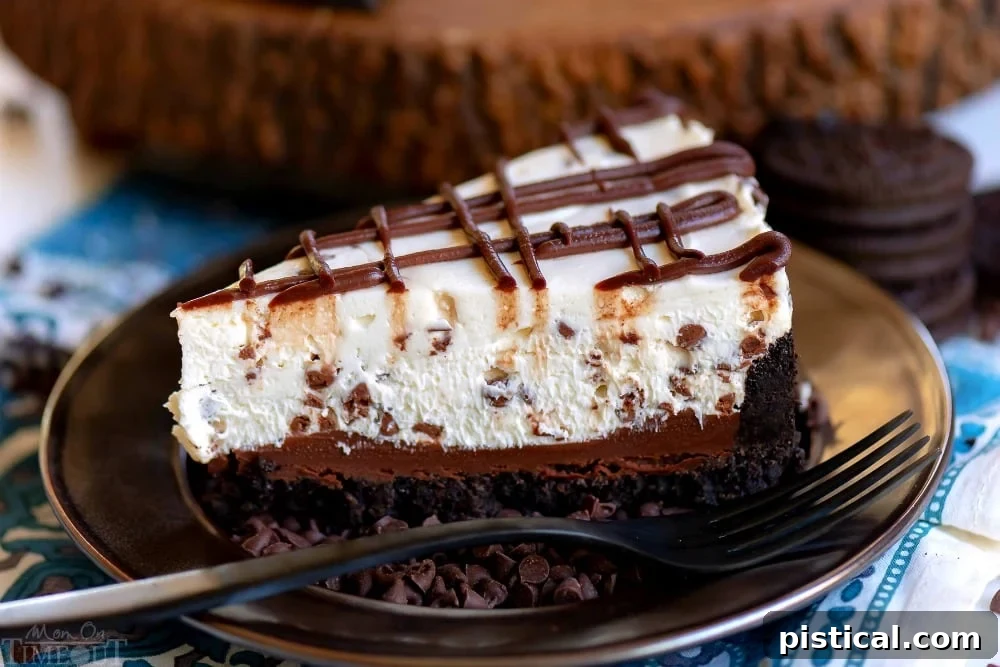
More Irresistible Cheesecake Desserts You Simply Must Try
If you’re as passionate about cheesecake as we are, you’ll love exploring these other fantastic recipes:
- No-Bake S’mores Cheesecake Bars
- Strawberry No-Bake Cheesecake
- Chocolate Chip Cookie Cheesecake Bars
- Cheesecake Brownies
- Peanut Butter Cup Cheesecake Fudge
How To Make No-Bake Cheesecake
Chocolate Chip No-Bake Cheesecake Recipe
This easy No-Bake Cheesecake is exactly what you are looking for! Perfectly creamy, sweet, and as close to a traditionally baked cheesecake as you can get. Made with real ingredients for a truly amazing flavor!
Course: Dessert
Cuisine: American
Keyword: cheesecake, chocolate chip cheesecake, no bake, no bake cheesecake
Prep Time: 30 minutes
Chill Time: 5 hours
Servings: 16
Calories: 510 kcal
Author: Trish – Mom On Timeout
Ingredients
For the Crust:
- 1 OREO cookie crust (click link for recipe, or see notes for Graham Cracker Crust)
For the Ganache Layer:
- 1 cup semi-sweet chocolate chips, coarsely chopped
- ⅓ cup heavy whipping cream
For the Cheesecake Filling:
- ½ cup heavy whipping cream
- 20 ounces cream cheese, softened (full-fat recommended)
- ½ cup powdered sugar
- ½ cup sour cream
- 1 tsp vanilla extract (high quality recommended)
- 1 cup mini chocolate chips (optional, for chocolate lovers)
For the Ganache Topping (Optional Drizzle):
- ⅓ cup semi-sweet chocolate chips
- 2 tbsp heavy whipping cream
Instructions
Crust Preparation:
- Lightly spray a 9-inch springform pan with cooking spray.
- Transfer the prepared Oreo cookie crust crumbs to the springform pan. Press the crumbs firmly into the bottom and evenly up the sides of the pan. A flat-bottomed measuring cup can help achieve a very firm and even crust.
- Refrigerate the crust for at least 30 minutes to set.
Ganache Layer Creation:
- Place 1 cup of coarsely chopped semi-sweet chocolate chips into a heatproof bowl.
- In a microwave-safe container, heat ⅓ cup of heavy whipping cream on high in 30-second increments until the cream is just beginning to simmer around the edges (do not boil).
- Pour the hot cream over the chocolate chips, ensuring all chocolate is covered. Let it sit undisturbed for two to three minutes to allow the chocolate to melt.
- Gently whisk the cream and chocolate together until the chocolate is completely melted and the mixture is smooth, glossy, and homogeneous.
- Pour this ganache layer over the cooled crust in the springform pan and spread it evenly with an offset spatula.
- Return the pan to the refrigerator for another 30 minutes to allow the ganache to set.
Cheesecake Filling Assembly:
- In a separate, clean bowl, beat ½ cup of heavy whipping cream using a hand or stand mixer until stiff peaks form. Set this whipped cream aside.
- In a large mixing bowl, beat the softened cream cheese for 2 to 3 minutes on medium-high speed until it is light, airy, and completely fluffy. Scrape down the sides of the bowl as needed.
- Gradually beat in the powdered sugar until no lumps remain and the mixture is smooth and well combined.
- Add the sour cream and vanilla extract, beating on low speed until just incorporated. Be careful not to overmix.
- Gently fold in the prepared whipped cream and the mini chocolate chips (if using) into the cream cheese mixture until everything is just combined and no streaks of whipped cream remain.
- Pour the cheesecake filling over the set ganache layer in the springform pan. Smooth the top with an offset spatula. Cover the pan tightly with plastic wrap and refrigerate for at least 4 hours, or ideally overnight, until the cheesecake is completely firm and set.
Ganache Topping Drizzle (Optional):
- Place ⅓ cup of semi-sweet chocolate chips into a small heatproof bowl.
- Heat 2 tbsp of heavy whipping cream in a microwave-safe container on high in 30-second increments until it begins to simmer.
- Pour the hot cream over the chocolate chips, covering them completely. Let sit for two to three minutes.
- Gently whisk until the chocolate is fully melted and the mixture is smooth.
- Just before serving, artfully drizzle this ganache over the top of the chilled cheesecake for an extra touch of flavor and visual appeal.
- Keep the cheesecake refrigerated until you are ready to serve.
Recipe Notes
Prefer a classic graham cracker crust? Here’s how to make one:
Graham Cracker Crust Ingredients:
- 6 tablespoons unsalted butter, melted
- 1 ½ cups graham cracker crumbs
- ¼ cup granulated sugar
Graham Cracker Crust Instructions:
- In a medium-sized bowl, combine the graham cracker crumbs, granulated sugar, and melted butter. Stir with a fork until the butter is fully incorporated and the mixture resembles wet sand.
- Press the crumb mixture firmly and evenly onto the bottom of a 9-inch pie or springform pan.
- Refrigerate the crust for at least 30 minutes to firm up before adding any cheesecake filling.
Nutrition Facts (per serving)
- Calories: 510 kcal
- Carbohydrates: 39g
- Protein: 5g
- Fat: 38g
- Saturated Fat: 21g
- Cholesterol: 80mg
- Sodium: 249mg
- Potassium: 207mg
- Fiber: 2g
- Sugar: 28g
- Vitamin A: 940 IU
- Vitamin C: 0.2mg
- Calcium: 81mg
- Iron: 3.4mg
Watch the Video!
For a visual guide on how to make this delightful No-Bake Chocolate Chip Cheesecake, watch our instructional video. It covers all the steps, from preparing the crust to drizzling the final ganache topping, ensuring you achieve perfect results every time. 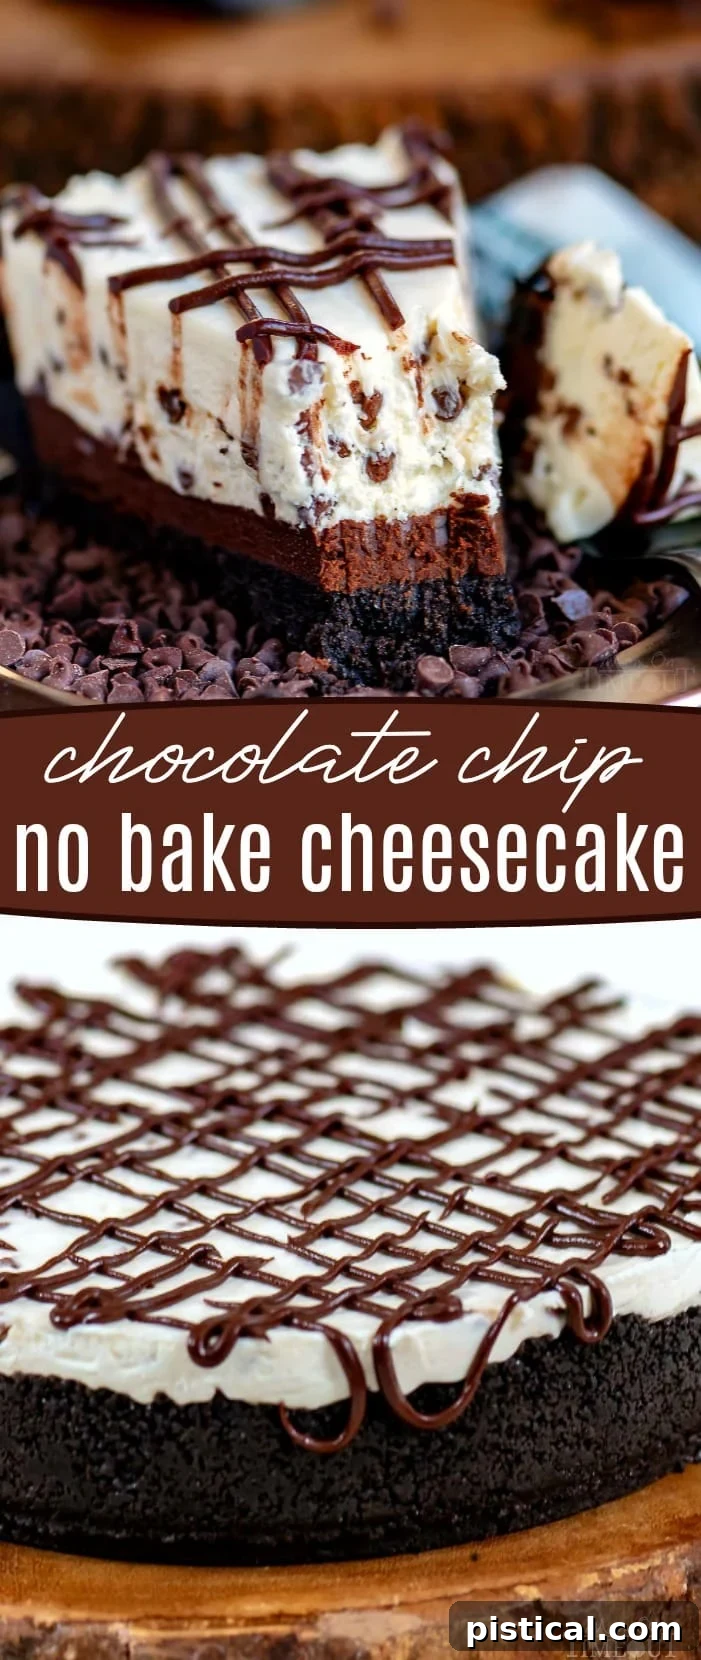

For all our delectable cookie recipes, visit HERE.
Explore our full collection of tempting dessert recipes HERE.
Never miss a new recipe! Sign up for our email newsletter to get fresh recipes delivered straight to your inbox.
Stay connected and find even more culinary inspiration by following us on Facebook, Pinterest, Instagram, Twitter, and Bloglovin’.