
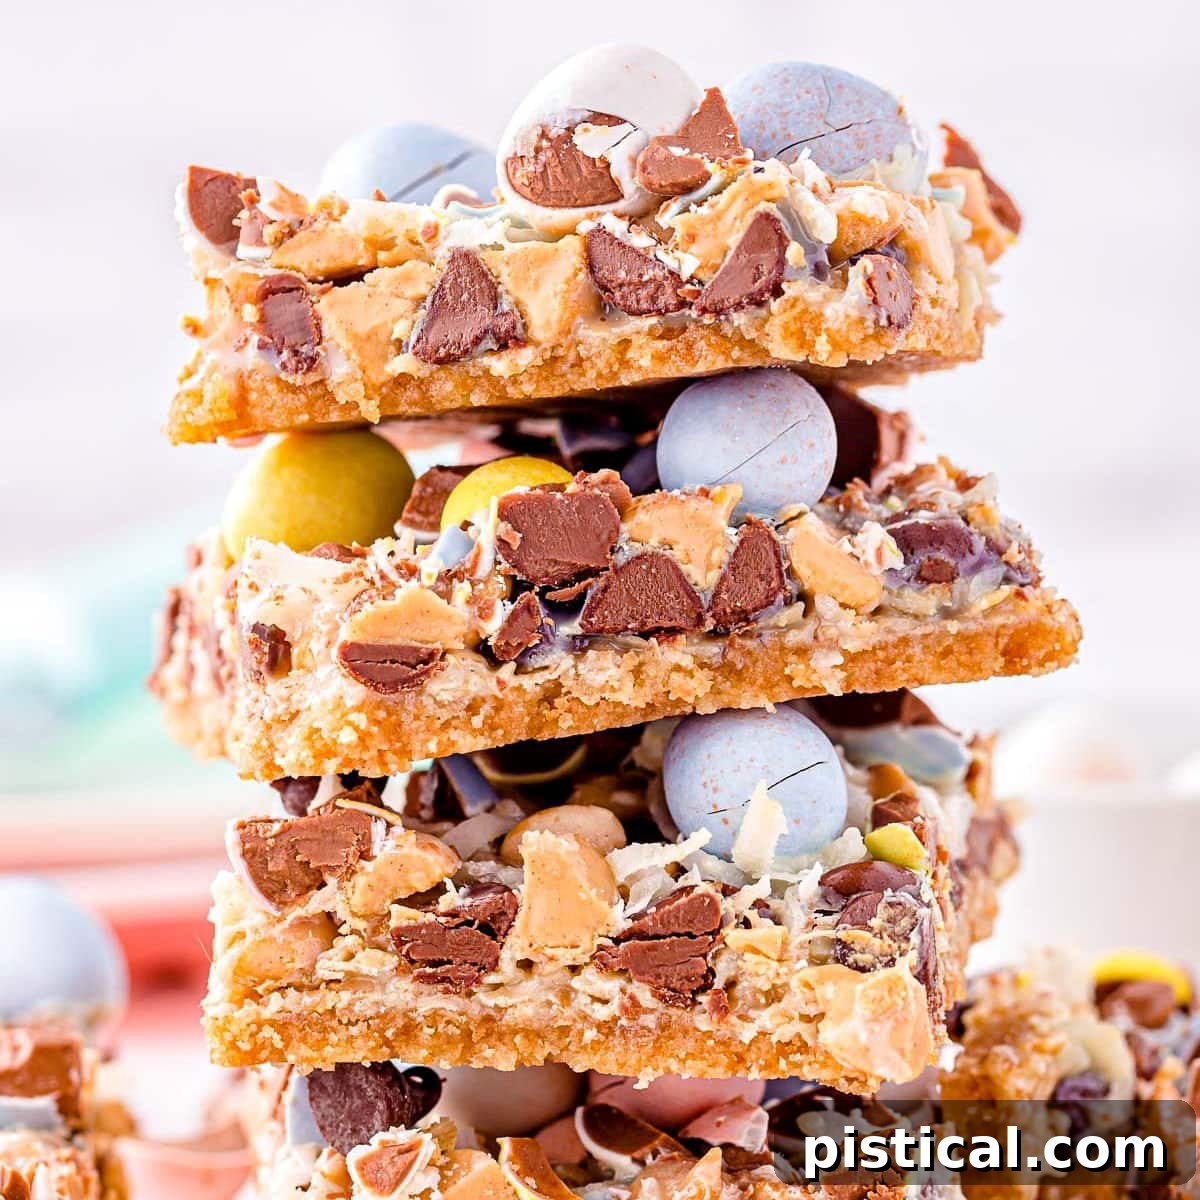
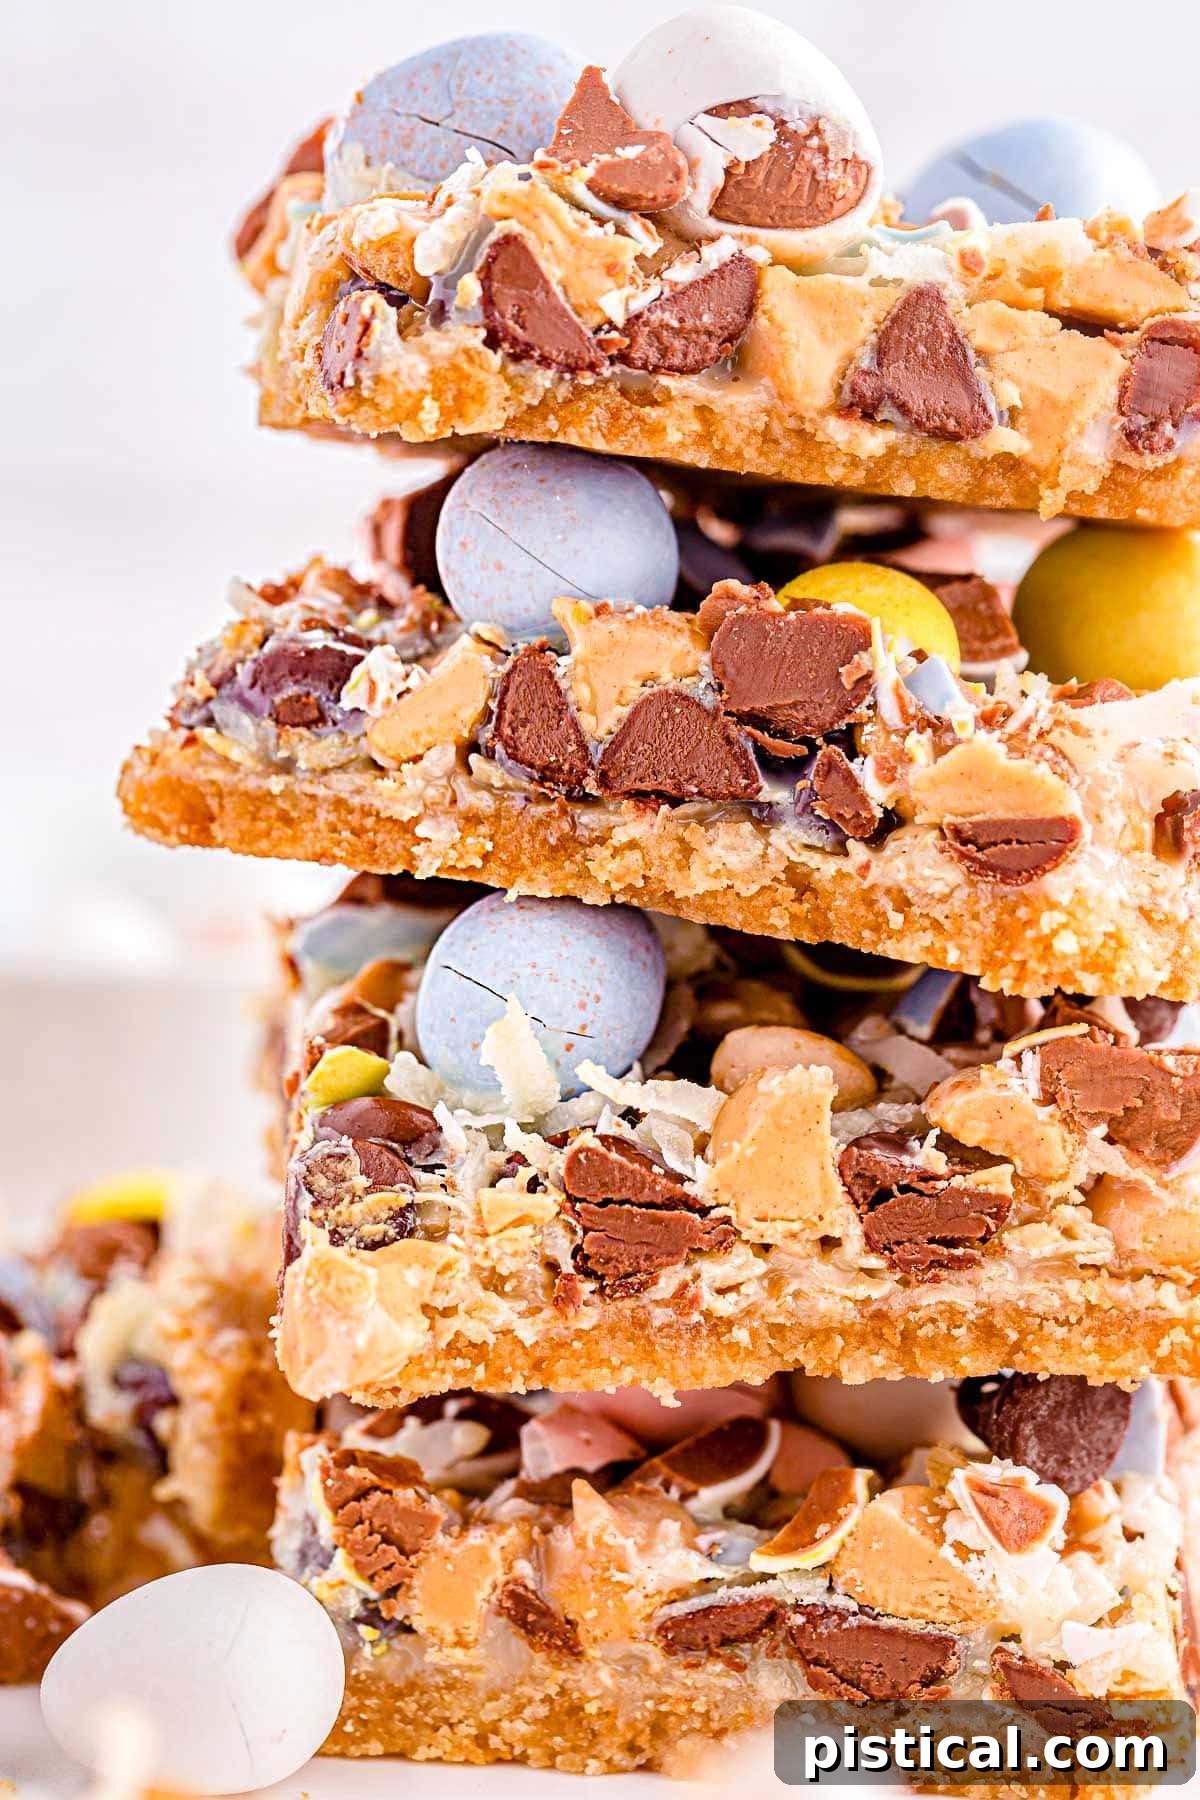
Get ready to infuse your Easter celebrations with an irresistible treat that promises to delight everyone – the enchanting Easter Magic Cookie Bars! This festive twist on the universally adored 7 Layer Bars brings a vibrant splash of spring color and flavor to your holiday table. Imagine a decadent, multi-layered dessert, lovingly topped with festive Easter chocolates, making it the quintessential sweet addition to your family gatherings and celebratory feasts. It’s a wonderfully engaging project to make with the whole family, creating delicious memories alongside delicious bites.
For those seeking even more delightful Easter recipes, we’ve curated a few of our absolute favorites. Pair your Magic Cookie Bars with these other holiday delights for a truly spectacular spread: Bunny Bait Easter Snack Mix, a classic and moist Carrot Cake, and whimsical Peeps Rice Krispie Treats. Each offers a unique flavor and texture, ensuring there’s something for every palate this Easter season.
The Enduring Appeal of 7 Layer Bars (Magic Cookie Bars)
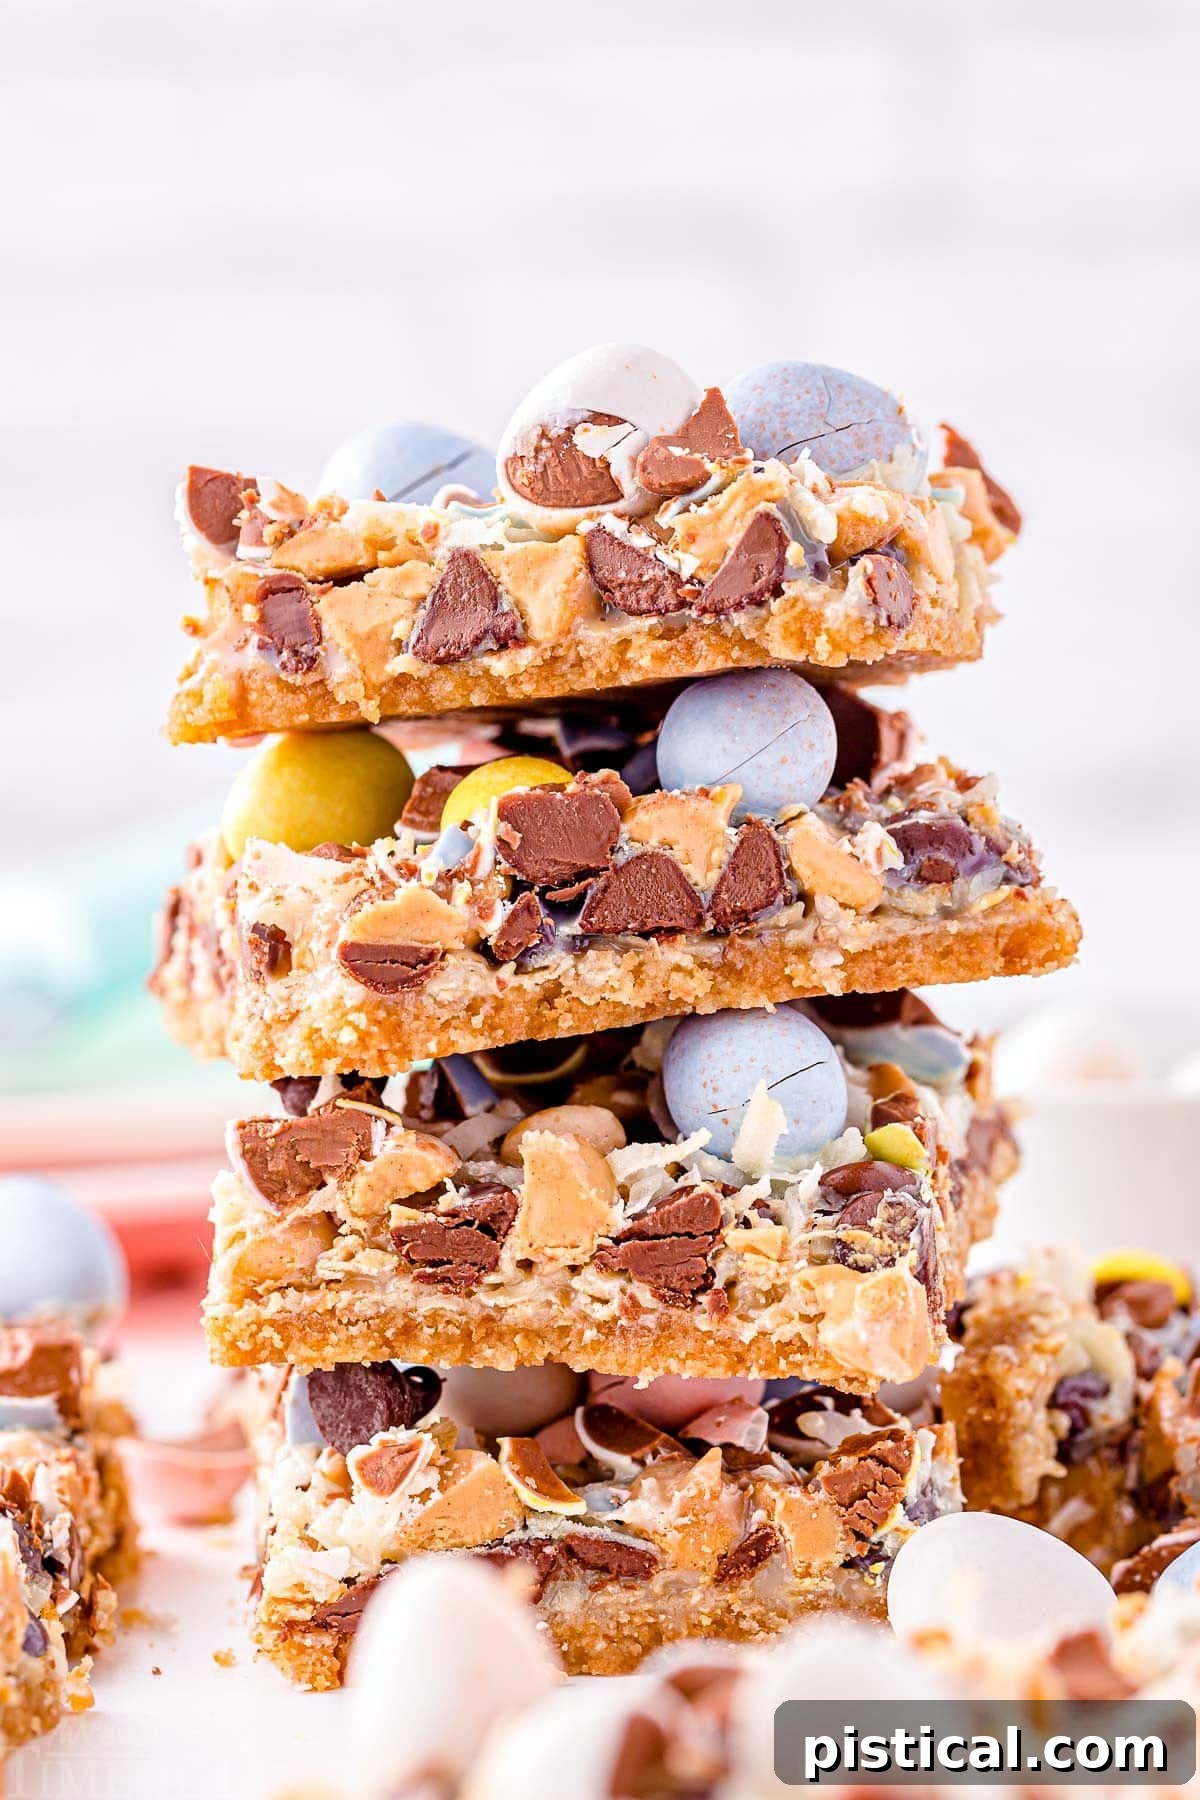
It’s truly a rare occasion to encounter someone who doesn’t adore Magic Cookie Bars, affectionately known by many as 7 Layer Bars. Their widespread appeal isn’t just a coincidence; it’s a testament to their perfect balance of textures and flavors, ranging from chewy to crunchy, sweet to subtly savory. What makes these bars truly remarkable is their incredible versatility. Over the years, countless variations have emerged, each bringing a unique twist to the beloved classic. While we’ve experimented with many delightful renditions, this particular Easter version, adorned with colorful holiday chocolates, stands out as a personal favorite.
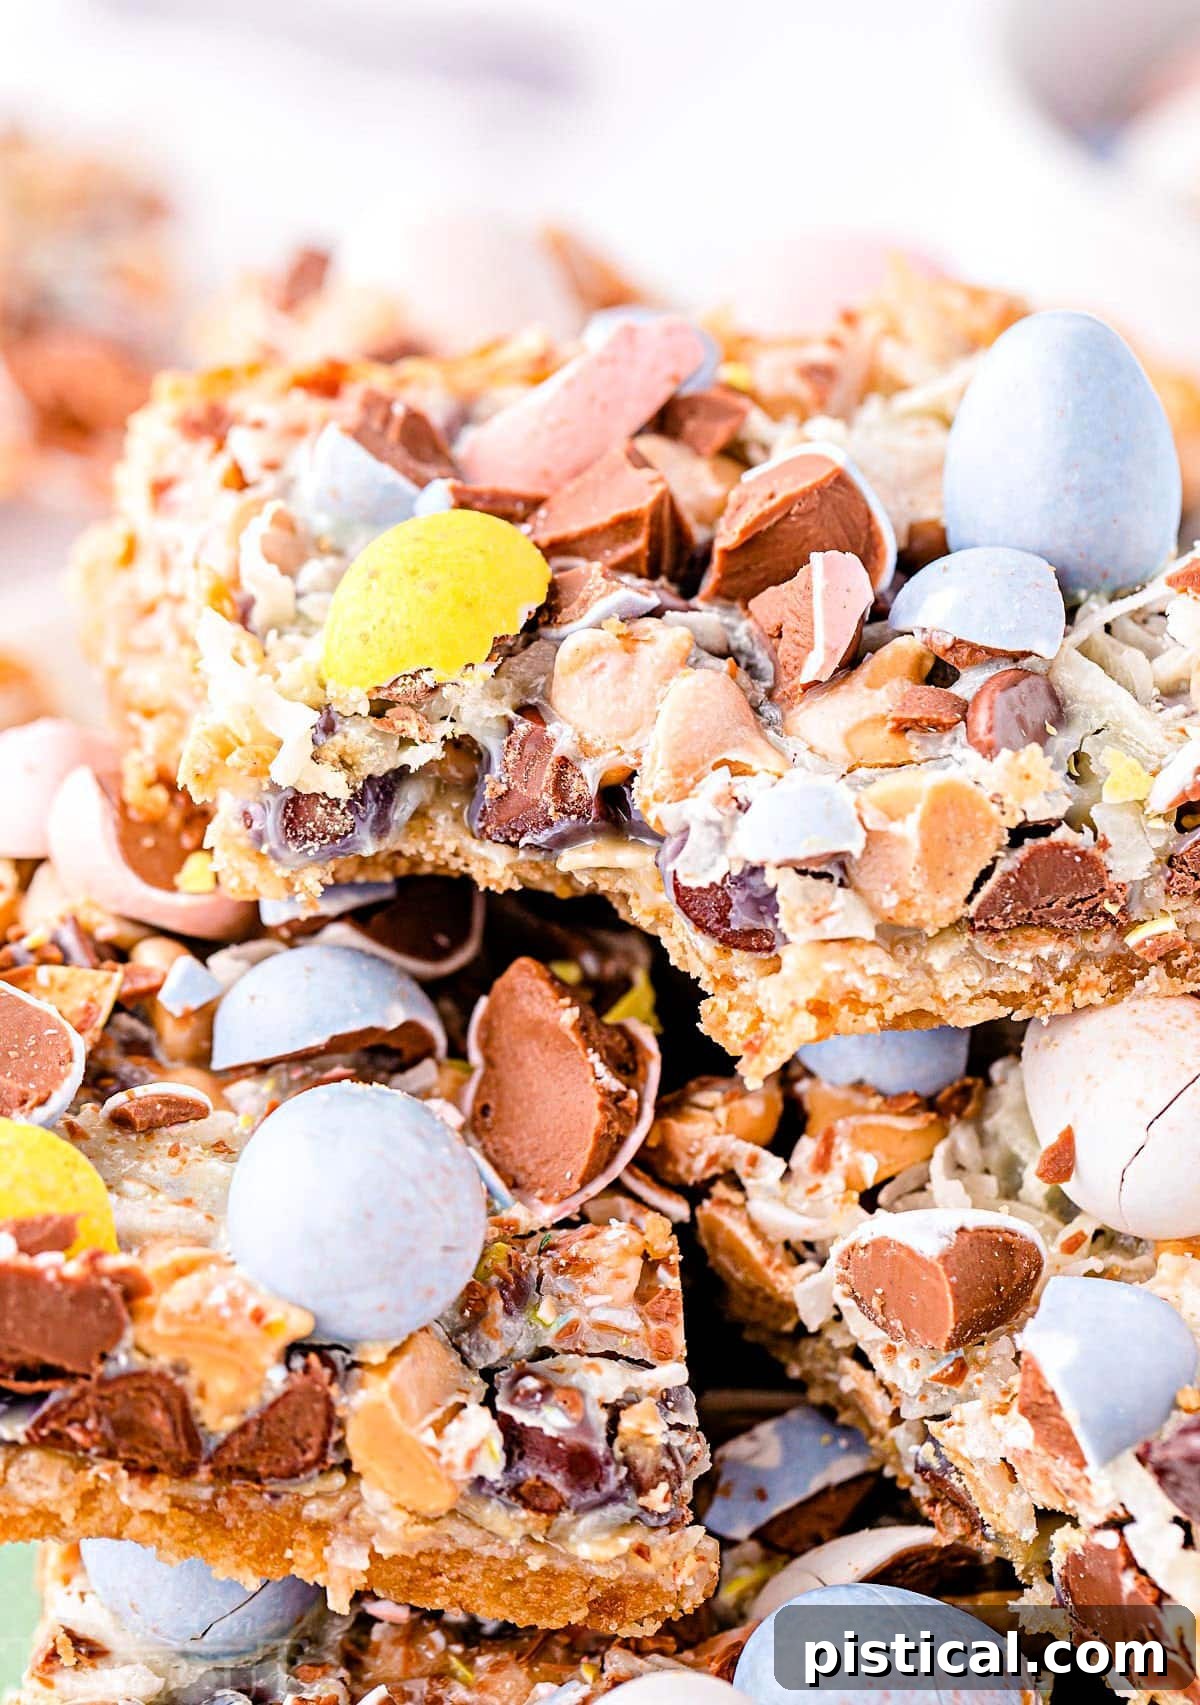
We’ve elevated the traditional Magic Cookie Bar recipe by incorporating iconic Cadbury Mini Eggs, instantly transforming them into a festive treat that unmistakably celebrates Easter. The pastel hues and creamy chocolate of Cadbury Eggs add both visual charm and a delightful crunch. Should Cadbury Eggs be hard to find, or if you simply prefer another option, a bag of pastel Easter M&M’s works just as beautifully, offering a similar burst of color and chocolatey goodness. Either choice guarantees a stunning and delicious dessert that will be the centerpiece of your Easter gathering.
Love Magic Bar recipes? Explore these cherished variations for year-round enjoyment: Indulge in the tropical flavors of Piña Colada Magic Bars, savor the sweet tartness of Cherry Magic Bars, or enjoy the vibrant taste of Raspberry Magic Bars.
Beyond Cookies: A World of Dessert Bar Delights
Dessert bars are consistently a brilliant idea, offering convenience and delightful variety that cookies sometimes can’t match. They’re often simpler to prepare than individual cookies, requiring less hands-on time and no endless trays of baking. One of their greatest advantages is the ability to be made in advance, allowing you to prepare for events without last-minute stress. Plus, bars offer incredible flexibility in portioning – whether you prefer small, elegant squares for a delicate treat or larger, more substantial portions to truly satisfy a sweet craving. Here are some indispensable bar recipes that you absolutely must try:
- Carrot Cake Bars: All the comforting spices and rich cream cheese frosting of a classic carrot cake, but in a convenient, easy-to-serve bar format. Perfect for spring and holiday tables.
- Key Lime Pie Bars: A zesty, refreshing treat featuring a buttery graham cracker crust, a tangy key lime filling, and a light, airy top. Ideal for warmer weather or when you crave a burst of citrus.
- No-Bake Snickers Crunch Bars: Indulge in the irresistible flavors of a Snickers candy bar transformed into a simple, no-bake dessert bar with layers of chocolate, caramel, and peanuts.
- Lemon Bars: A timeless favorite, these bars feature a shortbread crust topped with a vibrant, sweet-tart lemon filling. Dusted with powdered sugar, they are a bright and elegant dessert.
- Piña Colada Magic Bars: Transport yourself to a tropical paradise with these bars, featuring coconut, pineapple, and a hint of rum flavor (optional), all bound together by sweetened condensed milk.
Crafting the Perfect Easter Magic Cookie Bar: Essential Ingredients
The beauty of Magic Cookie Bars lies in their straightforward ingredient list, which magically transforms into something truly extraordinary. For our special Easter rendition, we build upon the foundation of classic 7 Layer Bar ingredients, introducing a few festive additions that elevate these treats to holiday perfection. You’ll find the comprehensive, printable recipe card at the conclusion of this post, but let’s delve into each component and its role in creating these magnificent bars:
- Vanilla Wafers: These form the delightful base of our crust, offering a mild, buttery flavor and a fine crumb texture. While vanilla wafers are ideal, feel free to substitute with honey graham crackers, chocolate graham crackers, or even shortbread cookies. The key is to select a cracker or cookie that can be easily crushed to form a firm, flavorful crust.
- Salted Butter: Melted salted butter is crucial for binding the crust crumbs together and adding a rich, savory counterpoint to the sweetness. If you only have unsalted butter on hand, simply add a small pinch of salt (about ¼ teaspoon) to the melted butter to achieve a similar flavor balance and enhance the overall taste.
- Sweetened Condensed Milk: This is the true “magic” ingredient, the sweet, sticky “glue” that holds all the layers together. As it bakes, it caramelizes slightly, infusing every layer with its rich, creamy sweetness and creating that signature chewy texture found in every great Magic Cookie Bar. Do not confuse it with evaporated milk, as it will not yield the same results.
- Quick Oats: Adding quick oats introduces a wonderful chewiness and a subtle nutty flavor to the bars. Quick oats are preferred because their smaller size integrates better and cooks more evenly than old-fashioned rolled oats. If you only have rolled oats, you can easily turn them into quick oats by pulsing them a few times in a food processor. Alternatively, if oats aren’t your preference, they can be entirely omitted or replaced with chopped nuts for a crunchier texture.
- Milk Chocolate Chips: A staple in most dessert bars, milk chocolate chips provide classic, creamy chocolatey goodness. You can customize this layer by swapping them out for semi-sweet chocolate chips for a less sweet profile, dark chocolate chips for a deeper cocoa flavor, or even white chocolate chips for a different color and taste.
- Peanut Butter Chips: These chips bring a delightful nutty, sweet, and slightly salty dimension to the bars, perfectly complementing the chocolate. For a different flavor profile, consider using butterscotch chips for a caramel-like taste, or opt for additional white chocolate chips if you’re not a fan of peanut butter.
- Coconut Flakes: Sweetened coconut flakes contribute a tropical sweetness and a lovely chewy texture, plus a beautiful golden-brown topping when baked. If you prefer a less sweet option, unsweetened coconut flakes can be used, allowing the other flavors to shine through more prominently.
- Easter Chocolate Eggs: This is where the Easter spirit truly comes alive! We recommend using Cadbury Mini Eggs for their iconic pastel colors and delicious candy shell crunch. However, colorful Easter M&M’s are an excellent substitute, offering a similar festive look and chocolatey taste. Roughly chop larger eggs to ensure even distribution and easier cutting.
Easily customize this classic recipe for any holiday or special occasion! Simply swap out the Easter chocolate eggs for M&M’s or other candies that correspond with the celebration. Think vibrant red and green for Christmas, spooky orange and black for Halloween, romantic pink and red for Valentine’s Day, or patriotic red, white, and blue for the 4th of July. The possibilities are endless for these delicious and adaptable treats!
Mastering the Art of Making 7 Layer Bars for Easter
Creating these delightful Easter Magic Cookie Bars is a surprisingly simple process, yielding impressive results every time. Follow these straightforward steps to bake a batch of heavenly 7 Layer Bars that will disappear in no time:
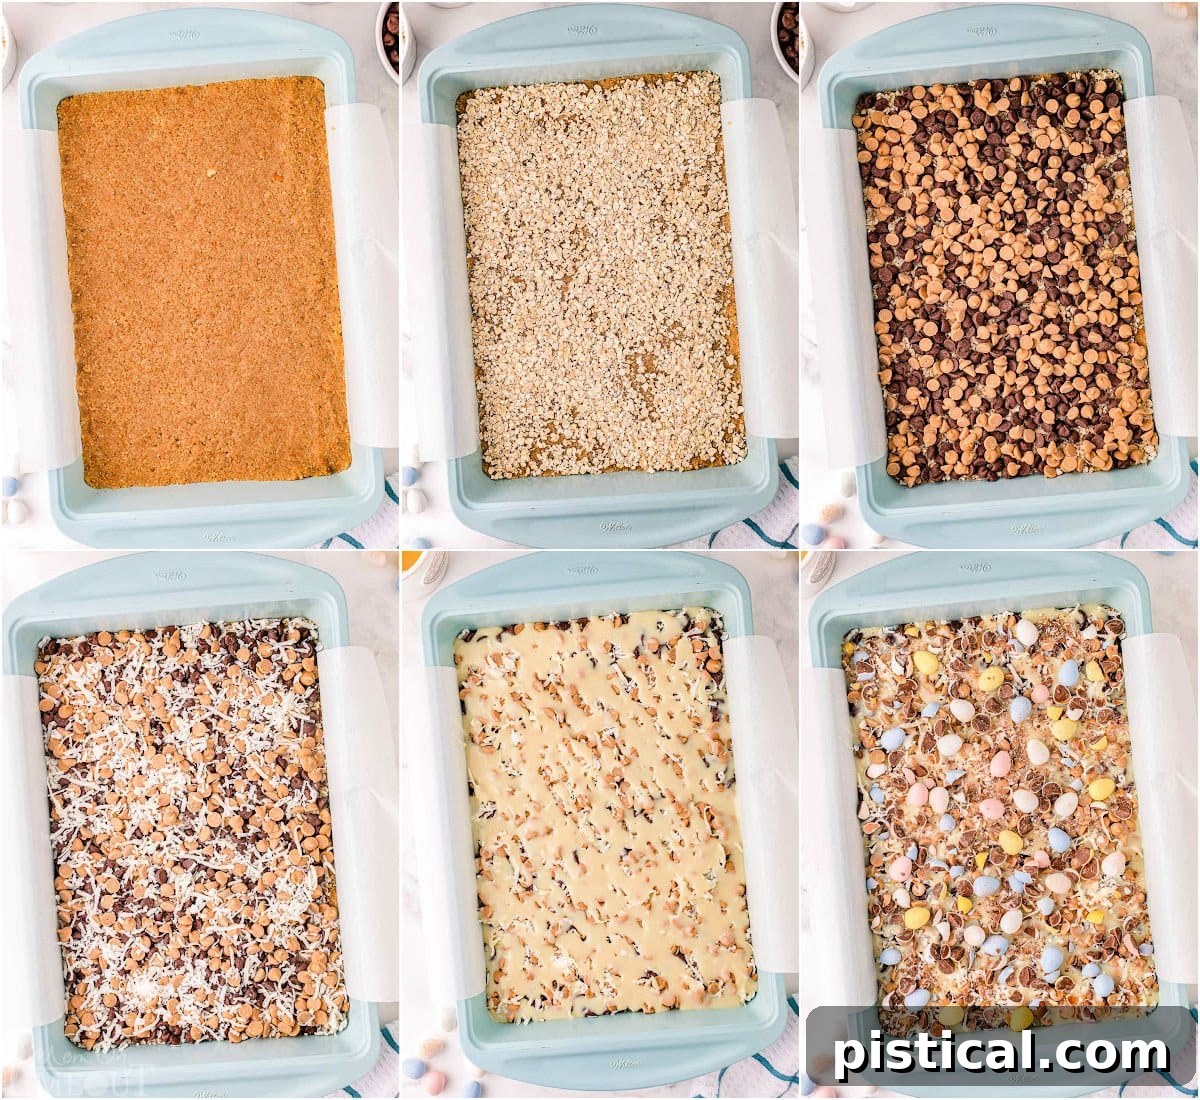
- Prepare Your Workspace: Begin by preheating your oven to 350°F (175°C). Next, prepare a 9×13 inch baking dish. For the easiest removal and cleanest cuts, generously grease the pan with non-stick cooking spray, then line it with parchment paper, allowing an overhang on the longer sides. This parchment “sling” will be your best friend when it’s time to lift the cooled bars out of the pan.
- Craft the Crumb Crust: In a medium-sized bowl, combine the finely crushed vanilla wafer crumbs with the melted salted butter. Stir these ingredients thoroughly until the crumbs are uniformly moistened, resembling wet sand.
- Press the Base: Transfer the vanilla wafer and butter mixture into the bottom of your prepared baking dish. Using the back of a spoon, a flat-bottomed glass, or your fingers, press the mixture firmly and evenly across the entire bottom of the pan. There’s no need to extend the crust up the sides; a flat, compact base is perfect.
- First Layer of Goodness: Evenly sprinkle the quick oats over the pressed crust. Ensure they form a single, consistent layer across the entire surface.
- Add the Chocolate and Peanut Butter: Next, distribute the milk chocolate chips over the oats, followed by the peanut butter chips. Try to spread them as evenly as possible to ensure every bite contains a medley of flavors.
- Coconut Crown: Sprinkle the sweetened coconut flakes generously over the top of the chips. This layer will toast beautifully, adding texture and a golden hue.
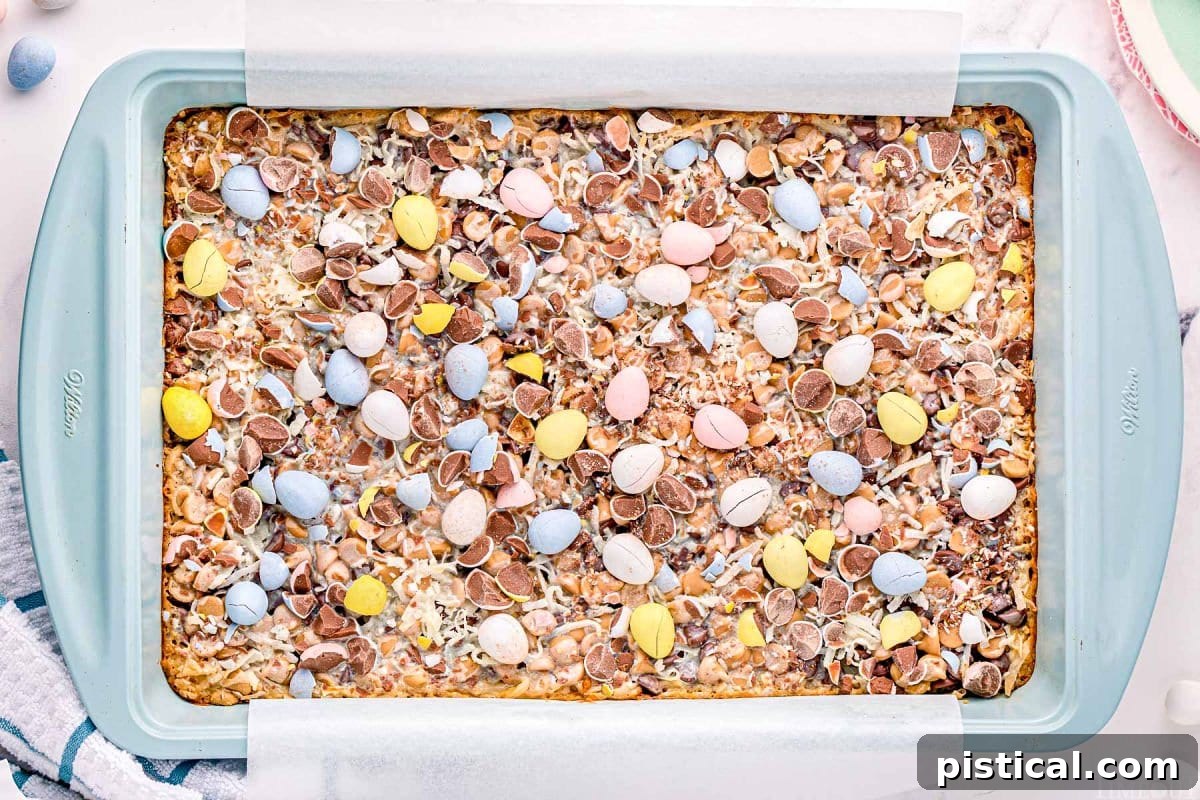
- The Magical Drizzle & Festive Finish: Carefully and evenly pour the sweetened condensed milk over all the layered ingredients. This sweet liquid will seep down, binding everything together as it bakes. Finally, scatter the roughly chopped Easter chocolate eggs over the top.
- Bake to Perfection: Place the baking dish into the preheated oven and bake for 18 to 20 minutes. Keep an eye on them; the bars are ready when the coconut flakes are golden brown and the chocolate eggs have visibly softened or split open slightly, creating a beautiful, molten appearance.
- Cool Completely: This step is critical! Once baked, remove the bars from the oven and allow them to cool completely at room temperature on a wire rack. Cooling allows the layers to set properly, ensuring clean cuts and firm bars. Rushing this step will result in a messy, crumbly dessert.
- Cut and Serve: Once fully cooled, use the parchment paper overhang to gently lift the entire slab of bars out of the baking dish. Place it on a cutting board, and with a sharp knife, cut them into your desired bar size. Serve these delightful Easter treats at room temperature and watch them disappear!
Optimal Storage for Freshness
To keep your Easter Magic Cookie Bars fresh and delicious, proper storage is key. Following these guidelines will ensure they maintain their incredible taste and texture for as long as possible:
- Room Temperature Storage: Once completely cooled, cover the bars tightly with plastic wrap or store them in an airtight container at room temperature. They will remain wonderfully fresh and chewy for 2 to 3 days. This is perfect for short-term enjoyment.
- Refrigerated Storage: For extended freshness beyond a few days, transfer the covered bars to the refrigerator. Chilling them will help them last for approximately 7 days. Be sure they are well-sealed to prevent them from drying out or absorbing other food odors.
To Freeze for Long-Term Enjoyment: Magic Cookie Bars freeze exceptionally well, making them an excellent make-ahead option.
- First, cut the cooled bars into individual portions.
- Wrap each bar tightly in plastic wrap, ensuring no air exposure.
- Then, place the individually wrapped bars into a freezer-safe ziploc bag or an airtight freezer container.
- They can be stored in the freezer for up to 3 months.
- When you’re ready to enjoy them, simply thaw the frozen bars at room temperature for an hour or two until soft. They’ll taste just as fresh as the day they were baked!
Your Questions Answered: Magic Cookie Bars FAQs
For short-term storage, these bars can be covered tightly and kept at room temperature for 2-3 days. If you need them to last longer, transfer them to the refrigerator, where they will stay fresh for about 7 days. For long-term preservation, cut the bars into individual portions, wrap each one securely in plastic wrap, and then place them in a freezer-safe bag. They will last up to 3 months in the freezer and can be thawed at room temperature before serving.
Doubling this recipe can be a bit tricky primarily because it’s challenging to find a single baking dish large enough to accommodate the increased volume of ingredients while ensuring even baking. If you wish to double the recipe, the best approach is to prepare two separate 9 x 13 inch baking dishes, following the instructions for each pan independently. This ensures proper layering and consistent results.
Quick oats are recommended because their finer texture integrates seamlessly into the bars and cooks nicely, contributing to their signature chewiness. Old-fashioned rolled oats tend to be coarser and may not cook as evenly or provide the desired texture. If quick oats are unavailable, you can create your own by pulsing old-fashioned oats a few times in a food processor until they are broken down into smaller pieces. Alternatively, if you prefer to omit oats entirely, consider replacing them with a layer of finely chopped nuts (like pecans or walnuts) for an added crunch, keeping in mind that the bars will be chewier with oats and crunchier with nuts.
Absolutely! These bars are an excellent make-ahead dessert. You can bake them 2-3 days in advance and store them at room temperature, or up to a week in the refrigerator. For longer storage, freeze them for up to 3 months. Preparing them ahead allows you to focus on other holiday preparations, making your Easter celebrations more relaxed and enjoyable.
Trish’s Expert Tips for Unforgettable Results
While this Magic Cookie Bar recipe is wonderfully straightforward, incorporating a few expert tips can elevate your baking experience and ensure truly spectacular results every time. Follow these simple tricks for the best Easter Magic Cookie Bars you’ve ever made:
- Effortless Crust Creation: For a perfectly uniform and easily mixed crust, use a food processor to crush your vanilla wafers into fine crumbs. Once crumbed, add the melted butter directly to the food processor and pulse a few times until the mixture is well combined. If a food processor isn’t available, place the wafers in a sturdy zipper-top plastic bag and use a rolling pin or the bottom of a heavy pan to crush them into fine crumbs. This method ensures a consistent base for your bars.
- The Parchment Paper Advantage: Using parchment paper to line your baking dish is highly recommended. It acts as a “sling,” allowing you to easily lift the entire slab of cooled bars out of the pan, making cutting and serving incredibly simple and mess-free. If you don’t have parchment paper, ensure you liberally spray your pan with non-stick cooking spray, paying extra attention to the corners and edges. A well-greased pan is crucial for easy removal, preventing the sticky bars from adhering.
- Enhance Texture with Nuts: For an additional layer of delightful crunch and nutty flavor, consider adding a thin layer of finely crushed walnuts or pecans over the oats. This introduces a contrasting texture that perfectly complements the chewy layers of the bars.
- Strategic Easter Egg Placement: The recipe suggests adding chocolate eggs before baking, allowing them to melt slightly and split, creating a beautiful, integrated topping. However, if you prefer the appearance of intact, vibrant chocolate eggs, you can add them after the bars have finished baking and have cooled slightly. For the best adhesion in this method, gently press the eggs into the warm, still-soft top layer of the bars. If added when fully cooled, they might not stick as well.
- Avoid Overbaking: Keep a close eye on your bars during the last few minutes of baking. Overbaking can lead to a dry, hard texture instead of the desired chewy, gooey center. The edges should be lightly golden, and the coconut toasted, but the center should still be slightly soft when gently pressed.
- Even Layers are Key: While layering, try to distribute each ingredient as evenly as possible. This ensures that every slice of the bar has a consistent blend of flavors and textures, making each bite equally delicious.
Creative Recipe Variations to Inspire Your Baking
The beauty of Magic Cookie Bars lies in their incredible adaptability, allowing you to easily customize them to suit any taste preference or holiday theme. Don’t be afraid to get creative and experiment with these delightful variations:
- Explore Different Flavor Chips: Beyond milk and peanut butter, the possibilities for chocolate chips are vast! Try dark chocolate chips for a more intense cocoa flavor, rich butterscotch chips for a sweet caramel note, or creamy white chocolate chips for a milder sweetness and contrasting color. You could even combine different types of chips for a unique blend.
- Introduce a Layer of Nuts: If you’re a fan of added crunch, replace the quick oats with a layer of your favorite chopped nuts. Pecans or walnuts are fantastic choices, adding a rich, earthy flavor and a satisfying bite. Remember that oats contribute chewiness, while nuts will provide a distinct crunch, altering the overall texture of the bar. For a balance, you could even add a smaller amount of both oats and nuts!
- Swap Out the Candy: The Easter chocolate eggs are festive, but you can easily substitute them with other candies to match any occasion. M&M’s are incredibly versatile, available in countless colors and seasonal mixes. Think crushed candy canes for Christmas, small candy corn for Halloween, or even mini candy bar pieces chopped into small bits for a fun mix-in.
- Alternate Crust Choices: If vanilla wafers aren’t your top choice, explore other options for the crust. Graham crackers (either classic honey or chocolate flavored) make an excellent, traditional Magic Bar crust. You could also try shortbread cookies, ginger snaps for a spicy kick, or even Oreo cookies (crushed whole) for a dark chocolate base. The goal is to choose a crisp cracker or cookie that can be finely crushed and mixed with butter.
- Add a Swirl of Caramel: Before pouring the sweetened condensed milk, drizzle a thin layer of caramel sauce over the chocolate chips. This adds an extra layer of gooey sweetness and a luxurious flavor dimension that’s truly irresistible.
Unleash your creativity and transform these delicious Magic Cookie Bars to perfectly match any celebration throughout the year! By simply changing the color or type of M&M’s or other candies used for the topping, you can adapt them for virtually any holiday or special event. Celebrate Christmas with festive red and green, spook up Halloween with orange and black, spread love on Valentine’s Day with pink and red, or even personalize them for birthdays with colors to match the party theme. These adaptable treats are always a crowd-pleaser!
More Delightful Easter Desserts to Sweeten Your Spring
As you plan your Easter feast, consider these additional dessert options to complement your Easter Magic Cookie Bars and make your holiday spread truly memorable. Each recipe offers a unique flavor profile and a touch of seasonal charm:
- Classic Carrot Cake: A moist, spiced cake loaded with fresh carrots and topped with rich cream cheese frosting – an undeniable Easter essential.
- Best Coconut Cream Pie: A silky, smooth coconut custard filling in a flaky crust, crowned with whipped cream and toasted coconut, evoking tropical spring vibes.
- No-Fail Jell-O Divinity: Light, airy, and delightfully sweet, this classic candy with a Jell-O twist adds a burst of fruity flavor and pretty pastel colors.
- Easter Chocolate Chip Cookies: Your favorite comforting chocolate chip cookies, made festive with colorful Easter M&M’s or sprinkles, perfect for kids and adults alike.
- Three Minute Easter Fluff: A quick and easy dessert salad that’s light, creamy, and bursting with fruity flavors and mini marshmallows, perfect for a casual side.
- Speckled Egg Easter Cake: A beautifully decorated cake resembling a robin’s egg, perfect as a show-stopping centerpiece for your Easter dessert table.
- Cream Cheese Mints: Sweet, refreshing, and incredibly easy to make, these melt-in-your-mouth mints can be tinted with pastel colors for a charming holiday touch.
- Bunny Bait Snack Mix: A fun, sweet, and salty mix with popcorn, pretzels, candies, and white chocolate, ideal for snacking or as an edible gift.
Easter Magic Cookie Bars Recipe
Print Recipe
Pin Recipe
Easter Magic Cookie Bars
Ingredients
- 2 ½ cups vanilla wafer crumbs ~ 70 cookies
- 12 tablespoons salted butter 1 ½ sticks, melted
- ¾ cup quick oats optional
- 1 ¼ cups milk chocolate chips or semi-sweet chocolate chips
- 1 ¼ cups peanut butter chips
- ½ cup sweetened coconut flakes
- 14 ounces sweetened condensed milk
- ¾ cups Chocolate Easter Eggs roughly chopped (I used Cadbury Eggs)
Instructions
-
Preheat the oven to 350°F.
-
Prepare a 9×13 inch baking dish by lightly greasing with non-stick cooking spray and lining it with parchment paper. Set aside.
-
Combine the vanilla wafer crumbs and melted salted butter in a medium bowl and mix well to combine.2 ½ cups vanilla wafer crumbs, 12 tablespoons salted butter
-
Create the crust by pressing the vanilla wafer mixture into the bottom of the prepared baking dish. There is no need to go up the sides, just create an even layer on the bottom of the pan.
-
Sprinkle the quick oats evenly over the crust.¾ cup quick oats
-
Add a layer of the milk chocolate chips followed by the peanut butter chips. Disperse these as evenly as possible as well.1 ¼ cups milk chocolate chips, 1 ¼ cups peanut butter chips
-
Sprinkle the coconut flakes on top of the chips.½ cup sweetened coconut flakes
-
Pour the sweetened condensed milk evenly over the top and finish with the chocolate eggs.14 ounces sweetened condensed milk, ¾ cups Chocolate Easter Eggs
-
Bake in the oven for 18 to 20 minutes or until the coconut flakes start to brown and the chocolate eggs split open.
-
Remove from the oven and let cool completely.
-
When ready to serve, pull the dessert out with the parchment paper to make it easier to cut into bars. Serve at room temperature.
Notes
Storage Information:
Cover these tightly and store at room temperature for 2 to3 days. After that, they need to go in the refrigerator and will last for about 7 days.
To Freeze: Cut into individual bars and wrap in plastic wrap and then transfer to a freezer safe ziploc bag. They will last up to 3 months and can be thawed at room temperature.