
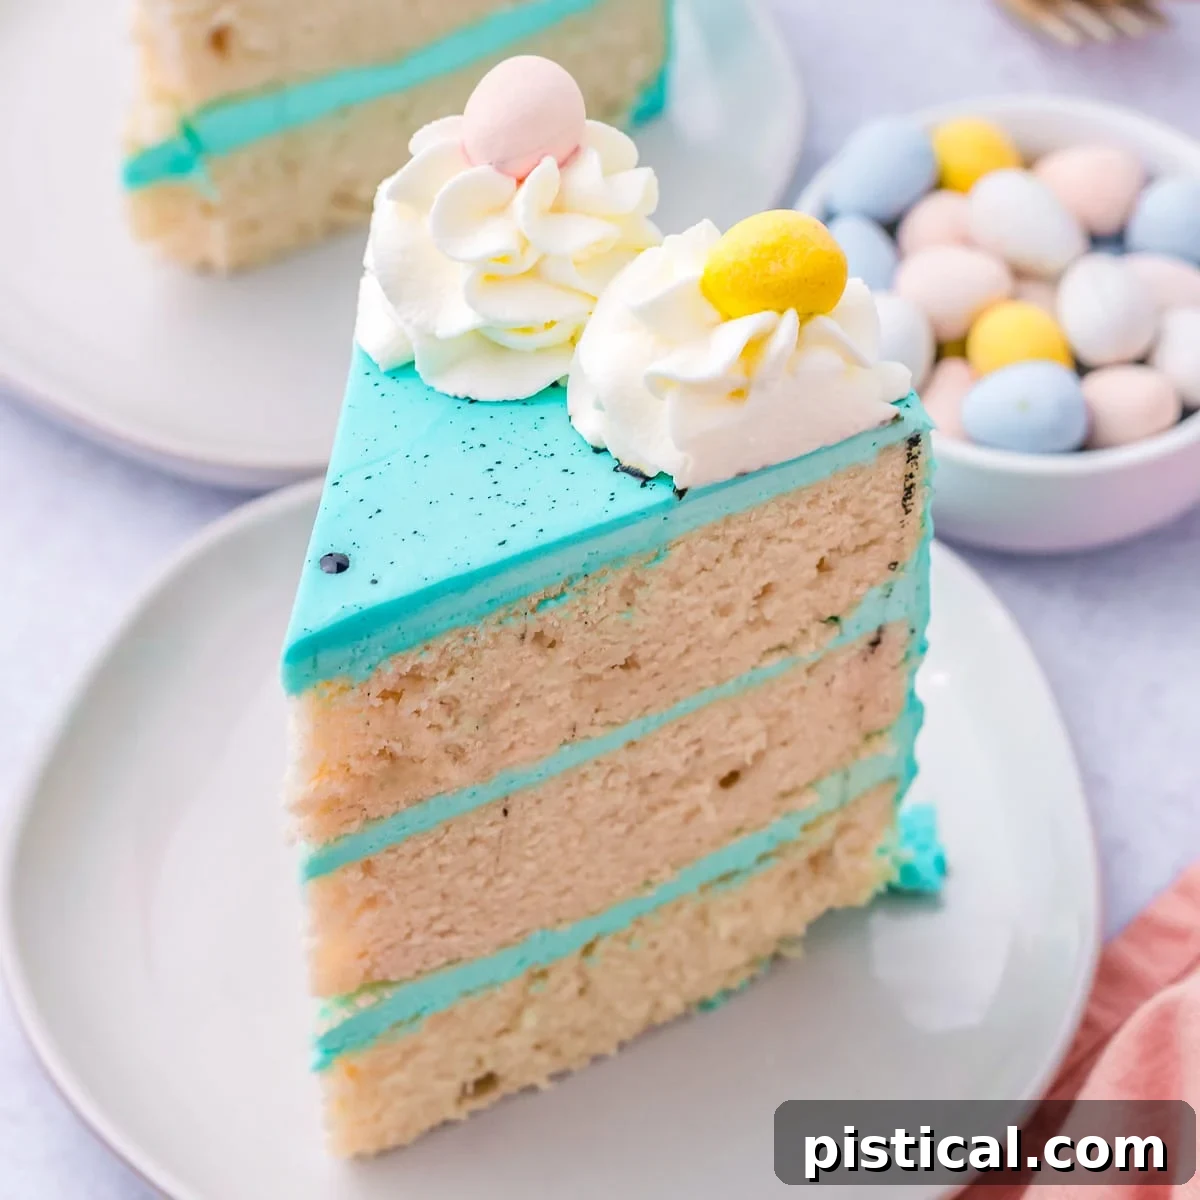
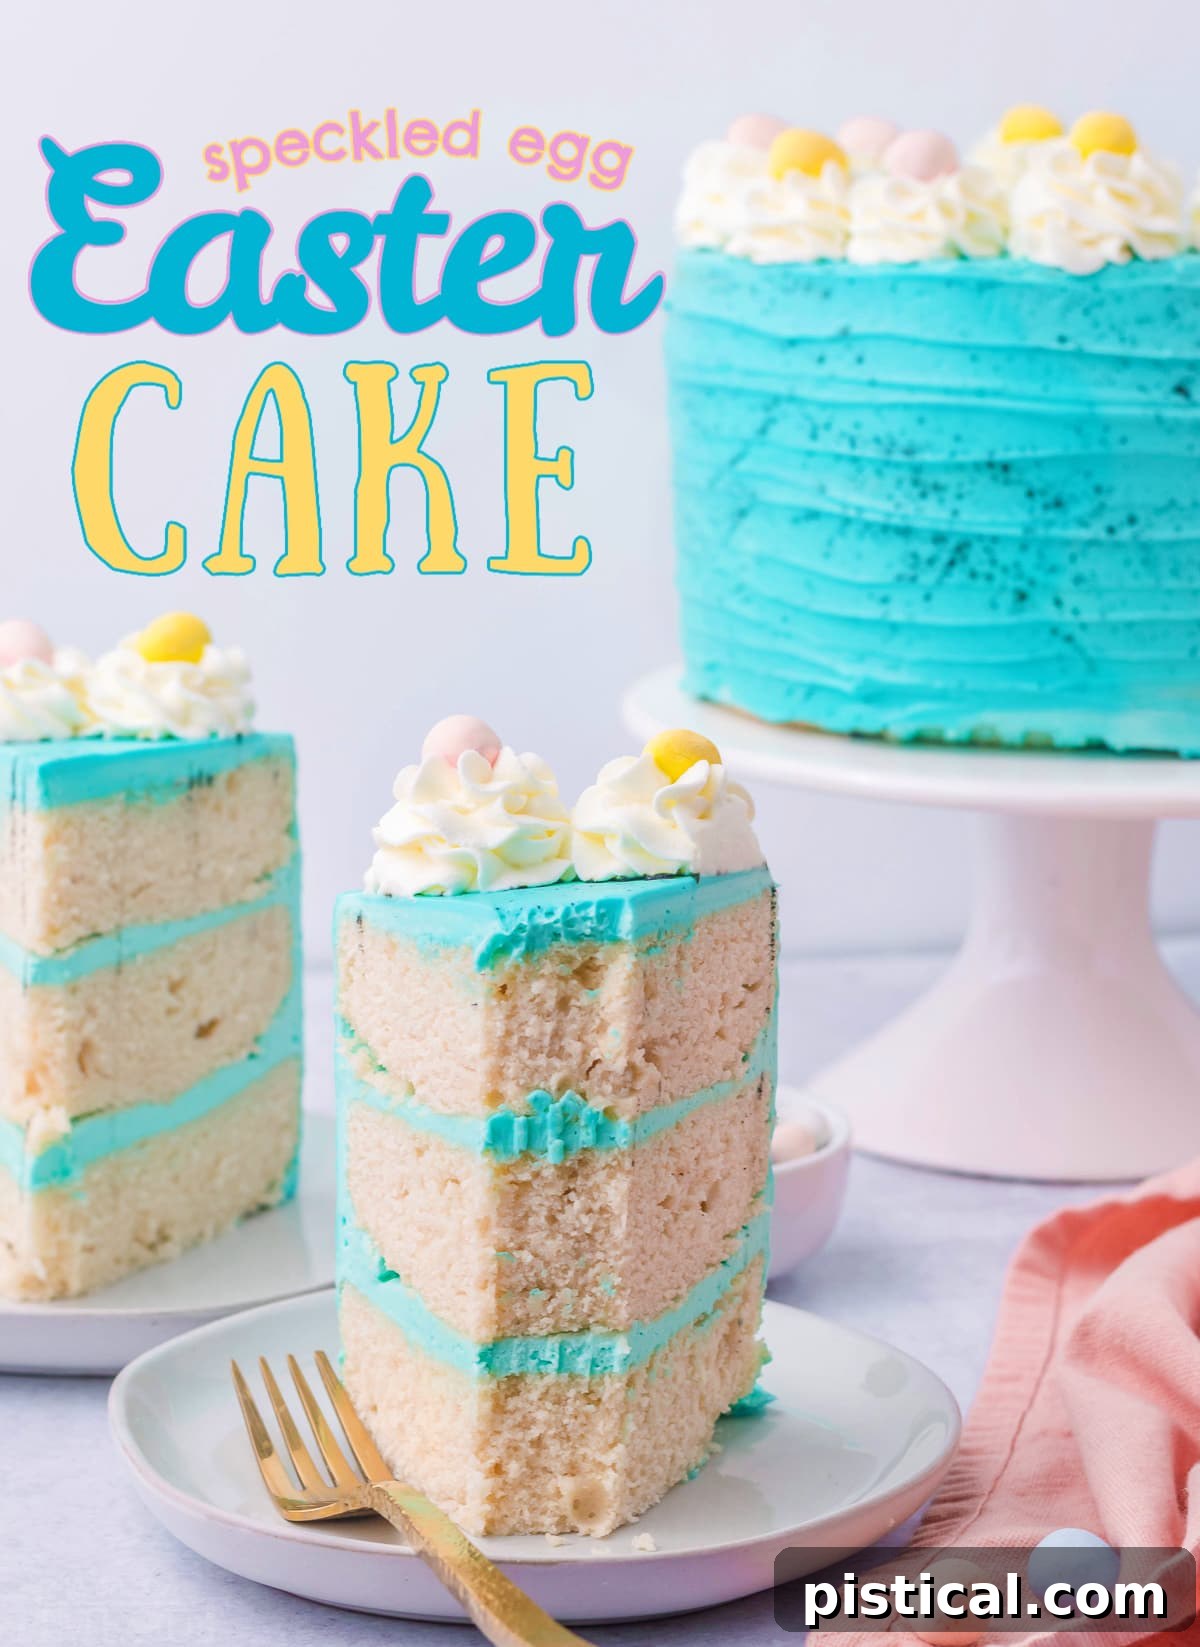
This speckled egg Easter Cake isn’t just pretty, it’s also incredibly delicious! This Easter will be even more special when you serve this truly beautiful layered vanilla cake with easy vanilla buttercream! If you love Easter as much as I do, then one dessert just won’t cut it… Make a Coconut Cream Pie and a batch of Easter Cookies too!
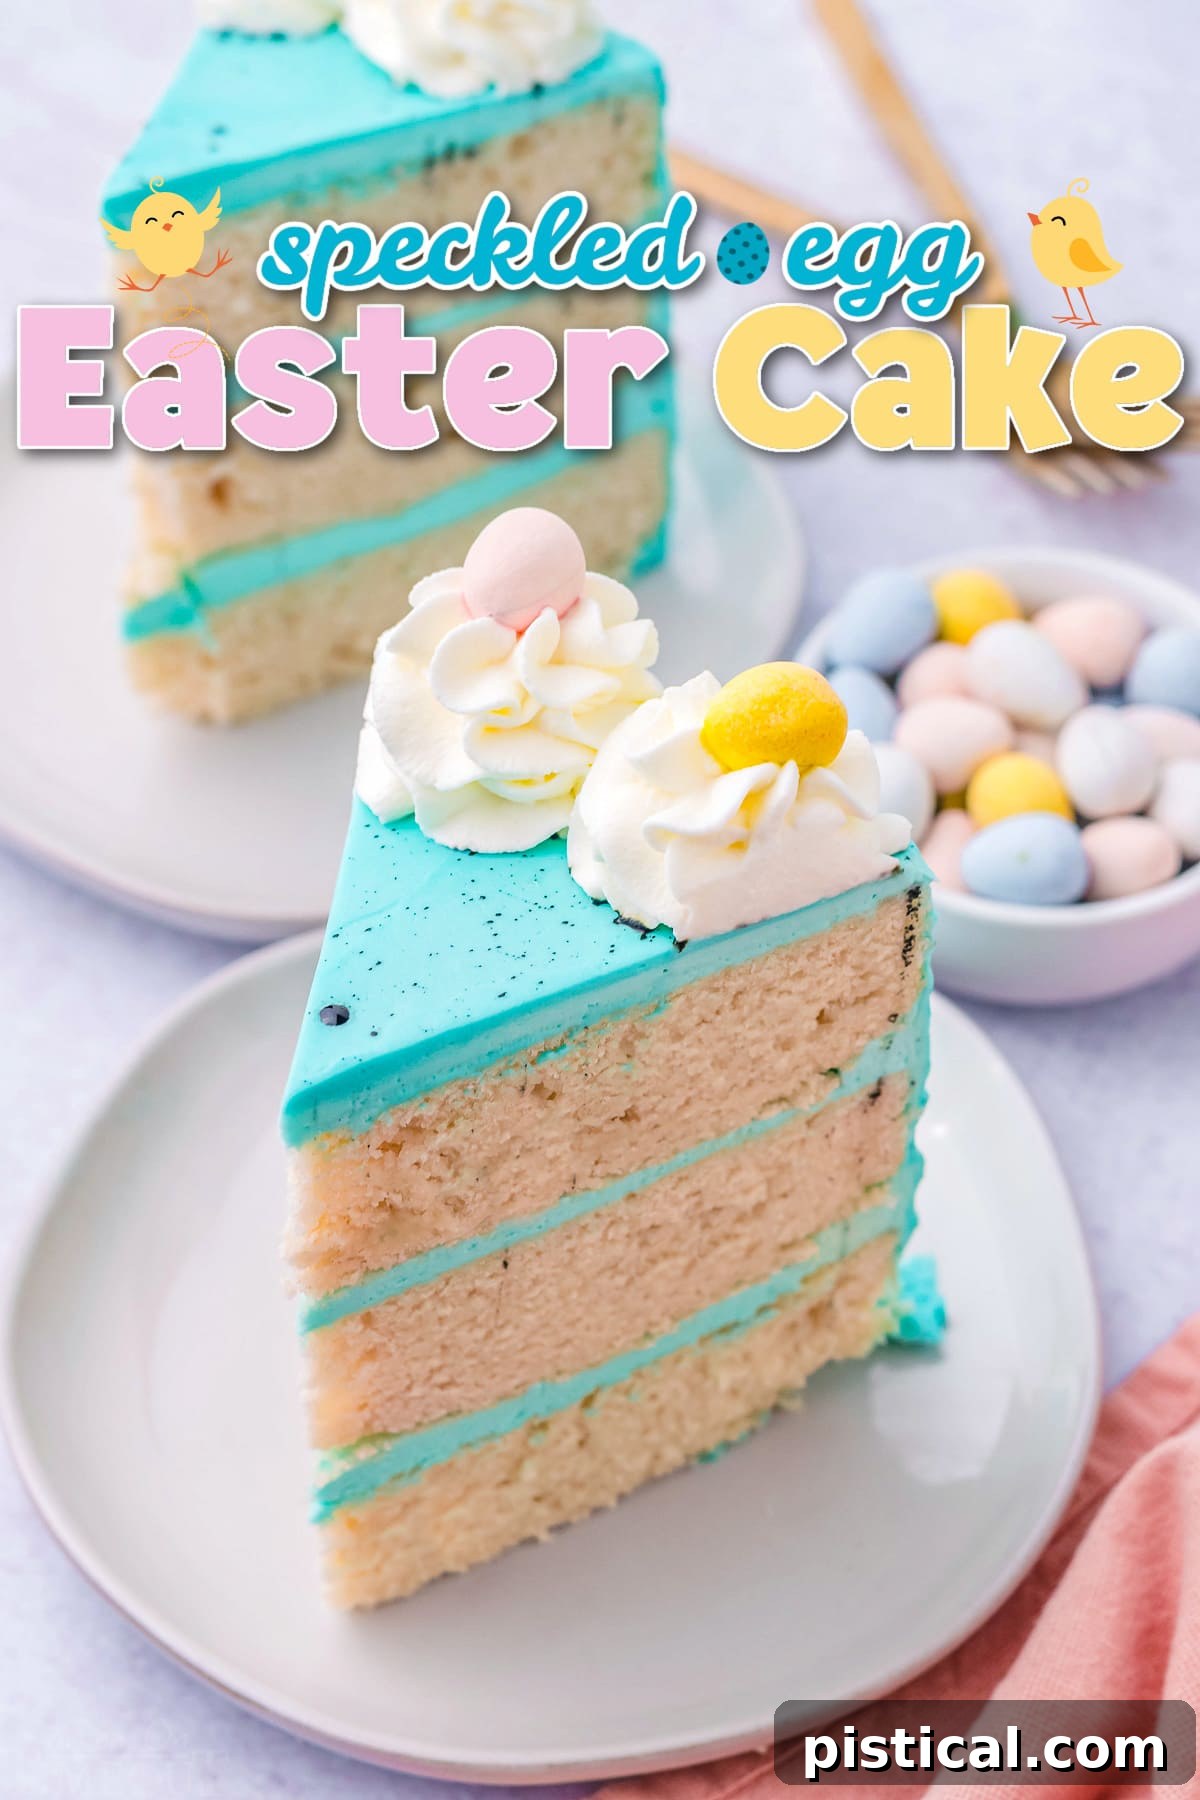
As the days grow longer and hints of spring emerge, our thoughts naturally turn to Easter – a time of renewal, joy, and, of course, delightful treats! While all Easter candy holds a special place in our hearts, those charming speckled eggs truly capture the essence of the season for me. They’re not just a tasty indulgence; they’re the vibrant inspiration behind this show-stopping dessert. This delicious Speckled Egg Easter Cake isn’t merely a cake; it’s a festive centerpiece, a celebration in layers of soft vanilla cake and smooth vanilla buttercream. Its impressive presentation makes it a standout amongst all other Easter cake ideas. Get ready to impress your family and friends with a dessert that’s as beautiful to behold as it is delightful to eat.
So, gather your favorite bag of mini Cadbury Eggs, and prepare to create the cutest and most delicious Easter cake ever. This easy-to-follow recipe ensures that even novice bakers can achieve stunning results, making your Easter celebrations truly unforgettable!
More Delicious Easter Desserts to Brighten Your Celebration
Easter Sunday is a wonderful occasion for indulging in a variety of sweet treats. While our show-stopping Speckled Egg Easter Cake will undoubtedly be the star, offering a selection of other delightful desserts ensures there’s something for everyone. From light and fluffy confections to rich, classic bakes, these Easter favorites will complete your festive spread and leave your guests wanting more. Consider adding these crowd-pleasing recipes to your holiday menu:
- Three Minute Easter Fluff: A quick and airy dessert that’s perfect for a light, fruity touch.
- Easter Cookies: Fun to decorate and a treat for all ages, these cookies add a playful element.
- To Die For Carrot Cake: A timeless classic, this moist and spiced cake with cream cheese frosting is a must-have for many Easter tables.
- Coconut Cream Pie: Creamy, tropical, and utterly decadent, a perfect alternative for coconut lovers.
- Watergate Salad: A nostalgic and vibrant green treat that adds a unique flavor and texture to your dessert table.
Essential Ingredients for Your Perfect Speckled Egg Easter Cake
Crafting this stunning Speckled Egg Easter Cake begins with selecting the right ingredients. For this recipe, we’re focusing on a classic vanilla cake paired with a luxurious vanilla buttercream, providing a universally loved flavor profile that truly shines. However, feel free to get creative and adapt the flavors to suit your personal preferences. The full, printable recipe with precise measurements can be found in the recipe card at the bottom of this post, but let’s dive into what you’ll need to create this festive masterpiece.
For the Fluffy Vanilla Cake Layers:
- All-Purpose Flour: The foundation of our cake. Bleached, all-purpose flour is recommended for its consistent texture, resulting in a tender and light crumb. Sifting your flour can also help prevent lumps and ensure an even distribution in the batter.
- Baking Powder: This essential leavening agent is what gives your cake its beautiful rise and airy texture. Ensure your baking powder is fresh for optimal results; an old leavening agent can lead to a dense, flat cake.
- Salt: A crucial flavor enhancer, just a small dash of salt balances the sweetness of the sugar and deepens the overall vanilla flavor of the cake, making it more complex and delicious.
- Unsalted Butter: Creamy, room-temperature unsalted butter is key for creating a tender crumb and rich flavor. Make sure it’s softened but not melted, as this impacts the creaming process and aeration. If using salted butter, reduce the added salt in the recipe accordingly.
- Granulated Sugar: Plain white granulated sugar is perfect for achieving both the desired sweetness and a fine, consistent texture in the cake. It also contributes to the cake’s golden crust and moist interior.
- Egg Whites: Using only egg whites gives this vanilla cake its signature pure white color and contributes significantly to its light, ethereal lift. Separating eggs carefully to avoid any yolk contamination is important. Don’t discard the leftover yolks! They can be used to make delightful treats like homemade lemon curd or rich custards.
- Pure Vanilla Extract: This is where the “vanilla” in vanilla cake truly comes to life! Use a high-quality pure vanilla extract for the most authentic and amazing flavor. Avoid imitation vanilla for the best taste.
- Whole Milk: Whole milk provides essential moisture and richness to the cake batter, contributing to a wonderfully tender and flavorful result. Its fat content helps create a more decadent and moist cake compared to lower-fat milk alternatives.
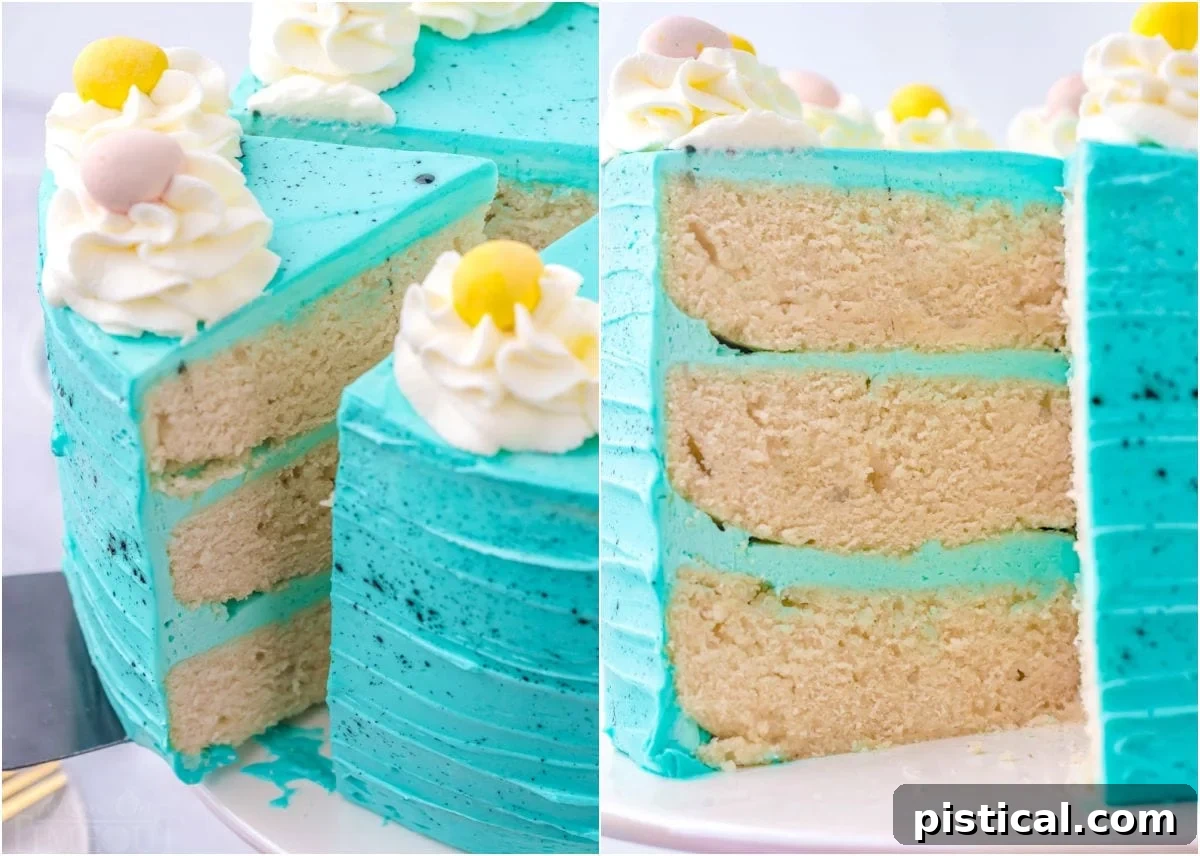
For the Velvety Vanilla Buttercream and Festive Decorations:
- Salted Butter: For the buttercream, softened salted butter provides a beautiful balance to the sweetness of the powdered sugar. If you only have unsalted butter on hand, simply add about ½ teaspoon of fine salt to the frosting mixture.
- Powdered Sugar (Confectioners’ Sugar): Absolutely essential for a smooth, lump-free buttercream frosting. This cannot be substituted with granulated sugar, as its fine texture is what gives buttercream its characteristic silky consistency. Sifting it before use can help prevent lumps.
- Pure Vanilla Extract: Just like in the cake, a generous amount of high-quality vanilla extract is necessary to infuse the buttercream with that irresistible, classic vanilla flavor.
- Heavy Whipping Cream: This is the “secret ingredient” for achieving a truly thick, creamy, and wonderfully pipeable buttercream frosting. It adds richness and helps create that light, whipped consistency we all adore. You can adjust the amount slightly to reach your desired consistency.
- Food Coloring: To replicate the stunning look of our cake, you’ll need a vibrant teal food coloring (gel food coloring provides the best, most intense color without thinning your frosting). Pink and yellow are also lovely choices for an Easter theme. Additionally, black or a very dark food coloring is required for creating the charming speckled effect.
- Mini Cadbury Eggs: These delightful, candy-coated chocolate eggs are the PERFECT cake toppers, adding a whimsical touch and an extra burst of chocolatey goodness that everyone will love. Their speckled shells perfectly complement the cake’s design.
- Whipped Cream or Additional Buttercream: For the delicate swirls on top of the cake, you can either prepare a batch of homemade whipped cream (light and airy) or make a half batch of the vanilla buttercream without adding any food coloring. This provides a beautiful contrast to the colored frosting and creates a lovely base for the Cadbury eggs.
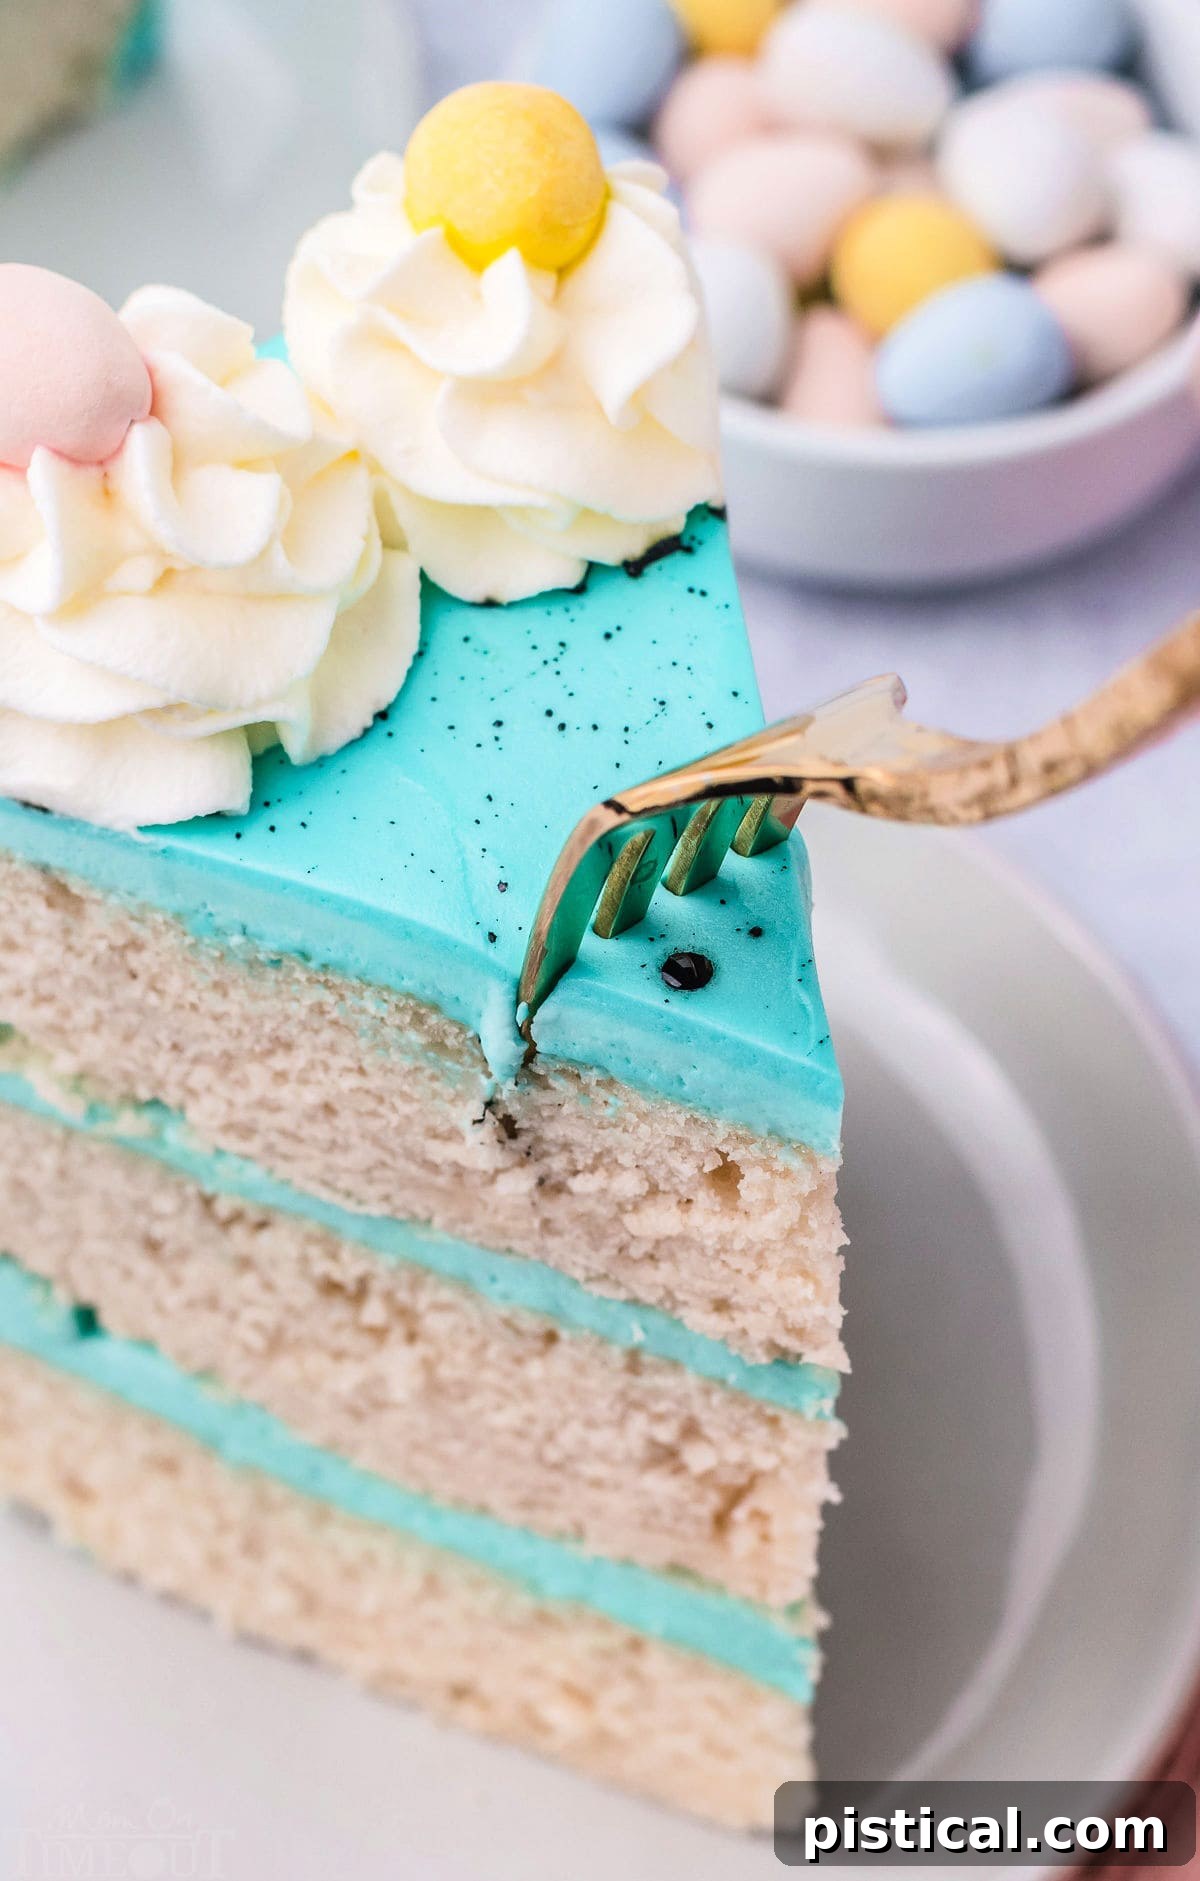
How To Craft the Most Beautiful Speckled Egg Easter Cake
Creating a visually stunning cake like this Speckled Egg Easter Cake might seem daunting at first glance, but don’t let its impressive appearance intimidate you! The process is surprisingly straightforward, breaking down into simple, manageable steps. With a little patience and attention to detail, you’ll be amazed at the professional-looking results you can achieve. Let’s walk through how to whip up this charming Easter centerpiece.
Part 1: Baking the Perfect Vanilla Cake Layers
- Prepare Your Pans and Preheat Oven: Start by preheating your oven to 350°F (175°C). This ensures the oven is at the correct temperature when your cake batter is ready to go in, leading to even baking. Generously grease three 8-inch round cake pans with shortening or butter, then dust them lightly with all-purpose flour, tapping out any excess. This creates a non-stick barrier, preventing your beautiful cake layers from sticking.
- Combine Dry Ingredients: In a large mixing bowl, whisk together the measured flour, baking powder, and salt. Whisking ensures these ingredients are thoroughly combined and evenly distributed, which is crucial for uniform leavening and flavor throughout the cake. Set this mixture aside.
- Cream Butter and Sugar: In the bowl of a stand mixer fitted with the paddle attachment, cream together the softened butter and granulated sugar on medium-high speed. Beat them for 2-3 minutes until the mixture is light, fluffy, and pale in color. This creaming process incorporates air into the mixture, which is vital for a light and tender cake crumb.
- Incorporate Egg Whites: Add the room-temperature egg whites to the creamed butter and sugar, one at a time, mixing well after each addition until just combined. Avoid overmixing here, as we want to maintain the air incorporated during the creaming stage.
- Alternate Wet and Dry Ingredients: Begin by adding about one-third of your dry ingredient mixture to the butter mixture, mixing on low speed until just combined. Then, add half of the milk, mixing until incorporated. Repeat this process, finishing with the last third of the dry ingredients. Remember to start and end with the dry ingredients. This alternating method helps prevent gluten from overdeveloping, which can lead to a tough cake. Mix only until no streaks of flour remain.
- Ensure Even Mixing: Periodically stop the mixer and use a spatula to scrape down the sides and bottom of the bowl. This ensures all ingredients are fully incorporated into the batter, preventing any pockets of unmixed flour or butter, and guaranteeing a smooth, consistent batter free of lumps.
- Distribute Batter Evenly: Divide the cake batter as evenly as possible among your three prepared cake pans. For precise results, you can use a kitchen scale to weigh the batter in each pan. Gently drop the filled pans onto the counter a few times from a short height. This helps to release any trapped air bubbles, leading to a denser, more uniform cake structure and preventing large air pockets.
- Bake to Golden Perfection: Transfer the cake pans to your preheated oven and bake for approximately 30 to 35 minutes. Baking time can vary, so start checking at 30 minutes. The cakes are done when a wooden skewer or toothpick inserted into the center comes out clean or with a few moist crumbs attached.
- Cool Completely: Once baked, remove the cakes from the oven and allow them to cool in their pans for about 10-15 minutes. This allows the cakes to firm up slightly, making them easier to handle. Then, carefully invert them onto a wire cooling rack to cool completely. Attempting to frost warm cakes will result in melted frosting and a messy cake!
Part 2: Whipping Up the Silky Vanilla Buttercream Frosting
- Cream the Butter: In the clean bowl of a stand mixer fitted with the paddle attachment, add the softened butter. Cream it on medium speed for 2 to 3 minutes until it becomes light, fluffy, and noticeably smoother. This step is vital for a light and airy buttercream.
- Gradually Add Powdered Sugar: With the mixer on low speed, gradually add the powdered sugar, one cup at a time, allowing each addition to fully combine before adding the next. This prevents a cloud of sugar from engulfing your kitchen! Continue until all the sugar is incorporated and the mixture is thick.
- Add Liquid and Flavor: Pour in the heavy whipping cream and vanilla extract. Mix on low speed until everything is just incorporated. Then, increase the speed to high and beat for 1 to 2 minutes. This high-speed mixing creates that desired whipped, fluffy consistency, making your buttercream irresistibly smooth and pipeable.
- Color Your Frosting: Add 1 to 2 drops of your chosen teal (or pink/yellow) gel food coloring to the buttercream. Mix on low speed until the color is evenly distributed and you achieve your desired vibrant hue. Remember, gel food coloring is highly concentrated, so start with a small amount and add more if needed.
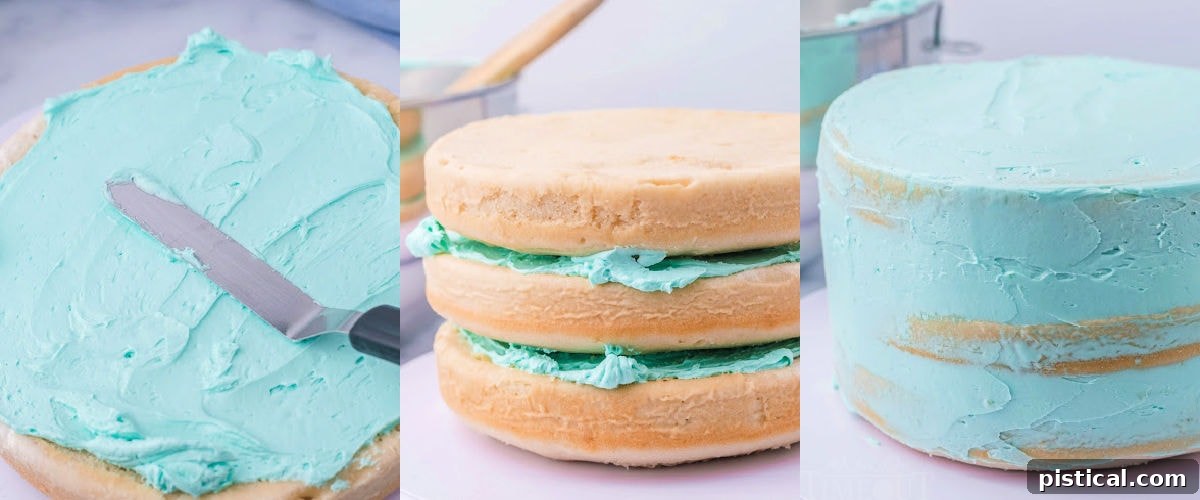
Part 3: Assembling and Decorating Your Stunning Easter Cake
- Level Your Cake Layers: For a perfectly even and professional-looking cake, it’s important to level each cooled cake layer. Use a sharp serrated knife or a dedicated cake leveler to carefully slice off any domed tops. This creates flat surfaces that stack neatly. A cake turntable can be incredibly helpful for achieving smooth, even cuts and frosting application.
- Stack and Fill Layers: Place your first leveled cake layer, top-side down (the flat side against your serving tray or turntable), on your chosen serving platter. Dollop approximately 1/3 cup of the colored buttercream frosting onto this layer and spread it evenly to the edges. Repeat this process with the remaining two cake layers, ensuring each layer is neatly stacked and filled.
- Apply the Crumb Coat: Take about half of the remaining buttercream and use it to cover the entire cake – top and sides – with a thin, even layer. This is called a “crumb coat,” and its purpose is to trap any loose crumbs, preventing them from mixing into your final layer of frosting and ensuring a smooth, clean finish. Place the crumb-coated cake in the refrigerator for 15 to 20 minutes to allow this layer to set up and firm.
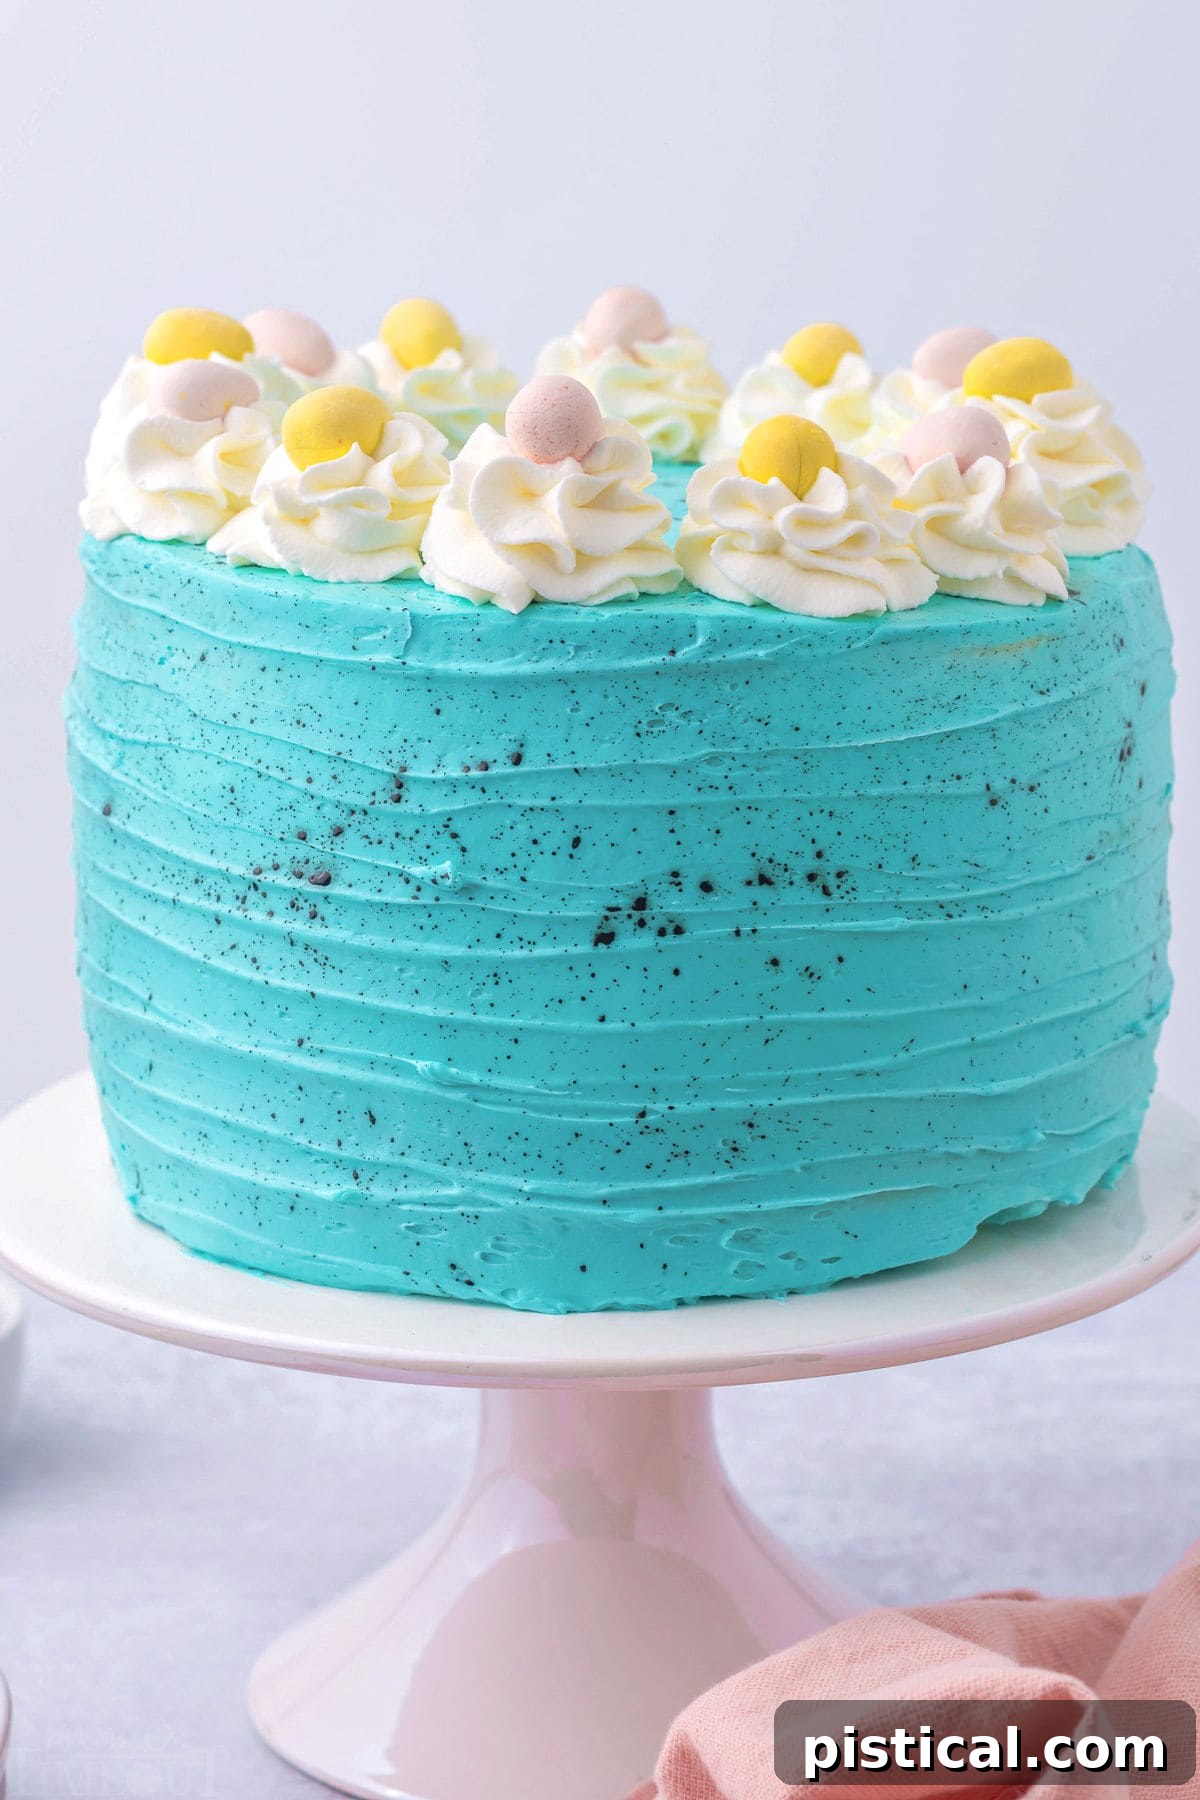
- Apply the Final Frosting Layer: Once the crumb coat is firm, remove the cake from the refrigerator. Use the remaining buttercream to cover the cake completely, smoothing it out with an offset spatula or bench scraper. For added texture, you can create a decorative swirl or striped effect by holding your spatula against the side of the cake and slowly spinning the turntable while dragging the spatula upwards.
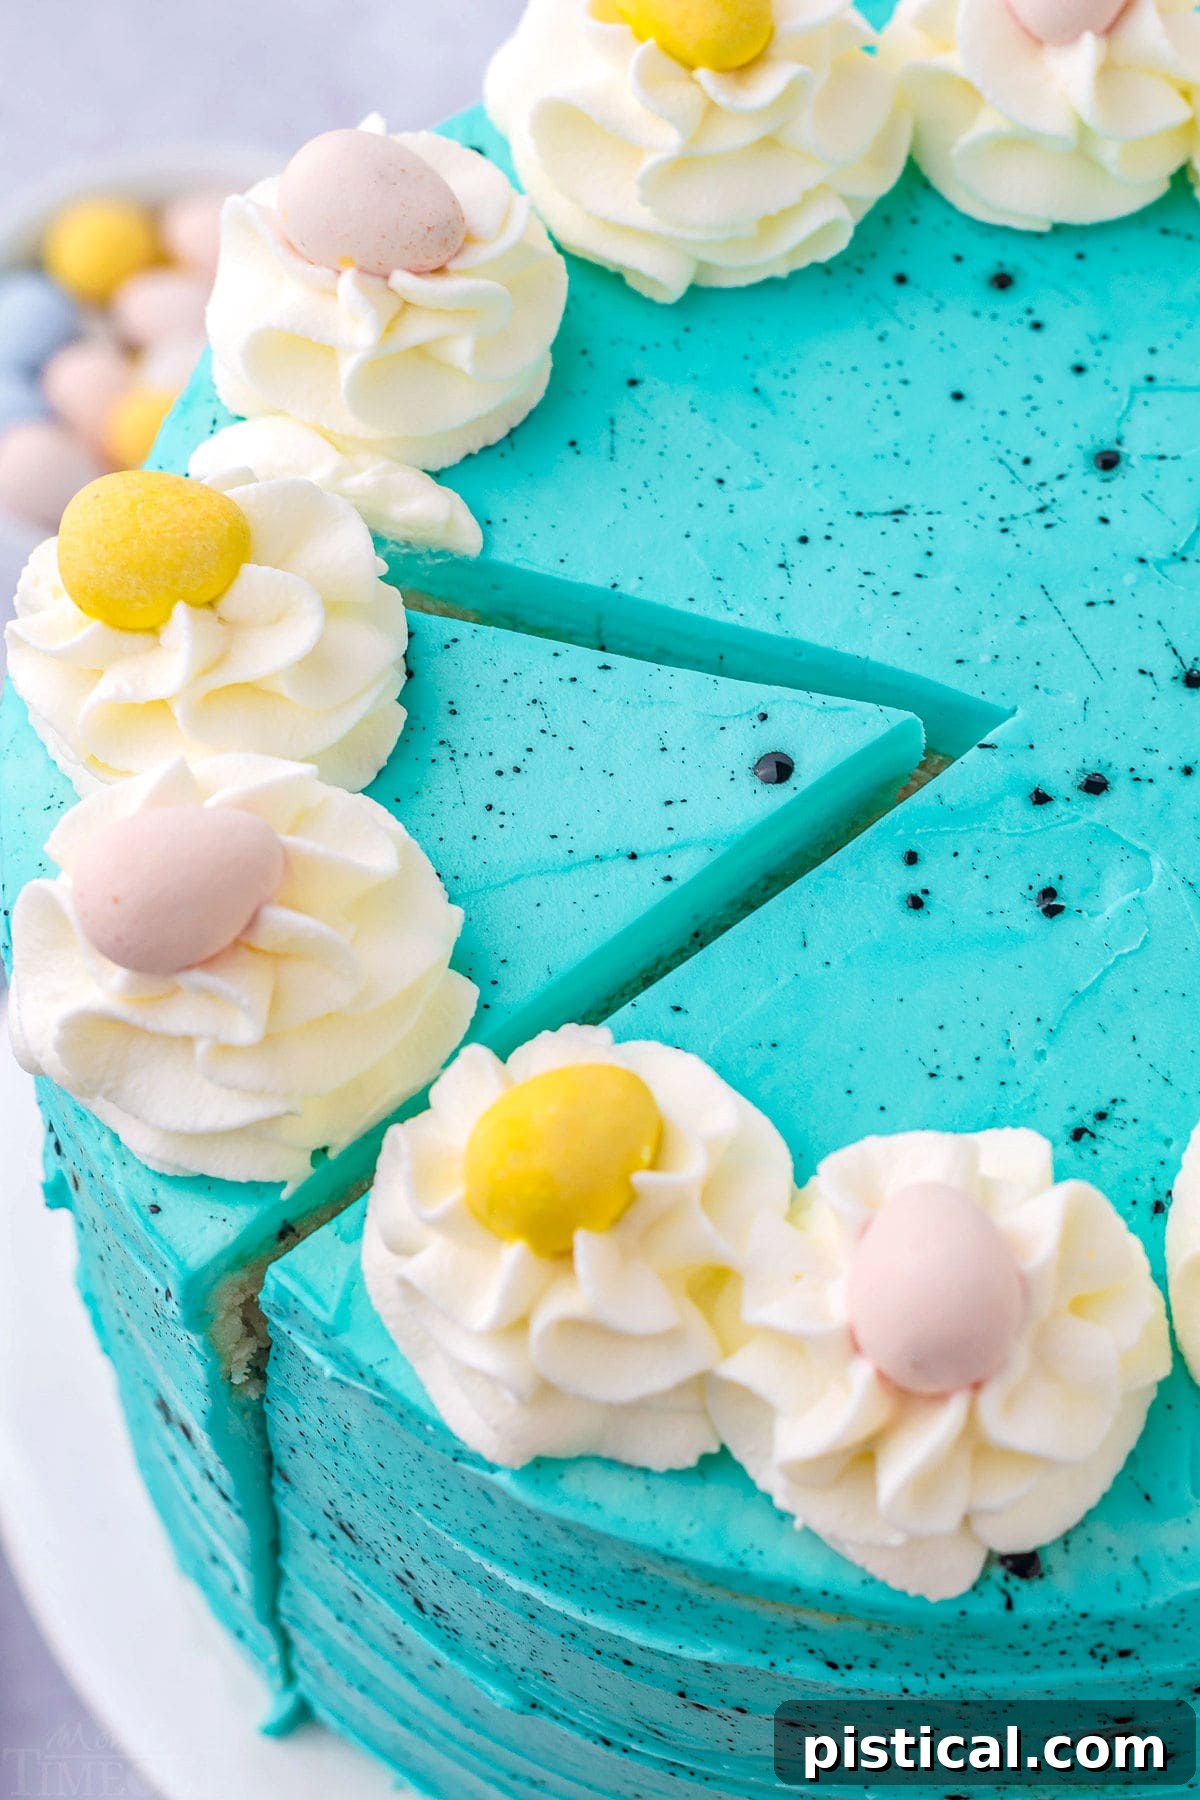
- Create the Iconic Speckled Effect: This is the fun part that gives your cake its unique charm! Dip a food-safe paint brush (or a clean, stiff-bristled brush) into black or very dark food coloring. Holding the brush a few inches away from the cake, gently tap or flick the bristles with your finger to “sling” tiny speckles of color onto the frosted surface. CAUTION: This process can be messy! Lay down plenty of paper towels or newspaper around your work area to protect your countertops, and consider wearing gloves and an apron to protect your clothes. Rinse your tools immediately after use to prevent staining.
- Final Embellishments: Just before you’re ready to serve your stunning Speckled Egg Easter Cake, pipe decorative swirls of white whipped cream or uncolored buttercream around the top edge of the cake. These elegant swirls provide a lovely contrast and create perfect nests for your mini Cadbury Eggs. Arrange the Cadbury Eggs artfully on top of the piped swirls, and your masterpiece is complete!
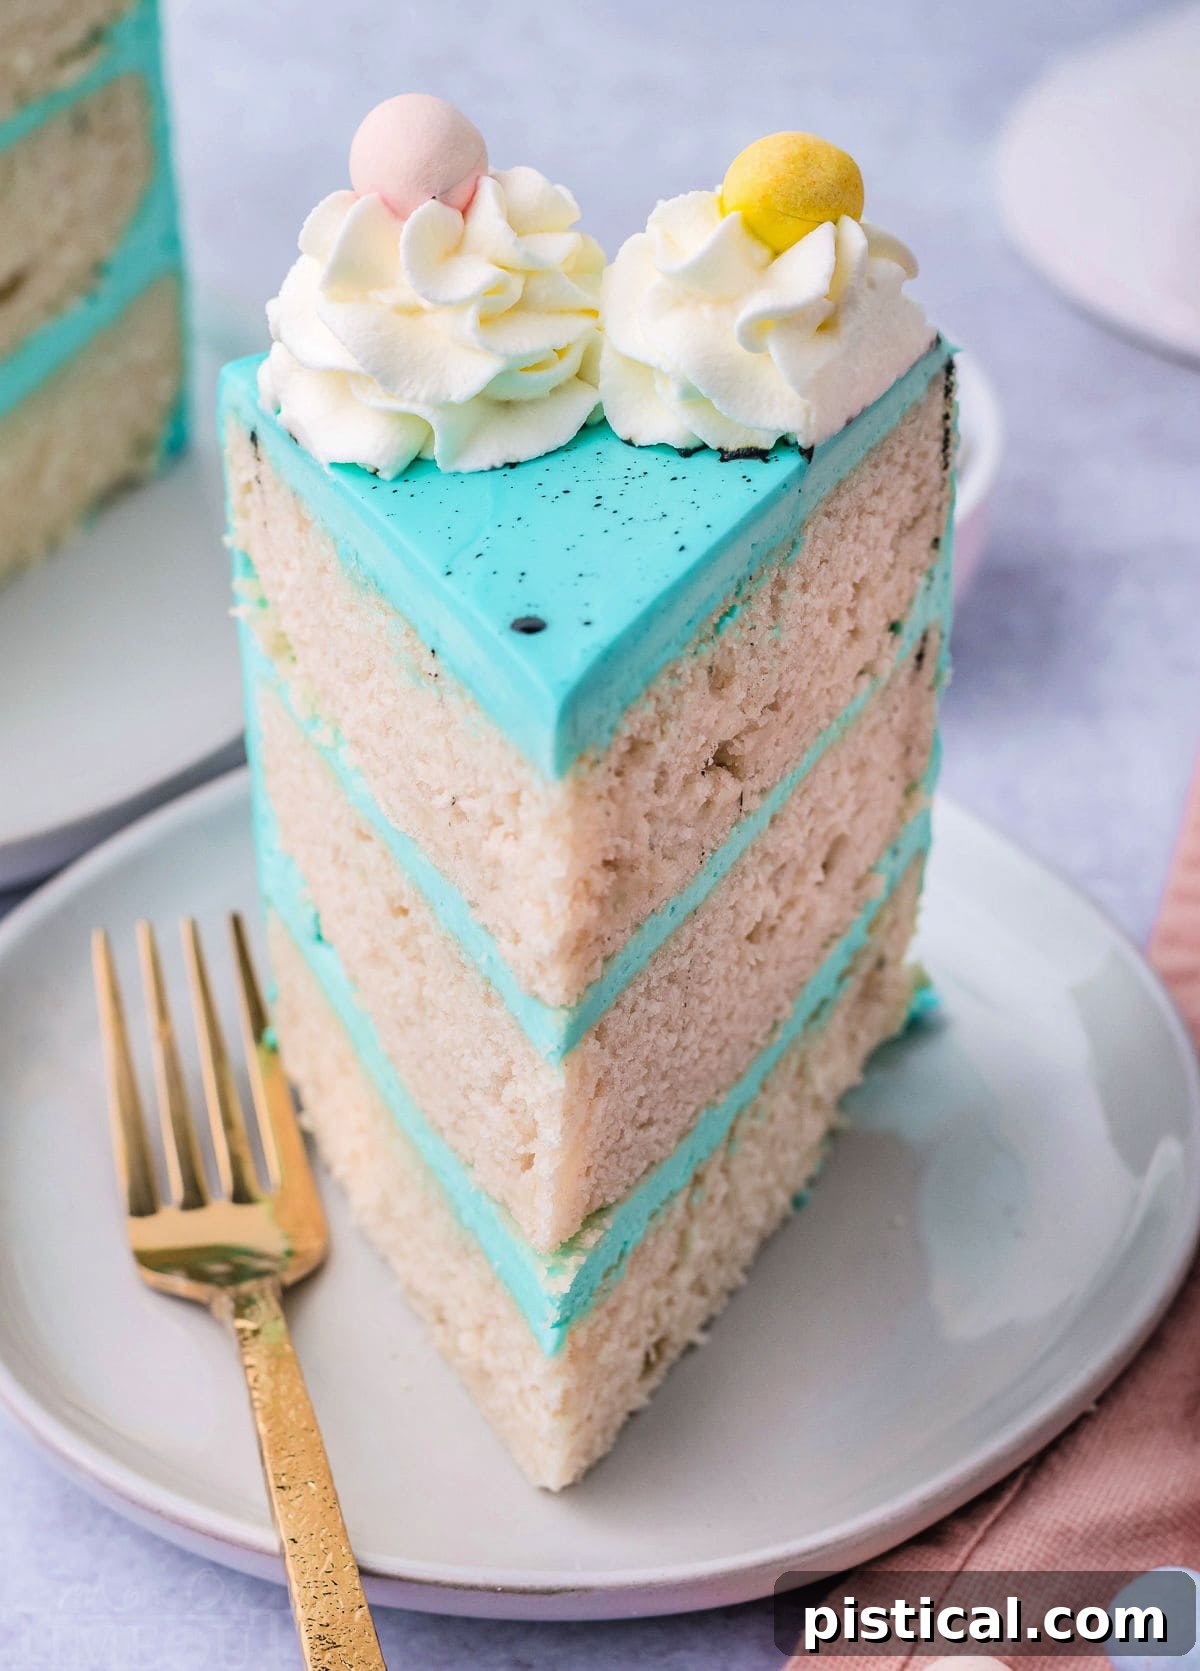
Frequently Asked Questions About Your Easter Cake
Here are some common questions and helpful tips to ensure your Speckled Egg Easter Cake turns out perfectly and stays delicious:
How do I store my leftover Easter cake?
To keep your homemade Easter cake fresh and prevent it from drying out, it’s essential to store any leftover slices properly. Place them in an airtight container to protect them from air exposure. Store the container in the refrigerator, where your cake will remain fresh and delicious for up to 3 days. For the best flavor and texture, always allow the cake to come to room temperature for about 30 minutes before serving.
Can I make this Easter cake ahead of time?
Absolutely! This cake is excellent for making ahead. You can bake the cake layers up to 2-3 days in advance. Once cooled, wrap them tightly in plastic wrap and store them at room temperature (or in the freezer for longer storage). The buttercream can also be made 2-3 days ahead and stored in an airtight container in the refrigerator. Before using, bring the buttercream to room temperature and re-whip it for a few minutes until smooth and fluffy again. Assemble and decorate the cake the day before or on the day of your event for optimal freshness.
How can I add extra texture to my cake’s frosting?
Adding texture to your frosting is a simple way to elevate the visual appeal of your Easter cake. To achieve the beautiful vertical streaks seen in some of our images, simply take an offset spatula and hold it gently against the side of your freshly frosted cake. While slowly rotating the cake on a turntable, carefully drag the spatula upwards. This creates elegant, subtle lines. You can also use a textured cake comb for more defined patterns, or create whimsical swirls with the back of a spoon.
What if my buttercream is too thick or too thin?
Buttercream consistency can be easily adjusted. If your buttercream is too thick, add heavy whipping cream (or milk) one teaspoon at a time, mixing well after each addition, until it reaches the desired smooth, spreadable consistency. If it’s too thin, gradually add more powdered sugar, one tablespoon at a time, mixing thoroughly until it thickens. Be patient and make small adjustments to get it just right.
Can I make cupcakes instead of a layered Easter cake?
Yes, absolutely! This versatile vanilla cake recipe works wonderfully for cupcakes. Simply divide the batter among lined muffin tins, filling each about two-thirds full. Bake for approximately 18-22 minutes, or until a toothpick inserted into the center comes out clean. This recipe should yield about 24 festive Easter cupcakes, perfect for individual servings.
Explore More Fabulous Cake Recipes
If you’ve enjoyed baking and decorating this delightful Speckled Egg Easter Cake, you’re in for a treat! Our collection of cake recipes offers something for every occasion and palate. From rich chocolate indulgences to refreshing fruity bakes, expand your baking repertoire with these incredible creations:
- To Die for Carrot Cake: A truly exceptional version of the classic, moist, and spiced carrot cake.
- Peanut Butter Icebox Cake: A no-bake dream for peanut butter lovers, perfect for warmer days.
- Cookies and Cream Oreo Cake: A delightful cake packed with everyone’s favorite cookie flavor.
- Chocolate Pound Cake: Rich, dense, and deeply chocolatey, a comforting classic.
- Chocolate Peanut Butter Ice Cream Cake: The ultimate frozen dessert combining two irresistible flavors.
- No Bake Banana Cream Pudding Cheesecake: A creamy, dreamy dessert with minimal effort.
- Strawberry Shortcake Roulade: An elegant rolled cake with fresh strawberries and cream.
- Easy Ice Cream Cake: Simple to assemble and customize, ideal for any celebration.
Speckled Egg Easter Cake Recipe
Speckled Egg Easter Cake
This speckled egg Easter Cake isn’t just pretty, it’s also incredibly delicious! This Easter will be even more special when you serve this truly beautiful layered vanilla cake with easy vanilla buttercream frosting! The perfect Easter dessert!
Course: Dessert | Cuisine: American | Keyword: easter cake, layer cake, vanilla buttercream, vanilla cake
Prep Time: 30 minutes | Cook Time: 30 minutes
Servings: 12 | Calories: 879kcal | Author: Trish – Mom On Timeout
Ingredients
Vanilla Cake
- 4 ¼ cup all-purpose flour
- 1 ½ tablespoons baking powder
- ¾ teaspoon salt
- 1 cup salted butter, softened
- 1 ½ cups granulated sugar
- 8 egg whites, room temperature
- 1 tablespoon vanilla extract
- 2 cups milk
Vanilla Buttercream Frosting and Toppings
- 2 cups salted butter, softened (4 sticks)
- 4 to 5 cups powdered sugar
- 2 teaspoons vanilla extract
- 4 to 5 tablespoons heavy whipping cream
- 1 to 2 drops teal food color
- black food color – liquid (If you have gel, just add vodka, Everclear, or clear vanilla extract to the gel)
- Mini Cadbury eggs
- whipped cream (optional – additional buttercream may be used instead, just make up 1/2 batch and don’t color. See notes below.)
Instructions
Vanilla Cake
- Preheat your oven to 350°F (175°C) and prepare three 8” cake pans by rubbing generously with vegetable shortening (or butter) and dusting with flour. Set aside. You can also use nonstick spray with flour in it.
- In a large bowl, whisk together the flour, baking powder, and salt. Set aside.
- In a large glass liquid measuring cup or small bowl, stir together the milk and vanilla. Set aside.
- In the bowl of a stand mixer equipped with a paddle attachment, cream the butter and sugar until light and fluffy. Add the egg whites one at a time and mix until just combined.
- Alternate adding the dry ingredients and milk to the butter mixture, starting and ending with dry ingredients. (NOTE: Be careful not to overmix, or you will end up with a very dense cake.)
- Scrape the sides and bottom of the bowl and make sure all of the ingredients are incorporated and there are no lumps.
- Divide the batter evenly between the prepared cake pans and drop the pans on the counter a couple times to release any air bubbles.
- Bake for 30 to 35 minutes or until a toothpick inserted into the center of each cake comes out clean or with a few moist crumbs.
- Allow the cakes to cool for about 10 minutes in the pan, then transfer the cake to a wire rack to cool completely.
Frosting:
- While the cakes are cooling, prepare your frosting by adding the butter into the bowl of a stand mixer and cream for 2 to 3 minutes until smooth.
- Add the powdered sugar one cup at a time, fully combining after each addition.
- Add the heavy cream and vanilla extract and mix on low speed until incorporated, then increase speed to high for 1 to 2 minutes or until you get a nice, whipped consistency. Add in your desired food color and mix until distributed evenly throughout the frosting.
Assembly:
- Level each cake by removing the domes with a sharp cake knife or cake level. You can use a cake turntable to help.
- Place one layer of cake top down on a serving tray and top with about 1/3 cup frosting and smooth. Continue with each layer of cake.
- Take half of the remaining frosting and cover the entire cake in a smooth crumb coat. Place the cake in the refrigerator for 15 to 20 minutes to allow frosting to set up.
- Cover the cake in the remaining frosting and smooth. (NOTE: I added a texture to my cake by taking my spatula and holding it to the side of the cake and spinning the cake on a turntable slowly dragging the spatula upward.)
- Once you have the cake covered, take the black food coloring on a food-safe paint brush, and sling the food color on the cake creating a “speckled” look. (CAUTION: this does get messy and the black stains EVERYTHING. I recommend laying down some paper towels on your work area and rinse your tools right after you use them. If possible, wear some gloves as well.)
- Just prior to serving, pipe swirls of whipped cream or additional buttercream and top with mini Cadbury eggs and serve!
- Place any leftovers in an airtight container and place in the refrigerator for up to three days. Bring the cake to room temperature before enjoying.
Notes
Place any leftovers in an airtight container and place in the refrigerator for up to three days. Bring the cake to room temperature before enjoying.
To create the white swirls for the Cadbury eggs, you can do one of the following:
Option 1: Make Whipped Cream
- 1 cup heavy whipping cream
- ¾ cup powdered sugar
- ½ teaspoon vanilla extract
- Chill the mixing bowl and whisk attachment in the freezer for 5 to 10 minutes.
- Pour heavy whipping cream into mixing bowl and beat on medium-high speed until the cream gets bubbly and starts to thicken. Add the vanilla extract.
- Gradually add the powdered sugar and continue beating on medium-high speed until stiff peaks form.
Option 2: Make a Half Batch of Buttercream Frosting
- 1 cup salted butter, softened
- 2 to 2 ½ cups powdered sugar
- 1 teaspoon vanilla extract
- 2 to 2 ½ tablespoons heavy whipping cream
- Prepare your frosting by adding the butter into the bowl of a stand mixer and cream for 2 to 3 minutes until smooth.
- Add the powdered sugar one cup at a time, fully combining after each addition.
- Add the heavy cream and vanilla extract and mix on low speed until incorporated, then increase speed to high for 1 to 2 minutes or until you get a nice, whipped consistency.
- Transfer frosting to a piping bag with your preferred piping tip and pipe directly onto the cake.
Nutrition
Calories: 879kcal | Carbohydrates: 102g | Protein: 9g | Fat: 50g | Saturated Fat: 31g | Trans Fat: 2g | Cholesterol: 133mg | Sodium: 607mg | Potassium: 306mg | Fiber: 1g | Sugar: 67g | Vitamin A: 1558IU | Vitamin C: 1mg | Calcium: 137mg | Iron: 2mg