
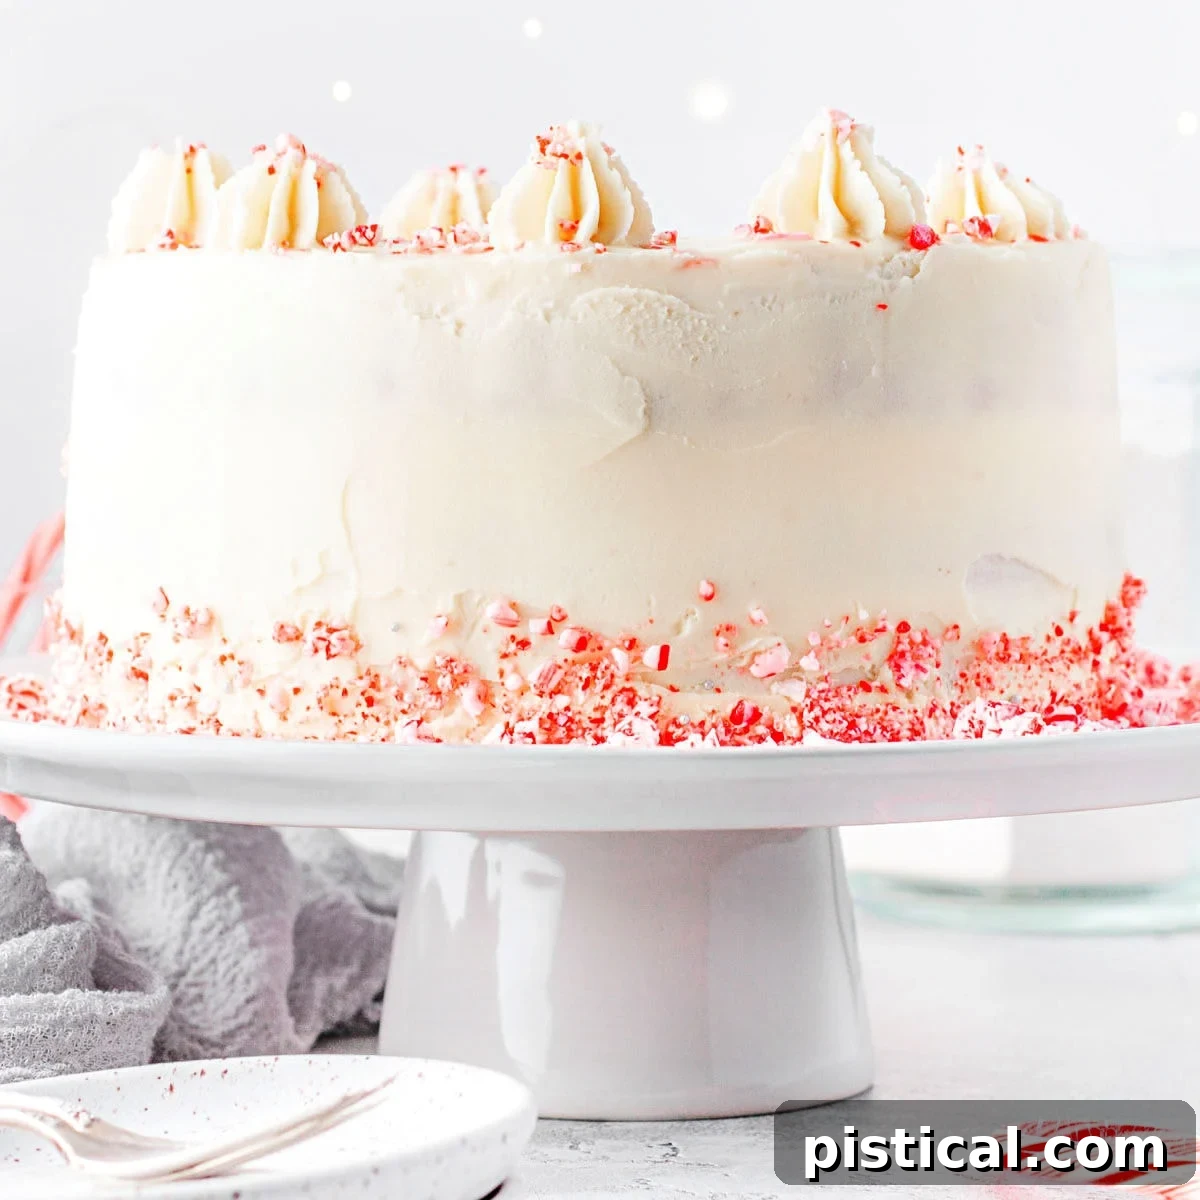
Prepare to dazzle your guests this holiday season with the most enchanting dessert on your table: this spectacular Peppermint Cake. Far more than just a cake, it’s a festive centerpiece, a symphony of flavors, and a true testament to the magic of Christmas baking. Imagine layers of incredibly moist and tender white chocolate cake, generously frosted with a creamy, vibrant peppermint buttercream, and adorned with a cheerful shower of crushed candy canes. This is the holiday treat that captures hearts and taste buds alike, promising to be the undisputed highlight of any festive gathering.
If you find yourself captivated by the refreshing allure of peppermint, you’re in for a treat! We have a delightful collection of peppermint-infused desserts that are simply irresistible. Be sure to explore our Peppermint Hot Chocolate Cake for a cozy twist, our homemade Peppermint Ice Cream for a cool delight, and our charming Peppermint Snowball Cookies – perfect for sharing.
The Ultimate Festive Candy Cane Cake
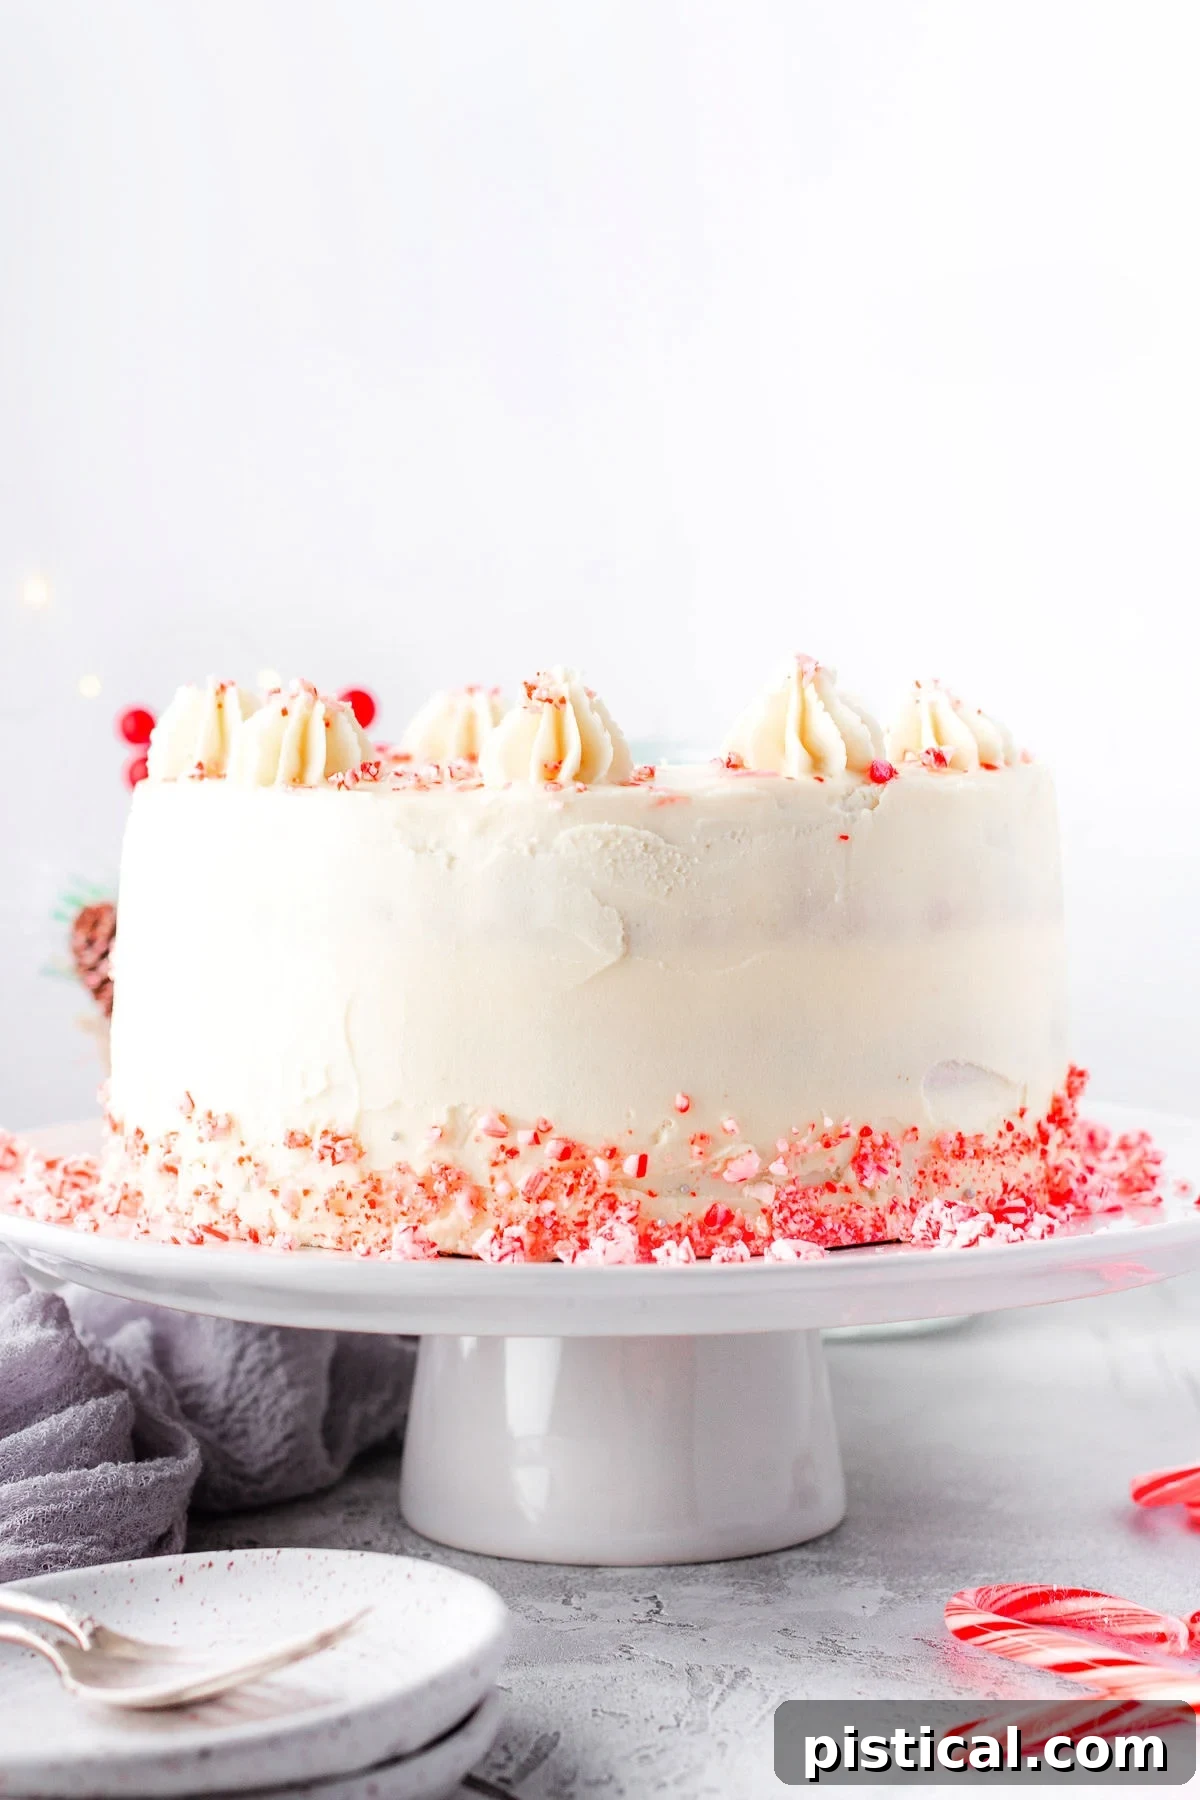
This magnificent Candy Cane Cake isn’t just a dessert; it’s a festive declaration, embodying the spirit and flavors of the holiday season. Every forkful offers an exquisite balance of rich white chocolate and cool, invigorating peppermint – a flavor pairing that is both classic and utterly divine. The cake’s appearance, with its vibrant layers and sparkling candy cane finish, transforms a simple baking project into a festive masterpiece, perfect for making lasting holiday memories.
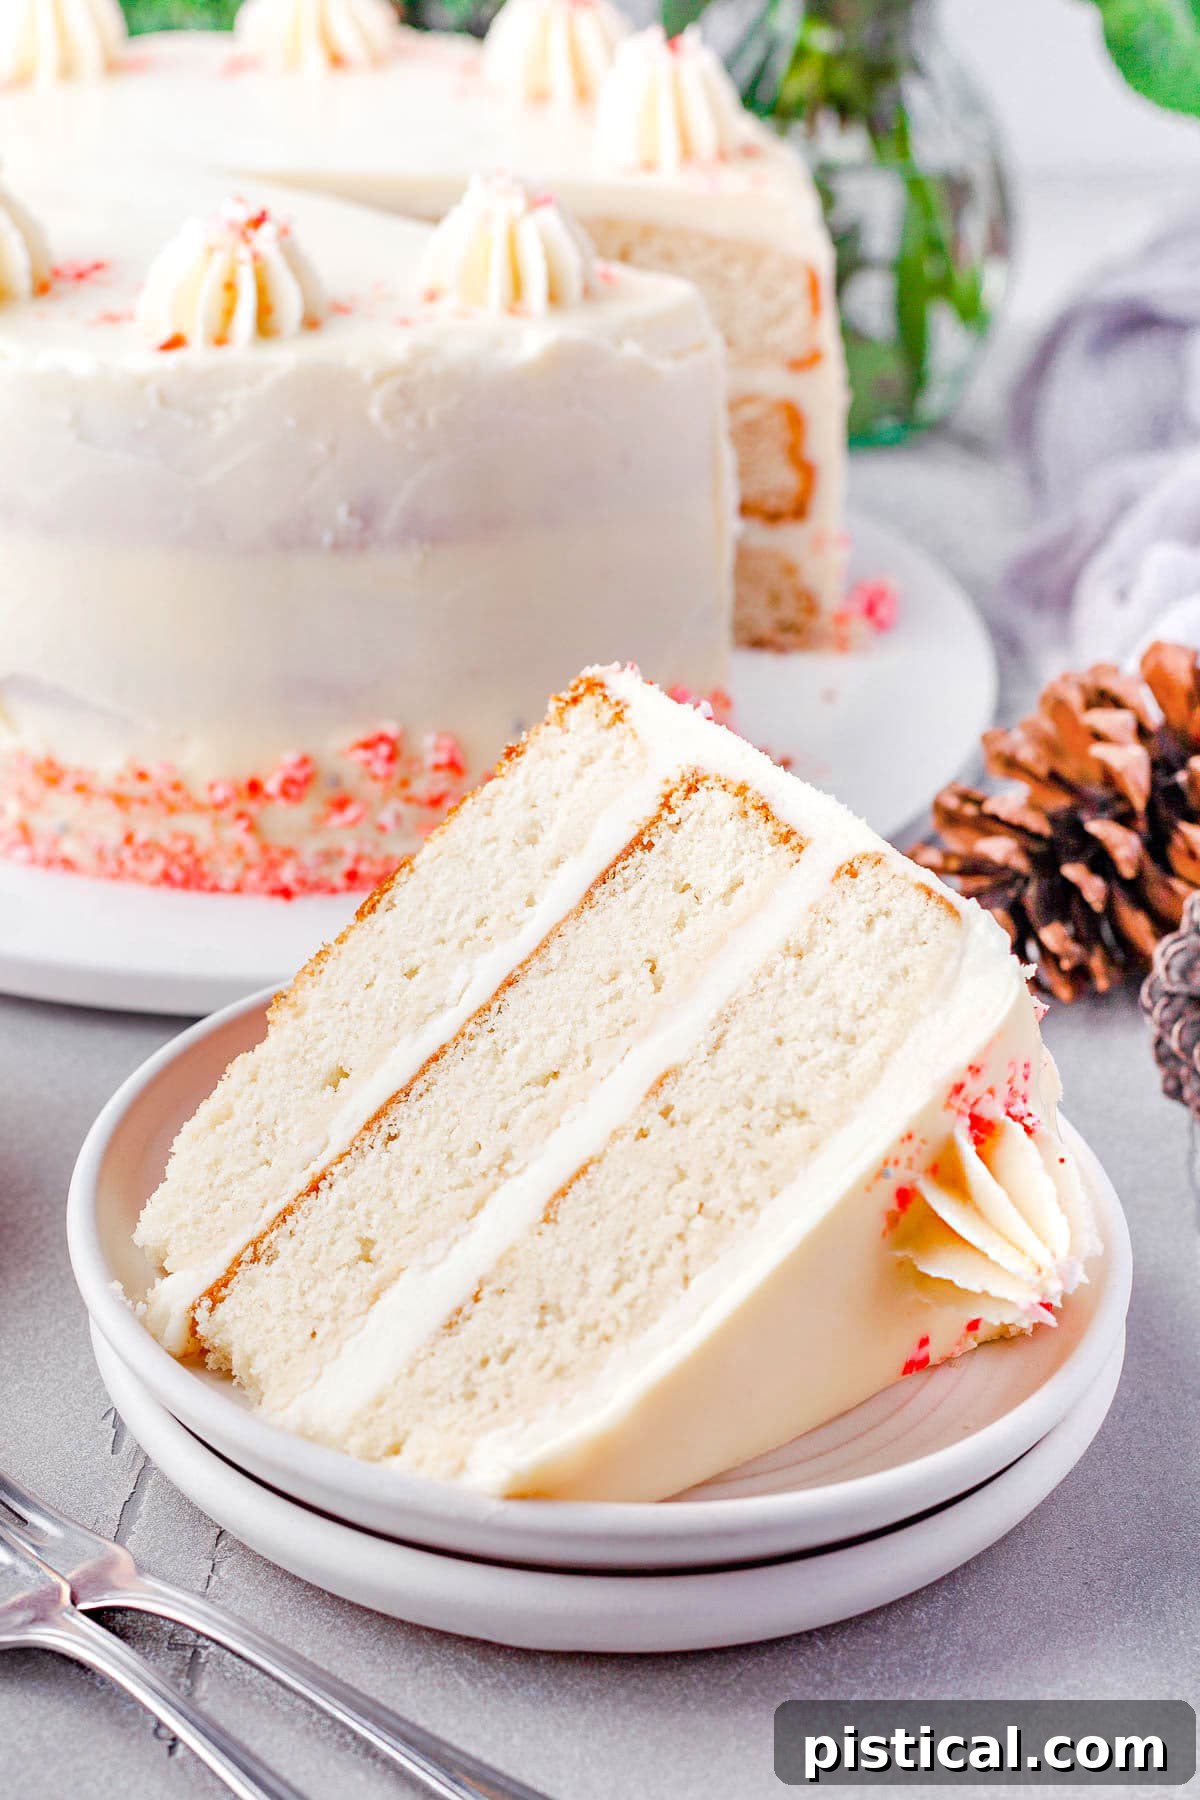
Crafted with care, the foundation of this cake is a wonderfully moist and tender white chocolate cake. It’s then generously layered and draped in a velvety peppermint buttercream frosting that, despite its luxurious texture and incredible flavor, is surprisingly straightforward to prepare from scratch. The white chocolate cake base itself is designed for indulgence, boasting a delicate crumb and profound flavor that perfectly complements the refreshing mint. With a few simple decorative touches and a generous scattering of crushed candy cane pieces, this cake transcends ordinary desserts, becoming a clear winter winner that will be talked about long after the last slice is enjoyed.
Whether you’re hosting an elaborate Christmas dinner, a cozy family gathering, or simply want to bring a spectacular treat to a holiday potluck, this delightful peppermint cake, beautifully adorned with chopped candy canes, is guaranteed to impress. It’s a crowd-pleaser that appeals to all ages, delivering both visual splendor and an unforgettable taste experience.
Why This Peppermint Cake Will Be Your New Holiday Favorite
There are countless reasons why this Peppermint Cake isn’t just another dessert recipe, but a must-have addition to your holiday baking repertoire. It’s designed to be a showstopper, a crowd-pleaser, and a truly enjoyable baking experience. Here’s why you’ll absolutely fall in love with it:
- A Unique Flavor Profile: While peppermint and chocolate are a classic duo, finding them combined in a decadent, layered cake is surprisingly rare. Many enjoy peppermint mocha coffees or peppermint fudge, but a multi-layered cake offering this specific flavor fusion is a unique delight. This innovative take on a beloved flavor combination ensures that everyone will be eager for a slice of this distinctive treat, making it a memorable talking point at any celebration.
- Embrace Festive Flavors: The pairing of crisp peppermint and luxurious white chocolate is the quintessential taste of the holiday season. It evokes warmth, cheer, and nostalgia, perfectly capturing the festive spirit. This cake delivers a harmonious blend that is both comforting and exhilarating, a flavor sensation that truly embodies holiday joy and will be adored by all your guests.
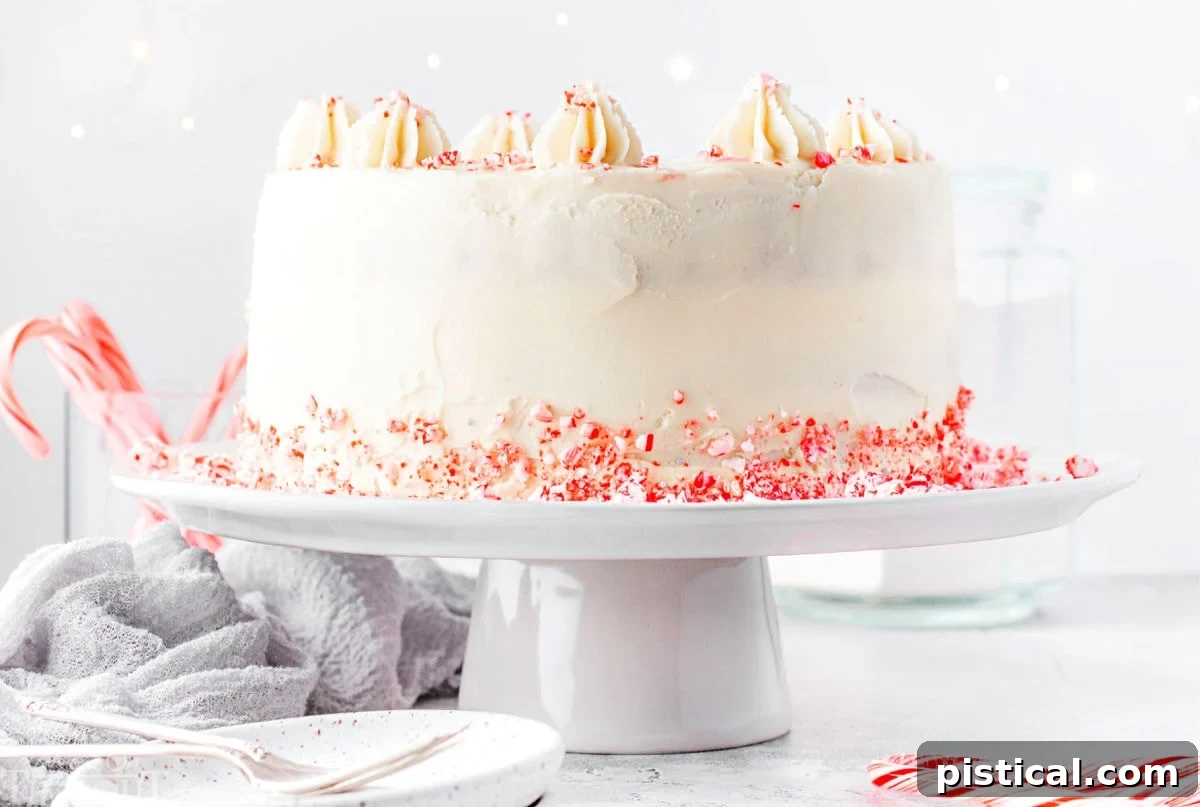
- Visually Stunning Presentation: Seriously, this elegant three-layer cake is designed to turn heads and elicit gasps of delight. Its pristine white frosting, often enhanced with subtle hints of red or pink, combined with the vibrant flecks of crushed candy canes, creates a breathtaking visual impact. Whether it’s the focal point of an office holiday party, the star of a neighbor’s dessert exchange, or the grand finale of your Christmas dinner, this dessert will undoubtedly make your event merry, bright, and utterly unforgettable.
- Surprisingly Achievable Elegance: Despite its impressive appearance, this recipe is crafted to be approachable for home bakers. While it has multiple steps, each one is broken down clearly, making the process manageable and enjoyable. You don’t need to be a professional pastry chef to create this stunning cake; the detailed instructions guide you to a perfect result every time.
- Perfect for Any Occasion: While it screams “holidays,” the timeless appeal of white chocolate and peppermint means this cake is also suitable for winter birthdays, engagement parties, or any special event where you want to serve something truly extraordinary and visually appealing.
Essential Ingredients for Your Peppermint Masterpiece
Creating this irresistible Peppermint Cake involves two main components: the rich, moist white chocolate cake layers and the dreamy, fluffy peppermint buttercream. Each ingredient plays a crucial role in achieving the perfect flavor and texture, ensuring your cake is a winner all season long. As always, for precise measurements and detailed step-by-step instructions, you can find the full printable recipe card conveniently located at the end of this post. Let’s take a closer look at what you’ll need to gather:
For the Decadent White Chocolate Cake Layers:
- White Chocolate Chips: These are the star of our cake, providing a delicate, sweet, and creamy white chocolate flavor that forms the perfect canvas for the peppermint. Opt for good quality chips for the best flavor infusion.
- Unsalted Butter: Ensure your butter is at perfect room temperature. This is crucial for creaming it with sugar, which incorporates air and creates a light, tender cake crumb.
- Granulated Sugar: Essential for sweetness and moisture, it also helps tenderize the cake and contributes to its fine texture.
- All-Purpose Flour: No specialty cake flour needed here! Standard all-purpose flour works wonderfully, providing the necessary structure without making the cake too dense.
- Baking Powder and Baking Soda: These leavening agents work in harmony to give the cake its beautiful rise and airy, soft texture, preventing it from becoming heavy.
- Fine Sea Salt: Just a dash of salt is key to enhancing all the other flavors, particularly the sweetness of the white chocolate, balancing the overall taste profile.
- Whole Milk: Using whole milk adds richness and moisture to the cake batter, contributing to a more luxurious and tender crumb. You can substitute with other milk varieties if preferred, but whole milk yields the best results.
- Vanilla Extract: A staple in baking, vanilla provides a warm, inviting base flavor that complements both the white chocolate and the peppermint beautifully, adding depth and a hint of spice.
- Peppermint Extract (Optional for Cake): While the buttercream carries the primary peppermint flavor, a drop or two of this potent extract in the cake batter can amplify the minty essence throughout. Use sparingly, as a little goes a long way.
- Plain Greek Yogurt: This secret ingredient is the key to a bakery-quality cake. It adds incredible moisture, a subtle tang, and helps create an exceptionally tender crumb, preventing the cake from drying out. Sour cream can be used as a substitute.
- Egg Whites: Using only egg whites results in a lighter, fluffier, and more delicate cake crumb with a pristine white interior, which is ideal for a white chocolate peppermint cake.
For the Dreamy Peppermint Buttercream:
- Unsalted Butter: Just like for the cake, ensure your butter is softened to room temperature. This allows it to whip up light and fluffy, creating the perfect creamy base for your frosting.
- Powdered Sugar (Confectioners’ Sugar): This fine sugar dissolves seamlessly into the butter, resulting in a smooth, non-grainy, and delightfully sweet buttercream.
- Heavy Cream: The essential liquid component for buttercream, heavy cream adds richness, helps achieve the ideal spreadable consistency, and contributes to the frosting’s luxurious texture.
- Pure Peppermint Extract: This is where the magic happens for our peppermint flavor! Start with a small amount (like ¼ teaspoon) and taste, then gradually add a tiny dash more if you desire a stronger minty punch. Remember, peppermint extract is very potent, so proceed with caution.
- Food Coloring (Optional): For an extra festive flair and visual pop, you can add a few drops of red, white, or pink food coloring to your buttercream. A pure white frosting allows the candy canes to stand out, while a pale pink or festive red can create a stunning candy cane effect.
- Crushed Candy Canes: These are indispensable for both decorating and adding a delightful crunch and intense peppermint burst to the finished cake. They bring both texture and undeniable holiday charm.
Step-by-Step Guide: How to Bake and Decorate Your Peppermint Cake
While this stunning cake requires a few distinct steps, the journey is incredibly rewarding, and the final result is most definitely worth every moment. We’ll walk you through each stage, from preparing the moist white chocolate cake layers to whipping up the luscious peppermint buttercream and artfully assembling your masterpiece. Remember, for the complete, printable recipe card with precise measurements and detailed instructions, refer to the end of this post.
Crafting the Perfect White Chocolate Cake Layers:
- Preheat Your Oven: Begin by preheating your oven to a steady 350°F (175°C). This ensures your oven is at the correct temperature when the batter is ready, promoting even baking.
- Prepare Your Pans: Lightly spray three 9-inch round cake pans with nonstick cooking spray. For an extra layer of non-stick insurance and easy release, line the bottoms of the pans with parchment paper circles. If you wish to line the sides as well, cut a long rectangle of parchment paper to fit the circumference of each pan. Set these prepared pans aside.
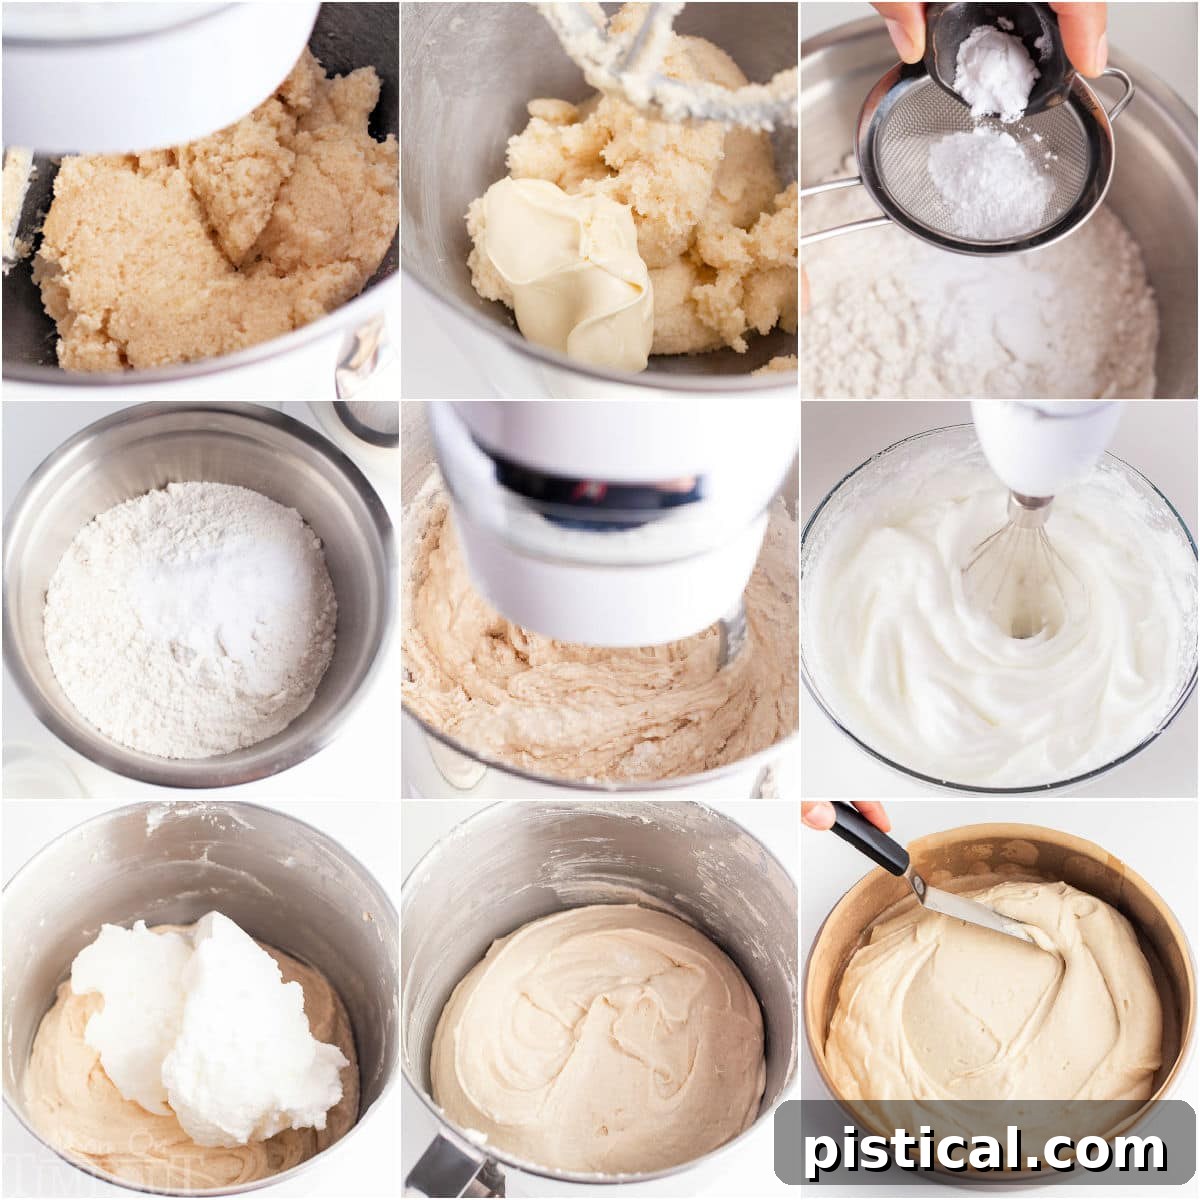
- Melt the White Chocolate: Place your white chocolate chips in a shallow, microwave-safe bowl. Melt them gradually in 20-second intervals at 50% power, stirring thoroughly after each interval. This gentle approach prevents the chocolate from overheating and seizing. Once smooth and melted, set it aside to cool slightly while you proceed with the next steps.
- Cream Butter and Sugar: In the bowl of a stand mixer fitted with the paddle attachment (or using a large bowl and a hand mixer), beat the softened unsalted butter and granulated sugar together. Cream them for about 3 to 5 minutes on medium speed until the mixture is visibly lightened in color, fluffy, and well-combined. This step incorporates essential air for a tender cake.
- Combine with White Chocolate: Pour the slightly cooled melted white chocolate into the creamed butter and sugar mixture. Mix again on low speed until the white chocolate is fully incorporated and the mixture is smooth and cohesive.
- Sift Dry Ingredients: In a separate large bowl, sift together the all-purpose flour, baking powder, fine sea salt, and baking soda. Sifting ensures there are no lumps and helps aerate the flour, contributing to a lighter cake. Stir briefly to combine these dry ingredients evenly.
- Whisk Wet Ingredients: In a medium bowl, whisk together the whole milk, plain Greek yogurt (or sour cream), vanilla extract, and the optional peppermint extract. Mix until all these liquid ingredients are well combined.
- Alternate Wet and Dry into Butter Mixture: With the mixer on low speed, begin adding the sifted dry ingredients to the butter-chocolate mixture, alternating with the wet ingredients. Start and end with the dry ingredients. Mix only until just combined after each addition. Be very careful not to overmix the batter, as this can lead to a tough cake.
- Whip Egg Whites: In yet another clean, medium bowl (preferably using the whisk attachment of your electric mixer), beat the egg whites until they form soft, light, and fluffy peaks. This adds a final boost of lightness to the cake.
- Fold in Egg Whites: Gently fold the whipped egg whites into the cake batter using a spatula. Use a light hand to preserve the air you’ve incorporated. Fold just until no streaks of egg white remain; again, avoid overmixing.
- Divide and Bake: Divide the finished cake batter evenly among your three prepared baking pans. For precision, you can use a kitchen scale to ensure each pan receives the exact same amount of batter, promoting even layers.
- Bake to Perfection: Transfer the cake pans to your preheated oven and bake for approximately 20 to 25 minutes. The cakes are done when their centers spring back gently when lightly pressed, and a wooden skewer inserted into the center comes out clean.
- Cool Completely: Allow the cakes to cool in their pans on a wire rack for about 5 minutes. Then, carefully invert them onto the wire racks to cool completely. It’s crucial that the cake layers are entirely cooled before frosting to prevent the buttercream from melting.
Whipping Up the Fluffy Peppermint Buttercream:
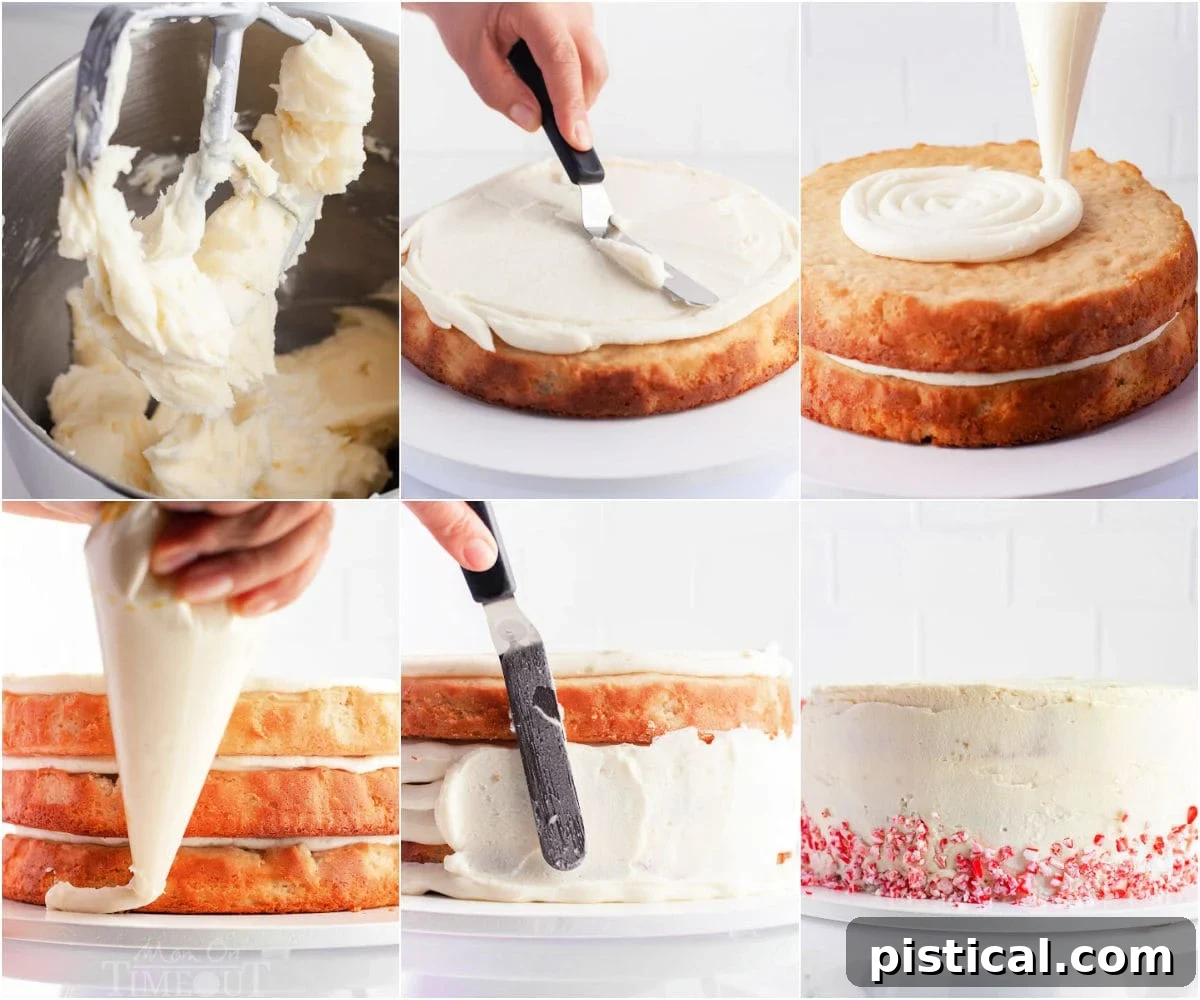
- Beat the Butter: In the bowl of your stand mixer (or with a hand mixer), beat the softened unsalted butter on medium speed for 3 to 4 minutes. Continue beating until the butter becomes noticeably lighter in color, incredibly fluffy, and airy. This aeration is key to a light buttercream.
- Add Remaining Ingredients: Gradually add the powdered sugar, starting with a portion to prevent a sugar cloud. Then, add 1 to 2 tablespoons of heavy cream and the pure peppermint extract. Begin mixing on low speed to incorporate all ingredients, then increase the speed to medium. Beat for another 3 minutes until the frosting is exceptionally fluffy, creamy, light, and smooth. Adjust the consistency by adding more heavy cream, one teaspoon at a time, until you reach your desired spreadability.
- Optional Food Coloring: If you’re using food coloring, now is the time to add it. A few drops of red, white, or pink gel food coloring can create a vibrant or pastel hue. Mix again briefly until the color is evenly distributed throughout the buttercream.
Assembling Your Stunning Peppermint Cake:
- Prepare for Assembly: Once your cake layers are completely cool, you’re ready to assemble! Ensure you have a flat, stable surface, ideally a cake plate or a rotating cake turntable, which makes frosting much easier.
- First Layer of Frosting: Place one cooled cake layer onto your chosen cake plate. Using an offset spatula or a piping bag, pipe or spread a generous, even layer of peppermint buttercream onto the first cake, aiming for about ½ inch thick. Spread it smoothly right to the edges.
- Repeat for the Middle Layer: Gently place the second cake layer directly on top of the frosted first layer. Repeat the frosting process, piping or spreading another even layer of buttercream over the second cake.
- Top Layer Placement: Carefully place the final cake layer on top of the frosted middle layer, positioning it bottom-side up. This trick often provides a flatter, more even top surface for your cake.
- Crumb Coat and Final Frosting: Now, frost the entire cake with the remaining peppermint buttercream. Start by applying a thin “crumb coat” all over the cake – this traps any loose crumbs. Then, apply the main layer of frosting. Begin on the bottom sides, working your way up, and then frost the top. Use an offset spatula to spread the icing smoothly and evenly, ensuring a polished finish. Don’t worry if the cake subtly shows through, as this rustic look can be charming.
- Decorate with Candy Canes: Take your crushed candy canes and press them gently all along the bottom third of the cake’s sides. This creates a festive border and adds a delightful crunch with every bite.
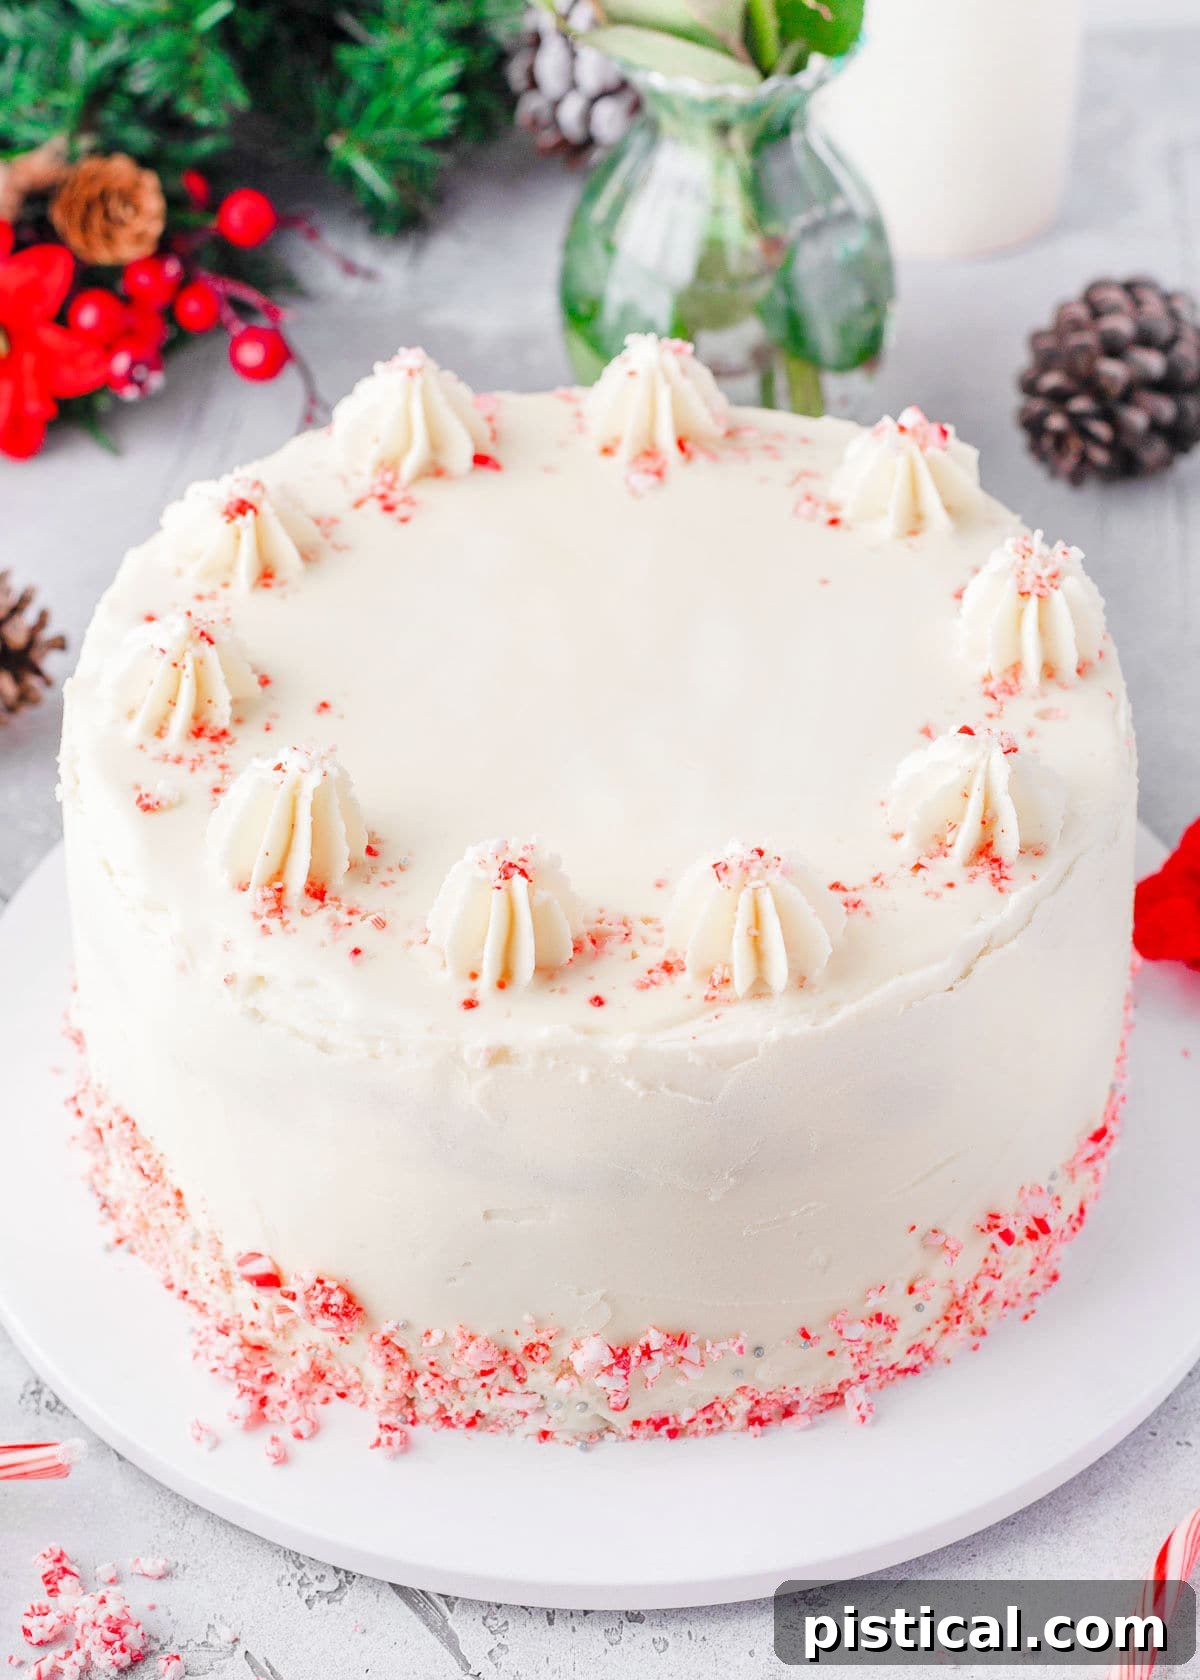
- Finishing Touches: For extra decoration, you can pipe swirls, rosettes, or elegant dollops of any remaining buttercream around the top edge of the cake. Generously sprinkle additional chopped candy cane pieces over the entire top surface. If you’re feeling extra festive, arrange a few mini candy canes strategically on top for an adorable and professional touch.
- Chill and Serve: Once decorated, cover your magnificent Peppermint Cake loosely and chill it in the refrigerator until you’re ready to slice and serve. Chilling helps the frosting set and makes for cleaner slices. Enjoy your breathtaking holiday creation!
Storage and Make-Ahead Tips for Your Peppermint Cake
To ensure your Peppermint Cake remains as fresh and delicious as possible, proper storage is key. Whether you have leftovers or plan to prepare parts of your cake in advance, these tips will help maintain its quality and flavor.
Storage Information:
For any leftover slices or a fully assembled cake, store it in an airtight container in the refrigerator. When properly stored, this candy cane cake will maintain its best flavor and texture for up to 5 days. Bringing it to room temperature for about 30 minutes before serving will enhance its flavors and soften the buttercream perfectly.
Making Ahead:
The cake layers themselves can be baked, cooled completely, and then stored tightly wrapped in plastic wrap at room temperature for up to 2 days before assembly. This is a great way to break up your baking tasks. Simply ensure they are thoroughly cooled before wrapping to prevent condensation and sogginess.
Freezing Instructions:
If you wish to extend the cake’s life even further, both unfrosted cake layers and the assembled (but unfrosted) cake can be frozen. Wrap individual cake layers tightly in plastic wrap, then place them in a freezer-safe, airtight ziploc bag or container. They can be stored in the freezer for up to 2 months. To thaw, simply transfer the wrapped layers overnight to the refrigerator. Once thawed, bring them to room temperature before assembling and frosting. The buttercream can also be made ahead and stored in an airtight container in the fridge for up to a week. Let it come to room temperature and re-whip briefly before using.
Troubleshooting: Why Are My Cake Layers Uneven?
It’s a common baking occurrence for cake batters to rise with a domed shape in the center, especially in round pans. While this is perfectly normal, it can lead to wobbly and uneven layers when stacking your cake. Fortunately, there’s a super easy fix to ensure all your layers lie perfectly flat on top of one another, creating a professionally neat appearance.
Once your cake layers have cooled completely, use a long, serrated knife (like a bread knife) to gently level the tops. Place the cake layer flat on your countertop, position the knife horizontally, and carefully saw off just enough of the domed top to create a perfectly flat surface. Not only does this solve the unevenness problem, but it also gives you some delicious, extra shaved-off cake pieces that are perfect for a little baker’s snack!
Can This Peppermint Cake Be Prepared in Advance?
Absolutely! Planning ahead is a fantastic way to reduce stress on the day of your event, especially during the busy holiday season. This Peppermint Cake is wonderfully adaptable to make-ahead strategies.
You can bake the cake layers a day or two in advance. Once they are completely cooled, wrap each layer tightly in plastic wrap to prevent them from drying out, and store them at room temperature or in the refrigerator. The peppermint buttercream can also be prepared 1-2 days ahead of time. Store it in an airtight container in the refrigerator. On the day you plan to serve the cake, simply take the buttercream out of the fridge an hour or two beforehand to allow it to soften slightly, then give it a quick re-whip in your mixer to restore its fluffy texture. This way, all you have left to do is the enjoyable task of assembling and decorating your gorgeous cake, allowing you to present a fresh, beautiful dessert with minimal last-minute effort.
Trish’s Expert Tips and Tricks for Peppermint Cake Perfection
Baking can be an art, but with a few clever tips, you can elevate your Peppermint Cake from great to absolutely exceptional. These tried-and-true tricks will help you achieve flawless results and unleash your inner pastry chef:
- Effortless Parchment Paper Lining: Lining round cake pans can sometimes be tricky. For the bottom, simply trace the pan onto parchment paper and cut out a perfect circle. For the sides, instead of wrestling with rectangular sheets that might slip or wrinkle, cut a long strip of parchment paper equal to the height of your pan. This method ensures a smooth, even surface for your cake’s sides, preventing dents and making removal a breeze.
- Creative Color Play with Food Coloring: The optional food coloring offers a wonderful opportunity for customization. You can add it to either the cake batter or the frosting. To fully embrace the festive candy cane theme, consider making two cake layers red and keeping one white, then maintain a pristine white frosting so the crushed candy cane pieces truly pop. Alternatively, for a softer, whimsical Christmas aesthetic, tint the entire cake and/or frosting a lovely pastel pink.
- Buttercream Consistency Control: If you find yourself in the common predicament of adding a little too much powdered sugar to your buttercream, don’t panic! The solution is simple: gradually add a touch more heavy cream, one teaspoon at a time, mixing well after each addition until you achieve the perfect, silky-smooth consistency. This trick can save a batch of overly stiff frosting.
- Handle Peppermint Extract with Care: Peppermint extract is incredibly potent and concentrated. A little goes a very long way! Start with the smallest recommended amount (e.g., ¼ teaspoon) and then taste. If you desire a stronger mint flavor, add a tiny drop at a time, mixing and tasting after each addition. Overdoing it can quickly make your cake taste like toothpaste, so exercise caution.
- Achieve Fluffy Egg Whites: When whipping egg whites, ensure your bowl and whisk are impeccably clean and grease-free. Even a tiny speck of fat can prevent the egg whites from whipping up properly. For best results, use egg whites that are at room temperature.
- Don’t Overmix the Batter: After adding the wet and dry ingredients, mix the cake batter only until just combined. Overmixing develops the gluten in the flour, which can lead to a tough and dense cake. A few small lumps are perfectly fine!
Discover More Perfect Peppermint Recipes
If you’ve fallen in love with the refreshing taste of peppermint in this cake, you’ll be thrilled to explore more ways to incorporate this beloved holiday flavor into your baking. Here are some other fantastic peppermint-infused recipes that are sure to become new favorites:
- Peppermint Shortbread Cookies
- Peppermint Mocha Fudge
- Chocolate Peppermint 4 Layer Dessert
- Classic Peppermint Cookies
- Practically Perfect Peppermint Fudge

Print Recipe
Pin Recipe
Peppermint Cake
Ingredients
Cake
- ¾ cup white chocolate chips
- 1 cup unsalted butter room temperature
- 1 ½ cups granulated sugar
- 3 ½ cups all purpose flour
- 1 ½ teaspoons baking powder
- 1 teaspoon fine sea salt
- ½ teaspoon baking soda
- 1 ½ cups whole milk
- ⅓ cup plain Greek yogurt or sour cream
- 1 teaspoon vanilla extract
- ¼ to ½ teaspoon peppermint extract optional
- 4 egg whites
Peppermint Buttercream
- 16 ounces unsalted butter softened to room temperature
- 5 cups powdered sugar
- 1 to 2 tablespoons heavy cream add more if needed for consistency
- ¼ to ½ teaspoon peppermint extract I suggest starting off with ¼ teaspoon because your extract might be very strong. If you want it stronger, add an extra ¼ teaspoon
- food coloring optional, white, red or pink
Decorations
- chopped candy canes
Instructions
Crafting the Perfect White Chocolate Cake Layers:
-
Preheat the oven to 350°F (175°C).
-
Prepare (3) 9-inch round cake pans by spraying lightly with nonstick cooking spray and then lining the bottoms with parchment paper circles. You can also line the sides with a parchment paper strip if desired. Set aside.
-
Melt the white chocolate chips in a shallow, microwave-safe bowl in the microwave at 50% power in 20-second intervals, stirring thoroughly between each. Be careful not to burn or overcook the chocolate, as it will seize. Set aside to cool slightly while you cream the butter and sugar.¾ cup white chocolate chips
-
In the bowl of a stand mixer (or a large bowl with a hand mixer), beat the unsalted butter and granulated sugar together until creamed, light, and fluffy, which usually takes about 3 to 5 minutes on medium speed.1 cup unsalted butter, 1 ½ cups granulated sugar
-
Add the slightly cooled melted white chocolate to the butter-sugar mixture and mix until thoroughly combined and smooth.
-
In a separate large bowl, sift together the all-purpose flour, baking powder, fine sea salt, and baking soda. Stir briefly to combine.3 ½ cups all purpose flour, 1 ½ teaspoons baking powder, 1 teaspoon fine sea salt, ½ teaspoon baking soda
-
In a medium bowl, whisk together the whole milk, plain Greek yogurt (or sour cream), vanilla extract, and the optional peppermint extract.1 ½ cups whole milk, 1 teaspoon vanilla extract, ⅓ cup plain Greek yogurt, ¼ to ½ teaspoon peppermint extract
-
Alternately add the sifted dry ingredients and the wet ingredients to the chocolate and butter mixture, beginning and ending with the dry. Mix on low speed just until combined, being careful not to overmix the batter.
-
In another clean medium bowl, use the whisk attachment of your electric mixer to beat the egg whites until they are light and fluffy and hold soft peaks.4 egg whites
-
Gently fold the whipped egg whites into the cake batter using a spatula, taking care not to deflate the mixture. Fold just until no streaks of egg white remain.
-
Evenly divide the batter into the three prepared cake pans. Using a kitchen scale can help ensure precise and even layers.
-
Bake the cakes for 20 to 25 minutes, or until the centers spring back when gently touched and a wooden skewer inserted comes out clean.
-
Allow the cakes to cool in their pans on a wire rack for 5 minutes before inverting them directly onto the wire racks to cool completely. Ensure they are fully cooled before proceeding.
Whipping Up the Fluffy Peppermint Buttercream:
-
In the bowl of an electric mixer with the paddle attachment (or using a hand mixer), beat the softened unsalted butter on medium speed for 3 to 4 minutes until it becomes light, fluffy, and noticeably lighter in color.16 ounces unsalted butter
-
Gradually add the powdered sugar, starting with a portion to avoid a sugar cloud. Then add 1 tablespoon of heavy cream and the peppermint extract. Mix on low speed for 1 minute to incorporate, then increase to medium speed and beat for another 3 minutes until the frosting is very fluffy, creamy, and light. Add additional heavy cream, 1 teaspoon at a time, if needed to reach your desired consistency.5 cups powdered sugar, 1 to 2 tablespoons heavy cream, ¼ to ½ teaspoon peppermint extract
-
Optional: If you desire a brilliant white buttercream or a specific color (red or pink), add a few drops of white, red, or pink gel food coloring now and mix until uniformly colored.food coloring
Assembling Your Stunning Peppermint Cake:
-
Once all cake layers have cooled completely, it’s time for assembly. Ensure you have a stable cake plate or turntable ready.
-
Place one cooled cake layer onto your turntable or serving plate.
-
Pipe or spread an even layer of peppermint buttercream onto the first cake layer, approximately ½ inch thick. Use an offset spatula to smooth it out evenly to the edges.
-
Carefully place the second cake layer on top and repeat the frosting process.
-
Position the third and final cake layer bottom-side up on top of the frosted middle layer. This often provides the flattest top surface.
-
Cover the entire cake with the remaining peppermint buttercream. Start by applying a thin crumb coat to seal in any loose crumbs, then follow with a more generous, even layer. Work from the bottom sides up, then frost the top. An offset spatula will help you achieve a smooth, elegant finish.
-
Gently press pieces of crushed candy cane onto the bottom third of the cake’s sides, creating a festive band.chopped candy canes
-
If you have any leftover buttercream, use it to pipe decorative swirls, rosettes, or dollops around the top edge of the cake. Sprinkle additional chopped candy cane pieces over the top, and for an extra festive touch, arrange mini candy canes as desired.
-
Cover the finished cake and chill it in the refrigerator until you are ready to serve and enjoy its delightful flavors.
Notes
Store leftovers of this candy cane cake in an airtight container in the fridge for up to 5 days for the best flavor.
The cake can be baked, cooled and stored tightly wrapped at room temperature for 2 days.
To freeze, wrap in plastic wrap and place in a freezer-safe, airtight ziploc bag for up to 2 months. Thaw overnight in the refrigerator and bring to room temperature before assembling and frosting.