
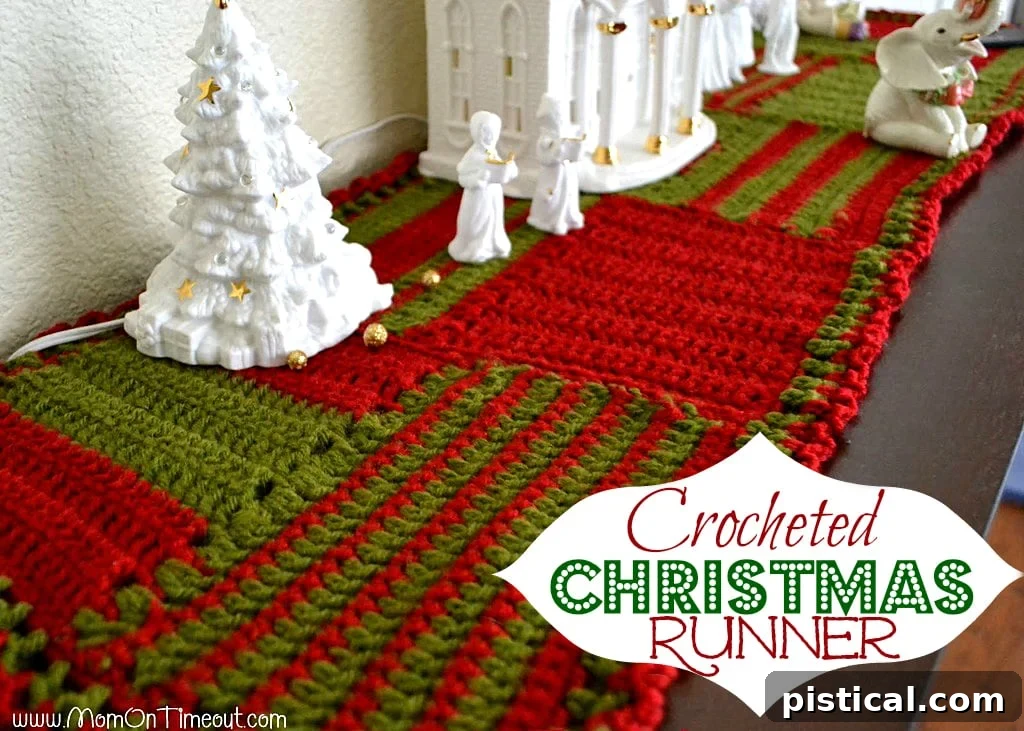
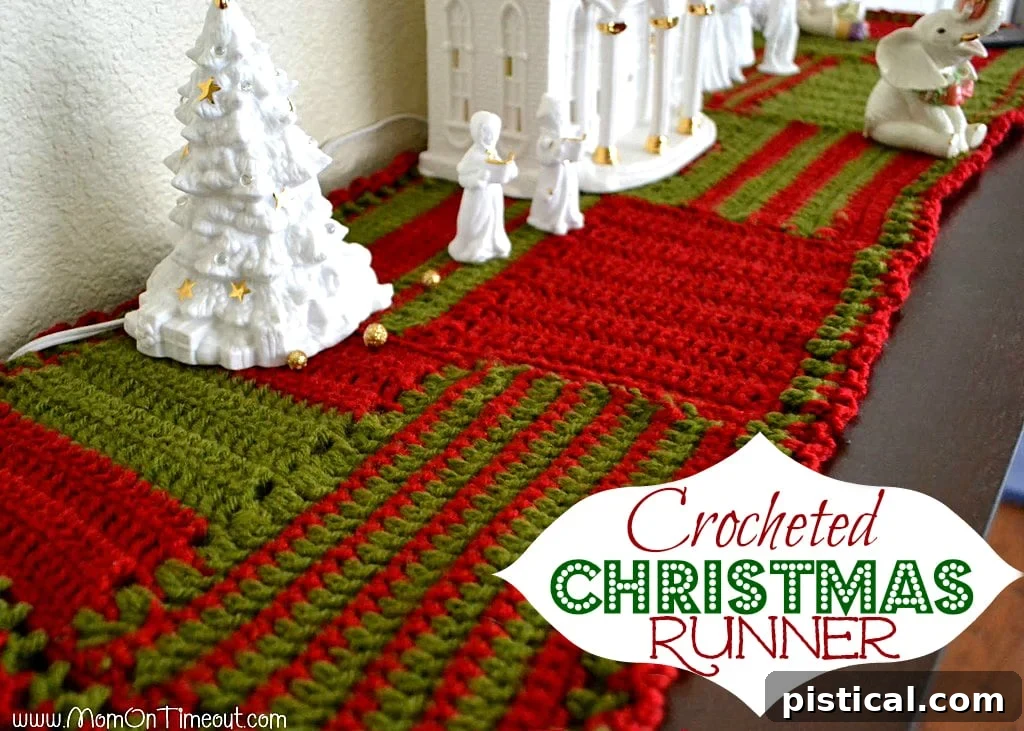
Crafting Joy: An Easy Crocheted Christmas Runner Pattern for All Skill Levels
There’s an undeniable magic that handmade creations bring into our homes, especially when they adorn our spaces during the festive season. For me, that magic often comes alive through the art of crochet. It’s a craft that holds a very dear place in my heart, a skill lovingly passed down by my Nana when I was just a child, probably around eight or nine years old. While life’s busy rhythm sometimes pushes hobbies to the side, this year, I felt a strong pull to reconnect with my hooks and yarn. The holidays offer the perfect excuse to create, to infuse our spaces with warmth and personal touches that store-bought decorations often lack. Beyond making a few special ornaments for the kids, I envisioned a festive centerpiece that would tie our holiday decor together—a charming, handcrafted Christmas table runner.
This project isn’t just about following a pattern; it’s about rekindling a joy, creating something beautiful with your own hands, and adding a unique, heartfelt touch to your seasonal celebrations. Whether you’re a seasoned crocheter looking for a quick, satisfying project, or a beginner eager to dive into the wonderful world of yarn and hooks, this pattern for a Crocheted Christmas Runner is designed with you in mind. It perfectly blends simplicity with stunning visual appeal, making it an ideal weekend endeavor that yields impressive results. Get ready to transform simple stitches into a treasured piece of holiday home decor!
Why a Crocheted Christmas Runner? The Perfect Holiday Accent for Your Home
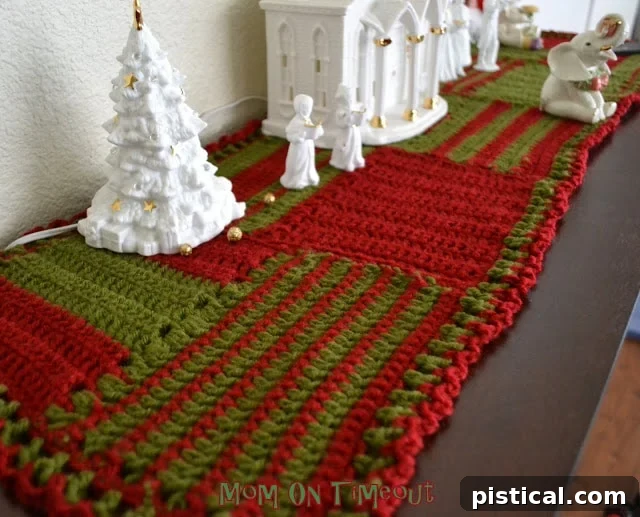
I’ve tackled similar runner patterns before, exploring various textures and color schemes, but never specifically for Christmas until now. The inherent beauty of this particular design lies in its incredible simplicity and remarkable adaptability. Constructed primarily with fundamental single crochet (sc) and double crochet (dc) stitches, it’s remarkably accessible to anyone with a basic understanding of crochet techniques. What truly sets this runner apart, however, is its ingenious modular construction and flexible nature. This means you’re not confined to a fixed size; you can effortlessly expand or reduce its dimensions to perfectly fit your dining table, fireplace mantel, console table, or any surface yearning for a charming festive touch.
A handmade Christmas runner does more than just decorate a space; it tells a story. It instantly adds a layer of warmth, coziness, and personal charm that mass-produced decorations simply can’t replicate. Imagine the delight of guests admiring a beautiful piece you created with your own hands, knowing the care and love woven into every stitch. This runner is not only a functional piece of holiday decor but also holds the potential to become a cherished heirloom, a special item that can be brought out year after year, weaving itself into the fabric of your family’s holiday traditions. Beyond personal use, it also makes an exceptional choice for a heartfelt, personalized gift that will surely be treasured for years to come.
Project Overview: Quick, Easy, and Infinitely Customizable for Your Style
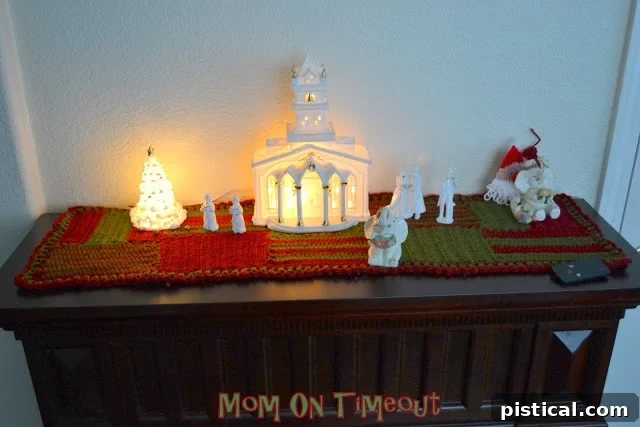
This Crocheted Christmas Runner truly lives up to its promise as a perfect weekend project. You’ll be pleasantly surprised at how quickly it comes together, making it incredibly satisfying to complete, especially if you’re looking for a delightful craft during the busy holiday season. Its straightforward design makes it an excellent choice for beginner crocheters eager to build confidence and create something beautiful without overly complex stitches or intricate shaping. The entire runner is composed of individual blocks, which are then seamlessly sewn together. For my own project, I created a total of 5 blocks, achieving a lovely length perfect for my fireplace mantel. However, the true beauty of this modular design is that you can effortlessly adjust the number of blocks to achieve any desired length, making it suitable for anything from a petite end table accent to a grand dining table centerpiece.
Beyond adjusting the length, you also have full creative control over the color scheme and pattern. While I personally opted for the timeless festive combination of red and green, don’t hesitate to unleash your creativity and experiment! Imagine a serene winter wonderland runner in elegant shades of white, silver, and icy blue, or perhaps a more rustic design utilizing warm, earthy tones. The modular structure also allows for varying stitch patterns or color combinations within each individual block, as I enjoyed doing, which can create a unique, patchwork-like effect. This high degree of customization ensures that your finished Crocheted Christmas Runner will be truly one-of-a-kind, perfectly suited to your personal style, and beautifully integrated with your existing holiday decor.
Materials Needed:
- 1 skein of red worsted weight yarn (or your preferred main festive color)
- 1 skein of green worsted weight yarn (or your preferred accent festive color)
- Crochet Hook Size J (6.0 mm) – feel free to adjust up or down a size based on your personal tension or the desired drape and density of your fabric.
- Yarn needle (also known as a tapestry needle) for expertly weaving in ends and seaming your blocks together.
- Sharp scissors for clean cuts.
Finished measurements: When using 5 blocks and the specified hook size, your runner will be approximately 38.5″ (98 cm) x 12″ (30.5 cm). Remember, these dimensions are easily altered by adding or subtracting blocks, or adjusting your initial chain count.
Step-by-Step Instructions: Crafting Your Crocheted Christmas Runner Blocks
Each individual block of your festive Christmas runner is cleverly constructed in two distinct sections, which collectively give it a distinctive appearance and robust structure. Remember, you’ll be making a total of five blocks (or more, depending on your desired final length), so let’s get comfortable with these foundational steps!
Block Construction – Section A: The Solid Foundation
- Chain Your Foundation: Begin by taking the color of your choice (for a classic look, start with red). Chain (ch) 20 stitches. This initial chain forms the foundation and directly determines the width of your individual block. If you wish to make your entire runner wider, simply add more chains here. Just be sure to note that your subsequent double crochet count will increase accordingly to maintain the pattern.
- Row 1 (Double Crochet): Now, double crochet (dc) into the 3rd chain from your hook. This initial chain 3 effectively counts as your very first double crochet stitch for this row. Continue to work one double crochet stitch into each remaining chain across the entire row. Upon completion of Row 1, you should have a total of 19 double crochet stitches.
- Rows 2-7 (Building Height and Color Play): For the subsequent rows, chain 3 (this will consistently count as your first double crochet), then turn your work. Proceed to double crochet (dc) into each double crochet stitch across the row. Repeat this sequence for a total of 7 rows. At the very end of Row 7, securely fasten off your yarn. These rows offer a fantastic opportunity for creativity: you can work them entirely in one solid color for a uniform look, or you can alternate colors to create striking stripes or any specific pattern you choose within each block. I personally enjoyed varying the color patterns for each of my blocks, which definitely adds to the unique, handmade charm of the finished runner.
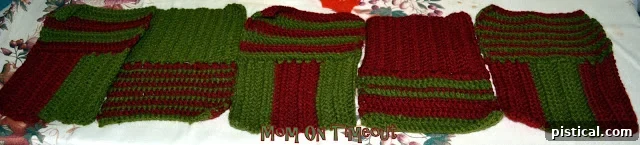
Block Construction – Section B: Adding the Textured Border
This pivotal section will be worked along one of the finished sides of your completed Section A. You’ll be creating a perpendicular extension to your block, which forms the distinctive textured border.
- Joining Yarn: With your second chosen color (for a classic look, try green), join your yarn with a slip stitch (sl st) into one of the corner stitches on the right side of your completed Section A. It’s important to ensure your work is facing you correctly to begin this new section.
- Row 1 (Double Crochet Edge): Chain 3 (this counts as your first double crochet). Now, carefully work double crochet stitches evenly spaced along the entire side of Section A. The key here is to distribute your stitches as evenly as possible to create a smooth, clean edge for the border. For my blocks, I found that approximately 26 double crochet stitches worked perfectly to achieve a balanced and aesthetically pleasing look. This row marks your very first row of double crochet for Section B.
- Alternating Rows (Creating Texture and Structure): To create the beautiful textured edge that defines this runner, you will now alternate between double crochet and single crochet rows. Your goal for Section B is to create a total of 12 rows, specifically consisting of 6 rows of double crochet and 6 rows of single crochet.
- Row 2 (Single Crochet): Chain 1, then turn your work. Work one single crochet (sc) stitch into each stitch across the entire row.
- Repeat Cycle: Repeat the sequence of Row 1 (one row of dc) and Row 2 (one row of sc) six times in total. While it’s traditional to alternate them strictly, the main objective here is simply to ensure you have a grand total of 12 rows for Section B, with an even distribution of six double crochet rows and six single crochet rows. This combination significantly contributes to both the visual texture and the overall stability of your runner.
- Fasten Off: Once you have successfully completed all 12 rows of Section B, fasten off your yarn securely.
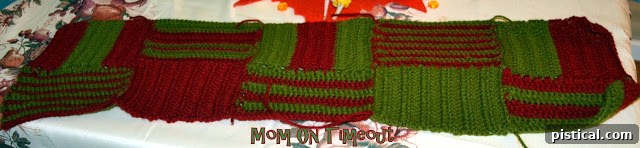
Repeat for Additional Blocks & Assembly: Now that you’ve mastered one block, make four more blocks using the exact same method. Feel free to vary the color patterns within each block as desired to create a unique, personalized look for your runner. Once all five (or more, if you’re making a longer runner) blocks are complete, carefully lay them out in your desired sequence. Take your time to arrange them aesthetically. Then, using your yarn needle, carefully sew the blocks together. A simple whip stitch or a neater mattress stitch works beautifully here, creating tidy and sturdy seams that hold your entire runner together seamlessly.
Adding the Perfect Finish: Edging Your Crocheted Christmas Runner
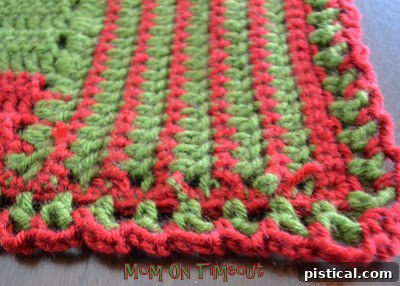
The edging is where your runner truly gets its polished, professional look. It not only neatly finishes all the raw edges but also adds a beautiful decorative border that frames your hard work, elevating it from a simple project to a sophisticated piece of decor.
- Row 1 (Single Crochet Base): With the color of your choice (I highly recommend using a contrasting or complementing color for added visual interest and definition), join your yarn with a slip stitch anywhere along the outside edge of your assembled runner. Ensure the right side of your runner is facing you as you begin. Now, work single crochet (sc) stitches evenly spaced all around the entire perimeter of the runner. The critical aspect here is to keep the stitches as even as possible to prevent any unsightly puckering or ruffling. Once you’ve crocheted all the way around, join with a slip stitch in the very first single crochet stitch of the row. Then, securely fasten off this color.
- Row 2 (Creating Decorative Loops): Now, with your new color choice (perhaps switching back to a main festive color like red or green for continuity), chain 3. Skip the next 1 single crochet stitch, then single crochet into the second single crochet stitch. Repeat this delightful pattern—chain 3, skip 1 sc, single crochet into the second sc—all the way around the runner. This rhythmic pattern beautifully creates a lovely scalloped effect adorned with small, elegant loops along the edge.
- Row 3 (Building on Loops for Depth): With your chosen color for this row, chain 3. Then, single crochet directly into the loop that was created by the chain 3 from Row 2. Repeat this same pattern—chain 3, single crochet into the next loop—all the way around the runner. This step further enhances the decorative edge, giving it more dimension and visual appeal. Securely fasten off your yarn at the end of this row.
- Row 4 (Optional Enhancement): If you desire a fuller, more pronounced, and even more luxurious edging, you have the option to repeat Row 3 for an additional layer. This extra layer adds wonderful depth and can make the border stand out even more, creating a truly rich finish.
- Weave in Ends: This crucial final step ensures a clean, professional, and lasting finish for your beautiful runner. Using your yarn needle, carefully weave in all loose ends throughout your runner. Take your time with this process to ensure they are securely hidden within the stitches and won’t unravel with use or washing.
Your Crocheted Christmas Runner: A Festive Masterpiece Ready for Display!
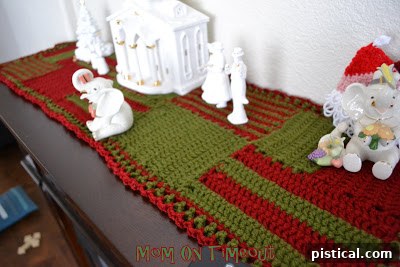
The moment of truth arrived as I gently placed my newly finished crocheted Christmas runner atop our fireplace mantel. The vibrant red and green blocks, beautifully accented by the delicate, handcrafted edging, immediately brought a burst of festive cheer and warmth to the entire room. It looks absolutely beautiful, far exceeding my initial expectations, and I honestly couldn’t be happier with the wonderful outcome. There’s an immense and unique sense of accomplishment that comes with seeing a project through from start to finish, especially when it turns out so wonderfully and adds such personal charm to your home. Beyond the joy of creation, the beauty of this runner is its practicality; it can be gently hand-washed and laid flat to dry, ensuring it remains a staple of your holiday decor for many seasons to come.
Now that this lovely runner is complete and proudly adorning our home, my mind is already buzzing with ideas for my next crochet adventures and holiday crafts. I sincerely hope this detailed pattern inspires you to pick up your hooks and create your own beautiful Christmas runner. It’s a truly rewarding journey that adds not just decor, but a piece of your heart and creativity to your home. Share your creations, embrace the joy of handmade, and most importantly, happy crocheting!
Connect with Me!
Find more crafting inspiration, holiday projects, and connect with fellow enthusiasts across my social channels:
Facebook |
Twitter |
Pinterest |
Google+ |
RSS
And find even more inspiration by linking up with these amazing creative communities:
Where I Party,
Home Stories A2Z, and
My Repurposed Life.