

These Holiday Dipped Oreos are more than just a sweet treat; they’re an incredibly inexpensive, delightfully festive, and utterly charming gift perfect for Christmas! Dive into my simple, step-by-step instructions and discover invaluable tips that will have you effortlessly creating gourmet chocolate-dipped Oreos in mere minutes. Prepare to impress everyone with these delightful, customizable cookies!
Craving more festive flavors and heartwarming holiday favorites? Don’t miss out on trying my Divinity Candy, rich Toffee, and playfully vibrant Grinch Cookies for a complete holiday spread!

The Unbeatable Charm of Holiday Dipped Oreos
As the magical holiday season draws near, the air fills with excitement, anticipation, and often, a touch of delightful chaos. For many, this time of year means bustling kitchens, creative crafting, and a seemingly endless list of things to do. Amidst the festive flurry, finding moments for simple joys, like whipping up a batch of homemade treats, becomes a cherished part of the experience. That’s where dipped Oreos truly shine – they offer a perfect blend of elegance, simplicity, and irresistible flavor, making them an ideal choice for last-minute gifts, party platters, or just a sweet indulgence.
Imagine the delight on faces young and old when they encounter these perfectly coated, beautifully decorated cookies. Each bite offers the familiar crunch of an Oreo, enhanced by a smooth, rich layer of chocolate or candy coating, finished with an explosion of festive toppings. The beauty of dipped Oreos lies in their versatility and the minimal effort required to transform a simple cookie into a gourmet-looking confection. They prove that you don’t need hours in the kitchen or a culinary degree to create something truly special and memorable.
My Holiday Baking Revelation: Effortless Dipped Oreos to the Rescue
With Christmas practically knocking on the door, the holiday season can feel like a marathon of shopping, decorating, and school activities. I distinctly remember a particular year, just a week out from Christmas, feeling utterly drained. After a whirlwind of helping at school – building countless gingerbread houses, painting candy canes, and generally spreading holiday cheer – my energy reserves were at an all-time low. The thought of venturing out to a crowded store like Target felt like an insurmountable quest. Yet, holiday parties awaited, and I absolutely needed to conjure up some treats!
Thankfully, my pantry often holds culinary treasures, and on that day, it came to my rescue. A moment of foresight earlier in the season meant I had stashed away multiple packages of Peppermint Oreos – those miraculous cookies that truly make everything better! Alongside them, I unearthed a few half-empty containers of festive Christmas sprinkles and a fresh package of CandiQuik. Suddenly, a wave of motivation, fueled by the prospect of a quick and satisfying project, washed over me. I sat down, ready to transform these simple ingredients into something special.
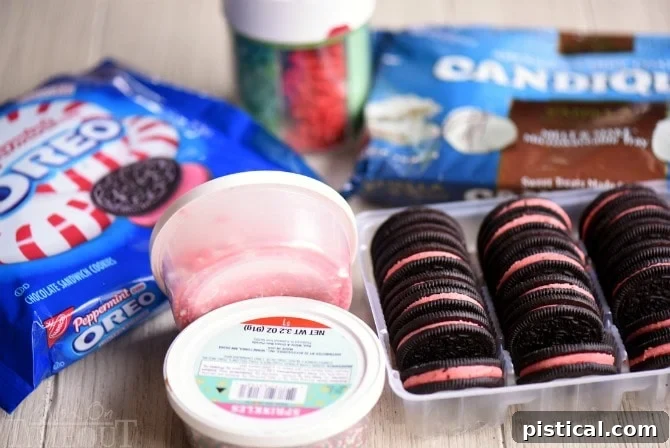
While some might argue that dipping an Oreo isn’t a traditional “recipe” in the strictest sense, the truth is that a few key tips and techniques can elevate your results from ordinary to absolutely extraordinary. I’ve refined my process over countless holiday seasons, and I’m excited to share my favorite strategies for achieving perfectly coated, beautifully decorated dipped Oreos. Trust me, these simple insights will make all the difference!
Essential Tips and Tricks for the Best Dipped Oreos
Master Your Workspace: Prep is Key
One of the most crucial steps to ensure a smooth, stress-free dipping experience is thorough preparation. Before you even think about melting your chocolate or candy coating, make sure all your decorating supplies are laid out and ready. This includes sprinkles, crushed candy canes, mini chocolate chips, or any other festive toppings you plan to use. There’s a critical window of opportunity after dipping an Oreo and before the coating sets, during which your toppings will adhere perfectly. Missing this window means your beautiful decorations won’t stick, leading to frustration and less-than-perfect treats. Having everything within arm’s reach allows for swift, confident decorating.
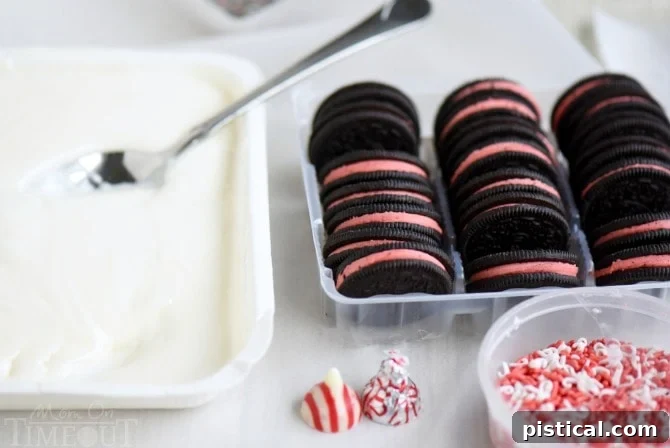
Next, always cover your work surface generously with parchment paper. While many people gravitate towards waxed paper for candy dipping, I’ve consistently found parchment paper to be the superior choice. It offers unparalleled non-stick properties, ensuring that your delicate dipped treats will never adhere to the surface once cooled. This makes for easy removal and prevents any damage to the pristine coating. Furthermore, parchment paper is remarkably durable and can often be reused multiple times, making it an eco-friendly and cost-effective option for your holiday baking endeavors.
The Art of Dipping: Tools and Technique for a Flawless Finish
When embarking on any candy or cookie dipping project, investing in the right tools can significantly enhance your experience and the quality of your finished product. For dipping Oreos, I highly recommend a specialized dipping tool set, particularly the three-pronged fork. This ingenious tool is specifically designed to cradle and maneuver cookies like Oreos with ease, allowing for complete submersion and precise handling.
Here’s my refined dipping technique:
- Carefully submerge the Oreo into the melted candy coating.
- Gently lift the Oreo with the three-pronged tool, allowing most of the excess coating to drip back into the bowl.
- For an even smoother, more uniform coating, use a small spoon to drizzle additional melted chocolate over the top of the cookie while it rests on the tool. Don’t be shy – you can always remove excess, but it’s harder to add more once it starts to set.
- Once coated, gently tap the tool against the rim of your bowl or a clean surface. This helps to shake off any remaining excess chocolate, preventing the formation of unsightly puddles around the base of your cookie once it sets. Patience here is key; take your time to ensure a clean, professional finish.
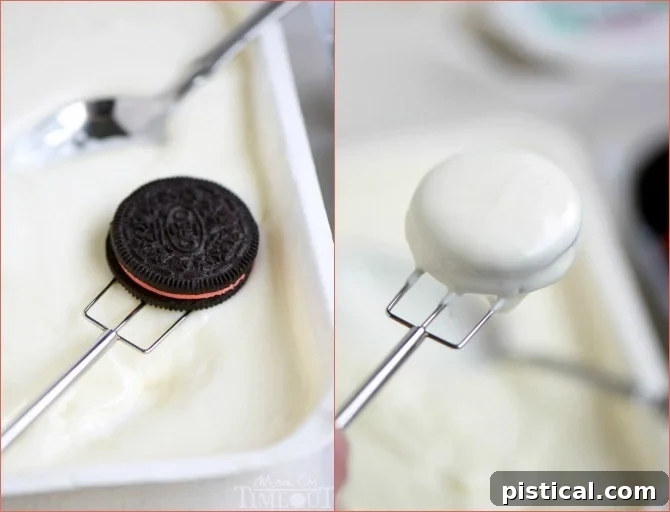
Finally, a simple yet highly effective trick for a pristine finish: utilize the edge of the container you are dipping from. Before transferring your dipped Oreo to the parchment paper, lightly scrape the bottom of the dipping tool against the container’s edge. This action neatly removes any drips or strands of chocolate from the underside of the cookie, ensuring a cleaner look. Not only does this technique contribute to a beautifully finished coating, but it also helps to conserve your valuable candy coating by returning excess back to the melting pot, minimizing waste.
Creative Decoration: Unleash Your Inner Elf
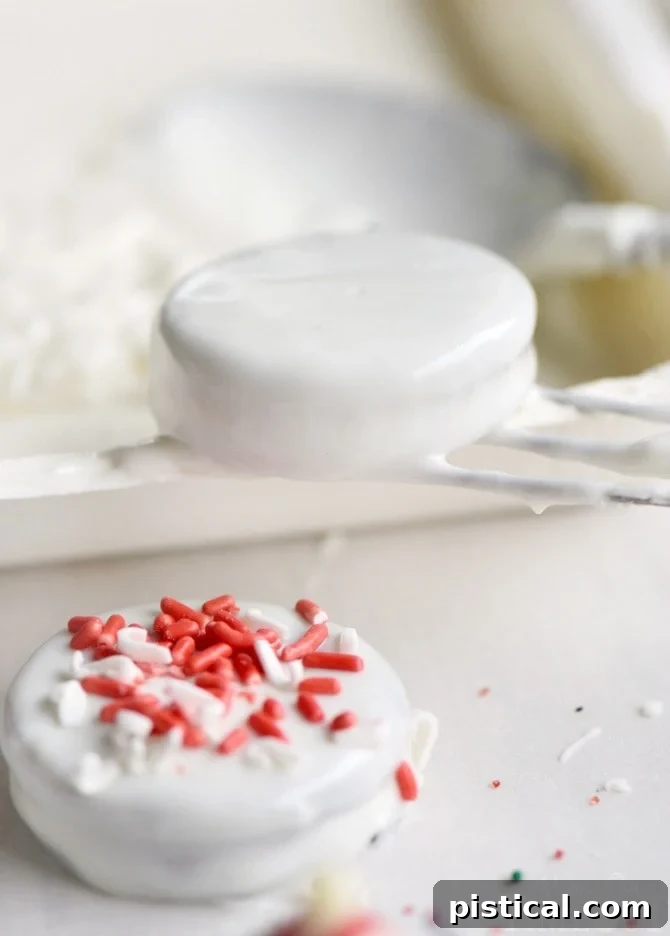
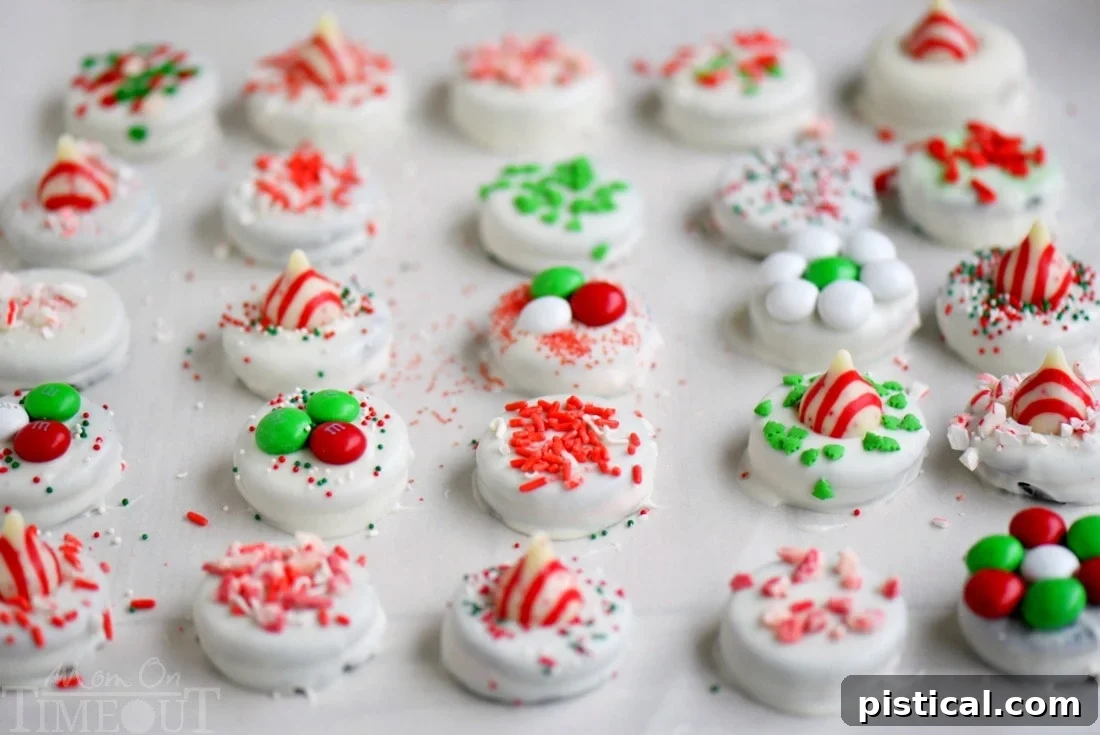
With your Oreos perfectly coated and glistening, it’s time for the most exhilarating part: adding the sprinkles and toppings! This is where you can truly let your creativity soar and transform each cookie into a miniature work of edible art. I confess, I tend to go a little “crazy” with the sprinkles, and the reaction from my family, especially the kids, makes every extra effort entirely worthwhile. The chorus of “oohs” and “aahs” is the ultimate reward!
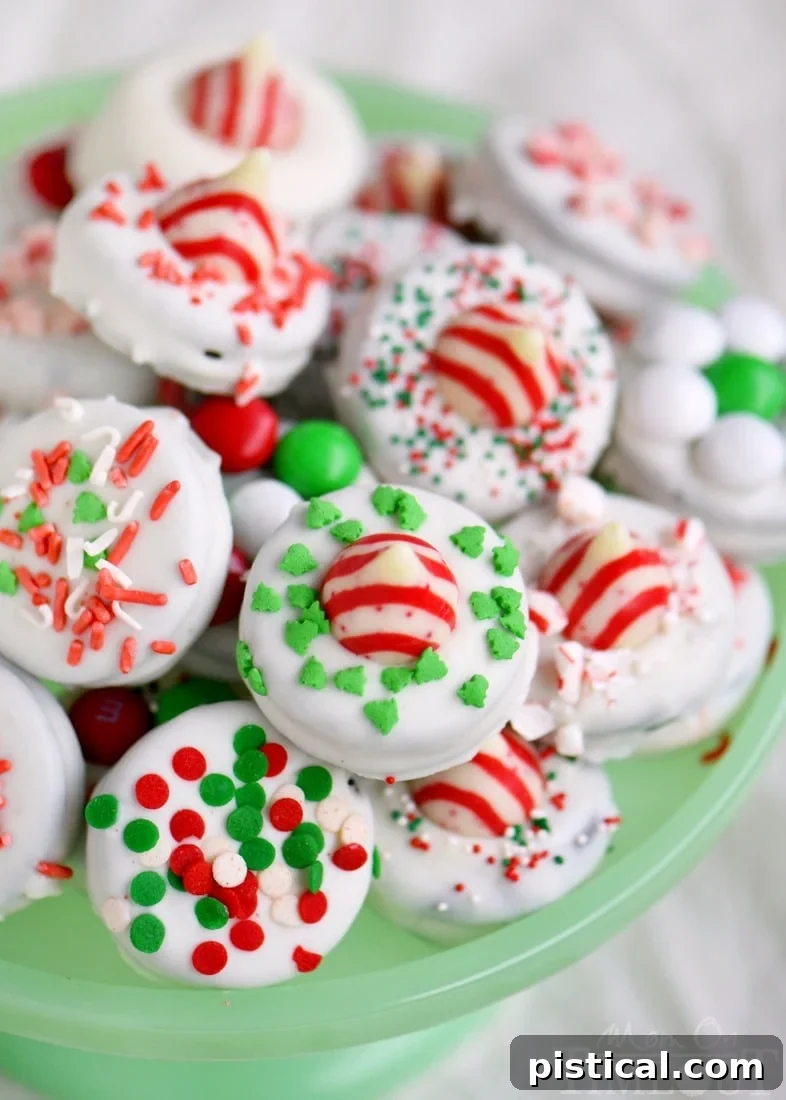
This stage is also a fantastic opportunity to make use of those leftover bits and bobs of sprinkles from previous baking adventures. Don’t let them languish in the pantry – give them a new life on your dipped Oreos! Beyond traditional sprinkles, consider elevating your creations with other festive additions. For a burst of minty flavor and vibrant color, I love adding mint M&M’s to the top. Miniature peppermint Hershey’s Kisses also make a delightful and visually appealing addition. The beauty of the still-soft candy coating is that these toppings adhere perfectly, creating a secure and stunning finish.
Endless Possibilities: Customizing Your Dipped Oreos
The magic of dipped Oreos extends far beyond just the basic recipe; it lies in the boundless opportunities for customization. While Peppermint Oreos are a holiday favorite, don’t hesitate to experiment with other seasonal or classic Oreo flavors like Golden Oreos, regular Chocolate Oreos, or even one of their limited-edition varieties. Each choice brings a new dimension to your treats. Similarly, the candy coating can be milk chocolate, dark chocolate, white chocolate, or even colored candy melts to match any holiday theme – think vibrant reds and greens for Christmas, pastels for Easter, or spooky blacks and oranges for Halloween.
Beyond the cookie and coating, your imagination is the only limit for toppings. Consider crushed pretzels for a sweet and salty crunch, finely chopped nuts for texture, edible glitter for a touch of sparkle, or miniature candies shaped like stars, snowflakes, or tiny gingerbread men. You can even drizzle contrasting colored chocolate over the main coating for an artistic flair. For gifting, arrange your finished dipped Oreos artfully on a festive serving platter or package them individually in clear cellophane bags tied with a ribbon. Nestling them in small decorative boxes or tins lined with parchment paper also makes for a truly professional and heartwarming presentation. Whichever route you choose, your thoughtful, homemade treats are guaranteed to be adored. That’s a promise!
More Festive Treats to Sweeten Your Season
If these Dipped Oreos have ignited your holiday baking spirit, you’ll love exploring these other delicious and easy recipes perfect for festive gatherings and gifting:
- 30 Last Minute Christmas Treats
- The BEST Divinity Candy
- Practically Perfect Peppermint Fudge
- M&Ms Marshmallow Dream Bars
- Chocolate Pretzel Peanut Butter Balls
Your Step-by-Step Recipe: How To Make Holiday Dipped Peppermint Oreos

Print
Pin
Holiday Dipped Peppermint Oreos – How To + Tips!
Ingredients
- 28.6 oz Peppermint Oreos (2 packages)
- 16 oz candy coating (like CandiQuik, Ghiradelli’s, etc.)
- Holiday Sprinkles (candies, edible glitter, crushed peppermint, etc.)
Instructions
-
Prepare your workspace by covering a clean, flat surface with parchment paper. This will prevent sticking and make cleanup easy.
-
Arrange all your chosen sprinkles, toppings, and decorative candies within easy reach. Speed is important once the Oreos are dipped.
-
Melt the chocolate or candy coating according to the package directions. Ensure it’s smooth and fluid for easy dipping.
-
Using a three-pronged dipping tool or a fork, gently dip one Oreo at a time into the melted coating, ensuring it’s fully submerged.
-
Carefully lift the Oreo, allowing excess coating to drip off. Use a spoon to drizzle additional melted chocolate over the top for a perfectly even coat.
-
Gently tap the dipping tool against the side of the bowl until all the remaining excess chocolate has dripped away, preventing puddles.
-
Scrape the bottom of the tool against the rim of the bowl to remove any final drips before carefully placing the dipped Oreo onto the prepared parchment paper.
-
Immediately sprinkle with your desired toppings while the coating is still wet. Allow the Oreos to sit undisturbed until the chocolate has fully hardened, which can be expedited in the refrigerator.
Nutrition