
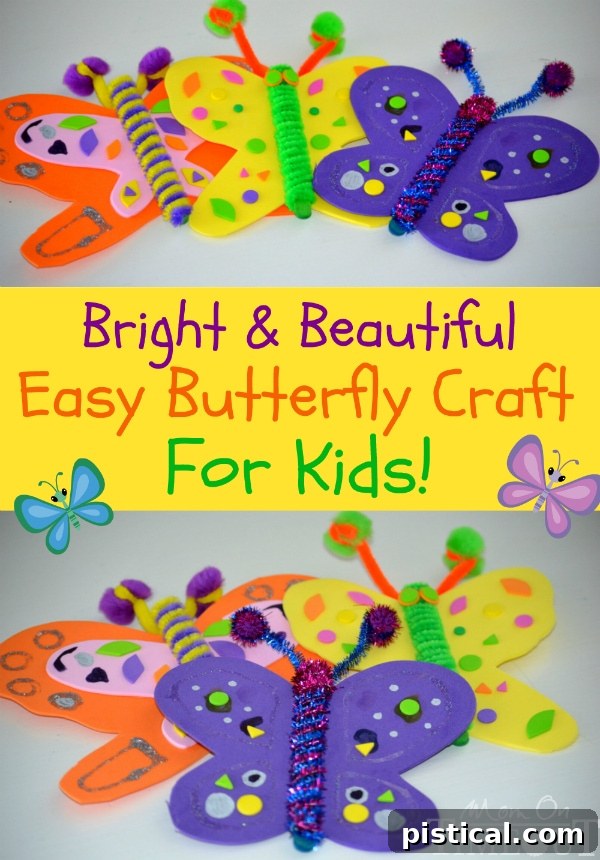
This **easy butterfly craft** offers a fantastic opportunity for kids to engage in creative play using materials you likely already have around the house!
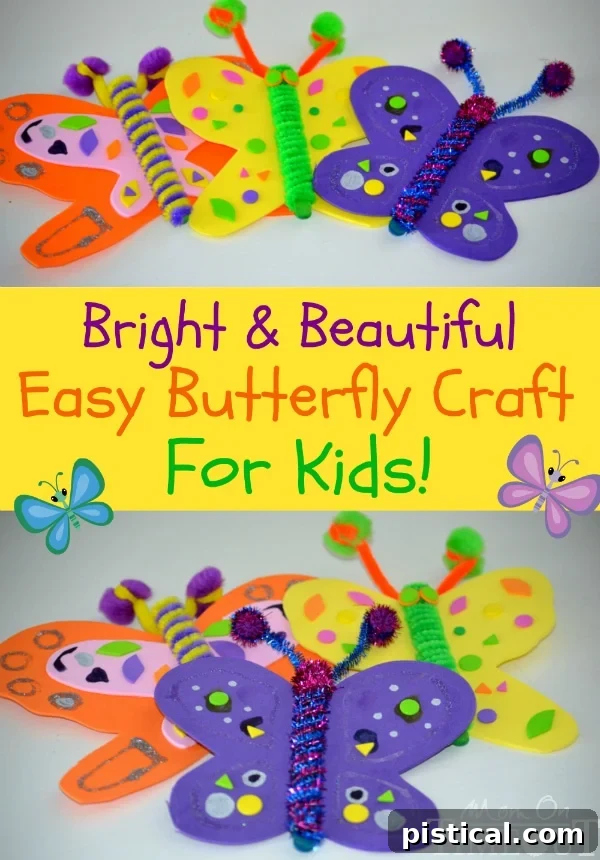
Welcome to a world of colorful wings and endless imagination! Today, we’re diving into a delightful project that will bring joy to children of all ages: crafting vibrant butterflies. This **DIY butterfly craft** is not only incredibly simple to make but also incredibly rewarding, fostering creativity and fine motor skills in a fun, engaging way. You’ll be amazed at how easily these beautiful creatures come to life with just a few basic supplies.
Get ready for a truly addictive crafting experience! As soon as you complete your first unique butterfly, inspiration will strike, and you’ll find yourself eager to create another, then another. Because they’re so quick and straightforward to assemble, it’s hard to resist the urge to design a whole fluttering collection. This simple yet captivating activity is perfect for a rainy afternoon, a playdate, or simply anytime your little ones need a creative outlet. It’s a craft that encourages personalized expression, where no two butterflies will ever be exactly alike!
Why Choose a Butterfly Craft for Kids?
Butterflies are enchanting creatures that captivate children with their delicate wings and vibrant colors. Crafting them offers more than just a fun activity; it’s an opportunity to spark curiosity about nature and the life cycle of these amazing insects. This particular **foam butterfly craft** allows for immense creative freedom, from choosing wing shapes and colors to adding various embellishments. It’s an ideal project for developing crucial skills while having a blast.
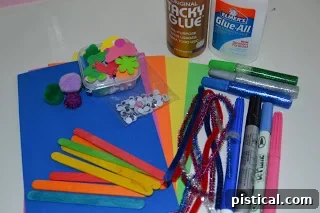
Gather Your Crafting Supplies:
One of the best aspects of this **popsicle stick butterfly craft** is that it uses readily available and affordable materials. You might already have most of these items in your craft bin! Here’s what you’ll need to create your colorful collection:
- Foam Sheets (Assorted colors are fantastic for vibrant wings!)
- Craft Glue (White school glue or tacky glue works well)
- Popsicle Sticks / Craft Sticks (These form the sturdy body of your butterfly)
- Pipe Cleaners (Various colors for the body and antennae)
- Pom-Poms (Small ones are perfect for antennae tips and decorations)
Optional Embellishments (Unleash more creativity!):
- Pens or Markers (For drawing patterns and details on wings)
- Glitter Glue (Add sparkle and shimmering accents)
- Foam Stickers (Shapes, letters, or numbers for easy decoration)
- Googly Eyes (Bring your butterflies to life with expressive eyes!)
- Sequins, Buttons, or Beads (For extra texture and bling)
- Scissors (Kid-friendly safety scissors are recommended)
Having a diverse selection of optional items encourages children to experiment and truly personalize their butterfly creations. Don’t be afraid to dig through your existing craft supplies; almost anything can become a unique decoration!
Step-by-Step Instructions: Creating Your Beautiful Butterfly
Step 1: Constructing the Butterfly Body
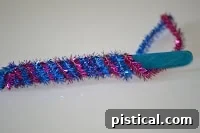
Begin by selecting two pipe cleaners in your desired colors. These will form the main body of your butterfly. Hold one end of a pipe cleaner against the popsicle stick and start wrapping it tightly around the stick. Continue wrapping until the entire stick is covered, securing the end by tucking it under a wrapped section or twisting it around itself. Repeat this process with the second pipe cleaner. For a unique striped effect, you can wrap both pipe cleaners simultaneously, twisting them together as you go. This step is excellent for developing fine motor skills and hand-eye coordination as children manipulate the pipe cleaners. Encourage them to experiment with different color combinations to make each butterfly distinct.
Step 2: Designing and Cutting the Wings
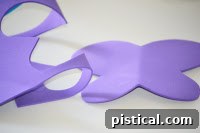
Now for the most visually striking part – the wings! Take a piece of colored foam sheet and fold it in half. On the folded side, draw half of a butterfly wing shape. Remember, butterflies come in an incredible variety of shapes and sizes, so there’s no need to strive for perfection. Encourage your child to be creative; they can draw wide, rounded wings, slender and pointed ones, or even more abstract designs. Once drawn, carefully cut along the lines. When you unfold the foam, you’ll have perfectly symmetrical butterfly wings! If working with younger children, an adult might pre-draw the shapes or assist with cutting. Foam is a wonderful material for this craft as it holds its shape well, is easy to cut, and comes in many brilliant colors, making your **homemade butterfly** truly pop.
Step 3: Assembling the Butterfly: Attaching Body to Wings
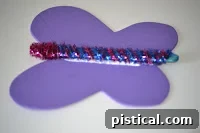
With the body and wings ready, it’s time to bring them together. Apply a generous line of craft glue down the very center of your foam butterfly wings. Carefully press the pipe cleaner-wrapped popsicle stick body onto this glue line. It’s crucial that the two pieces bond securely to ensure your butterfly lasts. Depending on the type of glue you use and its drying time, you might want to place a heavy object, like a book, on top of the butterfly body while the glue dries. This gentle pressure helps create a strong, lasting adhesion. Patience is key here; a fully dried butterfly is a sturdy butterfly!
Step 4: Decorating Your Butterfly Wings
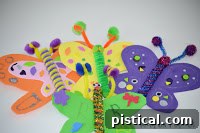
This is arguably the most exciting part for many kids – decorating! Let imagination take flight here. There are no rules, only endless possibilities. Look at our examples for inspiration, but encourage your child to express their unique style. They can use pens or markers to draw intricate patterns, polka dots, stripes, or even abstract designs on the foam wings. Glitter glue can add shimmering accents, tracing outlines or filling entire sections for a dazzling effect. Foam stickers are perfect for adding easy shapes, letters, or even small pictures. Googly eyes can be placed on the body or even on the wings for a whimsical touch. For added texture and dimension, consider gluing on pom-poms, sequins, buttons, or small pieces of colored paper. This stage is fantastic for exploring color theory and design concepts in a hands-on way, making this **easy craft for kids** a truly artistic endeavor.
Step 5: Crafting the Antennae
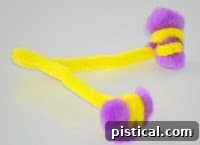
Every butterfly needs its antennae! Take another pipe cleaner and two small pom-poms. Select a pom-pom and firmly wrap one end of the pipe cleaner around its center, securing it tightly so it doesn’t fall off. Once the first pom-pom is attached, fold the pipe cleaner to the desired length for your antennae. Then, attach the second pom-pom to the other end of the pipe cleaner in the same manner. You likely won’t need the full length of the pipe cleaner, so trim any excess before securing the second pom-pom. This allows for neat and proportionate antennae. Children can choose contrasting colors for the pom-poms and pipe cleaners for an even more playful look, just like Reece did in our example!
Step 6: Attaching the Antennae to Your Butterfly
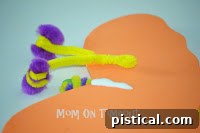
The final touch! Apply a small dot of glue to the back of your butterfly, near the top of the popsicle stick where the head would be. Press the folded middle section of the pipe cleaner antennae onto this glue. Again, if needed, place something heavy on top to ensure a firm bond while the glue dries. For those moments when speed is essential (as it often is with eager little crafters!), a quick alternative is to use a large foam sticker to secure the antennae to the back. Simply place the pipe cleaner stem onto the butterfly’s back and press a foam sticker over it. This is a wonderfully mess-free and instant way to complete the craft, showing that sometimes, a little improvisation is all part of the fun in **kids activities**!
The Benefits of This Easy Butterfly Craft
Beyond the sheer joy of creation, this **DIY butterfly** project offers numerous developmental advantages for children:
- Fine Motor Skills: Wrapping pipe cleaners, cutting foam, squeezing glue, and placing small decorations all strengthen tiny hand muscles and improve dexterity.
- Creativity and Imagination: Children are encouraged to choose colors, design patterns, and invent unique wing shapes, fostering imaginative thinking.
- Color Recognition: Working with a variety of colorful materials helps reinforce color identification and encourages aesthetic choices.
- Following Instructions: The step-by-step nature of the craft teaches children to follow directions and complete a task from beginning to end.
- Patience and Perseverance: Waiting for glue to dry or meticulously placing decorations teaches valuable lessons in patience and persistence.
- Sense of Accomplishment: Completing a beautiful butterfly craft provides a wonderful sense of pride and boosts self-esteem.
- Family Bonding: It’s a fantastic opportunity for parents and children to spend quality time together, collaborating and creating cherished memories.
Tips for a Smooth Crafting Experience
To make your **foam craft** session as enjoyable and mess-free as possible, consider these tips:
- Prepare Your Workspace: Lay down newspaper or a washable mat to protect your table from glue and glitter.
- Pre-Sort Materials: Have all foam sheets, pipe cleaners, pom-poms, and other embellishments readily accessible for easy selection.
- Adult Supervision: Especially with scissors and glue, adult guidance ensures safety and helps troubleshoot any challenges.
- Encourage Experimentation: Remind children that there’s no “right” or “wrong” way to decorate. Every butterfly is unique!
- Display the Art: Once completed, find a special spot to display the butterflies. This validates the child’s effort and artistic expression.
Showcasing Child-Led Creativity: Reece’s Masterpiece
Here is what Reece came up with when left to his own devices, a true testament to independent **creative kids**:
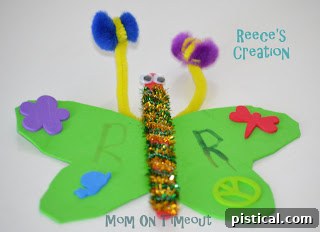
Reece took full ownership of his project, handling everything from the cutting of the wings to the intricate gluing and the careful placement of the pipe cleaners. He completed every step himself, resulting in a masterpiece he was clearly proud of. His artistic signature, a prominent “R” marked twice on his butterfly, signifies his unique touch and the immense satisfaction he derived from his creation. This highlights the true essence of **kids’ craft ideas**: allowing children the freedom to explore, experiment, and express themselves without rigid rules or expectations. Every child’s creation is a reflection of their personality and imagination.
Conclusion: Flutter into Fun with This Easy Butterfly Craft!
This **easy butterfly craft for kids** is more than just a simple activity; it’s a gateway to creativity, skill development, and cherished family moments. With minimal supplies and straightforward steps, you can help your child create a vibrant flutter of butterflies that will brighten any room and bring a smile to their face. Whether you’re looking for a fun project for a rainy day, a spring-themed craft, or just a way to engage young minds, these delightful foam butterflies are sure to be a hit. So gather your materials, clear your workspace, and get ready to create some beautiful memories, one colorful wing at a time. Share your creations with us – we’d love to see the unique butterflies your family brings to life!