
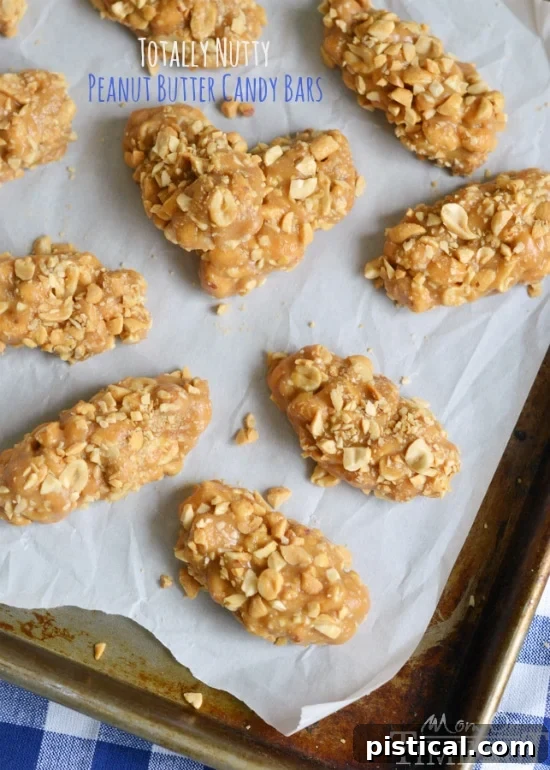
Irresistible No-Bake Peanut Butter Candy Bars: Your New Go-To 4-Ingredient Treat!
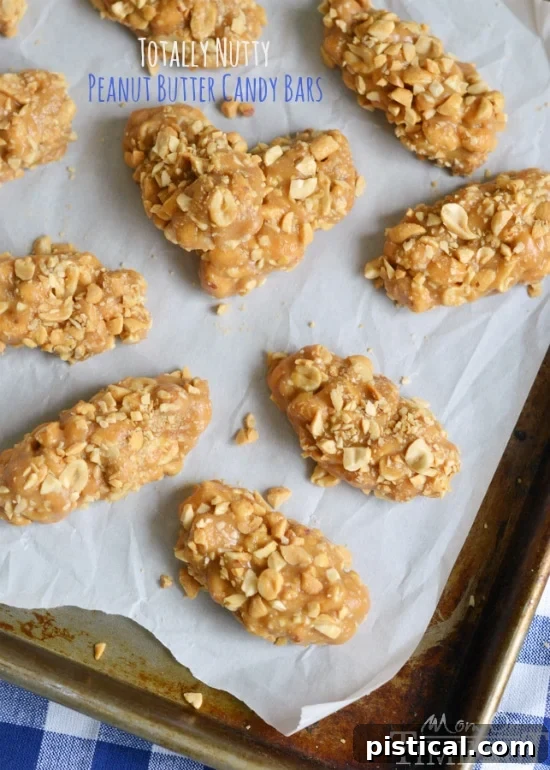
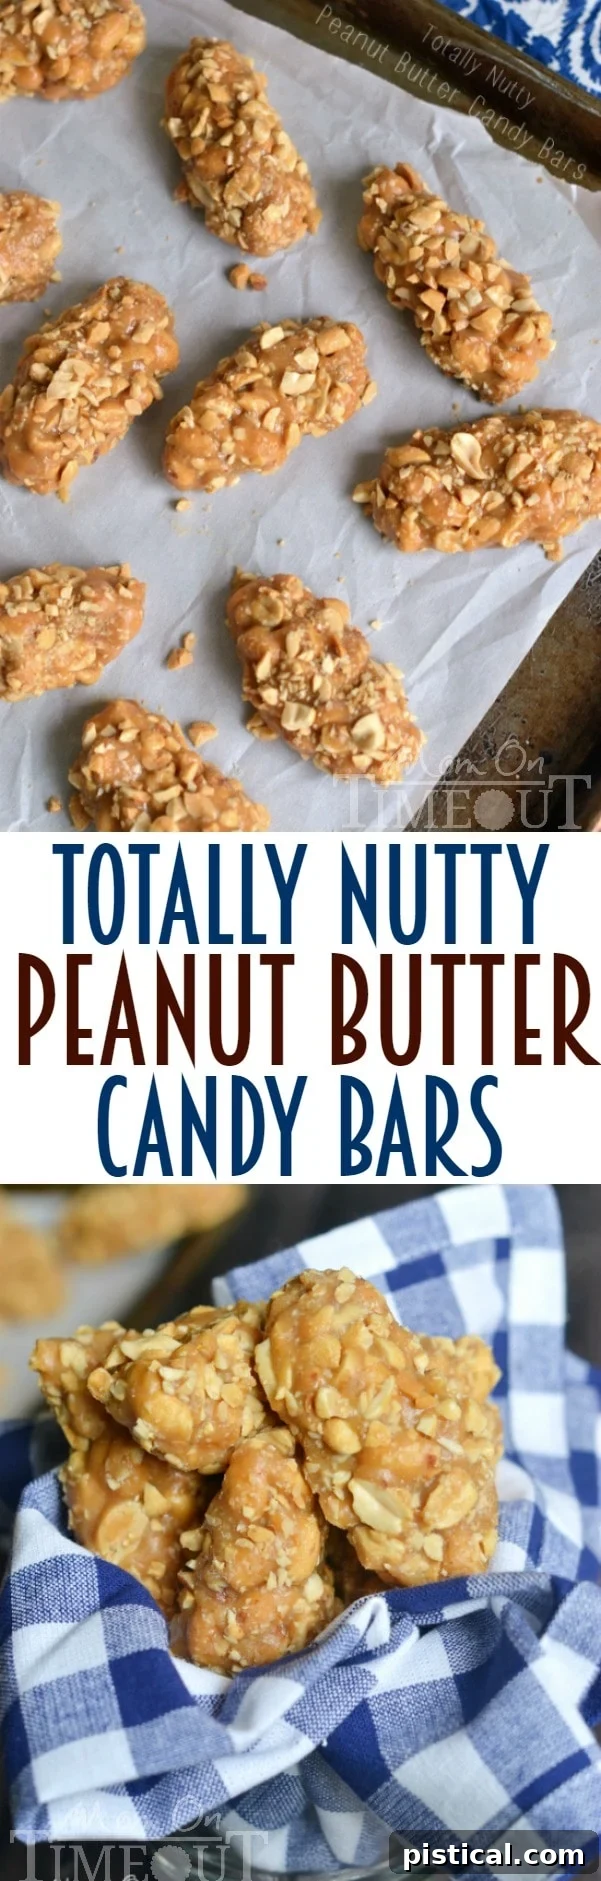
Calling all peanut butter enthusiasts! Prepare yourselves for an utterly delightful and incredibly simple recipe that will quickly become a cherished staple in your kitchen: our Totally Nutty Peanut Butter Candy Bars. These aren’t just any candy bars; they’re a dream come true for anyone craving a satisfying, protein-packed treat without the hassle of baking. With just four core ingredients, minimal prep time, and an explosion of genuine peanut flavor, these bars are poised to become your family’s favorite go-to snack. They’re so rich, so chewy, and so perfectly balanced that they truly taste out of this world!
What makes these candy bars truly special is their uncanny resemblance to a classic favorite: PayDay bars. This connection brings back a flood of cherished memories for me. I vividly recall my dad, a man who appreciated a good, hearty snack, always keeping a gigantic box of PayDays stashed in the back of his truck. They were his secret weapon for keeping energized during long days of field inspections. Sometimes, I’d forget my lunch on school days, and those were the moments I was most grateful for my dad’s thoughtful habit of stocking his truck with such delightful provisions. It’s those simple, nostalgic flavors that often leave the biggest impression, and these homemade bars capture that essence beautifully.
There’s something uniquely comforting about a snack that not only tastes amazing but also carries a hint of childhood joy. These “Totally Nutty” bars aren’t just a recipe; they’re an experience, ready to create new memories while invoking the sweet sentiment of old ones. If you’re looking for a simple yet profoundly satisfying dessert or snack that requires no oven and minimal effort, you’ve found your match.
The Simplicity of No-Bake: A Culinary Revelation
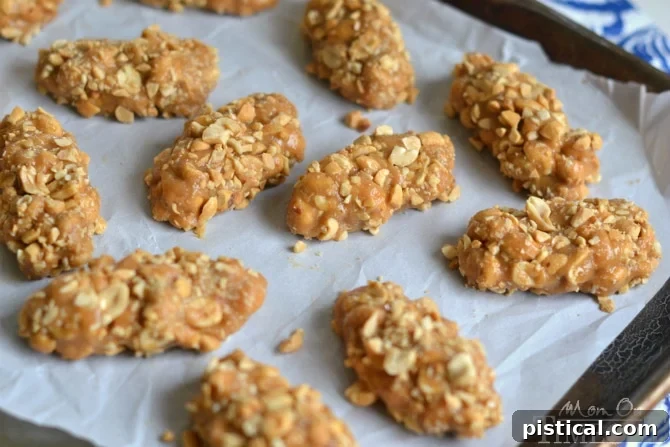
One of the greatest appeals of these peanut butter candy bars is their “no-bake” nature. Forget preheating the oven, monitoring baking times, or dealing with cooling racks for hours. All the essential “cooking” for this recipe happens quickly and efficiently in your microwave. It’s a game-changer for busy schedules, warm weather, or when you simply want to whip up a delicious treat without much fuss. The process is straightforward: melt a few ingredients, stir in some delightful salted peanuts, shape them to your liking (I often opt for logs, but squares or even bite-sized balls work wonderfully), and then generously coat them in even more peanuts for that ultimate nutty crunch.
While that description might sound a tad lengthy, I promise you, the actual execution is incredibly quick and uncomplicated. It’s the kind of recipe that empowers even novice bakers to create something truly impressive. The minimal steps mean less cleanup and more time enjoying your homemade creation. These no-bake bars are particularly fantastic for involving children in the kitchen. They can help with stirring (carefully, once cooled slightly), shaping, and rolling, making it a fun and rewarding activity for the whole family.
The Magic Behind Four Simple Ingredients
The brilliance of these peanut butter candy bars lies in their short and sweet ingredient list. You only need four key components to achieve this incredible flavor and texture:
- Reese’s Peanut Butter Chips: These are the star, providing that iconic, creamy peanut butter flavor and melting beautifully to form the base. Their specific formulation ensures a smooth, luscious texture when melted.
- Light Corn Syrup: This acts as a crucial binding agent, giving the candy bars their characteristic chewy texture. It also adds a touch of sweetness and helps prevent crystallization, ensuring a smooth mouthfeel.
- Unsalted Butter: A small amount of butter adds richness and depth to the flavor profile, contributing to the overall decadent feel of the bars. It also aids in achieving the perfect consistency.
- Roasted Salted Peanuts (whole and chopped): This is where the “totally nutty” part comes in! Using whole peanuts mixed into the base provides substantial crunch and intense flavor, while chopped peanuts for the coating ensure every bite is loaded with nutty goodness and a satisfying texture. The saltiness balances the sweetness perfectly.
This carefully selected quartet of ingredients works in harmony to create a candy bar that is far greater than the sum of its parts. You’ll be amazed at how such a simple combination can yield such a profound and satisfying taste.
Crafting Your Perfectly Nutty Creations: Step-by-Step Excellence
The actual preparation process for these peanut butter candy bars is delightfully simple, primarily relying on your microwave. Here’s a detailed look at how to achieve perfection:
- The Melting Phase: Combine the peanut butter chips, light corn syrup, and unsalted butter in a medium-sized microwave-safe bowl. Use medium heat and stir the mixture every 30 seconds. This gradual melting and stirring prevent scorching and ensure an incredibly smooth, uniform consistency. The goal is a luscious, liquid peanut butter base.
- Incorporating the First Layer of Nuts: Once your peanut butter mixture is silky smooth, it’s time to fold in two cups of whole, roasted, salted peanuts. Stir them in thoroughly until they are evenly distributed throughout the mixture. This is what gives the interior of the candy bars their delightful texture and robust peanut flavor.
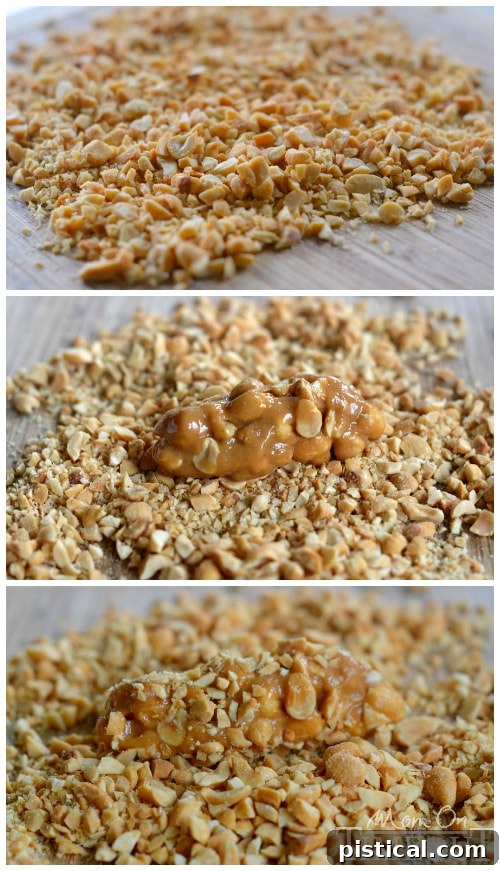
- Preparation for Shaping: Line two baking sheets with waxed paper. This crucial step prevents sticking and makes handling the bars much easier. Also, get your chopped peanuts ready in a separate bowl or spread them out on a clean cutting board for the final coating step.
- Cooling and Shaping: Allow the peanut butter mixture to cool for several minutes. It needs to be cool enough to handle comfortably but still warm enough to be pliable. Divide the mixture and begin shaping it into your desired forms. Logs are popular and easy to make, resembling traditional candy bars, but squares or even small, rustic nuggets work just as well.
- The Nutty Exterior: Once shaped, gently roll each candy bar in the chopped peanuts, pressing lightly to ensure the nuts adhere well. You don’t need a heavy, full coating; a generous sprinkle and press will create a beautiful, textured exterior that adds another layer of crunch and flavor. This exterior also helps keep your fingers clean as you enjoy the chewy interior.
- The Waiting Game (The Hardest Part!): Let your freshly coated candy bars sit for at least an hour. This allows them to finish cooling completely and harden slightly, developing that ideal firm-yet-chewy center. Patience here is key for the best texture.
The Ultimate Reward: Texture, Taste, and Health Benefits
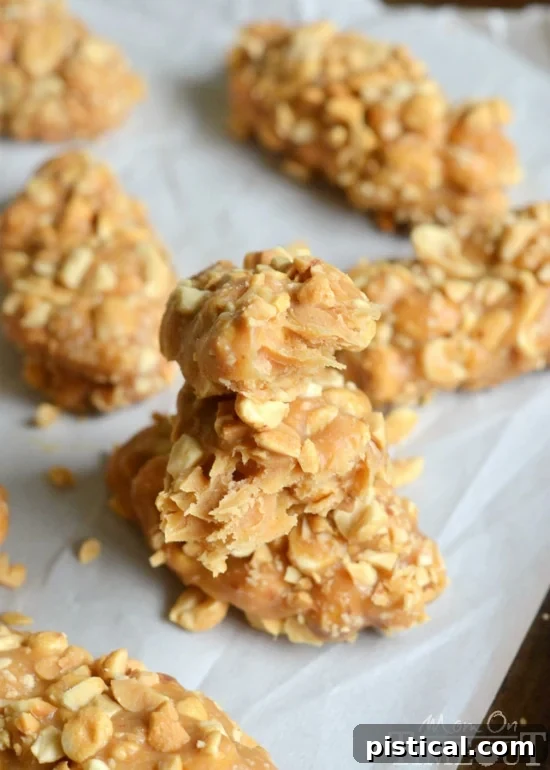
Once these delightful peanut butter candy bars have set, you’ll be amply rewarded with an explosion of flavor and a wonderfully satisfying texture. The interior is firm, yet distinctly chewy, absolutely packed with whole peanuts that deliver a delightful crunch in every bite. One of the best features? No sticky fingers to contend with! All that inherent peanut butter stickiness is beautifully encased and covered by the wonderfully roasted, chopped peanuts, creating a clean, enjoyable eating experience.
These aren’t just a sweet indulgence; they’re also a fantastic source of energy and protein. My boys and I absolutely adore them as a go-to snack, particularly around strenuous activities like swim practices. They provide a powerful protein punch that’s perfect whether you need a quick boost before, sustained energy during, or a satisfying recovery after a workout. I often find myself reaching for a bar (or, let’s be honest, sometimes two!) around 2 in the afternoon, right when that inevitable mid-day slump hits, and a nap starts sounding incredibly appealing. These bars are the perfect antidote, providing sustained energy to power through the rest of the day.
Storage and Longevity: Keeping Your Treats Fresh
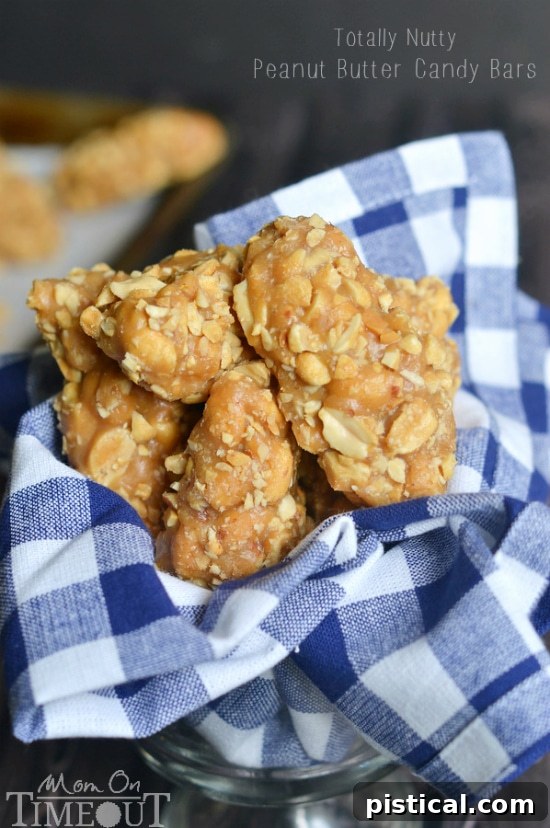
These incredible peanut butter candy bars have quickly become an absolute staple in our household, and for good reason! Not only are they delicious, but they also store remarkably well. When kept in an airtight container at room temperature, they remain fresh and utterly delicious for a week or even longer. This makes them perfect for meal prepping snacks for the week, packing into lunchboxes, or having a convenient, wholesome treat on hand whenever a craving strikes. Their longevity is a huge bonus, ensuring you always have a satisfying option ready to grab.
Why These Peanut Butter Candy Bars Are a Must-Try
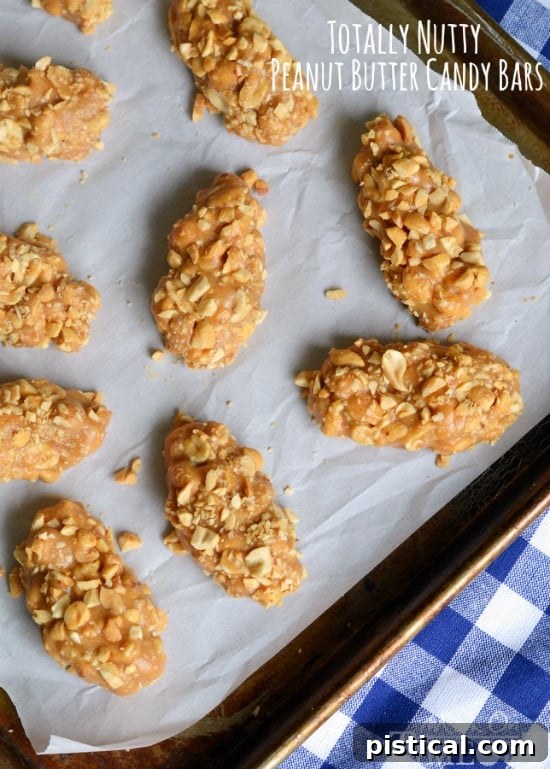
If you’re on the hunt for a truly delicious, easy-to-make, and satisfying snack or treat, you absolutely *must* give these “Totally Nutty Peanut Butter Candy Bars” a try. Their simplicity, combined with their incredible flavor and fantastic texture, makes them an unbeatable choice. With just a handful of ingredients and minimal effort, you can be indulging in the ultimate peanutty delight in a matter of minutes. They’re perfect for satisfying a sweet tooth, fueling your body, or simply enjoying a moment of pure, nutty bliss. Don’t wait – dive into the delicious world of homemade peanut butter candy bars today!
Frequently Asked Questions (FAQ)
- Can I use natural peanut butter instead of chips? While delicious, natural peanut butter often has a different fat content and can result in a greasier or less firm bar. For best results and the intended chewy texture, we recommend sticking with peanut butter chips as they are formulated to melt and set perfectly in recipes like this.
- How can I customize these candy bars? You can easily get creative! Consider adding a layer of melted chocolate on top for a peanut butter cup vibe, or mix in some mini chocolate chips before shaping. A sprinkle of sea salt on top before they set can also enhance the flavors.
- How long do these take to fully set? While they begin to firm up within an hour at room temperature, for a truly firm and sliceable bar, it’s best to let them sit for at least 2 hours, or even chill them in the refrigerator for 30-60 minutes.
- Are these gluten-free? Yes, as long as your specific brands of peanut butter chips, corn syrup, butter, and peanuts are certified gluten-free, this recipe is naturally gluten-free. Always check ingredient labels if this is a concern.
- Can I freeze these peanut butter candy bars? Absolutely! These bars freeze beautifully. Wrap individual bars tightly in plastic wrap, then place them in an airtight freezer-safe container or bag. They can be stored in the freezer for up to 2-3 months. Thaw at room temperature for a few minutes before enjoying.
Print
Pin
Totally Nutty Peanut Butter Candy Bars
Ingredients
- 10 oz Reese’s Peanut Butter Chips
- 1/2 cup light corn syrup
- 2 tbsp unsalted butter
- 2 cups roasted salted peanuts (whole)
- 1 cup roasted salted peanuts chopped
Instructions
-
Melt peanut butter chips, corn syrup, and butter together in a medium size microwavable bowl on medium heat, stirring every 30 seconds until smooth. (A 4-cup glass measuring cup works perfectly for this.)
-
Stir in 2 cups of whole, roasted, salted peanuts until evenly distributed throughout the mixture. Set aside to cool slightly.
-
Line two baking sheets with waxed paper to prevent sticking.
-
Place the remaining 1 cup of chopped peanuts in a shallow bowl or spread them evenly on a cutting board, ready for coating.
-
After the peanut butter chip mixture has cooled for several minutes (it should be warm enough to handle but not sticky), divide it and begin shaping into logs, squares, or your preferred candy bar shape.
-
Roll each shaped candy bar in the chopped nuts, pressing gently to ensure the nuts adhere. The candies do not need to be fully coated; a rustic, partial coating adds great texture and visual appeal.
-
Let the finished candy bars sit at room temperature for at least an hour (or up to two hours) to fully cool and harden slightly. For a firmer set, you can refrigerate them for 30 minutes.
-
Store your delicious creations in an airtight container at room temperature for 7-10 days, or freeze for longer storage.
Nutrition
Explore More Peanut Butter Madness!
If you’ve fallen in love with these easy no-bake bars, you’re in for a treat! Here are more fantastic peanut butter recipes to satisfy your cravings and bring more nutty deliciousness into your life:
Peanut Butter Caramel Toffee Chocolate Chip Cookie Bars
Peanut Butter and Jelly Sugar Cookie Pizza
Reese’s Peanut Butter Oatmeal Cookie Bars
No-Bake Chocolate Peanut Butter Oatmeal Cookies

Connect with Me!
Stay updated with more delicious recipes, tips, and inspiration by connecting with me on social media. I love hearing from you and seeing your creations!
I love linking up and sharing recipes at some of these fantastic parties.