
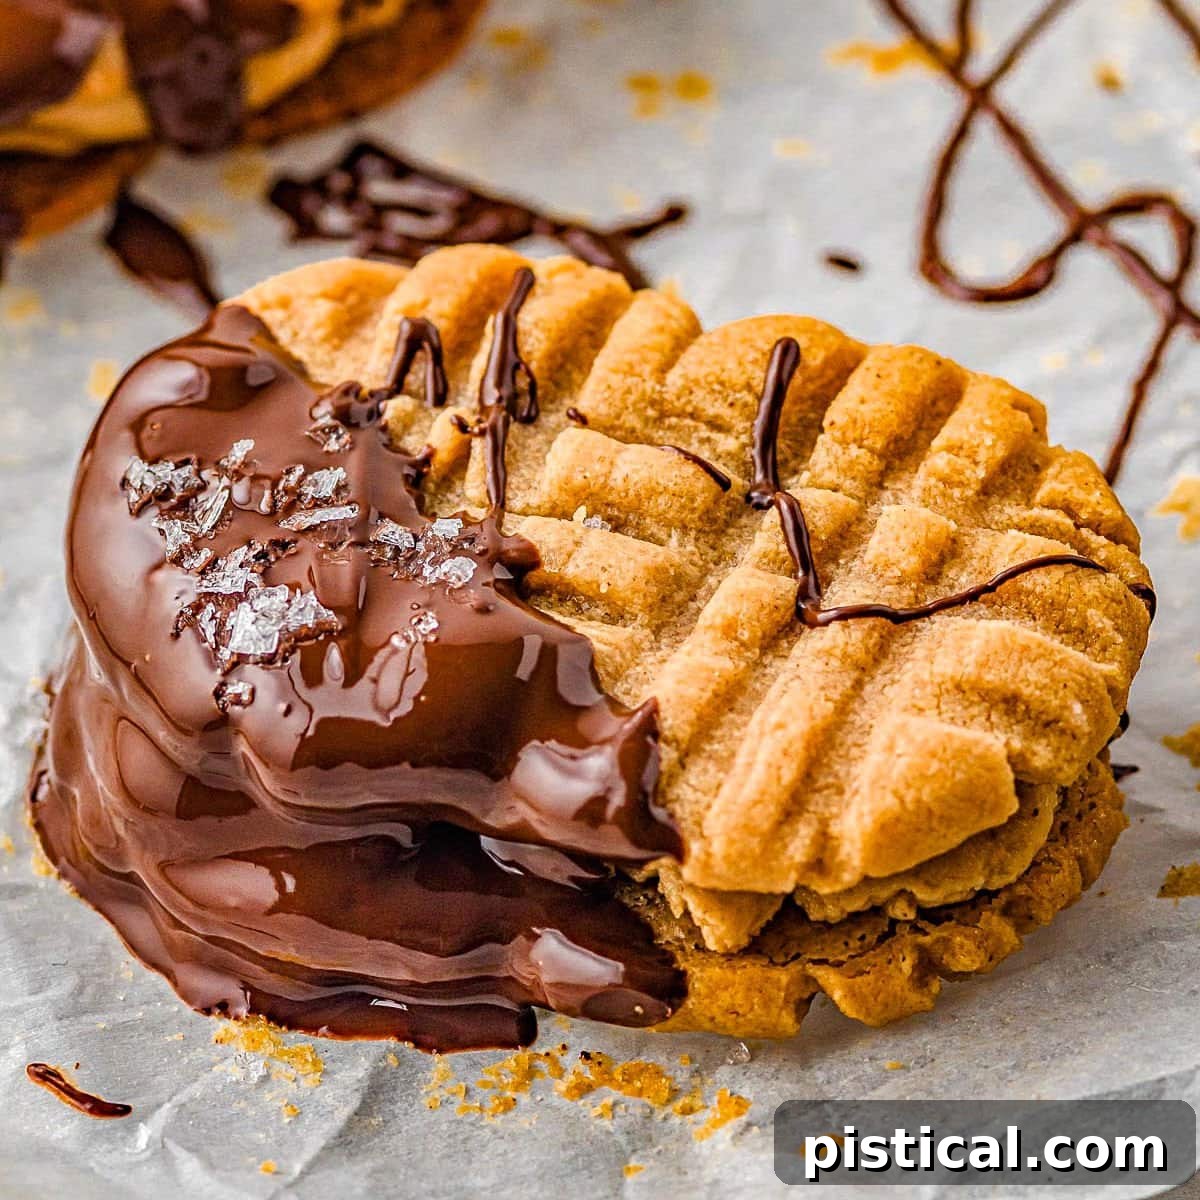
Homemade Nutter Butter Cookies: The Ultimate Peanut Butter Sandwich Treat
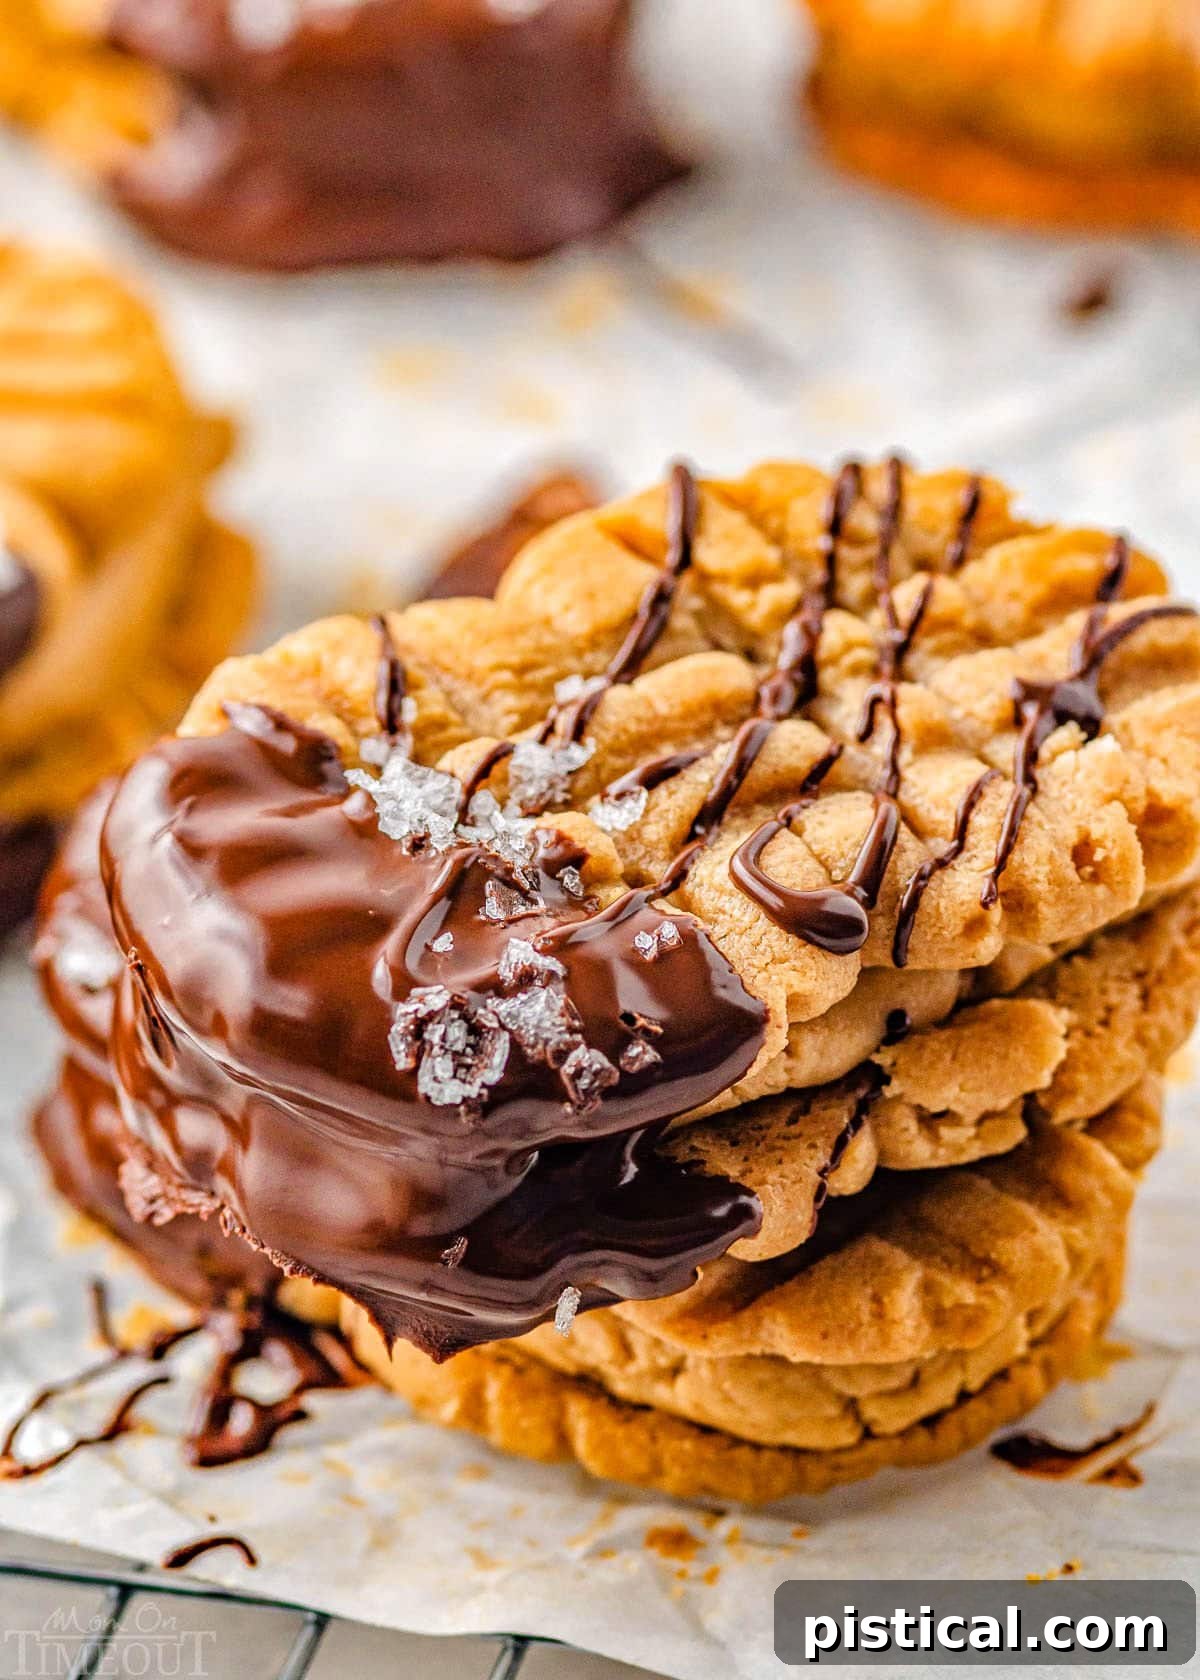
Prepare to fall in love with these Homemade Nutter Butter Cookies! This recipe offers an irresistibly delicious, elevated version of the classic peanut butter sandwich cookie you know and love. Imagine perfectly crisp peanut butter cookies, generously filled with a velvety smooth peanut butter cream, then optionally dipped in rich melted chocolate and finished with a delicate sprinkle of flaky sea salt. It’s a symphony of sweet and salty, crunchy and creamy, that promises to be even better than the store-bought originals. Get ready to bake a batch of pure peanut butter bliss that will captivate both kids and adults alike!
If your heart beats for peanut butter desserts, you’re in the right place! Don’t forget to explore my other delightful creations like the classic Peanut Butter Blossoms and the refreshing Peanut Butter Icebox Cake! Each one is a testament to the versatility and universal appeal of this beloved ingredient.
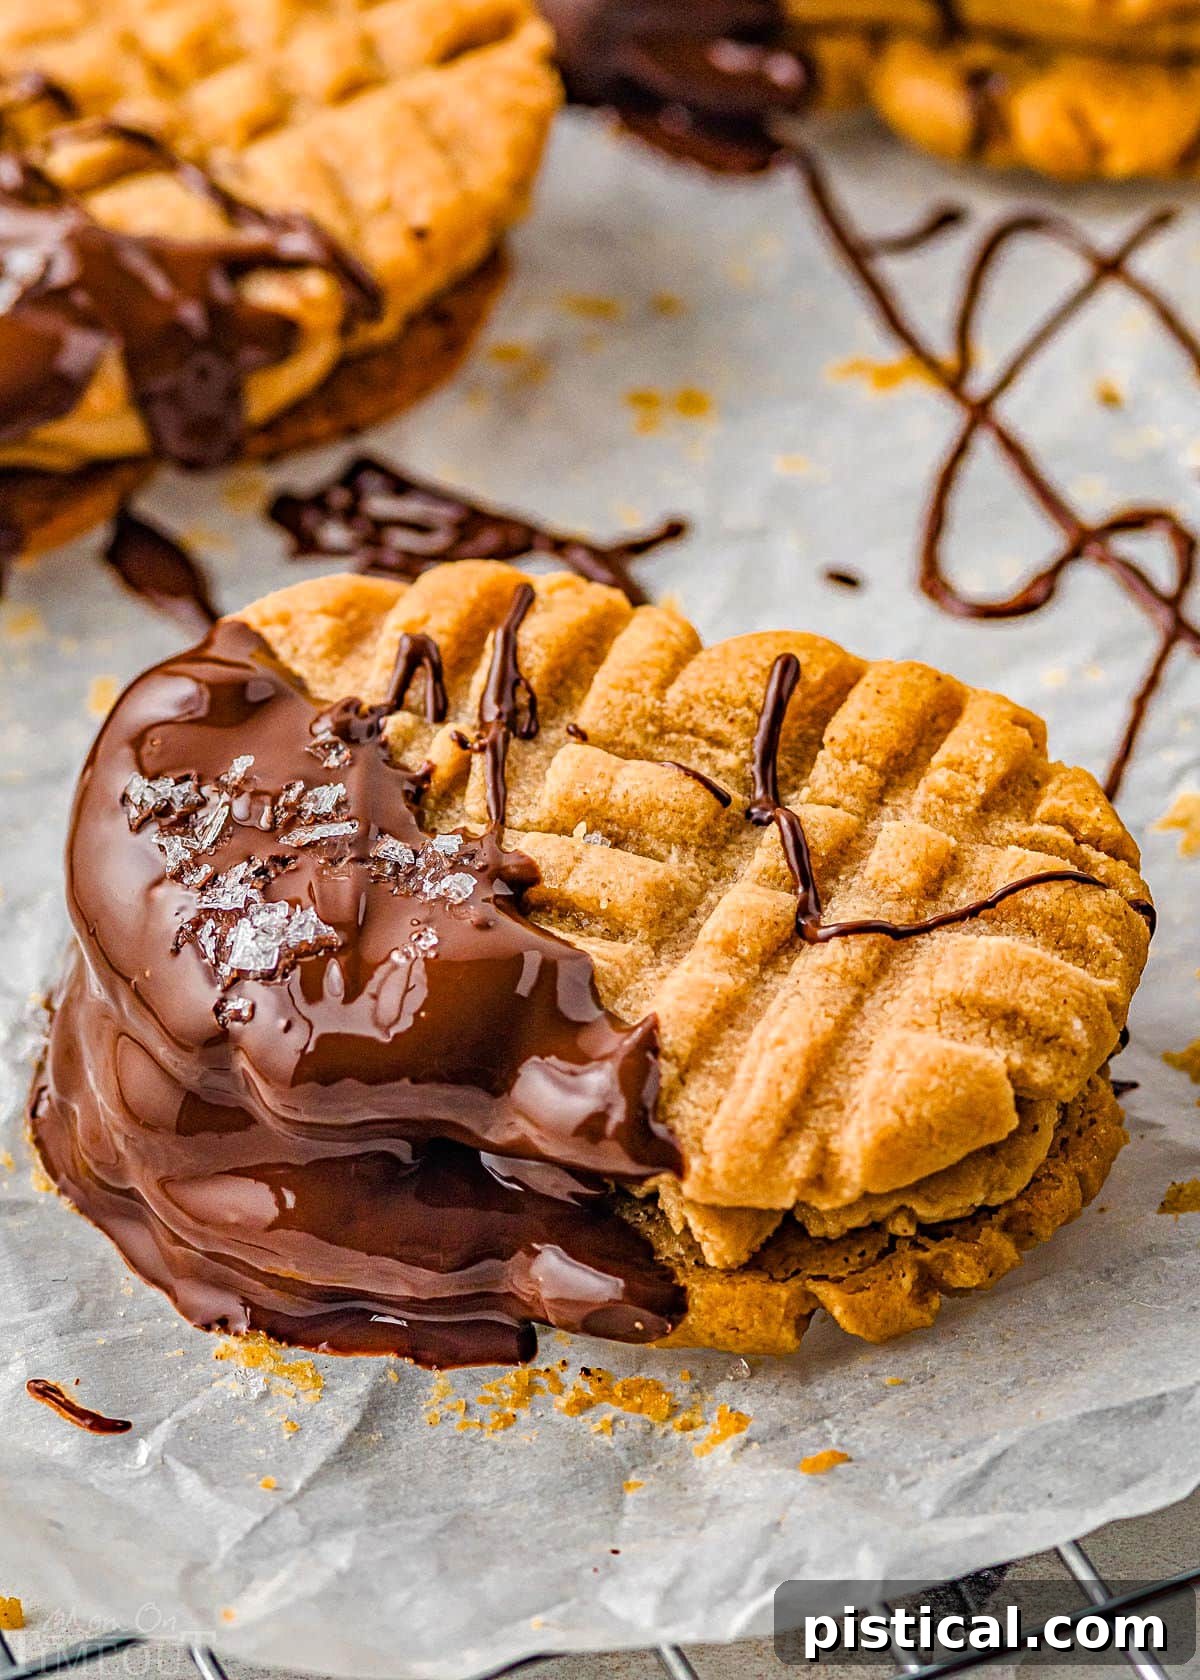
Why Choose Homemade Nutter Butter Cookies?
Many of us have fond memories of biting into a Nutter Butter for the first time – that perfect blend of crunchy cookie and smooth, nutty filling. While the store-bought version holds a special place, making your own homemade Nutter Butter cookies elevates the experience entirely. This recipe isn’t just a replication; it’s an enhancement. You get to control the quality of ingredients, ensuring fresh, rich peanut butter flavor without any artificial additives.
Beyond the superior taste, there’s an undeniable joy in baking these treats from scratch. It’s a fun activity to share with family, creating lasting memories along with delicious cookies. The aroma of freshly baked peanut butter cookies filling your kitchen is simply unmatched. Plus, with a few simple pantry staples, you can whip up a batch of these extraordinary peanut butter sandwich cookies in under an hour, making them a perfect last-minute dessert or a delightful weekend project.
Whether you’re a lifelong peanut butter enthusiast or simply looking for an impressive yet easy cookie recipe, these Nutter Butter cookies are destined to become a cherished favorite in your recipe collection. They are truly a must-have for any occasion, beloved by both children and adults for their iconic flavor and satisfying texture.
More Irresistible Peanut Butter Recipes
Peanut butter is more than just a spread; it’s a culinary marvel that transforms any dish into a comforting and delightful treat. If you can’t get enough of that rich, nutty flavor, these easy peanut butter recipes are perfect for satisfying your cravings:
- Nutter Butter Peanut Butter Fudge: A super creamy fudge with crushed Nutter Butters for an extra layer of texture and flavor.
- Peanut Butter Blossoms: The quintessential peanut butter cookie topped with a Hershey’s Kiss, a timeless classic.
- Loaded Peanut Butter Chocolate Chip Cookies: Combining two of the best cookie flavors into one epic treat.
- Flourless Toffee Peanut Butter Cookies: A gluten-free delight that’s chewy, rich, and packed with toffee bits.
- Peanut Butter Chocolate Chip Brownies: Fudgy brownies swirled with decadent peanut butter and chocolate chips.
- Peanut Butter Cup Cheesecake Fudge: A rich, creamy fudge reminiscent of your favorite peanut butter cups, with a cheesecake twist.
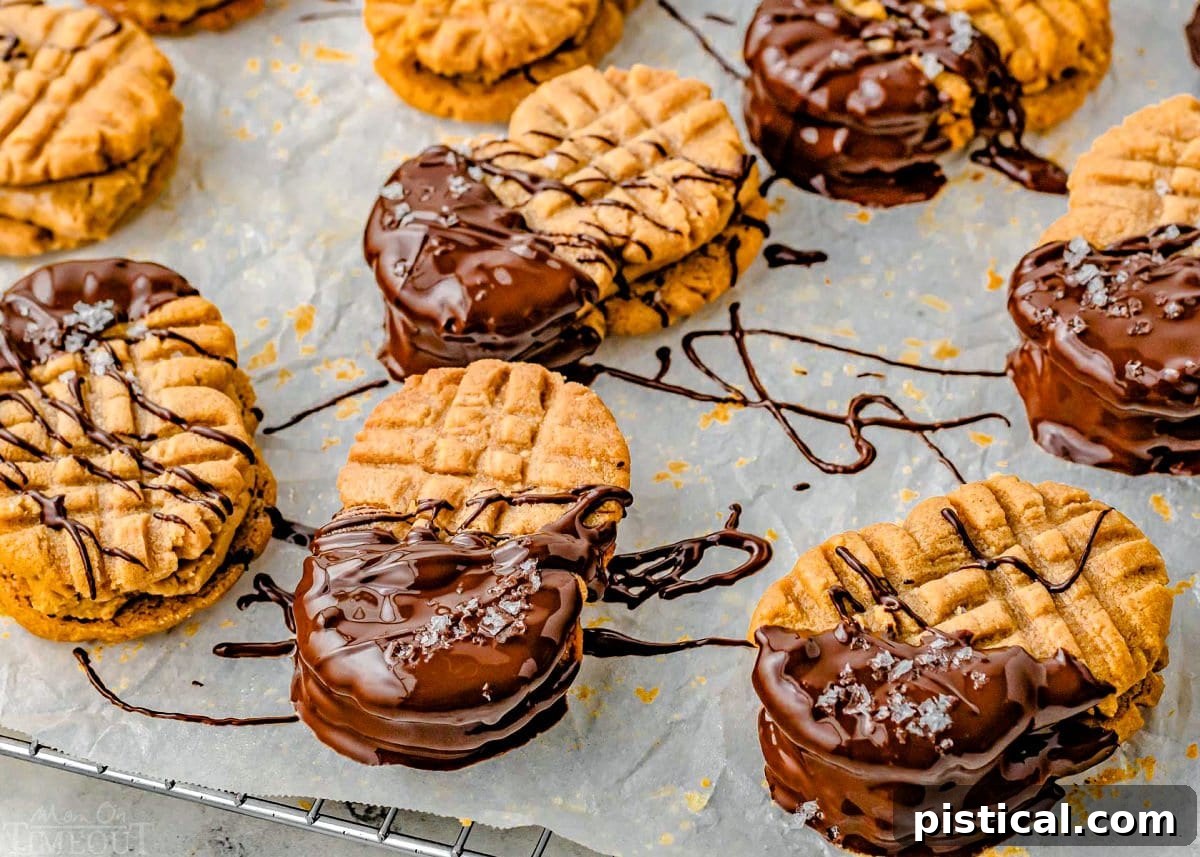
Essential Ingredients for Your Nutter Butter Masterpiece
While some sandwich cookies might intimidate with their complex ingredient lists or lengthy preparation times, these homemade Nutter Butter cookies are refreshingly simple. They come together quickly, requiring only about 30 minutes of active time, and utilize everyday pantry staples you likely already have on hand. It’s truly amazing how such basic components can combine to create an utterly sublime final product!
Here’s a detailed breakdown of the ingredients you’ll need. The full measurements and precise instructions are available in the comprehensive recipe card at the conclusion of this post.
For the Crispy Peanut Butter Cookies
- Peanut butter: The star of the show! Opt for your favorite brand of creamy peanut butter for the smoothest texture. If you desire a more rustic cookie with delightful nutty chunks, feel free to use a crunchy peanut butter variety instead. Avoid natural peanut butter that separates, as its oil content can affect cookie consistency.
- Granulated sugar: Provides the essential sweetness and contributes to the crisp texture of the cookies.
- Eggs: These act as a crucial binder, holding all the ingredients together and preventing the cookies from crumbling apart during baking. Ensure they are at room temperature for better incorporation into the dough.
- Vanilla extract: A touch of vanilla deepens and enhances the overall flavor profile of these delectable peanut butter cookies, adding a warm, aromatic note.
- All-purpose flour: Just a tablespoon of flour provides enough structure to the cookie dough, ensuring they hold their shape without becoming too cakey.
For the Creamy Peanut Butter Filling
- Powdered sugar: Also known as confectioners’ sugar, this fine sugar is key to creating a smooth, lump-free, and delightfully sweet peanut butter filling.
- Peanut butter: Again, creamy peanut butter is recommended here to achieve that signature silky filling. Its rich flavor is what makes these cookies so incredibly special.
- Vanilla extract: Another half-teaspoon of vanilla extract in the filling perfectly complements the sweetness and peanut butter flavor, adding another layer of deliciousness.
- Maple syrup: This natural sweetener not only adds a lovely depth of flavor but also helps achieve the perfect consistency for the filling. As an alternative, you can use honey if you prefer, for a slightly different sweet note.
For the Optional Indulgent Finishing Touches
- Chocolate: For dipping, Ghirardelli Melting Wafers are highly recommended for their smooth melting properties and excellent finish. However, good quality chocolate chips (dark or milk chocolate are both fantastic options!) will also work beautifully. The choice between dark and milk chocolate is entirely up to your preference – both are absolutely divine!
- Flaky Sea Salt: This is a truly optional but highly recommended flavor enhancer. A delicate sprinkle of flaky sea salt on top of the chocolate dip provides a delightful contrast, elevating these homemade Nutter Butter cookies to an extra special level of gourmet indulgence.
How to Craft Your Own Homemade Nutter Butter Cookies: A Step-by-Step Guide
Creating these iconic peanut butter sandwich cookies from scratch is a rewarding and surprisingly simple process. Follow these detailed steps to achieve Nutter Butter perfection.
Step 1: Preparing the Irresistible Peanut Butter Cookies
- Preheat your oven and prepare the baking sheet: Begin by preheating your oven to 350°F (175°C). Line a large baking sheet with a silicone baking mat or parchment paper. This prevents sticking and ensures even baking.
- Cream the wet ingredients: In a spacious mixing bowl, combine the peanut butter and granulated sugar. Beat them together with an electric mixer until the mixture is light, creamy, and well-combined. Next, crack in the egg and add the vanilla extract. Continue beating until these ingredients are thoroughly incorporated, forming a cohesive dough.
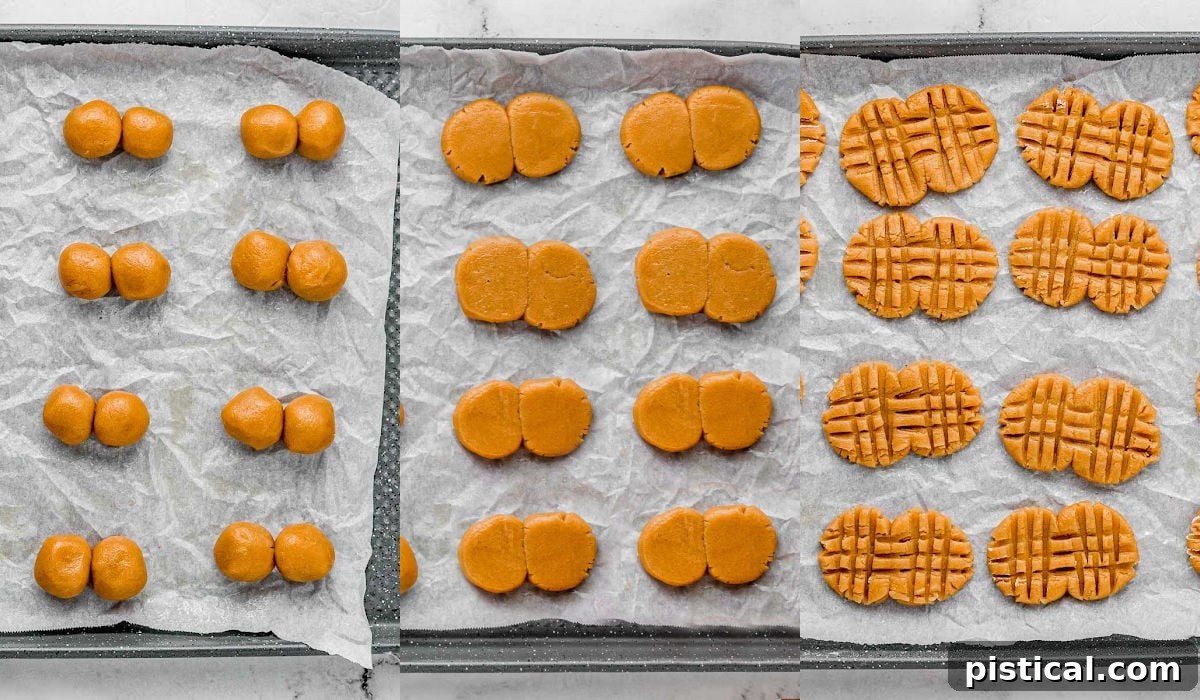
- Form the cookie dough balls: Take the prepared cookie dough and roll it into small, uniform balls. Aim for about ½ teaspoon to 1 teaspoon of dough per ball. The consistency should be easy to handle.
- Arrange and flatten the cookies: Place two dough balls side-by-side on your prepared baking sheet. Using the bottom of a glass or a measuring cup, gently flatten each pair of cookies to an even thickness of about ⅛ to ¼ inch. To achieve the classic Nutter Butter criss-cross pattern, dip the tines of a fork into a small bowl of flour (to prevent sticking) and gently press it into each flattened cookie, first in one direction, then perpendicular to create the iconic crosshatch. This also helps seal the two pieces together.
- Bake and cool: Bake the cookies for 9 to 11 minutes. Keep a close eye on them; they should be lightly golden brown around the edges but still slightly soft in the center. Remove the baking sheet from the oven and let the cookies rest on the sheet for about 5 minutes to firm up slightly. Then, carefully transfer them to a wire rack to cool completely.
Pro Tip for Cooling: To significantly speed up the cooling process, you can transfer the cookies to the freezer for approximately 10 minutes. This is especially helpful when you’re eager to assemble your sandwiches!
Step 2: Crafting the Silky Peanut Butter Filling
While your freshly baked cookies are cooling, it’s the perfect time to prepare the star filling that brings these sandwiches to life.
- Combine and beat the filling ingredients: In a clean mixing bowl, combine the creamy peanut butter, powdered sugar, maple syrup, and vanilla extract. Beat these ingredients together using an electric mixer until the mixture is wonderfully smooth, creamy, and uniform in consistency.
Adjusting Consistency: If your filling appears too thick to spread easily, add a tiny bit more maple syrup or a splash of milk, one teaspoon at a time, until it reaches the desired texture. Conversely, if the filling is too thin, gradually add more powdered sugar until it thickens to a perfect, spreadable consistency.
Step 3: Assembling Your Peanut Butter Sandwich Cookies
Now comes the moment to bring your two delicious components together to form the ultimate peanut butter sandwich cookie!
- Spread the filling: Take one cooled peanut butter cookie. Using a small spoon or an offset spatula, spread a generous dollop (about a teaspoon or so) of the creamy peanut butter filling onto its flat bottom side.
- Form the sandwich: Gently top the filled cookie with another cooled peanut butter cookie, pressing down lightly to create a neat sandwich. Repeat this process until all your cookies have been paired and filled.
- Chill for best results: For optimal firmness and to help the filling set, transfer the assembled cookies to a parchment-lined baking sheet and place them in the freezer for about 10 minutes. This step is crucial if you plan to dip them in chocolate.
Step 4: Adding the Optional Decadent Finishing Touches
For an extra layer of indulgence and gourmet appeal, consider these optional but highly recommended final steps.
- Melt the chocolate: If you’re opting for the chocolate dip, melt your chosen chocolate (Ghirardelli Melting Wafers or chocolate chips) according to the package directions. Ensure the chocolate is completely melted and smooth, without any lumps.
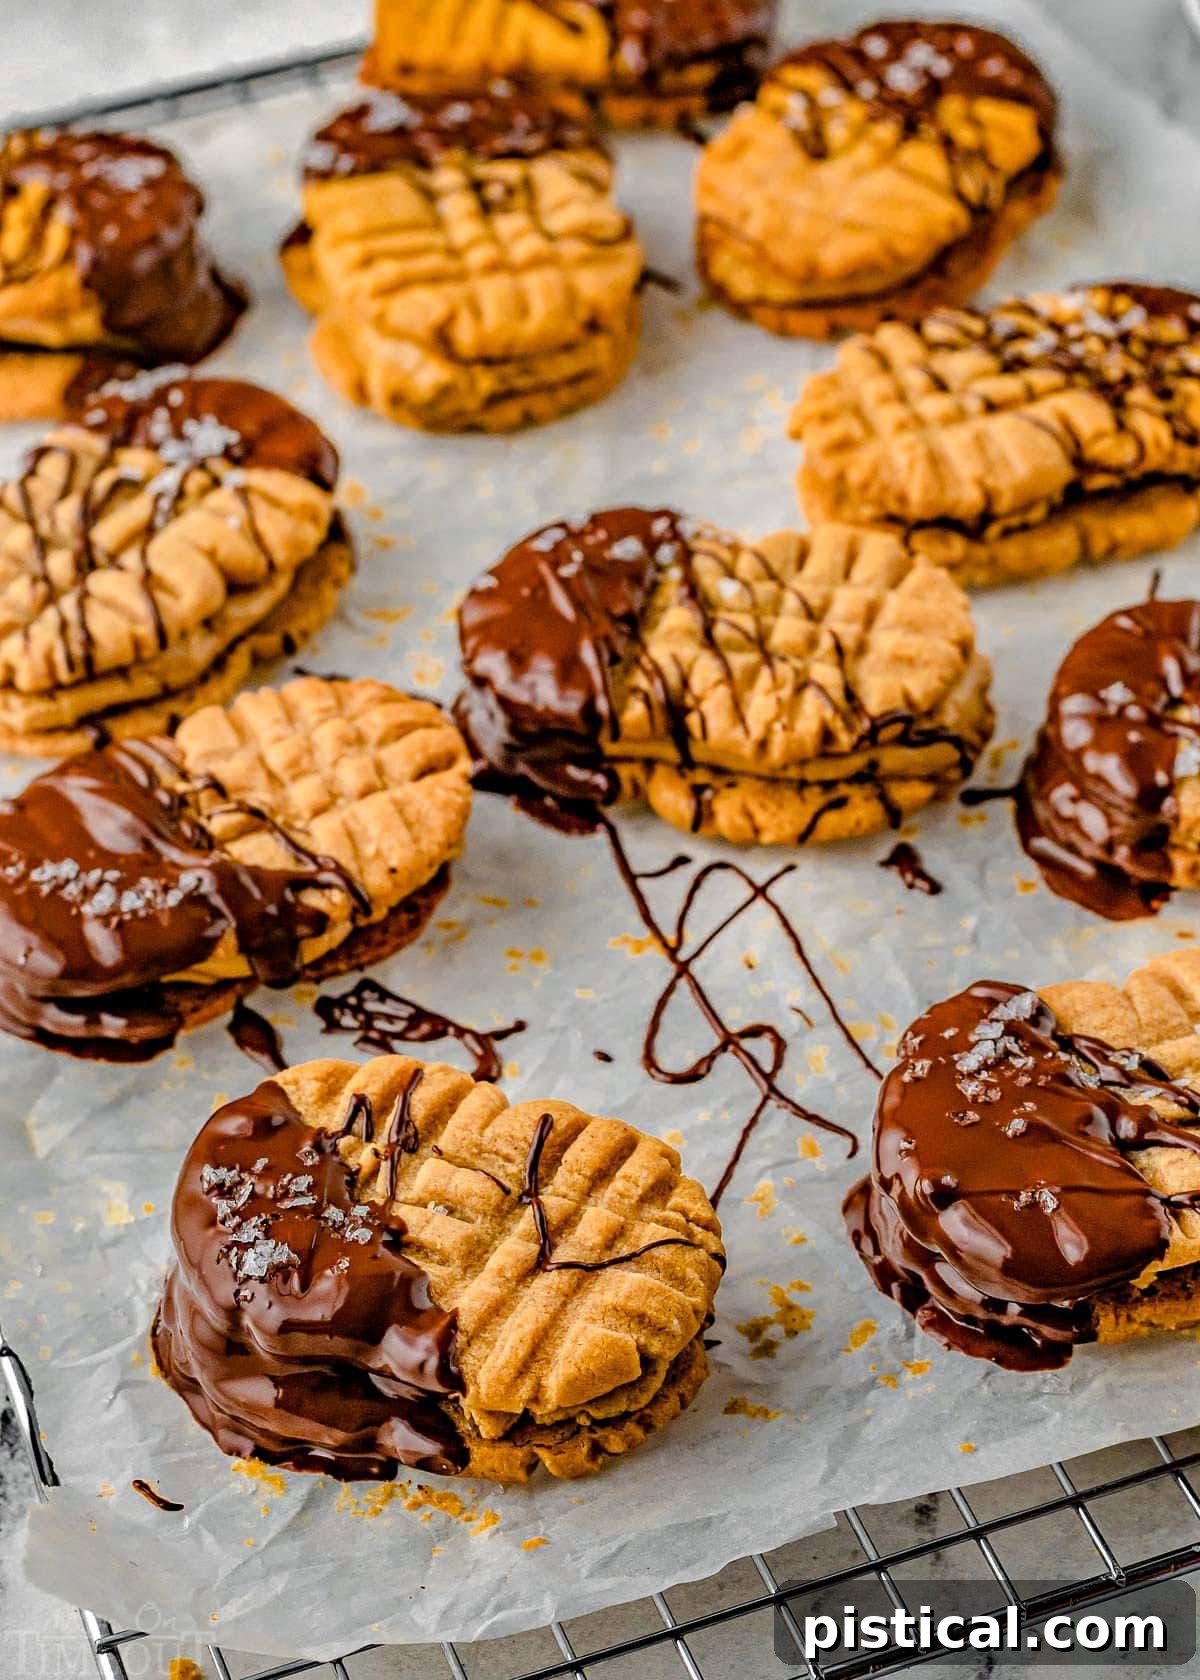
- Dip and sprinkle: Carefully dip half or all of each assembled peanut butter sandwich cookie into the melted chocolate. Allow any excess chocolate to drip off, then gently place the dipped cookies back onto the parchment-lined baking sheet. While the chocolate is still wet, sprinkle with flaky sea salt, if desired, for that irresistible sweet-and-salty contrast.
- Allow to set: Let the chocolate set completely before serving. You can achieve this by leaving them at room temperature, or for a faster set, place them in the refrigerator for 15-20 minutes. Once firm, they are ready to be devoured!
Storing Your Delicious Homemade Nutter Butter Cookies
Room Temperature Storage: These delightful cookies can be stored at room temperature in an airtight container for up to 4 days. Ensure they are in a cool, dry place away from direct sunlight.
Freezing for Longer Enjoyment: To extend their freshness, Nutter Butter cookies freeze exceptionally well. Lay the assembled cookies (with or without chocolate coating) in a single layer on a parchment-lined baking sheet and flash freeze them for about 30 minutes, or until solid. Once frozen, transfer them to an airtight, freezer-safe ziplock bag or container, separating layers with parchment paper to prevent sticking. They can be kept in the freezer for up to 3 months. When you’re ready to enjoy them, simply let them defrost at room temperature for 3 to 4 hours before serving. This makes them perfect for make-ahead treats or unexpected cravings!
Trish’s Expert Tips and Tricks for Nutter Butter Perfection
Achieving the perfect batch of homemade Nutter Butter cookies is easy with a few insider tips:
- Peanut Butter Choice for Cookies: Both creamy and crunchy peanut butter can be used for the cookie dough. If you opt for crunchy, be aware that the nut pieces might make it slightly challenging to create perfectly defined criss-cross fork marks. For the classic look, creamy is often preferred.
- Ensuring Cookie Cohesion: When flattening the two dough balls together, make sure they are firmly sticking to each other. This is crucial to prevent them from breaking apart during baking. You can further secure them by pressing the tines of the fork not just on the surface, but also across the center seam where the two dough balls meet, effectively sealing them together.
- Pre-Filling Freeze is Key: Freezing the baked and cooled cookies briefly before adding the peanut butter filling helps to firm them up quickly. This makes them easier to handle and ensures the filling doesn’t cause them to soften too much. While optional, this step is highly encouraged for a neater assembly.
- Adjusting Filling Consistency: The perfect filling consistency is spreadable yet firm. If your filling seems too thin, gradually mix in additional powdered sugar until it thickens. If it’s too thick, add a tiny splash more maple syrup or milk until it reaches a smooth, spreadable texture.
- Timing the Sea Salt Sprinkle: If you decide to add flaky sea salt to your chocolate-dipped cookies, make sure to sprinkle it immediately after dipping, while the chocolate is still wet and tacky. This ensures the salt adheres beautifully to the surface.
- Achieving the Peanut Shape: For a more authentic Nutter Butter look, after flattening and making the fork marks, gently pinch in the sides of each cookie slightly at the middle. For a longer, more pronounced peanut shape, carefully stretch the dough from either end, being mindful not to tear the delicate cookie.
Homemade Nutter Butters: Frequently Asked Questions
How do you achieve the classic peanut shape for these cookies?
While these cookies are delicious in any shape, achieving the classic Nutter Butter peanut shape is quite simple. After you’ve rolled the dough into two small balls and flattened them side-by-side with the fork marks, gently pinch in the sides at the middle of the combined cookie. This creates a slight indentation, giving it that familiar waistline. For a longer peanut shape, you can also gently stretch the dough from either end after the fork marks are made, being careful not to tear the cookie.
Can I freeze these homemade peanut butter sandwich cookies?
Absolutely! These cookies freeze beautifully, making them excellent for meal prep or enjoying later. To freeze them, arrange the fully assembled cookies in a single layer on a baking sheet lined with parchment paper and flash freeze for approximately 30 minutes, or until they are completely solid. Once frozen, transfer them to an airtight, freezer-safe ziplock bag or container. They will maintain their quality in the freezer for up to 3 months. When ready to serve, simply allow them to defrost at room temperature for 3 to 4 hours, and they’ll be as delicious as freshly baked.
What kind of peanut butter works best for this recipe?
For both the cookies and the filling, a standard creamy peanut butter (like Jif or Skippy) works best. These types of peanut butter have a consistent texture and oil content that is ideal for baking, ensuring your cookies hold their shape and your filling is smooth. While crunchy peanut butter can be used for the cookie dough if you enjoy extra texture, it might make the criss-cross pattern less defined. Avoid natural or “stir-at-the-top” peanut butter for this recipe, as their varying oil content can lead to unpredictable results in baking and filling consistency.
How can I make sure my chocolate dip is smooth and shiny?
For a smooth and shiny chocolate coating, the type of chocolate and how you melt it are key. Ghirardelli Melting Wafers are specifically designed to melt smoothly and set with a nice sheen without needing tempering. If using chocolate chips, opt for good quality semi-sweet or dark chocolate chips. Melt the chocolate slowly and gently, either in a microwave in 30-second intervals, stirring after each, or over a double boiler. Avoid overheating, which can cause the chocolate to seize or become dull. Adding a teaspoon of coconut oil or shortening can also help achieve a smoother, more fluid consistency and a shinier finish.
More Beloved Cookie Recipes to Bake and Enjoy
If you’ve enjoyed baking these Nutter Butter cookies, you’re likely a cookie enthusiast! Here are some other cherished cookie recipes from our kitchen that we think you’ll adore. Perfect for any occasion, these treats are sure to bring smiles:
- Whipped Shortbread Cookies: Light, buttery, and melt-in-your-mouth shortbread cookies, a holiday favorite.
- Kolaczki (Polish Cookies): Delicate, flaky cream cheese cookies with sweet fruit fillings, a delightful European classic.
- Chocolate Crinkle Cookies: Rich, fudgy chocolate cookies rolled in powdered sugar, creating a beautiful crackled effect.
- Chewy Chocolate Chip Cookies: The ultimate comfort cookie, perfectly chewy with generous chocolate chips.
- No Bake Cookies: Quick, easy, and satisfying chocolate peanut butter oat cookies that require no oven!
- Mint Chocolate Chip Snowball Cookies: Festive, crumbly cookies packed with refreshing mint and chocolate chips, perfect for winter.
Homemade Nutter Butter Cookies Recipe
These Homemade Nutter Butter Cookies are an addictively delicious homemade version of classic peanut butter sandwich cookies! Crisp peanut butter cookies sandwiched together with creamy peanut butter filling, optionally dipped in chocolate and finished with a sprinkle of flaky sea salt. This recipe makes approximately 16 servings and is perfect for sharing or enjoying all to yourself!
Course: Dessert
Cuisine: American
Keyword: nutter butter cookies, nutter butter cookie recipe, peanut butter sandwich cookies, homemade peanut butter cookies
Prep Time: 20 minutes
Cook Time: 15 minutes
Servings: 16 cookies
Calories: 267 kcal per serving
Author: Trish – Mom On Timeout
Ingredients
For the Peanut Butter Cookies
- 1 cup creamy peanut butter
- 1 cup granulated sugar
- 1 large egg, at room temperature
- ½ teaspoon vanilla extract
- 1 tablespoon all-purpose flour
For the Creamy Peanut Butter Filling
- ¾ cup creamy peanut butter
- ⅓ cup powdered sugar
- 2 tablespoons maple syrup (or honey)
- ½ teaspoon vanilla extract
Optional Finishing Touches
- 3 ounces Ghirardelli chocolate melting wafers (dark or milk chocolate, or use semi-sweet chocolate chips)
- Flaky sea salt (for sprinkling)
Instructions
Part 1: Making the Peanut Butter Cookies
- Preheat oven to 350°F (175°C). Line a large baking sheet with a silicone baking mat or parchment paper.
- In a large mixing bowl, beat 1 cup of peanut butter and 1 cup of granulated sugar together until creamy. Add the egg and ½ teaspoon of vanilla extract and beat until thoroughly combined.
- Roll the cookie dough into small balls, using approximately ½ to 1 teaspoon of dough per ball.
- Place two balls next to each other on the prepared baking sheet. Using the bottom of a cup or measuring cup, flatten the cookies to ⅛ to ¼ inch thickness. Dip the tines of a fork into the 1 tablespoon of flour and press into the cookies to create the classic criss-cross markings.
- Bake cookies for 9 to 11 minutes, or until edges are lightly golden. Remove from oven, let rest on the baking sheet for 5 minutes, then carefully transfer to a cooling rack to cool completely. For faster cooling, transfer to the freezer for about 10 minutes.
Part 2: Preparing the Peanut Butter Filling
- While the cookies are cooling, prepare the filling. In a medium mixing bowl, beat ¾ cup of peanut butter, ⅓ cup of powdered sugar, 2 tablespoons of maple syrup, and ½ teaspoon of vanilla extract together until smooth and creamy.
- Tip: If the filling is too thick, add a little more maple syrup (or milk) in ½ teaspoon increments. If it’s too thin, add more powdered sugar, 1 tablespoon at a time, until the desired consistency is reached.
Part 3: Assembling the Sandwich Cookies
- Spread about a teaspoon of the prepared filling onto the bottom of one cooled cookie. Top with another cooled cookie to create a sandwich. Repeat with remaining cookies.
- Transfer the assembled cookies to a parchment-lined baking sheet and place in the freezer for 10 minutes to help the filling set.
Part 4: Adding the Optional Finishing Touches
- If desired, melt the 3 ounces of chocolate wafers according to package directions until completely melted and smooth.
- Dip each cookie into the melted chocolate (half or all of the cookie) and place back on the parchment-lined baking sheet.
- While the chocolate is still wet, sprinkle with flaky sea salt, if using.
- Let the chocolate set up completely before serving. This can be done at room temperature or by refrigerating for 15-20 minutes.
Notes
- Storage Information: Store leftover homemade Nutter Butter cookies in an airtight container at room temperature for up to 4 days.
- Freezing Instructions: To freeze, arrange cookies in a single layer on a parchment-lined baking sheet and flash freeze for about 30 minutes. Once solid, transfer to an airtight, freezer-safe bag or container and store for up to 3 months. Thaw at room temperature for 3-4 hours before serving.
Nutrition Information (per serving)
- Calories: 267 kcal
- Carbohydrates: 26g
- Protein: 7g
- Fat: 16g
- Saturated Fat: 5g
- Polyunsaturated Fat: 4g
- Monounsaturated Fat: 7g
- Trans Fat: 1g
- Cholesterol: 10mg
- Sodium: 135mg
- Potassium: 194mg
- Fiber: 2g
- Sugar: 23g
- Vitamin A: 15 IU
- Calcium: 17mg
- Iron: 1mg