
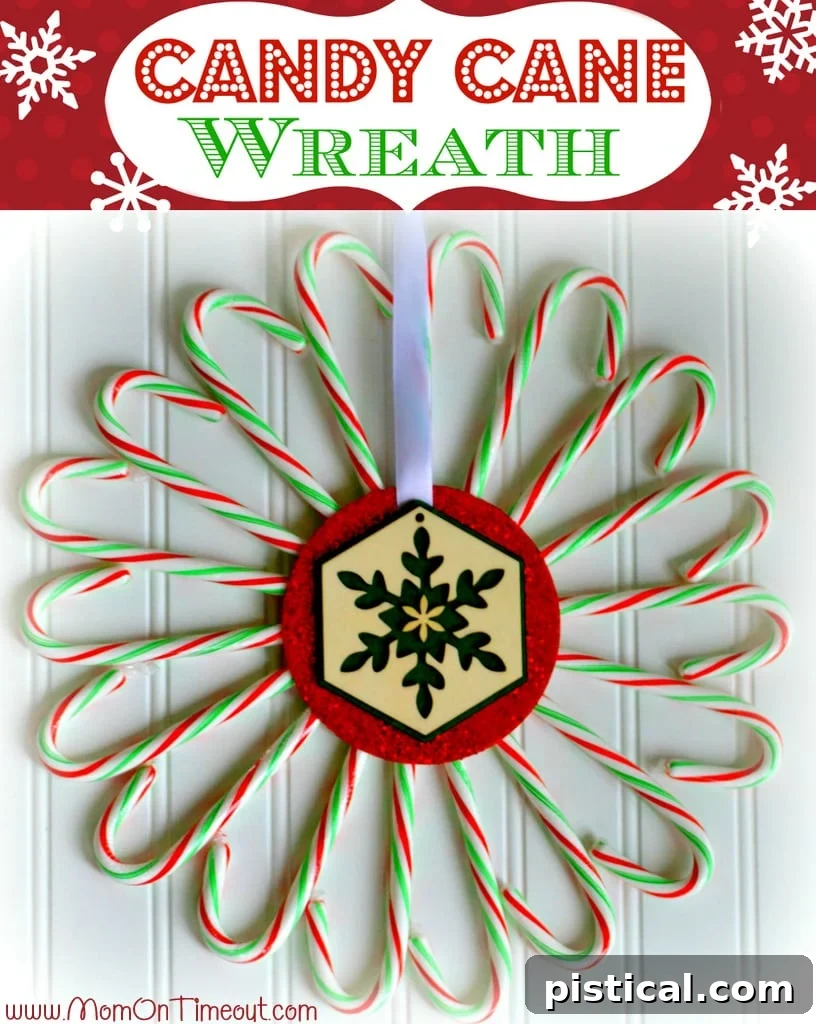
DIY Candy Cane Christmas Wreath: A Festive & Easy Holiday Craft
The magic of the holiday season is upon us, and what better way to embrace it than with a touch of handmade charm? Christmas crafts are not just about decorating; they’re about creating memories, adding a personal touch to your home, and finding joy in the simple act of making something beautiful. If you’re looking for an incredibly fun, surprisingly simple, and budget-friendly project to bring that extra sparkle to your festive decor, then you’ve landed in the perfect spot. We’re about to dive into crafting a delightful Candy Cane Christmas Wreath that will undoubtedly become a conversation starter.
Every year, the desire to create unique, personalized decorations grows stronger, but often, time just slips away. Sound familiar? This year, let’s change that! Our candy cane wreath project is designed for everyone, from seasoned crafters to enthusiastic beginners. What makes this particular wreath stand out isn’t just its charming appearance, but also the clever, eco-friendly secret at its core: a recycled CD or DVD serving as the perfect base. Yes, you heard that right! Repurposing everyday items into stunning holiday art is not only satisfying but also a testament to creative ingenuity.
Prepare to be amazed by how easily a handful of sweet treats and a few craft essentials can transform into a stunning holiday display. We’re thrilled to share this project with you, confident that it will add a cheerful, whimsical touch to your Christmas celebrations. Let’s get crafting and infuse your home with the spirit of the season!
Why a DIY Candy Cane Wreath is Your Perfect Holiday Project
In a world of mass-produced decorations, there’s something truly special about a homemade piece. A DIY Candy Cane Christmas Wreath offers a unique blend of nostalgia, creativity, and affordability. Candy canes are synonymous with Christmas – their vibrant red and white stripes and refreshing peppermint flavor evoke cherished childhood memories and festive cheer. Incorporating them into your decor allows you to celebrate this iconic holiday treat in a visually appealing way.
Beyond the aesthetic appeal, crafting your own wreath brings immense satisfaction. It’s an opportunity to express your personal style, choosing candy cane colors and embellishments that perfectly match your holiday theme. Unlike store-bought wreaths that can be expensive and generic, your handmade creation will be one-of-a-kind, reflecting your effort and love for the season. It’s also an excellent project for families, providing a wonderful opportunity for children and adults to bond over a shared creative activity. Plus, by repurposing an old CD or DVD, you’re embracing sustainability and giving new life to an item that might otherwise end up in landfill. This project proves that stunning holiday decor doesn’t require a hefty budget or complicated techniques – just a little imagination and some sweet inspiration.
Gathering Your Festive Supplies: What You’ll Need
One of the best aspects of this DIY Candy Cane Christmas Wreath is that it requires only a few readily available and inexpensive materials. Before you begin your crafting adventure, gather the following essentials. You might be surprised by how many of these you already have around the house, making this an incredibly budget-friendly endeavor.
- CD/DVD: This is our clever and eco-friendly wreath base! Any old, scratched, or unwanted CD or DVD will work perfectly. It provides a sturdy, circular form without needing to purchase a specialty craft ring.
- Spray Paint: Choose a festive color like red, green, gold, or silver to coat your CD base. Red provides a classic Christmas backdrop that really makes the candy canes pop. Ensure you’re working in a well-ventilated area when using spray paint.
- Glitter: A fine glitter adds an extra touch of sparkle and festivity. Red glitter on a red base creates a cohesive, shimmering effect, but feel free to experiment with contrasting colors for a bolder statement.
- Polyurethane Spray (Optional but Recommended): This clear protective spray acts as a sealant. It helps secure the glitter, preventing it from shedding all over your home. It also gives the base a durable, slightly glossy finish.
- Ribbon: You’ll need a festive ribbon for hanging your wreath and potentially for a decorative bow. Choose a width and pattern that complements your candy canes and overall holiday decor. Satin, grosgrain, or wired ribbons all work beautifully.
- Ornament: A central ornament serves as the perfect focal point, adding dimension and a touch of elegance to your wreath. Look for something that matches your color scheme and theme, perhaps a small sparkly ball, a miniature bell, or a festive charm. Target often has great, affordable options for just a dollar or two!
- Candy Canes: The star of our show! You’ll need a good quantity of standard-sized candy canes. The exact number will depend on how closely you space them, but typically, a dozen to two dozen will suffice for a standard CD-sized wreath. Feel free to mix traditional red and white stripes with other festive colors or patterns available for a unique look.
- Hot Glue Gun and Glue Sticks: A mini hot glue gun is ideal for this project, offering precision and quick drying time. Always exercise caution when using a hot glue gun, especially if crafting with children.
With these simple supplies in hand, you’re ready to transform them into a holiday masterpiece!
Step-by-Step Guide: Crafting Your Candy Cane Masterpiece
Creating your Candy Cane Christmas Wreath is an enjoyable process that yields beautiful results. Follow these simple steps to bring your festive vision to life.
Step 1: Preparing Your Wreath Base (CD/DVD)
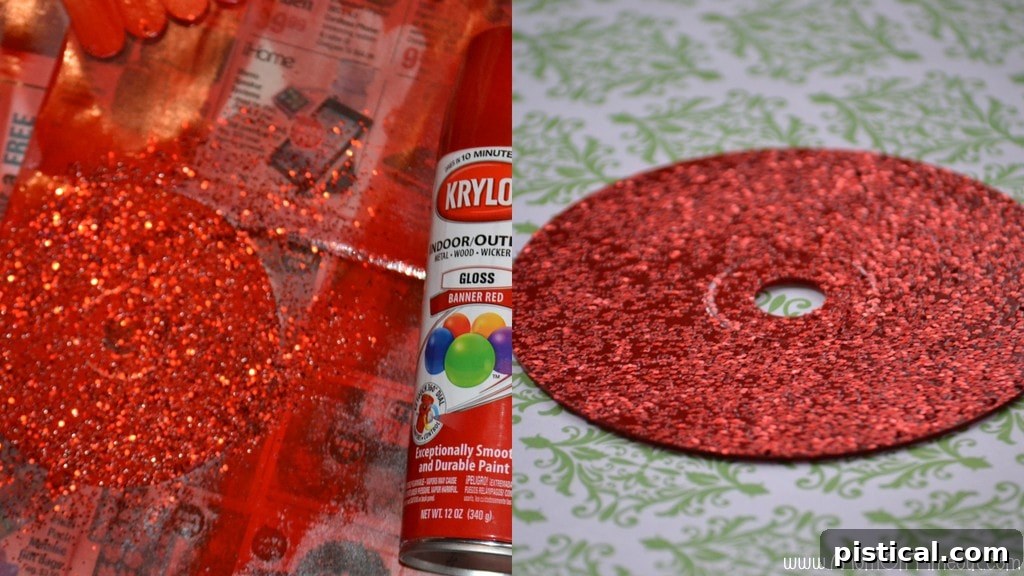
The foundation of your wreath is the humble CD or DVD. To transform it into a sparkling base, begin by laying it on a protected surface in a well-ventilated area, preferably outdoors. Apply your first coat of spray paint evenly across the surface. Once this initial coat is tacky but not fully dry, apply a second coat. While this second coat is still wet, generously sprinkle your chosen glitter over the entire painted surface. This ensures the glitter adheres effectively. Allow the paint and glitter to dry completely, which might take a few hours depending on humidity. To seal in the sparkle and prevent any glitter mess, finish with a coat of polyurethane spray. This protective layer will make your wreath more durable and keep the glitter securely in place, ready for years of enjoyment.
Step 2: Arranging and Securing Your Candy Canes
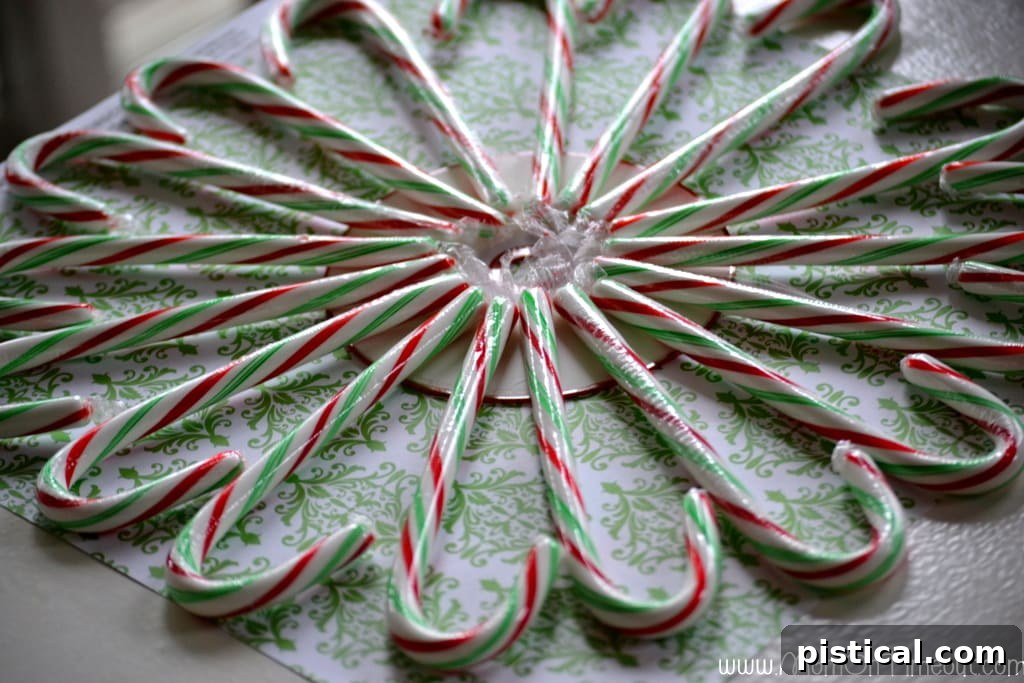
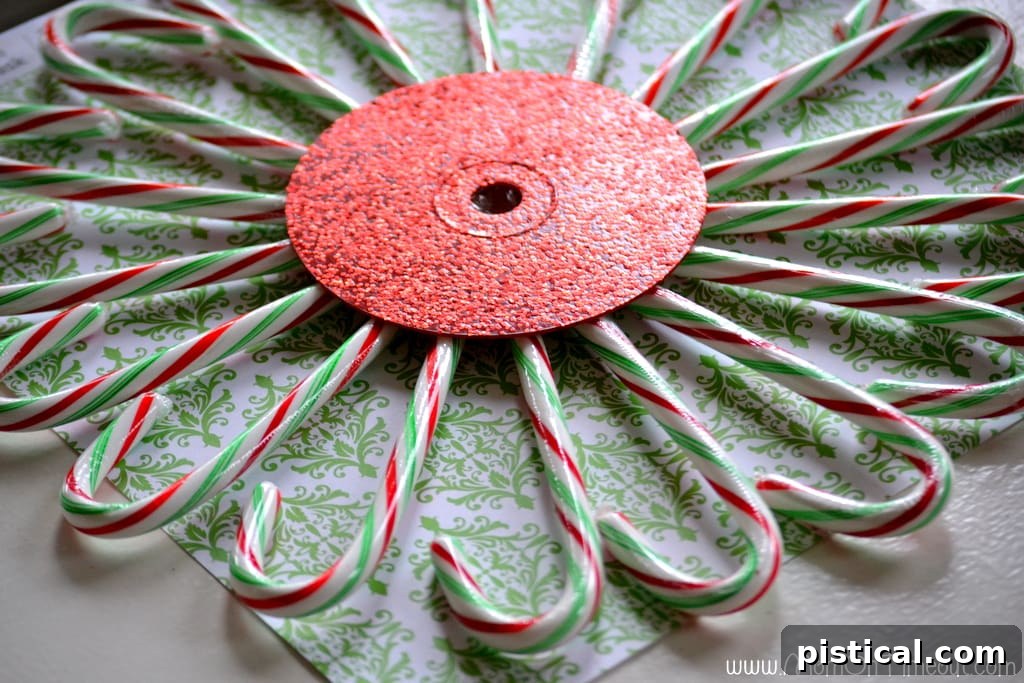
Once your CD base is perfectly dry and sparkling, it’s time for the candy canes! Flip the CD over so the painted and glittered side faces down. Before applying any glue, lay out your candy canes around the perimeter of the CD. Experiment with different spacings and angles until you achieve a symmetrical and aesthetically pleasing arrangement. Typically, the hooked ends of the candy canes will face outwards, creating a lovely radial pattern. Take a moment to ensure they are evenly spaced and that you like the overall look. This planning stage is crucial as it’s harder to adjust once the glue is applied. Once satisfied with the layout, bring out your hot glue gun. Working one by one, carefully lift each candy cane, apply a generous dab of hot glue to the flat side that will rest on the CD, and firmly press it into place. Hold each candy cane for a few seconds to allow the glue to set. Continue this process until all your candy canes are securely attached.
Step 3: Revealing Your Wreath and Adding the Hanging Ribbon
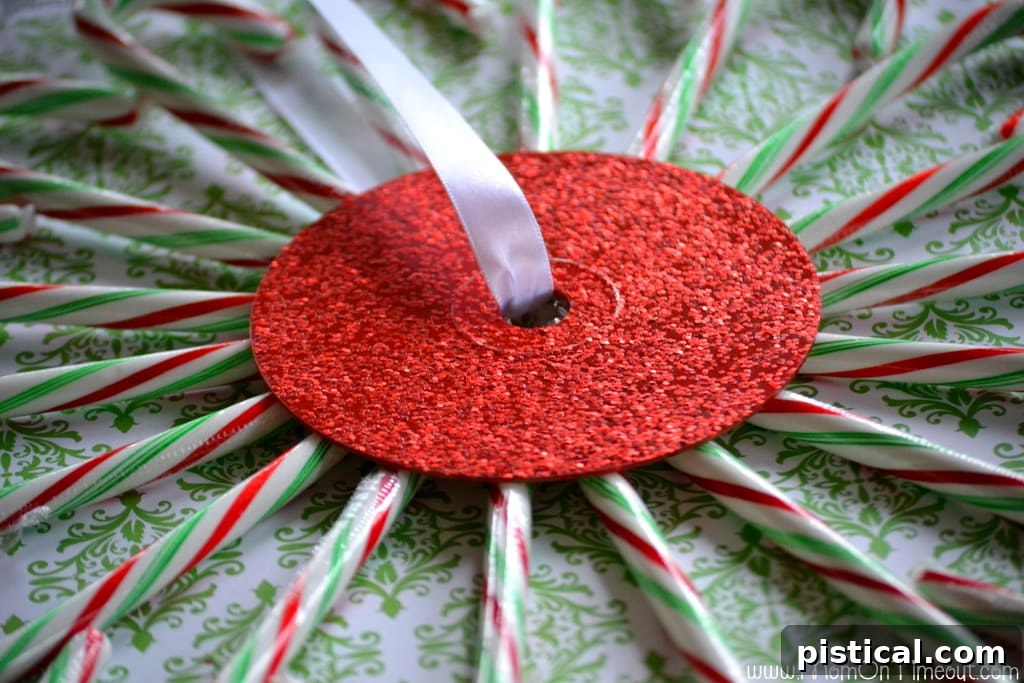
After all the candy canes are glued and the adhesive has fully dried, carefully flip your wreath over. This is the magical moment when your creation truly takes shape! You’ll be delighted by the vibrant and festive design. The CD serves a dual purpose: it’s not just the structural base for the candy canes but also the perfect anchor for your hanging ribbon. To create a hanger, take your chosen ribbon and thread it through the center hole of the CD. Bring the two ends of the ribbon together at the top and tie them securely with a sturdy knot. You can adjust the length of the ribbon loop to your desired hanging height. Ensure the knot is tight and reliable, as it will bear the weight of your beautiful new wreath.
Step 4: The Finishing Touch: Embellishing Your Wreath
To give your wreath a polished and complete look, a decorative embellishment at the center is ideal. This ornament not only adds visual interest but also helps to conceal the CD’s center hole and any visible glue, providing a refined finish. Choose an ornament that complements the candy canes and your overall festive theme. A small, sparkly Christmas ball, a miniature bell, or a festive floral pick can work wonderfully. Apply a dab of hot glue to the back of your chosen ornament and carefully press it into the center of the wreath. Hold it firmly until the glue sets. This final touch adds depth and a professional appearance, truly elevating your homemade Candy Cane Christmas Wreath from a simple craft to a stunning piece of holiday decor. Consider what personal touches you might add, perhaps a small bow or some additional glitter around the center to tie everything together beautifully.
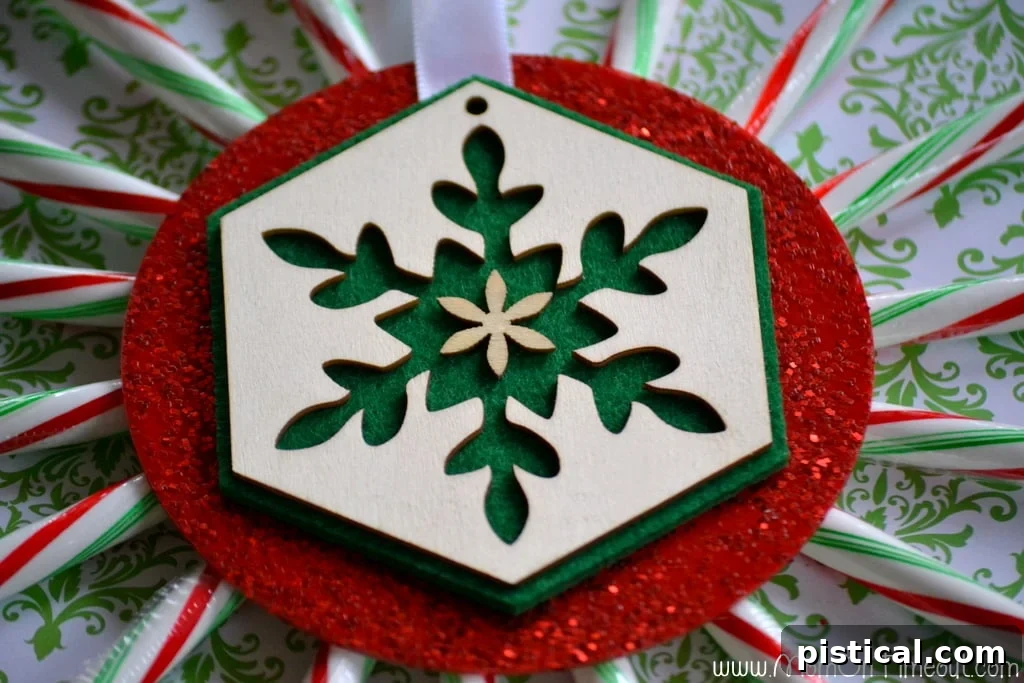
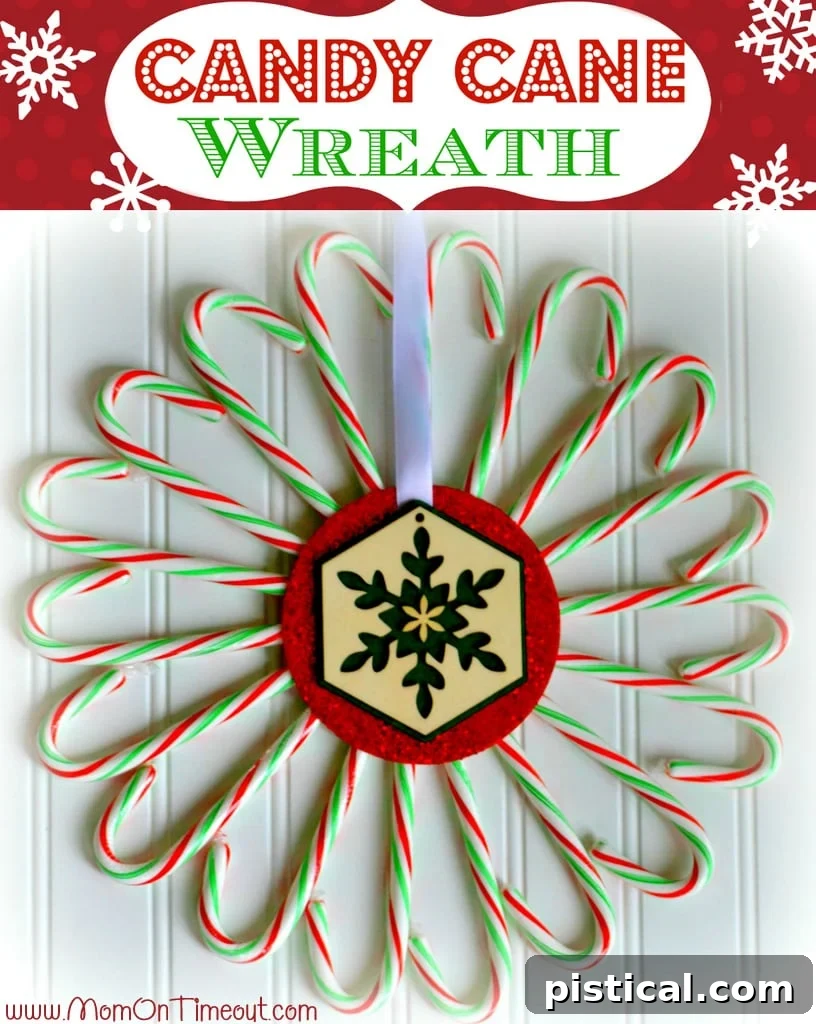
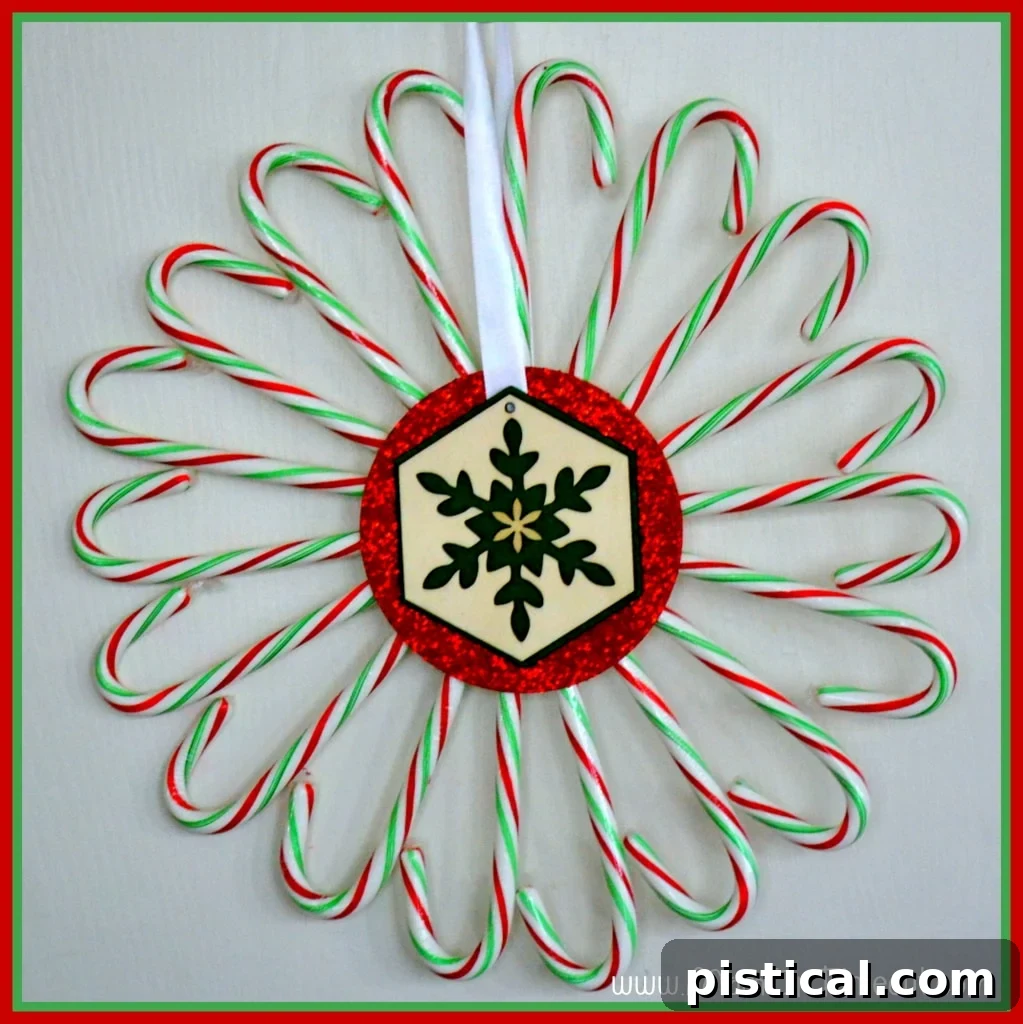
We absolutely adore the final look! The combination of the classic candy canes, the shimmering base, and the charming central ornament creates a truly captivating piece that embodies the joy of Christmas.
Tips for the Perfect Candy Cane Wreath
To ensure your Candy Cane Christmas Wreath is as charming and durable as possible, consider these helpful tips:
- Candy Cane Variety: Don’t limit yourself to just traditional red and white! Many stores offer candy canes in various colors like green, blue, pink, or even rainbow swirls. Using a mix of colors can create a vibrant, playful wreath, while sticking to a single color palette (e.g., all white and silver) can achieve a more elegant or modern look. Experiment to match your existing holiday decor.
- Hot Glue Savvy: A mini hot glue gun provides better control for precise application. Always work in small sections, gluing one candy cane at a time. If you find glue strings, they can easily be removed once the glue is completely cool by gently peeling or using tweezers.
- Durability for Display: While candy canes are sturdy, this wreath is best suited for indoor display or a very well-sheltered outdoor area. Extreme cold or humidity can make the candy canes sticky or brittle. If displaying outdoors, ensure it’s protected from the elements.
- Personalized Embellishments: Get creative with your central ornament! Instead of a traditional bauble, consider a small fabric bow, a cluster of miniature pinecones, tiny jingle bells, or even a personalized tag. These small details can make your wreath truly unique.
- Kids’ Crafting: This project is fantastic for involving children, especially the gluing and decorating steps. Always supervise closely when using a hot glue gun, or for younger children, pre-glue the candy canes to the CD and let them handle the glitter application and ornament placement with craft glue.
- Storage: To preserve your beautiful wreath for years to come, store it carefully after the holidays. Place it in a sturdy box, perhaps with some tissue paper or bubble wrap to protect the candy canes and glitter, and store it in a cool, dry place.
Displaying Your Handmade Holiday Charm
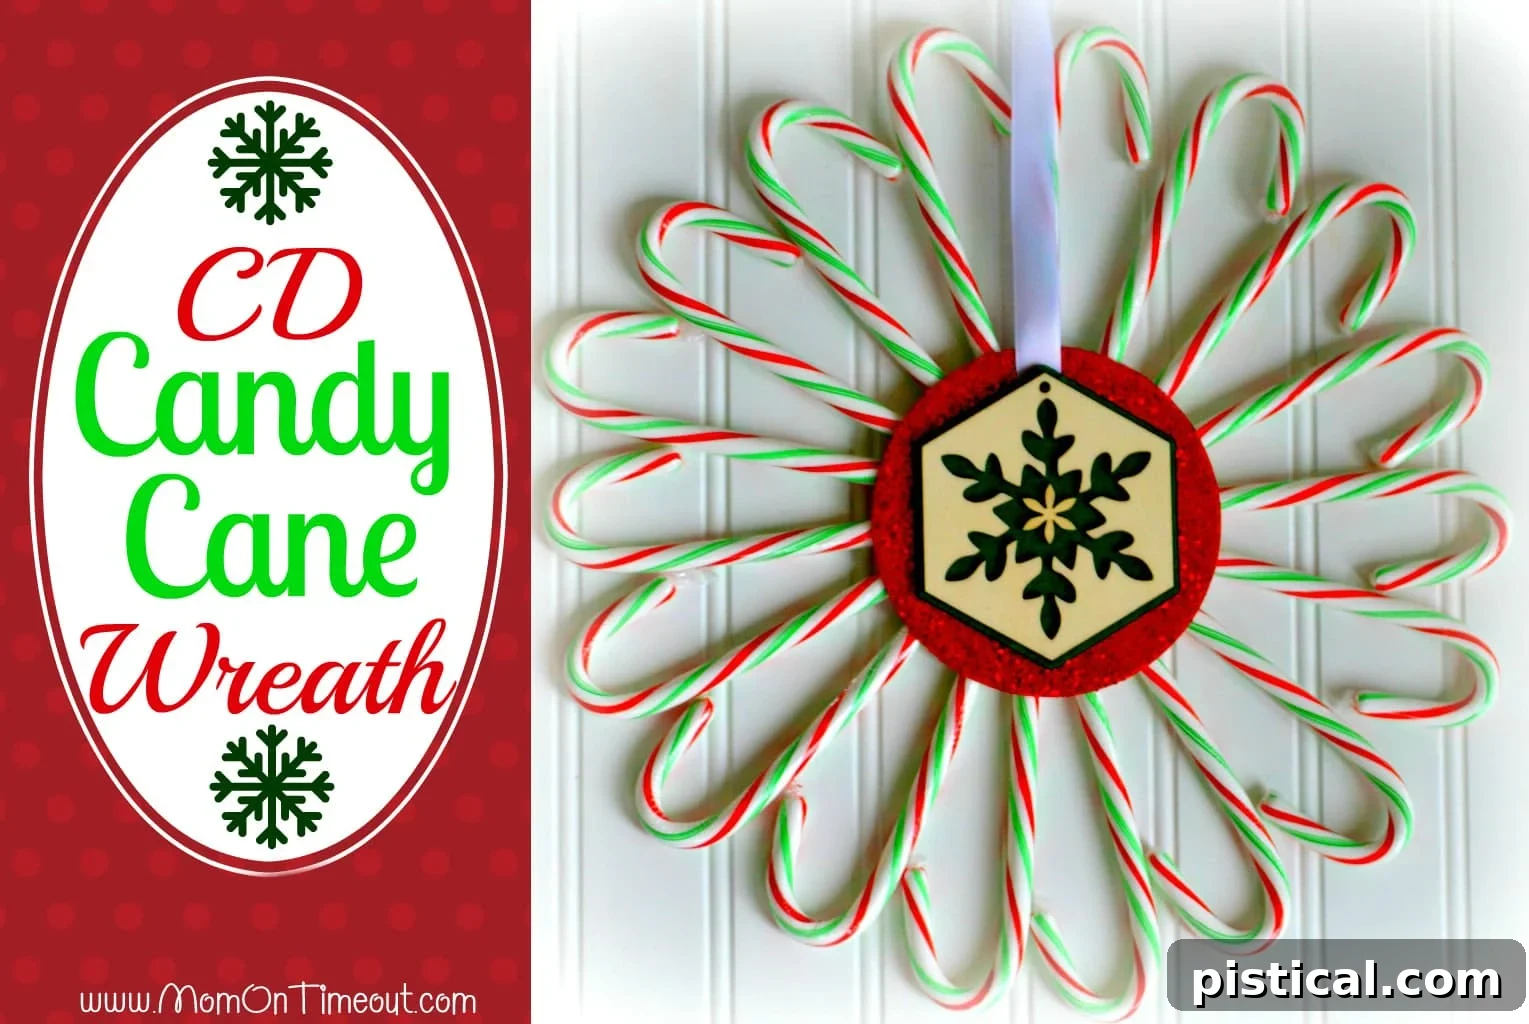
Once your Candy Cane Christmas Wreath is complete, the joy of displaying it truly begins! This charming piece is versatile enough to adorn various spots in your home, instantly infusing any space with holiday cheer.
Consider hanging it proudly on your front door to greet guests with a burst of festive color and a hint of whimsical sweetness. It makes a delightful alternative to traditional evergreen wreaths. Indoors, it can become a stunning focal point above your fireplace mantel, drawing attention to your festive hearth. Alternatively, hang it on a prominent wall in your living room or dining area, or even in a kitchen window where the light can catch its glittery sparkle.
This wreath also makes for an incredibly thoughtful and unique handmade gift. Imagine presenting this beautiful, personal creation to a friend, neighbor, or family member. It’s a gift that truly comes from the heart and showcases your festive spirit. Pair it with other candy cane-themed decorations for a cohesive look, or let it shine as a standalone statement piece. Regardless of where you choose to display it, your DIY Candy Cane Christmas Wreath is sure to bring smiles and compliments throughout the holiday season.
Beyond the Wreath: More Candy Cane Craft Ideas
If you’ve enjoyed crafting this delightful candy cane wreath, you’ll be thrilled to discover the myriad of other creative projects you can embark on using these iconic holiday treats. Candy canes are not just for eating; their distinctive shape and festive colors make them incredibly versatile for various Christmas crafts, allowing you to extend your holiday DIY spirit even further.
One popular and adorable project is creating Candy Cane Reindeer. With just a few simple additions like googly eyes, a small red pom-pom for a nose, and pipe cleaner antlers, two candy canes can be transformed into charming little reindeer, perfect as tree ornaments, gift toppers, or even festive place card holders for your holiday table. These are especially fun for kids to make!
You can also use candy canes to craft unique ornaments for your Christmas tree. Simply tie ribbons to individual candy canes, or glue several together in starburst patterns. They can also be incorporated into garlands by stringing them together with cranberries or popcorn, creating a classic and edible decoration. For a more sophisticated look, consider using mini candy canes to decorate small gift boxes or treat bags, adding a charming, personalized touch to your holiday favors.
The possibilities are endless when it comes to crafting with candy canes. They offer an affordable, accessible, and wonderfully festive medium to unleash your creativity, adding sweet and playful touches throughout your holiday home.
Embrace the Holiday Spirit with Your Handmade Wreath!
There’s an unparalleled joy that comes from adorning your home with decorations you’ve crafted yourself. This DIY Candy Cane Christmas Wreath project is more than just a craft; it’s an invitation to embrace the holiday spirit, unleash your creativity, and add a deeply personal touch to your festive decor. From selecting your favorite candy canes to adding that final, sparkling ornament, every step is a celebration of the season.
We hope this detailed guide has inspired you to grab your supplies and embark on your own wreath-making journey. It’s a project that promises not only a beautiful outcome but also a delightful crafting experience. Whether you’re making it for your own home or as a thoughtful gift for a loved one, your handmade candy cane wreath will undoubtedly spread cheer and capture the whimsical essence of Christmas. So, go ahead, get creative, and let your holiday spirit shine through your crafting!
Happy crafting and happy holidays!