
Dazzling & Durable: Crafting Kid-Proof Christmas Decorations on a Budget
The holiday season ushers in a magical atmosphere, transforming homes with sparkling lights, festive greenery, and glittering ornaments. Like many, I absolutely adore beautiful, shiny Christmas decorations; they instantly bring a smile to my face and fill our home with cheer. However, for those of us living with energetic little ones, this joy can sometimes be overshadowed by the constant worry of fragile glass ornaments meeting an untimely end. The sound of a cherished bauble shattering on the floor can quickly turn holiday delight into a moment of frustration, not to mention the safety concern of broken shards.
If you’ve ever experienced the heartache of seeing your carefully chosen decorations become casualties of curious hands or playful bumps, you know the dilemma all too well. The challenge is how to maintain that vibrant, festive aesthetic without sacrificing safety or constantly replacing broken items. What if you could create stunning, high-impact Christmas decor that not only looks fantastic but is also resilient enough to withstand the busiest of households, all while being incredibly budget-friendly?
Good news! I’ve discovered an ingenious, cost-effective, and remarkably simple solution that ensures your holiday sparkle stays intact. This DIY project is designed to bring joy, not tears, providing a festive display that’s perfectly safe for children and pets. Say goodbye to fragile decor stress and hello to a season of worry-free, dazzling decorations!
Why Opt for Kid-Friendly DIY Christmas Decor?
Embracing DIY decorations, particularly those designed with durability in mind, offers a multitude of benefits that extend beyond mere aesthetics. For families, the advantages are particularly compelling:
- Uncompromised Safety: The most significant advantage is the elimination of hazards. Using shatterproof materials means no sharp glass fragments, making your festive home a safer environment for curious toddlers and playful pets. Enjoy the holidays without constant vigilance over delicate items.
- Exceptional Affordability: This project leverages inexpensive materials, many of which can be found at dollar stores or repurposed from around your home. You can achieve a luxurious, full look without the hefty price tag often associated with high-end holiday decor.
- Limitless Customization: Your creativity is the only limit! Adapt this project to match any existing holiday theme, color scheme, or personal style. From traditional reds and greens to modern metallics or whimsical pastels, the choice is yours.
- Effortless & Time-Saving: Perfect for busy individuals, this craft requires minimal time and effort. It’s an ideal project for those who want to add a significant touch of holiday spirit without committing to complex, multi-day endeavors.
- Engage the Entire Family: With safe materials, this DIY becomes a wonderful family activity. Children can actively participate in selecting ornaments, wrapping cans, and arranging the display, fostering a sense of involvement and holiday magic.
- Sustainable & Reusable: These robust decorations are built to last season after season. Storing them carefully ensures they’ll be ready to bring joy next year, saving you both time and money on future holiday decorating.
- Stress-Free Festivities: The ultimate benefit is peace of mind. You can relax and fully immerse yourself in the holiday spirit, knowing your beautiful display is resilient against unexpected bumps and playful interactions.
Your Shopping List: Dollar Store Treasures & Household Staples
The true beauty of this DIY Christmas centerpiece lies in its simplicity and the readily available, inexpensive materials it requires. A quick trip to your local dollar store or craft supply retailer, combined with a little rummaging around your home, is all it takes to gather everything you need. Here’s a detailed list to get you started:
Essential Materials:
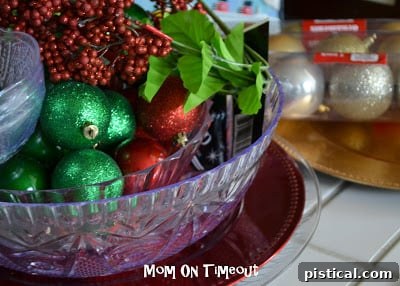
- Plastic Bowls and/or Plates: Visit your local dollar store and explore their selection of plastic dinnerware. Look for a variety of sizes and perhaps even different festive colors (clear, white, silver, gold, red, green). These will form the tiers of your display, acting as sturdy trays to hold your decorative elements. Their lightweight and durable nature make them perfect for this project.
- Shatterproof Ornaments: Crucial for a kid-proof design, shatterproof ornaments are widely available and come in an incredible array of colors, finishes (matte, glossy, glittery), and shapes. Stock up! The more variety you have in size, texture, and hue, the richer and more dynamic your finished centerpiece will appear. Consider traditional baubles, but also look for unique shapes or themed ornaments that complement your chosen holiday aesthetic.
- Empty Cans: Gather a few clean, empty food cans (e.g., soup cans, vegetable cans, coffee cans). These cylindrical forms will serve as the structural supports for your tiered stand. Varying the heights of the cans can add an interesting dimension to your display, creating a dynamic visual flow. Ensure they are thoroughly cleaned and dry.
- Wrapping Paper or Metallic Tissue Paper: This is where you infuse your personal style. Select festive wrapping paper with holiday prints, elegant metallic tissue paper, or even patterned craft paper that coordinates with your decor. This paper will cover the cans, transforming them from ordinary household items into attractive decorative pedestals.
- Adhesive: You’ll need something to secure your wrapping paper. Standard clear tape or a glue stick works well for a quick and easy application. For a more robust and permanent hold, a hot glue gun (used with adult supervision) can provide excellent stability for both wrapping and securing the tiers.
Optional Embellishments to Elevate Your Design:
- Ribbon or Bows: To add a touch of elegance or extra color.
- Battery-Operated Fairy Lights: Weave these among the ornaments for a magical, twinkling effect, especially enchanting in the evening.
- Faux Snow or Glitter: For a wintry, sparkly touch.
- Natural Elements: Small pinecones, faux berries, cinnamon sticks, or even sprigs of artificial evergreen.
- Small Figurines: Tiny reindeer, Santa, or snowman figures can add a playful narrative.
Crafting Your Masterpiece: Easy Step-by-Step Instructions
With all your materials at hand, it’s time to transform these simple items into a stunning and resilient Christmas centerpiece. This process is straightforward and fun, perfect for an afternoon craft session. Follow these steps carefully to bring your dazzling display to life:
Step 1: Elegantly Wrap Your Can Stands
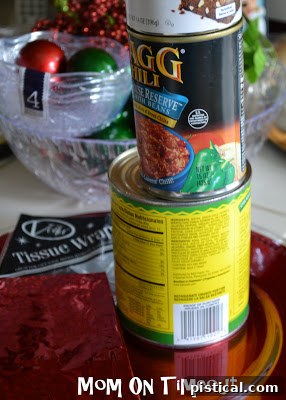
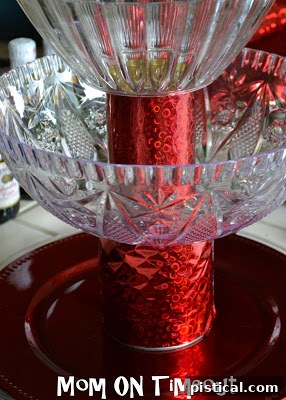
Begin by preparing your empty cans. Measure the height and circumference of each can. Cut your chosen wrapping paper or metallic tissue paper to size, ensuring it comfortably wraps around the can with a slight overlap (about half an inch to an inch) for securing. Carefully wrap each can, striving for a smooth, wrinkle-free finish. Secure the paper’s edge with tape or a glue stick. For enhanced durability, particularly if you want the cans to last multiple seasons, a thin line of hot glue along the seam will provide a stronger, more permanent bond. If you’ve collected cans of varying heights, decide now how you want to arrange them to create your desired tiered effect. This step is key to transforming utilitarian cans into attractive, festive pedestals.
Step 2: Construct Your Tiered Display Structure
With your cans beautifully wrapped, it’s time to build the foundation of your centerpiece. Start by placing your largest plastic plate or bowl on the surface where the centerpiece will ultimately reside. This will be your base layer. Next, strategically position one or more wrapped cans on top of this base. You can use a single can in the center for a simple pillar, or arrange several smaller cans for broader support. Carefully place another plastic plate or bowl on top of these cans to create the next tier. Repeat this process, using progressively smaller plates or fewer cans for higher tiers, until you achieve your desired multi-level structure. To ensure maximum stability, especially in a bustling household, consider applying a small dab of hot glue between each can and plate/bowl interface. This will prevent any accidental shifting and ensure your display remains steadfast. Test the structure to ensure it feels robust before proceeding.
Step 3: Fill with Festive Flair and Shatterproof Sparkle
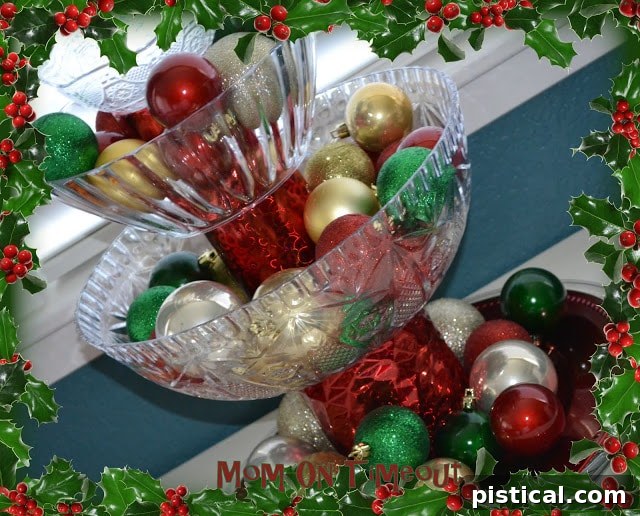
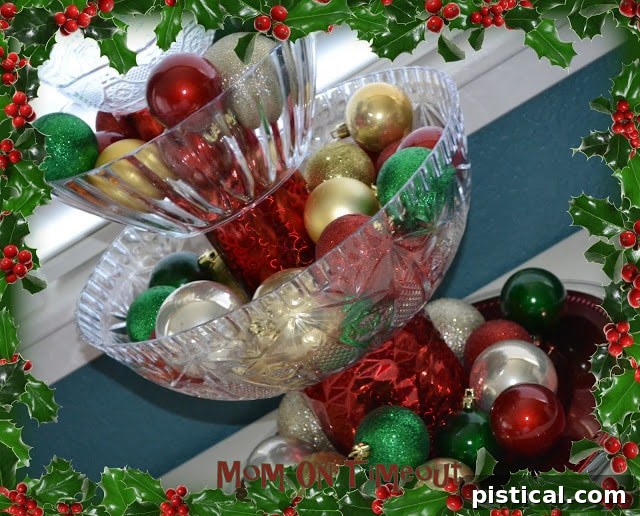
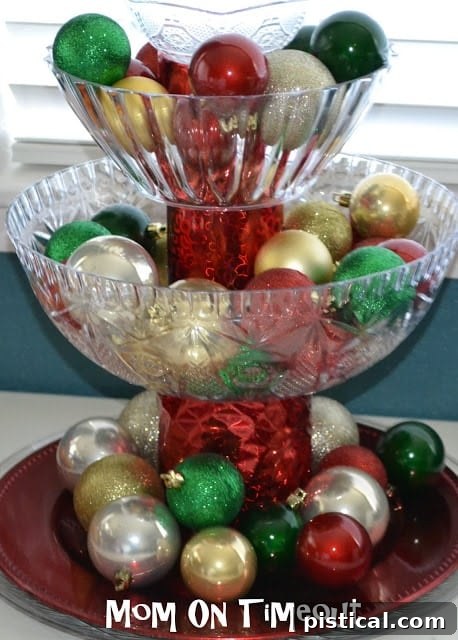
This is the most exciting and creative phase: filling your tiered display! Begin by carefully arranging your shatterproof ornaments within the plastic plates and bowls. Don’t simply dump them; take a moment to layer and position them strategically. Start with larger ornaments at the bottom of each tier, then fill in the gaps with smaller ones. Play with colors, textures (mixing matte, glossy, and glitter finishes), and sizes to create visual depth and a bountiful appearance. You might choose to group similar colors for a sophisticated look or scatter them for a vibrant, eclectic mix.
Now is also the perfect opportunity to incorporate any additional non-breakable embellishments you’ve gathered. Tuck in small pinecones, faux berries, festive ribbons, or even a strand of battery-operated fairy lights to add an extra magical glow. The goal is to fill the space generously, creating an overflowing, luxurious effect. And just like that, your stunning, kid-proof Christmas centerpiece is complete! You can now proudly display your creation, knowing it can withstand the spirited interactions of little boys (or girls, or pets!) without a single tear or broken shard. Take that, little boys and unforeseen accidents – this decor is ready for anything!
Pro Tips for a Flawless & Long-Lasting Display
To truly maximize the impact and longevity of your DIY Christmas centerpiece, consider these expert tips and creative enhancements:
- Embrace Variety in Heights and Sizes: Don’t be afraid to mix and match. Using cans of different heights for your stands and incorporating various sizes of ornaments adds visual interest and a professional, layered look.
- Strategic Color Palette: While a vibrant mix of colors can be fun, consider adhering to a specific color scheme (e.g., classic red and green, elegant silver and gold, frosty blues and whites, or playful pastels). A cohesive palette often creates a more sophisticated and harmonious aesthetic.
- Play with Textures: Combine glossy, matte, and glittery ornaments. Introduce elements like velvet ribbons or small faux snowballs to add a rich, tactile dimension to your display.
- Involve Kids Safely & Creatively: This project is perfect for little helpers. Let them select their favorite shatterproof ornaments or assist in wrapping the cans (with adult supervision for scissors/glue). This fosters a sense of ownership and deepens their connection to the holiday spirit.
- Mindful Placement: While your centerpiece is durable, place it on a stable, flat surface where it can be admired without being in the way of high-traffic areas. Center it on a dining table, mantelpiece, or console table for maximum visual impact.
- Illumination is Key: Small, battery-operated LED fairy lights or micro-LED strings woven gently among the ornaments can add an enchanting, magical twinkle to your display, especially as dusk settles.
- Year-Round Adaptability: This versatile concept isn’t limited to Christmas! Adapt it for other holidays or seasonal decor by simply changing out the ornaments and wrapping paper. Think colorful plastic eggs for Easter, mini pumpkins and faux leaves for autumn, or even seashells for a summer theme.
- Effortless Storage for Next Year: When the holiday season concludes, carefully empty the ornaments into their original packaging or separate storage bins. The wrapped cans and plastic dishes can be easily stacked and stored, making next year’s setup even quicker and more convenient.
Beyond the Centerpiece: Expanding Your Durable Decor
The ingenious concept behind this tiered stand—utilizing dollar store finds and shatterproof elements—can inspire a myriad of other kid-friendly holiday decorating ideas. Consider filling clear plastic vases (or even acrylic ones for extra peace of mind) with shatterproof ornaments for another chic, durable display. You can also string shatterproof ornaments into garland strands to drape across doorways or shelves, or use them to adorn a small, artificial tabletop tree that’s less prone to tipping. The ultimate goal is to embrace the beauty, warmth, and sparkle of the holiday season without the underlying stress of fragility. Empower yourself to enjoy a truly festive, joyful, and worry-free Christmas, confident that your beautiful decor is both stunning and safe for every member of your household, big and small.
Embrace the sparkle, banish the breaks, and create lasting holiday memories with this ingenious DIY solution! Happy crafting!
|
|
|
Google+
|
RSS
here,
Home Stories A2Z, and
My Repurposed Life.