
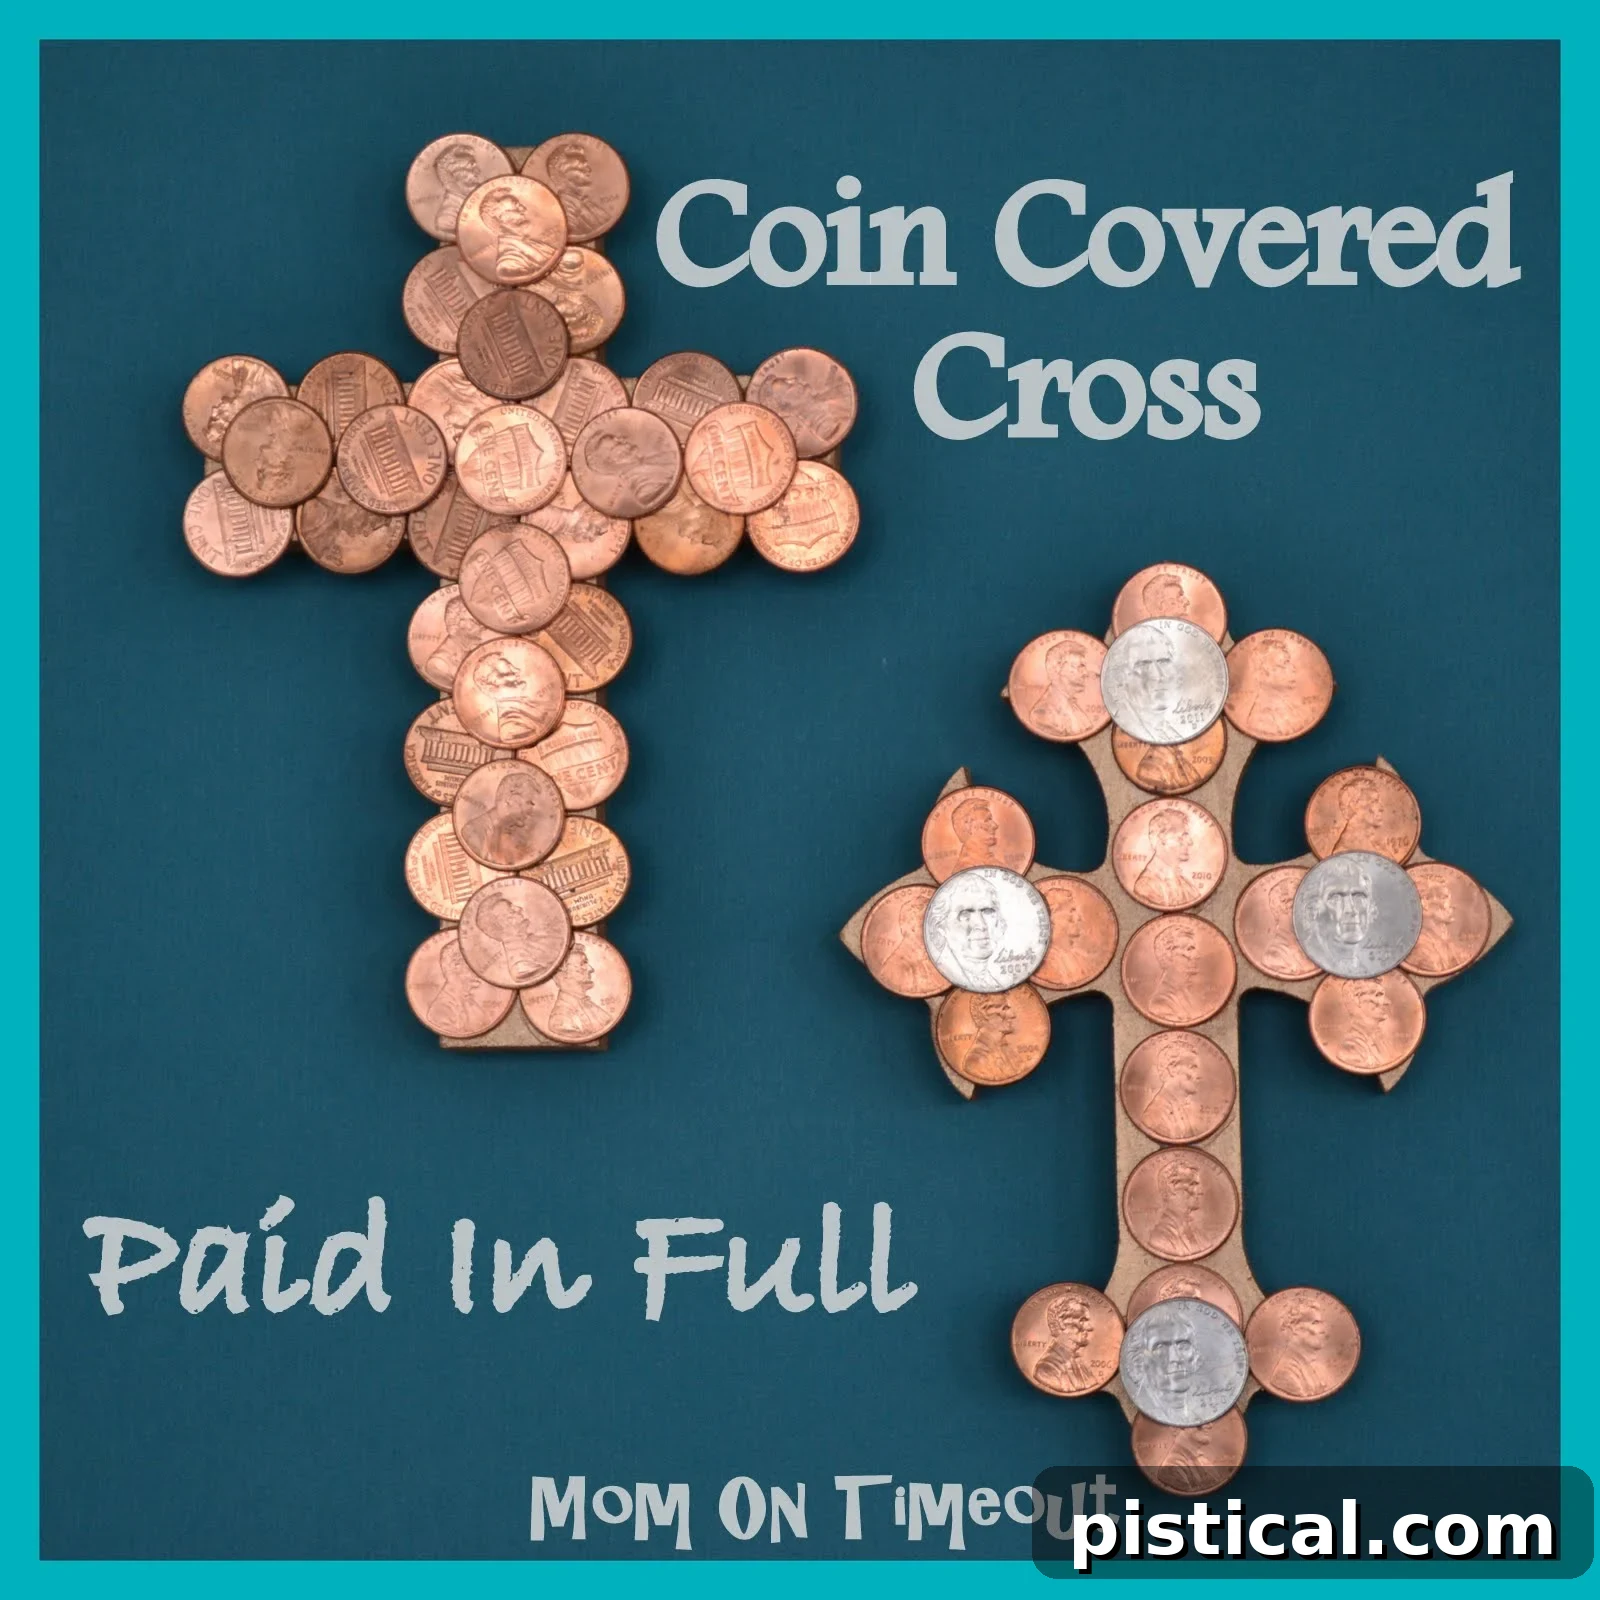
Crafting a Symbol of Faith: The “Paid In Full” Coin-Covered Cross Easter Craft
Transform a simple wooden cross into a powerful symbol of redemption with this beautiful Coin-Covered Cross – a truly meaningful Easter Craft project for your family.
Embracing the True Meaning of Easter with Family Crafts
As Easter approaches, the excitement in our home is palpable. We bring out the Easter baskets, colorful plastic eggs, and an array of festive decorations, ready to dive into the joy of the season. For many families, including ours, Easter crafts are a cherished tradition. I especially love involving my boys, Reece and Bryce, in these creative projects, as they help us transform our home into a vibrant and festive space for Easter.
It’s incredibly easy to get swept up in the delightful flurry of chocolate bunnies, candy, and thrilling egg hunts. While these traditions are certainly fun and bring much joy, I always make it a point to gently remind the boys about the profound reason we truly celebrate Easter: the death, burial, and resurrection of Jesus Christ. This central truth is what gives Easter its deepest meaning and eternal hope. When Jesus willingly went to the cross, He paid the ultimate penalty for all our sins, past, present, and future. Through this selfless act, He purchased eternal life for everyone who believes in Him. This beautiful Coin-Covered Cross craft offers a tangible and visually striking way to illustrate the immense price He paid for our redemption. The metallic gleam of the coins, especially when kissed by the sun, beautifully symbolizes the light and hope found in His sacrifice.
This project isn’t just about glue and coins; it’s an opportunity for deep conversation and reflection. As you gather the materials and assemble each piece, you can discuss with your children the concept of payment, debt, and freedom. Each coin meticulously placed on the cross serves as a powerful reminder of the complete and final payment Jesus made, allowing us to declare, with gratitude, “Paid In Full.” This craft transforms a simple wooden shape into a powerful testament of faith, making it a truly unique and meaningful addition to your Easter celebrations and decor. It encourages thoughtful engagement with the Easter story, creating lasting memories and reinforcing core beliefs in an accessible, hands-on way. It’s a wonderful blend of artistic expression and spiritual teaching, perfect for any family looking to deepen their understanding and celebration of this sacred holiday.
Gathering Your Supplies: What You’ll Need for Your Coin-Covered Cross
Creating this symbolic “Paid In Full” cross is a straightforward and rewarding process, requiring just a few readily available materials. Here’s a detailed look at what you’ll need to get started on your meaningful Easter craft:
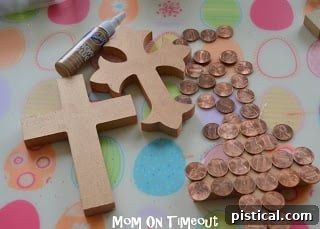
- Wooden Cross: The foundational element of your craft. You can find these in various sizes at local craft stores, online shops like Mr. Woody’s Etsy shop (where I sourced mine), or even by cutting your own from wood if you have the tools and expertise. Consider different sizes – smaller crosses make great ornaments or thoughtful gifts, while larger ones can become a beautiful focal point in your Easter home decor. The texture and grain of the wood will also add a unique character to your finished piece.
- Metallic Paint: Copper paint is a fantastic choice, especially if you’re primarily using pennies, as it creates a harmonious, rich backdrop that enhances their natural hue. However, feel free to choose any metallic shade that appeals to you – gold, silver, or bronze can also create stunning, opulent effects. High-quality acrylic metallic paints work wonderfully and dry relatively quickly, making the crafting process smooth and efficient. You might even consider a contrasting non-metallic base color if you want the coins to truly pop against it.
- Paint Brush: A standard craft paintbrush will suffice for applying the base coat of paint. Ensure it’s an appropriate size for your cross to allow for smooth, even coverage without leaving excessive brush strokes. For intricate details or smaller crosses, a smaller brush might be useful.
- Coins: This is where the symbolism truly shines! Pennies are popular for their copper hue and affordability, but don’t limit yourself. Nickels, dimes, quarters, or a mix of different denominations and even international coins (if readily available) can add unique texture, color variations, and a global touch to your cross. You might even consider cleaning older, tarnished coins to bring out their metallic luster, which can be an interesting mini-project in itself. This step is a fantastic opportunity to discuss the concept of “payment” with children.
- Strong Craft Glue: A reliable adhesive is crucial to ensure your coins stay firmly attached over time. Craft glues like E6000, Gorilla Glue clear grip, or a good quality tacky glue are excellent choices for their strong bond. For projects involving children, a low-temperature hot glue gun can also work under close adult supervision, offering quicker setting times and less mess. Ensure the glue dries clear to maintain the aesthetic appeal of your metallic coins.
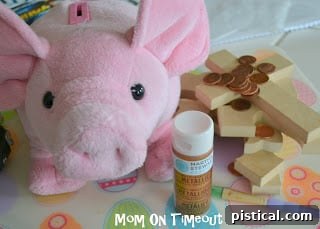
The preparation for this craft can be an engaging part of the learning experience. I began by literally raiding my children’s piggy banks! My initial quest was for “pretty” pennies – bright, shiny ones – which proved surprisingly difficult to find in our collection. This seemingly simple task sparked a wonderful conversation with Reece and Bryce, allowing me to naturally introduce the deeper meaning behind this craft and the profound significance of Easter itself. It’s an organic way to connect the tactile experience of crafting with the spiritual lessons of the season.
Step-by-Step Guide to Crafting Your Coin-Covered Cross
1. Prepare and Paint Your Wooden Cross
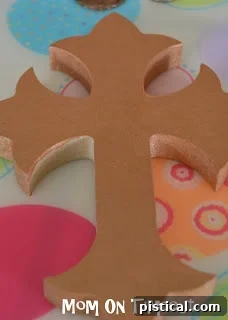
The first step in creating your Coin-Covered Cross is to prepare your wooden cross by giving it a beautiful base coat. While you can choose any color, a metallic paint truly enhances the final look, providing a luminous backdrop that complements the coins. I opted for a Martha Stewart copper metallic paint, which provided a gorgeous, rich backdrop that perfectly complemented the pennies and created a seamless transition.
Tips for Painting:
- Even Coverage: Always apply thin, even coats of paint. It’s often better to apply two or three thin coats, allowing each to dry completely, rather than one thick, clumpy layer. This technique prevents drips and ensures a smooth, professional finish.
- Drying Time: Allow adequate drying time between coats. Since the cross is multi-dimensional, you might need to paint one side or section, let it dry, then flip it to paint the remaining surfaces. Rushing this step can lead to smudges or an uneven finish.
- Edge Detail: Pay close attention to the edges and sides of the cross. Painting these often-overlooked areas ensures that if someone views the finished craft from any angle, it still looks complete and well-finished, contributing to a truly cohesive and polished appearance.
2. Plan Your Coin Layout
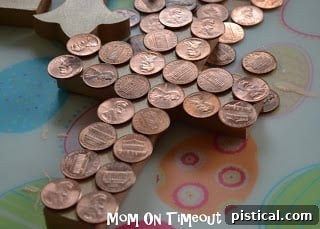
Before you commit to gluing, take some dedicated time to arrange your coins on the painted cross. This crucial planning step allows you to visualize the final design and make any necessary adjustments without the pressure of permanent adhesion. It’s an artistic moment where you can experiment with different aesthetics.
Consider the following design elements:
- Heads or Tails: Do you want all “heads” showing, all “tails,” or a mix of both? Each side of a coin offers a different aesthetic and can create varying visual textures.
- Coin Variety: Will you use only one type of coin (e.g., all pennies for a uniform look) or mix different denominations and colors (e.g., pennies, nickels, dimes, quarters) for added interest and contrast? Mixing can create unique patterns and visual depth.
- Coverage: Decide if you want to cover the entire surface of the cross with coins, creating a dense mosaic, or if you prefer to leave some of the painted background visible. Having the cross painted underneath provides the flexibility to create a partial mosaic without unsightly bare wood showing through.
- Pattern: Experiment with different patterns. You could start from the center and work your way out, create a linear pattern, or arrange coins along the edges first and fill in the middle. Think about overlapping coins for a more textured look or laying them flat for a smoother surface.
3. Begin Gluing Your Coins
Once you’re completely satisfied with your coin arrangement and have a clear vision for your design, it’s time to start gluing them onto the cross. Work in small sections to prevent the glue from drying prematurely, especially with fast-setting adhesives.
Gluing Tips for Success:
- Apply Glue Sparingly: Use a small dab of strong craft glue on the back of each coin. Too much glue can seep out from underneath the coin, creating a messy look that detracts from your beautiful work.
- Press Firmly: Press each coin firmly into place on the cross and hold for a few seconds to ensure good adhesion. This step is particularly important for ensuring the longevity of your craft.
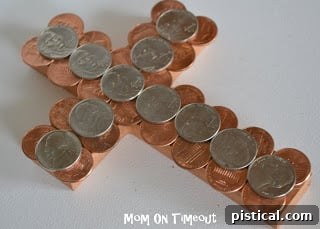
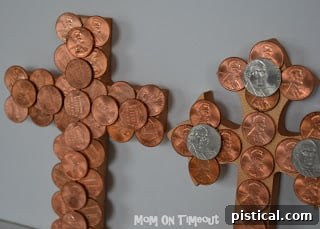
- Layering for Dimension: If you wish to add dimension and visual intrigue, consider layering different coins. I initially loved the look of the copper pennies by themselves, but adding a second layer of nickels introduced a beautiful contrast and added significant visual depth. This layering technique can create a truly unique and intricate design that catches the eye and reflects light in interesting ways. Don’t be afraid to experiment with different overlaps and arrangements.
- Drying Time: Once all coins are glued, allow the cross to dry completely, ideally for 24 hours, to ensure all adhesive has fully cured and the coins are securely attached.
The Finished Masterpiece: A Symbol of Hope and Redemption
Watching the coin-covered crosses come to life has been a truly rewarding experience. I am absolutely thrilled with how beautiful they turned out, and I particularly cherish the profound symbolism they embody. Each coin, meticulously placed, serves as a powerful reminder of the “Paid In Full” sacrifice of Jesus Christ, a message that resonates deeply with the true spirit of Easter.
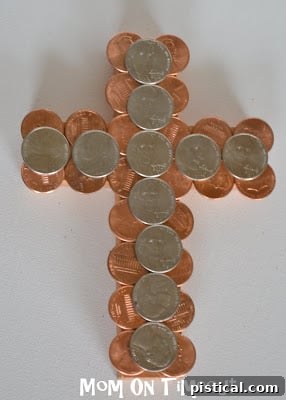
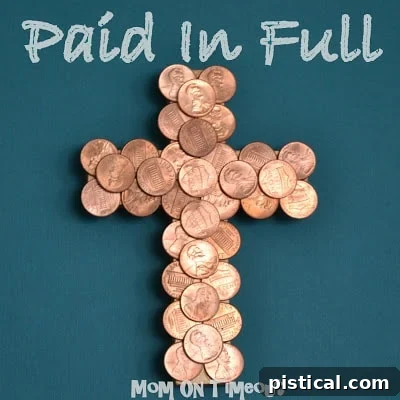
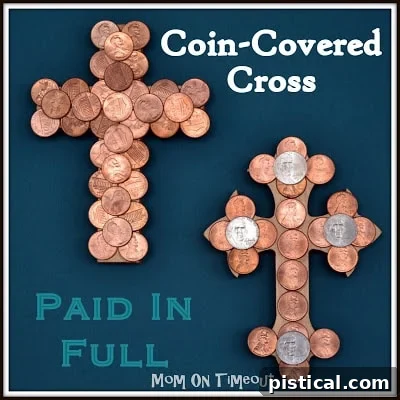
The shimmering metallic coins not only create an eye-catching piece of decor but also serve as a constant, tangible reminder of the light and hope that Easter brings into our lives. Display these crosses prominently in your home – on a mantel, a shelf, as part of a centerpiece, or even as a reverent wall hanging. They make excellent conversation starters, prompting thoughtful discussions about faith and sacrifice, and serve as powerful visual aids for teaching children about the cornerstone of Christian faith. Beyond personal display, these handmade crosses can also be incredibly thoughtful and heartfelt gifts for loved ones, carrying a deep message of love, redemption, and enduring faith.
Ideas for Personalization and Variations:
- Mixed Metals: Experiment with different types of metallic paint for the base (e.g., silver, gold, bronze) and combine them with various colored coins for striking contrasting effects.
- Sparkle and Shine: Incorporate additional embellishments such as fine glitter (applied over a sealant), small rhinestones, or even tiny decorative beads into your design for an extra touch of sparkle and glamour.
- Alternative Materials: While coins are perfect for the “Paid In Full” theme, you could also explore using other small metallic objects like washers, gears, or even metallic mosaic tiles for a similar textural effect, creating a different but equally compelling visual.
- Varying Sizes: Create a collection of crosses in different sizes, from small ornaments perfect for a rearview mirror or a gift tag, to larger statement pieces designed to command attention in any room.
- Sealant: To protect your beautiful work and ensure longevity, consider applying a clear craft sealant or varnish over the finished coin-covered surface once the glue is completely dry. This will add durability and a protective sheen.
This craft transcends mere decoration; it becomes a cherished keepsake, a permanent fixture in your home that speaks volumes about your faith and creativity. It’s a beautiful, enduring testament to the grace and mercy that was offered on the cross, a daily reminder of hope and unconditional love. Truly, I am so thankful for that profound truth: Paid In Full. This Easter, may your home be filled with joy, reflection, and the beautiful symbolism of redemption.