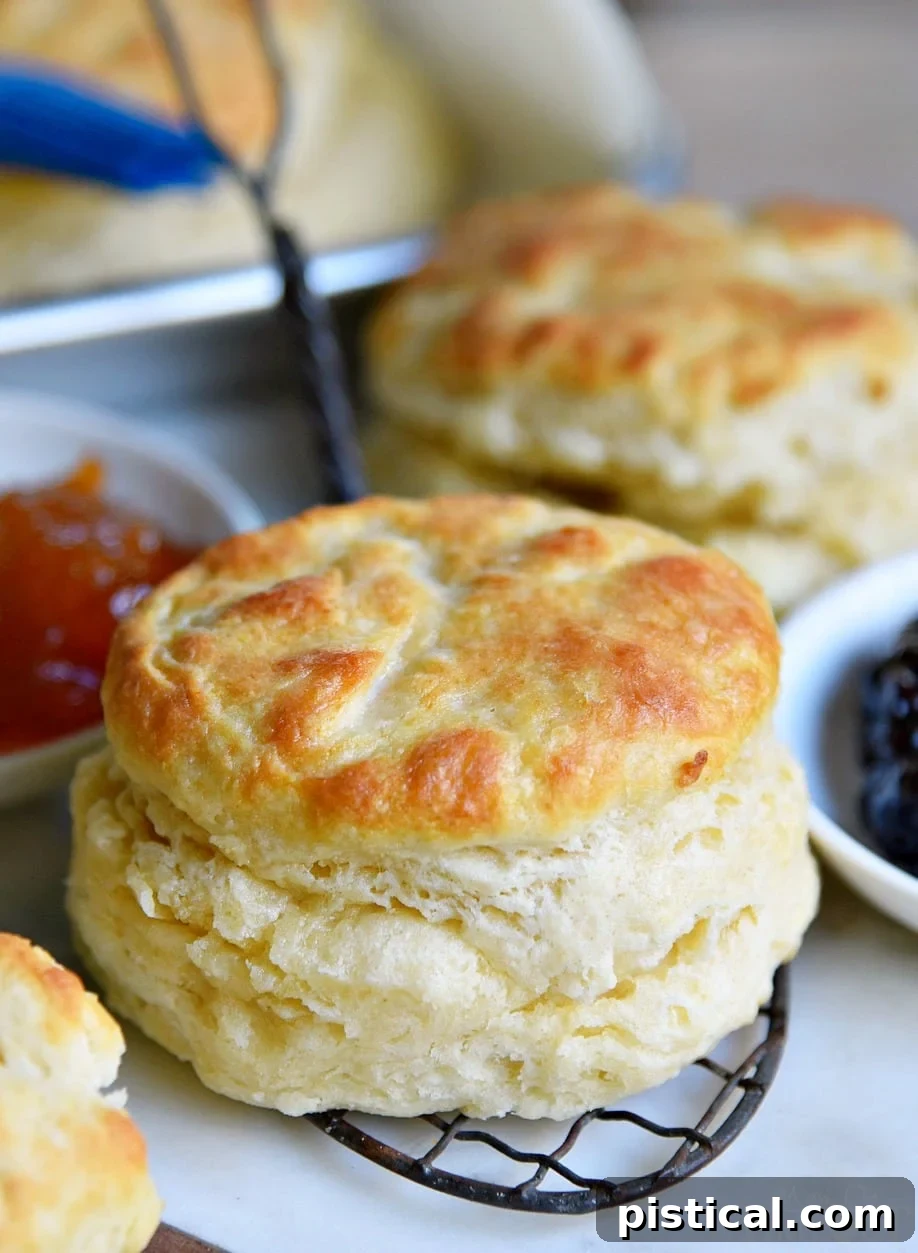
Welcome to the definitive guide for crafting the BEST Homemade Biscuits you’ll ever taste! These incredibly easy biscuits are soft, wonderfully flaky, and made completely from scratch. Best of all, they can be ready to enjoy on your table in about 15 minutes! A true weekend staple in our household, these biscuits are a joy to make and an even greater pleasure to devour. If you cherish breakfast delights as much as I do, be sure to also try my amazing Fluffy Buttermilk Pancakes and Lemon Blueberry Scones!
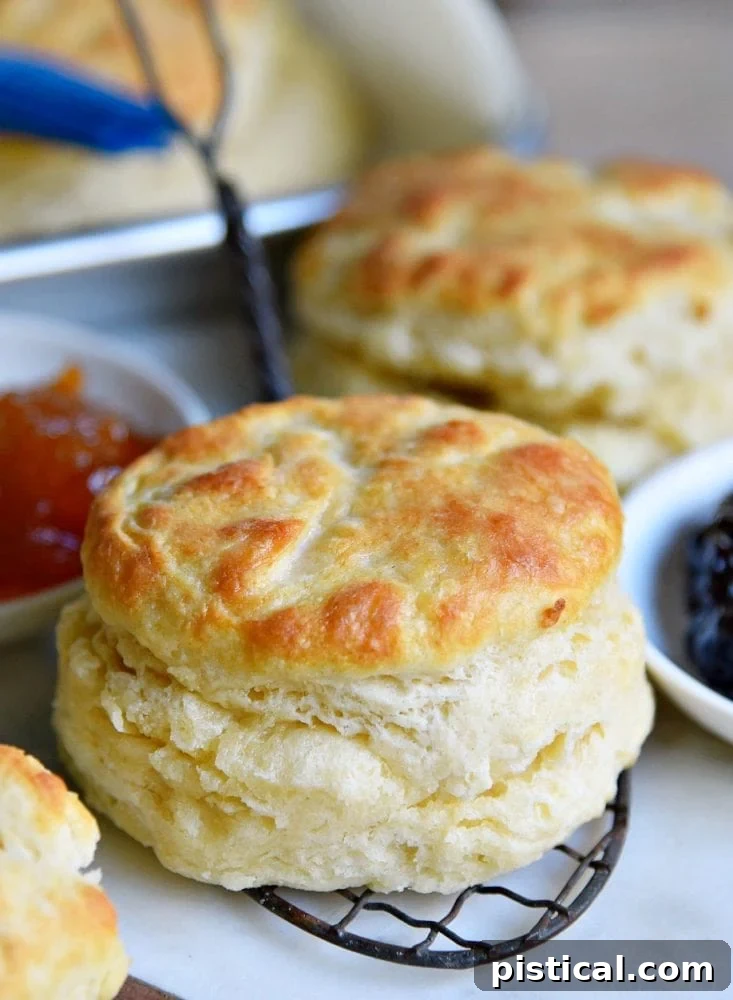
The Ultimate Guide to Flaky Homemade Biscuits: Perfect Every Time!
The comforting aroma of freshly baked biscuits is one of life’s simplest pleasures, especially on a relaxed weekend morning. For years, I’ve honed a recipe that consistently delivers light, tender, and beautifully flaky biscuits – all from scratch, and surprisingly quick to prepare! It’s become a cherished tradition in our home, bringing warmth and smiles to every breakfast table. Once you experience the simple magic of these homemade delights, you might find yourself saying goodbye to store-bought mixes forever.
Imagine pulling a warm, golden-brown biscuit straight from the oven, its delicate layers ready to be slathered with creamy butter and your favorite fruit jelly. Perhaps you envision it as the perfect foundation for a hearty breakfast sandwich, piled high with eggs, cheese, and crispy bacon. For many, a classic pairing with rich, savory sausage gravy is the ultimate comfort food. This particular biscuit recipe has never failed me, and after much tweaking and perfecting, it has truly become my go-to. Each batch rises up wonderfully fluffy, and the generous amounts of cold butter ensure a tender, delicious biscuit with every bite.
Why Homemade Biscuits Are Always Better
While pre-packaged mixes offer convenience, the difference in flavor and texture when you bake biscuits from scratch is truly remarkable. Homemade biscuits boast a depth of flavor, a delicate crumb, and an irresistible flakiness that mixes simply cannot replicate. Beyond the superior taste, there’s immense satisfaction in crafting something so delicious with your own hands. This recipe demonstrates that creating incredible homemade food doesn’t have to be complicated or time-consuming. In fact, these biscuits are so straightforward and quick, you’ll likely wonder why you ever opted for a box mix!
The Science of Fluff: Achieving Perfectly Flaky Biscuits
That coveted flaky texture in a perfect biscuit isn’t just a happy accident; it’s a result of understanding a bit of baking science. The secret weapon here is unequivocally **COLD BUTTER**. When tiny, distinct pieces of cold butter are worked into the flour, they don’t fully blend in. Instead, as the biscuits bake in a hot oven, these butter pieces melt, releasing steam. This steam becomes trapped between the layers of dough, forcing them apart and creating those beautiful, airy, and flaky pockets we all adore. This process, often referred to as ‘lamination,’ is what gives homemade biscuits their signature, melt-in-your-mouth quality.
The key is to handle the dough as little as possible. Overworking the dough or allowing the butter to warm up before baking will cause the butter to fully incorporate into the flour. When this happens, those critical fat pockets for steam production are lost, resulting in a denser, tougher biscuit with a cake-like crumb instead of delicate layers. So, embrace the chill, work swiftly, and trust the process – cold butter is your best friend for flaky biscuit perfection.
Essential Ingredients for Your Perfect Homemade Biscuits
You might be pleasantly surprised by the simplicity of the ingredient list for such a spectacular result. Most, if not all, of these staples are likely already residing in your pantry. Each component plays a vital role in the final texture and flavor of these delightful biscuits. One ingredient you might notice that’s a little less common is cream of tartar. I find it adds a lovely tang and an extra boost to the biscuit’s rise, similar to its role in my favorite Snickerdoodles. However, if you don’t have it on hand, please don’t let that deter you; your biscuits will still be wonderfully delicious without it. You’ll find this list quite similar to the ingredients for my scones recipe, though scones typically call for heavy cream and a more substantial amount of sugar for a different richness and crumb structure.
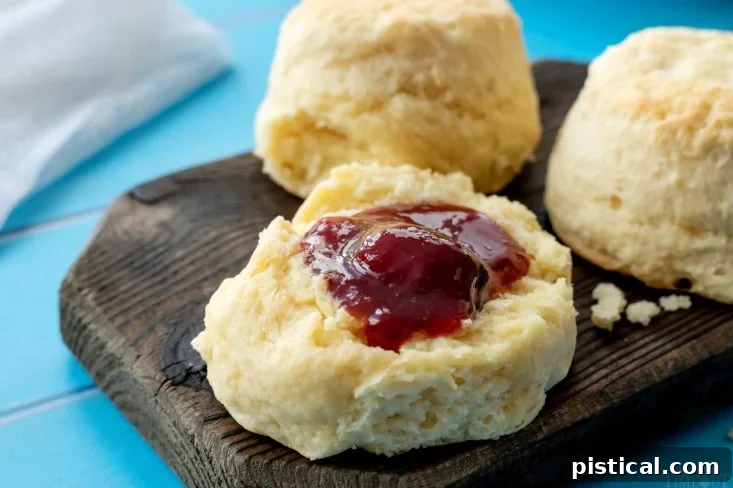
An interesting point: both my brother and my little sister regularly make these biscuits without using the egg, and their batches always turn out fantastic! While the egg adds a bit of richness and helps bind the dough, if you prefer a slightly lighter texture or simply don’t have an egg available, feel free to omit it. Baking is all about experimentation and finding what works best for you and your preferences!
Here’s what you’ll need to gather:
- **All-Purpose Flour:** The foundational ingredient, providing structure.
- **Granulated Sugar:** Just a hint for tenderness and a subtle golden color on the crust.
- **Salt:** Essential for balancing and enhancing all the other flavors.
- **Baking Powder:** The primary leavening agent that creates lift and a light, airy texture.
- **Cream of Tartar (Optional):** Works with baking powder for extra rise and a distinct tender crumb.
- **COLD Unsalted Butter:** The absolute star for flakiness. Keep it very cold!
- **Large Egg (Optional):** Adds richness and contributes to binding the dough.
- **Whole Milk:** Provides the necessary moisture; whole milk adds a lovely richness.
Expert Tips for Baking Your Best Homemade Biscuits
Achieving truly exceptional biscuits is more about mastering a few simple techniques than relying on complex ingredients. Follow these tried-and-true tips to ensure your biscuits are consistently light, flaky, and utterly delicious every single time.
- **The Absolute Essential: COLD BUTTER!** I cannot overstate the importance of this. Your butter must be thoroughly chilled, preferably straight from the refrigerator, or even after a brief stint in the freezer. The key is to prevent the butter from fully blending with the flour. Instead, it needs to remain in small, distinct pieces throughout the dough. These tiny pockets of butter are what create steam during baking, pushing apart the layers of dough and forming those desirable flaky layers. If the butter melts too early, before the biscuits hit the oven, you’ll end up with a dense, cake-like texture rather than a light and airy one. Handle the butter and dough quickly!
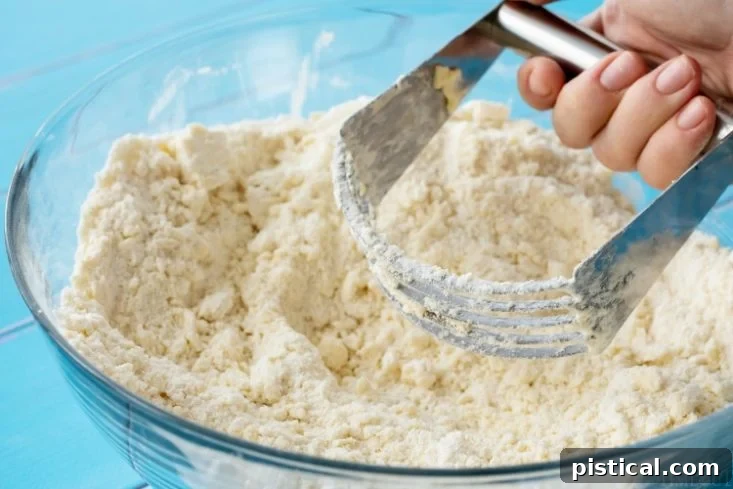
- **Effective Methods for Incorporating Cold Butter:**
- **Using a Pastry Blender:** Cut your very cold butter into small cubes. Then, use a pastry cutter to quickly work the butter into the flour mixture until it resembles coarse crumbs with some noticeable pea-sized chunks of butter remaining. This method is classic and effective.
- **Grating Frozen Butter:** For an even easier and often faster approach, freeze your stick of butter for about 15-20 minutes. Then, use a box grater to grate the slightly frozen butter directly into your dry ingredients. Gently toss the grated butter with the flour mixture to coat it. This technique ensures very fine, evenly distributed pieces of cold butter, promoting maximum flakiness.
Both techniques work wonderfully, so choose the one you prefer. The most important thing is to avoid overmixing; you should still clearly see small, distinct pieces of butter throughout your flour mixture.
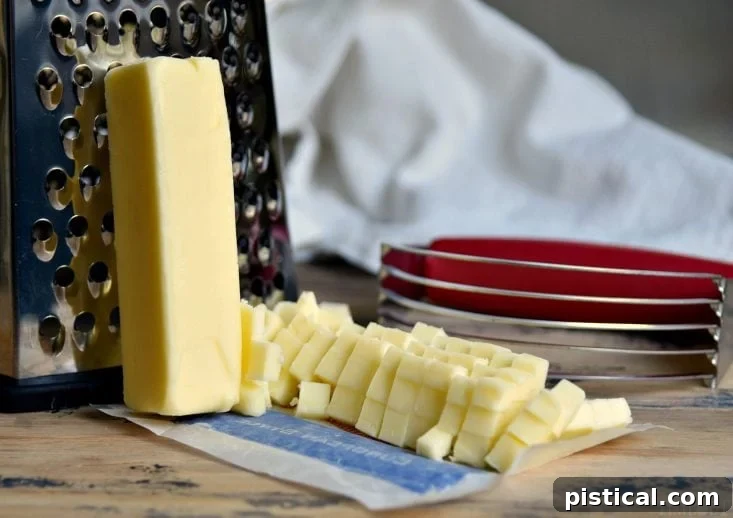
- **Maintain Overall Chill:** Extend the ‘cold’ rule to all your wet ingredients. Using a cold egg and cold milk (or buttermilk) will help to keep the butter in the dough from warming up, thus preserving those essential fat pockets for flakiness.
- **Minimal Dough Handling:** This is crucial. Overworking biscuit dough develops the gluten in the flour, which inevitably leads to tough, chewy biscuits instead of tender ones. Mix the ingredients just enough until they are combined and the dough barely comes together. It should still appear a bit shaggy and not perfectly smooth.
- **Generously Flour Your Work Surface:** Biscuit dough, by nature, can be quite sticky. Ensure your countertop or work surface is liberally floured before you turn the dough out onto it. A light dusting of flour on top of the dough and your hands will also prevent sticking as you proceed to pat or roll it. Don’t be shy with the flour on the surface!
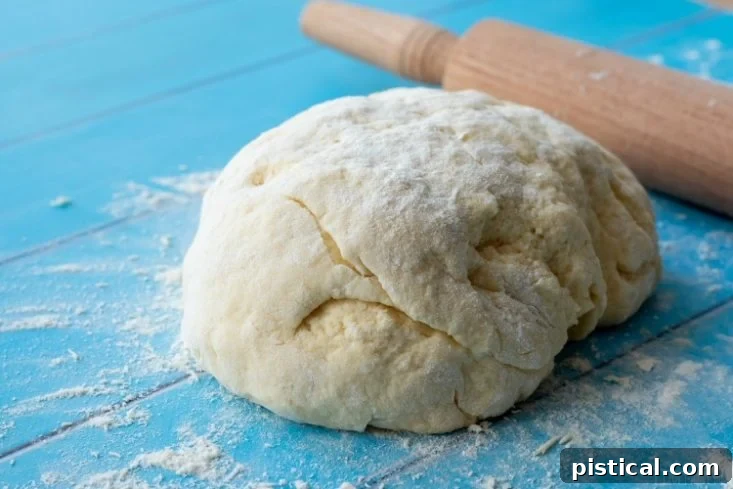
- **Patting or Gently Rolling the Dough:** You have two options for shaping the dough. You can either use your hands to gently pat the dough out to the desired thickness, or if you prefer, use a rolling pin. If opting for a rolling pin, apply very light and even pressure. I personally tend to just use my hands because, let’s be honest, at this point they’re usually already a bit messy with flour and dough! If you find the dough is still excessively sticky, simply sprinkle on an additional tablespoon of flour at a time until it becomes manageable.
Can I Use Buttermilk in This Biscuit Recipe?
Yes, absolutely! Using buttermilk is a fantastic choice and one that we frequently opt for. Buttermilk introduces a delightful, subtle tang and contributes to an even more tender crumb in your biscuits. The lactic acid present in buttermilk reacts with the baking powder (and cream of tartar, if you’re using it) to produce additional lift and a wonderfully softer texture. Since buttermilk is typically thicker than regular whole milk, you will need to adjust the liquid quantity slightly. Begin with approximately one and one-quarter cups of buttermilk, and then add more gradually, a tablespoon at a time, until your dough achieves the correct slightly sticky consistency. Trust me, buttermilk biscuits are a revelation!
Shaping and Baking for a Perfect Rise
To achieve those coveted tall, fluffy biscuits, aim to pat your dough out to a thickness of about 3/4 to 1 inch. Use a sharp biscuit cutter – or even the rim of an upside-down drinking glass – to cut out your biscuit shapes. The crucial technique here is to press straight down and pull straight up without twisting the cutter. Twisting can seal the edges of the biscuit, which can inhibit it from rising to its fullest potential in the oven. From this recipe, I typically yield about nine biscuits, but depending on the size of your cutter and perhaps a little strategic snacking on dough scraps, you can sometimes get up to 12 biscuits.
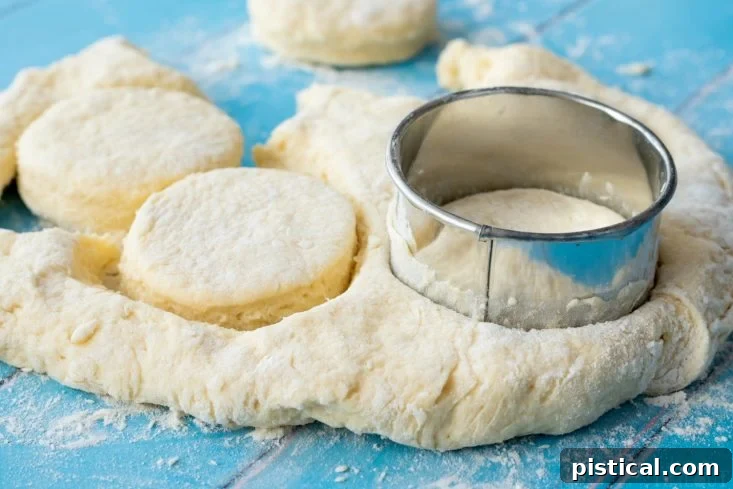
Baking these magnificent biscuits is a surprisingly quick process – they usually only need about 10 to 15 minutes in a hot oven. You’ll know they’re ready when their tops are beautifully golden brown and they’ve puffed up significantly. I always prefer to bake my biscuits on parchment paper, as it ensures effortless removal and prevents any sticking. If you don’t have parchment paper readily available, simply lightly grease your baking sheet to achieve a similar non-stick surface.
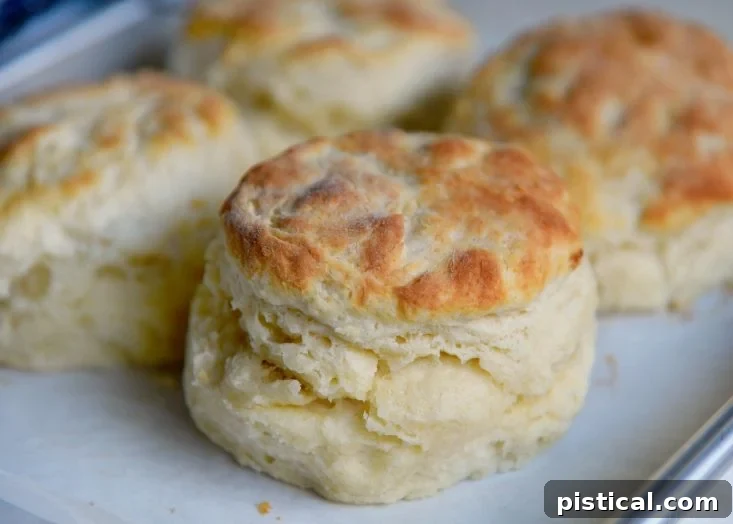
The Finishing Touch: A Kiss of Melted Butter
For an extra layer of irresistible richness and a beautiful, glistening golden finish, immediately after taking the biscuits out of the oven, brush their tops generously with melted butter. This simple step elevates them from simply delicious to absolutely extraordinary and enhances their inviting aroma.
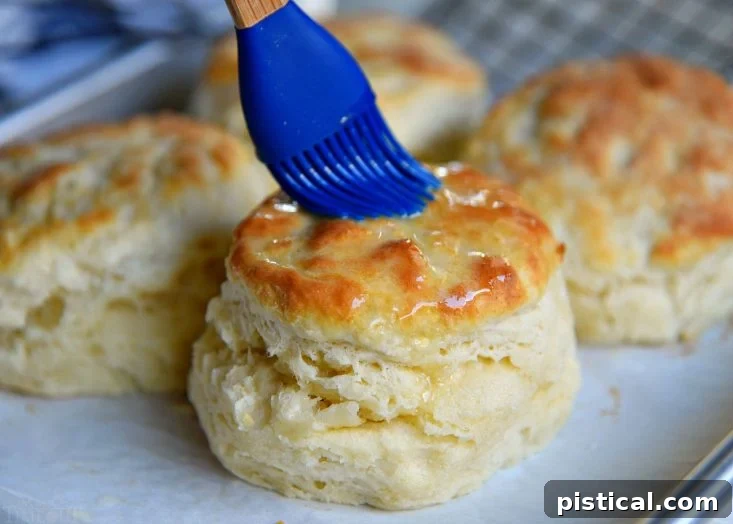
And then, it’s time to serve! Present these warm, buttery biscuits with an assortment of homemade jams, fruit preserves, honey, or simple creamy butter for a serious treat. They are also incredibly versatile and make a perfect accompaniment to savory dishes like fried chicken, pot roast, or a comforting bowl of chili.

Essential Tools for Biscuit-Making Success
While you don’t need a professional kitchen setup, having a few key tools can significantly streamline your biscuit-making process and enhance your results:
- A sturdy baking sheet that can accommodate all your biscuits without overcrowding.
- A good quality, sharp-edged biscuit cutter for uniform, perfectly round biscuits that rise beautifully.
- Parchment paper to line your baking sheet, ensuring easy removal and preventing any sticking.
- A pastry cutter for efficiently incorporating the cold butter into the flour mixture. Alternatively, two knives or even a box grater for frozen butter work well.
- A small pastry brush to apply that glorious melted butter glaze right after baking.
Troubleshooting Common Homemade Biscuit Issues
Even with the best recipes, baking can sometimes present challenges. Here are quick solutions to help you overcome common biscuit-making dilemmas and achieve perfect results every time:
- **Hard, Dense Biscuits:** This is the most common issue and almost always points to overworking the dough. Too much kneading or handling develops the gluten in the flour excessively, making the biscuits tough instead of tender. Remember: mix just until combined, and handle the dough as lightly and minimally as possible.
- **Biscuits Not Rising:** Several factors can contribute to flat biscuits. First, ensure your baking powder is fresh; it loses its potency over time. Always check the expiry date. Second, your oven must be adequately preheated to the correct temperature, as a hot oven is crucial for activating the leavening agents quickly. Lastly, twisting the biscuit cutter can seal the edges of the biscuit, preventing it from rising properly. Press straight down and lift straight up.
- **Dry, Crumbly Biscuits:** This usually indicates too much flour or insufficient liquid. Be precise with your measurements, and when adding milk, do so gradually. The dough should feel sticky, not dry and stiff. If it feels too dry, add a tiny bit more milk, a teaspoon at a time.
- **Lack of Flaky Layers:** The primary culprit here is typically butter that wasn’t cold enough or was worked too much into the flour. If the butter melts and fully incorporates before baking, it won’t create those crucial steam pockets. Ensure your butter is ice-cold and remains in distinct, pea-sized pieces throughout the dough.
Delicious Variations to Customize Your Biscuits
While a classic butter biscuit is undeniably divine, don’t hesitate to unleash your creativity and experiment with different additions to tailor them to your taste:
- **Cheesy Garlic Biscuits:** Fold in about 1/2 cup of shredded sharp cheddar cheese and 1 teaspoon of garlic powder along with the dry ingredients. Serve warm with chili or soup.
- **Herbed Savory Biscuits:** Incorporate 1-2 tablespoons of finely chopped fresh herbs such as chives, rosemary, thyme, or a blend, into the dry mix. These are fantastic with dinner.
- **Sweet Fruit Biscuits:** Increase the sugar to 1/4 cup and add a pinch of ground cinnamon or nutmeg. You can also gently fold in 1/2 cup of dried cranberries, raisins, or mini chocolate chips before adding the liquid.
- **Spicy Southern Kick:** For a delicious savory twist, add a dash of cayenne pepper and some freshly ground black pepper to the dry ingredients. Perfect with fried chicken or gravy.
How to Store and Reheat Your Homemade Biscuits
Homemade biscuits are undeniably at their absolute best when served fresh and warm from the oven. However, if you happen to have any glorious leftovers (a rare occurrence!), they can certainly be enjoyed later. Store cooled biscuits in an airtight container at room temperature for up to 2-3 days. For slightly longer freshness, they can be kept in the refrigerator for up to a week. For extended storage, biscuits freeze beautifully; simply place them in a freezer-safe bag or container for up to 2-3 months.
To reheat, the best method is to wrap the biscuits loosely in aluminum foil and warm them in a preheated 300°F (150°C) oven for about 10-15 minutes, or until they are heated through and softened. Alternatively, a quick zap in the microwave for 15-30 seconds can work in a pinch, but they might lose some of their crispy exterior. Splitting them in half and toasting them in a toaster oven is also an excellent way to restore some of their delightful texture.
More Favorite Breakfast Recipes to Inspire You:
- The BEST Fluffy Buttermilk Pancakes
- Ham and Cheese Hash Brown Breakfast Casserole
- Baked Cherry Cheesecake French Toast
- Peanut Butter Banana Chocolate Chip Muffins
- Lemon Blueberry Scones
Perfect Homemade Biscuits Recipe Card

Print Recipe
Pin Recipe
Perfect Homemade Biscuits
Ingredients
- 3 cups all-purpose flour
- 3 tbsp sugar
- 1/2 tsp salt
- 4 tsp baking powder
- 1/2 tsp cream of tartar
- 3/4 cup COLD butter (cut into small pieces or grated and chilled)
- 1 large egg (optional, cold)
- 1 cup whole milk (cold, or use 1 ¼ to 1 ½ cups cold buttermilk)
Instructions
-
Preheat your oven to 450°F (232°C). Prepare a large baking sheet by lining it with parchment paper, or lightly grease it. Ensure all your ingredients, especially the butter and milk/egg, are thoroughly chilled.
-
In a large mixing bowl, combine all the dry ingredients: the all-purpose flour, sugar, salt, baking powder, and cream of tartar (if you are using it). Whisk these together vigorously for about 30 seconds to ensure they are evenly distributed, creating a uniform mixture.
-
Add the very cold butter (either small cubed or grated) to the dry ingredients. Use a pastry cutter, two knives, or even your fingertips (working very quickly!) to cut the butter into the flour mixture. Continue this process until the mixture resembles coarse crumbs with some visible pea-sized pieces of butter throughout. It is critical not to overmix; distinct butter pieces are key for developing flaky layers.
-
In a separate small bowl, lightly whisk together the cold milk (or buttermilk) and the optional cold egg. Pour these wet ingredients into the dry mixture. Stir gently with a spatula or your hands just until the ingredients are barely combined and a shaggy dough forms. Do not overmix – the dough will be sticky, and you should still be able to see small flecks of butter throughout.
-
Turn the sticky dough out onto a generously floured surface. Sprinkle a little additional flour over the top of the dough to prevent it from sticking to your hands or rolling pin. Gently pat or very lightly roll the dough into a rectangle or circle, aiming for a thickness of 3/4 to 1 inch. For extra layers, you can fold the dough over onto itself once or twice, then pat/roll again. Handle the dough as little as possible.
-
Using a biscuit cutter (or an upside-down drinking glass), cut out your biscuits. Press the cutter straight down and lift straight up; avoid twisting, as this can seal the edges and inhibit a proper rise. Gather any dough scraps, gently press them together (do not knead forcefully), pat them out, and cut any remaining biscuits. You should yield approximately 9-12 biscuits depending on the size of your cutter.
-
Carefully place the cut biscuits onto your prepared baking sheet. For softer sides, place them so they are lightly touching each other. For crispier edges, space them about an inch apart.
-
Bake in the preheated oven for 10 to 15 minutes, or until the tops are beautifully golden brown and the biscuits have puffed up significantly. Keep an eye on them, as oven temperatures can vary.
-
Once baked, remove the biscuits from the oven. For an extra touch of deliciousness and a beautiful sheen, immediately brush the tops of the hot biscuits with a little melted butter. Serve these homemade delights warm and enjoy every flaky bite!
Video Tutorial
For a visual guide to making these perfect homemade biscuits, you can watch a step-by-step video tutorial here (external link to assumed video resource).
Nutrition Information (per serving, approximate)
Carbohydrates: 28g |
Protein: 4g |
Fat: 12g |
Saturated Fat: 7g |
Cholesterol: 46mg |
Sodium: 214mg |
Potassium: 257mg |
Sugar: 4g |
Vitamin A: 405IU |
Calcium: 105mg |
Iron: 1.7mg
Recipe originally published May 22, 2012. This version has been updated and enhanced for clarity and detail.

Explore More Delicious Breakfast Recipes:

For all our delightful breakfast recipes, go HERE.
Indulge your sweet tooth with all our dessert recipes, found HERE.
Don’t miss out on new recipes! Sign up for our email newsletter to get updates directly in your inbox.
Connect with us and discover even more great ideas, behind-the-scenes content, and daily inspiration by following us on Facebook – Pinterest – Instagram – Twitter – Bloglovin’.
Happy Baking, and enjoy your perfect homemade biscuits!