
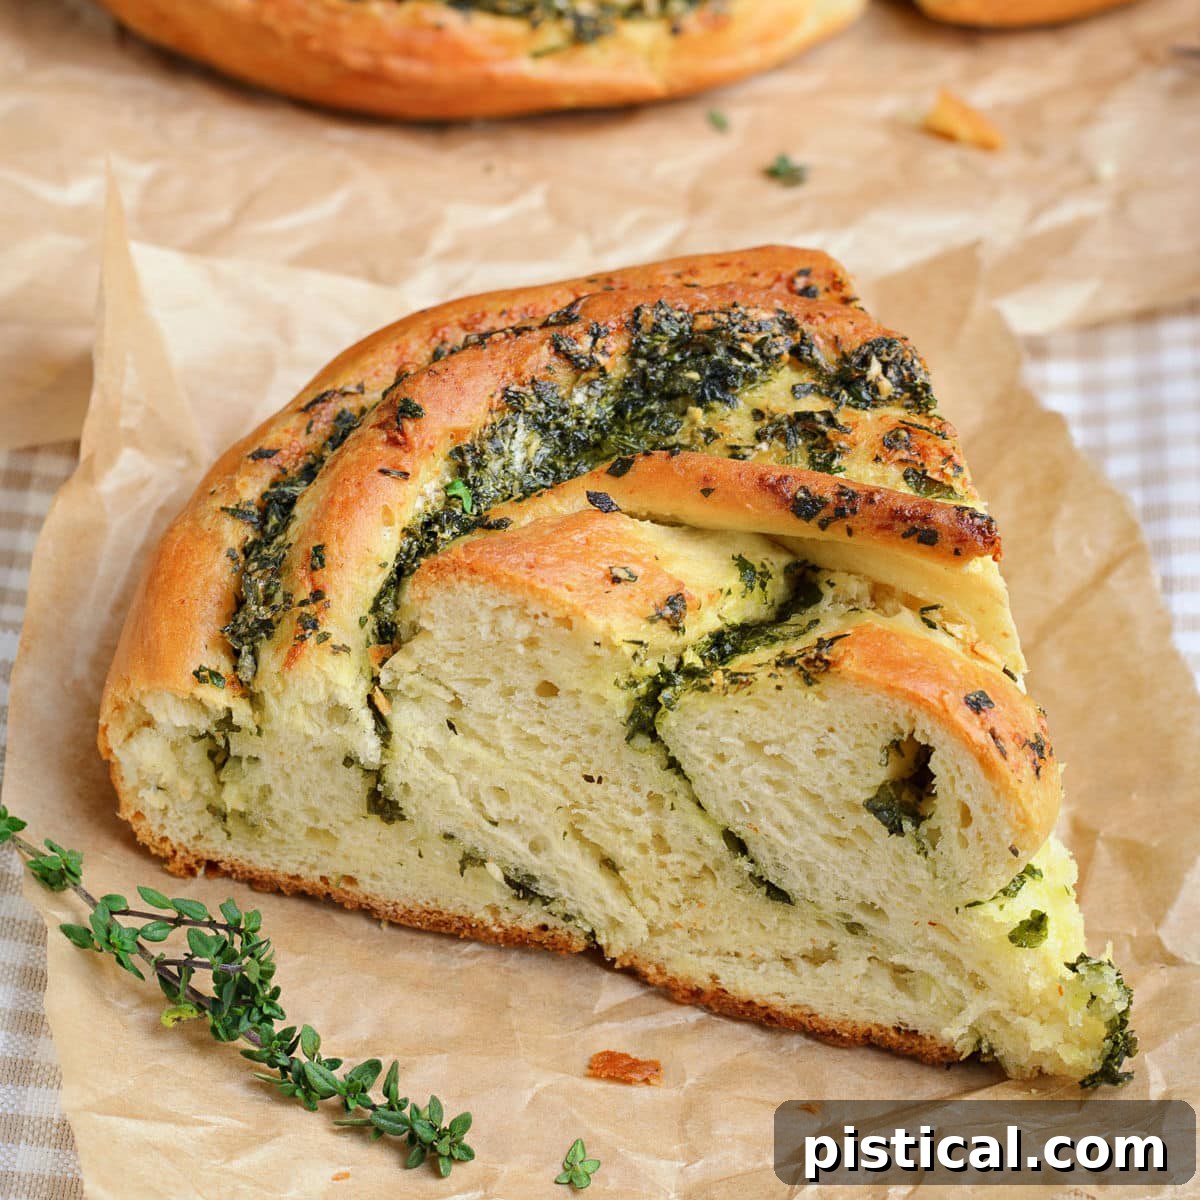
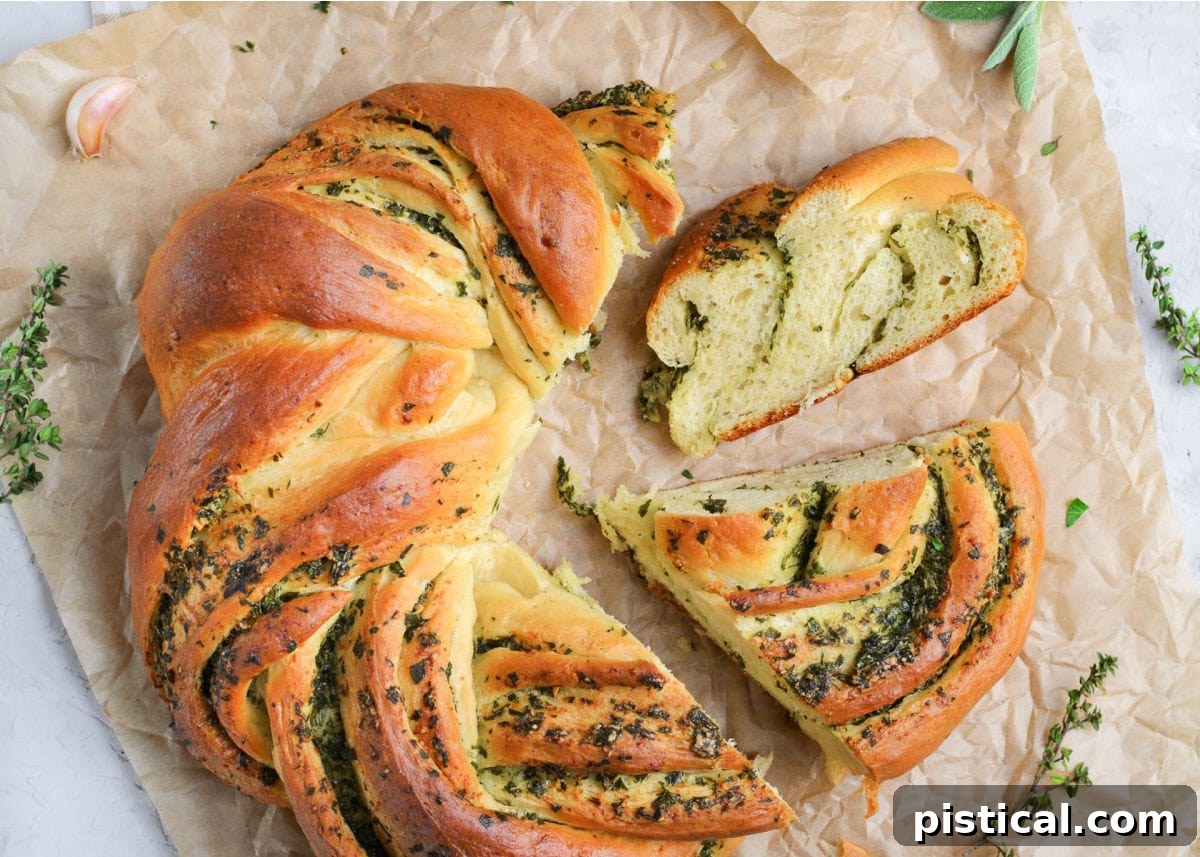
Get ready to impress your guests and elevate any meal with this truly spectacular Garlic Herb Bread Wreath. Combining the comforting warmth of homemade bread with the vibrant flavors of Parmesan cheese, aromatic garlic, and a medley of fresh herbs, this wreath is as delightful to behold as it is to eat. While it makes a stunning centerpiece for special occasions and holiday gatherings, its simple preparation means you can easily whip it up to transform even a casual weeknight dinner into something extraordinary. If you have a passion for baking your own bread, you’ll also adore my classic dinner rolls and perfectly flaky biscuits!
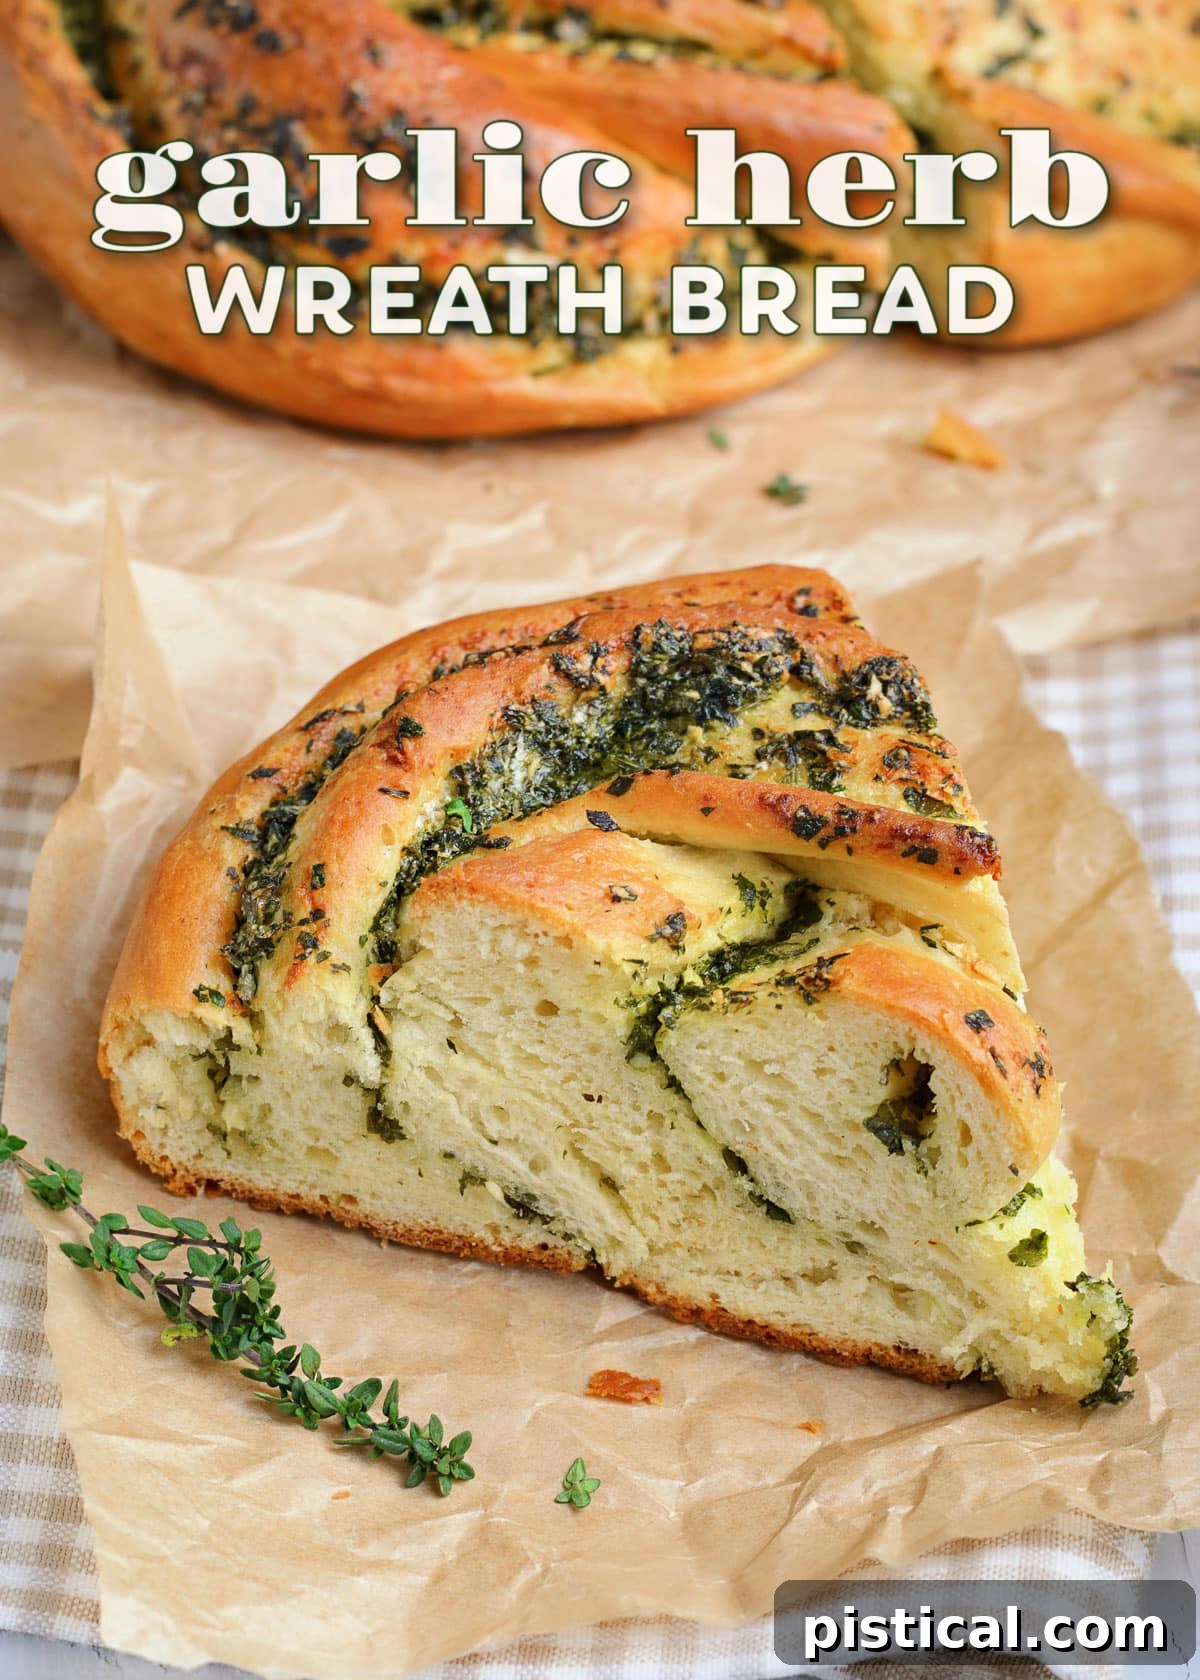
This incredibly flavorful and visually striking Garlic Herb Bread Wreath is a fantastic addition to any dining table. It’s a perennial favorite for holiday feasts, adding a touch of elegance and homemade goodness. Yet, don’t let its sophisticated appearance fool you; it’s straightforward enough to bake for a simple family meal, perfectly complementing dishes like a hearty Slow Cooker Spaghetti Sauce or a comforting bowl of soup.
The magic of this bread lies in its unique presentation. We twist the dough into a beautiful, intricate pattern before shaping it into a rustic wreath. Many people are intimidated by the idea of shaping bread, but I promise you, this technique is much simpler than it looks. Below, I’ll walk you through each step with clear, concise instructions, empowering you to create this masterpiece with confidence. You’ll be amazed at how easily you can achieve such an impressive result!
Imagine the delight on your friends’ and family’s faces when you serve this homemade bread wreath. They’ll be captivated by its beauty and rich aroma, convinced you spent hours perfecting it. Whether you choose to reveal your secret – just how effortlessly this stunning bread comes together – is entirely up to you!
When you need a show-stopping side for a festive dinner, or simply want to elevate a mundane weeknight meal, this Garlic Herb Bread Wreath is pure perfection. The harmonious blend of savory garlic and fragrant fresh herbs creates an irresistible flavor profile that will have everyone reaching for another piece. It’s truly a recipe that will become a cherished part of your culinary repertoire.
What is a Garlic Herb Bread Wreath?
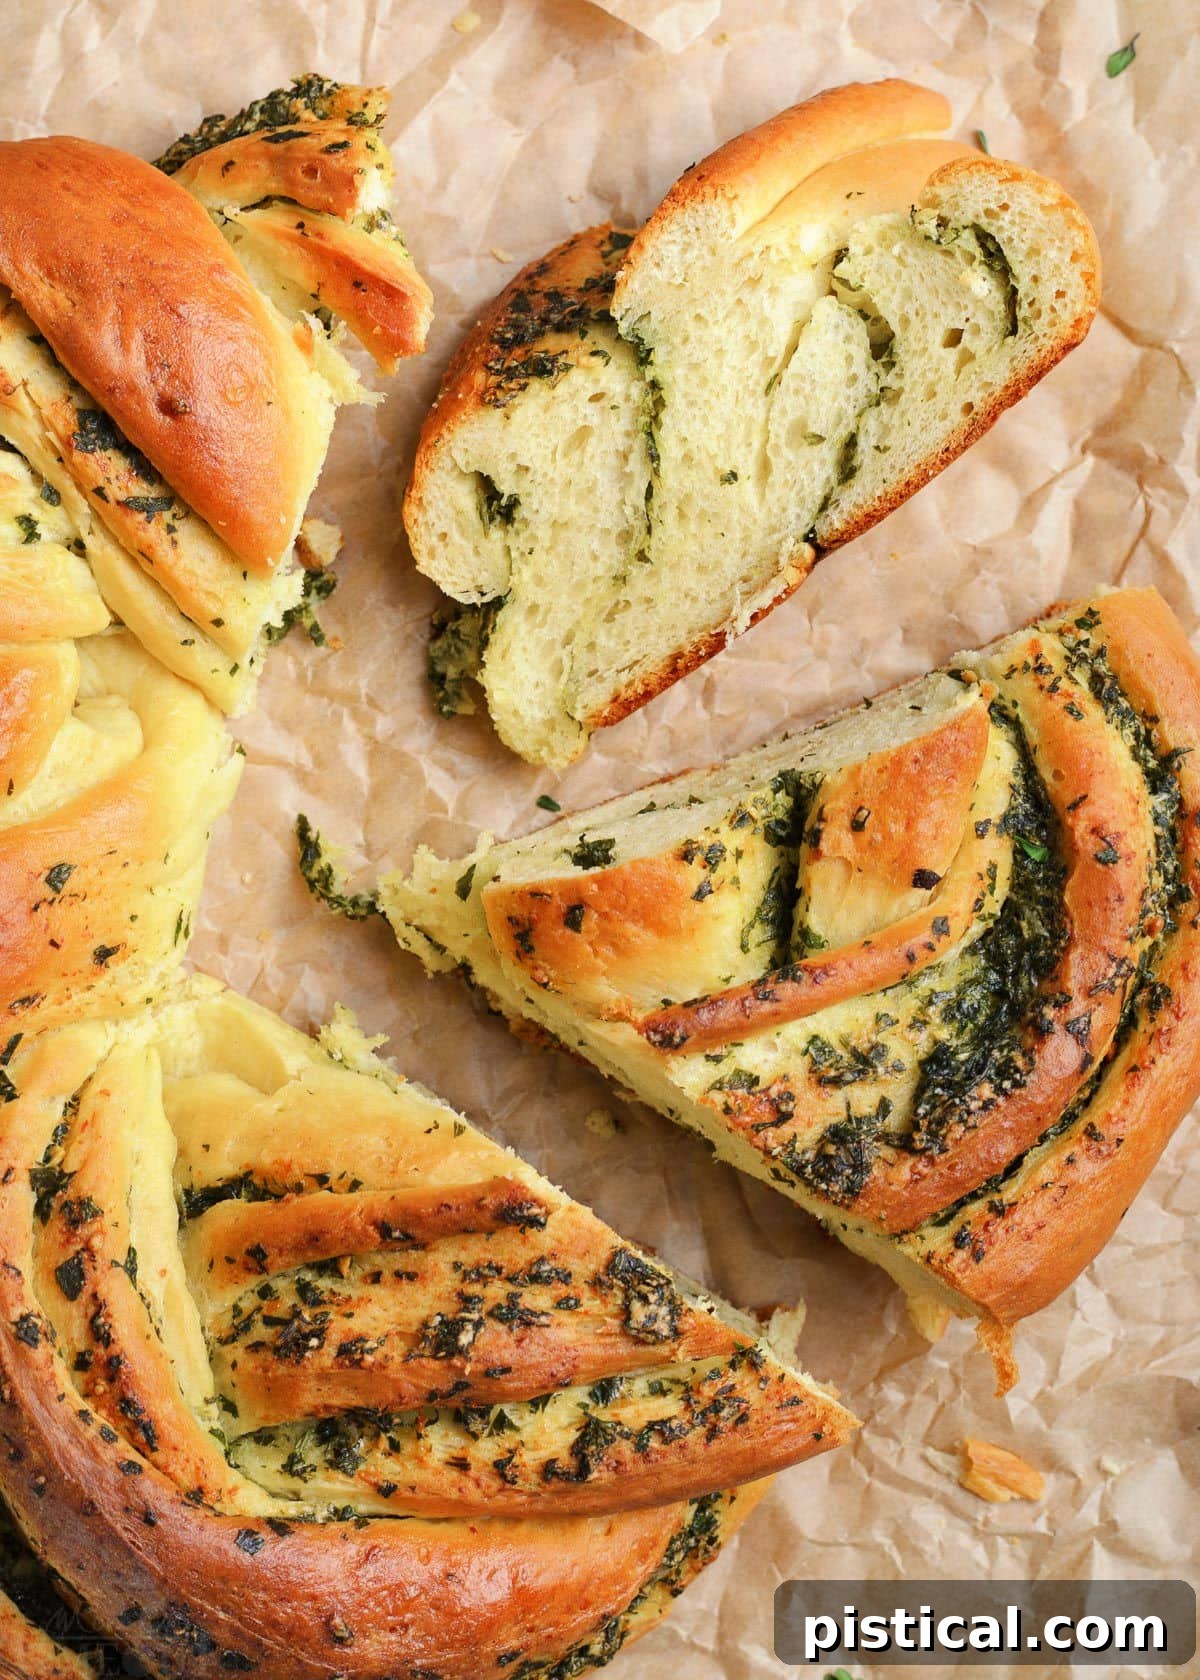
A Garlic Herb Bread Wreath is a delightful, savory bread that starts with a soft, yeasted dough. This dough is then generously layered with a luscious, aromatic butter mixture, typically infused with minced garlic, fresh herbs, and often Parmesan cheese. The unique “wreath” aspect comes from a clever shaping technique where the filled dough is rolled, sliced lengthwise, twisted into a beautiful braid-like form, and then gently curved into a circular wreath shape.
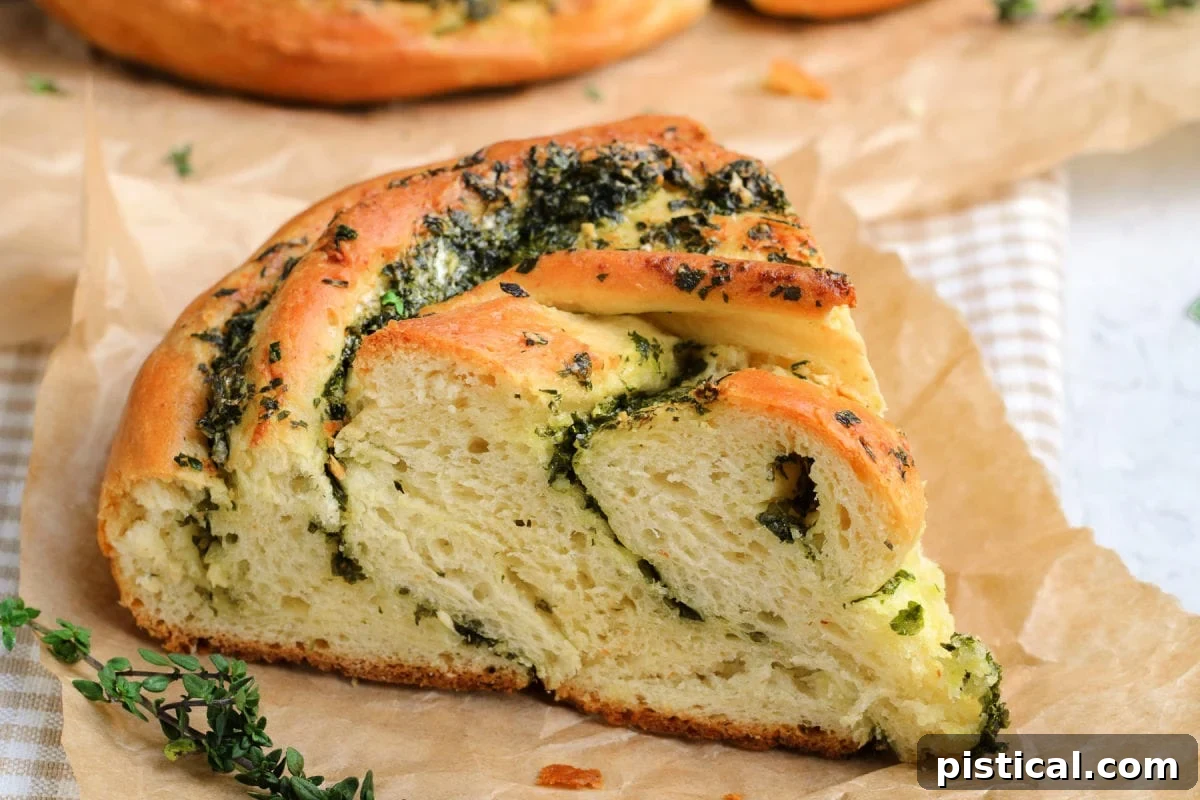
This bread stands out not only for its incredible taste but also for its visually appealing presentation, making it a wonderful centerpiece. It serves as a fantastic side dish, pairing beautifully with a wide array of main courses such as pasta, hearty soups, stews, and roasted meats. Beyond a side, it also shines as an impressive appetizer, perhaps served with a warm bowl of marinara sauce for dipping.
Why You’ll Love Making This Garlic Herb Bread
Beyond its undeniable deliciousness, there are so many reasons this Garlic Herb Bread Wreath will become a staple in your kitchen:
- Stunning Presentation: The wreath shape and visible herby swirls make it look incredibly fancy and impressive, perfect for holiday tables or special gatherings.
- Irresistible Flavor: The combination of fresh garlic, fragrant herbs, rich Parmesan, and buttery bread is simply divine and deeply satisfying.
- Easier Than It Looks: Despite its elaborate appearance, the shaping method is quite simple and I’ll guide you through it step-by-step. Even novice bakers can achieve beautiful results.
- Versatile Pairing: It complements a vast range of meals, from Italian pasta dishes and comforting soups to roasted chicken or steak.
- Wonderful Aroma: The smell of this bread baking will fill your home with an inviting, savory scent that will get everyone excited for dinner.
- Fresh Ingredients Shine: Using fresh herbs and garlic truly elevates the flavor, making every bite burst with freshness.
Perfect Pairings: Serve With These Favorites
This Garlic Herb Bread Wreath is incredibly versatile and enhances a variety of meals. Here are some of our top recommendations:
- Lazy Day Lasagna – The ultimate comfort food pairing.
- Zuppa Toscana Soup – Dip this savory bread into a creamy, flavorful soup.
- Chicken Fried Steak – A surprising but delicious contrast of flavors and textures.
- Turkey Chili – Perfect for soaking up every last bit of hearty chili.
- Stuffed Shells – A classic Italian pairing that’s always a crowd-pleaser.
- Any rich stew or roasted chicken dish would also be greatly improved with a side of this herbaceous bread.
Essential Garlic Herb Bread Ingredients
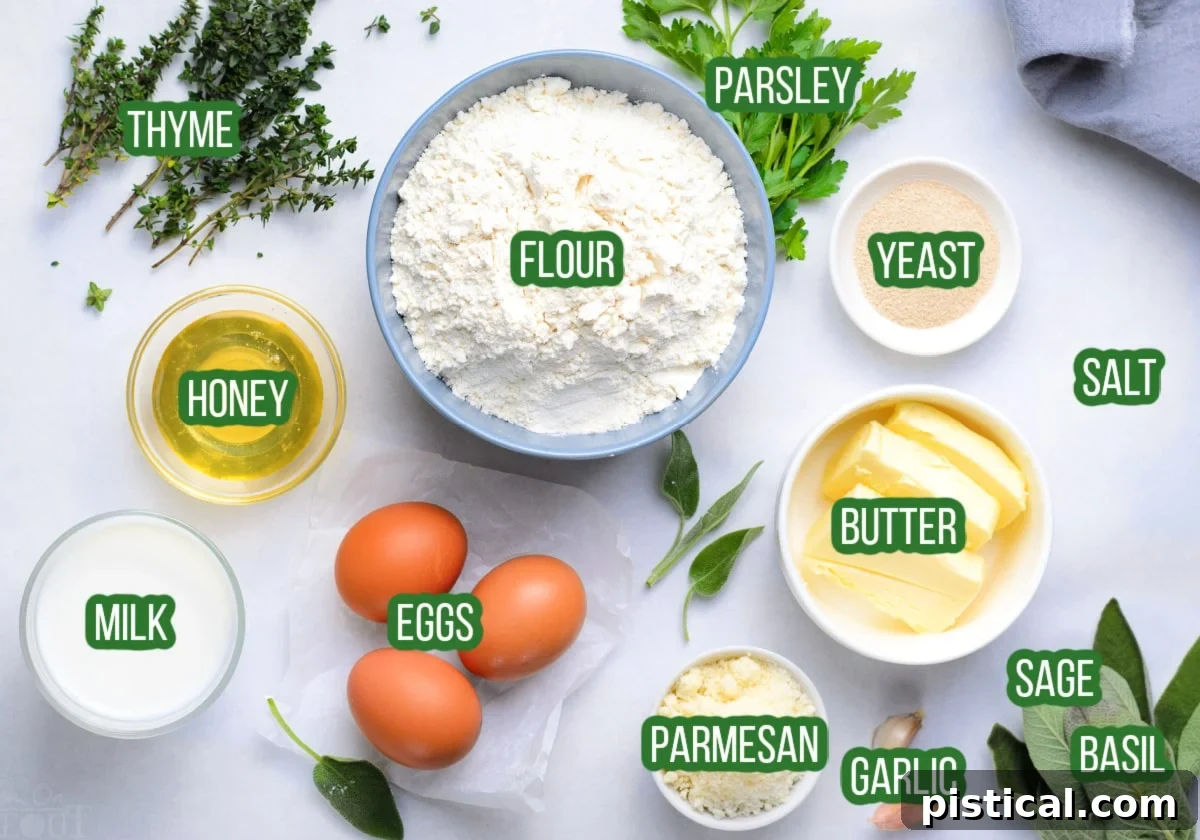
While this bread looks incredibly gourmet, the ingredients are straightforward and likely already in your pantry. The key is using fresh, high-quality components to achieve the best flavor. Take a quick glance at what you’ll need below, and remember, the comprehensive printable recipe card with exact measurements and detailed instructions is available further down this post.
- All-Purpose Flour: The foundation of our dough. While some recipes call for bread flour, all-purpose provides a wonderfully soft and tender crumb for this particular bread.
- Milk (Whole Milk Recommended): Acts as a liquid for the dough and adds richness. It’s crucial that your milk is warmed to between 100°F and 110°F. This specific temperature range is vital for activating the instant yeast without killing it (if too hot) or hindering its growth (if too cold).
- Instant Yeast: Our leavening agent that makes the bread wonderfully soft and airy. Instant yeast is convenient as it can be mixed directly with dry ingredients, though we’ll proof it here with the warm milk and honey to ensure it’s active.
- Salt: Don’t skip the salt! It’s essential for balancing the flavors and enhancing the overall taste of the bread, preventing it from tasting bland.
- Honey: Not just for sweetness, honey serves as food for the yeast, helping it to activate and thrive, resulting in a beautiful rise and a slightly golden crust.
- Eggs (Large, Room Temperature): Three large eggs contribute significantly to the bread’s incredible color, rich flavor, and tender texture. Using room temperature eggs helps them incorporate more smoothly into the dough.
- Butter (Unsalted, Softened, Divided): Provides unparalleled richness and a delicious buttery flavor to both the dough and the herb filling. Dividing it ensures you have enough for both stages of the recipe.
- Parmesan Cheese (Freshly Grated): For the best results, always opt for freshly grated Parmesan cheese. Its sharp, nutty flavor is far superior to pre-grated varieties and melts beautifully into the filling.
- Garlic (Minced): The star of the show! Two cloves, finely minced, deliver that quintessential aromatic garlic flavor. A garlic press makes this step quick and easy, ensuring an even distribution of flavor.
- Fresh Herbs (Parsley, Basil, Sage, Thyme): This blend provides a bright, complex, and incredibly fresh flavor profile. Finely chopping them is key for even distribution. While you can adjust the selection based on your preferences (or omit any you don’t favor), using fresh herbs is highly recommended over dried for their superior aroma and taste.
How to Make Homemade Garlic Herb Bread From Scratch
Creating this impressive bread from scratch might seem daunting at first glance, but I assure you, it’s a rewarding and surprisingly manageable process. To ensure the smoothest baking experience, I highly recommend reading through all the instructions thoroughly a couple of times before you begin. This will give you a clear overview of each stage and help you anticipate what’s next. We’ll break it down into three simple phases: preparing the dough, mixing the flavorful filling, and finally, the fun part – rolling, twisting, shaping, and baking your beautiful wreath.
Phase 1: Prepare the Enriched Dough
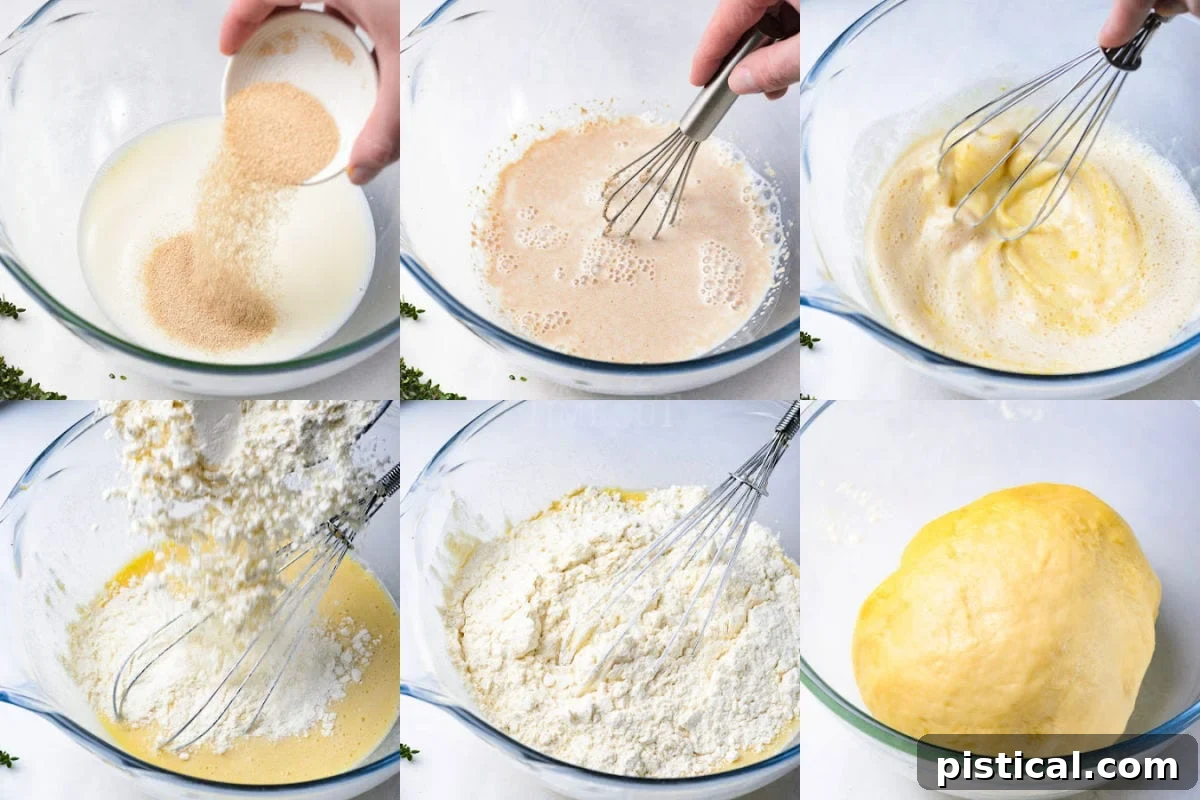
- In a generously sized mixing bowl, combine the instant yeast, honey, and warm milk. Whisk these ingredients gently until they are well combined. Allow the mixture to sit for about 5-10 minutes. This gives the yeast time to activate, and you should see a slight foam or bubbling on the surface, indicating your yeast is alive and ready to work!
- Next, whisk in the three room temperature eggs until they are fully incorporated into the liquid mixture.
- Add the first cup of all-purpose flour to the wet ingredients and stir until just combined. Then, whisk in 2 tablespoons of the softened butter. Follow this by adding another cup of flour and the salt. Continue whisking until all the added flour is thoroughly incorporated and the mixture starts to come together.
- Gradually continue adding flour, approximately half a cup at a time, stirring after each addition. The goal is for the dough to become cohesive and begin pulling away cleanly from the sides of the bowl. If you have a stand mixer, this is an excellent time to attach the dough hook and let the machine do the hard work for you.
- Once the dough has formed, transfer it to a lightly floured surface (or keep it in the stand mixer with the hook attachment). Knead the dough for approximately 6 to 8 minutes. You’ll know it’s ready when it transforms into a smooth, elastic, and supple ball that springs back when gently pressed.
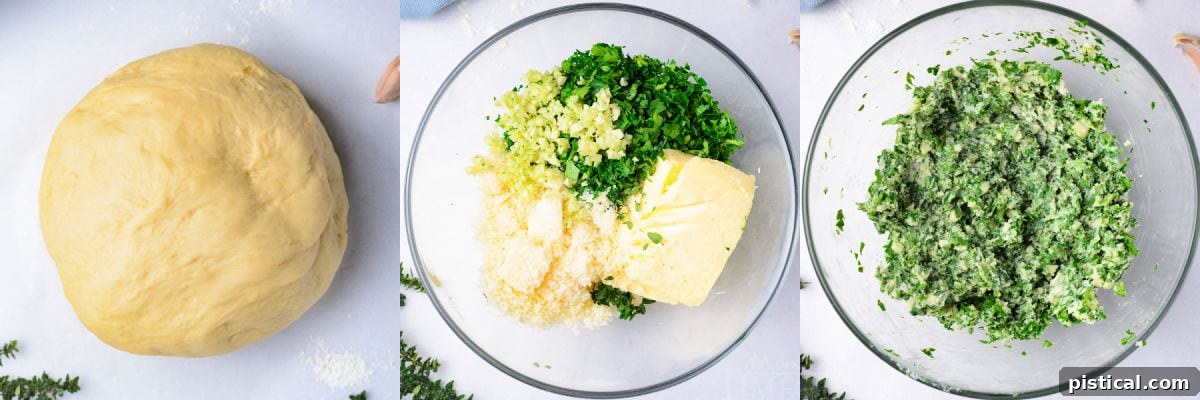
- Lightly grease a large, clean bowl with a little oil or butter. Place the kneaded dough inside, turning it once to coat it evenly. Cover the bowl securely with a clean kitchen towel or plastic wrap. Find a warm, draft-free spot in your kitchen and let the dough rise for about 60 minutes, or until it has noticeably doubled in size. This crucial step allows the yeast to work its magic, developing flavor and a light texture.
- While the dough is rising, prepare your baking sheet. Line it with a sheet of parchment paper or a silicone baking mat. This will prevent your bread from sticking and ensure easy cleanup. Set it aside for later.
Phase 2: Prepare the Savory Herb Filling
- Once your dough has completed its first rise and doubled in volume, it’s time to prepare the incredibly flavorful filling that will transform your bread.
- In a small mixing bowl, combine the 4 tablespoons of remaining softened butter, all the finely minced garlic, your vibrant fresh herbs (parsley, basil, sage, thyme), and the freshly grated Parmesan cheese. Stir these ingredients together thoroughly until they are well combined, creating a fragrant and cohesive spread. This mixture is the heart of the garlic herb flavor!
Phase 3: Roll, Twist, Shape, and Bake Your Wreath
- Gently punch down the risen dough to release the air. Transfer it to a lightly floured surface and knead it for just a couple of minutes until it’s smooth and pliable again. This gentle kneading helps to redistribute the yeast and creates a uniform texture.
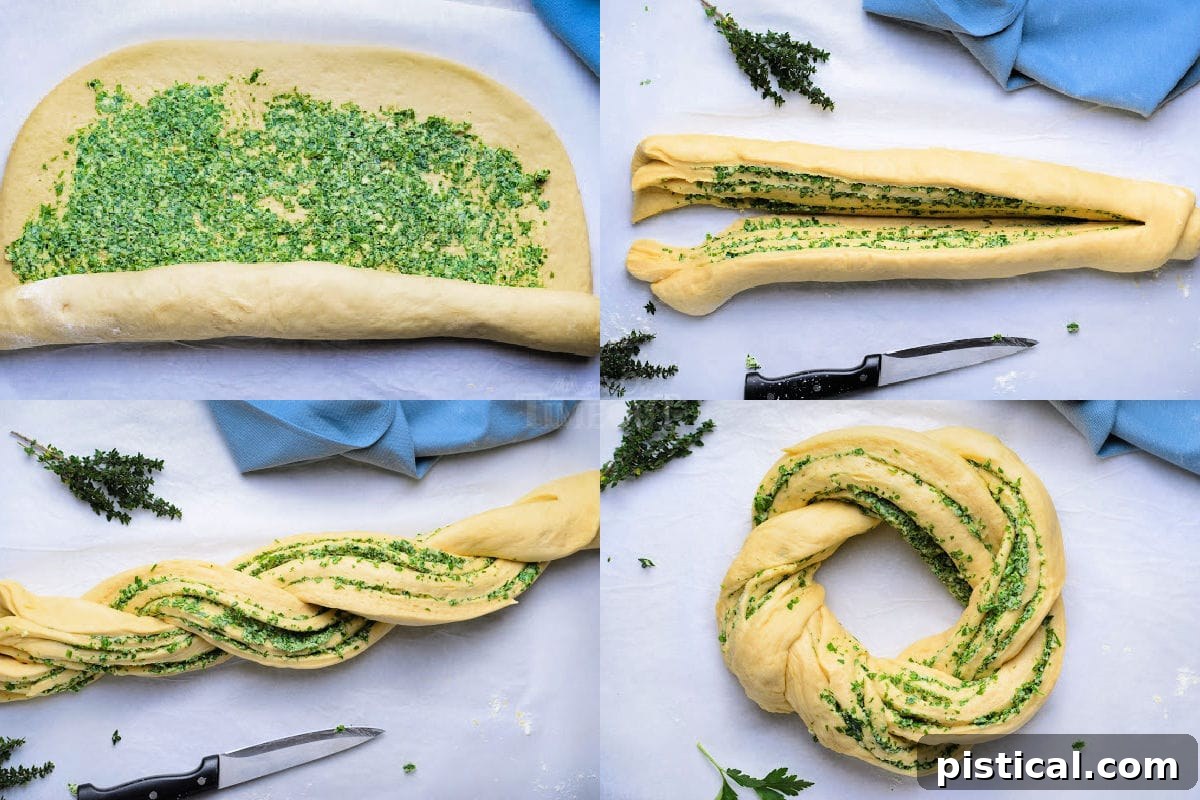
- Using a rolling pin, roll the dough out into a large, even rectangle, approximately 18 inches long by 10 inches wide. Aim for a consistent thickness across the entire rectangle.
- Evenly spread the prepared herb butter mixture over the entire surface of the dough rectangle. Be sure to leave a small, clear perimeter of about 1 inch around all the edges of the dough. This clean edge will help you seal the dough securely in the next step.
- Starting from one of the longer sides, carefully and tightly roll up the dough to form a neat log, much like you would for cinnamon rolls. Pinch the seam firmly along the length of the log to seal it completely.
- Using a very sharp knife or a clean piece of dental floss (unwaxed, unflavored), carefully cut the log lengthwise right down the middle, exposing the beautiful layers of filling. Crucially, leave about the last inch of the dough log intact at one end. This small intact section will act as a hinge, keeping your two dough strands connected.
- Now for the magic! Gently pick up the two cut pieces of dough and carefully twist them over and under each other, creating a braid-like pattern. As you twist, the dough will naturally lengthen a bit, stretching to approximately 22 inches long.
- Once twisted, bring the two ends of your long, twisted dough together to form a circular wreath shape. Pinch the ends firmly and securely together to seal the wreath. Ensure it’s well sealed so it doesn’t unravel during baking.
- Carefully transfer your newly shaped bread wreath to the prepared baking sheet. Loosely cover the wreath with plastic wrap or a clean kitchen towel. Allow it to rest in a warm place for its second rise (proof) for about 30 minutes, or until it has nearly doubled in volume. This final rise is essential for a light and fluffy interior.
- While the wreath is completing its second rise, preheat your oven to 375°F (190°C).
- Bake the bread wreath in the preheated oven for 30 to 35 minutes, or until it achieves a beautiful golden-brown color and sounds hollow when tapped on the bottom. It should be cooked through.
- Immediately upon removing the bread from the oven, brush it generously with the remaining 2 tablespoons of softened butter. This adds an extra layer of richness and a beautiful sheen.
- Allow the bread to rest on the baking sheet for at least 10 minutes before carefully transferring it to a cutting board. This resting period allows the internal structure to set, making it easier to slice without tearing. Then, cut and serve your magnificent Garlic Herb Bread Wreath!
Baker’s Note: If you prefer a simpler presentation, you can certainly just twist the dough into a long, braided loaf without forming a wreath. Simply pinch the ends firmly together to seal and bake as directed. It will be just as delicious!
Expert Tips for Making Perfect Garlic Herb Bread
- Even Butter Application: For smooth and even coverage of the herb butter mixture, use a pastry brush. This ensures every part of your dough gets a burst of flavor.
- Boost the Cheese Factor: For cheese lovers, consider mixing an additional 1/2 cup of shredded mozzarella cheese into the herb filling mixture. This will create pockets of gooey, melted cheese throughout your bread.
- Prevent Sticking: Always lightly grease your mixing bowl before the first dough rise. This small step makes it significantly easier to remove the dough after it has risen, preventing it from tearing.
- Baking Sheet Prep: Whether you choose parchment paper or a silicone baking mat, ensure your baking sheet is properly lined. Both options provide a non-stick surface and facilitate easy transfer of the bread.
- Yeast Activation: Ensure your milk is at the correct temperature (100°F-110°F). Too hot, and it will kill the yeast; too cold, and the yeast won’t activate, resulting in a flat loaf. A kitchen thermometer is very helpful here.
- Room Temperature Eggs: Bringing your eggs to room temperature helps them incorporate more easily and evenly into the dough, leading to a smoother texture.
- Don’t Over-Flour: While you need enough flour for the dough to come together and not be overly sticky, avoid adding too much. Over-flouring can result in a dry, dense bread. Add flour gradually until the dough is just pliable.
- Achieving a Golden Crust: For an even more golden and slightly crispier crust, you can brush the top of the wreath with an egg wash (one egg whisked with a tablespoon of water) before baking.
Frequently Asked Questions (FAQs)
How should I store leftover Garlic Herb Bread?
To keep your garlic bread fresh and prevent it from drying out, it’s best to wrap it tightly in aluminum foil. You can store it at room temperature for up to three days. While best served fresh and warm, it will retain much of its deliciousness if stored properly. Avoid refrigerating it, as the cold environment can cause the bread to become stale and lose its desirable texture more quickly. For longer storage, the freezer is your best option.
Can I freeze Garlic Herb Bread?
Absolutely, freezing is an excellent way to preserve your Garlic Herb Bread. As mentioned, it’s preferable to freezing it in the refrigerator because freezing helps maintain its soft interior and crisp exterior without becoming rubbery. To freeze, first wrap the cooled bread tightly in aluminum foil, then place the foil-wrapped bread into a large, freezer-safe Ziploc bag or airtight container. It will keep beautifully in the freezer for up to 3 months. When you’re ready to enjoy it, thaw it at room temperature, then reheat in a preheated oven at 350°F (175°C) for about 10-15 minutes, or until warmed through and fragrant.
Can I use dried herbs instead of fresh?
While fresh herbs are highly recommended for their vibrant flavor and aroma, you can use dried herbs as a substitute if fresh ones are not available. A general rule of thumb is to use about one-third the amount of dried herbs compared to fresh. For example, if the recipe calls for 1 tablespoon of fresh basil, use 1 teaspoon of dried basil. Be aware that the flavor profile will be slightly different, less bright and more concentrated.
What if my dough doesn’t rise?
There are a few common reasons dough might not rise:
- Inactive Yeast: Your yeast might be old or expired. Always check the expiration date.
- Water/Milk Temperature: If the liquid was too hot, it killed the yeast. If too cold, it didn’t activate it properly. Always aim for 100°F-110°F.
- Environment: The rising environment might be too cold or drafty. Find a warm spot, or create one by placing the covered bowl in a slightly warmed (but turned off) oven, or near a warm appliance.
If your dough hasn’t risen at all after the recommended time, it’s likely the yeast failed. Unfortunately, there’s no way to fix it at that point, and it’s best to start over with fresh yeast and correct temperatures.
Explore More Delicious Bread Recipes
Once you master this Garlic Herb Bread Wreath, you might find yourself eager to dive deeper into the wonderful world of homemade bread. It’s a truly rewarding experience! Beyond this savory delight, here are some other fantastic bread recipes to expand your baking repertoire:
- Pumpkin Dinner Rolls – A seasonal favorite, perfect for autumn meals.
- Cinnamon Swirl Bread – Sweet, comforting, and perfect for breakfast or dessert.
- Angel Biscuits – A unique blend of yeast bread and biscuit, incredibly light and tender.
- Garlic Parmesan Breadsticks – Another savory garlic and cheese favorite, ideal for dipping.
- Cheesy Bacon Ranch Bread – A hearty and flavorful loaf, packed with savory goodness.
- Homemade Beer Bread – Incredibly easy and requires no yeast, a great beginner recipe!
Garlic Herb Bread Wreath Recipe Card

Print Recipe
Garlic Herb Bread Wreath
This Garlic Herb Bread Wreath is equally delicious and gorgeous! Made with Parmesan cheese, garlic, and fresh herbs. Super impressive to serve for special occasions yet easy enough to pair with your favorite weeknight dinner.
Course: Bread | Cuisine: American | Keyword: bread wreath, garlic herb bread
Prep Time: 20 minutes | Cook Time: 30 minutes | Resting Time: 1 hour 30 minutes
Servings: 10 servings | Author: Trish – Mom On Timeout
Ingredients
- 3 1/2 to 4 cups all purpose flour
- 3/4 cup whole milk (warmed to 100°F to 110°F)
- 2 ¼ ounces instant yeast (1 packet)
- 1 teaspoon salt
- 2 tablespoons honey
- 3 large eggs (room temperature)
- 8 tablespoons butter (softened, divided)
- 1/4 cup freshly grated Parmesan cheese
- 2 cloves garlic (minced)
- 1/3 cup fresh parsley (finely chopped)
- 2 tablespoons fresh basil (finely chopped)
- 1 tablespoon fresh sage (finely chopped)
- 1 tablespoon fresh thyme (finely chopped)
Instructions
- Whisk the yeast, honey, and warm milk together in a large bowl. Whisk in the eggs until combined.
- Add one cup of flour, stir just until combined. Whisk in 2 tablespoons of the softened butter and then add another cup of flour and the salt, then whisk until all the flour is incorporated into the mixture.
- Continue adding flour, about a half a cup at a time, until the dough pulls away from the side of the bowl when stirred. (You can use a stand mixer with the hook attachment for this as well.)
- Continue kneading the dough for about 6 to 8 minutes, until a smooth dough forms.
- Lightly grease a large bowl and place the dough inside. Cover with a towel or plastic wrap and let rise in a warm, draft-free area for 60 minutes or until doubled in size.
- Line a baking sheet with parchment paper or silicone baking mat. Set aside.
- In a small bowl, stir together 4 tablespoons of softened butter, minced garlic, herbs, and Parmesan cheese until combined.
- Place the dough on a lightly floured surface and knead for a few minutes until smooth and pliable. Roll the dough out to a large rectangle, about 18 inches by 10 inches. Spread the herb butter over the top of the dough leaving a 1 inch perimeter around the rectangle.
- Roll up the dough tightly to form a log, just like you would for cinnamon rolls. Using a sharp knife, cut through the log lengthwise, leaving the last inch of the dough intact on one end of the log. This will hold the dough together.
- Hold up the two pieces of dough and twist. The dough will lengthen as you do this to about 22 inches long. Form a wreath by bringing the ends together and pinch to seal.
- Carefully transfer to the prepared baking sheet. Cover the wreath loosely with plastic or a towel and let rest until nearly doubled in volume, about 30 minutes.
- Preheat oven to 375°F. Bake bread for 30 to 35 minutes until golden brown and cooked through. Brush the bread with the remaining 2 tablespoons of softened butter and then let rest for at least 10 minutes before cutting and serving.
Nutrition Information
Calories: 316kcal | Carbohydrates: 41g | Protein: 11g | Fat: 13g | Saturated Fat: 7g | Trans Fat: 1g | Cholesterol: 77mg | Sodium: 385mg | Potassium: 179mg | Fiber: 3g | Sugar: 5g | Vitamin A: 623IU | Vitamin C: 4mg | Calcium: 81mg | Iron: 3mg