
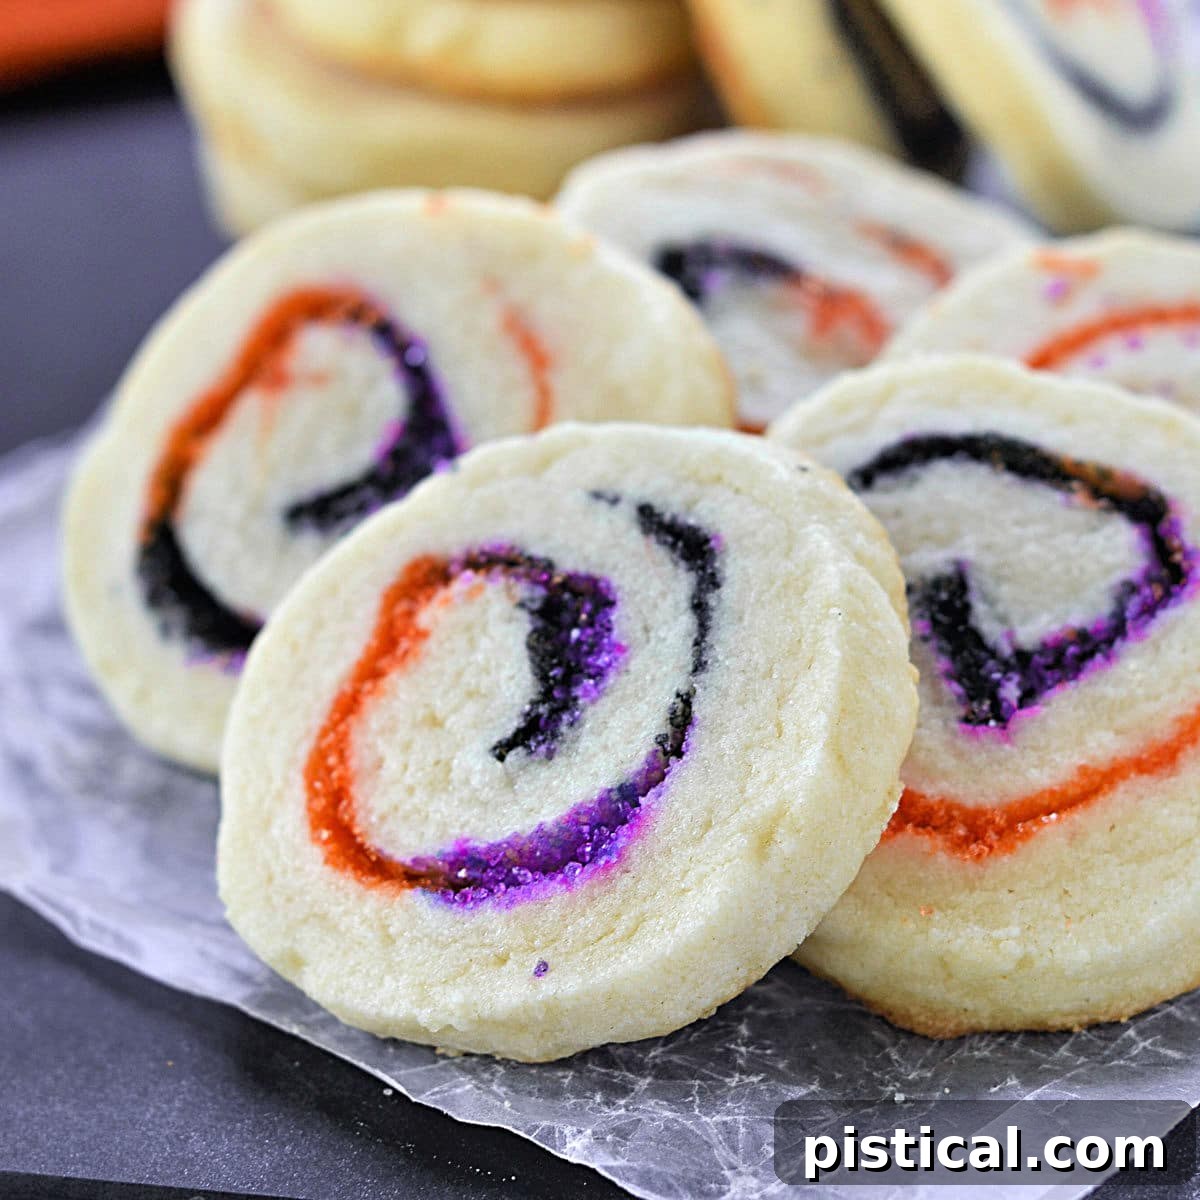
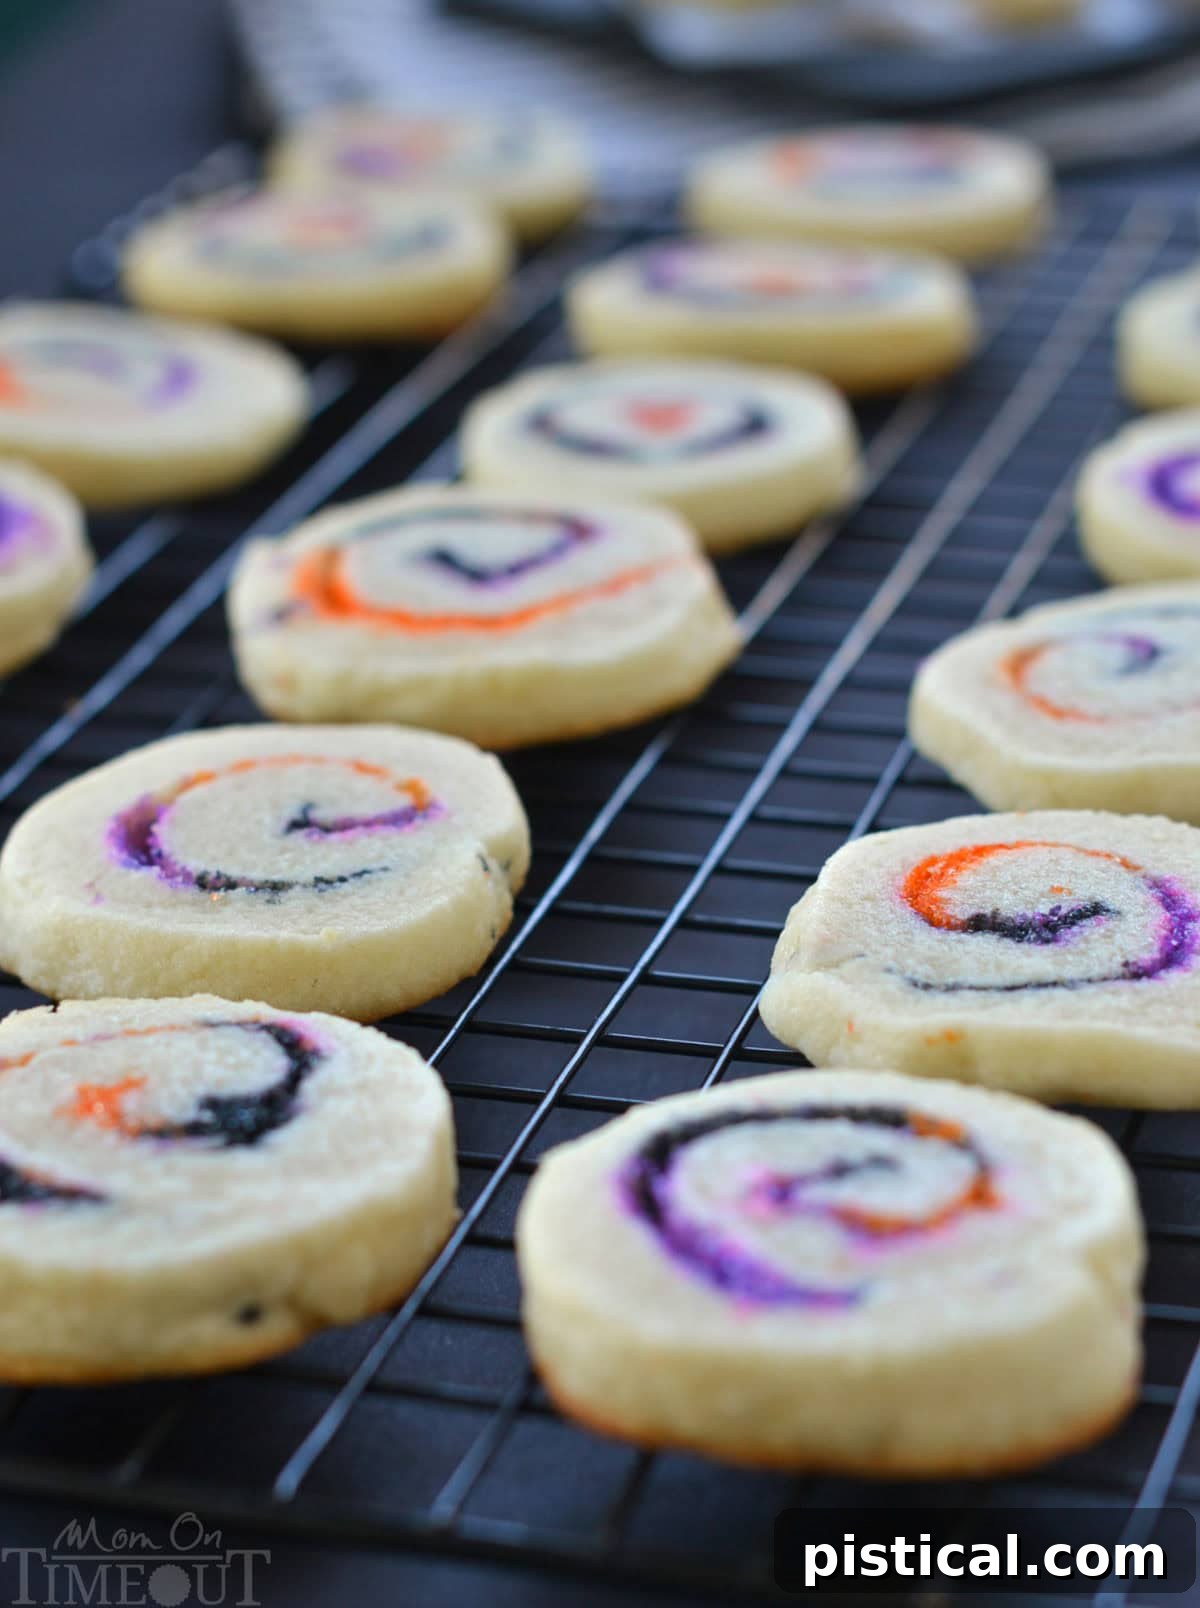
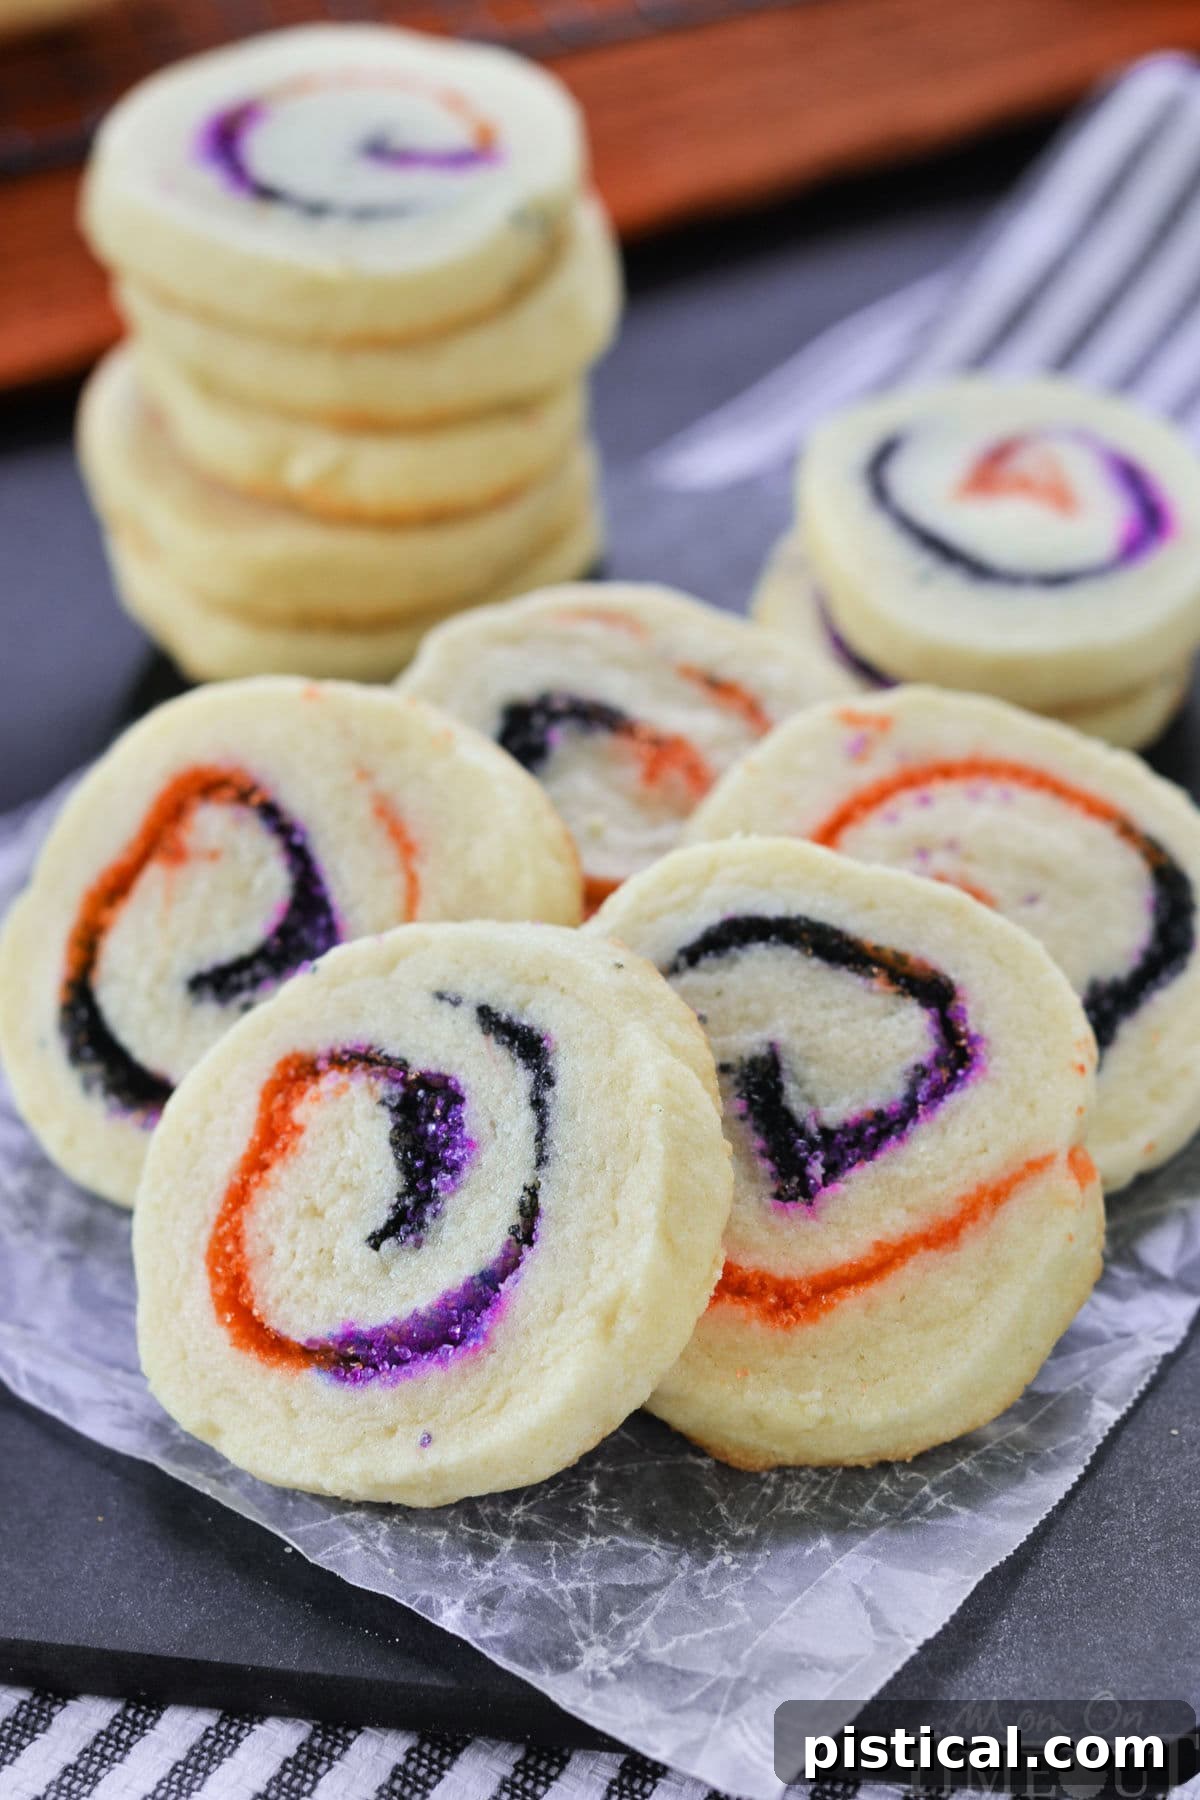
Get ready for a treat that’s as delightful to look at as it is to eat: our vibrant and irresistible Spiral Halloween Cookies! These aren’t just any sugar cookies; they are buttery, melt-in-your-mouth confections beautifully swirled with electric orange, mysterious black, and regal purple colored sugars, creating a stunning spiral design that will captivate everyone. Perfect for adding a whimsical, spooky touch to any autumnal gathering, school party, or family Halloween celebration, these cookies are an absolute must-make for the festive season. Their enchanting appearance and classic sugar cookie flavor make them a standout addition to your Halloween dessert table.
Looking for more spooky inspiration? Don’t miss out on these other fantastic Halloween treats: try our delightful Pumpkin Popcorn Balls and the deliciously eerie Black Widow Brownie Bites for a complete Halloween spread!
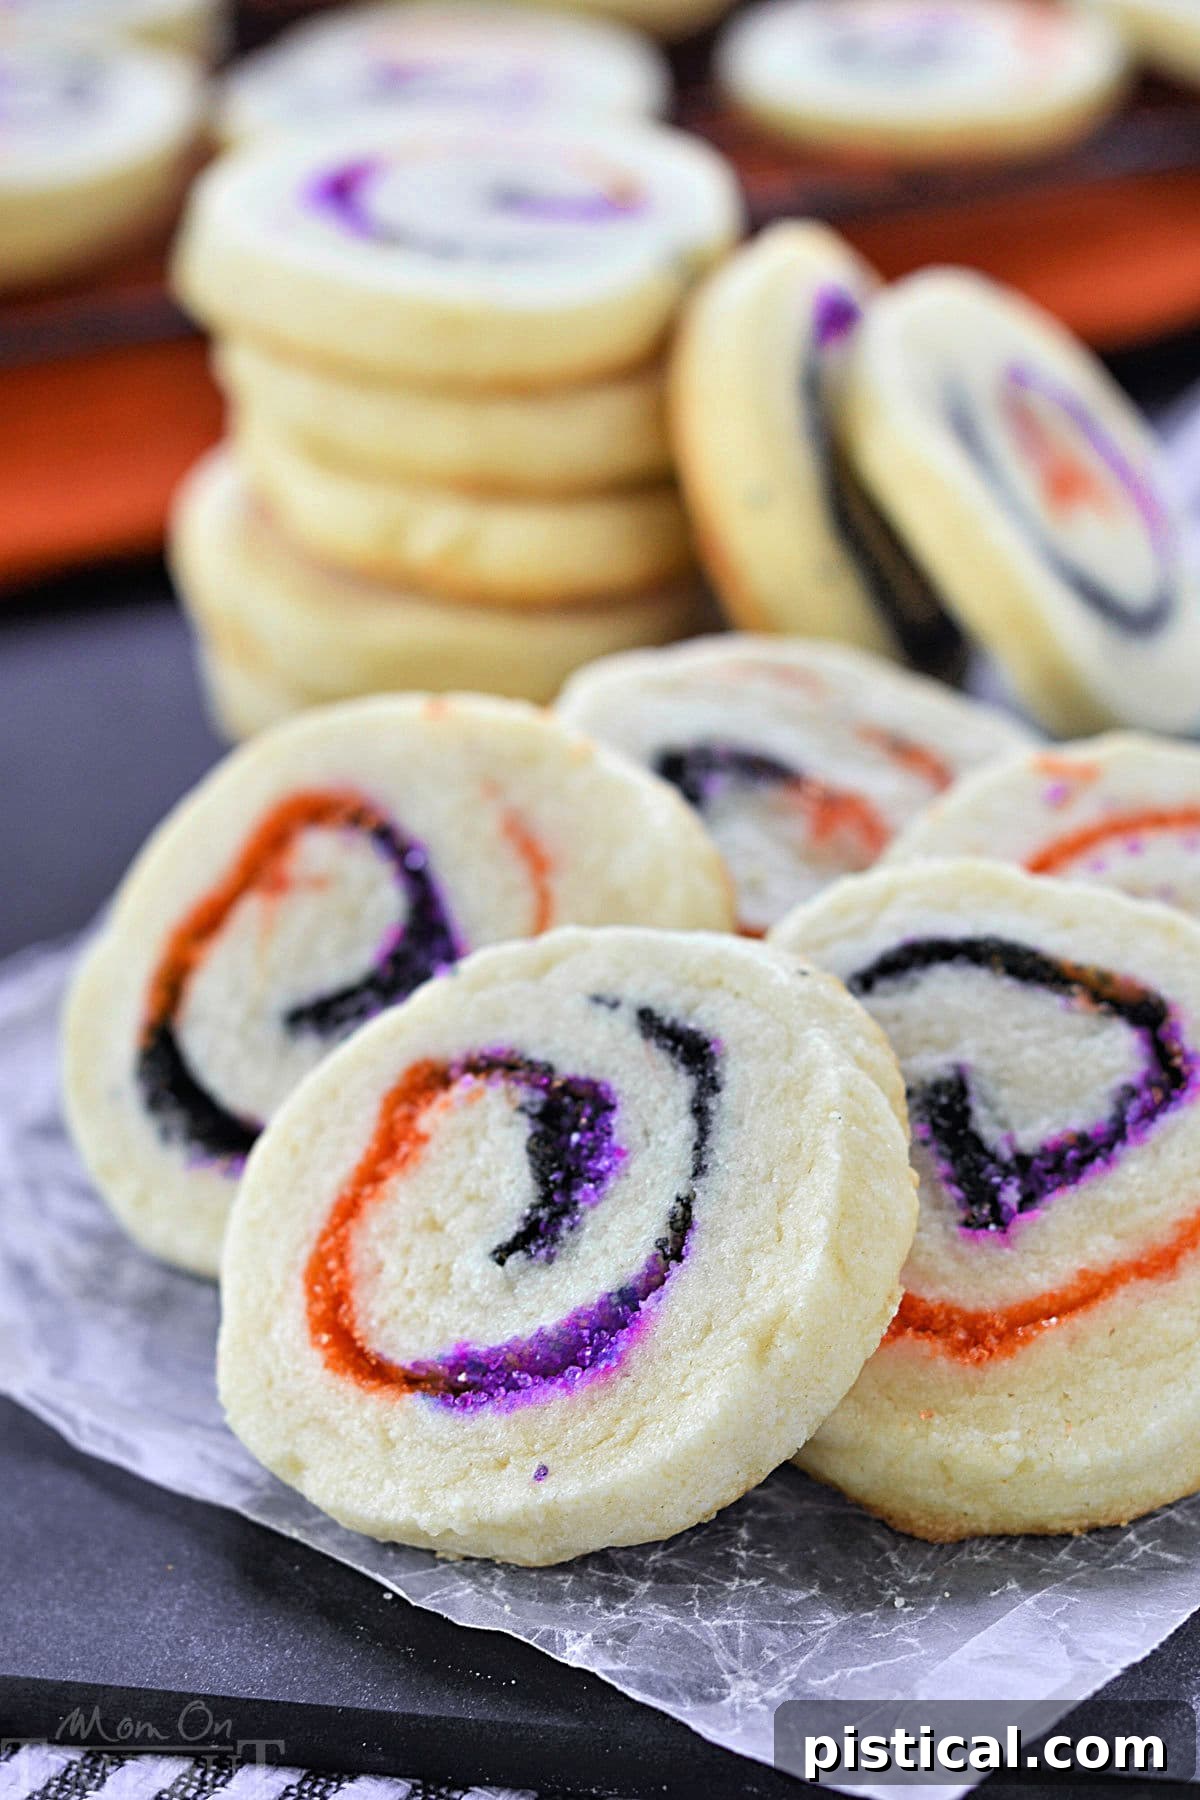
The Ultimate Spiral Halloween Cookies Recipe
Embrace the spirit of Halloween with these incredibly easy and endlessly festive cookies! Our slice-and-bake Spiral Halloween Cookies are celebrated for their rich, buttery flavor and a texture that truly melts in your mouth. The secret to their irresistible charm lies in the playful swirls of colorful sugar embedded directly into the cookie dough, creating a visually striking effect that is surprisingly simple to achieve. These cookies are a vibrant pop of color, guaranteed to elevate any Halloween party or autumnal gathering.
The beauty of spiral cookies is their incredible versatility. This technique allows for endless customization, making them perfect for any holiday or special occasion – simply by changing the colors of the sugar you use! In the past, I’ve created cheerful rainbow pinwheel cookies and patriotic red, white, and blue sparkler cookies for the 4th of July, both of which were met with rave reviews. For Halloween, I’ve chosen a classic trio of orange, black, and purple, and the results are absolutely enchanting! If you find it challenging to source specific colored sugars, don’t worry – my comprehensive DIY Colored Sugar tutorial provides all the guidance you need to make your own at home.
Crafted in the ever-convenient slice-and-bake style, these cookies are a dream for busy bakers. The dough comes together quickly and easily, and the chilling and slicing process is straightforward, making them accessible even for novice bakers. Whether you’re hosting a grand Halloween bash, contributing to a potluck, or simply looking for a fun and engaging fall baking project to enjoy with your children, these spiral cookies are an excellent choice. They bring joy, deliciousness, and a touch of homemade magic to any celebration, making them a seasonal staple you’ll want to revisit year after year.
I opted for a classic Halloween palette of orange, purple, and black, and I must confess, I utterly adore how they turned out! If you’re struggling to find the specific colored sugar you need, my DIY Colored Sugar tutorial offers a simple solution.
Why These Halloween Spiral Cookies Will Be Your New Favorite
Prepare for a truly spooktacular baking experience with this outstanding Halloween cookie recipe! These buttery, vibrant swirl cookies are not only easy to prepare but also provide the perfect festive flourish for your Halloween festivities. Here’s why you’ll absolutely love making (and eating) them:
- Effortlessly Easy to Make: The cookie dough itself is incredibly straightforward, requiring only a few basic pantry ingredients that you likely already have on hand. It’s a classic, reliable sugar cookie dough that transforms into a spectacular swirl design when rolled with colored sugars, all without the need for intricate decorating or special cookie cutters. This recipe is designed for maximum visual impact with minimal fuss.
- Perfectly Festive for Halloween: With their captivating swirls of bright orange, deep black, and rich purple, these cookies are the quintessential Halloween treat. They instantly evoke the fun and mystery of the season. While we love the traditional Halloween colors, feel completely free to experiment with any combination of colored sugars that spark your imagination!
- A Delightful Family Activity: This recipe is truly ideal for baking with children. Kids will revel in the hands-on fun of helping to press out the dough, sprinkle the vibrant sugars, and especially, roll up the dough to create those mesmerizing spirals. It’s a wonderful opportunity to create cherished memories in the kitchen, fostering a love for baking and the joy of homemade treats.
This recipe is generously scaled to yield approximately three dozen cookies, making it an excellent choice for classroom treats, large Halloween parties, or sharing with neighbors and friends!
Essential Ingredient Breakdown for Perfect Spiral Cookies
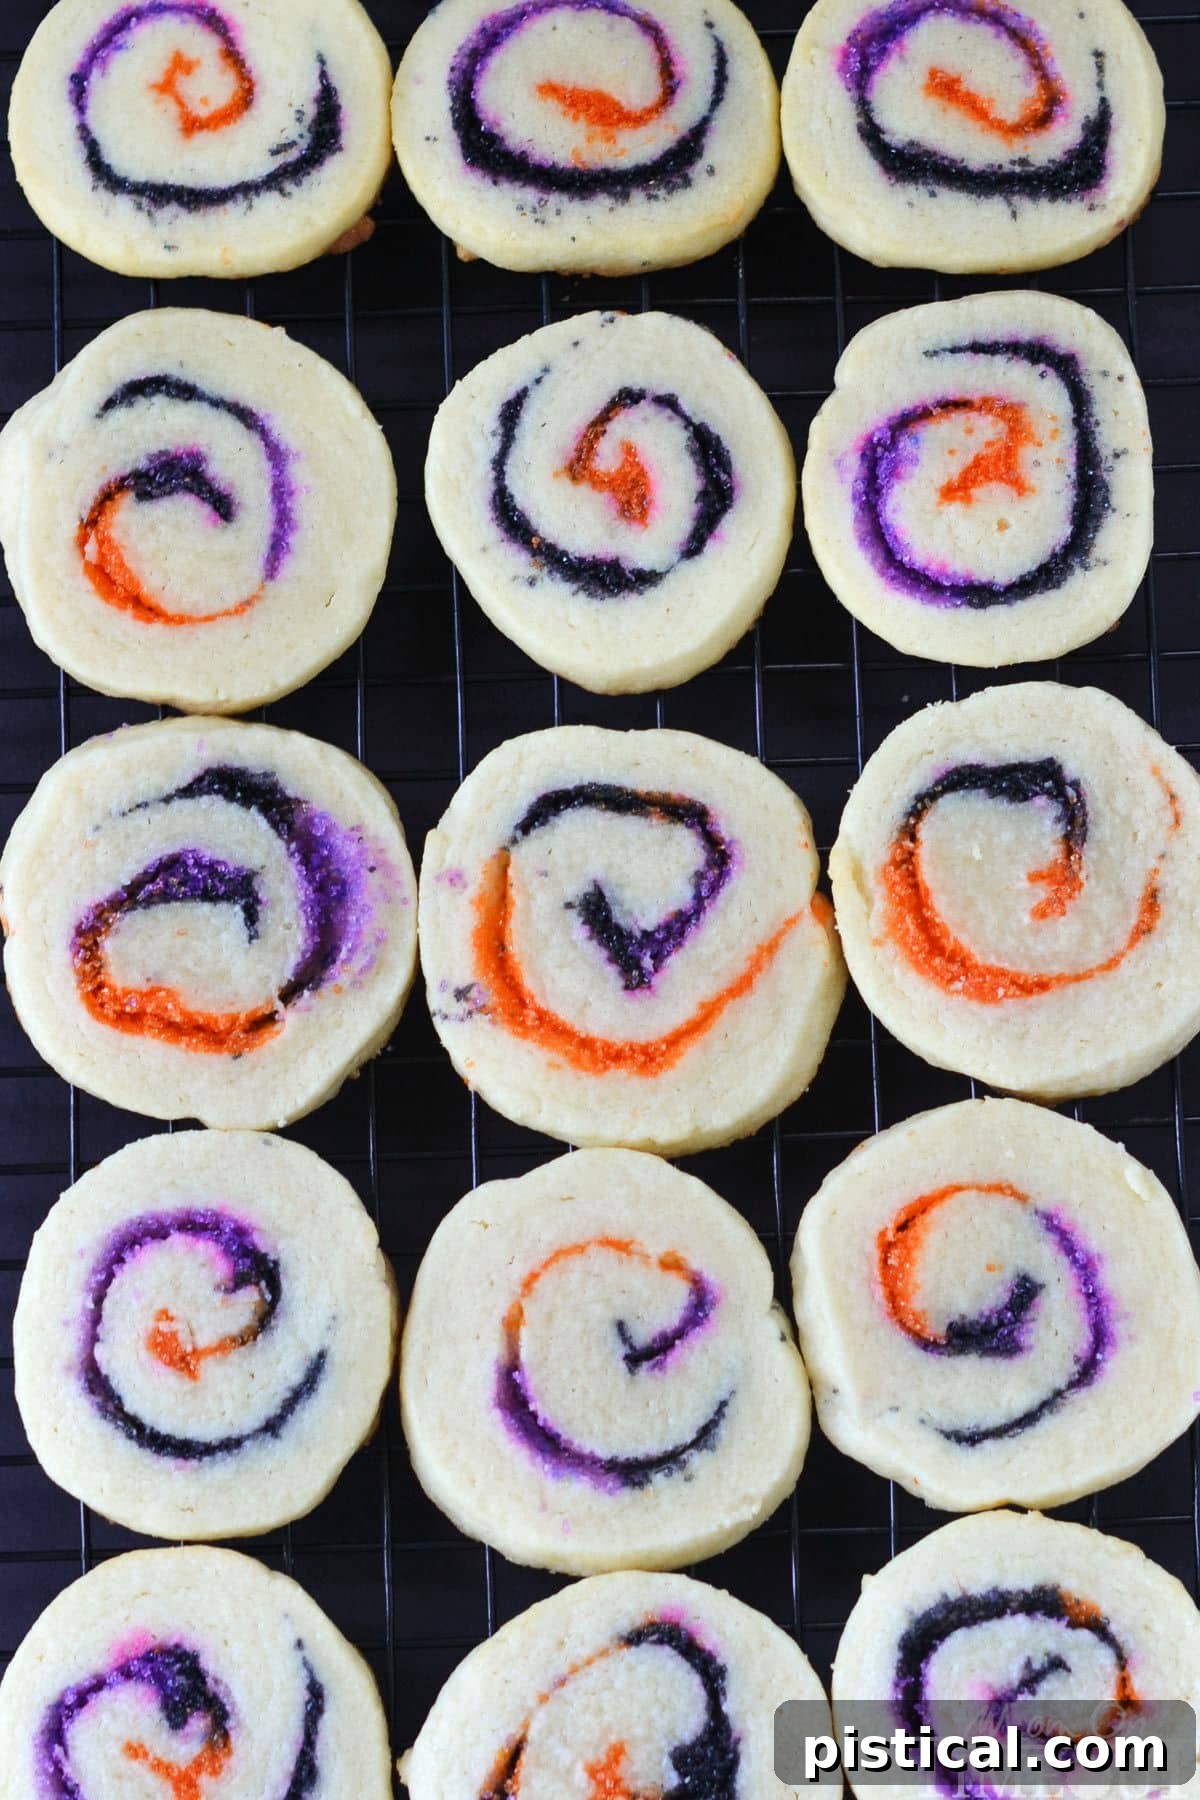
One of the many appealing aspects of this Halloween cookie recipe is its reliance on readily available pantry staples, complemented by the addition of festive colored sugar. You’ll be surprised to learn that these delightful cookies require just six core ingredients, including the vibrant sugars!
Below is a detailed look at each ingredient and its role in creating these perfect spiral cookies. As always, the full printable recipe card with precise measurements can be found at the very end of this post.
- Salted Butter: This is the foundation of our rich, tender, and incredibly flavorful sugar cookies. Using salted butter not only adds depth of flavor but also reduces the number of ingredients you need to add separately. It’s crucial that your butter is softened to room temperature before you begin, as this ensures it creams properly with the sugar, leading to a smooth, uniform dough. If you opt for unsalted butter, simply incorporate half a teaspoon of fine sea salt into your dough to achieve a balanced flavor profile.
- Granulated Sugar: Beyond providing essential sweetness, granulated sugar contributes to the cookies’ delicate texture and helps them achieve that appealing light golden hue during baking. It creams with the butter to create an airy base for the dough.
- Almond or Vanilla Extract: These extracts are flavor powerhouses. While classic vanilla extract always brings warmth and a familiar sweetness, I personally have a strong preference for almond extract in this recipe. Its slightly nutty, sophisticated note truly elevates the cookie’s flavor, adding a unique dimension that makes these cookies even more special. Feel free to choose the extract that best suits your taste or what you have on hand.
- Egg: A single large egg plays a vital role in binding the ingredients together, providing crucial structure to the cookie dough, and imparting a pleasant chewiness and tenderness to the final baked cookies. Ensure your egg is at room temperature for optimal incorporation into the creamed butter and sugar mixture.
- All-Purpose Flour: As the primary dry ingredient, all-purpose flour forms the structural backbone of our cookie dough. It provides the necessary consistency for shaping and slicing, ensuring your cookies hold their beautiful spiral design during baking. Always measure flour accurately, preferably by weight or using the spoon-and-level method, to avoid a dense or dry cookie.
- Colored Sugar: This is where the magic happens! Colored sugar is not just for aesthetics; it adds a subtle textural crunch and, of course, the vibrant, festive touch that defines these Halloween cookies. We’re using orange, black, and purple sugars to infuse them with undeniable Halloween spirit. You can find pre-colored sugars in most baking aisles or easily make your own if you prefer a specific shade.
Step-by-Step Guide: Crafting Your Perfect Spiral Halloween Cookies
Get ready to create some truly show-stopping treats! These Halloween Cookies, with their signature buttery, melt-in-your-mouth texture and vibrant swirls of orange, black, and purple sugar, are the perfect festive addition to any spooky celebration. The process is straightforward, and the results are incredibly rewarding.
Let’s walk through the steps to make these delightful cookies. Remember, for precise measurements and a full printable version, refer to the recipe card available at the conclusion of this post.
- Cream Butter and Sugar: In the bowl of a stand mixer fitted with the paddle attachment (or using a large mixing bowl and a hand mixer), combine the softened salted butter and granulated sugar. Beat them together on medium speed for about 3 minutes, or until the mixture becomes light, fluffy, and visibly creamy. This step is crucial for incorporating air, which contributes to the cookies’ tender texture.
- Incorporate Wet Ingredients: Reduce the mixer speed to low and add the room temperature egg and your chosen extract (almond or vanilla). Mix until they are fully combined into the butter-sugar mixture, scraping down the sides of the bowl as needed to ensure everything is thoroughly integrated.
- Add Dry Ingredients: Gradually add the all-purpose flour to the wet ingredients, mixing on low speed only until the flour is just incorporated and no dry streaks remain. Be careful not to overmix, as this can develop the gluten too much, resulting in tougher cookies.
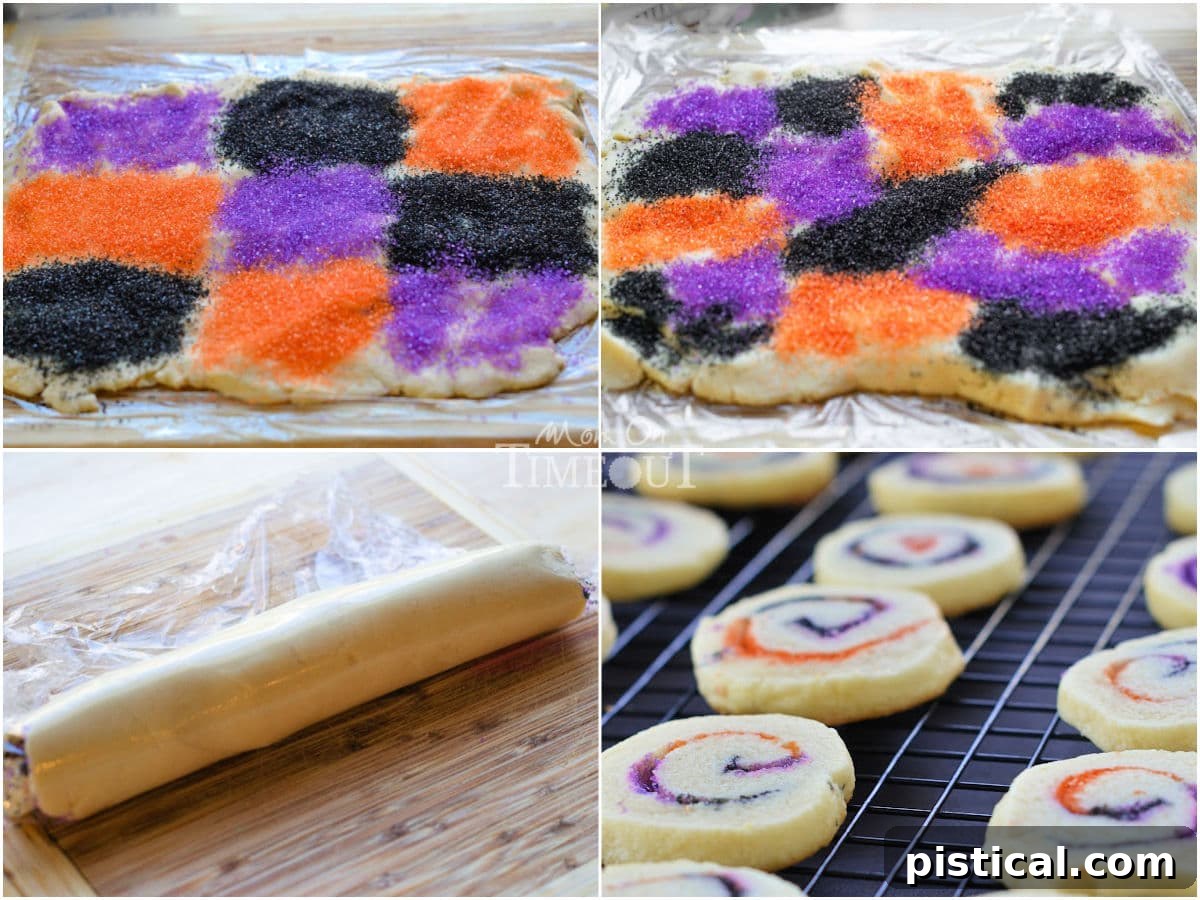
- Divide and Prepare Dough: Carefully divide the prepared cookie dough in half. On a clean cutting board or smooth surface, lay down a large piece of plastic wrap. Take one half of the dough and press it out evenly into an approximate 8-inch by 8-inch square. Aim for a consistent thickness across the entire square.
- Apply Colored Sugars: Now for the artistic part! Generously sprinkle your colored sugars (orange, black, and purple) onto the flattened dough in patches. There’s no strict method here; you can create a mosaic, random splotches, or even distinct stripes. The goal is to cover a good portion of the dough with vibrant color before rolling.
- Roll the Dough Log: Using the plastic wrap as an aid, carefully lift one edge of the dough and begin to roll it tightly, much like you would a cinnamon roll or sushi. Continue rolling until you have a compact log. Use the plastic wrap to help shape and tighten the log, ensuring it’s firm and evenly cylindrical. Wrap this log tightly in the plastic wrap. Repeat the entire process with the second half of your dough and the remaining colored sugar.
- Chill for Firmness: Place both tightly wrapped dough logs into the refrigerator for at least 1 to 2 hours, or until they are thoroughly firm. This chilling step is absolutely essential for preventing the cookies from spreading excessively during baking and for allowing you to cut clean, precise slices.
- Preheat and Prepare Baking Sheets: Once the dough is firm, preheat your oven to 375°F (190°C). Line one or two large baking sheets with parchment paper or silicone baking mats. This prevents sticking and ensures even baking.
- Slice and Arrange: Remove one dough log from the refrigerator and unwrap it. Using a sharp knife, carefully cut the log into ¼-inch thick slices. Aim for consistent thickness for even baking. Arrange the sliced cookies about 2 inches apart on your prepared baking sheets.
- Bake to Golden Perfection: Transfer the baking sheets to the preheated oven and bake for 6 to 8 minutes. Keep a close eye on them; the cookies are done when their edges just begin to turn a light golden color and the centers appear set. Avoid overbaking to maintain their soft, melt-in-your-mouth texture.
- Cool and Serve: Once baked, remove the cookies from the oven and let them cool on the baking sheet for 1 to 2 minutes. This allows them to firm up slightly. Then, carefully transfer them to a wire rack to cool completely before serving or storing.
There’s truly no right or wrong way to apply the colored sugar! For one batch, I opted for a playful “patchwork quilt” look, while another time, I simply scattered the colors completely randomly. The key is to ensure you have distinct, large sections of color on the dough before you begin rolling. As long as you embrace the creativity, your cookies will undeniably look fantastic!
Storage and Make-Ahead Tips for Your Halloween Cookies
These Spiral Halloween Cookies are not only delicious but also incredibly convenient to prepare and store. Here’s how you can make them ahead of time and keep them fresh:
- Make Ahead Dough: The beauty of slice-and-bake cookies is their flexibility! You can prepare the cookie dough up to 2 days in advance. Once you’ve rolled the dough into logs and tightly wrapped them in plastic wrap, simply store them in the refrigerator. This allows you to do the prep work ahead of a busy schedule, and then simply slice and bake when you’re ready for fresh cookies.
- Freezing Dough for Later: For even longer storage, the unbaked cookie dough logs can be frozen for up to 3 months. After rolling and tightly wrapping each log in plastic wrap, place them in a freezer-safe bag or an airtight container to prevent freezer burn. When you’re ready to bake, transfer the frozen logs to the refrigerator overnight to thaw. Once thawed, proceed with slicing and baking as directed in the recipe. This is perfect for having homemade cookies on demand!
- Storing Baked Leftovers: If you happen to have any leftover baked cookies (a rare occurrence, we know!), store them in an airtight container at room temperature. They will retain their freshness and delicious texture for up to 5 days. For optimal freshness, you might consider placing a slice of bread in the container to help keep them soft.
Creative Variations to Elevate Your Spiral Cookie Game
While our classic Spiral Halloween Cookies are perfection, there’s always room for a little creativity in the kitchen! Here are some exciting variations to try, allowing you to adapt this versatile recipe for any occasion or flavor preference:
- Unleash a Rainbow of Sugar Colors: The spiral design lends itself beautifully to any color palette. Beyond Halloween’s orange, black, and purple, imagine vibrant red and green for festive Christmas swirls, delicate pastel shades for an elegant Easter display, bold blues and whites for winter wonderland themes, or even school colors for graduation parties. The possibilities are truly endless, limited only by your imagination and the availability of colored sugars!
- Infuse with Warm Spices: For a cozy, autumnal twist, consider mixing a pinch of warm spices into your cookie dough. A quarter to half a teaspoon of ground cinnamon, nutmeg, or even a pre-made pumpkin pie spice blend can add a wonderfully aromatic and comforting flavor profile that pairs perfectly with the buttery sugar cookie base.
- Decadent Chocolate Drizzle: For an extra touch of indulgence and visual appeal, consider drizzling your cooled, baked cookies with melted chocolate. White chocolate offers a beautiful contrast against the vibrant sugar swirls, while dark chocolate or milk chocolate drizzles add a rich, complementary flavor. You can use a piping bag with a fine tip or simply a spoon to create elegant zigzags or intricate patterns.
- Sprinkle Magic (Inside or Out!): Instead of, or in addition to, colored sugar, you could roll the dough in various sprinkles like nonpareils, jimmies, or even edible glitter. For a surprise element, you can even gently fold a small amount of sprinkles *into* the dough before rolling to create a subtle confetti effect within the spiral.
- Citrus Zest Brightness: For a brighter, fresher flavor, add 1-2 teaspoons of finely grated lemon or orange zest to the cookie dough along with the extracts. The citrus notes would provide a lovely counterpoint to the sweetness.
Frequently Asked Questions About Spiral Halloween Cookies
Let’s address some common questions that often arise when making these delightful spiral cookies, ensuring your baking experience is as smooth and successful as possible.
Can I use unsalted butter instead of salted butter?
Absolutely, you certainly can! If your preference is unsalted butter, or if that’s what you have available, simply add half a teaspoon of fine sea salt to the dough along with the flour. This small addition is crucial, as the salt helps to balance the sweetness of the sugar and enhances all the other flavors, preventing your cookies from tasting flat or overly sweet. It’s an easy adjustment for equally delicious results.
Do I really have to chill the dough?
Yes, the chilling step is genuinely non-negotiable for these spiral cookies! While it might feel like an extra wait, it serves two critical purposes. First, chilling causes the butter in the dough to firm up, making the logs solid enough to cut into clean, uniform ¼-inch slices without squishing or distorting the beautiful spiral design. Second, cold butter melts more slowly in the oven, which significantly helps to prevent the cookies from spreading out too much while baking, ensuring they retain their lovely round shape and distinct swirls. Skipping this step often leads to misshapen, thin, and less visually appealing cookies.
How do I know when the cookies are done baking?
Knowing when these cookies are perfectly baked is key to their tender texture. Look for a subtle cue: the edges of the cookies should just be beginning to turn a light golden-brown, while the centers still look slightly soft but set, with a dry appearance. The cookies should not be deeply browned across the top. It’s far better to underbake them slightly than to overbake, as overbaking will result in dry, crumbly cookies. Once removed from the oven, allow them to rest on the hot cookie sheet for 1-2 minutes; this residual heat continues to cook them gently to perfection before transferring them to a wire rack.
I don’t have time to chill the dough – what can I do to speed it up?
If you’re in a pinch and need to expedite the chilling process, you can certainly use your freezer! Instead of refrigerating the dough logs for 1 to 2 hours, place them in the freezer for about 20-30 minutes. This will firm them up much faster. However, be vigilant and don’t leave them in too long – if the dough becomes rock hard, it will be extremely difficult to slice without cracking or crumbling. The goal is firm, not frozen solid.
Should I use almond or vanilla extract?
The recipe allows for either almond extract or vanilla extract, and while both are delicious, I highly recommend giving almond extract a try if you have it! There’s something almost magical about the subtle, slightly nutty, and sophisticated flavor that almond extract imparts to these sugar cookies. It adds a unique depth that sets them apart and is truly my preference for enhancing the overall taste. Vanilla extract will yield a classic, comforting flavor, but almond extract elevates them to another level. You won’t be disappointed!
Trish’s Top Tips for Flawless Spiral Halloween Cookies
Achieving bakery-quality Spiral Halloween Cookies is easier than you think with these expert tips:
- Embrace the Chill: Seriously, do not skip or shorten the dough chilling step! This is the most critical factor for perfect spiral cookies. Cold dough ensures two things: first, it makes the dough firm enough to slice cleanly without distorting the intricate spiral design; and second, it prevents the cookies from spreading too much in the oven, maintaining their beautiful shape and thickness.
- Butter Temperature Matters: For the ideal dough consistency, ensure your butter is genuinely soft to the touch but not melted or greasy. Butter that’s too cold won’t cream properly with the sugar, leading to a lumpy dough, while melted butter will make your dough greasy and difficult to handle, affecting the cookie’s texture.
- Precision Slicing: When cutting your chilled dough logs, strive for slices that are as uniform as possible in thickness. Cookies of similar size and thickness will bake evenly, preventing some from being burnt while others are still raw. A sharp, thin knife will be your best friend here.
- Troubleshooting Soft Dough: If, after the recommended refrigeration time, you find your dough still a bit too soft to cut cleanly, pop the logs into the freezer for an additional 10-15 minutes. This quick freeze will firm them up just enough to allow for perfect, crisp slices without making them rock hard.
- Keep Your Knife Clean: As you slice the dough, some stickiness can occur. To ensure clean cuts and prevent the dough from deforming, intermittently wipe your knife blade clean with a damp cloth or dip it in a little flour between cuts.
- Watch Them Closely: These spiral sugar cookies bake relatively quickly, typically within 6 to 8 minutes. Oven temperatures can vary, so stay vigilant! Remove them from the oven as soon as the edges turn a light golden color and the centers are set. Overbaking can lead to dry, crisp cookies rather than the desired soft, tender texture.
- Parchment Paper is Your Friend: Always line your baking sheets with parchment paper or a silicone baking mat. This not only ensures even heat distribution for consistent baking but also makes for effortless removal of the delicate cookies and a much simpler cleanup.
Other Spooktacular Halloween Treats to Try
If you’re hosting a Halloween party or just want to expand your festive baking repertoire, be sure to check out these other crowd-pleasing Halloween-themed recipes:
- Mint Chocolate Chip Monster Halloween Cookies
- Halloween Punch
- Witch Hat Halloween Cookies
- Halloween Popcorn Balls
- Pumpkin Chocolate Chip Cookies

Print
Pin
Spiral Halloween Cookies
Ingredients
- 1 cup salted butter softened
- 1 cup granulated sugar
- 1 large egg room temperature
- ¾ teaspoon almond extract or vanilla
- 2 ½ cups all purpose flour
- ½ cup colored sugar I used orange, black and purple
Instructions
-
Combine butter and granulated sugar together in the bowl of a stand mixer or large mixing bowl and beat together until smooth and creamy, about 3 minutes.1 cup salted butter, 1 cup granulated sugar
-
Mix in the egg and almond extract or vanilla extract until well combined.1 large egg, ¾ teaspoon almond extract
-
Stir in the all purpose flour, mixing just until incorporated.2 ½ cups all purpose flour
-
Divide dough in half.
-
Cover a cutting board or smooth surface with plastic wrap and press out half of dough into an 8 inch square.
-
Sprinkle sugar onto the dough in patches.½ cup colored sugar
-
Use the plastic wrap to to lift and roll up dough – just like you would cinnamon rolls or sushi. Use the plastic wrap to roll the dough and form in into a log.
-
Repeat with second half and refrigerate dough rolls for 1 to 2 hours or until nice and firm.
-
Preheat oven to 375°F. Line a large baking sheet with parchment paper. Set aside.
-
Remove plastic wrap from rolls and cut log into ¼ inch slices. Place slices about 2 inches apart on cookie sheet.
-
Bake cookies for 6 to 8 minutes or until edges just turn golden. Let cool for 1 to 2 minutes and remove to wire rack.
Notes
- Make Ahead: You can make the dough up to 2 days in advance. Just wrap it tightly in plastic and store it in the fridge until you’re ready to bake.
- Freezing: The dough can also be frozen for up to 3 months. Wrap the rolls tightly in plastic wrap and place them in a freezer-safe bag. When you’re ready to bake, simply thaw in the fridge overnight, slice and bake as directed.
- Leftovers: Store baked cookies in an airtight container at room temperature for up to 5 days.
I used salted butter to cut down on the number of ingredients. If using unsalted, add half a teaspoon of fine sea salt to the dough.
Nutrition
Originally published October 18, 2014.