
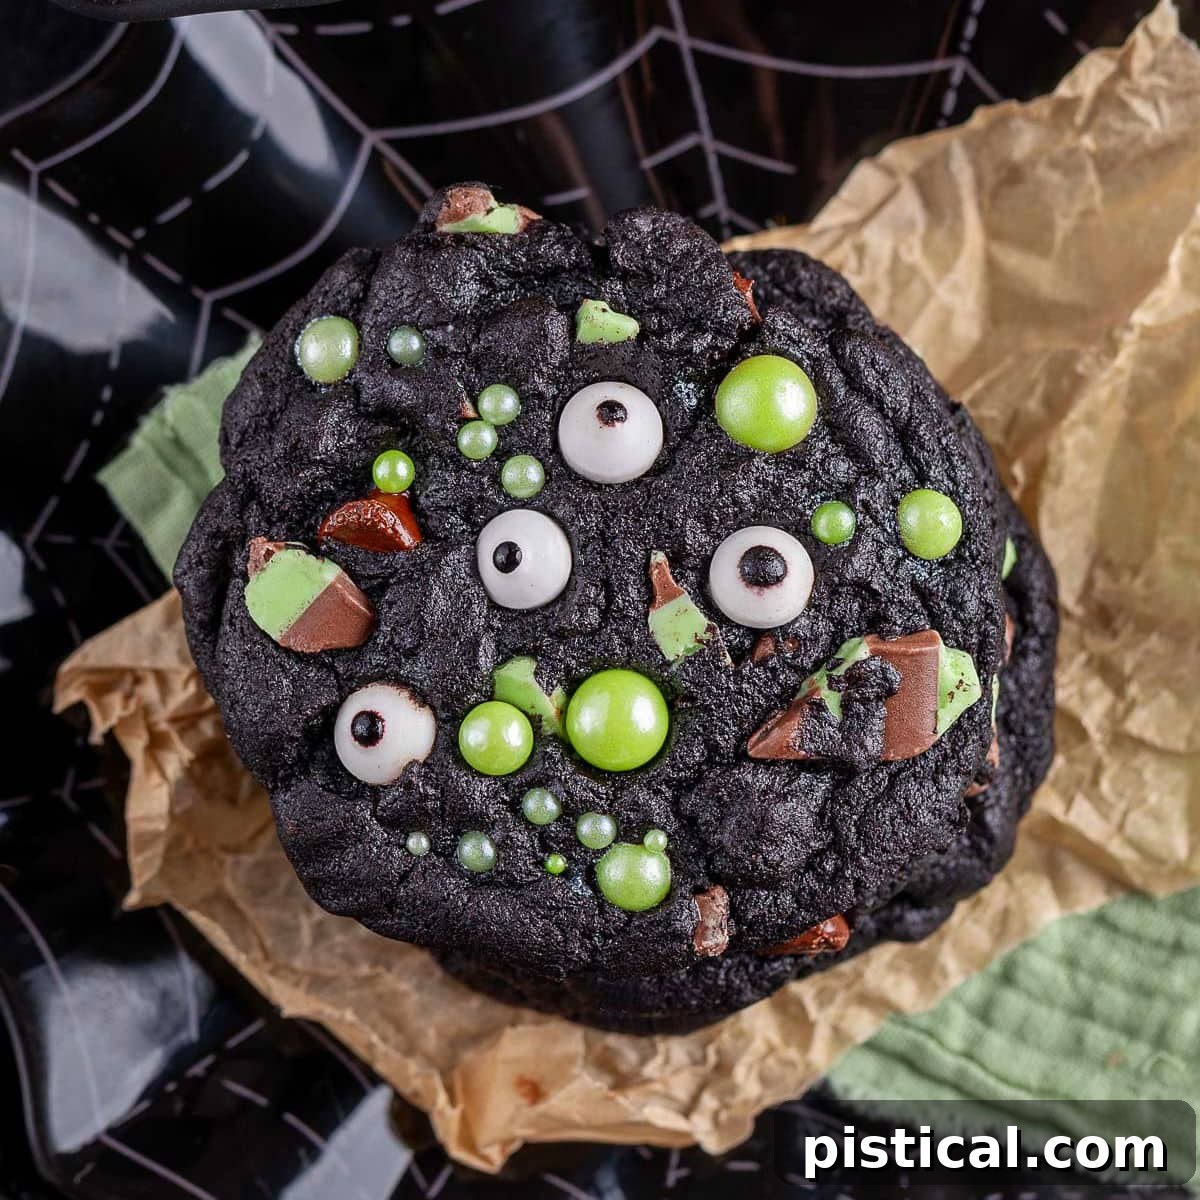
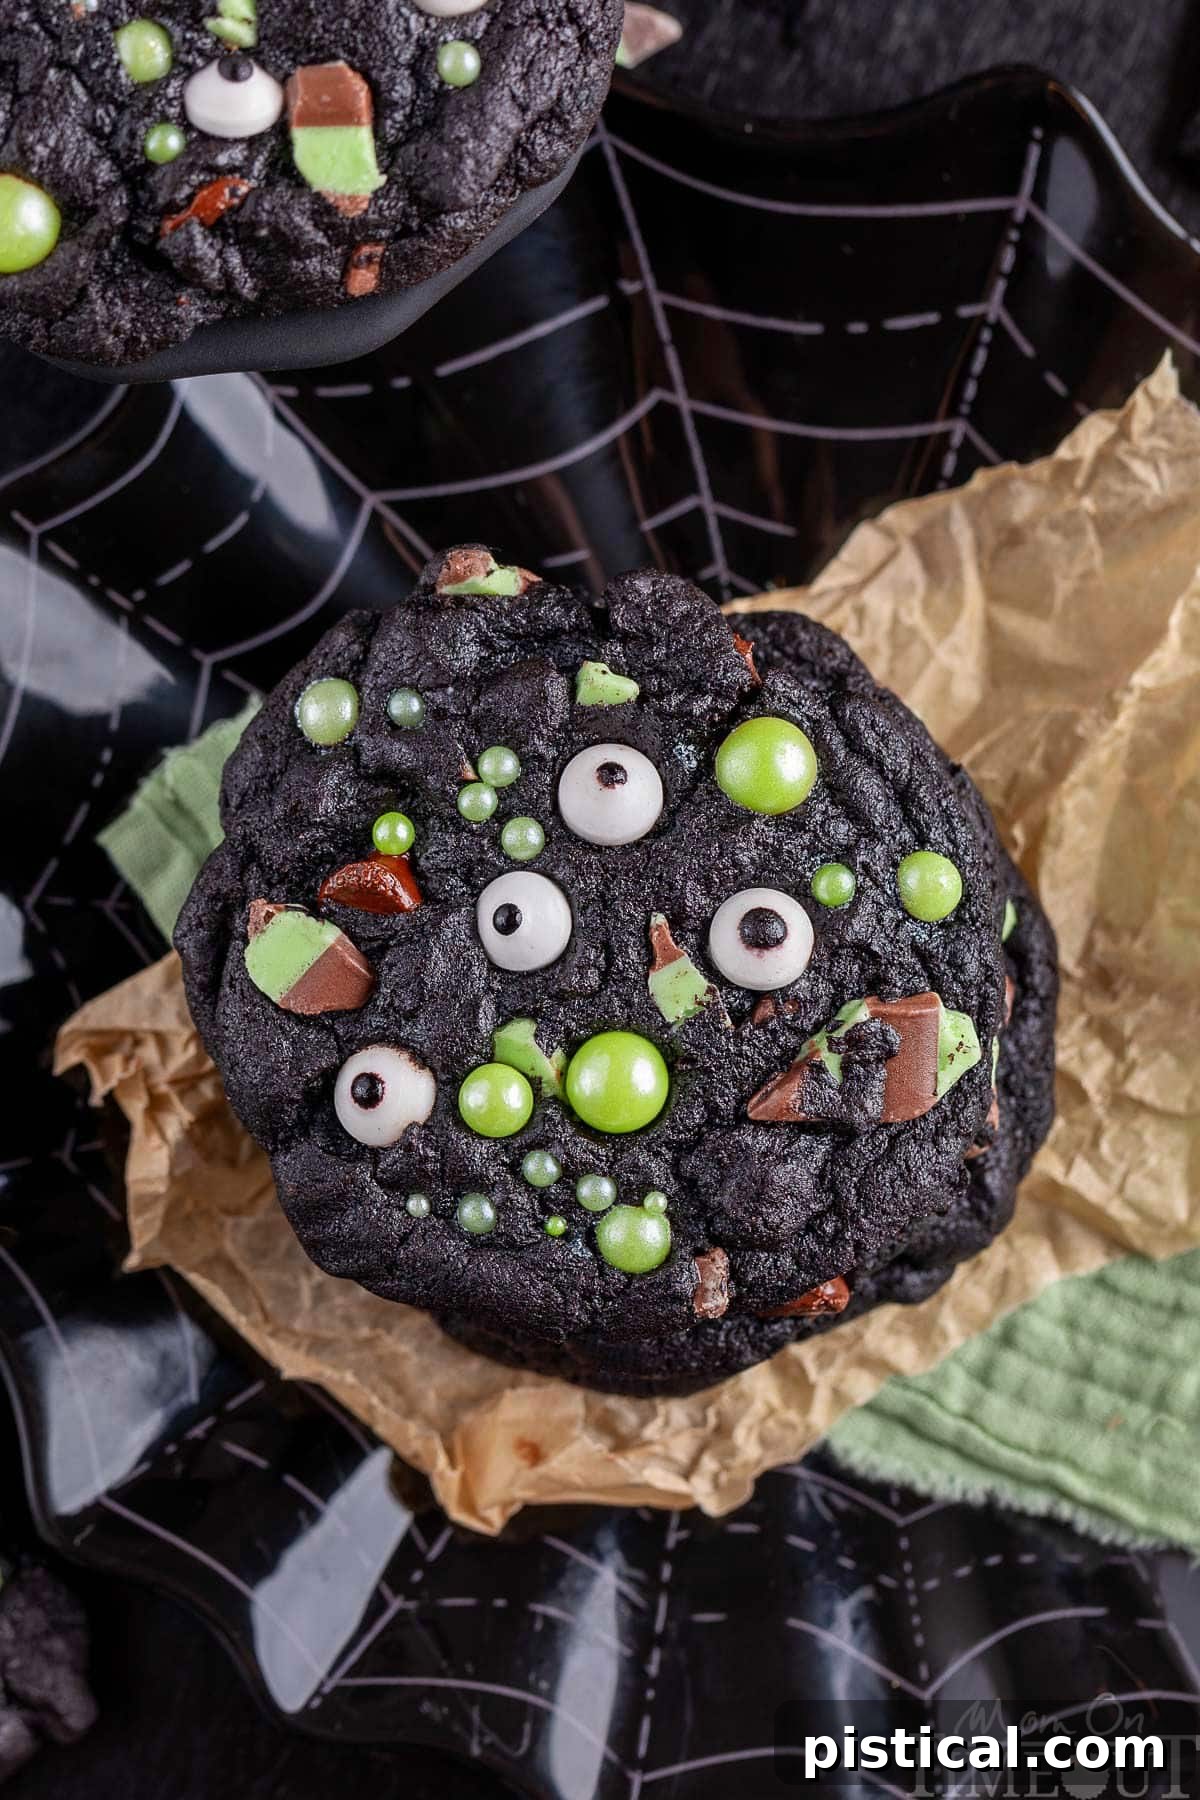
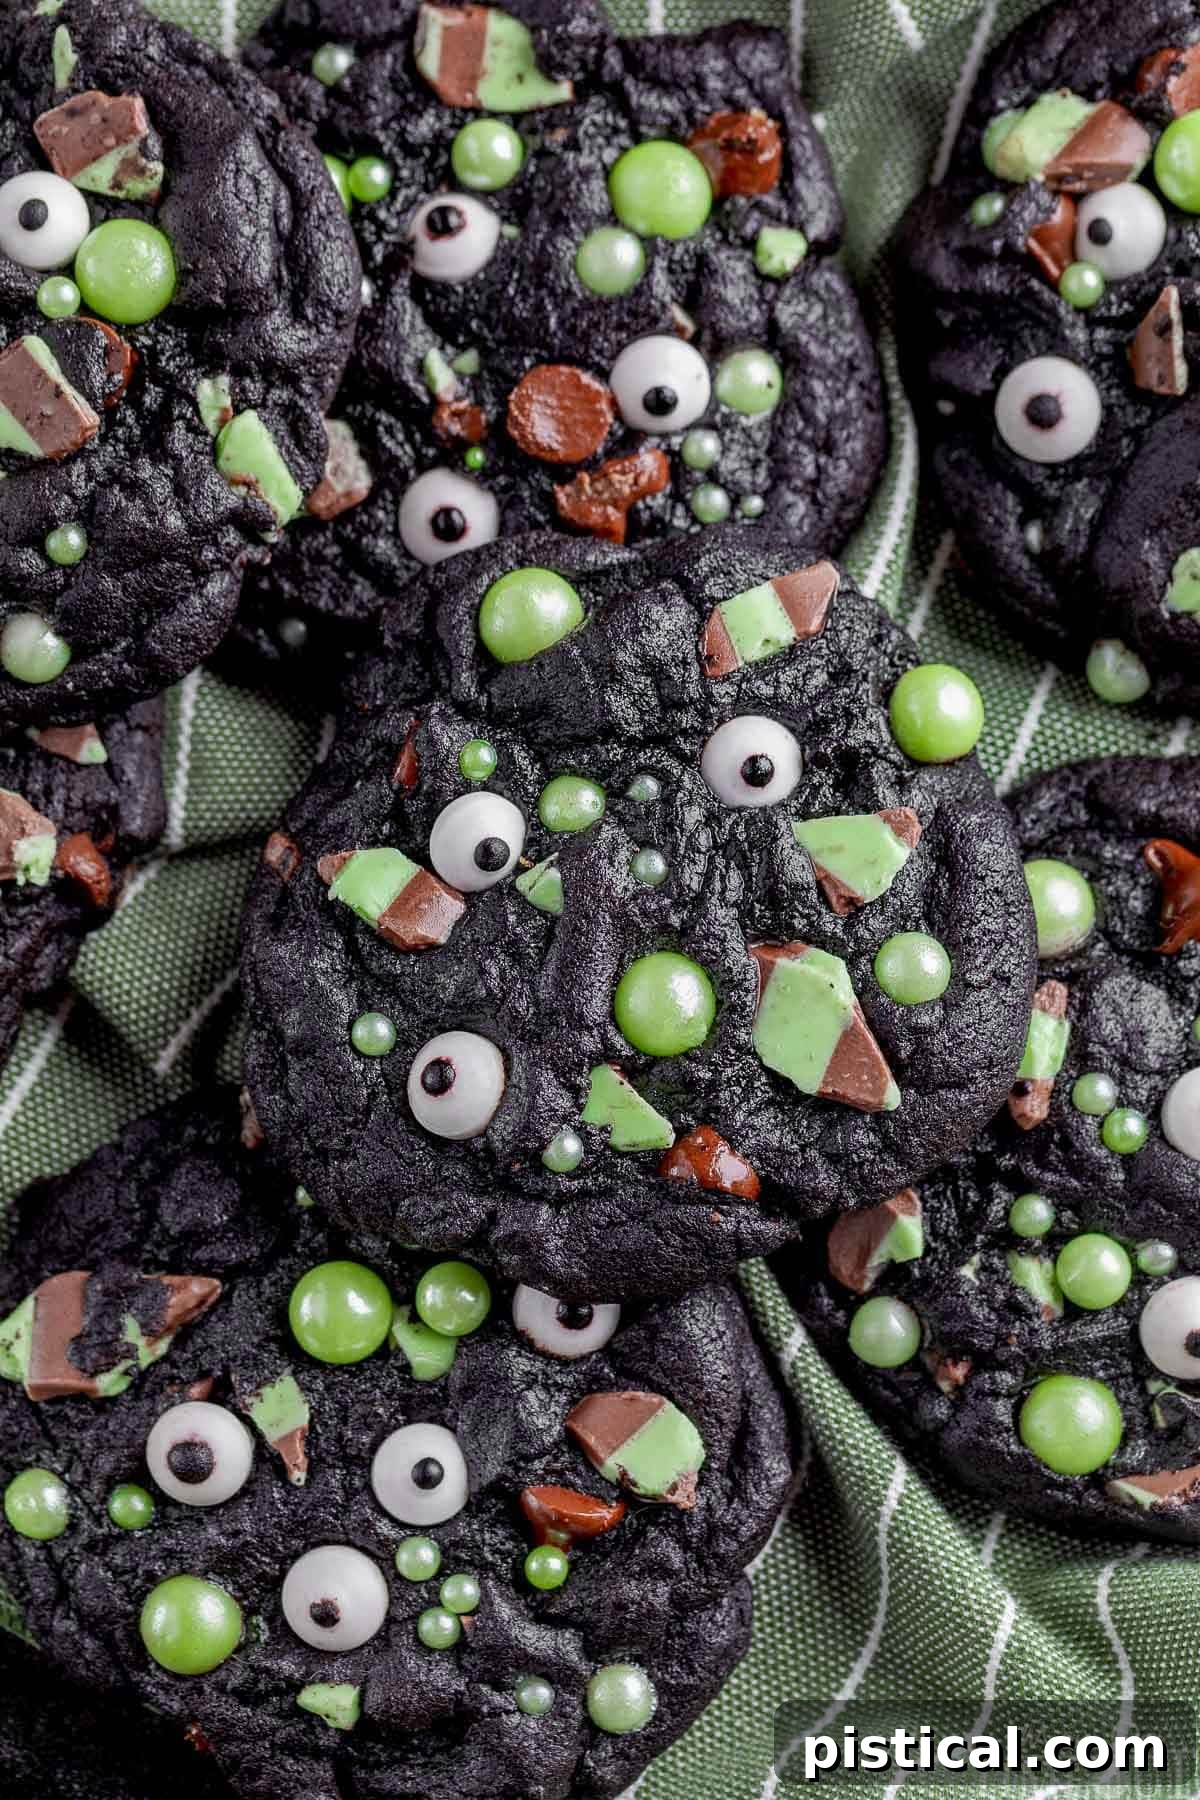
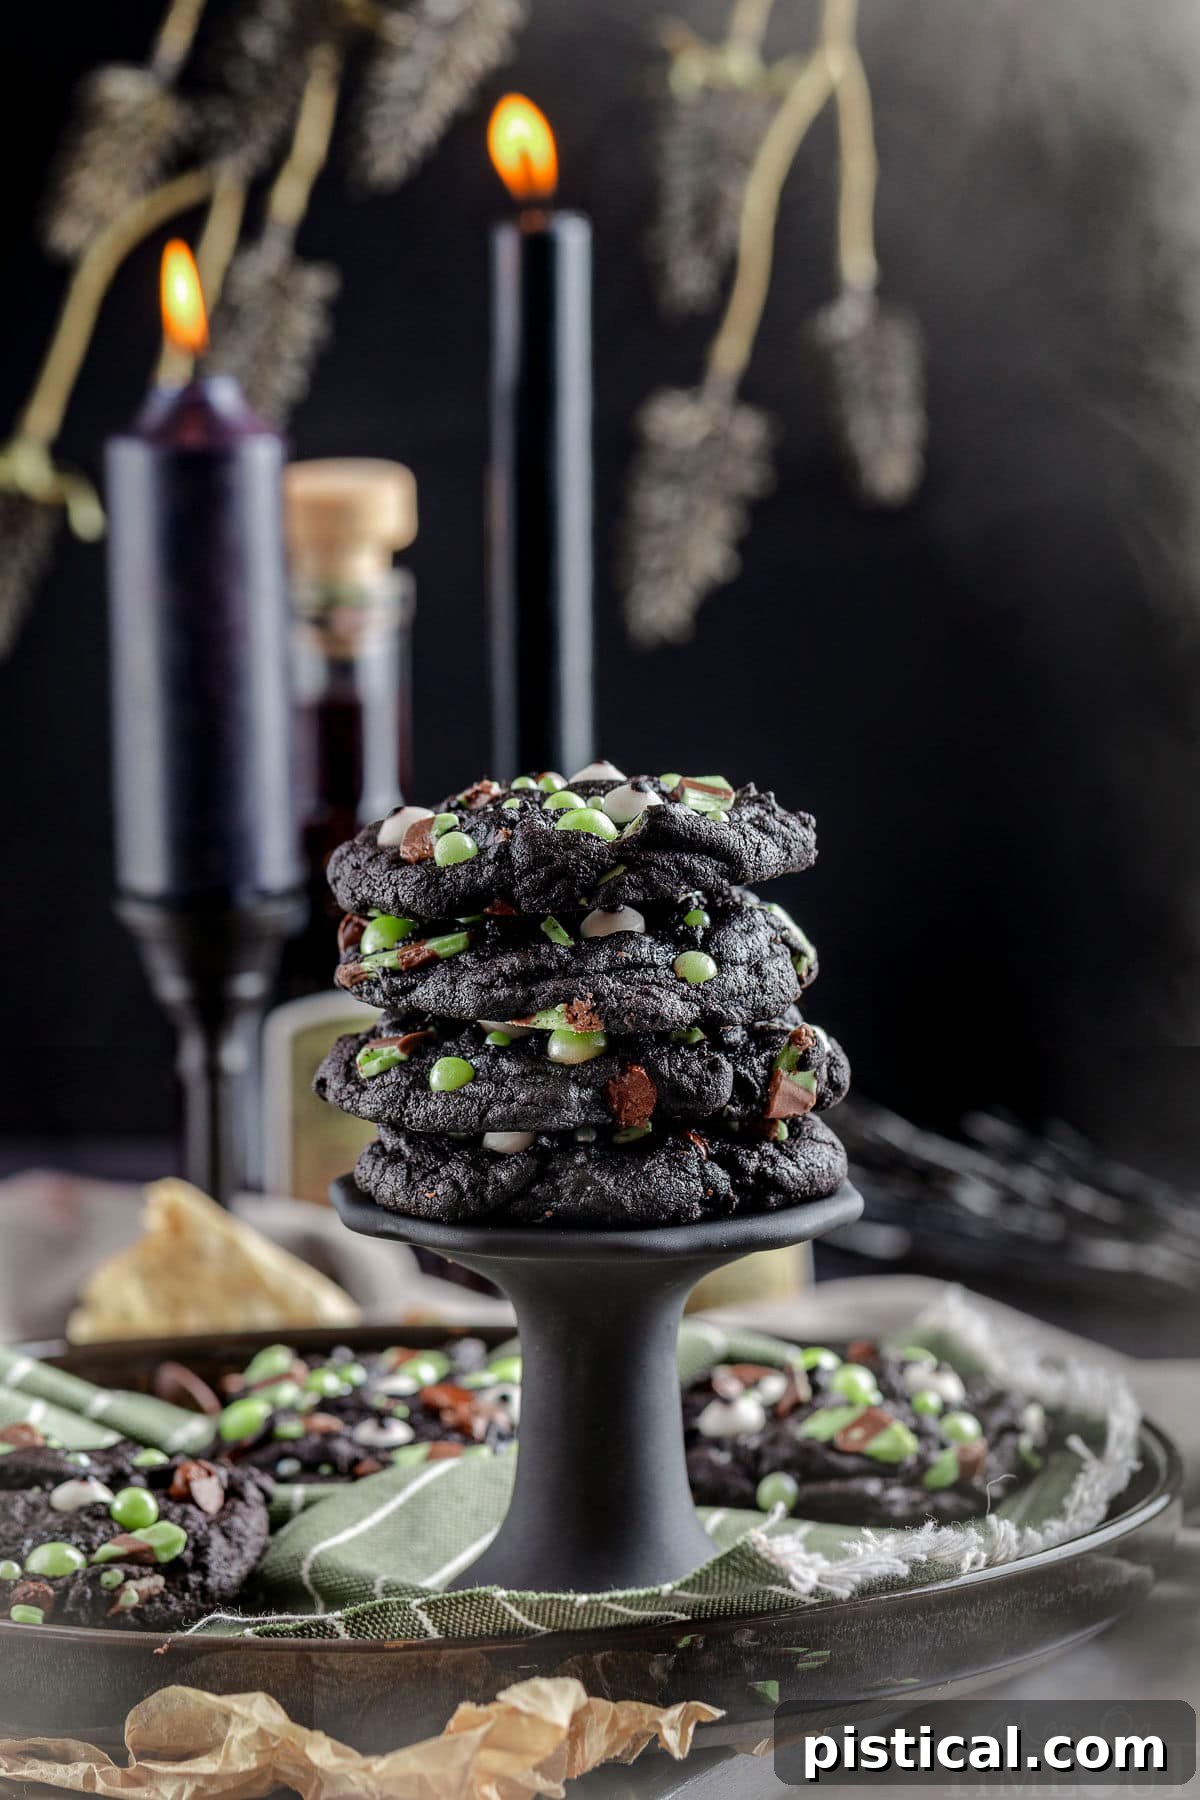
Get ready to infuse your Halloween celebrations with a delightful blend of spooky charm and irresistible flavor! These remarkable Mint Chocolate Chip Monster Halloween Cookies are meticulously crafted to capture the essence of the season, making them an absolute showstopper at any festive gathering. Imagine rich, dark cookies, made even more mysterious with intensely colored black cocoa powder, generously studded with vibrant green candy pearls and whimsical candy eyes that seem to peer out from the shadows. Every bite is an enchanting experience, a harmonious balance of deep chocolate notes and refreshing mint, ensuring these treats will be the highlight of your Halloween party!
Planning a ghoulishly good Halloween bash? Don’t stop at just cookies! Complement these monstrous delights with a spread of other spellbinding treats designed to captivate your guests: whip up a festive Halloween Punch, create some addictively crunchy Halloween Popcorn Balls, or prepare a batch of cheerfully orange Pumpkin Rice Krispie Treats. These pairings will complete your spooky dessert table and leave everyone craving more!
Unleash the Fun with Monster Halloween Cookies
As the air turns crisp and the leaves begin to fall, a sense of anticipation builds for Halloween—a time for costumes, trick-or-treating, and, of course, baking extraordinary treats! These Mint Chocolate Chip Monster Cookies are my absolute favorite to create for the season, bringing smiles to both young and old alike. Their striking dark black hue, achieved with special cocoa, forms the perfect backdrop for the lively green accents and the mischievous candy eyes that transform each cookie into a charming, edible monster. Beyond their captivating appearance, these cookies are incredibly enjoyable to bake, offering a perfect project for getting into the Halloween spirit and adding a truly unique, spooky touch to any gathering.
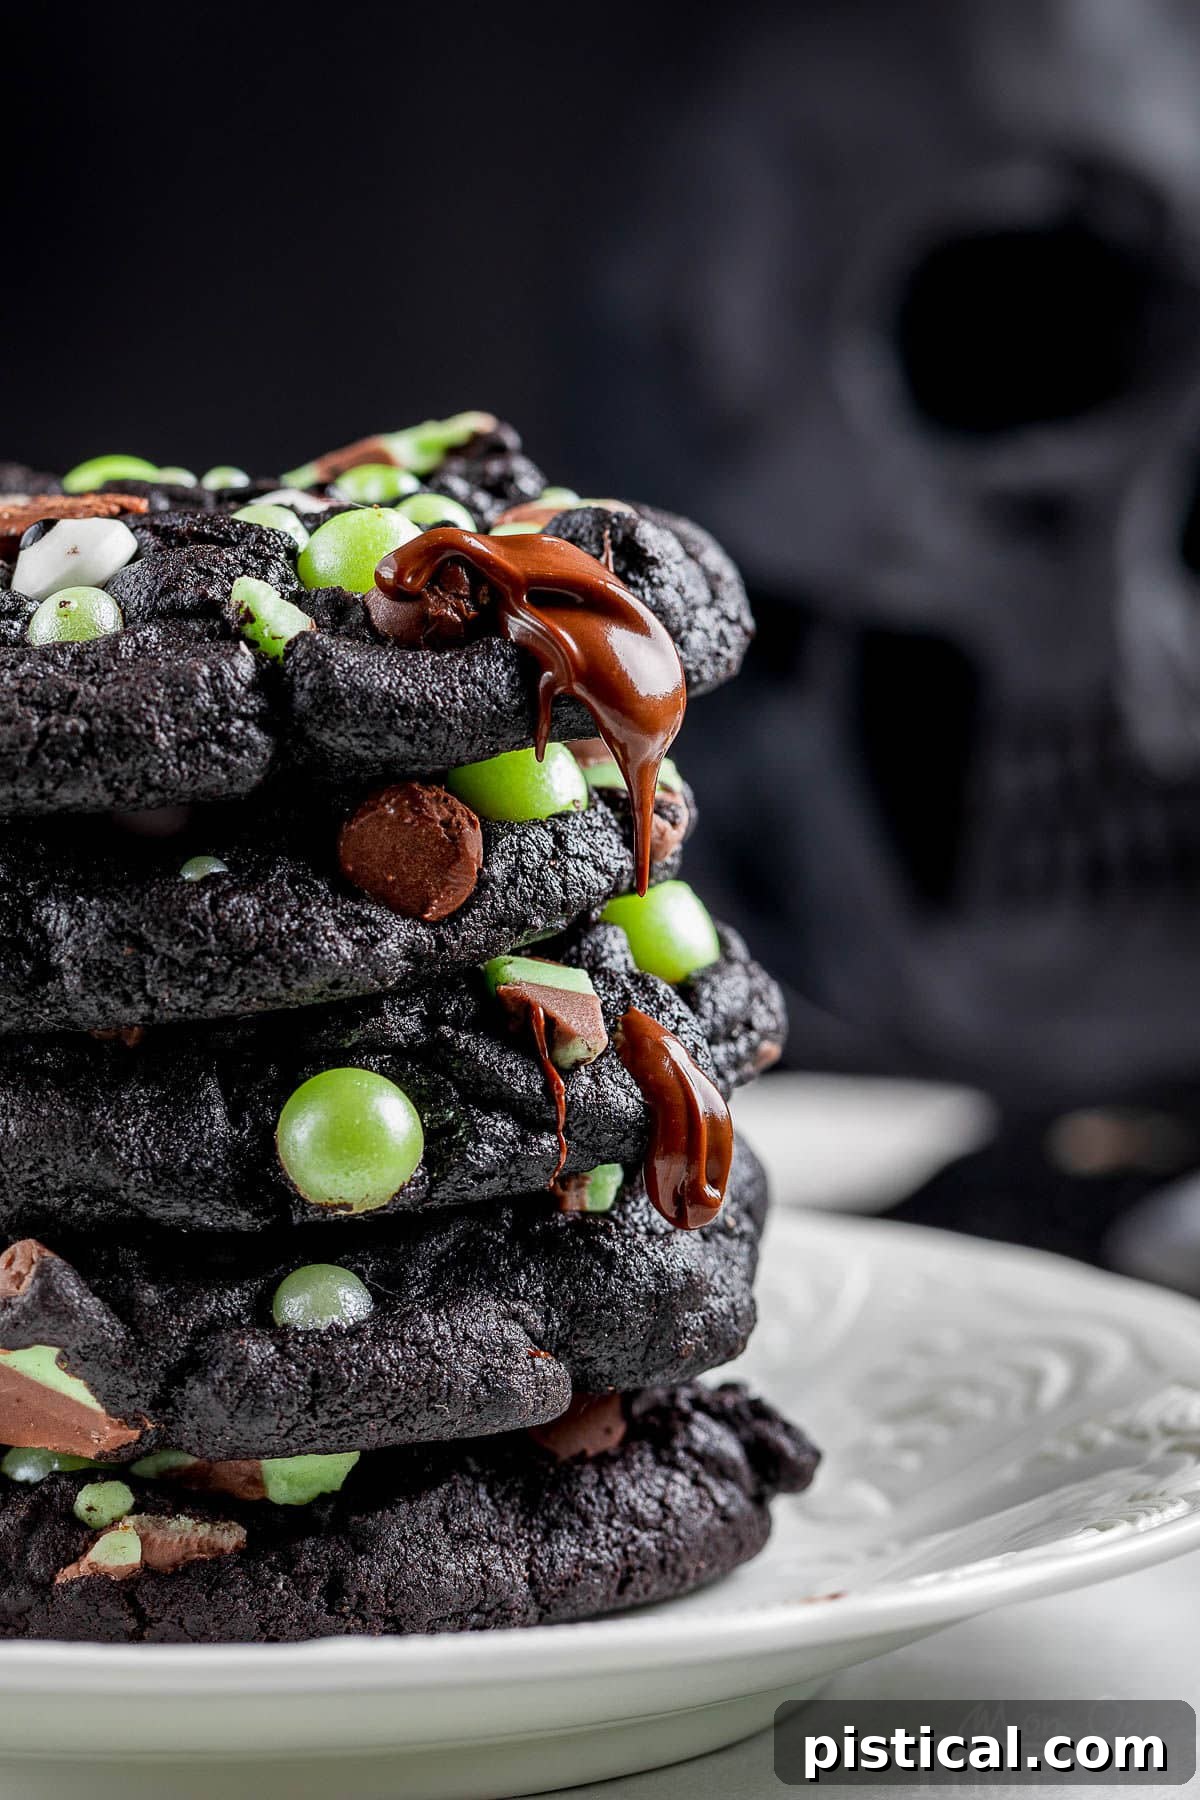
What truly sets these cookies apart is their unique and utterly delicious flavor profile. The secret lies in the masterful combination of rich black cocoa powder, which imparts a deep, almost Oreo-like chocolate taste and an intensely dark color, paired with the refreshing brightness of mint extract. This blend creates a wonderfully complex and satisfying flavor that is universally adored. To elevate the experience further, we fold in generous amounts of melty dark chocolate chips and delightful mint chocolate chunks, adding layers of texture and an irresistible burst of minty chocolate in every single bite. They are an experience you won’t soon forget and will surely want to recreate year after year!
Effortless Halloween Cookie Fun for Everyone
Baking these Monster Mint Chocolate Chip Cookies is more than just making a treat; it’s an event, especially when you invite the kids to join in the culinary magic! Watching their faces light up as they help mix the ingredients and, most excitingly, decorate each cookie with playful candy eyes and vibrant green candy pearls, is truly priceless. It’s a wonderful opportunity to create cherished family memories and immerse everyone in the joyful, slightly spooky ambiance of Halloween. The simple steps and engaging decoration process make this recipe perfect for budding bakers of all ages.
Whether you’re orchestrating the ultimate Halloween party, contributing a standout dish to a potluck, or simply cozying up at home for a festive movie night, these Monster Mint Chocolate Chip Cookies are guaranteed to be a sensational hit. Their unique flavor, striking appearance, and the sheer joy of creating them make them an unforgettable part of any Halloween celebration. Take my word for it: one bite, and you’ll find yourself eagerly anticipating the next Halloween season just so you can bake another batch of these delightful monsters!
No Black Cocoa Powder? No Problem! If you can’t find black cocoa powder or dark cocoa powder, feel free to substitute with regular cocoa powder. Your cookies will still be incredibly delicious, just with a lighter chocolate color.
Why You Absolutely Need to Make These Monster Cookies
These Mint Chocolate Chip Monster Halloween Cookies aren’t just another dessert; they’re an experience! Here’s why this recipe will quickly become a cherished part of your Halloween traditions:
- An Unforgettable Flavor Journey: Prepare your taste buds for an extraordinary treat! The exceptional blend of deep, robust black cocoa powder, which provides a dramatic dark hue and an intense chocolate depth, combined with the invigorating zest of refreshing mint extract, creates a flavor profile that stands proudly apart from typical chocolate chip cookies. But the magic doesn’t stop there; the inclusion of luscious dark chocolate chips and delightful mint chocolate chunks adds layers of texture and explosive flavor, ensuring each bite is a captivating adventure. You’ll find yourself reaching for another cookie almost instinctively!
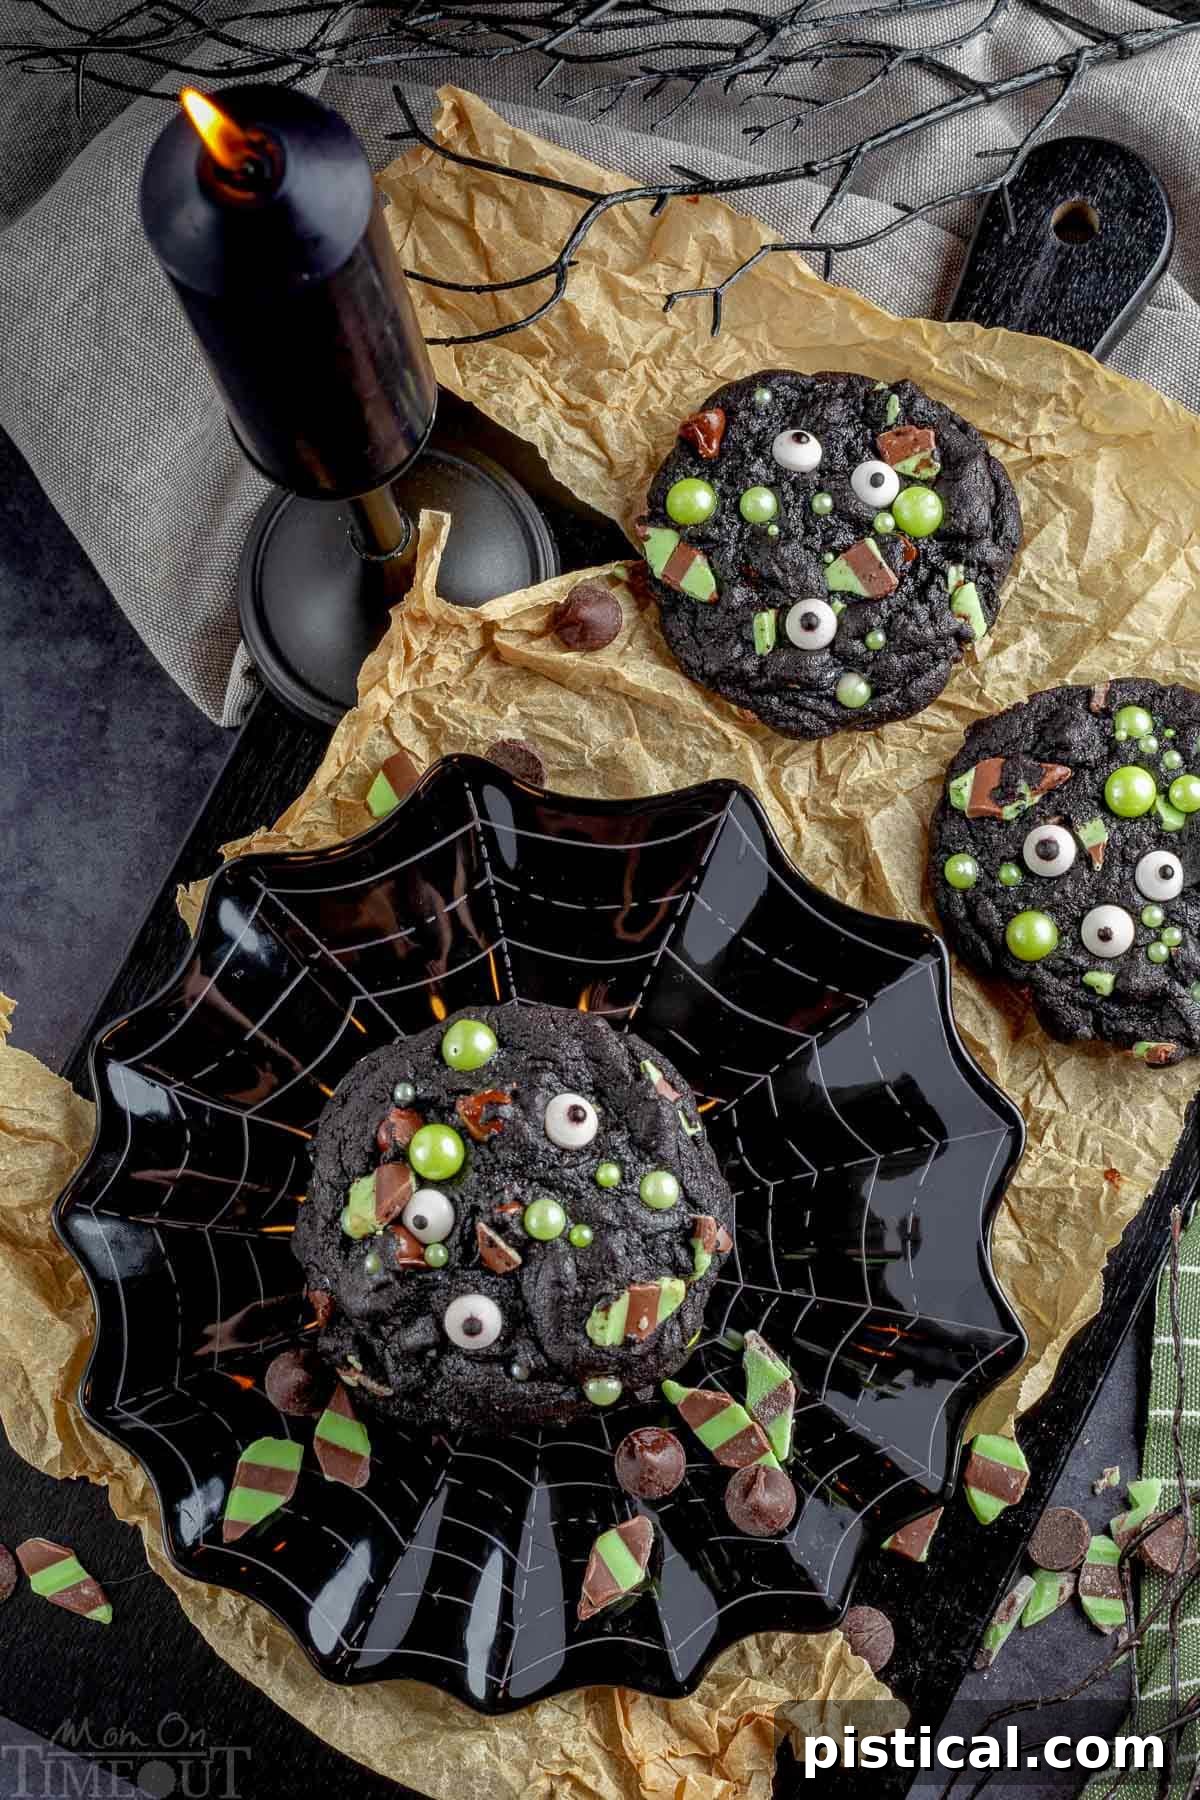
- Visually Stunning and Utterly Festive: Imagine the delight on your guests’ faces when they see these cookies! Their dramatic dark black color, achieved by the special cocoa, provides a striking contrast for the whimsical candy eyes and dazzling green candy pearls. These aren’t just cookies; they’re miniature edible works of art that scream Halloween fun. They instantly elevate any dessert table, making them an undisputed highlight at any spooky celebration, and are perfect for Instagram-worthy moments.
- A Joyful Baking Experience for the Whole Family: This recipe is designed to be a fantastic hands-on activity, making it an ideal way to bond with family during the festive Halloween season. From the simple stirring of ingredients to the exciting moment of adorning each cookie with its monster features, every step is an opportunity for laughter and connection. It’s a rewarding process that not only creates lasting memories but also results in a batch of incredibly delicious Halloween cookies that are so good, they’ll vanish almost as soon as they’re placed on the platter!
- Simple Ingredients, Impressive Results: Despite their gourmet taste and elaborate appearance, these cookies are made with readily available ingredients and straightforward steps. You don’t need to be a pastry chef to achieve stunning results. This recipe empowers home bakers to create something truly special without complicated techniques or exotic components.
- Versatility in Decoration: While candy eyes and green pearls give them their signature monster look, the decorative possibilities are endless! You can experiment with different colored sprinkles, edible glitter, or even tiny Halloween-themed candies to personalize each cookie, allowing for endless creativity and making each batch uniquely yours.
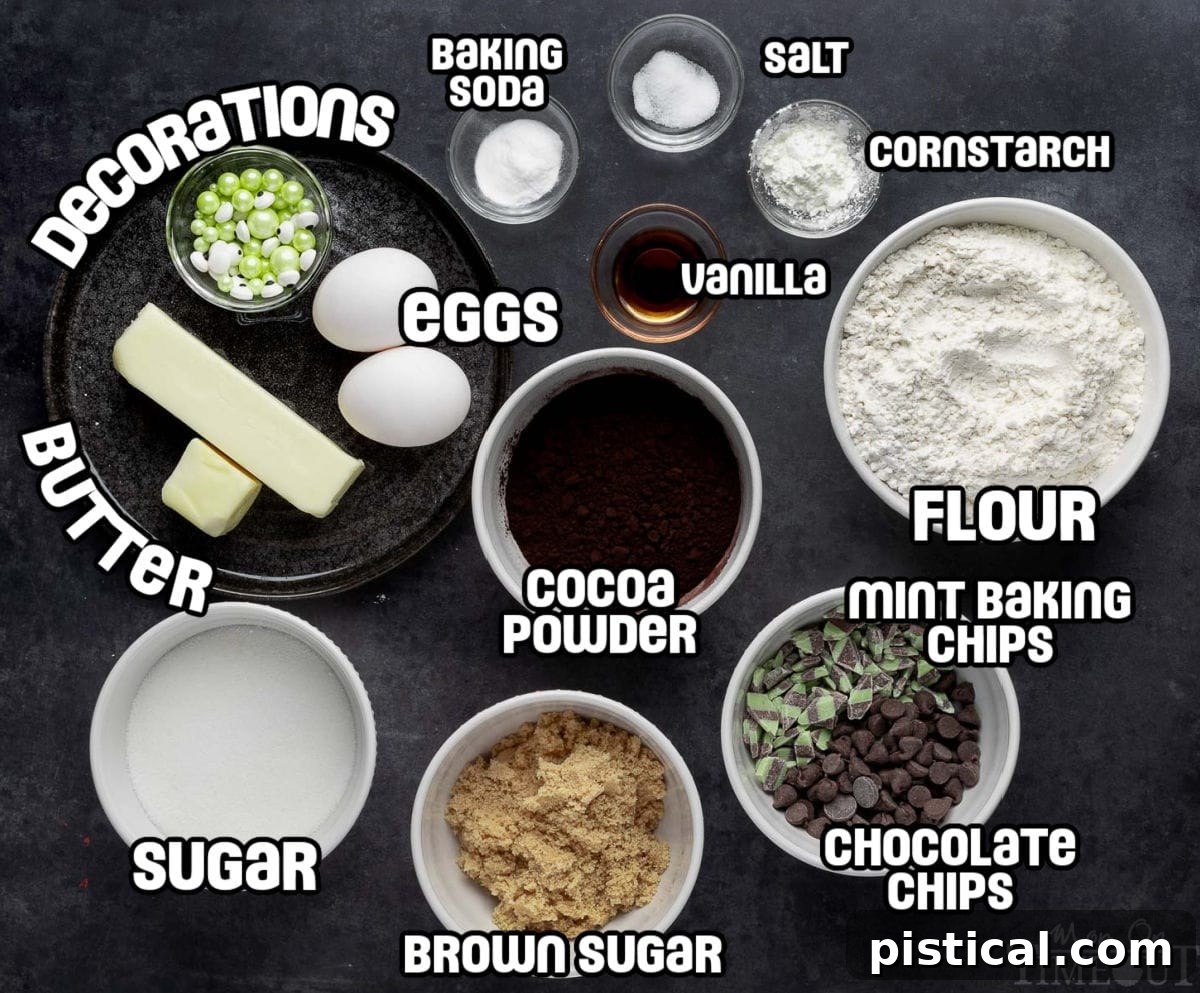
Crafting Your Spooky Masterpieces: How to Make Monster Halloween Cookies
Embark on a culinary adventure this Halloween by creating these enchanting Mint Chocolate Chip Monster Cookies. Follow these clear and concise steps to bring your spooky treats to life:
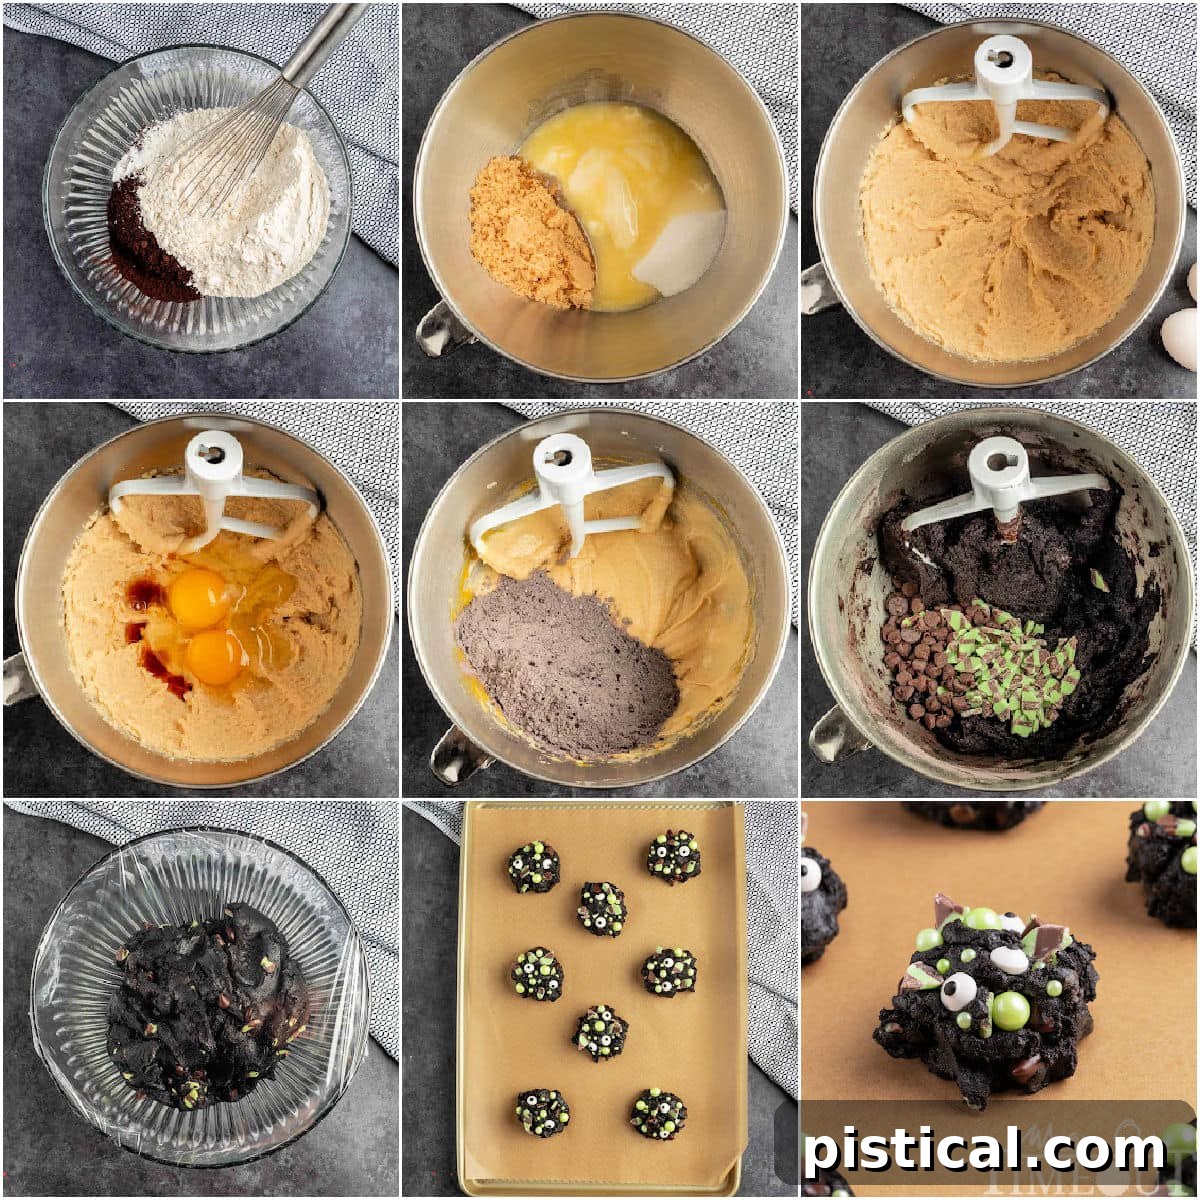
- Prepare Your Workspace: Begin by preheating your oven to a precise 325°F (160°C). Line a sturdy baking sheet with parchment paper or a reliable silicone mat. This crucial step prevents sticking and ensures even baking.
- Combine Dry Ingredients: In a medium bowl, thoroughly whisk together the cocoa powder, all-purpose flour, baking soda, cornstarch, and salt. Whisking ensures these ingredients are evenly distributed, leading to a perfectly textured cookie. Set this mixture aside.
- Cream Wet Ingredients: In the large bowl of a stand mixer fitted with the paddle attachment, or using a hand mixer, combine the melted and slightly cooled unsalted butter with both granulated sugar and light brown sugar. Beat these ingredients together until the mixture becomes wonderfully light and fluffy, usually about 2 minutes. This creaming process incorporates air, which contributes to the cookies’ soft texture.
- Incorporate Eggs and Extracts: Add the room temperature eggs one at a time, mixing well after each addition. Then, stir in the vanilla extract and, if using, the mint extract. Continue mixing until the batter is smooth and well-combined.
- Integrate Dry into Wet: Gradually add the whisked dry ingredients into the wet mixture. Mix on low speed until just incorporated. Be careful not to overmix the dough, as overmixing can lead to tougher cookies. Stop as soon as no streaks of flour remain.
- Fold in the Chocolaty Goodness: Gently fold in the dark chocolate chips and mint chocolate chunks using a spatula. Distribute them evenly throughout the dough for delightful bursts of flavor in every bite.
- Chill the Dough: Cover the cookie dough tightly with plastic wrap and transfer it to the refrigerator to chill for at least 30 minutes. This chilling period is vital as it helps the flavors meld and prevents the cookies from spreading too much during baking, ensuring they retain their monstrous shape. The dough can be chilled overnight for convenience.
- Shape Your Monsters: Once chilled, remove the dough from the fridge. For extra-large cookies, use about 3 tablespoons of dough per cookie. For large cookies, use 2 tablespoons. Form the dough into rough, shaggy balls rather than perfectly smooth spheres. This technique actually helps in creating a more visually appealing, “craggy” texture when baked.
- Add Their Ghoulish Gaze: Carefully place your candy monster eyes and green candy pearls directly onto the top of each dough ball. Press them in gently so they adhere without sinking too deeply.
- The “Anti-Spread” Freeze: To further prevent spreading and ensure your monster cookies hold their shape, place the prepared dough balls onto a baking sheet and chill them in the freezer for 10 minutes before baking. This quick chill sets the butter, making for a more stable cookie.
- Bake to Perfection: Transfer the chilled dough balls to your preheated oven. Bake for 12-14 minutes at 325°F (160°C). Keep an eye on them; the edges should be set and slightly crisp, while the centers may still appear soft. As soon as they are removed from the oven, if desired, you can gently press a few more sprinkles or candy pearls into the tops for an extra festive touch.
- Cool and Enjoy: Allow the cookies to cool on the baking sheet for a few minutes to firm up slightly. Then, carefully transfer them to a wire rack to cool completely. This step prevents the bottoms from becoming soggy and ensures a perfect texture.
Precision Baking Tip: For perfectly uniform cookies, consider using a digital kitchen scale to weigh your dough. Extra-large cookies should weigh approximately 60g, while large cookies are around 50g. This ensures consistent size and baking time for every monster!
These charming monster cookies are not only a treat for your family but also make fantastic gifts! Package them in a festive Halloween-themed box or bag to surprise friends, neighbors, or teachers with a sweet, homemade token of the season.
Maximizing Freshness: Storage Information for Your Monster Cookies
Ensuring your delicious Mint Chocolate Chip Monster Halloween Cookies stay fresh and delightful is simple with these storage guidelines:
- Room Temperature Storage: For immediate enjoyment, allow your freshly baked cookies to cool completely before storing. Once cooled, place them in an airtight container at room temperature. They will maintain their deliciousness and texture for approximately 3-5 days. Keep them away from direct sunlight or heat sources to preserve their quality.
- Refrigerator Storage: If you’re looking to extend the freshness of your cookies a bit longer, storing them in the refrigerator is an excellent option. Place them in an airtight container or a resealable plastic bag. When stored this way, your monster cookies can stay fresh for up to one week. Bring them to room temperature or warm them slightly before serving for the best experience.
- Freezer Storage for Longer Enjoyment: To truly savor these cookies for an extended period, freezing them is the way to go. First, arrange the completely cooled cookies in a single layer on a baking sheet. Freeze them for about an hour, or until they are solid. This prevents them from sticking together. Once solid, transfer them to a freezer-safe container or a heavy-duty freezer bag, using parchment paper to separate layers if stacking them. Properly frozen, these monster cookies can be stored for up to 3 months. To enjoy, simply thaw them at room temperature or warm gently in the oven for a freshly baked feel.
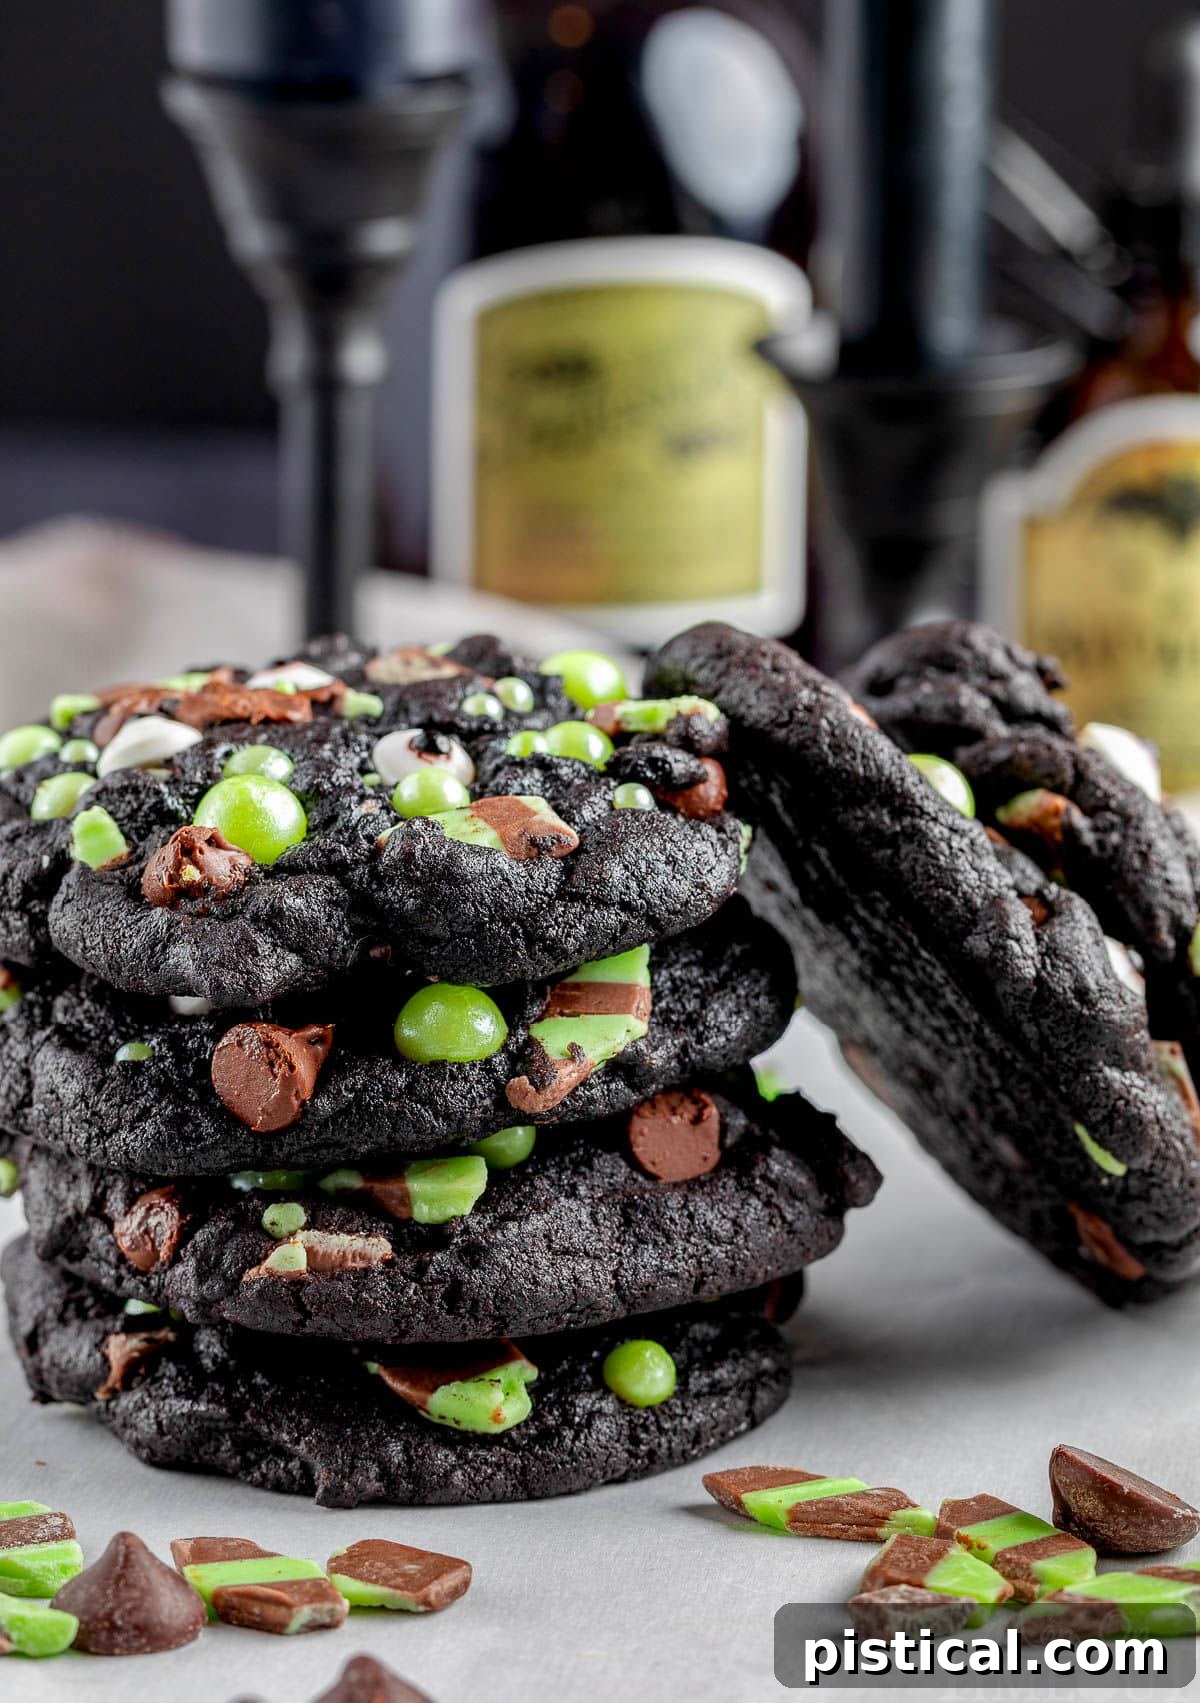
Exciting Variations to Customize Your Monster Cookies
While the classic Mint Chocolate Chip Monster Cookies are undeniably fantastic, don’t hesitate to unleash your creativity and experiment with these fun variations to suit different tastes or themes:
- White Chocolate Mint Dream: For a delightful visual and flavor contrast, consider replacing some of the dark chocolate chips with creamy white chocolate chips. The sweetness of white chocolate beautifully complements the refreshing mint, creating a softer, more indulgent profile. This variation is particularly appealing for those who enjoy a less intense chocolate flavor.
- Peanut Butter Monster Mash: Give your cookies an exciting peanut butter twist! Simply omit the mint extract from the recipe. Instead of mint chocolate chunks, fold in an equal amount of delicious peanut butter chips. To complete the transformation, use vibrant orange candy pearls for decoration, creating a fantastic peanut butter monster cookie perfect for autumn.
- Spicy Cinnamon Halloween Cookies: For a warmer, spiced twist, try adding ½ teaspoon of ground cinnamon to your dry ingredients. You could also experiment with a hint of chili powder for a “spicy hot chocolate” inspired cookie, perfect for adult palates.
- Pumpkin Spice Monster Cookies: Embrace the fall season by adding 1 teaspoon of pumpkin pie spice to the dry ingredients and using pumpkin-shaped candy eyes or orange and brown sprinkles for decoration. This creates a cozy, autumnal monster cookie.
- Nutty Crunch Monsters: For an added layer of texture and flavor, fold in ½ cup of finely chopped toasted pecans or walnuts along with the chocolate chips. The nutty crunch provides a wonderful contrast to the soft cookie.
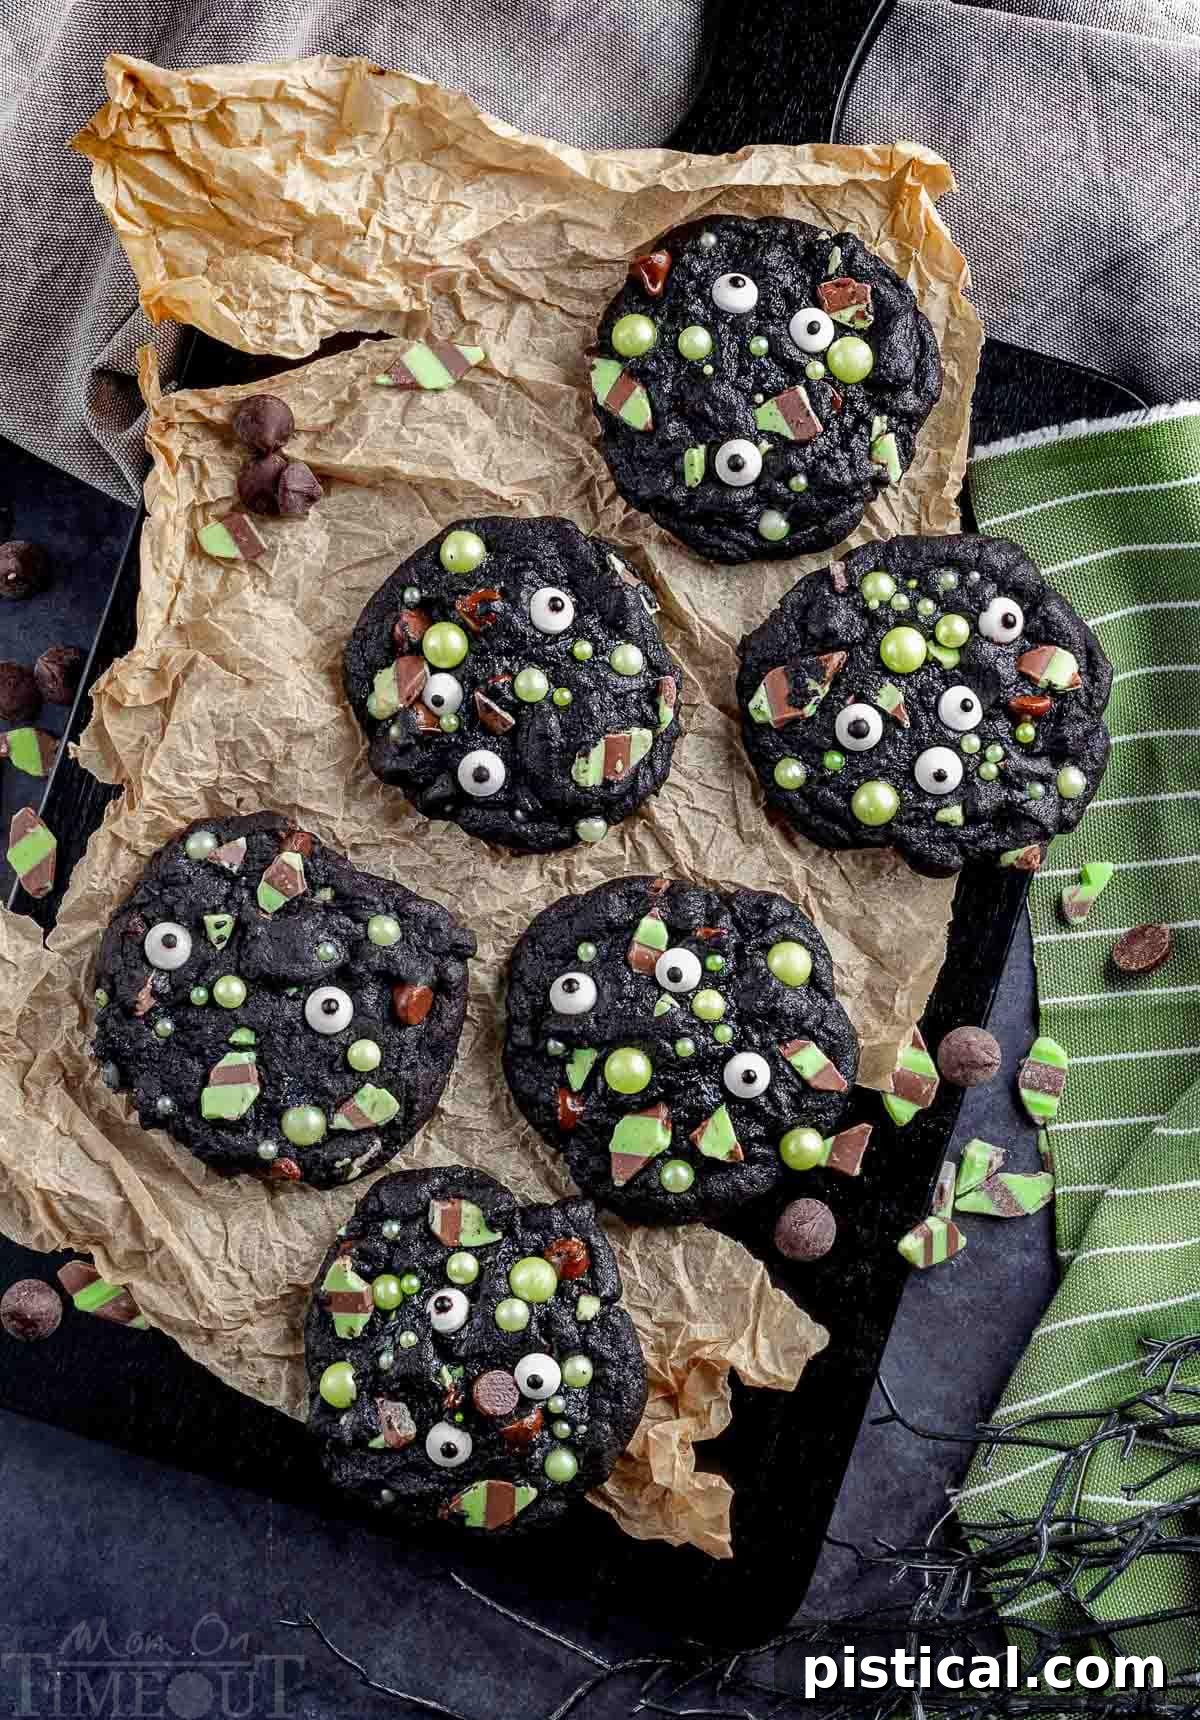
Frequently Asked Questions About Monster Halloween Cookies
Here are answers to some common questions you might have while baking these fun Halloween treats:
Can I use regular cocoa powder instead of black cocoa powder?
Absolutely, you can definitely substitute regular cocoa powder if black cocoa powder isn’t available or if you prefer a less intense dark color. However, be aware that the cookies will have a noticeably lighter brown color and a slightly different flavor profile. Black cocoa powder imparts a very deep, almost earthy chocolate flavor and a striking black hue, similar to an Oreo cookie. Regular cocoa will still yield delicious cookies, just with a more traditional chocolate appearance and taste.
Can I use different types of chocolate chips?
Yes, please do! This recipe is wonderfully versatile when it comes to chocolate. Feel free to mix and match different types of chocolate chips to customize your cookies. Semi-sweet chocolate chips are a classic choice, milk chocolate chips will add a sweeter touch, or you could even incorporate white chocolate chips for a delightful contrast. You can also experiment with different flavored chips like butterscotch or peanut butter for unique variations.
How do I know when the cookies are done baking?
Knowing when to pull your cookies from the oven is key to achieving that perfect texture. Look for the edges of the cookies to be visibly set and slightly crisp, while the centers may still appear somewhat soft and puffy. It’s important to remember that cookies continue to cook slightly from residual heat after they are removed from the oven, so avoid overbaking. If you wait until the centers are completely firm in the oven, you’ll likely end up with dry cookies. They will firm up beautifully as they cool on the baking sheet and then on the wire rack.
Can I prepare the dough in advance?
Yes, absolutely! Preparing the dough ahead of time is a great time-saver. After step 6 (folding in the chocolate chips), cover the dough tightly with plastic wrap and store it in the refrigerator for up to 2-3 days. When you’re ready to bake, let the dough sit at room temperature for about 10-15 minutes to soften slightly before shaping and baking as directed. This can even enhance the flavor as the ingredients have more time to meld.
What if my cookies spread too much?
Cookie spread can be frustrating! Several factors can contribute to it. Ensure your butter isn’t too warm when you mix it, and most importantly, follow the chilling steps precisely. Chilling the dough in the fridge for at least 30 minutes, and then the formed dough balls in the freezer for 10 minutes, is crucial for preventing excessive spreading. Also, make sure your baking sheets are cool before placing new dough on them, and don’t overcrowd the pan. Using parchment paper or silicone mats also helps. If your cookies consistently spread, try adding an extra tablespoon or two of flour to the dry ingredients next time.
Trish’s Expert Tips for Perfect Monster Halloween Cookies
Achieving bakery-quality monster cookies is easier than you think with these insider tips from Trish:
- The dough chilling process is a non-negotiable step to prevent your monster cookies from spreading excessively and losing their charming shape during baking. Don’t rush it; proper chilling results in thicker, chewier cookies.
- When forming your dough, aim for rough, “shaggy” balls instead of perfectly smooth, round ones. This unconventional shaping method surprisingly helps in creating a beautiful, naturally crinkled texture on the baked cookies and also aids in managing spread.
- Always use parchment paper or a silicone mat when baking your cookies. This not only makes for easy cleanup but also provides an even surface that helps prevent excessive spreading and promotes uniform browning.
- Cool baking sheets are essential. Never place a fresh batch of cookie dough onto a hot baking sheet. The residual heat will cause the butter in the dough to melt prematurely, leading to flat, overly spread cookies. Allow your baking sheets to cool completely between batches.
- Ingredient Substitutions for Mint Chunks: If you’re having trouble locating mint chocolate chunks, fear not! Andes mints are a fantastic alternative. Simply chop them into small, manageable pieces, and they’ll melt beautifully into your cookies, delivering that beloved minty burst.
- Room Temperature Eggs: For optimal emulsification and a smoother dough, ensure your eggs are at room temperature. This allows them to incorporate more easily and evenly into the butter and sugar mixture.
- Don’t Overmix: After adding the dry ingredients, mix only until just combined. Overmixing develops the gluten in the flour, which can lead to tough, dense cookies instead of the desired soft and chewy texture.
- Placement of Decorations: For the most visually impactful monster cookies, gently press the candy eyes and green pearls onto the dough balls *before* baking, and if desired, add a few more right after they come out of the oven while they are still warm and soft. This ensures they adhere well and remain prominent.
More Enchanting Halloween Treats to Explore
If you’ve fallen in love with these Monster Halloween Cookies and are eager to continue your spooky baking adventures, here are more fantastic Halloween-themed recipes to try. Each one is designed to be fun, festive, and absolutely delicious:
- Witch Hat Halloween Cookies: Adorably spooky and easy to make, these cookies are perfect for adding a magical touch to your party.
- Pumpkin Popcorn Balls: A delightful, chewy snack that captures the essence of autumn and Halloween in one bite.
- Halloween Punch: A vibrant, family-friendly beverage that’s sure to be a hit at any spooky celebration.
- Spiral Slice and Bake Halloween Cookies: Create mesmerizing patterns with ease using this fun and customizable recipe.
- Candy Corn Popcorn Munch: A sweet and salty treat that combines classic Halloween candy with crunchy popcorn for an irresistible snack mix.
With these recipes in your arsenal, your Halloween celebrations are guaranteed to be the most delicious and memorable ones yet. Happy baking and happy haunting!

Mint Chocolate Chip Monster Halloween Cookies
Ingredients
Cookies:
- 1¾ cup all-purpose flour
- ¾ cup black cocoa powder or dark cocoa powder
- 1 teaspoon baking soda
- 1½ teaspoons cornstarch
- ½ teaspoon salt
- 12 tablespoons unsalted butter melted and cooled slightly
- ¾ cup granulated sugar
- ½ cup light brown sugar packed
- 2 large eggs room temperature
- 2 teaspoons vanilla extract
- ¼ teaspoon mint extract optional
- ¾ cup dark chocolate chips or semi sweet chocolate chips
- ½ cups mint chocolate chunks creme de menthe baking chips or Andes mints cut into chunks, or any mint chip will work
Decorations:
- candy eyes
- green candy pearls
Instructions
- Preheat your oven to 325°F. Line a baking sheet with parchment paper or a silicone mat and set aside.
- Whisk together the all-purpose flour, black or dark cocoa powder, baking soda, cornstarch and salt. Set aside.1¾ cup all-purpose flour, ¾ cup black cocoa powder, 1 teaspoon baking soda, 1½ teaspoons cornstarch, ½ teaspoon salt
- Add the melted and cooled butter, granulated sugar, and brown sugar to the bowl of a stand mixer. Mix until fluffy. About 2 minutes.12 tablespoons unsalted butter, ¾ cup granulated sugar, ½ cup light brown sugar
- Add in the eggs, vanilla extract and mint extract (if using). Mix again until smooth.2 large eggs, 2 teaspoons vanilla extract, ¼ teaspoon mint extract
- Slowly add in the dry ingredients and mix until just incorporated. Make sure not to overmix.
- Lastly, fold in your chocolate and mint chocolate chips.¾ cup dark chocolate chips, ½ cups mint chocolate chunks
- Cover your dough with plastic wrap and chill in the fridge for at least 30 minutes. It may be chilled overnight.
- Once your dough has chilled, form rough balls of dough. Use 3 tablespoons of dough for extra-large cookies and 2 tablespoons for large cookies. Using a digital kitchen scale to weigh your dough ensures that each cookie is the same size. Extra large cookies are 60g and large cookies are 50g.
- Place your candy monster eyes and sprinkles or green candy pearls gently on top of your dough.candy eyes, green candy pearls
- To prevent your cookies from spreading, chill these prepared dough balls in the freezer for 10 minutes.
- Bake for 12-14 minutes at 325 F. When the cookies are removed from the oven, more sprinkles can gently be pressed into the top of the cookie.
- Allow the cookies to cool slightly on the baking sheet, then transfer them to a wire rack to finish cooling.
Notes
- Room Temperature: Allow the cookies to cool completely before storing them. Place them in an airtight container at room temperature and store for about 3-5 days.
- Refrigerator: If you want to extend their freshness, you can store the cookies in the refrigerator for up to one week.
- Freezer: Place the cookies in a single layer on a baking sheet and freeze for about an hour until solid. Then, transfer them to a freezer-safe container or bag, separating layers with parchment paper. They can be frozen for up to 3 months.