

There’s nothing quite like the aroma of freshly baked bread filling your home, and these Crescent Rolls are the epitome of comfort and deliciousness. Imagine buttery, flaky layers that melt in your mouth, making every bite an experience to savor. These homemade rolls aren’t just a side dish; they’re a centerpiece, a conversation starter, and a true testament to the joy of home baking. Perfect for any gathering, from intimate family dinners to grand holiday feasts, they are destined to become a cherished tradition with family and friends. Forget the store-bought versions; once you experience the superior taste and texture of these rolls, you’ll never look back. Crafted with simple ingredients you likely already have on hand, this recipe has been perfected over more than 25 years, earning its rightful place as an absolute must-have at our family dinners and holiday meals. When these delectable crescent rolls aren’t gracing our table, you might find us indulging in The BEST Dinner Rolls or the incredibly flavorful Cheesy Bacon Ranch Bread!

Mastering the Art of Homemade Crescent Rolls
This crescent roll recipe is more than just a list of ingredients and steps; it’s a cherished family legacy, deeply intertwined with heartwarming memories. Every Christmas, my Mom would meticulously prepare these rolls, and the anticipation among us five kids was palpable. We knew the magic that awaited us. She had a wonderful system: the first batch would emerge from the oven, golden and fragrant, precisely as we gathered around the table, ready to be devoured. Then, as the first basket quickly emptied, the second batch would be pulled out, ensuring a continuous supply of warm, melt-in-your-mouth goodness throughout the meal. It was a simple tradition, but one that made our holiday gatherings truly special and filled with love.
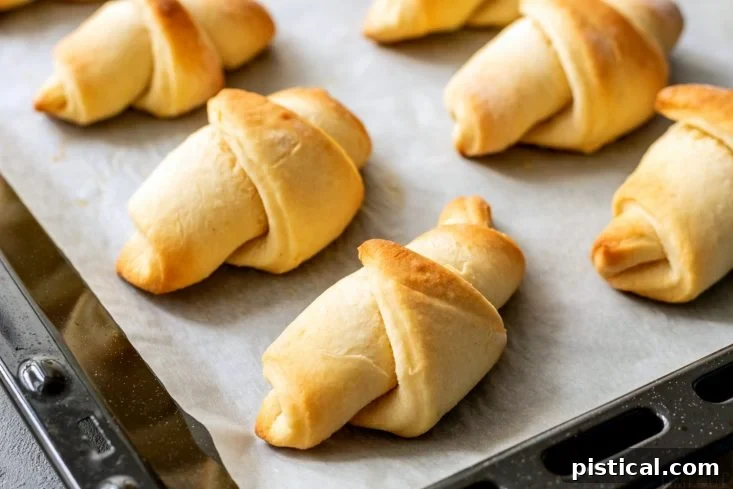
The Unrivaled Perfection of Homemade Crescent Rolls
These crescent rolls are, quite simply, true perfection. Each one boasts a beautiful golden-brown crust that yields to an incredibly soft, ethereal interior. They practically melt in your mouth, delivering a rich, buttery flavor that is guaranteed to bring a smile to everyone’s face. There’s a profound satisfaction in baking something from scratch, especially a dish that carries such a heartwarming tradition. I sincerely hope you’ll take the time to bake these incredible rolls and share them with your loved ones, not just during the holiday season, but whenever you crave a moment of pure culinary delight. Who knows, perhaps they’ll become a treasured tradition for your family, too!
Understanding the Dough: Key Steps to Success
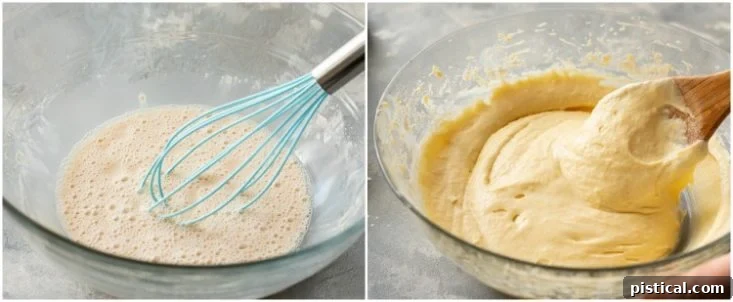
The journey to perfect crescent rolls begins with activating the yeast. You’ll dissolve the yeast in warm water, allowing it to bloom until it becomes wonderfully foamy. This foamy appearance is your visual cue that the yeast is alive and ready to work its magic, giving your rolls their light and airy texture. A crucial tip for achieving the best results: ensure your eggs and butter are at room temperature. This allows them to incorporate smoothly and evenly into the dough, resulting in a more consistent and tender crumb.
While you can certainly mix the dough by hand with a sturdy wooden spoon, I highly recommend using a stand mixer if you have one. It makes the process incredibly easy and efficient, freeing up your hands for other tasks. Begin by adding about half of the flour, ensuring it’s fully incorporated into the wet ingredients before gradually adding the rest. This incremental approach helps prevent a dry, overworked dough. You’ll know you’ve added enough flour when the dough starts to pull cleanly away from the sides of the bowl, forming a soft, cohesive mass.
The Art of Rising: Patience is a Virtue
Once your dough is perfectly mixed, shape it into a smooth ball and place it in a lightly greased bowl. Cover the bowl snugly with a clean kitchen towel or plastic wrap to create a warm, humid environment. Now comes the waiting game: let the dough rise until it has doubled in size. This process can take anywhere from an hour to two hours, depending on the warmth of your kitchen. A slightly warmer spot can speed up the rise, but don’t rush it! This first rise is crucial for developing flavor and creating that wonderful airy structure.
Shaping and the Second Rise
After the first rise, gently punch down the dough to release the air. Divide it in half and, on a lightly floured surface, roll each half into a roughly 12-inch circle. Here’s where the magic intensifies: spread a generous amount of melted butter over each circle of dough (yes, more butter for ultimate flavor!). Then, using a pizza wheel or sharp knife, cut each circle into quarters, and then each quarter into three wedges, giving you 12 wedges per circle, totaling 24 crescents. Roll each wedge tightly from the wider end towards the point to form that classic crescent shape.
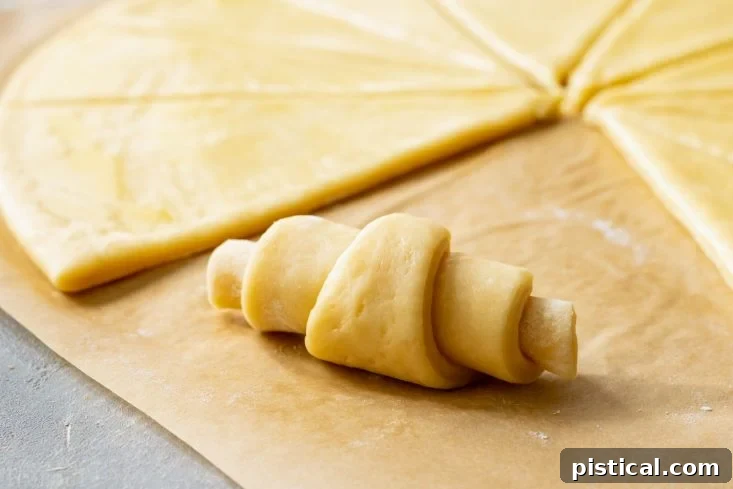
Place the shaped rolls onto a baking sheet, leaving some space between them. Cover them again and let them undergo their second rise, also known as proofing, until they’ve doubled in size once more. This second rise is absolutely critical for achieving that light, fluffy, and tender texture. Do not rush this step! If the rolls don’t proof fully, they will be denser and not quite as soft and flaky as they should be. While still delicious, they won’t have that signature ethereal quality you’re aiming for.
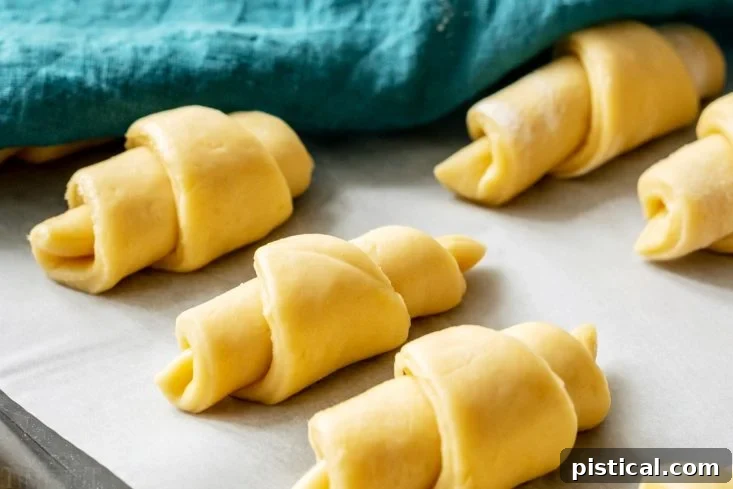
Baking to Golden Perfection
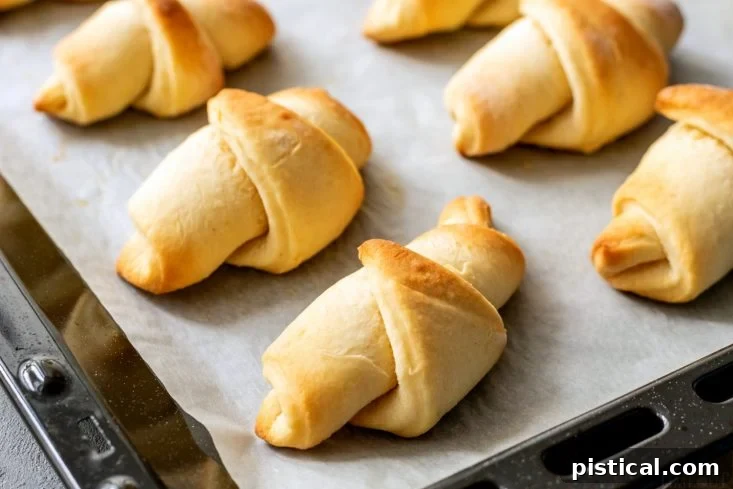
Now, the moment of truth: it’s time to bake! I usually time it so that the first batch goes into the oven just minutes before we plan to eat. The intoxicating aroma of these baking crescent rolls is far more effective than any dinner bell, drawing everyone to the kitchen with anticipation. Keep a watchful eye on your rolls as they bake. Oven temperatures can vary, especially if you have multiple dishes cooking simultaneously. I typically start checking for doneness around the 10-minute mark, but they can take up to 14 minutes. Be attentive, as they can transform from a beautiful golden to overly dark very quickly.
The rolls are truly incredible when served warm and soft, fresh from the oven.
The Final Flourish
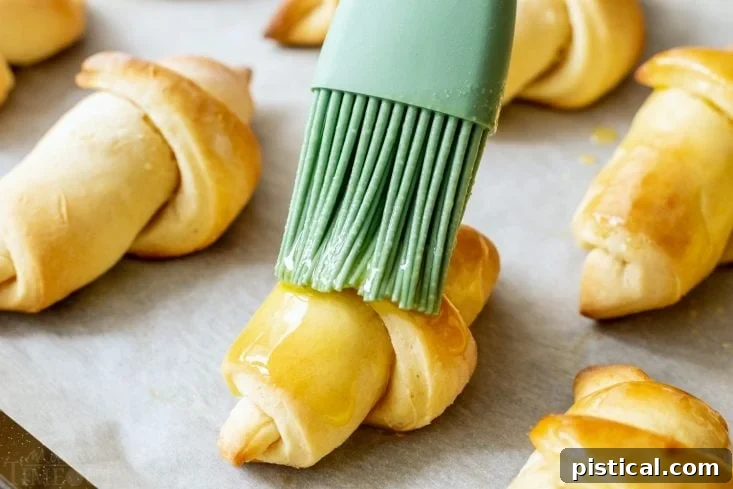
As soon as they emerge from the oven, lightly brush the tops with a little extra melted butter. This simple step adds an extra layer of richness and shine, enhancing their appeal and flavor.
My dad always insisted on a spread of various jams and jellies, alongside a dish of perfectly softened butter, to accompany these rolls. And I wholeheartedly agree! There’s something truly delightful about slathering a warm, flaky roll with your favorite sweet or savory topping. I sincerely hope you’ll give these amazing crescent rolls a try this holiday season, and indeed, every weekend after that. They are an experience that everyone deserves to enjoy!
Tips for Perfect Crescent Rolls Every Time
- Yeast Activation: Ensure your water is warm (105-115°F or 40-46°C), not hot, to activate the yeast without killing it. If it doesn’t foam, your yeast might be old or the water temperature was off.
- Room Temperature Ingredients: Eggs and butter at room temperature emulsify better, leading to a smoother, more uniform dough and a tender crumb.
- Don’t Over-Flour: Add flour gradually. Too much flour makes for dry, dense rolls. The dough should be soft and slightly tacky, pulling away from the bowl but not dry.
- Warm Environment for Rising: A slightly warm place (like a turned-off oven with the light on, or a sunny spot) encourages faster, more consistent rising.
- The Second Rise is Key: This proofing stage is vital for a light and airy texture. Don’t skip or shorten it.
- Watch the Oven: Ovens can be temperamental. Keep an eye on the rolls, especially towards the end of baking, to prevent over-browning.
Variations to Explore
- Sweet Crescents: Before rolling, sprinkle the dough with cinnamon sugar or a thin layer of fruit jam.
- Savory Crescents: Add grated Parmesan cheese, a sprinkle of garlic powder, or fresh chopped herbs (like chives or rosemary) to the dough or butter before rolling.
- Honey Butter Glaze: Instead of plain melted butter, whisk a tablespoon of honey into melted butter for an extra sweet and shiny finish after baking.
Storage and Reheating
- Storing Leftovers: Store cooled crescent rolls in an airtight container at room temperature for up to 2-3 days.
- Freezing Dough: You can freeze the shaped, unbaked rolls. Place them on a baking sheet and freeze until solid, then transfer to a freezer bag for up to 1 month. When ready to bake, place frozen rolls on a baking sheet, cover, and let rise at room temperature for 3-5 hours (or overnight in the fridge) before baking as directed.
- Reheating Baked Rolls: To reheat, wrap rolls loosely in foil and warm in a 300°F (150°C) oven for about 10-15 minutes, or microwave briefly until warm.
What Do I Need To Make Crescent Rolls?
- While you can absolutely make these rolls by hand, I genuinely recommend a stand mixer. It truly simplifies the kneading process, ensuring a perfectly smooth dough with minimal effort and freeing up your time to focus on other aspects of your meal.
- For clean and precise cuts, I find that a pizza wheel works wonderfully when dividing the dough into wedges.
- Rolling out the dough onto a silpat (silicone baking mat) is an excellent idea. It provides a non-stick surface, making the rolling process much easier and reducing the need for excessive flour.
- I always prefer to bake my crescent rolls on parchment paper-lined baking sheets. It makes for incredibly easy cleanup and eliminates any worries about the rolls sticking to the pan, truly a win-win situation.
How To Make Crescent Rolls: The Detailed Recipe

Print
Pin
Crescent Rolls
Ingredients
- 2 packages of dry yeast or 5 tsps
- 3/4 cup warm water
- 1 tsp salt
- 1 cup butter softened
- 3 1/2 to 4 1/2 cups all purpose flour
- 1/2 cup granulated sugar
- 2 eggs room temperature
- 4 tbsp butter
Instructions
-
In a small bowl, dissolve the dry yeast in warm water (105-115°F or 40-46°C). Let it sit undisturbed for about 5 minutes until it becomes visibly foamy, indicating the yeast is active.
-
In the bowl of a stand mixer (or a large mixing bowl), combine the granulated sugar, room temperature eggs, softened butter, salt, and two cups of the all-purpose flour with the activated yeast mixture. Beat on low speed until all ingredients are well combined and the mixture is smooth.
-
Gradually add the remaining flour, about half a cup at a time, mixing thoroughly after each addition. Continue mixing until the dough comes together and starts to pull cleanly away from the sides of the bowl. The dough should be soft and slightly sticky, but not wet.
-
Shape the dough into a smooth ball and place it in a large, lightly greased bowl. Cover the bowl with a clean kitchen towel or plastic wrap. Let the dough rise in a warm place until it has doubled in size. This typically takes 1 to 2 hours, depending on your room temperature.
-
Once doubled, gently punch down the dough to release the air. Divide the dough in half. On a lightly floured surface, roll each half into a circular shape, approximately 12 inches in diameter. Melt the four tablespoons of butter and evenly spread half of it onto each rolled-out dough circle. Using a pizza wheel or sharp knife, cut each circle into quarters, and then each quarter into three wedges, yielding 12 wedges per circle, for a total of 24 crescents.
-
Starting from the wider end, tightly roll up each dough wedge to form a crescent shape. Place the rolls onto a baking sheet lined with parchment paper (or a lightly greased sheet), ensuring there is adequate space between each roll. Cover the baking sheet with a clean towel or plastic wrap, and let the rolls rise again until they have doubled in size. This second rise, or proofing, is essential for a light and flaky texture.
-
Preheat your oven to 400°F (200°C). Bake the crescent rolls for 10 to 14 minutes. Begin checking at the 10-minute mark, as these rolls can quickly go from golden to dark. Once baked to a beautiful golden brown, remove them from the oven and, while still warm, quickly brush a little extra melted butter over the tops. Serve immediately for ultimate enjoyment!
Video
Nutrition
Originally published November 21, 2011.

For all appetizer recipes, go HERE.
For all dessert recipes, go HERE.
Sign up to get emails when I post new recipes!
For even more great ideas follow me on Facebook – Pinterest – Instagram – Twitter – Bloglovin’.