
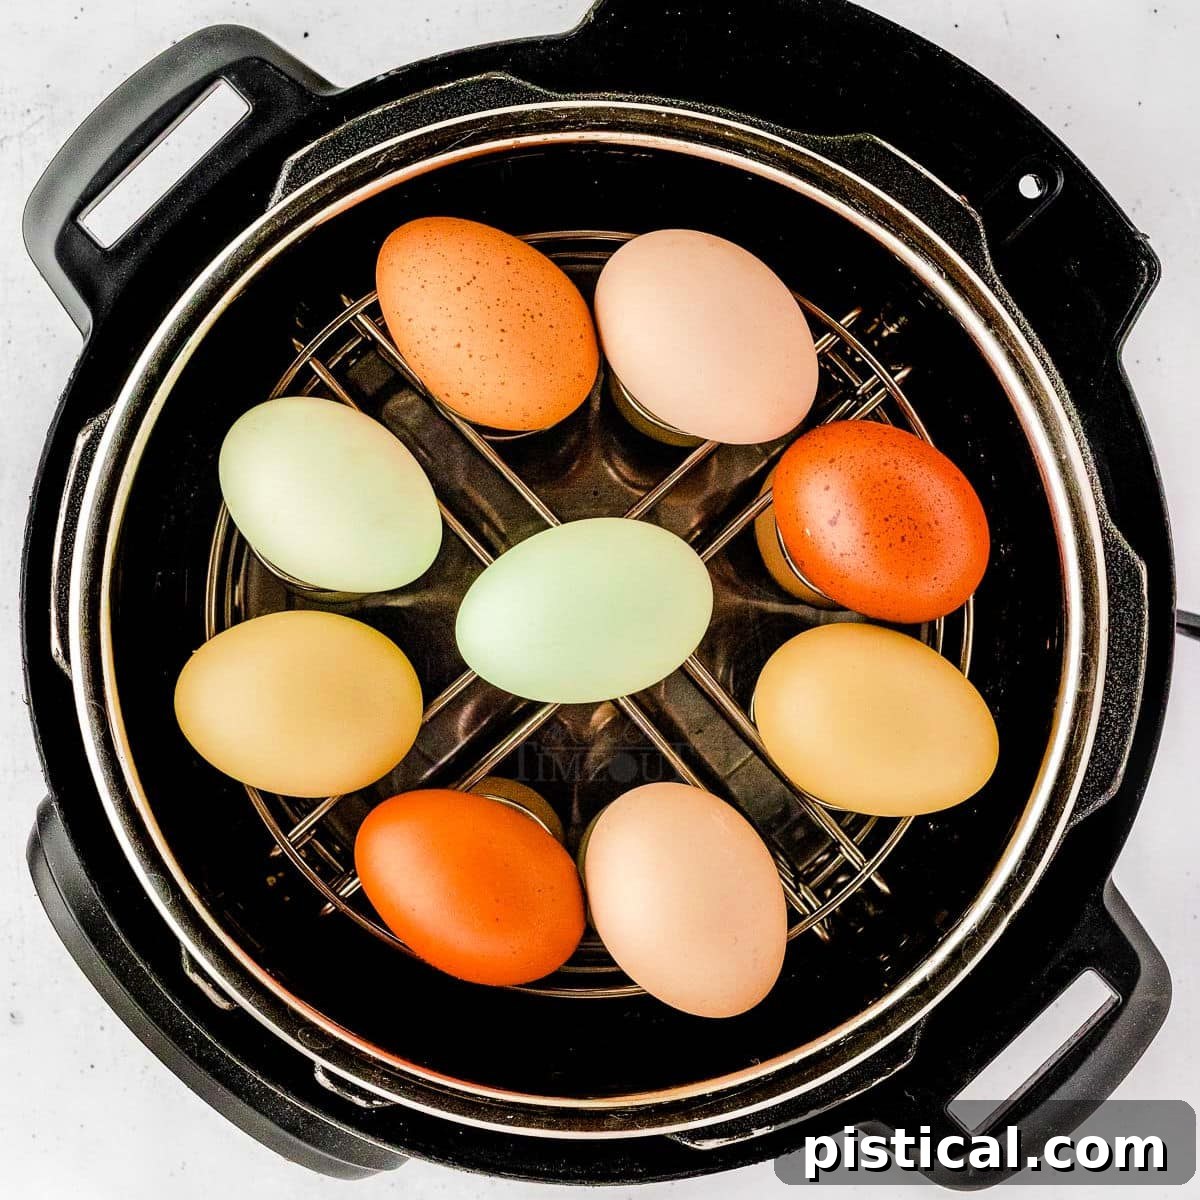
Unlock the secret to consistently perfect, incredibly easy-to-peel hard-boiled eggs with this revolutionary Instant Pot Hard Boiled Eggs recipe! Say goodbye to the frustrations of stovetop cooking – the constant vigilance, the guesswork, the agonizing peeling process. The electric pressure cooker transforms this kitchen chore into a foolproof, fast, and consistently delicious experience. Whether you’re a seasoned Instant Pot user or new to the world of pressure cooking, this method will become your go-to for effortlessly preparing flawless hard-boiled eggs every single time.
Once you master these perfectly cooked eggs, a world of culinary possibilities opens up. They are fantastic on their own as a protein-packed snack, but also form the foundation for countless delicious dishes. You’ll absolutely love elevating your meals with my Deviled Eggs, a creamy Deviled Egg Macaroni Salad, or the indulgent Bacon Cream Cheese Deviled Eggs.
Mastering Hard-Boiled Eggs with Your Instant Pot
For far too long, achieving the elusive “perfect” hard-boiled egg felt like a culinary Everest. The traditional stovetop method often resulted in a disheartening array of issues: yolks that were either still runny or sporting an unappetizing green-grey ring, whites that were rubbery, and a peeling process so frustrating it could make you question why you even bothered. Shells would cling stubbornly, taking large chunks of the precious egg white with them, leaving behind a cratered, uneven mess.
Then, a shining beacon of kitchen innovation appeared: the Instant Pot. This remarkable appliance has utterly revolutionized my approach to hard-boiled eggs, transforming a once-dreaded task into a simple, consistent, and enjoyable part of my routine. It’s more than just a convenience; it’s a guarantee of perfection.
What truly sets the Instant Pot apart is its ability to deliver consistent results without any fuss. Gone are the days of hovering over a boiling pot, constantly adjusting heat, or setting multiple timers. With precise pressure cooking and a well-timed ice bath, you’re rewarded with eggs that boast flawlessly set yolks and whites, and – perhaps most importantly – shells that slide off with incredible ease. This newfound reliability means I can effortlessly prepare large batches for weekly meal prep, whip up my family’s favorite Deviled Eggs for a gathering, or enjoy a quick, protein-rich breakfast without a single moment of stress or disappointment.
Why the Instant Pot is Your Hard-Boiled Egg Hero
Few things are as satisfying as a perfectly cooked hard-boiled egg. The ability to achieve flawless results with minimal effort truly is a game-changer for any home cook. Here are just a few of the many compelling reasons why you’ll fall in love with making hard-boiled eggs in your Instant Pot:
- Unrivaled Consistency: The Instant Pot provides a controlled, pressurized environment that cooks eggs uniformly every single time. Unlike stovetop boiling where temperature fluctuations can lead to inconsistent results, the pressure cooker maintains a steady heat, ensuring every egg reaches your desired level of doneness without any green rings around the yolk or undercooked centers. This consistency is key for perfect batches.
- Effortless and Hands-Off Cooking: Bid farewell to babysitting a boiling pot. With the Instant Pot, you simply add your eggs and water, set the timer, and walk away. There’s no need to constantly monitor the water, adjust heat, or worry about boil-overs. The Instant Pot takes all the guesswork out of the process, freeing you up to focus on other tasks until the timer signals completion.
- Remarkably Easy Peeling: This is arguably the biggest benefit and the feature that converts most people to the Instant Pot method. The pressure cooking process creates a slight gap between the egg white and the shell, making the eggs incredibly easy to peel. The shells almost glide off, leaving you with perfectly smooth, intact whites, eliminating the frustration of losing precious egg pieces to stubborn shell fragments.
- Significant Time Savings: The Instant Pot dramatically cuts down on active preparation time. There’s no waiting for a large pot of water to come to a rolling boil before adding your eggs. The pressure cooker heats up quickly, bringing the internal temperature up to optimal cooking levels in a matter of minutes. From start to finish, including pressure build-up and release, you’ll have perfectly cooked eggs much faster than traditional methods.
- Versatility in Doneness: The beauty of the Instant Pot lies in its precision. You can easily adjust the cooking time to achieve a range of yolk consistencies, from perfectly firm hard-boiled to delightfully jammy or even slightly runny centers, all with the same simple method. This adaptability makes it suitable for every preference and recipe requirement.
How to Make Perfect Hard-Boiled Eggs in Your Instant Pot
The brilliance of making hard-boiled eggs in your Instant Pot lies in its sheer simplicity. You only need two fundamental ingredients: eggs and water, alongside your trusty pressure cooker. Let’s walk through the straightforward steps to achieve consistently flawless results.
As always, for a convenient, printable version of this recipe with exact measurements and cooking details, please refer to the recipe card located at the end of this comprehensive guide.
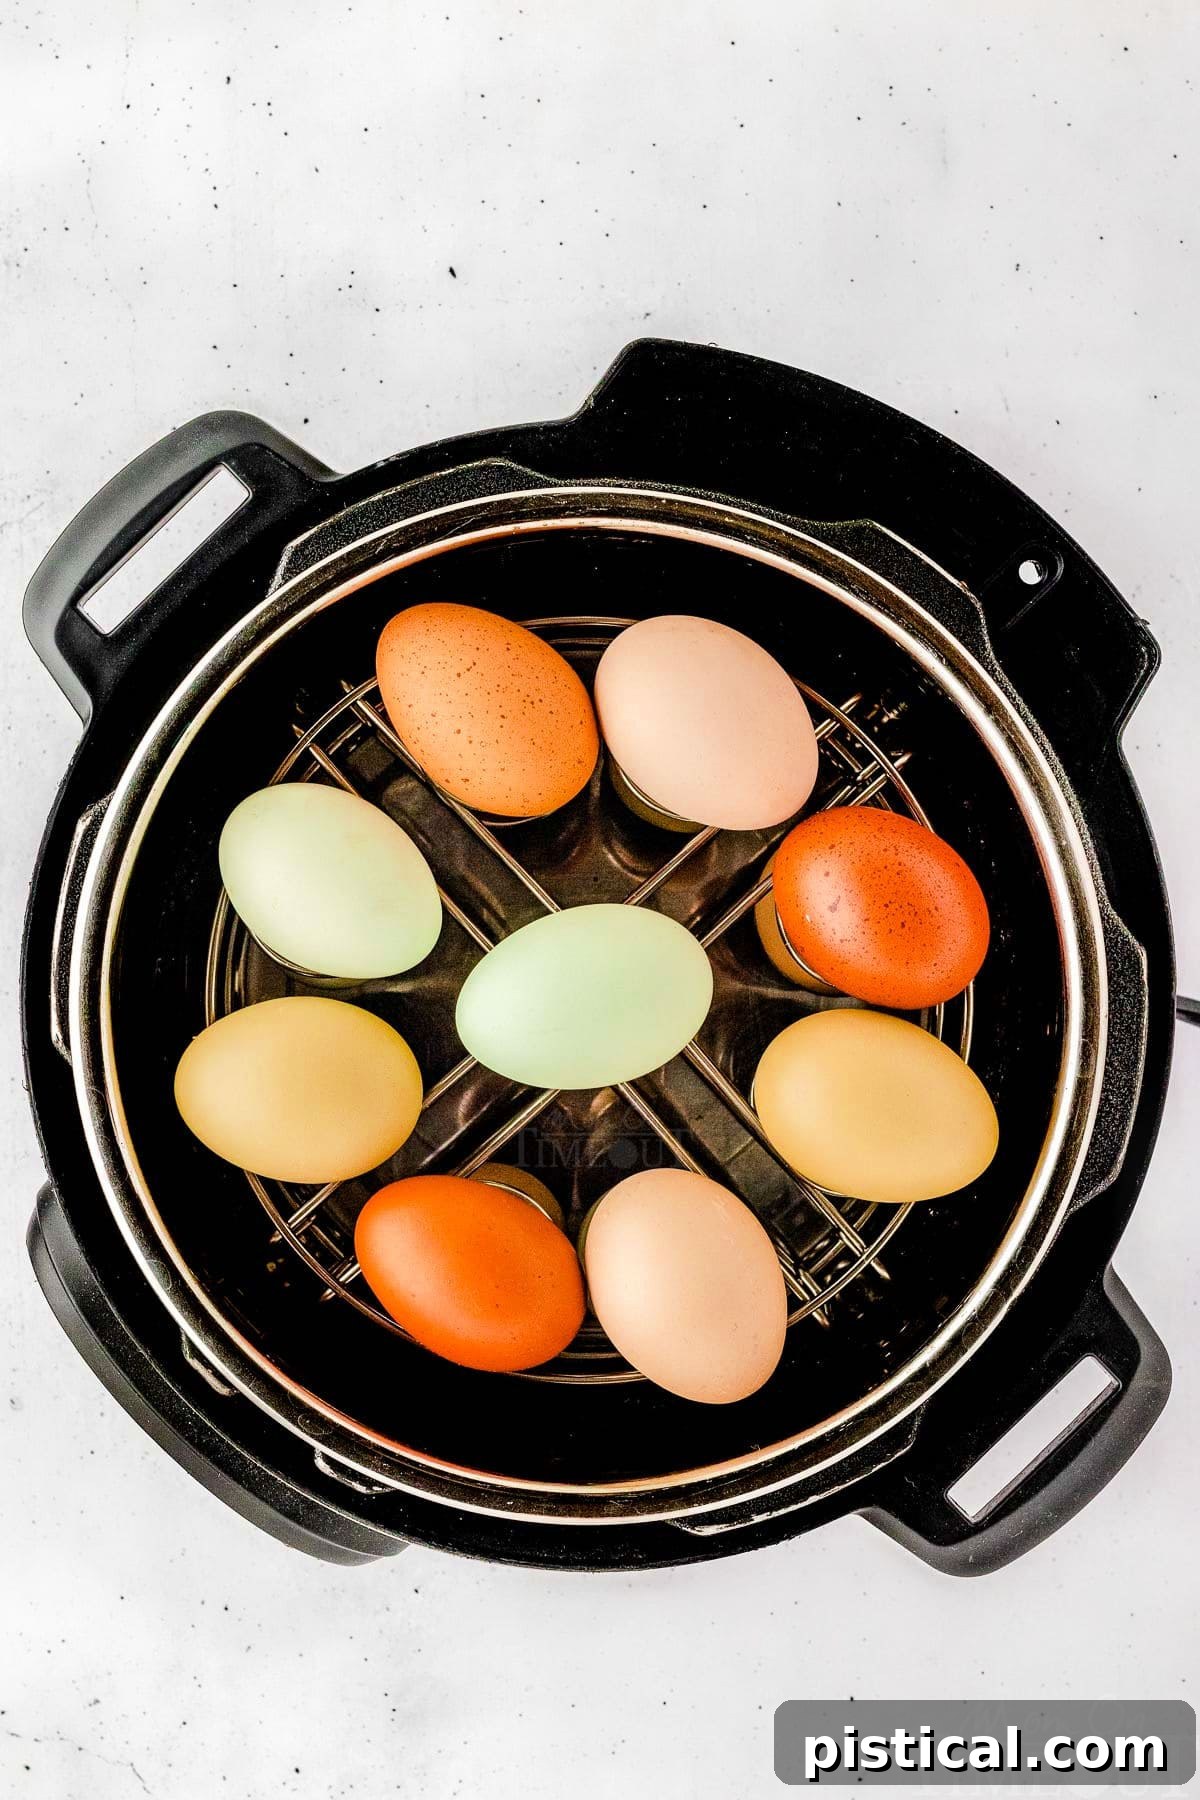
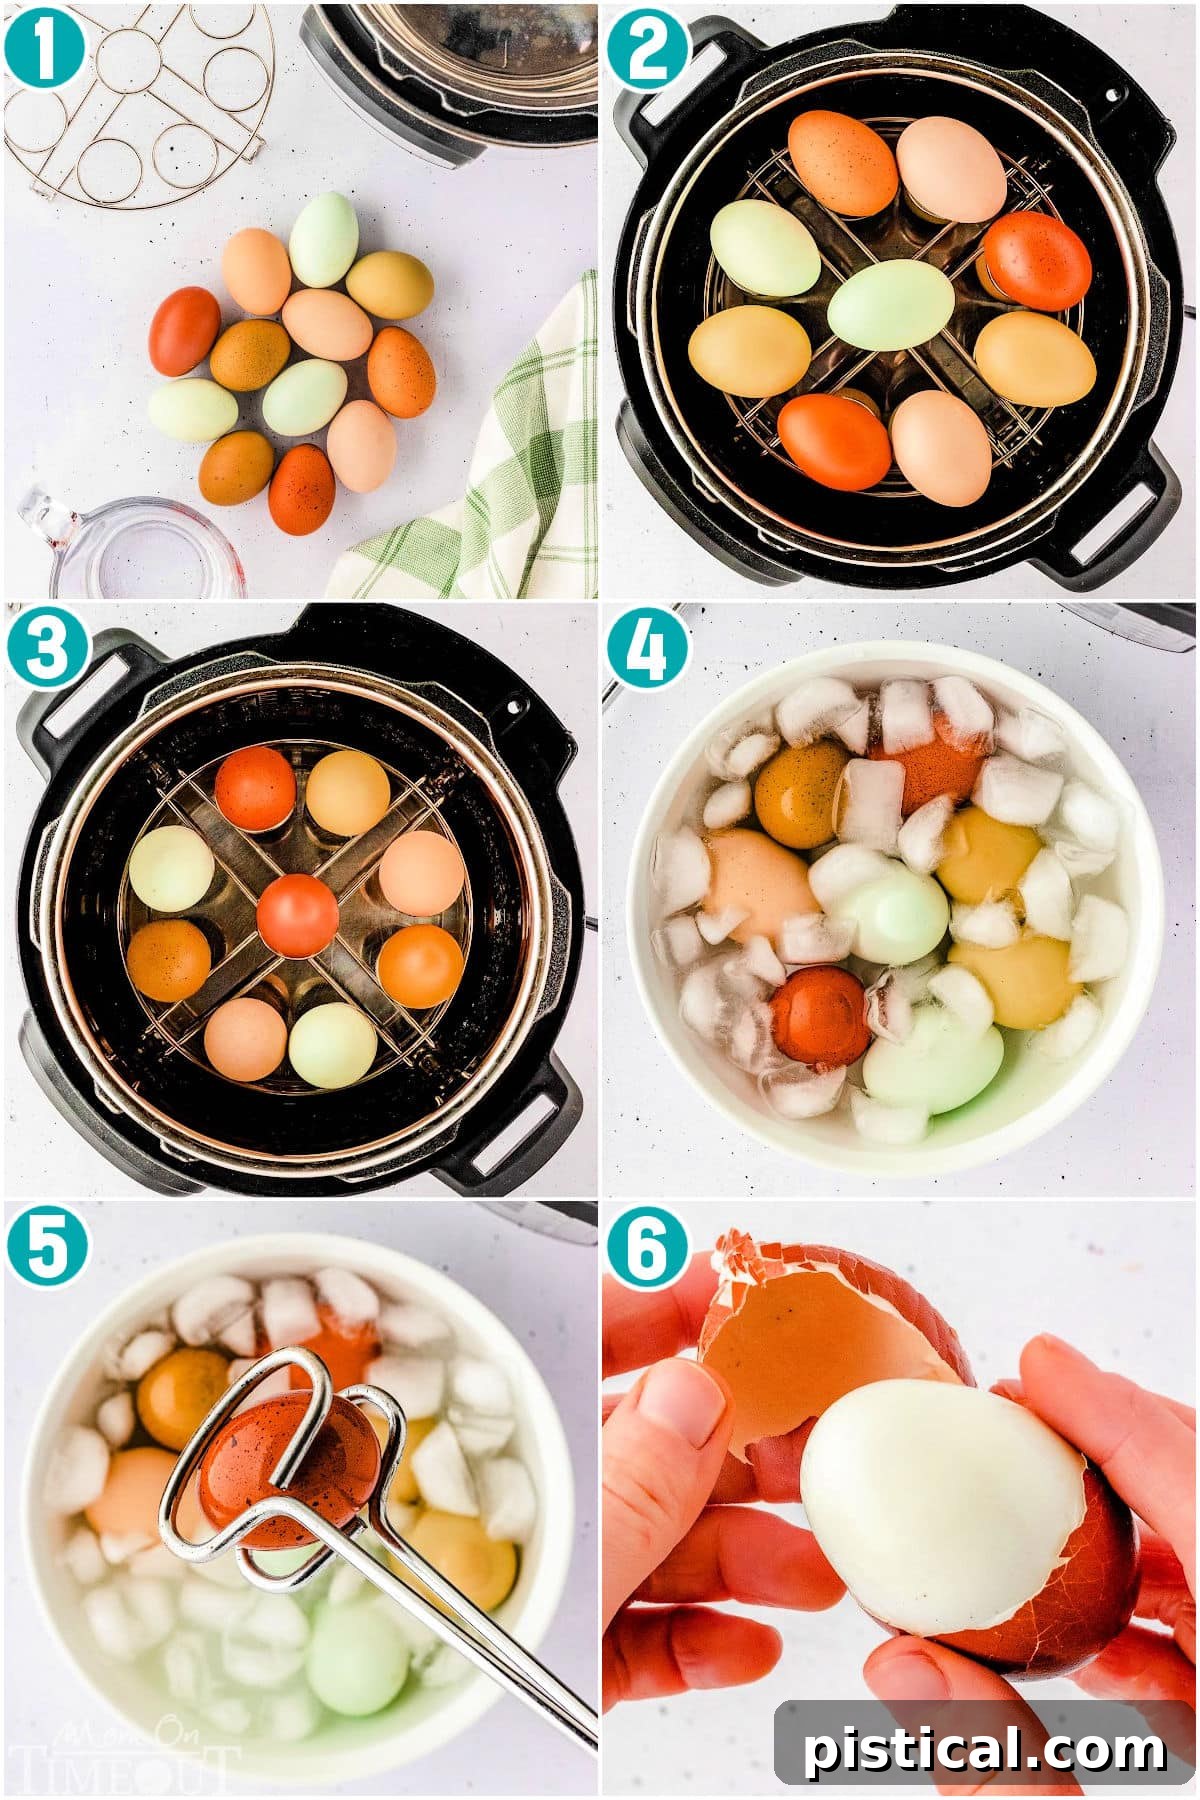
- Prepare Your Instant Pot: Begin by placing the metal trivet that typically comes with your Instant Pot into the bottom of the inner pot. This crucial accessory elevates the eggs, preventing them from sitting directly in the water and ensuring even steam circulation around each one. If you frequently make eggs, consider investing in a dedicated metal egg rack, which allows you to cook a larger quantity of eggs more efficiently by stacking them.
- Add the Water: Pour the specified amount of cold water into the Instant Pot. For a 6-quart model, use 1 cup of water. If you’re using an 8-quart Instant Pot, increase the water to 1 ½ cups. It’s important to use cold tap water or refrigerated water, as warmer water will cause the Instant Pot to come to pressure more quickly, potentially altering the precise cooking time and desired yolk consistency.
- Arrange the Eggs: Carefully place your eggs in a single layer on top of the trivet or egg rack. Ensure they are not overcrowded, as this can impede even cooking and increase the risk of cracking. Most 6-quart Instant Pots can comfortably accommodate 12-14 large eggs in a single layer.
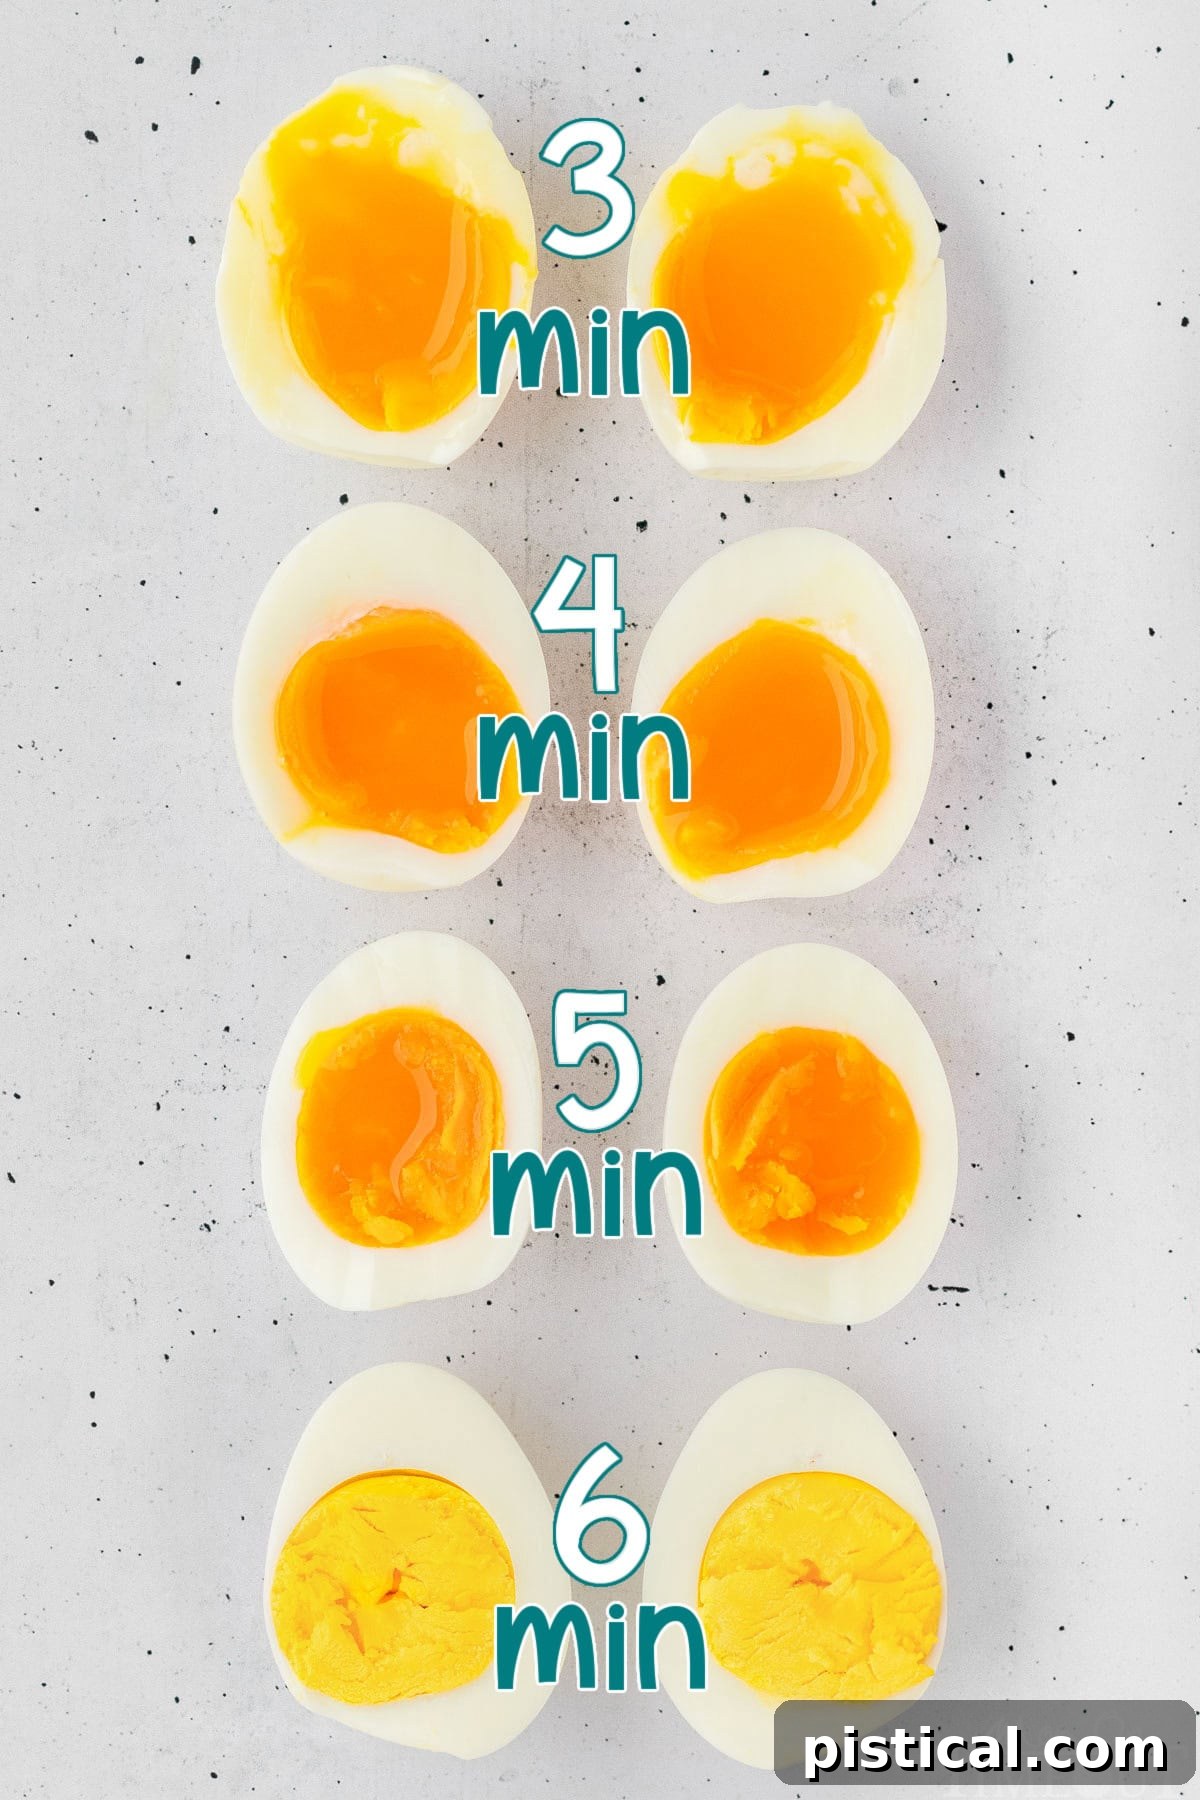
- Set the Cooking Time: Secure the lid on your Instant Pot, making certain that the pressure release valve is set to the “Sealing” position. Now, select the “Manual” or “Pressure Cook” function (depending on your model) and set it to HIGH pressure for your desired cooking time. Here’s a guide to yolk consistency:
- 3 minutes: For a very runny yolk and barely set whites (ideal for ramen or poached-style eggs).
- 4 minutes: For a slightly jammy, soft-boiled yolk with fully set whites.
- 5 minutes: For a perfectly jammy, creamy yolk with tender whites.
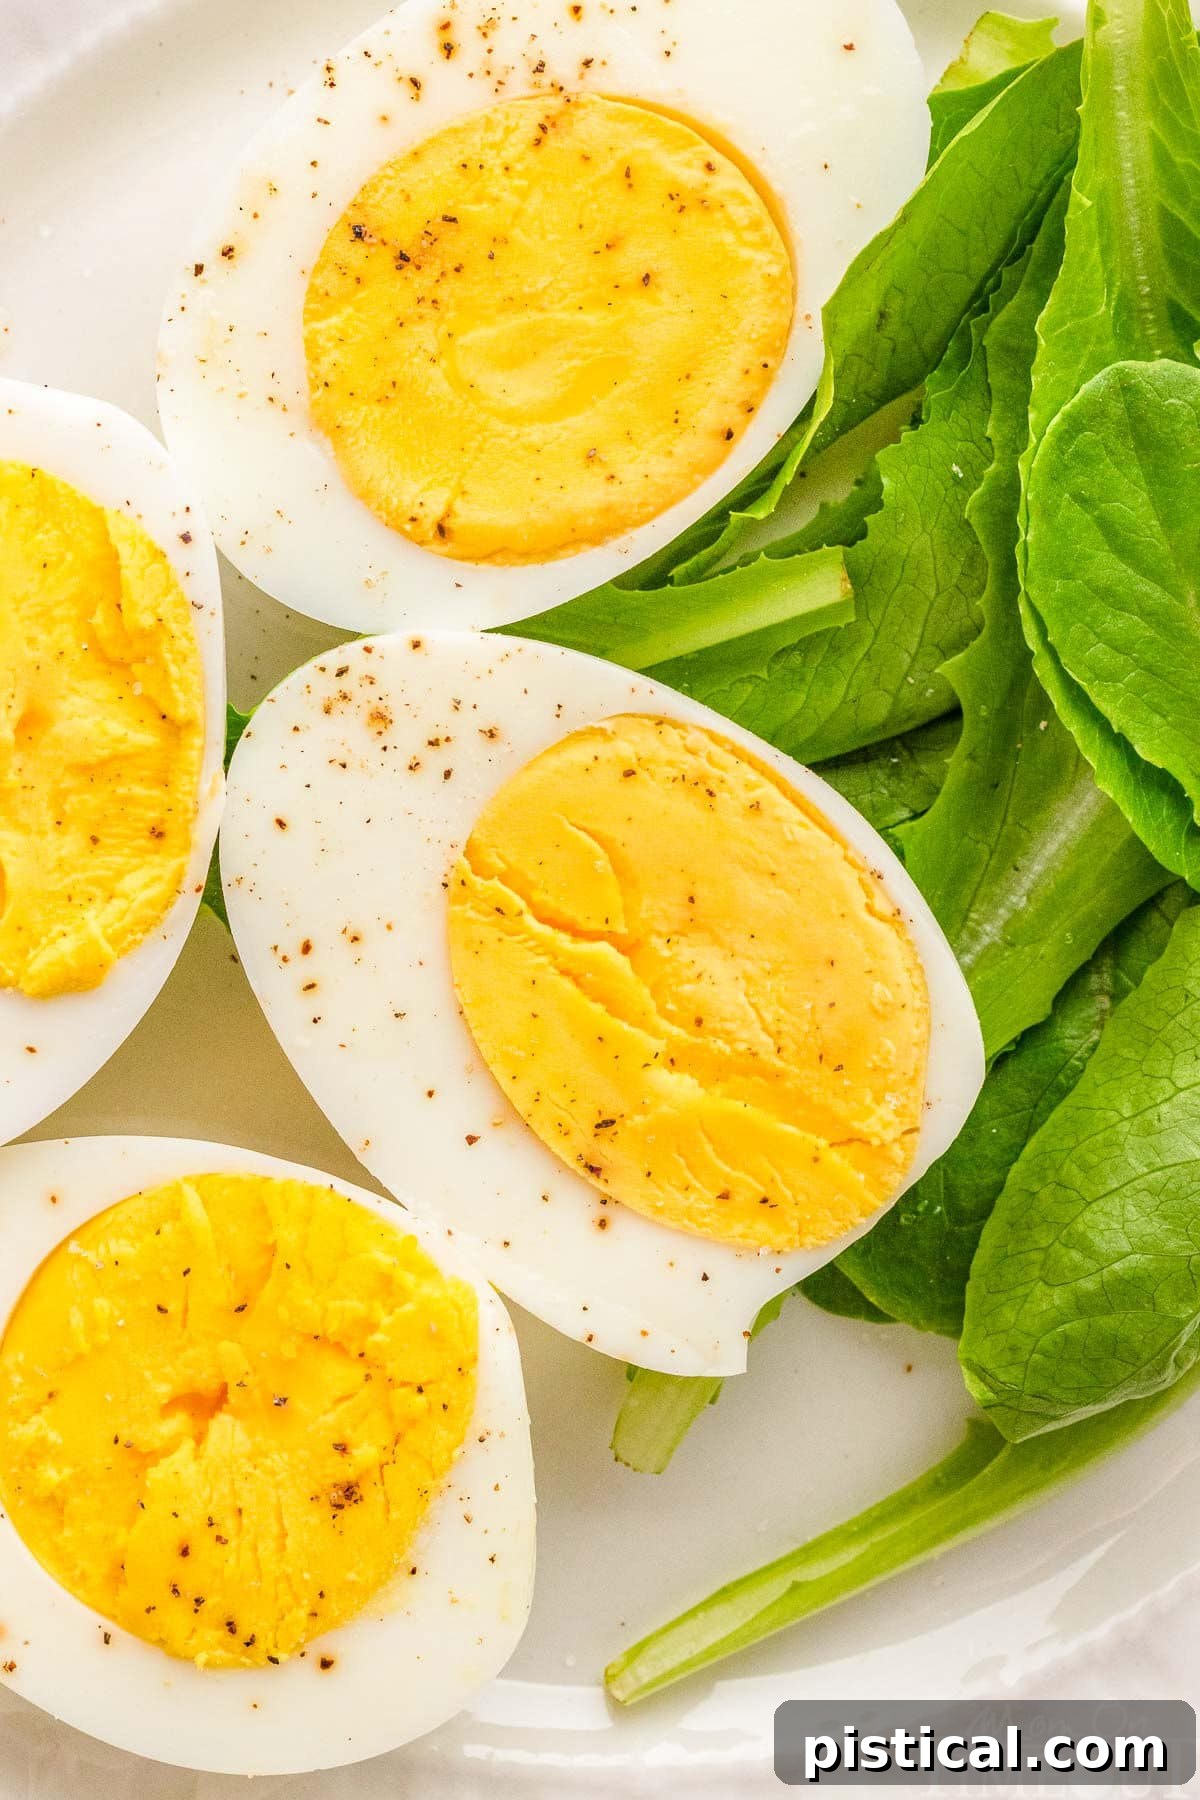
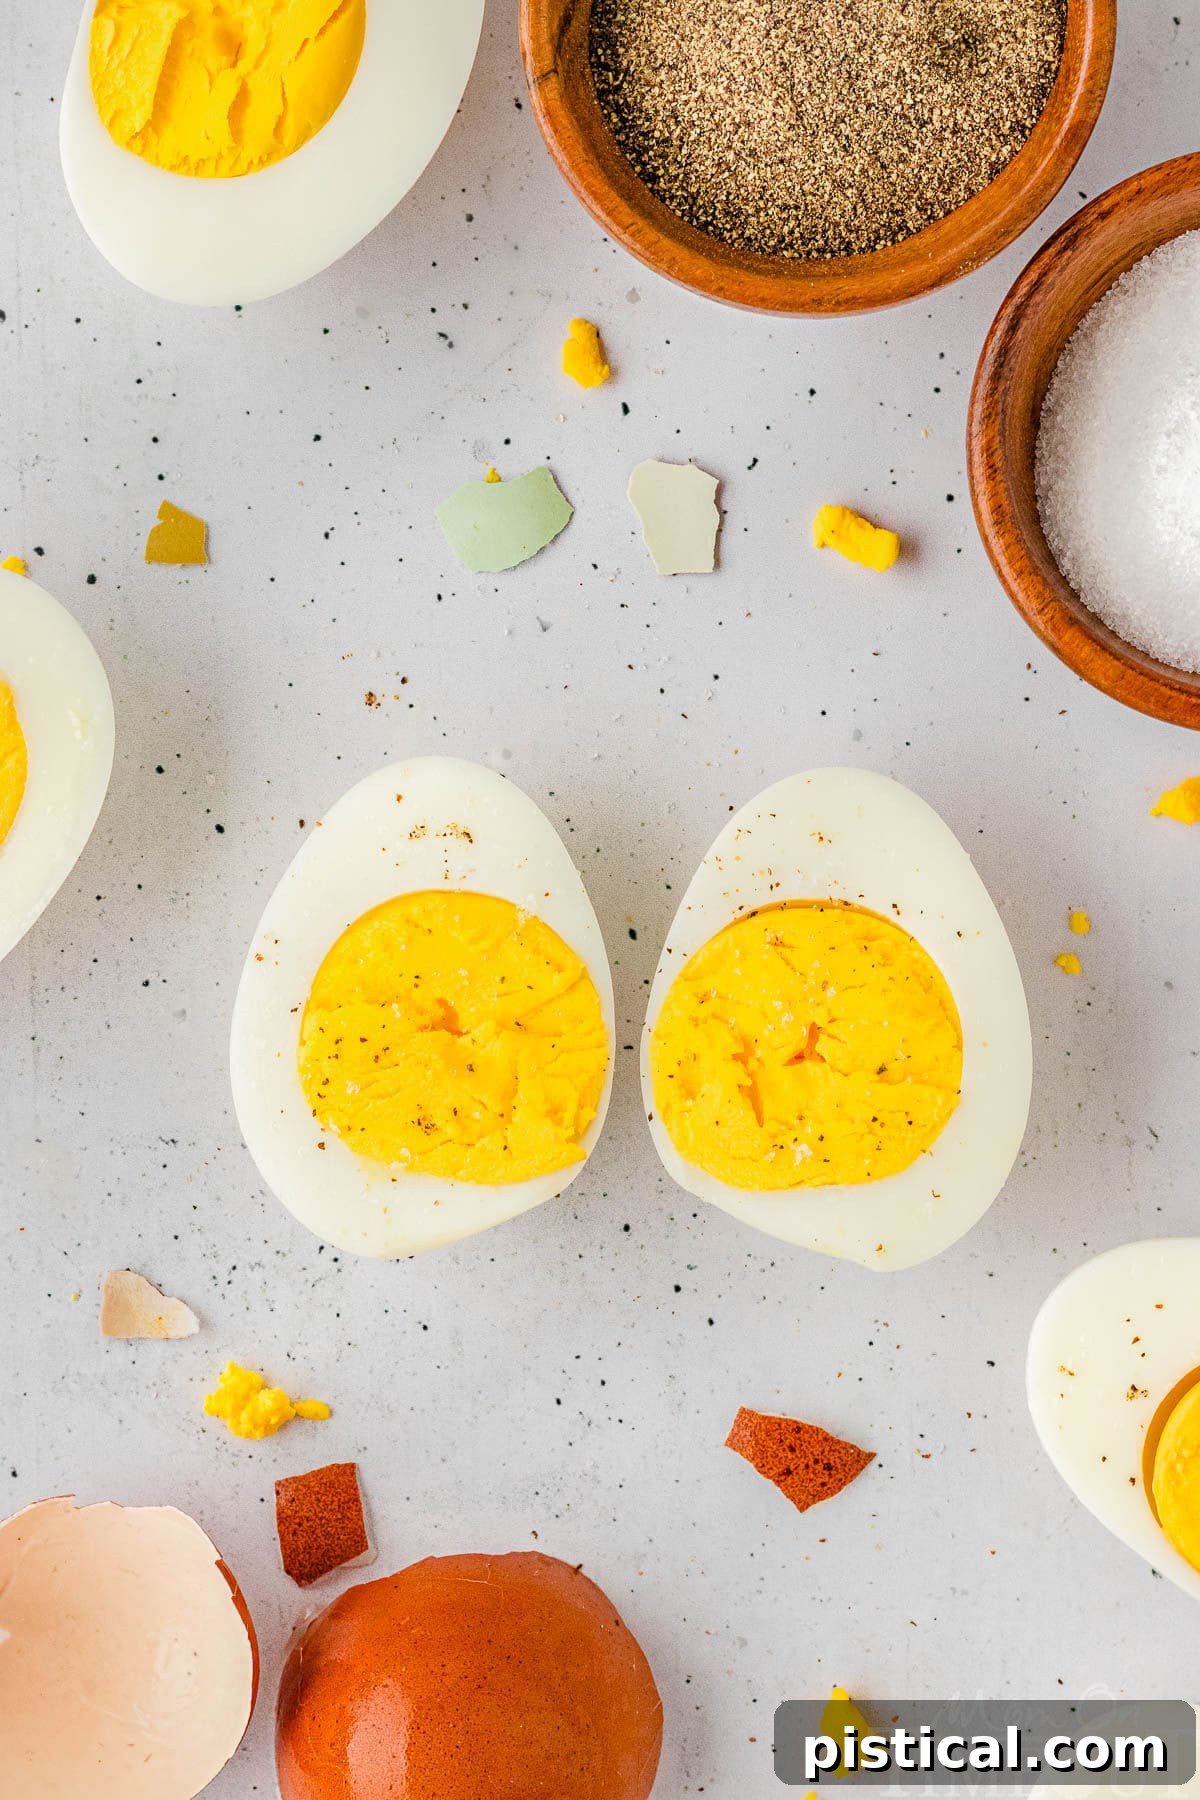
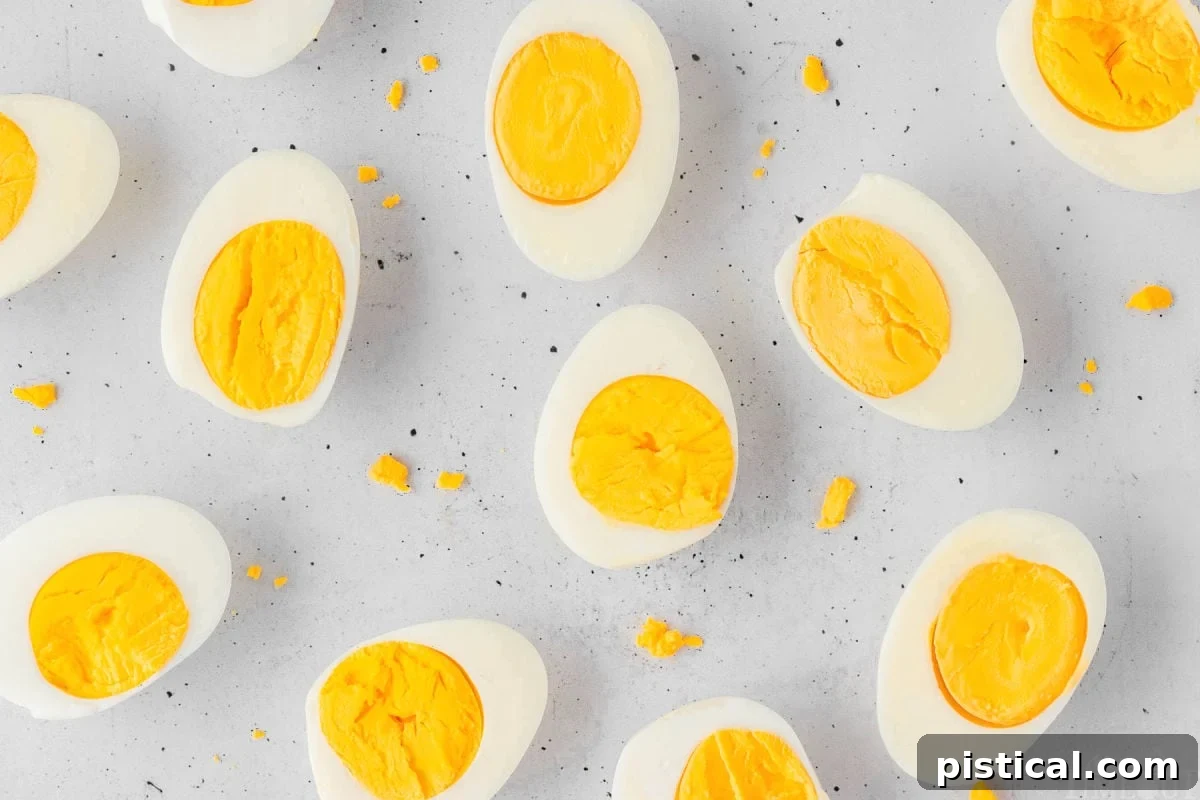
- 6 minutes: For classic, firm hard-boiled eggs with a bright yellow, fully set yolk.
Once you set the time, the Instant Pot will take a few minutes to build pressure, indicated by the float valve rising. Only after the pressure is fully built will the countdown timer begin.
- Quick Pressure Release and Ice Bath: As soon as the cooking cycle is complete and the timer beeps, immediately perform a quick pressure release (QPR). Carefully turn the pressure release valve to the “Venting” position using a long-handled spoon or a kitchen towel to protect your hand from the hot steam. Once all the pressure has been released and the float valve drops, carefully remove the lid. Using tongs or a slotted spoon, transfer the cooked eggs directly into a prepared ice bath (a bowl filled with ice and cold water) for at least 5 minutes. This crucial step instantly halts the cooking process, preventing overcooking and contributing significantly to the easy-peel magic.
- Peel and Enjoy: After their refreshing ice bath, your eggs are ready! Gently crack and peel them under cold running water for the easiest removal of any remaining shell fragments. Marvel at the smooth, perfectly cooked eggs, and enjoy them as desired!
Pro Tip: Every Instant Pot model can vary slightly in its heating element and pressure build-up time. I highly recommend conducting a small test run with just one or two eggs initially to fine-tune the cooking time to your specific appliance and preferred yolk consistency before preparing a large batch of Instant Pot Hard Boiled Eggs.
Understanding the Science: Why Instant Pot Eggs Peel So Easily
The “magic” behind incredibly easy-to-peel Instant Pot hard-boiled eggs isn’t really magic at all; it’s basic food science at work. When eggs are cooked under pressure, a few key things happen:
- Steam Penetration: The high-pressure steam inside the Instant Pot quickly penetrates the eggshell and the membrane directly beneath it. This rapid, thorough steaming helps to gently separate the membrane from the egg white, preventing it from sticking.
- Temperature Uniformity: Pressure cooking ensures a consistently high temperature throughout the entire cooking process. This uniform heat denatures the proteins in the egg white effectively and evenly.
- Rapid Cooling (Ice Bath): The immediate transfer of hot eggs to an ice bath causes a sudden contraction of the egg white. This quick change in temperature further helps to pull the cooked egg white away from the shell, creating that crucial air gap that makes peeling a breeze. Without the ice bath, the eggs continue to cook from residual heat, and the membrane tends to re-adhere to the white as it cools slowly.
Storage Information
Proper storage is key to keeping your Instant Pot hard-boiled eggs fresh and safe to eat. Here’s how to store them for optimal longevity:
- Unpeeled Eggs: For the longest shelf life, store unpeeled hard-boiled eggs in their shells in an airtight container within your refrigerator. This helps prevent them from absorbing odors from other foods and keeps them fresh for up to one week.
- Peeled Eggs: If you’ve already peeled your eggs, they have a shorter shelf life. Place them in an airtight container and cover them with just enough cold water to submerge them completely. Change the water daily to maintain freshness. Stored this way, they will remain good for 2-3 days in the refrigerator.
Creative Serving Suggestions
Instant Pot hard-boiled eggs are incredibly versatile and can be incorporated into a wide variety of meals and snacks. Their convenience makes them a perfect addition to almost any dish. Here are some inspiring ideas:
- Salad Booster: Slice or chop them to add a significant protein boost and creamy texture to any green salad, Cobb salad, or potato salad.
- Classic Egg Salad: The quintessential use! Mash them with mayonnaise, mustard, celery, and seasonings for a delightful sandwich filling or cracker spread.
- Deviled Egg Perfection: Transform them into elegant and flavorful deviled eggs, perfect for potlucks, parties, or a special appetizer.
- Soup Enhancer: Quarter or halve hard-boiled eggs and float them in bowls of chicken noodle soup, ramen, or even a creamy tomato soup for added richness and protein.
- Gourmet Avocado Toast: Elevate your avocado toast by layering thin slices of hard-boiled egg on top, perhaps with a sprinkle of everything bagel seasoning or red pepper flakes.
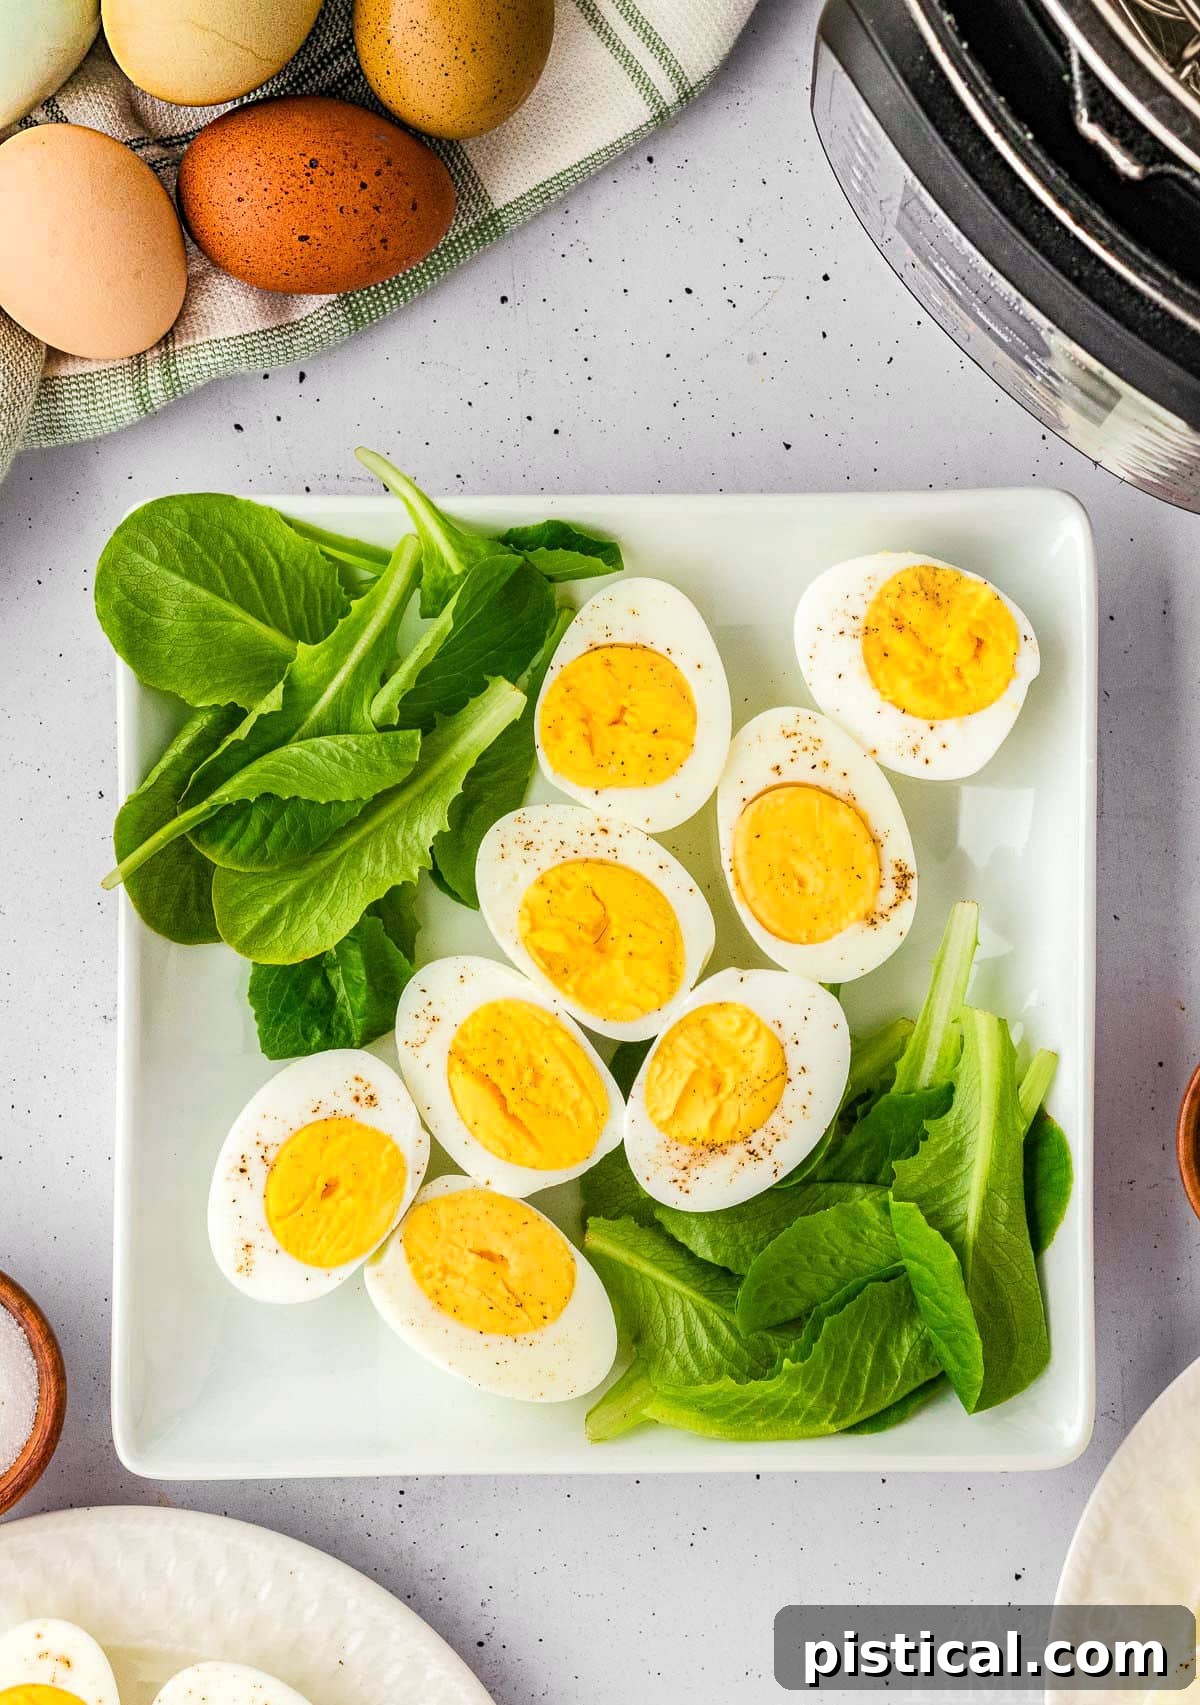
- Simple & Healthy Snack: Enjoy them plain with a dash of salt and freshly ground black pepper for a quick, wholesome, and satisfying snack or a healthy addition to your breakfast plate.
- Kid-Friendly Bites: Cut them into fun shapes using cookie cutters for a playful and nutritious addition to school lunchboxes or afternoon snacks.
- Curried Eggs: Gently simmer whole peeled eggs in a flavorful curry sauce for a unique and hearty vegetarian main course.
- Nicoise Salad: A must-have ingredient for the classic French Nicoise salad, alongside tuna, green beans, potatoes, and olives.
Frequently Asked Questions About Instant Pot Hard-Boiled Eggs
Even with a foolproof method, a few questions often arise. Here are answers to common queries to ensure your success:
How many eggs can I cook in my Instant Pot at once?
The capacity depends on the size of your Instant Pot. A standard 6-quart Instant Pot can comfortably hold a single layer of about 12-14 large eggs on the trivet or a specialized egg rack. You can often stack more if you have an egg rack designed for multiple layers. The key is to avoid overcrowding to ensure even cooking and prevent cracking. For larger batches, an 8-quart Instant Pot can hold even more.
Do I need to use a steamer basket or trivet?
While technically you *could* cook eggs directly in the water, using the steamer basket or trivet that comes with your Instant Pot is highly recommended. It elevates the eggs from the bottom of the pot, allowing for better steam circulation around each egg. This promotes more even cooking and further aids in the easy peeling process by ensuring consistent exposure to the high-pressure steam.
What’s the deal with the ice bath? Is it really necessary?
Absolutely! The ice bath is a critical and non-negotiable step for truly perfect, easy-peel Instant Pot hard-boiled eggs. Immediately submerging the hot eggs in ice-cold water accomplishes two vital things:
- It stops the cooking process instantly, preventing the eggs from overcooking from residual heat, which can lead to that undesirable green ring around the yolk.
- The rapid temperature change causes the egg white to contract quickly, creating a crucial separation between the egg white and the inner membrane/shell. This makes the shells practically slide off, solving the age-old problem of difficult peeling.
What factors can affect the results of my Instant Pot eggs?
Several variables can influence the final texture of your eggs, even with the Instant Pot’s precision. This is precisely why I always recommend doing a small test run with a single egg to discover what works best for your specific setup and preferences. Key factors include:
- Egg Size: Larger eggs (like jumbo or extra-large) will typically require an additional minute or so of cooking time compared to standard large eggs. Conversely, smaller eggs (medium) may need slightly less time.
- Egg Temperature: Starting with cold, refrigerated eggs is usually recommended as it allows for a more controlled cooking process. Room-temperature eggs will come to pressure quicker, potentially shortening the effective cooking time.
- Altitude: Believe it or not, higher altitudes can slightly affect pressure cooking times. If you live at a significantly high elevation, you may need to increase the cooking time by a minute or two.
- Water Temperature: As mentioned in the instructions, using cold tap or refrigerated water is best. Warm water will cause the Instant Pot to reach pressure faster, which can impact the final cooking outcome.
- Instant Pot Model: Different Instant Pot models (e.g., Duo, Ultra, Viva) can have slight variations in their heating elements and pressure calibration. This reinforces the value of a test run.
Are Instant Pot boiled eggs truly easier than boiling eggs on the stovetop?
Unequivocally, yes! Not only is the active cooking time often quicker and more hands-off, but you also eliminate the constant worry of water boiling over and making a mess. Most importantly, the Instant Pot method almost guarantees perfectly peelable shells every single time, which is a significant advantage over the often frustrating stovetop experience. It truly simplifies the entire process.
Trish’s Top Tips for Instant Pot Hard-Boiled Egg Success
Achieving consistently perfect hard-boiled eggs in your Instant Pot is incredibly easy, but a few expert tips can elevate your results from great to truly exceptional:
- Preventing Cracks: If you find your Instant Pot boiled eggs are prone to cracking during cooking, try reducing the cooking time by one minute. Additionally, using eggs that are closer to room temperature rather than straight from the refrigerator can sometimes help reduce the thermal shock and prevent cracks. Avoid overcrowding the pot; ensure eggs are in a single, unforced layer.
- Customizing Yolk Firmness:
- For a Softer, Jammy Yolk: After the initial cooking time (e.g., 4 or 5 minutes), allow the Instant Pot to perform a Natural Pressure Release (NPR) for about 3-5 minutes before doing a quick release. This allows the eggs to continue cooking very gently as the pressure slowly dissipates.
- For a Firmer, Classic Hard-Boiled Yolk: Stick to an immediate Quick Pressure Release (QPR) as soon as the cooking cycle is finished. This halts the cooking process rapidly, ensuring a completely firm, vibrant yellow yolk without any green tinge.
- Embrace the Ice Bath: Do NOT underestimate the power and necessity of an immediate ice bath! As soon as the pressure is released, transfer the hot eggs directly into a large bowl filled with ice water. Let them cool for at least 5 minutes, preferably 10. This critical step not only stops the cooking process (preventing overcooking and green yolks) but, more importantly, causes the egg whites to rapidly contract, separating them beautifully from the shell membrane, which makes peeling incredibly easy.
- Egg Age vs. Peelability: While some sources suggest that older eggs peel slightly easier due to changes in pH, fresher eggs often boast a superior flavor and texture. With the Instant Pot method and a proper ice bath, even very fresh eggs typically peel wonderfully. Experiment with both to discover your personal preference.
- Avoid Overcrowding: Always arrange your eggs in a single layer on the trivet or egg rack. Overcrowding the pot can lead to uneven cooking and increase the likelihood of eggs bumping into each other and cracking under pressure. For larger quantities, consider cooking in batches or investing in a multi-tier egg steamer rack.
- Don’t Skimp on Water: Ensure you add the correct amount of water (1 cup for 6-quart, 1.5 cups for 8-quart). This water is essential for generating enough steam to build pressure and cook the eggs effectively. Too little water can lead to insufficient pressure and potentially undercooked eggs or a burn notice.
More Delicious Instant Pot Recipes to Explore
The Instant Pot is a remarkably versatile kitchen appliance, capable of much more than just perfect hard-boiled eggs. Once you’ve experienced the ease and efficiency of pressure cooking, you’ll be eager to try other incredible recipes. Here are some of my top recommendations for expanding your Instant Pot repertoire:
- Decadent Instant Pot Cheesecake: Surprisingly, your Instant Pot can create a perfectly moist and creamy cheesecake, often without the fuss of a water bath.
- Quick and Easy Instant Pot Spaghetti: A one-pot wonder that cooks pasta and sauce together for a fast weeknight meal.
- Easy Instant Pot Beef Stroganoff: Tender beef in a rich, creamy sauce, ready in a fraction of the traditional time.
- Flavorful Instant Pot Pulled Pork: Achieve incredibly tender, fall-apart pulled pork for sandwiches or tacos with minimal effort.
- Creamy Instant Pot Mashed Potatoes: Perfect mashed potatoes in no time, freeing up stovetop space, especially during holidays.

Print Recipe
Pin Recipe
Instant Pot Hard Boiled Eggs
This Instant Pot Hard Boiled Eggs recipe is the secret to getting perfectly cooked, easy-peel hard-boiled eggs! Ditch the pot on the stove and embrace the pressure cooker. Making hard-boiled eggs in your Instant Pot is a game-changer. No more waiting for water to boil or wondering if your eggs will overcook. This method is foolproof, fast, and delivers consistently delicious results every single time!
Course: Instant Pot
Cuisine: American
Keyword: hard boiled eggs in instant pot, hard boiled eggs instant pot, instant pot boiled eggs, instant pot hard boiled eggs
Prep Time: 5 minutes
Cook Time: 5 minutes
Water Bath: 5 minutes
Servings: 9
Calories: 63 kcal
Author: Trish – Mom On Timeout
Equipment
- Instant Pot
Ingredients
- 1 – 1 ½ cup of cold water
- 9 large eggs
Instructions
-
Place your metal trivet that should have come with your Instant Pot in the bottom of the pot. You can also use a metal egg rack, which will help you cook more eggs at once.
-
Pour your water into the pot. If you’re using a 6 quart pot, use 1 cup, and if you’re using an 8 quart pot, use 1 ½. The trick is to use cold tap or refrigerated water, as room-temperature or warm water will come to pressure quicker and may alter your cooking time.
(Ingredients used: 1 – 1 ½ cup of cold water)
-
Place eggs in a single layer on the rack in the pot.
(Ingredients used: 9 eggs)
-
Put the lid on, making sure the pressure release valve is closed, and set your Instant Pot to manual high pressure for 6 minutes for hard boiled eggs, 5 minutes for jammy centers, 4 minutes for less jammy centers, or 3 minutes for runny yolk and just barely set whites. Once you set your Instant Pot, it will take a few minutes to build pressure; then your timer will begin.
-
Once the timer has finished, use a long-handled spoon to quickly release the pressure by opening the vent. After the pressure is released, remove the eggs and immediately place them in an ice bath for about 5 minutes to stop the cooking process.
-
Crack and peel your eggs and enjoy!
Notes
Storage Information
Store unpeeled eggs in an airtight container in the refrigerator for up to one week. Store peeled eggs in an airtight container filled with just enough cold water to cover them. They can be stored for 2-3 days.
Nutrition
Calories: 63 kcal | Carbohydrates: 0.3g | Protein: 6g | Fat: 4g | Saturated Fat: 1g | Polyunsaturated Fat: 1g | Monounsaturated Fat: 2g | Trans Fat: 0.02g | Cholesterol: 164mg | Sodium: 62mg | Potassium: 61mg | Sugar: 0.2g | Vitamin A: 238IU | Calcium: 25mg | Iron: 1mg