
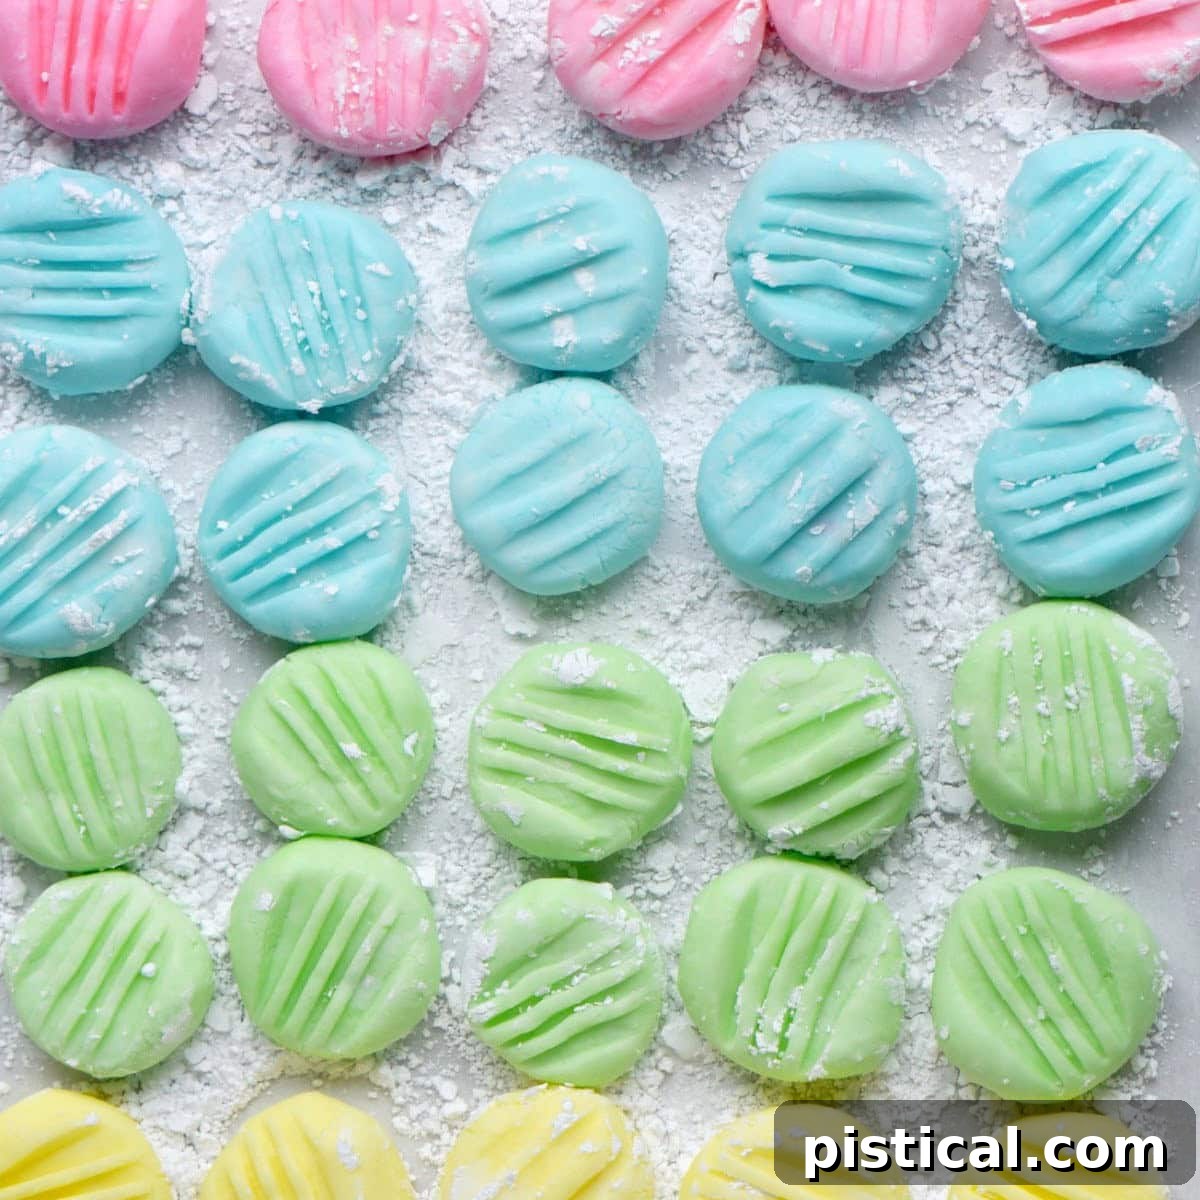
Welcome to the ultimate guide for crafting the most delectable, melt-in-your-mouth Cream Cheese Mints! This incredibly easy recipe promises to deliver luscious, smooth, and perfectly sweet candies that are simply irresistible. Whether you’re planning for Easter, a baby shower, a wedding, or simply looking for a delightful homemade treat, these customizable cream cheese mints are guaranteed to impress. Prepare them in any color to perfectly match your event’s theme and enjoy the compliments!
Craving more delightful confections for your next celebration? Be sure to explore our recipes for Bunny Bait Easter Snack Mix, classic Coconut Cream Pie, and Nana’s legendary Carrot Cake. Each offers a unique burst of flavor perfect for festive gatherings.
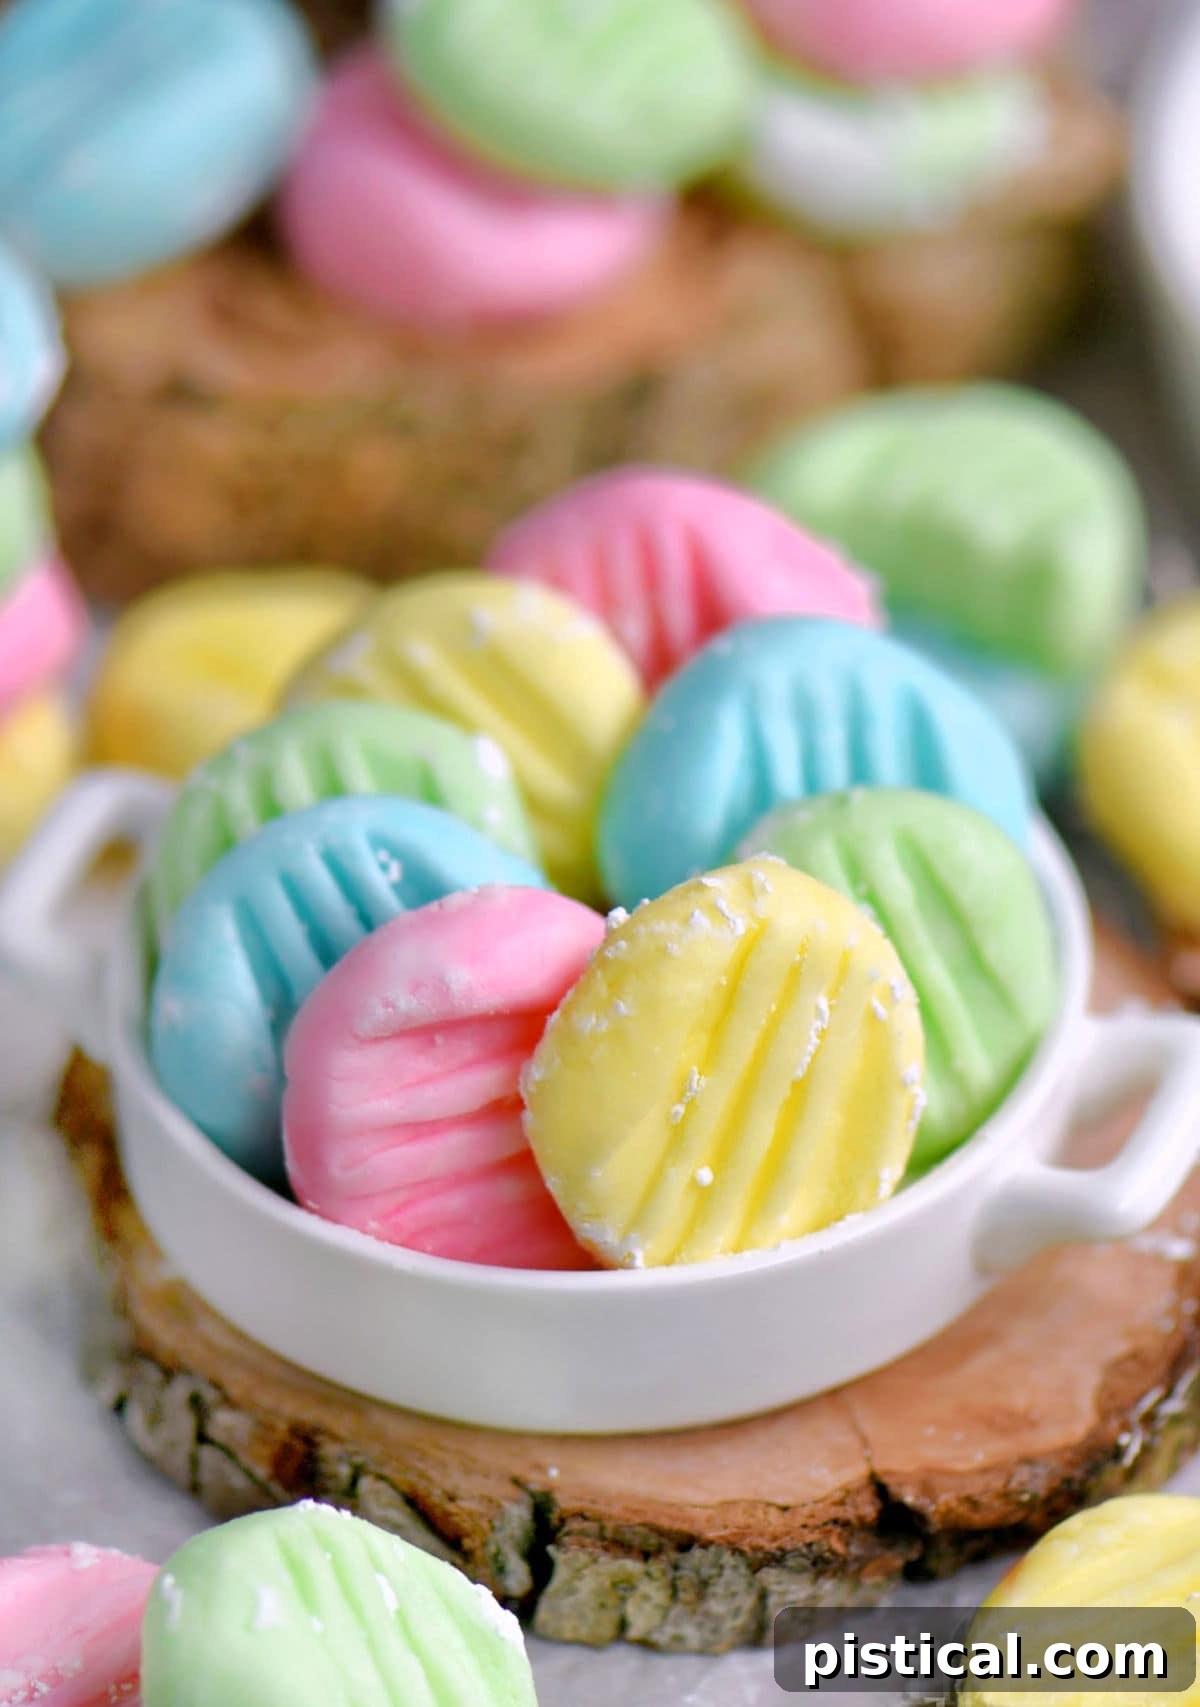
The Irresistible Charm of Cream Cheese Mints
Cream Cheese Mints are a true classic, a nostalgic treat that transcends generations and occasions. These delightful candies, with their smooth, creamy texture and just the right hint of mint (or peppermint!), literally dissolve in your mouth, leaving behind a refreshing sweetness. Their timeless appeal makes them a cherished staple at a wide array of events, from elegant weddings and heartwarming baby showers to joyous holiday gatherings. Once you experience their exquisite taste and texture, you’ll understand why they’ve remained a beloved favorite for so long.
While I affectionately refer to them as cream cheese mints, many of you might know them by other charming names, such as cream cheese butter mints, wedding mints, or baby shower mints. Each name speaks to their versatility and popularity at special events. Regardless of what you call them, the core ingredient that makes these candies uniquely superior in my recipe is the generous amount of cream cheese. It’s the secret behind their unparalleled creaminess and melt-in-your-mouth quality.
You’ll find countless recipes for these mints online, many of which call for only a small portion of cream cheese, perhaps just 3 or 4 ounces. My recipe, however, champions the use of an entire 8-ounce block of full-fat cream cheese. This commitment to creaminess is precisely what elevates these candies, transforming them into the BEST Cream Cheese Mints you’ll ever encounter. The higher cream cheese content ensures each bite is incredibly rich, smooth, and genuinely melts away on your tongue, distinguishing them from any other mint candy out there.
Crafted with only a handful of readily available ingredients, this recipe for cream cheese mints is remarkably straightforward to prepare and offers endless possibilities for customization with various colors and shapes, allowing them to perfectly complement any event or season!
Why You’ll Adore These Homemade Cream Cheese Mints
These cream cheese mints are not just a recipe; they’re a delightful tradition in the making. We find ourselves making them for every festive occasion, from the vibrant pastels of Easter and the joyful hues of Christmas to the elegance of baby showers, weddings, and general celebrations. Their ease of preparation combined with the fantastic benefit of being make-ahead friendly makes them an absolute dream for busy hosts and home bakers alike.
- Effortlessly Simple Ingredients: You’ll be amazed at how a few basic pantry staples come together in mere minutes to create these exquisite, mouth-watering cream cheese mints. No complex, hard-to-find ingredients here – just pure, simple deliciousness.
- Universally Perfect for Any Occasion: From intimate family gatherings to grand celebratory events, these cream cheese mints are always a hit. They’re incredibly well-received and deeply appreciated for their delightful flavor and the touch of nostalgia they bring, making them ideal for showers, parties, holidays, or even as thoughtful homemade gifts.
- Conveniently Make-Ahead Friendly: Planning your event has never been easier! These mints store beautifully and freeze exceptionally well, offering ultimate flexibility. You can prepare a batch weeks or even months in advance, then simply store them in the refrigerator for up to two weeks or in the freezer for several months. This make-ahead capability is a lifesaver, especially during the bustling holiday season.
- Limitless Customization Options: The creativity doesn’t stop at just making these mints; it extends to personalizing them! Not only can you tint them in any color imaginable to match your event’s palette, but you can also experiment with a variety of flavors. Simply swap the traditional mint extract for your favorite alternative. We’ve had incredible success with lemon, cherry, and various peppermint extracts – each variation proving just as delicious and unique as the last!
A Closer Look at the Key Ingredients
Let’s dive into the essential components that contribute to the unparalleled deliciousness and perfect texture of these cream cheese mints:
- Full-Fat Cream Cheese: This is the star of our show and the foundational ingredient that gives these mints their signature ultra-creamy texture and a subtle, delightful tang. Ensure it’s full-fat and softened to room temperature for the smoothest, most luxurious consistency.
- Salted Butter: The addition of softened salted butter enhances the richness of the mints and plays a crucial role in helping the mixture achieve the ideal consistency, allowing it to hold its shape beautifully. Softening the butter beforehand is key for effortless blending.
- Powdered Sugar (Confectioners’ Sugar): Powdered sugar is vital for sweetening the mints and providing the necessary structure to the dough. Beyond its role in the mixture, it’s also indispensable for rolling the formed mints, preventing them from sticking and giving them a lovely finished coating.
- Mint or Peppermint Extract: This is where the magic of the mint flavor comes in! A small, precise amount delivers that refreshing, cool sensation characteristic of classic mints. Both peppermint and spearmint extracts work wonderfully, allowing you to choose your preferred intensity and type of mint flavor.
- Gel Food Coloring (Optional, but Fun!): While entirely optional, gel food coloring transforms these mints into festive, eye-catching treats. It allows you to tint your mints in a rainbow of colors to perfectly align with your event, holiday, or personal preference. We highly recommend using a quality gel food coloring set for vibrant and consistent results.
Step-by-Step Guide: How to Make Irresistible Cream Cheese Mints
Creating these smooth, sweet, and utterly melt-in-your-mouth Cream Cheese Mints is a surprisingly simple and rewarding process. With just a handful of ingredients and a few straightforward steps, you’ll have a batch of perfect candies ideal for weddings, baby showers, holidays, or any time a sweet little bite is desired.
Let’s walk through the easy steps to make this delightful recipe. For your convenience, the complete printable recipe card with exact measurements can be found at the end of this post.
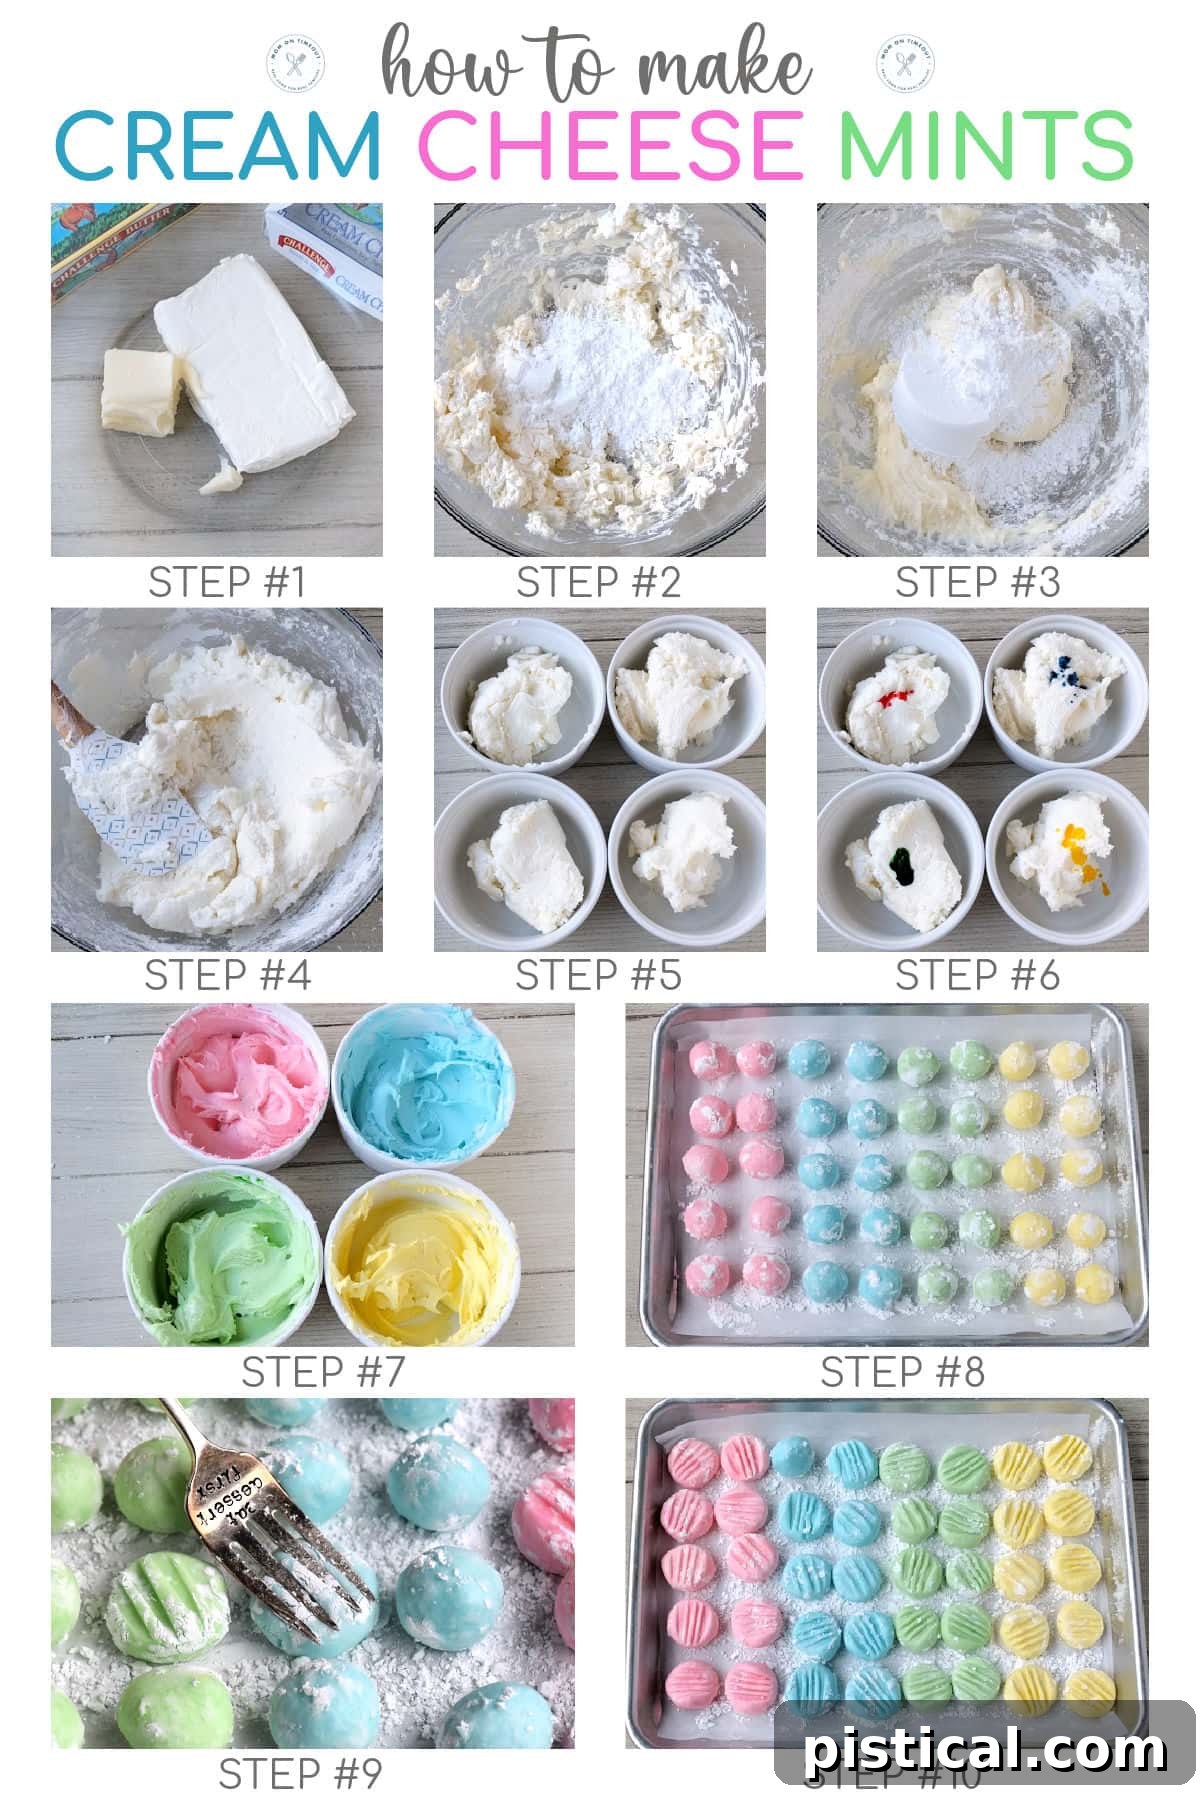
- Prepare the Base: In a spacious mixing bowl, combine the softened full-fat cream cheese and butter. Mix these ingredients thoroughly until the mixture is completely smooth and creamy, with no lumps remaining.
- Initial Sweetening and Flavoring: Add the first cup of powdered sugar to the cream cheese and butter mixture. Continue mixing until this is also smooth. Next, stir in your chosen mint extract (spearmint or peppermint) until it is evenly incorporated throughout the dough, ensuring that classic refreshing flavor.
- Building Structure: Gradually incorporate the remaining powdered sugar into the mixture. The dough will become quite stiff and thick towards the end, so a sturdy mixer (stand mixer or powerful hand mixer) or a strong arm if mixing by hand, will be beneficial. Mix until the dough is smooth, consistent, and firm enough to handle without being overly sticky.
- Divide for Color: Carefully separate the prepared dough into separate bowls. The number of bowls will depend on how many different colors you wish to create for your mints. Four bowls for four colors is a popular choice.
- Coloring the Dough: To each bowl, add a small drop or two of your desired gel food coloring. Begin with a minimal amount, as a little gel coloring goes a long way.
- Achieve Uniform Color: Stir the dough in each bowl until the food coloring is thoroughly and uniformly distributed. Continue mixing until you achieve the desired vibrant pastel or rich shade.
- Chill the Dough: Cover each bowl of colored dough tightly with plastic wrap and refrigerate for at least 2 hours. This chilling period is crucial as it allows the dough to firm up, making it much easier to handle and shape without sticking to your hands.
- Prepare for Shaping: While the dough chills, line two quarter sheet pans (or baking sheets) with parchment paper. Liberally dust the parchment paper with extra powdered sugar. This prevents the mints from sticking as they dry.
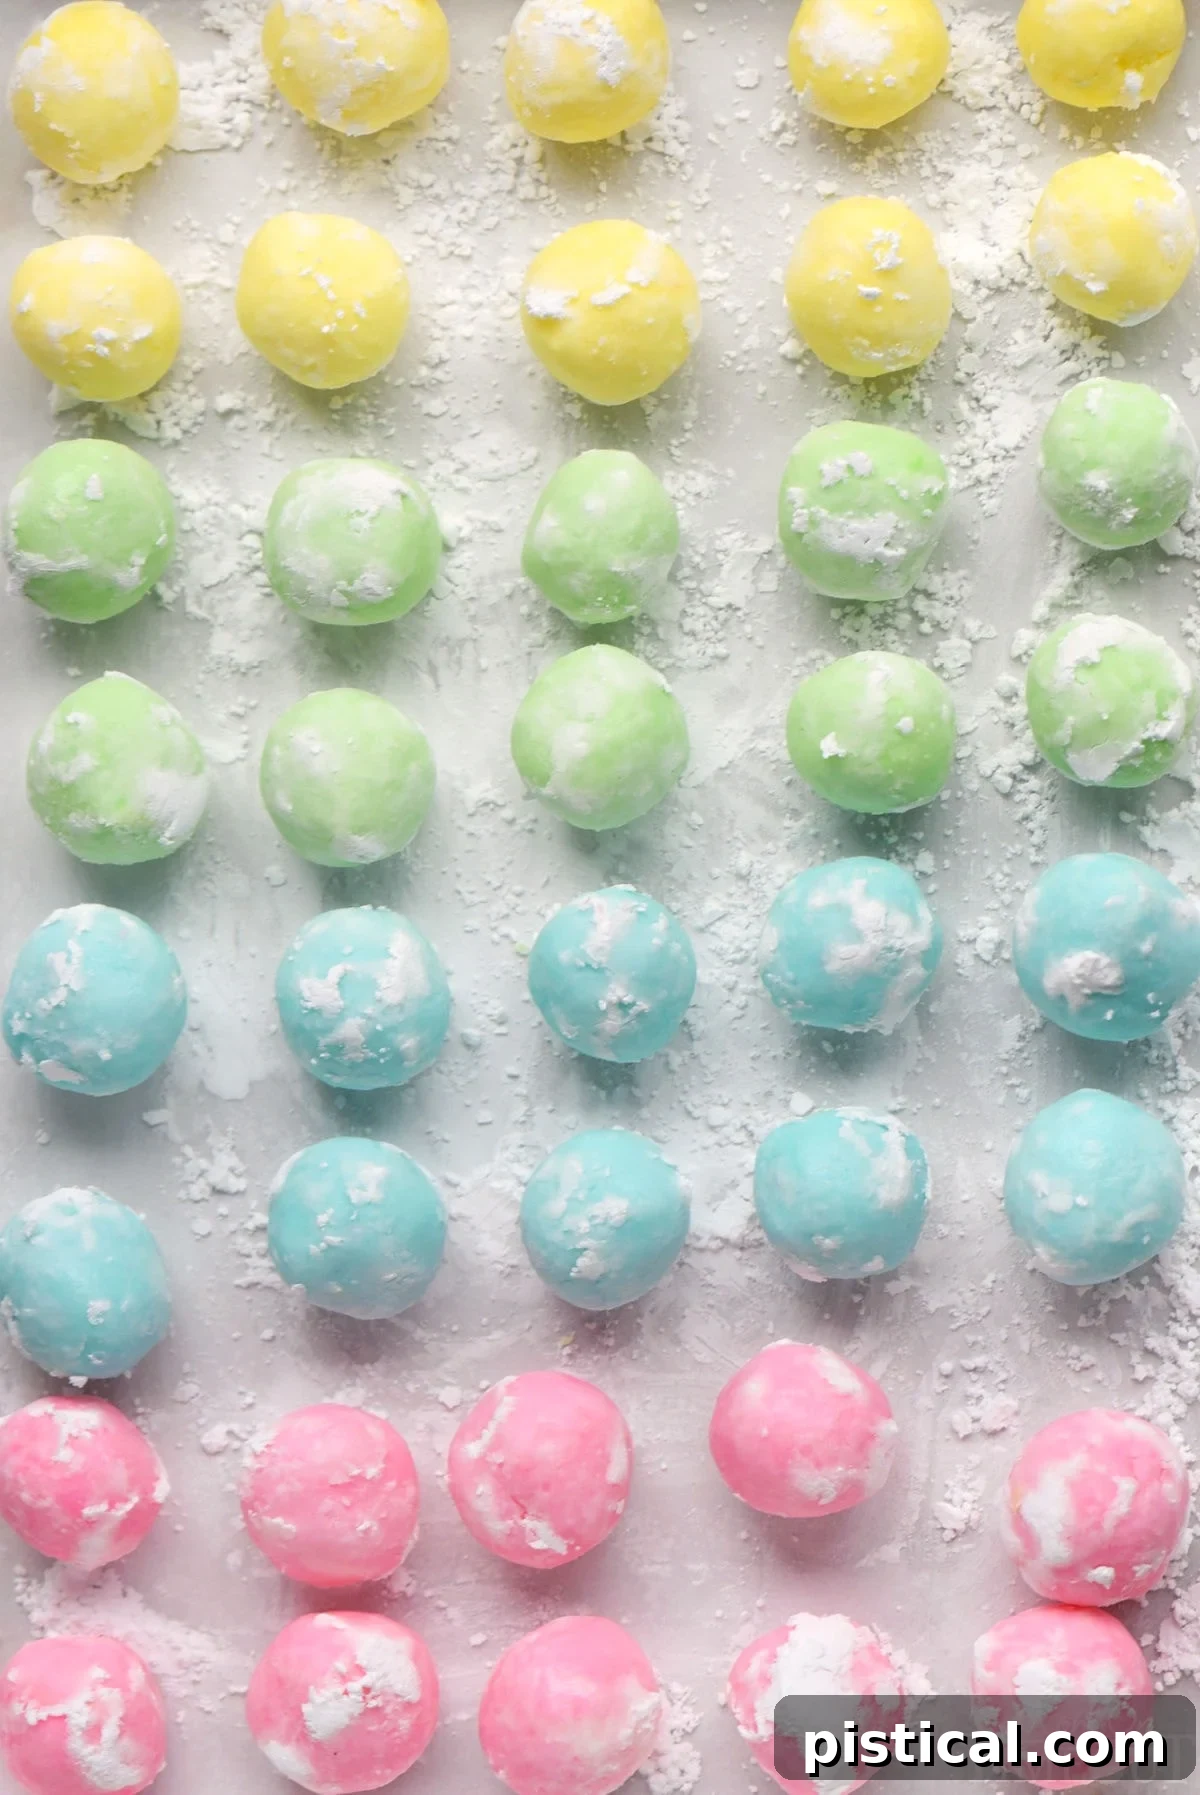
- Shape the Mints: Once the dough is firm, pinch off small, approximately 1-inch amounts. Roll each piece between your palms to form smooth, uniform balls.
- Coat and Place: Roll each formed ball gently in the powdered sugar-dusted sheet pan to ensure an even coating. Place the coated mint balls onto the prepared sheet pans, leaving a little space between each.
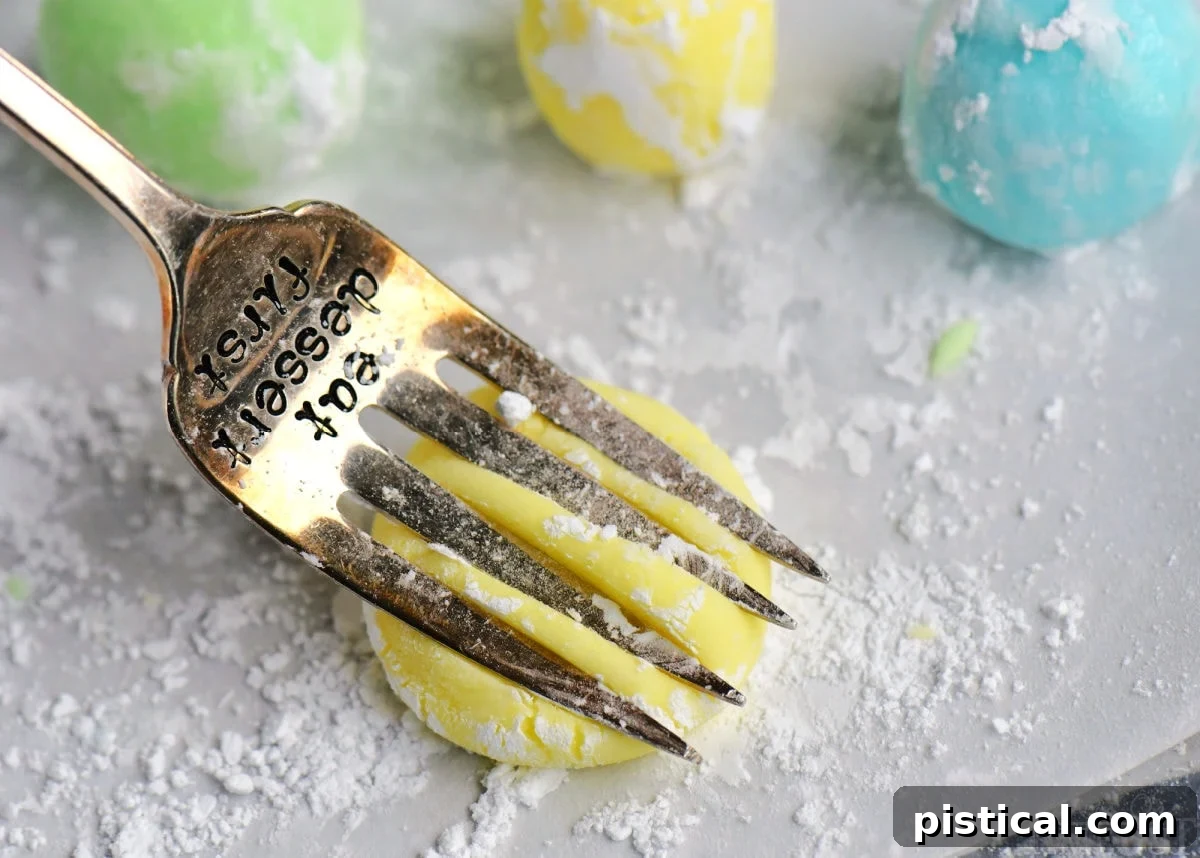
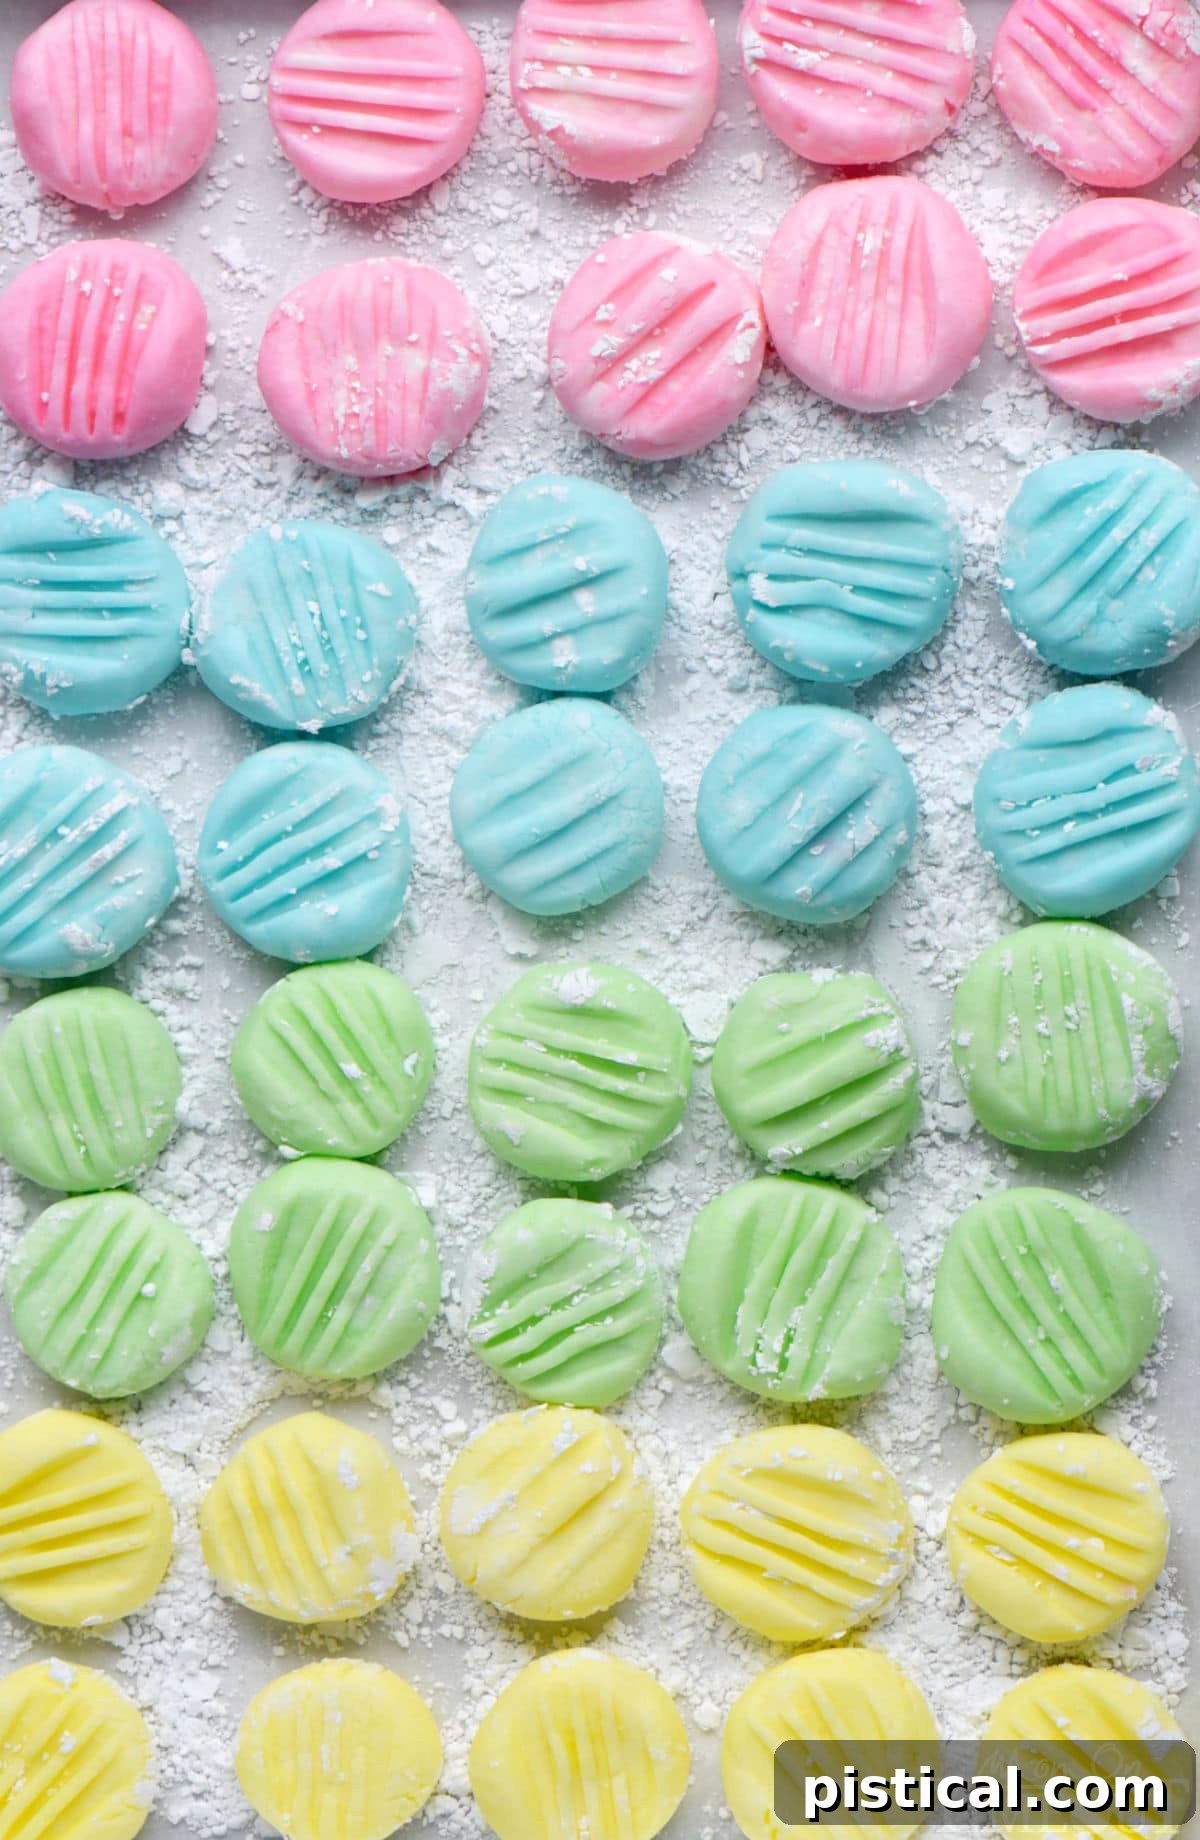
- Create the Classic Indentation: Gently press the tines of a fork into the top of each mint ball. This creates the characteristic ridged pattern. Alternatively, for a smooth, classic disc shape, you can use the bottom of a shot glass, dipping it in powdered sugar first to prevent sticking.
- Allow to Firm Up: Leave the mints uncovered at room temperature for a minimum of 4 hours, or until they are completely firm to the touch. If you notice any moisture on the bottoms, carefully flip them over and allow them to dry further until both sides are firm. This drying process is essential for the mints to harden and maintain their shape.
Optimal Storage for Your Delightful Mints
One of the fantastic advantages of these Cream Cheese Mints is how perfectly they lend themselves to make-ahead preparation, saving you precious time when hosting or preparing for special events. Proper storage ensures they retain their exquisite texture and flavor for extended periods.
- Refrigerator Storage: To keep your mints fresh and firm, store them in an airtight container in the refrigerator for up to 2 weeks. For best results and to prevent any sticking, arrange the mints in layers, separated by sheets of waxed or parchment paper. This simple step will ensure each mint remains pristine until ready to serve.
- Freezer Storage: For longer-term storage, cream cheese mints freeze exceptionally well. Begin by freezing the mints in a single layer on a baking sheet until they are solid. This prevents them from sticking together. Once frozen, transfer them to an airtight freezer-safe container, again separating layers with parchment paper. They can be stored in the freezer for up to 2 months. For the best texture and flavor experience, allow the frozen mints to come to room temperature before serving. This gradual thawing process helps to restore their melt-in-your-mouth creaminess.
Exciting Variations & Customization Ideas
While these mints are undeniably delicious in their classic form, their simple base recipe makes them a perfect canvas for culinary creativity. Here are some fun and inspiring ways to customize your batch of cream cheese mints:
- Explore a Spectrum of Flavors: Don’t limit yourself to just mint! The versatility of this recipe allows for almost any extract to be swapped in. Imagine the delightful taste of vanilla, the sophisticated aroma of almond, or the bright zestiness of lemon extract. Other popular choices include cherry, root beer, or orange extracts. Experiment with your favorites to create unique flavor profiles for different occasions!
- Play with Shapes and Designs: Beyond the traditional fork-pressed rounds, you can get creative with the shapes of your mints. Use small candy molds or miniature cookie cutters (lightly dusted with powdered sugar) to create intricate or themed designs. For a more classic, no-fuss approach reminiscent of old-fashioned butter mints, simply roll the dough into a log, then slice it into small, uniform squares.
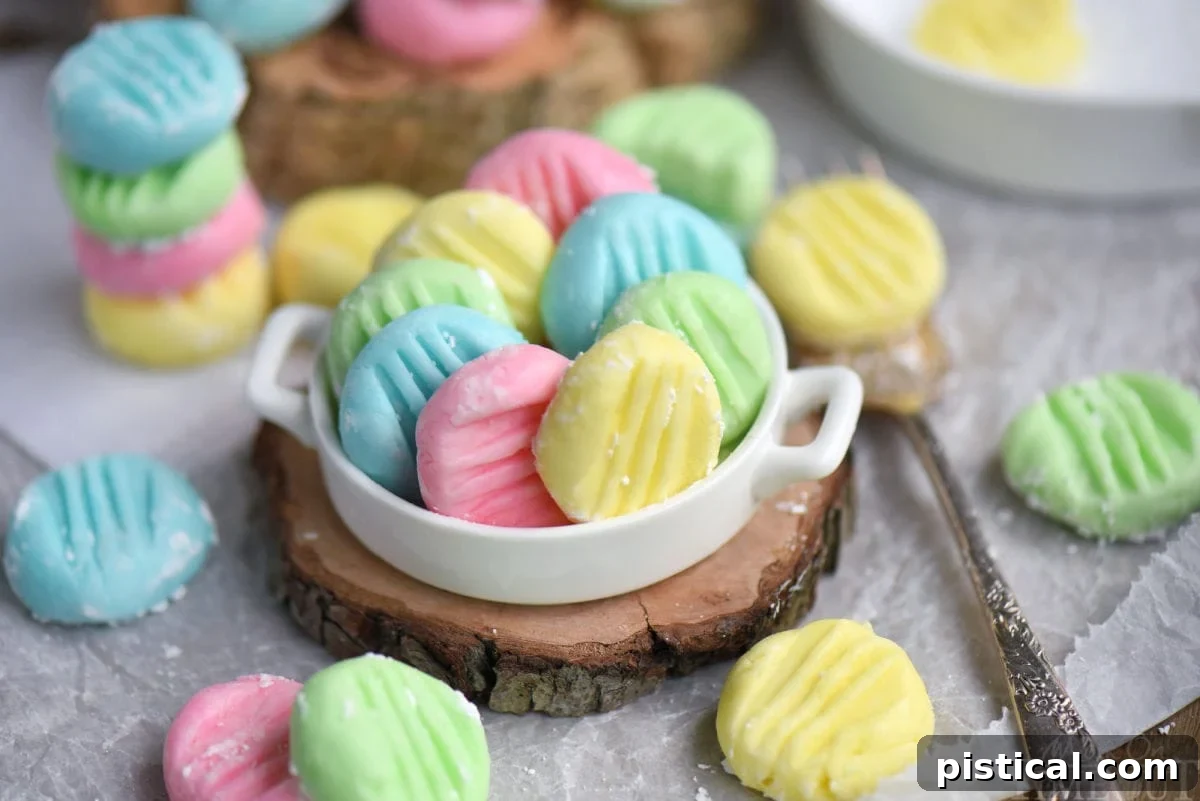
- Embrace a Rainbow of Colors (or None at All!): Food coloring offers an incredible opportunity to personalize your mints. For Christmas, think festive reds and greens. For Easter, soft pastels like pink, blue, yellow, and green are ideal. Pink and blue are perfect for baby showers, while more vibrant shades can add a pop of fun to any general party. If you prefer a more natural or rustic aesthetic, feel free to omit the food coloring entirely for beautiful, creamy white mints.
Frequently Asked Questions About Cream Cheese Mints
Can I make these cream cheese mints in advance?
Absolutely, making these mints in advance is highly recommended and one of their best features! The candies require time to dry and harden at room temperature to achieve their desired texture, so preparing them at least one day ahead is ideal. Don’t worry if the powdered sugar coating seems to absorb into the mints over time; this is a natural part of the drying process. For even longer preparation, cream cheese mints can be stored in the refrigerator for up to two weeks or frozen for several months, making them perfect for busy schedules.
How do you achieve those beautiful pastel colors?
Creating those lovely pastel hues is incredibly easy with the right tools! I personally use Wilton gel food colors because they offer concentrated color without adding excess liquid to the dough, ensuring the consistency remains perfect. Start with a very small amount, like a toothpick’s tip, and gradually add more until you achieve your desired shade. These gel colors allow for a wide range of vibrant to soft pastel tones, letting you customize your mints to match any theme or preference.
Should I use peppermint extract or mint extract in the recipe?
This is a matter of personal preference, as both peppermint and spearmint (often labeled as “mint”) extracts yield delicious results! I typically opt for spearmint extract, which provides a milder, sweeter mint flavor. However, many people adore the bolder, cooler taste of peppermint extract. In fact, when I shared my Chocolate Mint Cream Cheese Buttons recipe, many readers enthusiastically reported that using peppermint extract made them the best treats they had ever tasted! So, feel free to use whichever flavor you prefer to suit your palate.
On that note, don’t feel limited to just mint! This versatile recipe works beautifully with almost any flavor extract. Consider trying cherry for a fruity twist, root beer for a unique nostalgic taste, or vibrant lemon or orange for a zesty burst. The possibilities are truly endless!
Can I use a candy mold with this recipe?
Absolutely! Using candy molds is a fantastic way to create beautifully detailed and uniformly shaped mints. Simply pinch off a small piece of the prepared dough, roll it into a ball, and then lightly roll it in granulated sugar. Press the sugar-coated ball firmly into your chosen candy mold. Gently pop out the shaped mint, and repeat the process. While molds can produce intricate designs, I also love how you can achieve really adorable and beautiful mints with just the simple press of a fork!
Can I dip these mints into chocolate?
Yes, and it’s highly recommended for an extra layer of decadence! Dipping these creamy mints in chocolate transforms them into an even more luxurious treat. You can choose to fully coat them, creating a rich chocolate shell around the minty center, similar to our chocolate-covered mint patties, or simply dip them halfway for a decorative and delicious touch. The combination of cool, creamy mint and rich chocolate is simply divine.
Why are my cream cheese mints not firming up?
If your cream cheese mints aren’t firming up, there are a few common culprits. The most frequent reason is insufficient powdered sugar. The sugar not only sweetens but also provides the structural integrity that allows the mints to dry and harden. Ensure you’ve added the full amount specified in the recipe, gradually, until the dough is quite stiff. Another factor could be high humidity; if your environment is very moist, it will take longer for the mints to dry. Also, make sure they are left uncovered at room temperature for the full resting time (at least 4 hours, or even overnight) and ensure good air circulation around them.
The Ultimate Cream Cheese Mints Recipe

The BEST Cream Cheese Mints recipe you’ll ever try! This incredibly easy recipe makes the most delicious, luscious, melt-in-your-mouth cream cheese mints around! Make them in any color you like! Perfect for Easter, baby showers, weddings and more!
Course: Dessert
Cuisine: American
Keyword: cream cheese mints, cream cheese mints recipe, recipe for cream cheese mints
Prep Time: 10 minutes
Resting Time: 4 hours
Total Time: 4 hours 10 minutes
Servings: 96 mints
Calories: 49kcal
Author: Trish – Mom On Timeout
Ingredients
- 8 ounces cream cheese, full fat, softened
- 4 tablespoons salted butter, softened
- 2 pounds powdered sugar
- ½ to 1½ teaspoons mint extract or peppermint extract
- gel food coloring, optional
- ½ cup powdered sugar, for rolling mints
Instructions
- Combine cream cheese and butter in a large mixing bowl and mix until smooth.
- Add 1 cup of powdered sugar and mix until smooth.
- Add the mint extract and mix until combined.
- Gradually, add the remaining powdered sugar until smooth and consistent. You can do this with a stand mixer, hand mixer, food processor or by hand. The dough will get quite stiff towards the end.
- Separate the mixture into four separate bowls, or however many different colors you want.
- Add a small amount of food color to each bowl and stir in until the color is uniform.
- Cover and refrigerate for 2 hours or until firm enough to handle. You don’t want it sticking to your hands.
- Line two quarter sheet pans with parchment paper and liberally dust with powdered sugar. Set aside.
- Pinch off small amounts of the dough and form into 1-inch balls.
- Roll each ball in powdered sugar and place on prepared sheet pans.
- Gently press the tines of a fork into the top of each ball. (You can also use the bottom of a shot glass if you don’t want the lines. Just dip the bottom of the glass into powdered sugar to keep it from sticking.)
- Let stand, uncovered, for at least 4 hours or until the mints are firm. If the bottoms have any moisture, flip over and let stand again until the bottoms of the mints are also firm.
Notes
Storage Information: Store mints in an airtight container, separating layers with parchment or waxed paper, for up to 2 weeks in the refrigerator or up to 3 months in the freezer. Let thaw at room temperature before serving.
Tools and Equipment (affiliate links): Glass Mixing Bowls | Quarter Sheet Pans | Parchment Sheets | Electric Mixer (Hand Mixer or Stand Mixer)
Please see post above for more information, recipe tips and frequently asked questions.
Nutrition
Calories: 49kcal | Carbohydrates: 10g | Protein: 0.2g | Fat: 1g | Saturated Fat: 1g | Polyunsaturated Fat: 0.1g | Monounsaturated Fat: 0.3g | Trans Fat: 0.02g | Cholesterol: 4mg | Sodium: 11mg | Potassium: 4mg | Sugar: 9g | Vitamin A: 46IU | Calcium: 3mg | Iron: 0.01mg
More Irresistible Candy Recipes to Try
If you’ve fallen in love with making your own sweet treats, we have a treasure trove of other easy and delicious candy recipes waiting for you to discover. Expand your confectionery skills with these delightful options:
- Divinity Candy: A light, airy, and fluffy classic that melts in your mouth.
- Penuche Recipe: A rich, buttery brown sugar fudge that’s incredibly satisfying.
- Buckeyes: Peanut butter balls dipped in chocolate, a beloved treat for peanut butter lovers.
- Martha Washington Candy: A sweet, coconutty, pecan-filled confection dipped in chocolate.
- Saltine Cracker Toffee: An addictive blend of salty crackers, caramel, and chocolate that’s surprisingly easy.
- Better Than Anything Toffee Recipe: A crunchy, buttery toffee that lives up to its name.
- Raspberry Truffles: Elegant and rich chocolate truffles with a delightful raspberry flavor.
We hope you enjoy crafting these beautiful and delicious cream cheese mints as much as we do. They truly add a special touch to any occasion and are a joy to share with loved ones. Happy baking!