
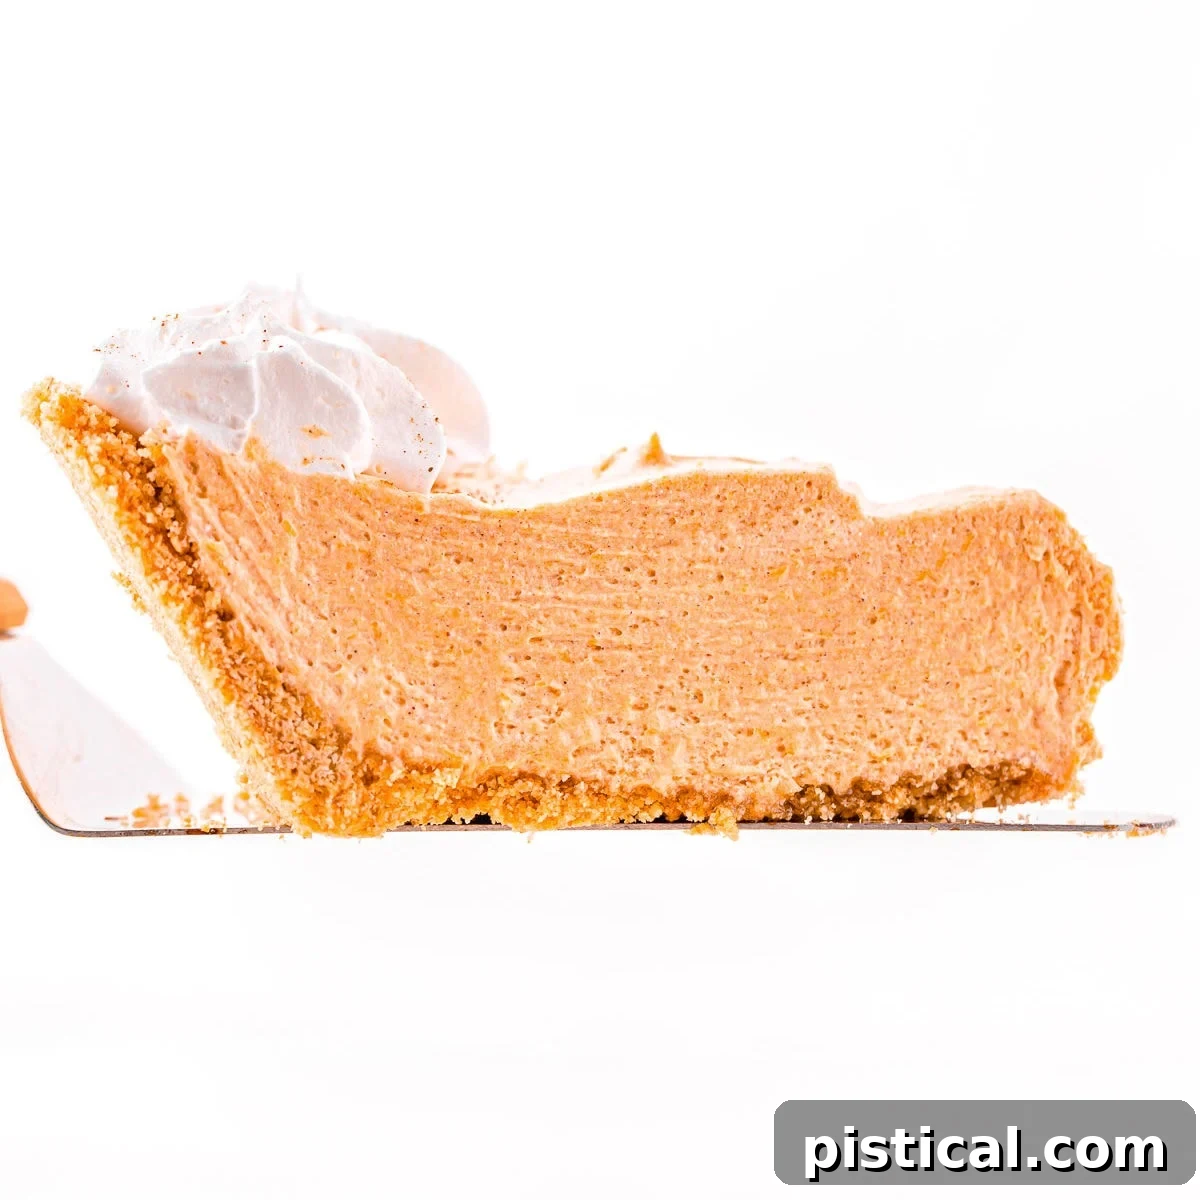
Delightfully Easy No-Bake Pumpkin Pie Recipe: Your New Holiday Favorite
This scrumptious No-Bake Pumpkin Pie offers a delightful twist on the traditional baked version, delivering all the beloved, warm flavors without ever needing to turn on your oven. Featuring a dreamy, creamy filling perfectly nestled in a buttery graham cracker crust, this quick and easy pie is an absolute game-changer. It’s the ideal dessert for busy holidays, cozy family gatherings, or any time you desire a truly fuss-free, yet utterly impressive, sweet treat.
If your heart beats for pumpkin desserts, you’re in for a treat! Explore some of our other no-bake favorites:
- No-Bake Pumpkin Cheesecake
- Pumpkin Mousse
- Pumpkin Lasagna
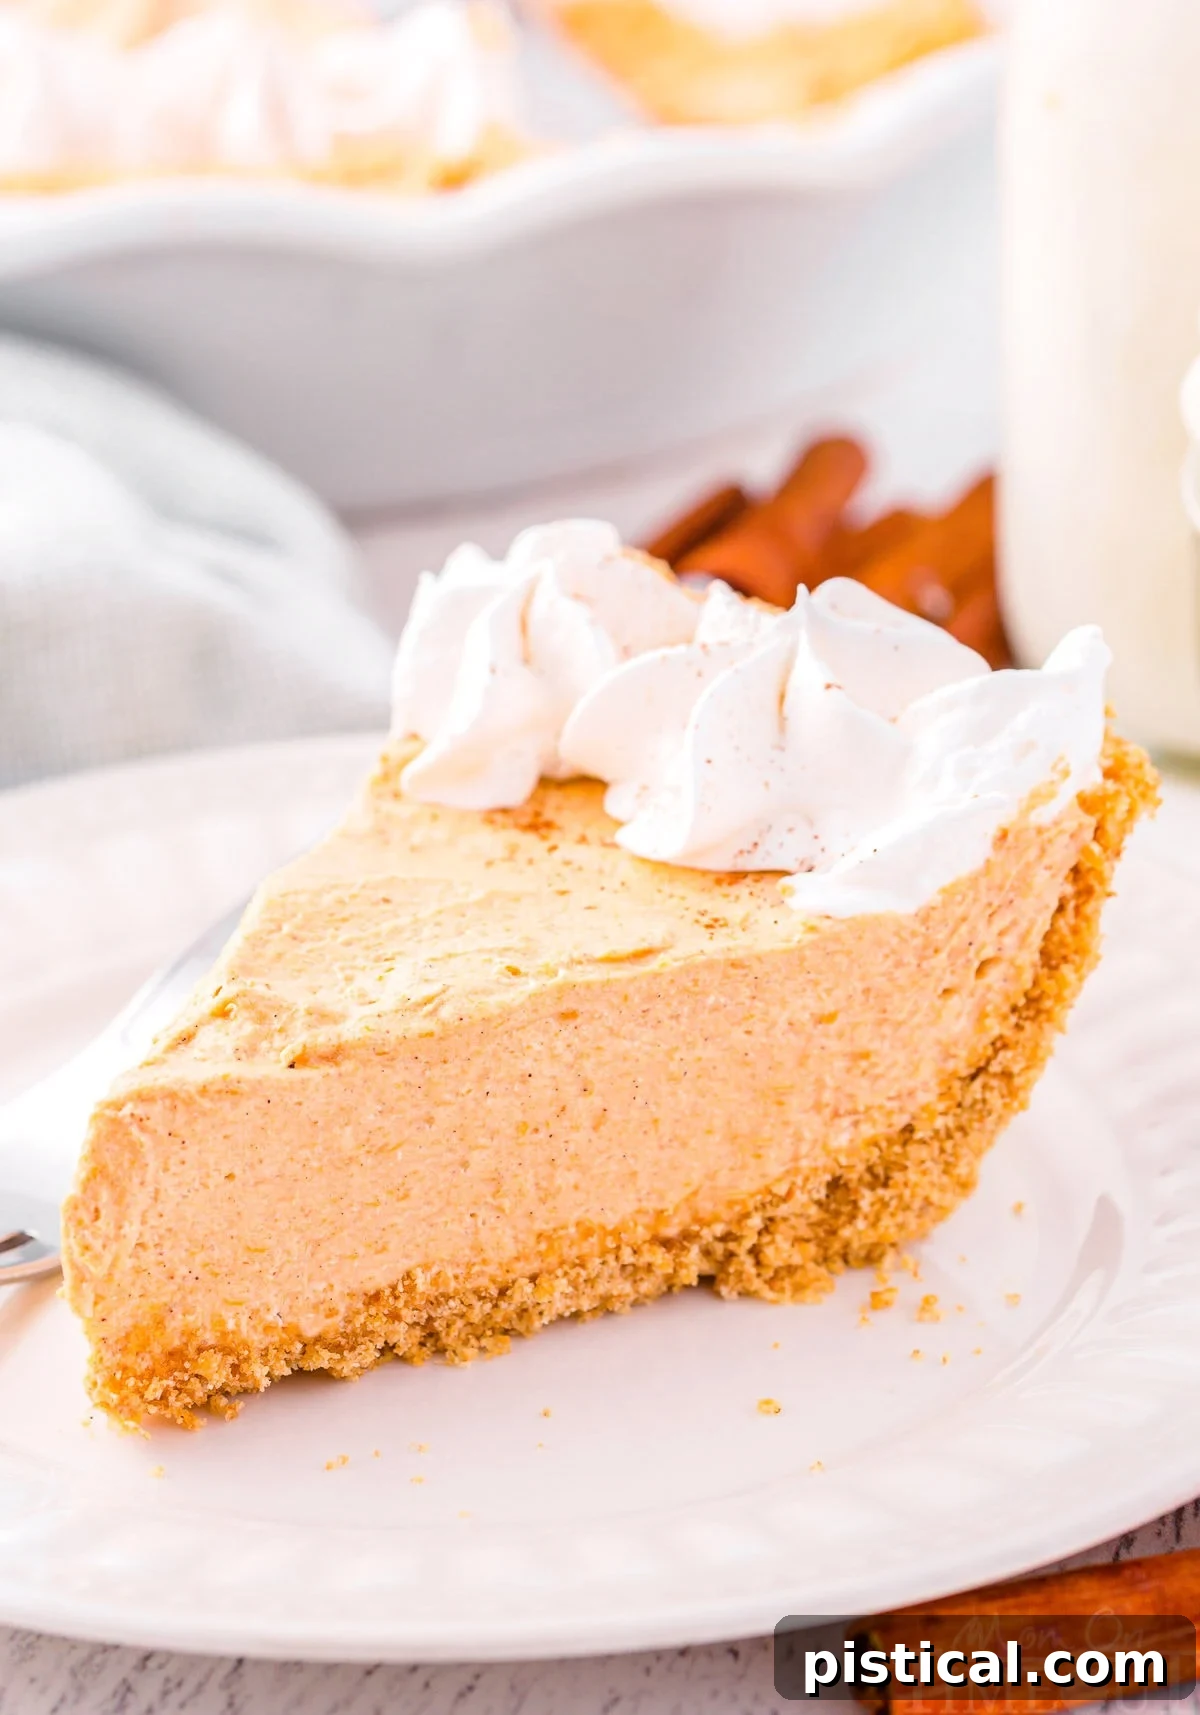
Experience the Creamiest No-Bake Pumpkin Pie
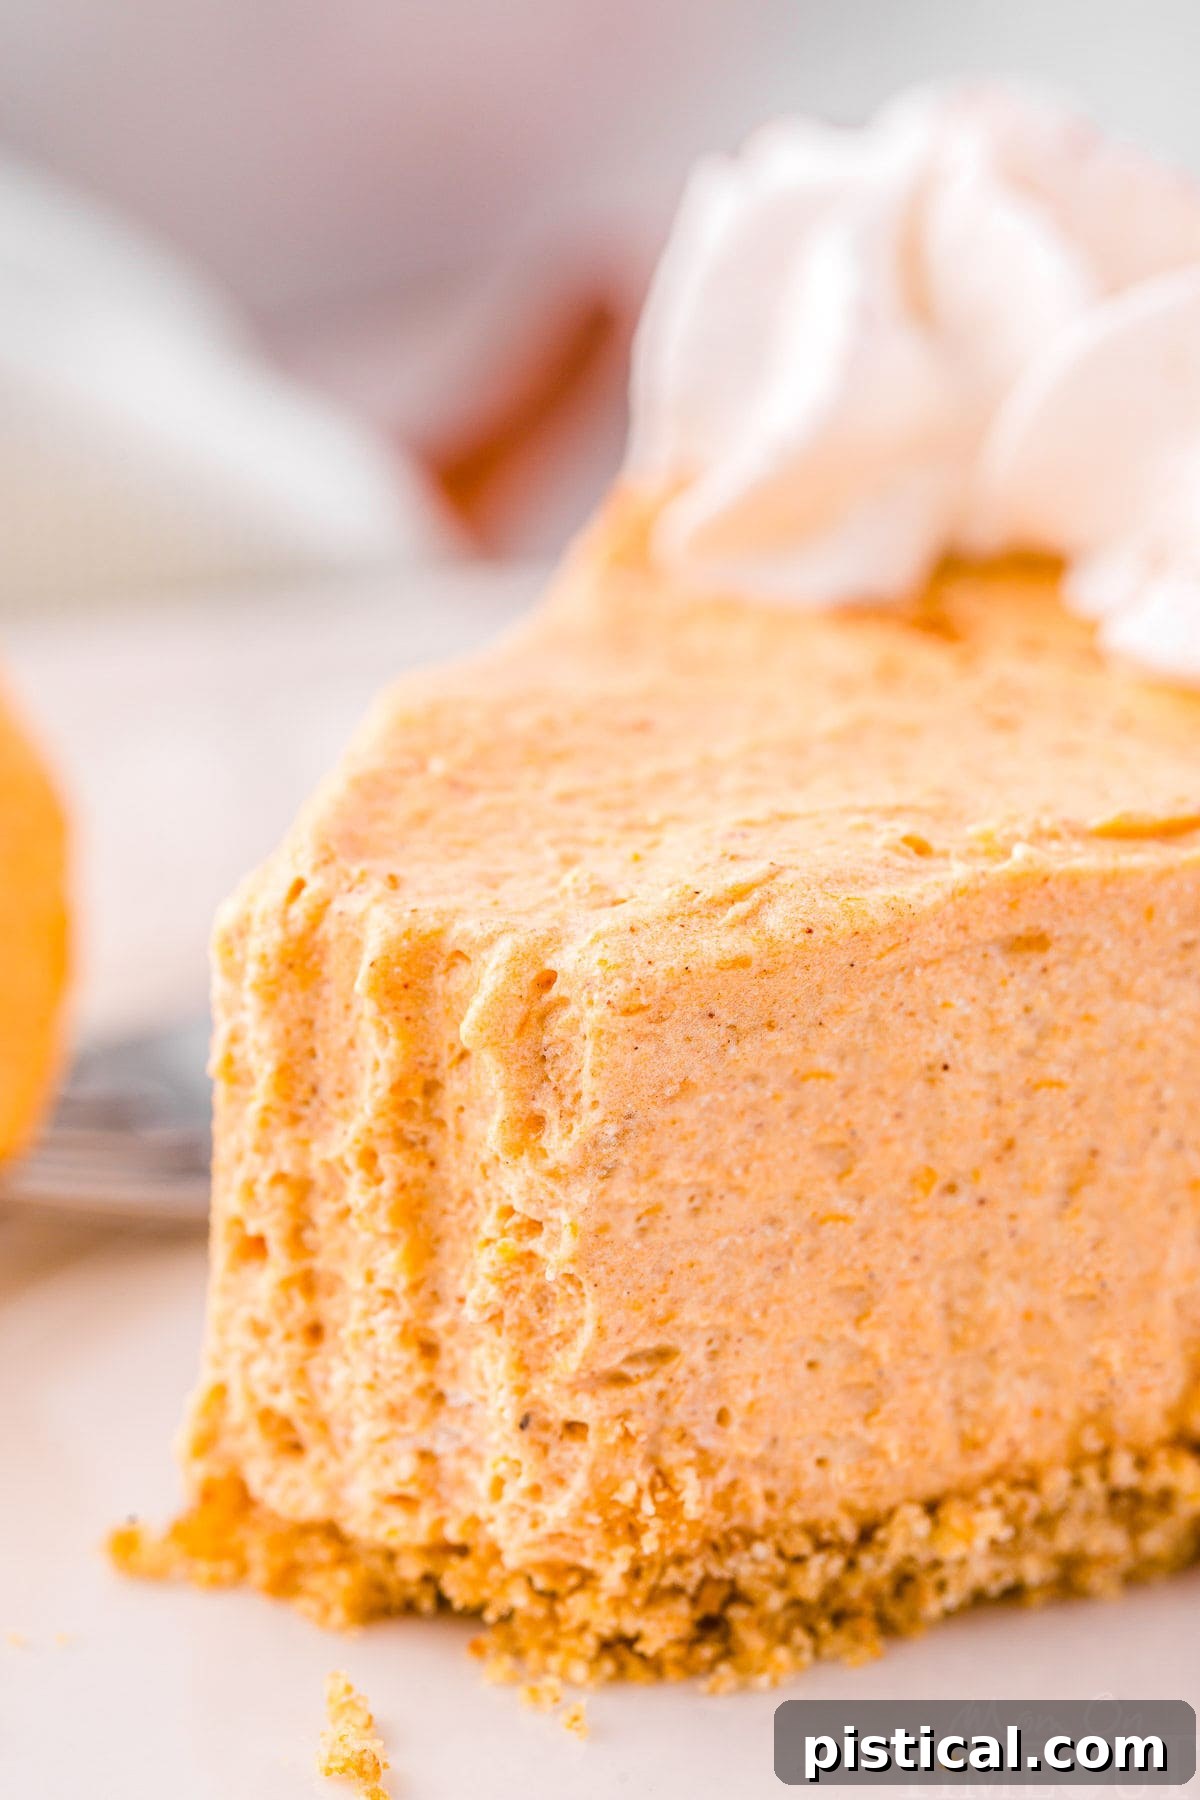
Imagine a pumpkin pie that’s not just rich but exceptionally creamy and wonderfully fluffy. This No-Bake Pumpkin Pie brings that vision to life, offering a truly indulgent dessert that comes together in mere minutes, making it the ultimate make-ahead treat. Finish it with a generous dollop of freshly whipped cream and a light dusting of pumpkin pie spice for a truly delightful presentation and an explosion of flavor. This pie is specifically crafted for those who adore the classic, comforting tastes of pumpkin pie but prefer to bypass the complexities and time commitment of traditional baking.
Our delightful recipe masterfully blends smooth, pure pumpkin puree with the sweet, ethereal texture of marshmallow fluff, all perfectly seasoned with aromatic pumpkin pie spice. This luscious filling rests upon a crisp, buttery graham cracker crust, creating a harmonious balance of textures and tastes. Whether you’re preparing for festive holiday gatherings, a cozy fall evening, or simply seeking a hassle-free yet utterly delicious dessert, this easy no-bake recipe is a perfect choice to savor the classic taste of pumpkin pie with minimal effort.
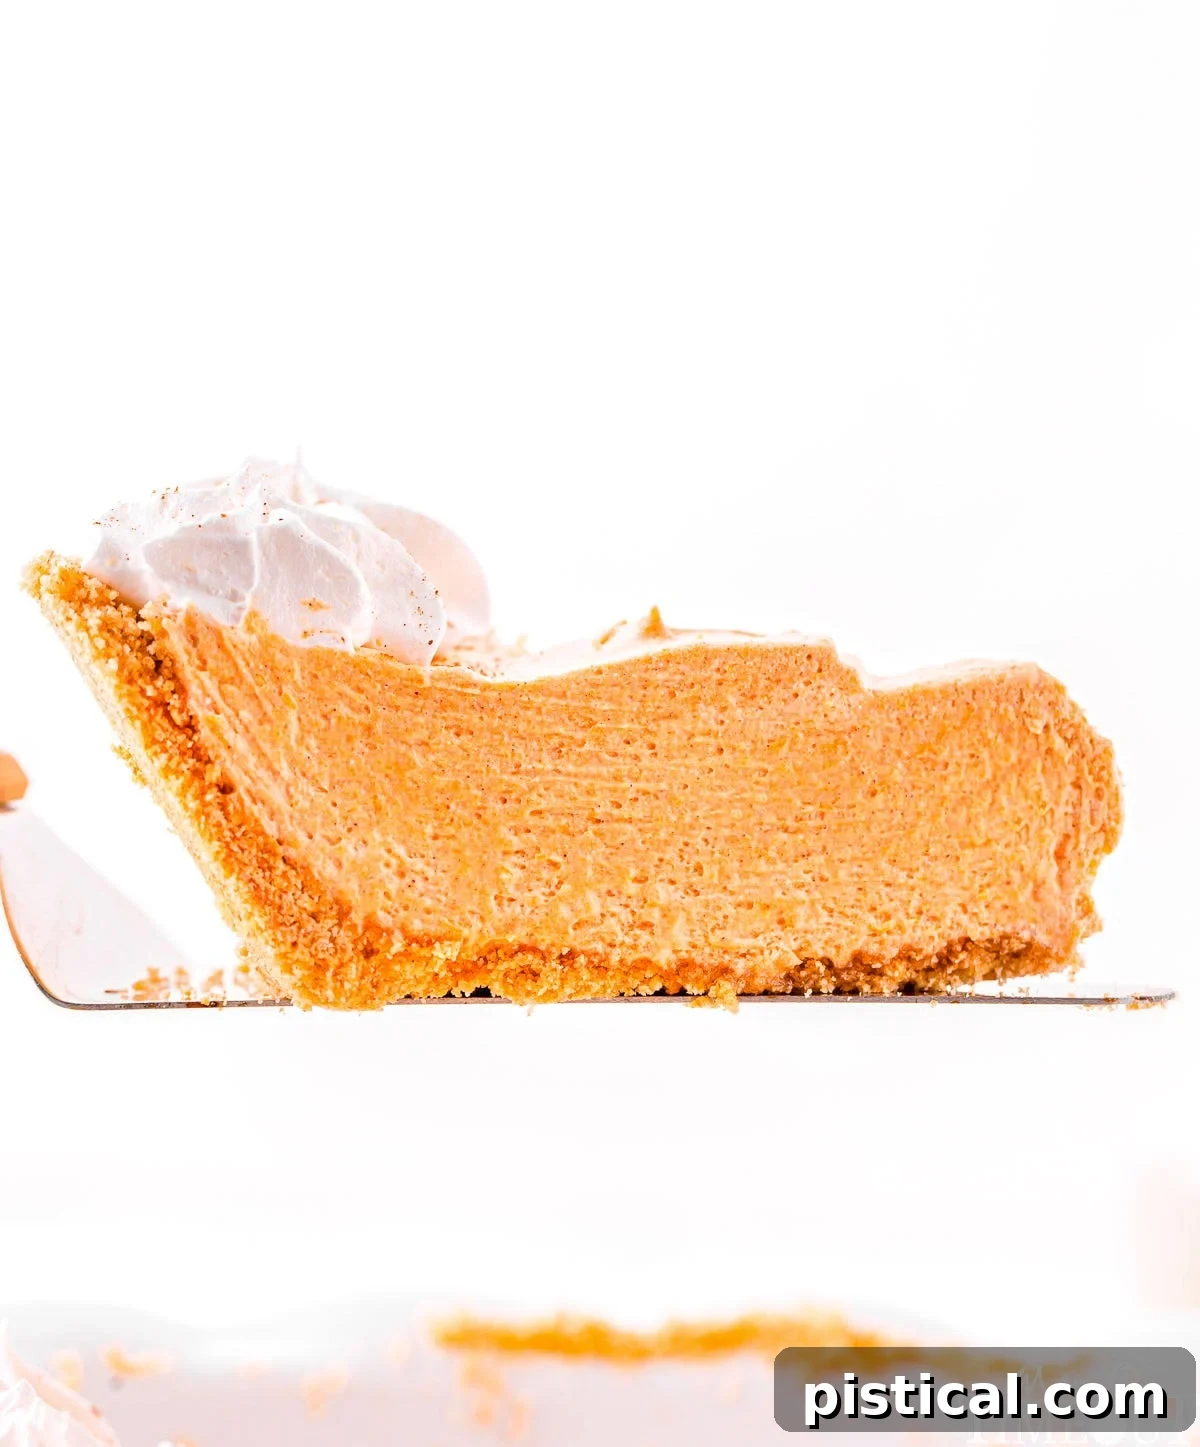
Why This No-Bake Pumpkin Pie Will Become Your Go-To Recipe
This recipe isn’t just a dessert; it’s a celebration of convenience and flavor, offering a delightful twist on the beloved traditional pumpkin pie. It promises all the familiar, comforting flavors you adore, but with a fraction of the effort typically required. Prepare to impress your family and friends with its incredibly creamy texture and rich, authentic pumpkin taste. Here are just a few reasons why this no-bake pie will quickly earn a permanent spot in your recipe collection:
- Effortlessly No-Bake: During the bustling holiday season, oven space can be a precious commodity. This no-bake marvel frees up your oven for other dishes, making it an indispensable part of your festive meal planning. The ease of preparation, requiring no baking at all, truly cannot be beaten!
- Luxuriously Rich and Creamy: The secret to this pie’s exquisite texture lies in its carefully selected ingredients. High-quality pumpkin puree provides a deep, authentic pumpkin flavor and a rich base. Marshmallow fluff and whipped topping are then gently folded in, transforming the filling into an irresistibly creamy, light, and airy delight that melts in your mouth.
- Perfectly Make-Ahead: Like many classic pies, this no-bake version is inherently suited for advance preparation. This is a huge advantage when planning for special occasions or simply looking to save time. You can easily assemble this pie the day before, refrigerate it covered, and then simply add your garnishes just before serving. This allows you more time to relax and enjoy the moment with your loved ones.
- Simple Ingredients, Big Flavor: Despite its gourmet taste and luxurious texture, this pie calls for a minimal list of readily available ingredients. This simplicity ensures that anyone, regardless of their baking experience, can create a show-stopping dessert with confidence.
- Customizable to Your Liking: While delicious on its own, this no-bake pie offers endless possibilities for customization. Experiment with different crusts, vary your garnishes, or even swirl in some caramel for an extra touch of decadence.
Essential Ingredients for Your No-Bake Pumpkin Pie
One of the best aspects of this quick and easy recipe is its straightforward ingredient list, requiring just seven items – including the components for our delicious graham cracker crust! The creamy filling itself needs only four core ingredients, making it incredibly accessible. For ultimate convenience, consider opting for a store-bought graham cracker crust. Below is a concise overview of what you’ll need. For precise measurements and the full, printable recipe, remember to scroll to the very end of this post.
- Pumpkin Puree: The star of our pie! It’s absolutely crucial to use 100% pure pumpkin puree, not pumpkin pie filling. Pumpkin pie filling contains added spices and sugar, which would alter the carefully balanced flavor profile of this recipe. Look for cans labeled “100% Pure Pumpkin” for that authentic, earthy pumpkin flavor.
- Marshmallow Fluff: This magical ingredient contributes to the pie’s lovely sweetness and, more importantly, imbues the filling with its signature light, fluffy, and incredibly smooth texture. It’s the secret to that dreamy, melt-in-your-mouth consistency.
- Pumpkin Pie Spice: A quintessential fall flavor blend, pumpkin pie spice is a mix of cinnamon, nutmeg, ginger, and cloves. It’s essential for giving the pie its warm, cozy, and unmistakable holiday aroma and taste, beautifully enhancing the natural flavor of the pumpkin.
- Whipped Topping: (such as Cool Whip, thawed) This is key to achieving that creamy, airy, and stable filling. If you prefer a homemade touch, feel free to substitute with 3 cups of your own homemade whipped cream for an even richer, fresher flavor. Ensure it’s whipped to stiff peaks before folding in.
- Graham Cracker Crust Ingredients: For a homemade crust that’s both buttery and perfectly crunchy, you’ll need:
- Graham Crackers: Crushed finely to form the base. About one sleeve typically yields the right amount.
- Brown Sugar: Adds a touch of caramel sweetness and helps bind the crust together. Use light brown sugar, packed.
- Melted Butter: Binds the graham cracker crumbs and sugar, creating a firm, rich, and flavorful crust. Salted butter is recommended for a subtle savory balance.
Equipment You’ll Need:
While this is a no-bake recipe, a few basic kitchen tools will make the process even smoother:
- Medium Saucepan: For gently heating and combining the pumpkin filling ingredients.
- Mixing Bowls: Several sizes for preparing the crust and combining the filling.
- Whisk or Spatula: For stirring the filling and gently folding in the whipped topping.
- 9-inch Pie Pan: A deep-dish pie pan is recommended to perfectly accommodate the generous filling.
- Food Processor or Blender (Optional): For quickly crushing graham crackers into fine crumbs. A sturdy ziplock bag and rolling pin work just as well!
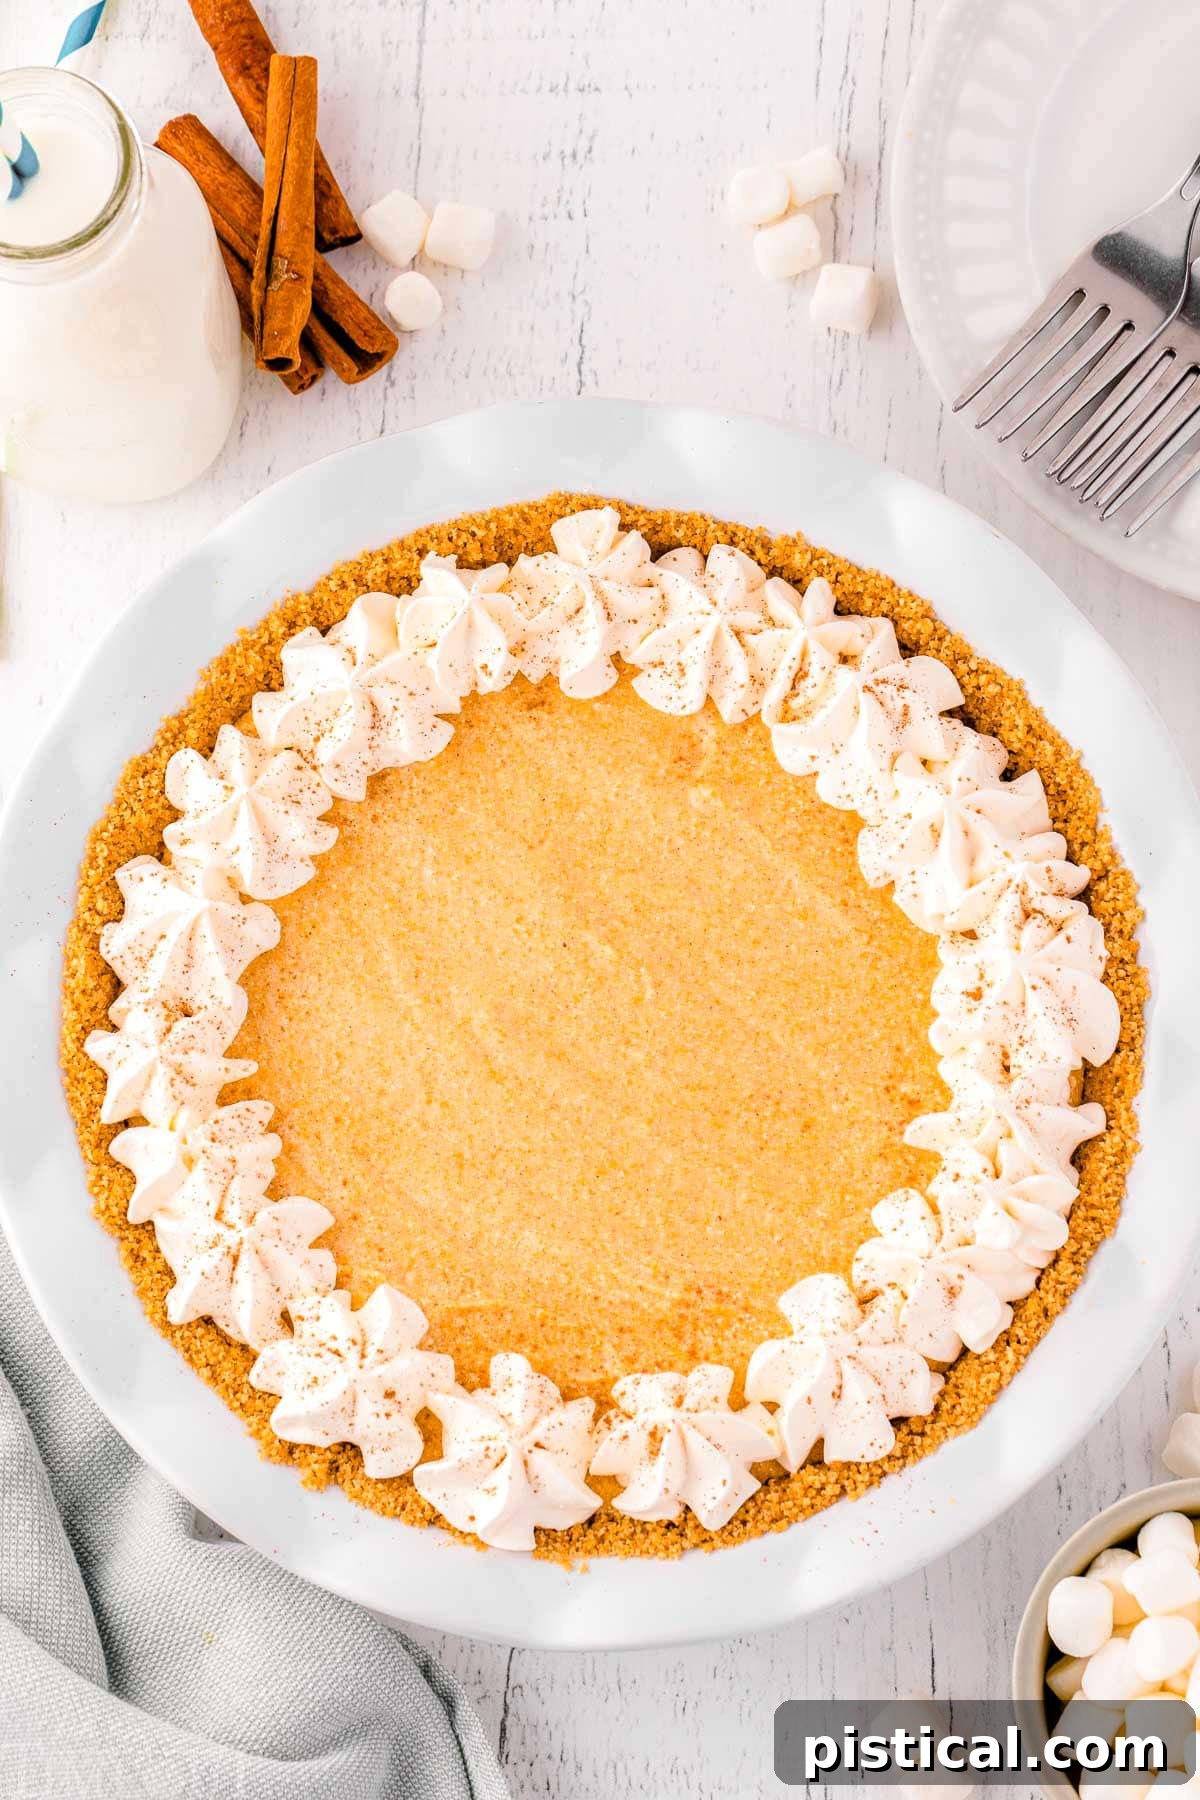
Crafting Your Perfect No-Bake Pumpkin Pie: Step-by-Step Guide
This simple, quick, and absolutely scrumptious dessert is guaranteed to impress with its velvety smooth filling and delightful graham cracker crust. Follow these clear steps to create a masterpiece that requires no oven time. As always, the full printable recipe card with precise measurements and detailed instructions can be found at the very end of this post.
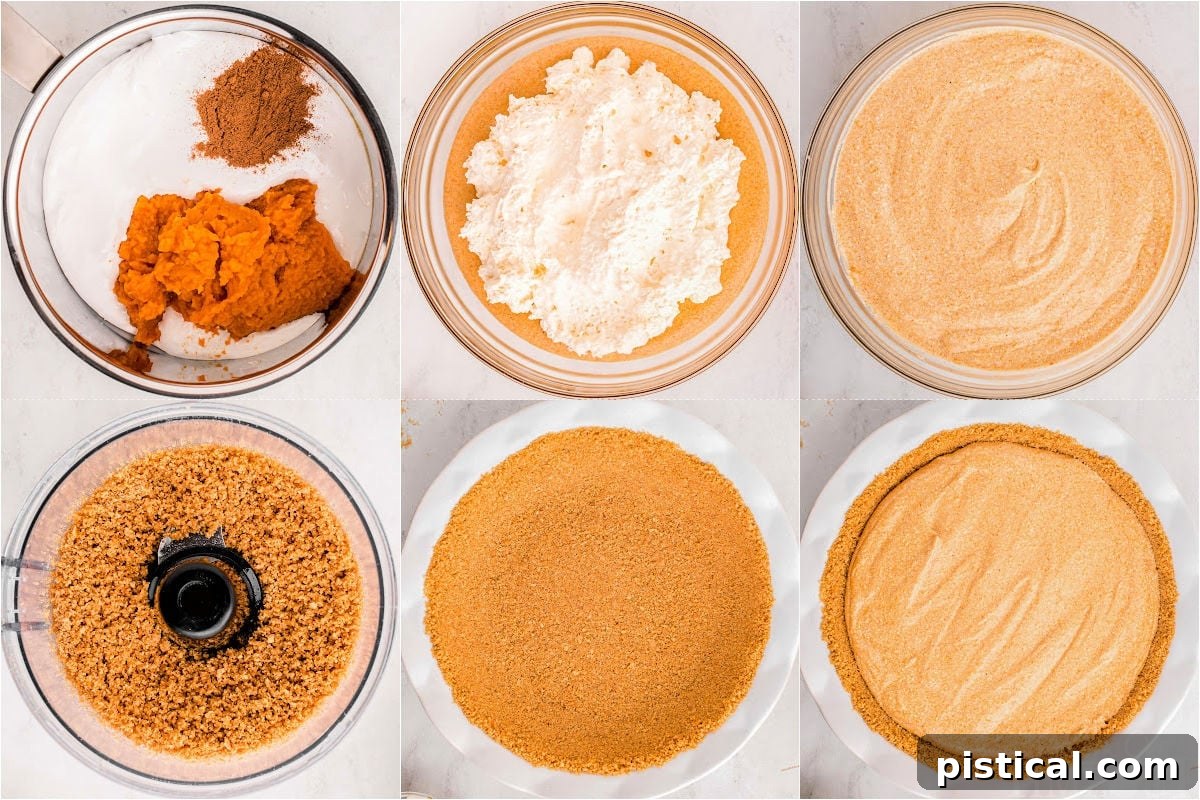
Step 1: Prepare the Irresistibly Creamy Filling
- In a medium saucepan, combine the pumpkin puree, marshmallow fluff, and pumpkin pie spice. Place the saucepan over medium-low heat.
- Gently heat the mixture for 5 to 10 minutes, stirring frequently with a whisk or spatula. Continue until all the marshmallow fluff has completely melted and all ingredients are thoroughly incorporated into a smooth, uniform pumpkin mixture. Be careful not to overheat or boil.
- Once smooth, transfer the warm pumpkin mixture to a clean bowl. Place the bowl in the refrigerator to chill. This cooling step is crucial to ensure the whipped topping maintains its light and airy texture when folded in later. Chill until it reaches room temperature or is slightly cool to the touch.
Step 2: Construct the Buttery Graham Cracker Crust
- In a separate bowl, combine the finely crushed graham crackers with the light brown sugar. Stir well to ensure the sugar is evenly distributed throughout the crumbs. For best results, use a food processor to achieve very fine crumbs.
- Add the melted butter to the graham cracker and brown sugar mixture. Stir thoroughly with a fork or pulse briefly in a food processor until the mixture resembles wet sand and is fully combined. The butter ensures the crust will hold its shape.
- Carefully press the graham cracker mixture evenly into the bottom and up the sides of a 9-inch pie pan. Use the back of a spoon or your fingers to firmly pack the crust, creating a solid and uniform base for your pie. For an extra firm crust, you can refrigerate it for about 15-20 minutes while the pumpkin mixture chills further.
Step 3: Assemble and Chill Your Masterpiece
- Once the pumpkin mixture has cooled to room temperature, gently fold in the thawed whipped topping until it is just combined. Overmixing can deflate the whipped topping, leading to a less airy filling, so mix with a light hand.
- Carefully spoon the luscious filling on top of your prepared graham cracker crust. Use a spatula to gently smooth the surface, ensuring an even layer.
- Cover the pie tightly with plastic wrap or aluminum foil. Refrigerate for a minimum of 6 hours, or ideally, overnight. This chilling period is essential for the pie to set properly, resulting in a firm yet creamy texture perfect for slicing.
- When ready to serve, garnish with additional whipped cream and a light dusting of pumpkin pie spice, if desired. Slice into generous portions and enjoy the incredible flavors of your homemade no-bake pumpkin pie!
Elevate Your Pie: Looking to enhance your no-bake pumpkin pie with additional gourmet toppings? Consider adding a sprinkle of candied pecans for a delightful crunch, or a decadent drizzle of caramel sauce for an extra layer of sweetness!
Storage, Freezing, and Make-Ahead Tips
Proper storage is key to enjoying your delicious No-Bake Pumpkin Pie for days to come. Here’s everything you need to know:
- Refrigerated Storage: Any leftover pie should be transferred to an airtight container or tightly covered with plastic wrap in the refrigerator. It will maintain its freshness and delightful texture for up to 4 days.
- Freezing for Long-Term: Yes, this pie can be frozen! For longer storage, cover the entire pie tightly with plastic wrap, then an additional layer of aluminum foil. Store it in an airtight, freezer-safe container or bag in the freezer for up to 3 months. When you’re ready to enjoy, thaw the pie overnight in the refrigerator. Please note that freezing can slightly alter the texture, making it a bit softer upon thawing, but the flavor remains fantastic.
- Excellent Make-Ahead Option: This pie truly shines as a make-ahead dessert. You can prepare the entire pie a day or even two days in advance. Simply follow all the assembly steps, but hold off on adding any garnishes or toppings until just before you’re ready to serve. This strategy significantly reduces stress on the day of your event, allowing you to focus on other preparations.
Trish’s Expert Tips for the Perfect No-Bake Pumpkin Pie
- Gentle Folding is Key: When it comes time to incorporate the whipped topping into the pumpkin mixture, remember to fold gently. This technique is vital for maintaining that light, airy, and fluffy texture in your pie filling. This tip applies equally if you choose to use homemade whipped cream instead of store-bought topping.
- Individual Mini Pies: For parties, picnics, or simply delightful portion control, consider making mini no-bake pumpkin pies! Use individual serving cups, small jars, or muffin tins lined with paper liners for a charming and easy-to-serve dessert.
- Opt for a Deep-Dish Pan: This recipe yields a generous amount of creamy filling. A deep-dish pie pan works best to comfortably accommodate all the lusciousness, ensuring you get a substantial slice every time.
- Get Creative with Garnishes: While whipped cream and a dusting of pumpkin pie spice are classic and perfect, don’t hesitate to experiment! Other fantastic additions include crunchy candied pecans, a luxurious drizzle of caramel sauce, or even a sprinkle of crushed ginger snaps or toffee bits for an added layer of texture and flavor.
- Achieve Clean Slices: For impeccably neat slices, dip your knife in hot water and wipe it dry before each cut when serving the pie. This helps the knife glide smoothly through the creamy filling and firm crust without sticking or tearing.
- Don’t Rush the Chill Time: The 6-hour minimum chilling time (or overnight) is non-negotiable for a perfectly set pie. Resist the urge to cut corners; adequate chilling ensures the pie holds its shape beautifully and achieves its ideal creamy consistency.
Frequently Asked Questions About No-Bake Pumpkin Pie
Can this no-bake pumpkin pie be frozen?
Yes, absolutely! While the texture might become slightly softer upon thawing compared to its fresh state, it freezes wonderfully. To freeze, ensure the pie is tightly covered with plastic wrap, followed by an additional layer of aluminum foil. Store it in an airtight, freezer-safe container in the freezer for up to 3 months. When ready to serve, simply transfer it to the refrigerator to thaw overnight. Enjoy it chilled!
Can I use a different type of crust for this pie?
Certainly! While the graham cracker crust is a classic choice, feel free to get creative with your base. A gingersnap crust would add a delightful spicy kick, an OREO crust offers a rich chocolatey contrast, and a vanilla wafer crust provides a lighter, buttery flavor. Any of these options would be delicious! You can also save time by using a store-bought graham cracker crust.
Can I make this pie ahead for Thanksgiving or other holidays?
Yes, this pie is an excellent make-ahead option! You can prepare the entire pie, including the crust and filling, one to two days in advance. Just make sure to cover it tightly with plastic wrap and store it in the refrigerator. Add your desired toppings and garnishes (like whipped cream and pumpkin pie spice) right before serving to keep them fresh and visually appealing.
Is it possible to make this recipe gluten-free?
Yes! To make this no-bake pumpkin pie gluten-free, simply substitute regular graham crackers with certified gluten-free graham crackers for the crust. The rest of the filling ingredients are typically gluten-free, but always check the labels of your marshmallow fluff and whipped topping to be certain.
Can I use fresh pumpkin puree instead of canned?
While canned 100% pumpkin puree is recommended for its consistent texture and moisture content, you can use homemade fresh pumpkin puree. Ensure your fresh puree is very thick and has as much excess moisture removed as possible to prevent the pie from being too runny. You might need to gently cook down fresh puree on the stovetop to reduce moisture before combining it with the marshmallow fluff.
Explore More Irresistible Pumpkin Dessert Recipes
If you’ve fallen in love with the comforting flavors of pumpkin, we have even more delightful recipes for you to try:
- Pumpkin Cupcakes with Cream Cheese Frosting
- Chewy Pumpkin Oatmeal Cookies
- Decadent Praline Pumpkin Roll
- Layered Pumpkin Cheesecake Trifle
- Soft Pumpkin Chocolate Chip Cookies
Pin Recipe
No-Bake Pumpkin Pie
This No-Bake Pumpkin Pie is a delightful twist on traditional pumpkin pie with the same beloved flavors! This quick and easy pie has a dreamy, creamy filling nestled in a buttery graham cracker crust and is perfect for the holidays, family gatherings or any time you need a no-fuss dessert!
Course: Dessert, Pie
Cuisine: American
Keyword: creamy pumpkin pie, no bake pumpkin pie, pumpkin dessert
Prep Time: 15 minutes
Cook Time: 0 minutes
Chill Time: 6 hours 30 minutes
Servings: 8
Calories: 379 kcal
Author: Trish – Mom On Timeout
Ingredients
- ¾ cup pumpkin puree (not pumpkin pie filling)
- 14 ounces marshmallow fluff
- 1 ½ teaspoons pumpkin pie spice
- 1¼ cups crushed graham crackers (about 1 sleeve of graham crackers)
- ¼ cup light brown sugar (packed)
- ⅓ cup salted butter (melted)
- 8 ounces whipped topping (thawed, or 3 cups whipped cream)
Garnish (Optional)
- Whipped cream
- Pumpkin pie spice
Instructions
- Combine ¾ cup pumpkin puree, 14 ounces marshmallow fluff, and 1 ½ teaspoons pumpkin pie spice in a medium saucepan over medium-low heat.
- Heat and stir for 5 to 10 minutes or until the marshmallow fluff is melted and all ingredients are fully incorporated.
- Transfer to a bowl and place in the refrigerator to chill while making the crust.
- Crush the 1¼ cups graham crackers (in a food processor or blender). Add ¼ cup brown sugar and pulse until combined.
- Pour in the ⅓ cup melted butter and pulse to combine.
- Press the graham cracker mixture evenly into the bottom and sides of a 9-inch pie pan.
- Once the pumpkin mixture has cooled to room temperature, gently fold in the 8 ounces whipped topping until combined.
- Spoon the filling on top of the graham cracker crust and smooth the surface.
- Cover tightly and refrigerate for 6 hours or overnight.
- Serve with whipped cream and a dusting of pumpkin pie spice if desired. Slice, serve, and enjoy!
Notes
Storage Information
- Storage: Leftover pie should be stored in an airtight container in the refrigerator for up to 4 days.
- Freeze: Cover tightly and store in an airtight, freezer-safe container in the freezer for up to 3 months. Thaw overnight in the refrigerator. The texture will change a bit if frozen, so keep that in mind.
- Make Ahead: Prepare the pie a day in advance without the toppings or garnish. Garnish when ready to serve.
Nutrition
Calories: 379kcal | Carbohydrates: 68g | Protein: 2g | Fat: 13g | Saturated Fat: 8g | Polyunsaturated Fat: 0.4g | Monounsaturated Fat: 3g | Trans Fat: 0.3g | Cholesterol: 21mg | Sodium: 177mg | Potassium: 115mg | Fiber: 1g | Sugar: 48g | Vitamin A: 3833IU | Vitamin C: 1mg | Calcium: 48mg | Iron: 1mg