
The Ultimate Crunchy Homemade Caramel Corn Recipe
There’s nothing quite like the comforting aroma and irresistible taste of homemade Caramel Corn. It’s a timeless classic that evokes memories of fall festivals, cozy movie nights, and festive gatherings. Whether you’re seeking the perfect treat for a special occasion, much like it was a must-have for Bryce’s Harvest Party, or simply craving a delightful snack to share with your loved ones, this recipe for Crunchy Caramel Corn is an absolute winner. Its simplicity means you’ll find yourself whipping up batches again and again, establishing it as a go-to favorite in your kitchen.
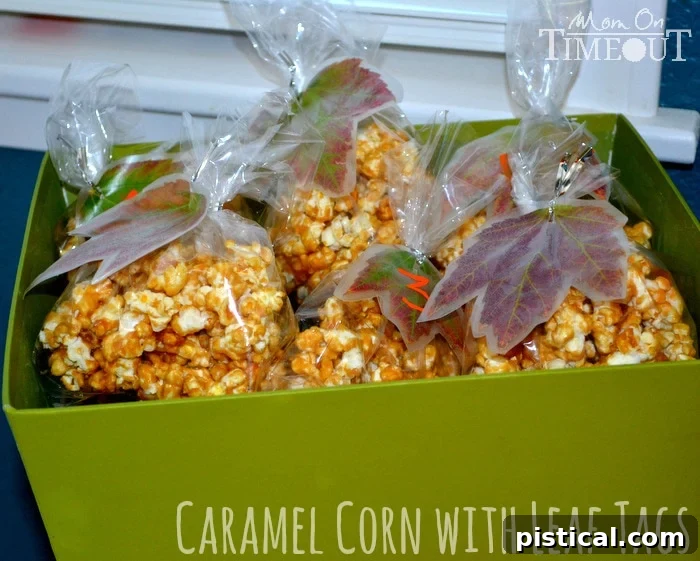
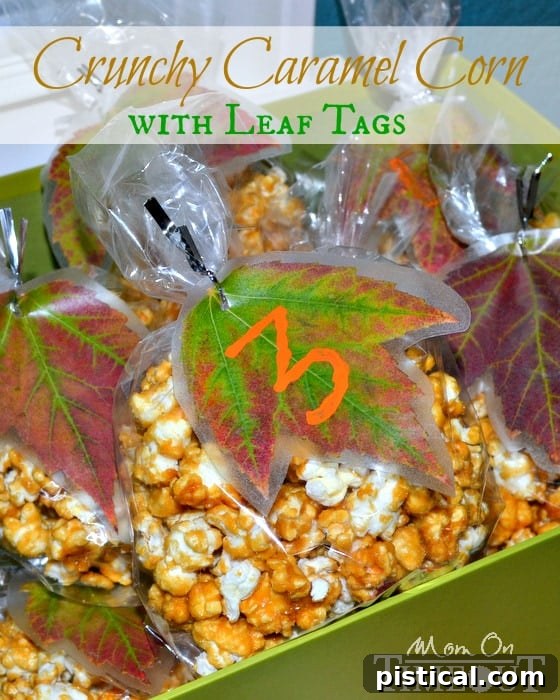
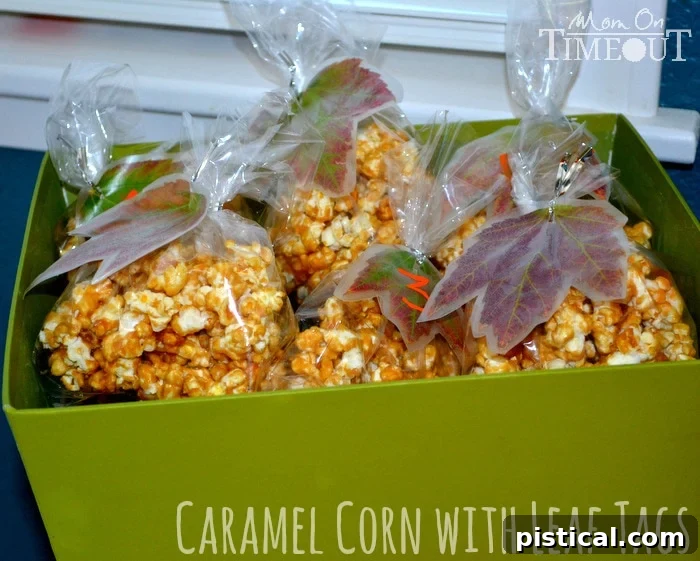
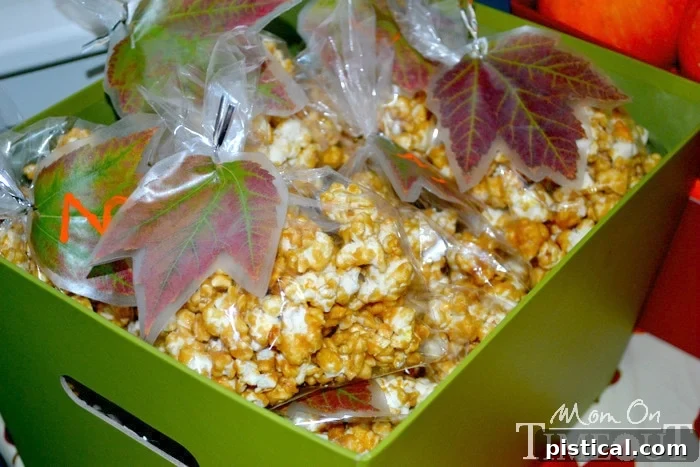
For Bryce’s recent Harvest Party, I meticulously prepared these golden delights, bagging them up individually and adorning each with charming decorative leaf tags. These yummy treats were not just party favors; they were a thoughtful gesture for guests to enjoy on their journey home, ensuring the celebration’s sweetness lingered. My son, Reece, took on the important responsibility of distributing these as guests departed, and he performed his role with admirable enthusiasm and care, making sure everyone received a special package.
I’ve received nothing but rave reviews and enthusiastic compliments from everyone who has had the pleasure of tasting this incredible treat. I fully expect that anyone who tries this easy caramel corn recipe will experience the same delight. My suggestion? Don’t reserve this for special parties only! This homemade caramel corn is absolutely perfect for a relaxed family movie night, a casual afternoon snack, or simply to satisfy a sweet craving. When stored in an airtight container at room temperature, it maintains its delightful crunch and freshness for at least a week, making it an ideal make-ahead snack or last-minute gift. So, let’s gather our ingredients and get started on creating this truly addictive and rewarding treat!
Mastering Homemade Crunchy Caramel Corn: A Step-by-Step Guide
Making delicious, crunchy caramel corn from scratch is a surprisingly simple process, especially with this foolproof recipe. The key to its irresistible texture and rich, buttery caramel flavor lies in a few precise steps that ensure every kernel is beautifully coated and baked to perfection. Get ready to fill your home with an amazing aroma and create a snack that everyone will adore.
Ingredients:
- 5 quarts of freshly popped plain popcorn (this is typically made from about 1/2 cup of unpopped kernels)
- 1/2 cup (1 stick) unsalted butter
- 1/2 cup light corn syrup
- 2 cups light brown sugar, firmly packed
- 1/2 teaspoon baking soda
- 1 teaspoon fine salt
- 1 teaspoon pure vanilla extract
Directions for Making Crunchy Caramel Corn:
- Preheat Your Oven: Start by preheating your oven to a low temperature of 250 degrees Fahrenheit (120 degrees Celsius). This gentle heat is essential for slowly baking and drying the caramel corn, resulting in that wonderfully crisp and non-sticky texture we all love.
- Prepare the Popcorn: Pop your popcorn using your preferred method, but ensure it is completely plain – no added salt, butter, or oil. Using unsalted, unbuttered popcorn provides a clean canvas for the caramel, allowing it to adhere and flavor the popcorn perfectly.
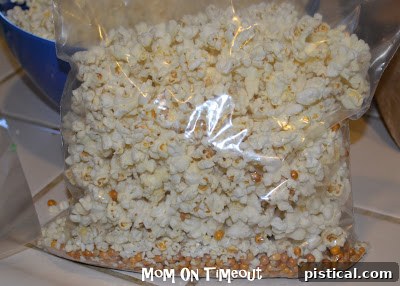
- Remove Unpopped Kernels: This step is crucial for an enjoyable eating experience. Hard, unpopped kernels are no fun! An easy and effective way to remove them is to place your popped popcorn into a large gallon-sized resealable bag. Gently shake the bag; the heavier unpopped kernels will naturally fall to the bottom, making them simple to separate and discard. Alternatively, you can carefully pick them out by hand. (If you don’t have a dedicated popcorn popper, be sure to check out my simple solution for popping popcorn in the microwave at the end of this post!)
-

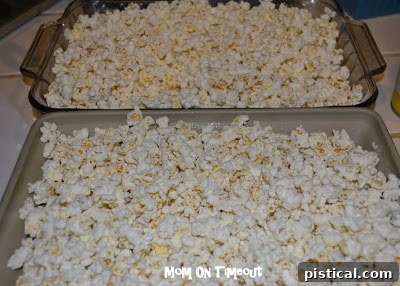
Keep Popcorn Warm: Divide your prepared popcorn evenly between two 9×13 inch baking dishes or use one large, deep roasting pan. Place these dishes in your preheated oven to keep the popcorn warm. This is a vital step you should not skip! Warm popcorn allows the hot caramel sauce to coat each piece more smoothly and efficiently, ensuring a uniform and superior caramel corn texture.
-
Begin the Caramel Sauce: In a medium-sized, heavy-bottomed saucepan, melt the butter over medium heat. A heavy-bottomed pan helps distribute heat evenly and prevents scorching. Once the butter is fully melted, stir in the light brown sugar, corn syrup, and salt. Continue to stir this mixture constantly as you bring it to a full, rolling boil. Constant stirring at this stage is important to dissolve the sugar crystals and prevent them from burning on the bottom of the pan.
-
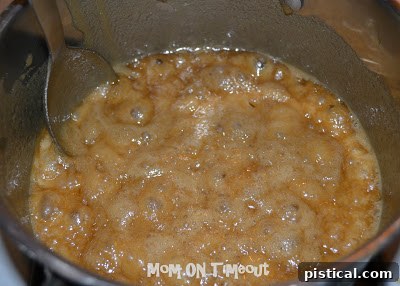
Boil the Caramel: Once the caramel mixture reaches a vigorous, continuous boil, stop stirring. Allow the caramel to boil undisturbed for precisely 4 minutes. This specific boiling time is crucial for developing the caramel’s rich flavor and achieving the correct consistency needed for a perfectly crunchy coating. Resist the urge to stir during these 4 minutes; let it do its magic!
-
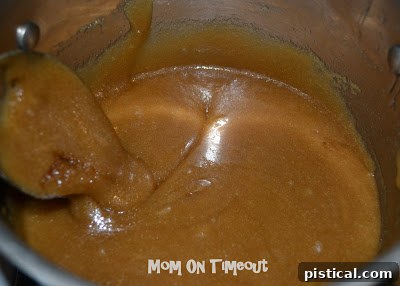
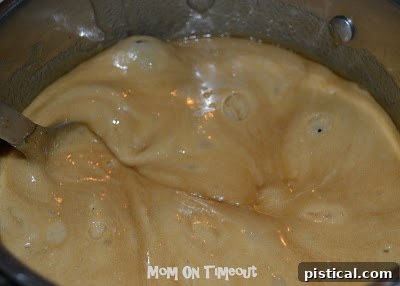
Incorporate Vanilla and Baking Soda: Carefully remove the saucepan from the heat. Immediately stir in the vanilla extract and baking soda. You will notice a remarkable transformation: the caramel mixture will instantly increase in volume, becoming light, airy, and wonderfully “fluffy” with a visibly thicker consistency. The baking soda reacts with the brown sugar and acid in the corn syrup, creating tiny carbon dioxide bubbles that make the caramel light and porous, contributing significantly to the final crunch.
-
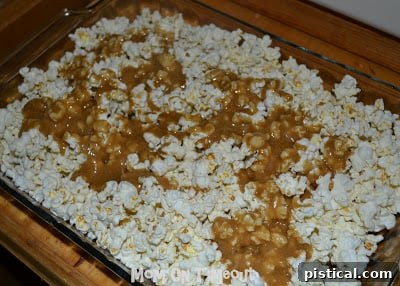
Coat the Popcorn: Carefully retrieve your warm popcorn from the oven. Pour the hot caramel mixture in a thin, steady stream over the popcorn, trying to distribute it as evenly as possible over both baking dishes. Using heat-resistant tongs or two sturdy spatulas, gently but thoroughly mix the popcorn and caramel. Continue mixing until every single piece of popcorn is beautifully coated with that glorious golden, bubbling caramel.
-
Bake to Perfection: Return the baking dishes containing the caramel-coated popcorn to the preheated 250°F oven. Bake for a total of 45 minutes. This prolonged, low-temperature baking process is absolutely essential for drying out the caramel and transforming it into that signature perfectly crunchy, non-sticky texture.
- Stir During Baking: To ensure even baking and prevent clumping or burning, pull the dishes out of the oven every 15 minutes. Using tongs, carefully break up any large clumps and turn the popcorn over, mixing it thoroughly. This allows all sides of the popcorn to crisp up beautifully.
-
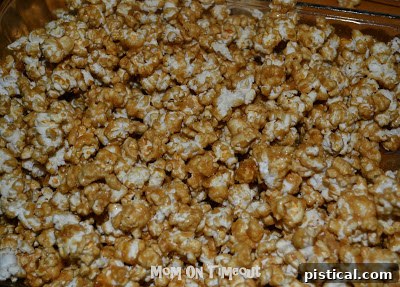
Cool and Enjoy: After the full 45 minutes of baking, remove the caramel corn from the oven. Immediately spread it out onto parchment paper or a silicone baking mat to cool completely. As it cools, the caramel will harden, and the popcorn will become wonderfully crunchy. Once fully cooled, break it into smaller, bite-sized pieces for easy snacking. A CRITICAL WARNING: DO NOT ATTEMPT TO TASTE THE HOT CARAMEL CORN DIRECTLY FROM THE OVEN. THE CARAMEL IS EXTREMELY HOT AND CAN CAUSE SEVERE BURNS. Trust me on this – I speak from personal experience! And that’s it! Despite the multiple steps, the ample downtime makes this homemade caramel corn recipe surprisingly easy and incredibly rewarding.
Tips for Perfect Caramel Corn and Delicious Variations
To ensure your homemade caramel corn is always a resounding success and to explore delightful new flavors, consider these helpful tips and creative variations:
- High-Quality Ingredients: The best results start with good ingredients. Use fresh butter and quality light corn syrup. Light brown sugar is preferred over dark brown sugar for its more subtle molasses flavor, which perfectly complements the caramel.
- Even Coating: Take your time during the mixing stage after pouring the caramel. Thoroughly coating every piece of popcorn is key to achieving consistent crunch and flavor throughout the batch.
- Storage is Simple: Keep your crunchy caramel corn in an airtight container at room temperature. It will remain wonderfully fresh and delicious for up to a week. For extended freshness, you can even freeze it in a freezer-safe bag for up to a month; simply thaw at room temperature when you’re ready for a snack.
- Exciting Variations:
- Nutty Caramel Corn: For an added layer of flavor and texture, mix in 1 to 2 cups of roasted nuts (pecans, almonds, or peanuts work beautifully) with the popcorn before coating it with the caramel sauce.
- Chocolate Drizzle: Once the caramel corn has cooled completely and is broken into pieces, drizzle melted dark, milk, or white chocolate over it for an extra indulgent treat. Allow the chocolate to set before serving.
- Spiced Caramel Corn: Enhance the warm, inviting flavors by adding a pinch of cinnamon, nutmeg, or even a touch of pumpkin pie spice to your caramel sauce during the boiling stage.
- Thoughtful Gifting: Homemade caramel corn makes a fantastic, heartfelt gift. Package it beautifully in decorative tins, clear cellophane bags tied with a festive ribbon, or use the charming DIY leaf tags described in the next section for an extra personal touch!
Caramel Corn Recipe Card

This irresistible recipe for homemade caramel corn is incredibly easy and yields perfectly crunchy, sweet results every time. Perfect for parties, movie nights, or a delightful everyday snack!
Course: Snack, Dessert
Cuisine: American
Keywords: crunchy caramel corn, homemade caramel corn, caramel popcorn, easy recipe, fall treats
Prep Time: 10 minutes
Cook Time: 50 minutes
Total Time: 1 hour
Servings: 8 servings
Calories: 458 kcal
Author: Trish – Mom On Timeout
Ingredients:
- 16 cups popcorn (from approximately 1/2 cup unpopped kernels, plain)
- 1/2 cup butter
- 1/2 cup corn syrup
- 2 cups light brown sugar
- 1/2 tsp baking soda
- 1 tsp salt
- 1 tsp vanilla extract
Instructions:
- Preheat oven to 250 degrees F (120 C).
- Pop your popcorn plain, without salt or butter. Carefully remove all unpopped kernels by shaking the popcorn gently in a gallon-sized bag; the kernels will fall to the bottom.
- Keep your popcorn warm by dividing it into two 9×13 inch baking dishes or a deep roasting pan and placing it in the preheated oven.
- Melt butter in a medium, heavy saucepan over medium heat. Stir in brown sugar, corn syrup, and salt. Bring to a boil, stirring constantly.
- Once boiling, stop stirring and let it boil for exactly 4 minutes.
- Remove from heat and stir in vanilla and baking soda. The caramel will become fluffy and increase in volume.
- Pour the caramel mixture in a thin stream over the warm popcorn. Use tongs to mix thoroughly until all popcorn is coated.
- Place the coated popcorn back into the 250°F oven. Bake for 45 minutes, stirring and breaking up clumps with tongs every 15 minutes.
- After baking, remove from oven and spread on parchment paper to cool completely before breaking into small pieces. WARNING: Caramel is extremely hot and can cause burns. Allow to cool fully before eating.
Nutrition Facts (per serving):
Calories: 458 kcal |
Carbohydrates: 88g |
Protein: 3g |
Fat: 13g |
Saturated Fat: 7g |
Cholesterol: 31mg |
Sodium: 501mg |
Potassium: 146mg |
Fiber: 3g |
Sugar: 70g |
Vitamin A: 398IU |
Calcium: 53mg |
Iron: 1mg
Print Recipe
Pin Recipe
DIY Autumn Leaf Tags: A Charming Decorative Touch
Beyond being a delicious and satisfying snack, this crunchy caramel corn also lends itself beautifully to thoughtful gifting. When paired with these adorable, handmade leaf tags, your homemade treats will make an even bigger impression. These simple-to-make tags add a personal, rustic, and distinctly autumnal touch, perfect for fall parties, Thanksgiving treats, hostess gifts, or any occasion where a touch of nature-inspired charm is appreciated. They are a wonderful way to elevate your presentation and add a unique, heartfelt detail to your homemade goodies.
Materials for Leaf Tags:
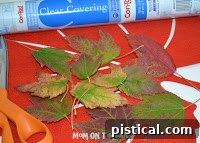
- Assorted fall leaves (freshly fallen leaves with vibrant, varied colors work best)
- Clear contact paper (the adhesive shelf liner type)
- Sharp scissors
Directions for Crafting Leaf Tags:
- Gather Your Leaves: Take a lovely stroll outdoors and collect some beautiful, multi-colored fall leaves. Look for leaves that are relatively flat, well-preserved, and free from major tears or imperfections. Gently clean them to remove any dirt, dust, or tiny debris.
- Prepare the Contact Paper: Cut a piece of clear contact paper that is approximately twice the length you will need for your chosen leaves. Ensure it’s wide enough to comfortably encapsulate your leaves with a small margin around the edges for sealing.
-
Position the Leaves: Carefully peel back the backing from one half of your cut contact paper. Thoughtfully arrange your selected leaves on the sticky side of the paper. If you plan to cut them out individually, remember to leave enough space between each leaf to make cutting easier.
- Seal the Leaves: Fold the other half of the contact paper over the leaves, ensuring the sticky sides meet. Gently smooth out any trapped air bubbles using your hand, a ruler, or a credit card, working from the center outwards. The goal is to create a perfectly flat, clear, and sealed laminate around your leaves.
-
Cut and Utilize: Using a sharp pair of scissors, carefully cut out your laminated leaves. You can follow the natural outline of each leaf for a realistic look or cut them into simple geometric shapes if preferred. Once cut, these charming and durable tags are ready to be used as desired!
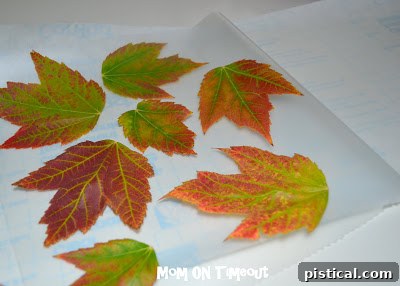
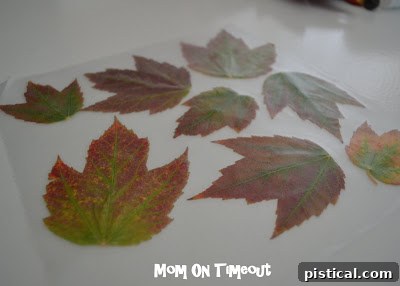
I found these rustic leaf tags to be the perfect accessory to beautifully adorn my individual Caramel Corn bags, adding an extra touch of autumnal elegance and making them truly special:
Effortless Microwave Popcorn: A Handy Hack for Plain Popping
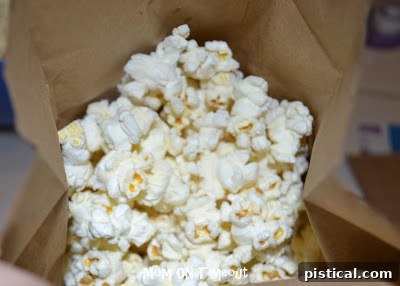
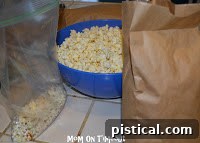
If you don’t own a traditional air-popper or stovetop popcorn maker, or simply prefer a quick, no-fuss method for making plain popcorn, this paper bag microwave technique is an absolute game-changer. It’s incredibly efficient, requires minimal equipment, and ensures you have perfectly popped, unsalted kernels ready to be transformed into our delicious Crunchy Caramel Corn.
What You Need for Microwave Popcorn:
- One standard lunch-size paper bag
- 1/3 cup unpopped popcorn kernels
- A small piece of tape (a heat-resistant tape like masking tape or painter’s tape is ideal, but regular clear tape works for this short duration)
Directions for Easy Microwave Popcorn:
-
Prepare the Bag: Carefully pour the 1/3 cup of unpopped popcorn kernels into the bottom of the paper bag. Fold the top of the bag over at least twice to create a secure seal. Use a small piece of tape to hold the fold firmly in place, ensuring the bag remains completely closed during the popping process. This prevents kernels from escaping and steam from prematurely releasing.
- Microwave: Place the sealed bag flat in your microwave. If your microwave has a specific “popcorn” setting, you can use that. Otherwise, heat the popcorn on high power. It’s crucial to stay by the microwave and listen intently. Stop the microwave once there are approximately 2 to 3 seconds between pops. Overcooking will lead to burnt popcorn, which can quickly ruin the taste of your caramel corn.
- Careful Transfer: Once the popping has slowed and you’ve removed the bag from the microwave, be extremely cautious. The bag will be very hot, and steam will escape when you open it. Immediately pour the freshly popped popcorn directly into a large, heat-safe bowl. A VITAL CAUTION: NEVER POUR HOT POPCORN DIRECTLY INTO PLASTIC BAGS OR CONTAINERS. The intense heat can melt the plastic, potentially releasing harmful chemicals into your food. Always use a ceramic, glass, or metal bowl first.
More Yummy Treats from Mom On Timeout:
Reese’s Chocolate Peanut Butter Bread Pudding
Raspberry Coconut Magic Bars
Heath Bar Brownie Trifles
Chocolate Cherry Marshmallow Crunch Bars

For all our delicious appetizer recipes, simply click HERE.
For our complete collection of delightful dessert recipes, click HERE.
Want to stay updated with new recipes and delightful ideas straight to your inbox? Sign up for our email newsletter today!
Connect with us on social media and never miss a sweet moment:
- Bloglovin’