
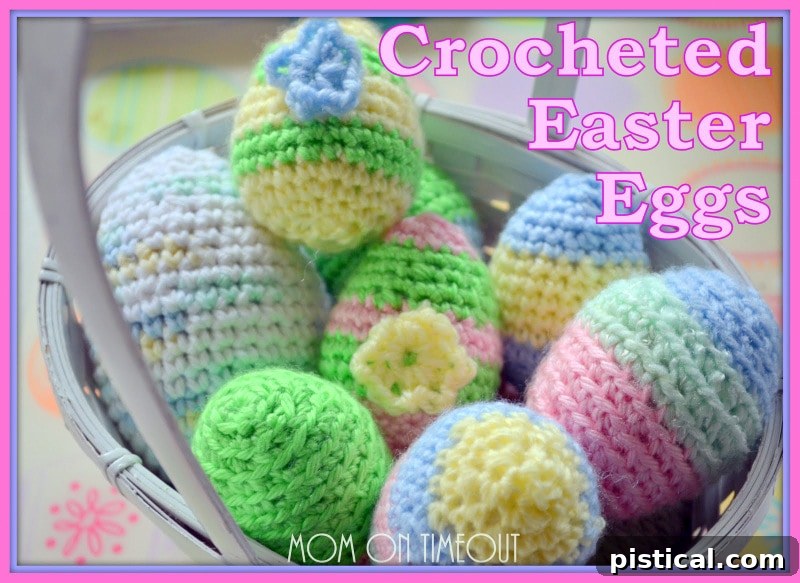
Crocheted Easter Eggs are a delightful project, and this pattern is incredibly simple and rewarding!
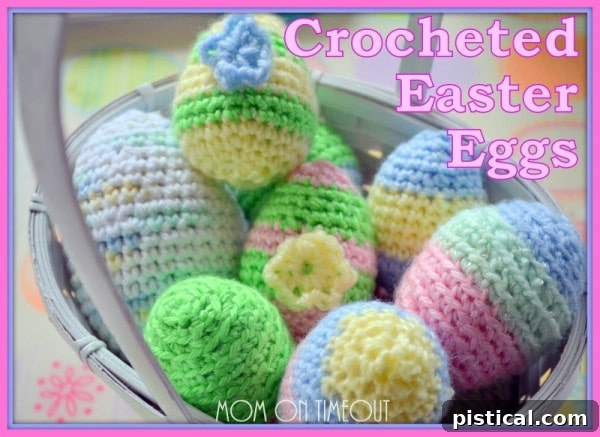
The arrival of spring and Easter fills the air with a sense of renewal and vibrant colors. What better way to celebrate this joyful season than by adding a personal, handmade touch to your decorations? If you adore the art of crochet, or even if you’re just starting out, you’re in for a treat with this charming project. I often find myself yearning for more time to dedicate to my beloved hobby, crochet, but the results are always worth it. This past weekend, I made it a mission to create some festive Crocheted Easter Eggs, and after a few enthusiastic (and admittedly, some less successful) attempts, I finally perfected this simple yet satisfying Crocheted Easter Egg pattern!
These adorable crochet eggs are designed to be almost the exact size of a large hen’s egg, making them perfect for filling baskets, decorating tabletops, or hiding for an Easter egg hunt that will last for years. Imagine a collection of these eggs crafted in bold, bright, and cheerful colors – they would truly brighten any space and bring a smile to everyone’s face. Unlike traditional dyed eggs, these handmade treasures are durable, reusable, and offer a cozy, tactile feel that mass-produced decorations simply can’t replicate. They are not just decorations; they are little works of art, each infused with care and creativity.
One of the many wonderful aspects of this Crocheted Easter Egg pattern is its incredible versatility and practicality. These eggs are an excellent solution for utilizing all those delightful bits of leftover yarn that accumulate in every crafter’s stash. Instead of letting those beautiful remnants go to waste, you can transform them into something truly special and meaningful. I personally love using yarn scraps from baby blankets I’ve crocheted; it adds a sentimental touch to each egg, and the soft textures are perfect for these delicate creations. Beyond yarn, the only other essential material you’ll need is a suitable filling. For this project, I opted for Poly-Fil, which gives the eggs a wonderfully soft yet firm feel, helping them maintain their perfect egg shape.
For the crafting process itself, an F hook (or a 3.75mm hook) is ideal, providing a tight enough gauge to prevent the stuffing from showing through while remaining easy to work with. Don’t be afraid to experiment with a variety of yarn types and colors! Mix and match solids, variegated yarns, or even different fiber blends to create a unique collection of Easter eggs. The beauty of this pattern lies in its adaptability; you can change colors at any round to create stripes, speckles, or even intricate color patterns, making each egg a distinctive piece of art. This encourages personal expression and ensures that no two crocheted Easter eggs will be exactly alike.
Before diving into the pattern, let’s clarify a key stitch that will be used: the **Sc Dec**, or Single Crochet Decrease. This stitch is fundamental for shaping your egg, allowing it to taper at the top and bottom. Here’s a clear breakdown:
- **Sc Dec (Single Crochet Decrease):** Insert your hook into the first stitch, yarn over, and pull up a loop (you now have two loops on your hook). Without finishing the stitch, insert your hook into the second stitch, yarn over, and pull up another loop (you now have three loops on your hook). Yarn over once more and pull through all three loops on your hook. This technique effectively combines two stitches into one, reducing your stitch count and helping to create the elegant curves of your egg.
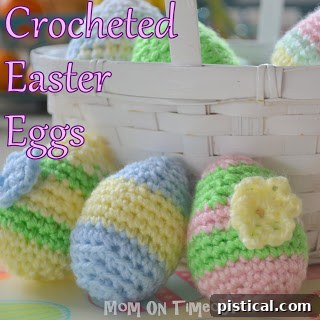
Crocheted Easter Egg Pattern:
To begin your journey into creating these charming DIY Easter eggs, you will start with a magic ring or a chain and slip stitch to form a ring. This forms the very bottom tip of your egg.
- **Ch 3.** Sl st to form ring. (Alternatively, you can start with a magic ring for a tighter center, especially if you’re comfortable with that technique.)
- **Round 1:** 5 sc in ring. (This establishes your initial base stitches. Pull the tail of your starting chain/magic ring tight to close the hole.)
- **Round 2:** 2 sc in each st around. (10 sc) (Here, you begin increasing stitches evenly to widen the base of your egg, creating a gentle curve.)
- **Round 3:** (2 sc in next st, sc in next st) repeat 5 times. (15 sc) (Continue increasing to expand the egg’s circumference.)
- **Round 4:** (2 sc in next st, sc in next 2 st) repeat 5 times. (20 sc) (Your egg is now starting to take a more defined shape, widening steadily.)
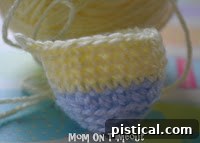
As you progress through the pattern, you’ll notice the egg’s shape emerging. The next few rounds continue the expansion, forming the main body of your egg, which will be the widest part.
- **Round 5:** (2 sc in next st, sc in next 3 st) repeat 5 times. (25 sc) (This is the final increase round for the main body, establishing the maximum circumference of your egg.)
(Helpful Tip: I usually find it easier to turn the egg inside out around this point. This hides the seam from the initial rounds on the inside and presents a smoother outer surface.) - **Rounds 6-9:** sc in each st around (25 sc) (These rounds are worked without any increases or decreases, creating the straight sides of the egg before it begins to taper towards the top. This is where your egg really gains length.)
(Important Note: This is a good stage to start stuffing the egg lightly. Adding a bit of Poly-Fil now makes it easier to distribute the stuffing evenly and reach the bottom without struggling later when the opening becomes smaller.) - **Round 10:** (Sc Dec, sc in next 3 st) repeat 5 times. (20 sc) (Now you begin decreasing stitches, gently shaping the egg towards its upper curve. This is where the Sc Dec stitch becomes crucial.)
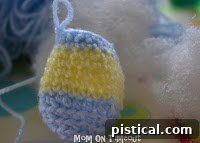 The egg is really taking shape now, and you’ll continue with more decreasing rounds to form the top, ensuring a smooth and natural egg silhouette. Keep an eye on your stuffing level; you’ll want it to be firm but not overly packed.
- **Round 11:** sc in each st around (20 sc) (A round of single crochet maintains the current circumference, creating a small pause in the decreasing action and refining the egg’s shape.)
- **Round 12:** (Sc Dec, sc in next 2 st) repeat 5 times. (15 sc) (Further decreases narrow the opening, bringing you closer to the egg’s crown.)
- **Round 13:** sc in each st around (15 sc) (Another stabilizing round of single crochet to solidify the shape.)
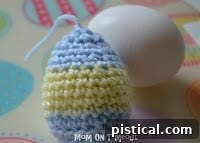
You’re almost there! The final rounds will close the top of your crocheted Easter egg, giving it a neat and finished look. Make sure to adjust the stuffing to your desired firmness before closing completely.
- **Round 14:** (Sc Dec, sc in next st) repeat 5 times. (10 sc) (The decreases are becoming more frequent, rapidly closing the top.)
(Final Stuffing: This is your last chance to add or adjust the stuffing to ensure your egg is perfectly plump and holds its shape. Make sure it’s firm, but don’t overstuff it to avoid distorting the stitches.) - **Round 15:** (Sc Dec) repeat 5 times (5 sc) (You’re now down to just five stitches, forming a tiny opening at the very top.)
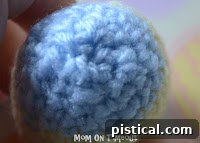
Cut your yarn, leaving a tail of about 6-8 inches. Thread this tail through a yarn needle. Carefully weave the yarn needle through the remaining 5 stitches. Pull the yarn tight to cinch the opening closed. For an extra secure finish, insert the needle through the center of the pulled-tight opening and bring it out through any part of the egg. Give it a gentle tug and snip the yarn close to the surface, allowing the end to disappear inside the egg. This creates a seamless finish for your beautiful handmade Easter egg.
Customizing Your Crocheted Easter Eggs: Creativity Unleashed
The beauty of crafting your own crochet eggs lies in the endless possibilities for customization. While the basic pattern provides a solid foundation, don’t hesitate to infuse your personality into each creation. Consider experimenting with different yarn weights – a chunkier yarn will result in a larger, cozier egg, while a finer thread can yield delicate, intricate pieces. Playing with color changes is another fantastic way to add flair. Create subtle stripes by switching colors every few rounds, or go bold with stark contrasts. You can even try variegated yarns for an effortless burst of multiple hues.
Beyond the yarn itself, embellishments can truly make your eggs stand out. Small embroidered details like polka dots, stripes, or even a tiny bunny silhouette can add charm. Ribbons, beads, or small buttons can also be sewn on for an extra touch of sparkle or texture. One of my favorite ways to adorn these eggs is with a delicate crocheted flower, as detailed below. Attaching a small loop of yarn at the top of some eggs allows them to be hung from an Easter tree or garland, transforming them into even more versatile decorations.
Adding a Sweet Touch: Crocheted Flowers
A small, simple crocheted flower can elevate your Easter egg from lovely to absolutely enchanting. It’s a quick and easy addition that provides a pop of color and a touch of whimsy.
Flower Instructions:
This tiny bloom is perfect for adorning your crocheted eggs, adding a delicate and festive touch.
- **Ch 4.** Sl st to form ring. (This creates the center of your flower.)
- (Ch 3, sc in the ring to form a petal) Repeat until you have the desired number of petals. I typically make between 5-7 petals for a full, pretty look, but you can adjust this based on your preference and the size of your yarn.
Once your flower is complete, simply fasten off and leave a long tail for sewing. Position the flower on your crocheted egg and carefully stitch it in place using the yarn tail and a yarn needle. You can sew a small button or bead in the center of the flower for an extra decorative element.
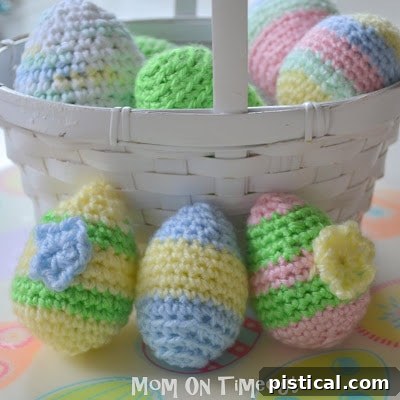
These crocheted Easter eggs are more than just a craft; they are a cherished tradition in the making. They offer a sustainable and adorable alternative to plastic eggs and can be brought out year after year, becoming a beloved part of your family’s Easter celebrations. Whether you make a dozen in pastel shades or a single vibrant showstopper, each egg will be a testament to your creativity and the joy of handmade goodness. This pattern is designed to be accessible for beginners while still offering enough scope for experienced crocheters to add their personal flair. Grab your hook, choose your favorite yarn, and get ready to create some truly special Easter memories!
Looking for More Easter Inspiration?
If you’ve enjoyed crafting these delightful crochet Easter eggs, you’ll love exploring other ways to make your holiday festivities even more memorable. From sweet treats to savory delights, these recipes are perfect for your Easter gatherings.
Three Minute Easter Fluff
A light, airy, and incredibly quick dessert that’s perfect for any Easter meal.
To Die For Carrot Cake
Indulge in this rich, moist carrot cake, a classic Easter treat that lives up to its name!
Pastel Mint Patties
Delicate and refreshing, these homemade mint patties are a lovely addition to any Easter basket.
The Best Coconut Macaroons
Crispy on the outside, chewy on the inside – these macaroons are simply irresistible.
Easter Cathedral Candy Recipe
A colorful and unique no-bake candy that’s as beautiful as it is delicious.
Carrot Cake Bars with Cream Cheese Frosting
All the flavor of carrot cake in convenient, shareable bar form, topped with luscious cream cheese frosting.

For all Easter ideas and inspiration, explore HERE.
Discover a wide range of delectable dessert recipes HERE.
Stay updated with new recipes and craft ideas by signing up for our email list!
For even more great ideas and community engagement, follow us on Facebook – Pinterest – Instagram – Twitter – Bloglovin’.
Happy crocheting and have a wonderfully creative day!